parking sensors BMW X5 2011 E70 Owner's Manual
[x] Cancel search | Manufacturer: BMW, Model Year: 2011, Model line: X5, Model: BMW X5 2011 E70Pages: 312, PDF Size: 8.91 MB
Page 73 of 312
Controls
71Reference
At a glance
Driving tips
Communications
Navigation
Entertainment
Mobility
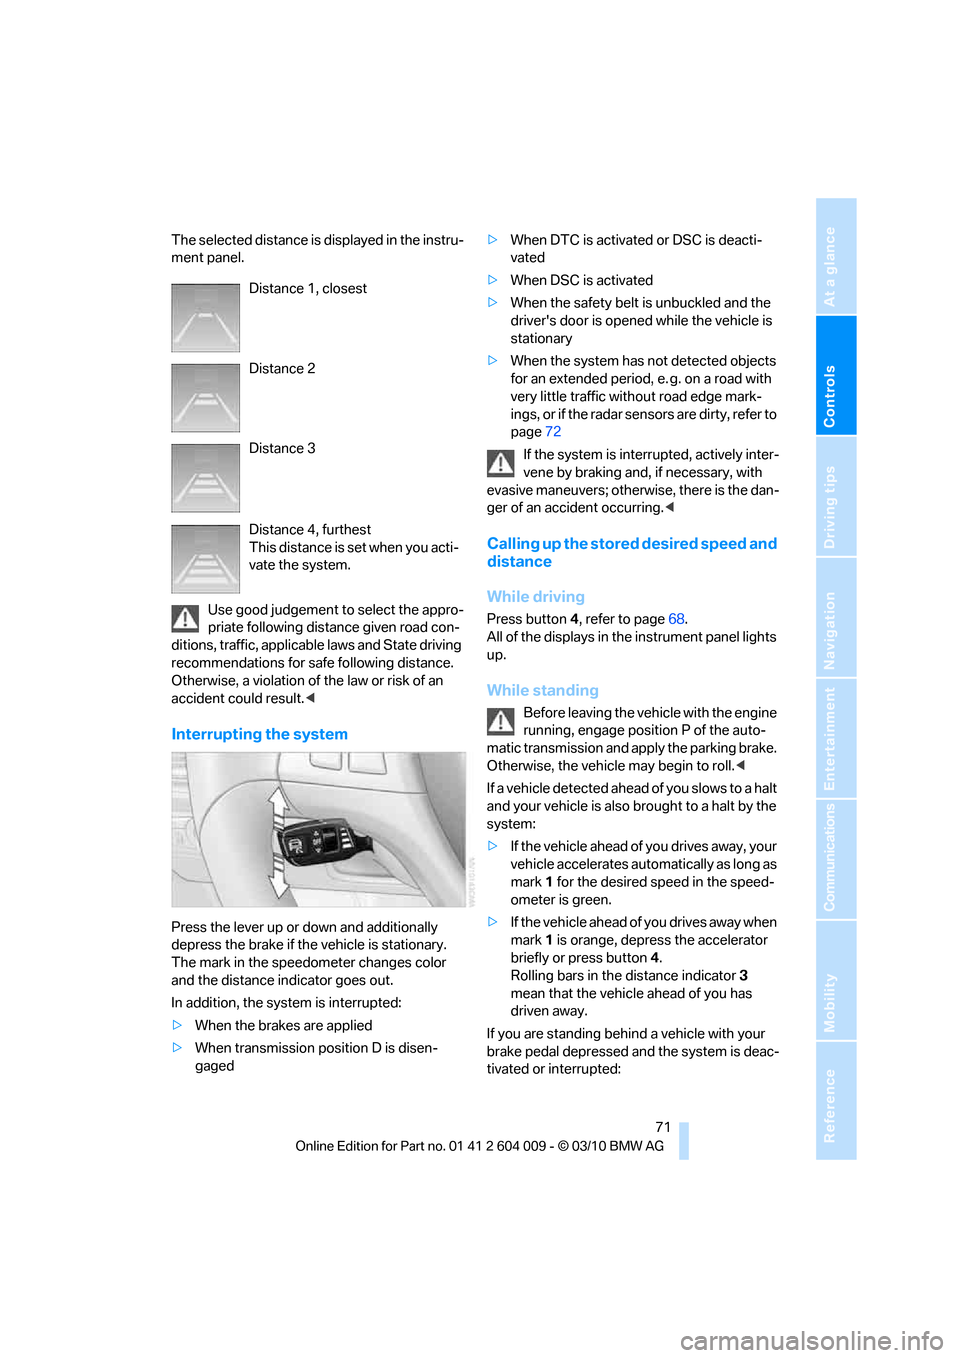
The selected distance is displayed in the instru-
ment panel.
Use good judgement to select the appro-
priate following distance given road con-
ditions, traffic, applicable laws and State driving
recommendations for safe following distance.
Otherwise, a violation of the law or risk of an
accident could result.<
Interrupting the system
Press the lever up or down and additionally
depress the brake if the vehicle is stationary.
The mark in the speedometer changes color
and the distance indicator goes out.
In addition, the system is interrupted:
>When the brakes are applied
>When transmission position D is disen-
gaged>When DTC is activated or DSC is deacti-
vated
>When DSC is activated
>When the safety belt is unbuckled and the
driver's door is opened while the vehicle is
stationary
>When the system has not detected objects
for an extended period, e. g. on a road with
very little traffic without road edge mark-
ings, or if the radar sensors are dirty, refer to
page72
If the system is interrupted, actively inter-
vene by braking and, if necessary, with
evasive maneuvers; otherwise, there is the dan-
ger of an accident occurring.<
Calling up the stored desired speed and
distance
While driving
Press button4, refer to page68.
All of the displays in the instrument panel lights
up.
While standing
Before leaving the vehicle with the engine
running, engage position P of the auto-
matic transmission and apply the parking brake.
Otherwise, the vehicle may begin to roll.<
If a vehicle detected ahead of you slows to a halt
and your vehicle is also brought to a halt by the
system:
>If the vehicle ahead of you drives away, your
vehicle accelerates automatically as long as
mark 1 for the desired speed in the speed-
ometer is green.
>If the vehicle ahead of you drives away when
mark 1 is orange, depress the accelerator
briefly or press button 4.
Rolling bars in the distance indicator 3
mean that the vehicle ahead of you has
driven away.
If you are standing behind a vehicle with your
brake pedal depressed and the system is deac-
tivated or interrupted: Distance 1, closest
Distance 2
Distance 3
Distance 4, furthest
This distance is set when you acti-
vate the system.
Page 90 of 312
Technology for comfort, convenience and safety
88
Technology for comfort, convenience and
safety
PDC Park Distance Control*
The concept
In addition to the PDC Park Distance Control,
the rear view camera
*, refer to page93, can
also be switched on.
PDC assists you during parking. A slow
approach to an object in front of or behind your
vehicle is announced by:
>Signal tones
>Optical displays
Measurement
Ultrasonic sensors in the bumpers carry out the
measurement.
Their range is approx. 7 ft/2 m.
The acoustic warning begins:
>At approx. 24 in/60 cm for the front
* sen-
sors and the two rear corner sensors.
>At approx. 5 ft/1.50 m for the middle sen-
sors in the rear.
System limitations
PDC cannot replace the personal assess-
ment of the traffic situation. Also make a
direct visual check of the traffic situation around
the vehicle. Otherwise, there could be a risk of
accident, for example due to other road users or
objects outside the detection range of PDC.
Loud sources of sound, inside and outside the
vehicle, could drown out the PDC signal tone.<
Avoid approaching an object too quickly.
Avoid starting off quickly while PDC is not
yet activated.
Otherwise, physical circumstances could cause
the system to issue a warning late.<
Limitations of ultrasonic measurement
The detection of objects can come up against
the limitations of physical ultrasonic measure-
ment, for example:
>When using tow bars and towing hitches
>In the presence of thin or wedge-shaped
objects
>In the presence of low objects
>In the presence of objects with corners and
sharp edges
Low objects that have already been displayed,
e.g. curbs, can disappear again from the detec-
tion area of the sensors before or after a contin-
uous tone sounds.
Higher, protruding objects, e.g. ledges, cannot
be detected.
False warnings
Under the following conditions, PDC may dis-
play a warning even though no obstacle is
present in the detection range:
>In heavy rain
>When the sensors are heavily soiled or iced-
over
>When the sensors are covered with snow
>On rough road surfaces
>In large, rectangular buildings with smooth
walls, e.g. underground garages
>In the presence of heavy exhaust
>Due to the presence of other ultrasonic
sources such as street sweepers, steam
cleaners, or neon lamps.
Automatic activation
With the engine running or the ignition switched
on, shift the selector lever into position R.
Automatic deactivation
The system switches off and the LED goes out:
Page 92 of 312
Technology for comfort, convenience and safety
90
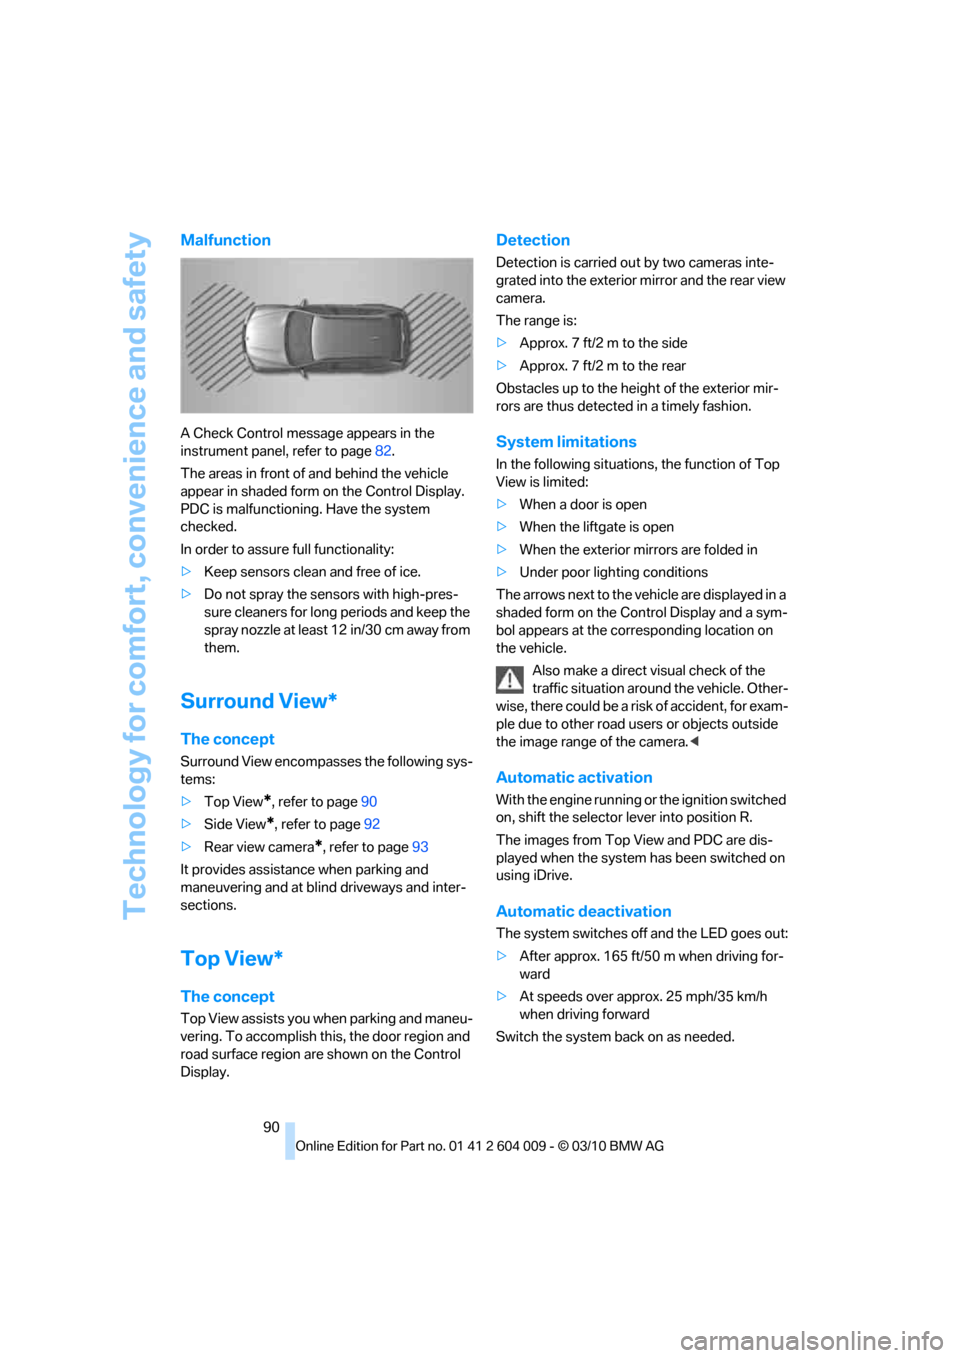
Malfunction
A Check Control message appears in the
instrument panel, refer to page82.
The areas in front of and behind the vehicle
appear in shaded form on the Control Display.
PDC is malfunctioning. Have the system
checked.
In order to assure full functionality:
>Keep sensors clean and free of ice.
>Do not spray the sensors with high-pres-
sure cleaners for long periods and keep the
spray nozzle at least 12 in/30 cm away from
them.
Surround View*
The concept
Surround View encompasses the following sys-
tems:
>Top View
*, refer to page90
>Side View
*, refer to page92
>Rear view camera
*, refer to page93
It provides assistance when parking and
maneuvering and at blind driveways and inter-
sections.
Top View*
The concept
Top View assists you when parking and maneu-
vering. To accomplish this, the door region and
road surface region are shown on the Control
Display.
Detection
Detection is carried out by two cameras inte-
grated into the exterior mirror and the rear view
camera.
The range is:
>Approx. 7 ft/2 m to the side
>Approx. 7 ft/2 m to the rear
Obstacles up to the height of the exterior mir-
rors are thus detected in a timely fashion.
System limitations
In the following situations, the function of Top
View is limited:
>When a door is open
>When the liftgate is open
>When the exterior mirrors are folded in
>Under poor lighting conditions
The arrows next to the vehicle are displayed in a
shaded form on the Control Display and a sym-
bol appears at the corresponding location on
the vehicle.
Also make a direct visual check of the
traffic situation around the vehicle. Other-
wise, there could be a risk of accident, for exam-
ple due to other road users or objects outside
the image range of the camera.<
Automatic activation
With the engine running or the ignition switched
on, shift the selector lever into position R.
The images from Top View and PDC are dis-
played when the system has been switched on
using iDrive.
Automatic deactivation
The system switches off and the LED goes out:
>After approx. 165 ft/50 m when driving for-
ward
>At speeds over approx. 25 mph/35 km/h
when driving forward
Switch the system back on as needed.
Page 101 of 312
Controls
99Reference
At a glance
Driving tips
Communications
Navigation
Entertainment
Mobility
reduces the steering angle requirement,
improves the running comfort and increases
the dynamic driving characteristics of your
BMW.
Chassis and suspension tuning
You can choose between two types of chassis
and suspension tuning.
>Normal:
The comfortable basic setting offers opti-
mum comfort when traveling.
>Sport:
The sporty basic setting offers increased
driving agility.
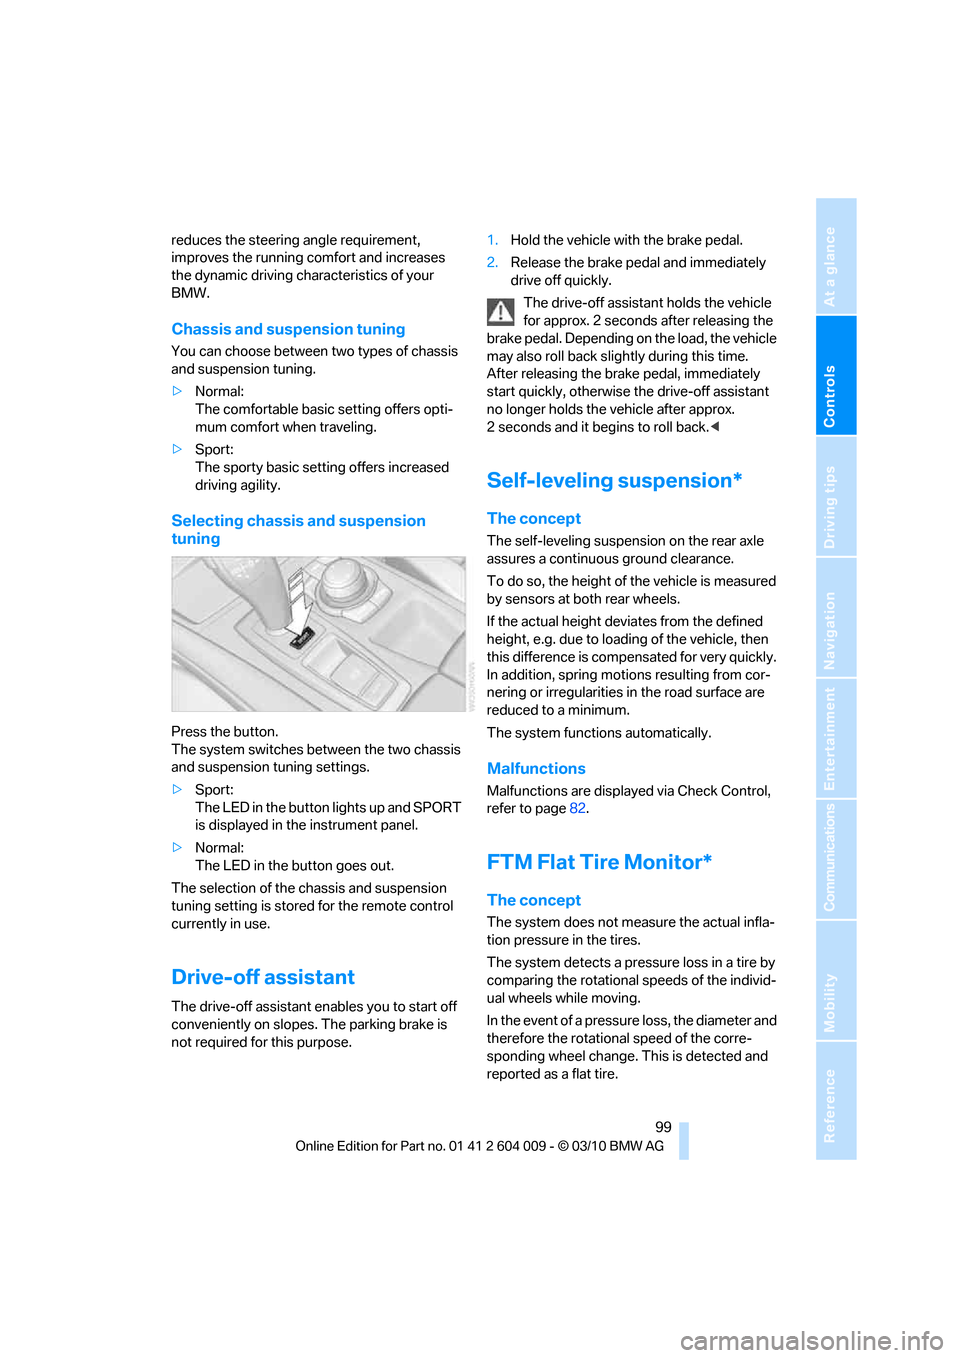
Selecting chassis and suspension
tuning
Press the button.
The system switches between the two chassis
and suspension tuning settings.
>Sport:
The LED in the button lights up and SPORT
is displayed in the instrument panel.
>Normal:
The LED in the button goes out.
The selection of the chassis and suspension
tuning setting is stored for the remote control
currently in use.
Drive-off assistant
The drive-off assistant enables you to start off
conveniently on slopes. The parking brake is
not required for this purpose.1.Hold the vehicle with the brake pedal.
2.Release the brake pedal and immediately
drive off quickly.
The drive-off assistant holds the vehicle
for approx. 2 seconds after releasing the
brake pedal. Depending on the load, the vehicle
may also roll back slightly during this time.
After releasing the brake pedal, immediately
start quickly, otherwise the drive-off assistant
no longer holds the vehicle after approx.
2 seconds and it begins to roll back.<
Self-leveling suspension*
The concept
The self-leveling suspension on the rear axle
assures a continuous ground clearance.
To do so, the height of the vehicle is measured
by sensors at both rear wheels.
If the actual height deviates from the defined
height, e.g. due to loading of the vehicle, then
this difference is compensated for very quickly.
In addition, spring motions resulting from cor-
nering or irregularities in the road surface are
reduced to a minimum.
The system functions automatically.
Malfunctions
Malfunctions are displayed via Check Control,
refer to page82.
FTM Flat Tire Monitor*
The concept
The system does not measure the actual infla-
tion pressure in the tires.
The system detects a pressure loss in a tire by
comparing the rotational speeds of the individ-
ual wheels while moving.
In the event of a pressure loss, the diameter and
therefore the rotational speed of the corre-
sponding wheel change. This is detected and
reported as a flat tire.
Page 113 of 312
Controls
111Reference
At a glance
Driving tips
Communications
Navigation
Entertainment
Mobility
Lamps
Parking lamps/low beams
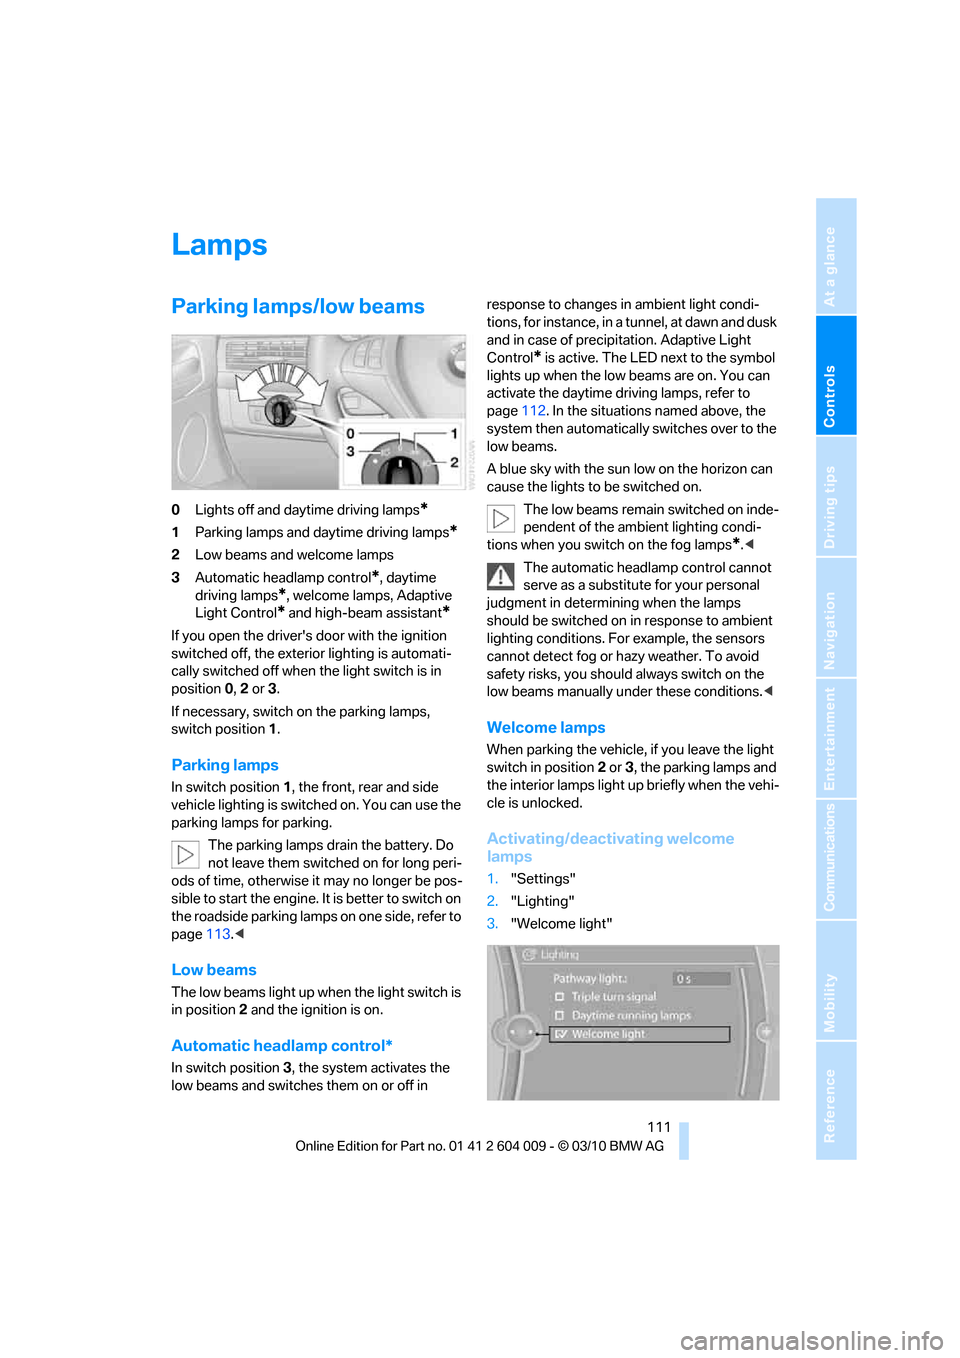
0Lights off and daytime driving lamps*
1Parking lamps and daytime driving lamps*
2Low beams and welcome lamps
3Automatic headlamp control
*, daytime
driving lamps
*, welcome lamps, Adaptive
Light Control
* and high-beam assistant*
If you open the driver's door with the ignition
switched off, the exterior lighting is automati-
cally switched off when the light switch is in
position0, 2 or 3.
If necessary, switch on the parking lamps,
switch position1.
Parking lamps
In switch position1, the front, rear and side
vehicle lighting is switched on. You can use the
parking lamps for parking.
The parking lamps drain the battery. Do
not leave them switched on for long peri-
ods of time, otherwise it may no longer be pos-
sible to start the engine. It is better to switch on
the roadside parking lamps on one side, refer to
page113.<
Low beams
The low beams light up when the light switch is
in position 2 and the ignition is on.
Automatic headlamp control*
In switch position3, the system activates the
low beams and switches them on or off in response to changes in ambient light condi-
tions, for instance, in a tunnel, at dawn and dusk
and in case of precipitation. Adaptive Light
Control
* is active. The LED next to the symbol
lights up when the low beams are on. You can
activate the daytime driving lamps, refer to
page112. In the situations named above, the
system then automatically switches over to the
low beams.
A blue sky with the sun low on the horizon can
cause the lights to be switched on.
The low beams remain switched on inde-
pendent of the ambient lighting condi-
tions when you switch on the fog lamps
*.<
The automatic headlamp control cannot
serve as a substitute for your personal
judgment in determining when the lamps
should be switched on in response to ambient
lighting conditions. For example, the sensors
cannot detect fog or hazy weather. To avoid
safety risks, you should always switch on the
low beams manually under these conditions.<
Welcome lamps
When parking the vehicle, if you leave the light
switch in position2 or3, the parking lamps and
the interior lamps light up briefly when the vehi-
cle is unlocked.
Activating/deactivating welcome
lamps
1."Settings"
2."Lighting"
3."Welcome light"