mirror controls BMW X5 2013 E70 User Guide
[x] Cancel search | Manufacturer: BMW, Model Year: 2013, Model line: X5, Model: BMW X5 2013 E70Pages: 345, PDF Size: 9.45 MB
Page 96 of 345
▷Make sure that the front passenger is sit‐
ting correctly, i.e., keeps his or her feet and
legs in the footwell; otherwise, leg injuries
can occur if the front airbag is triggered.▷Do not place slip covers, seat cushions or
other objects on the front passenger seat
that are not approved specifically for seats
with integrated side airbags.▷Do not hang pieces of clothing, such as
jackets, over the backrests.▷Make sure that occupants keep their heads
away from the side airbag and do not rest
against the head airbag; otherwise, injuries
can occur if the airbags are triggered.▷Do not remove the airbag restraint system.▷Do not remove the steering wheel.▷Do not apply adhesive materials to the air‐
bag cover panels, cover them or modify
them in any way.▷Never modify either the individual compo‐
nents or the wiring in the airbag system.
This also applies to steering wheel covers,
the dashboard, the seats, the roof pillars
and the sides of the headliner.◀
Even when all instructions are followed closely,
injury from contact with the airbags cannot be
ruled out in certain situations.
The ignition and inflation noise may lead to
short-term and, in most cases, temporary
hearing impairment in sensitive individuals.
In the case of a malfunction, deactivation
and after triggering of the airbags
Do not touch the individual components imme‐
diately after the system has been triggered;
otherwise, there is the danger of burns.
Only have the airbags checked, repaired or dis‐
mantled and the airbag generator scrapped by
your service center or a workshop that has the
necessary authorization for handling explo‐
sives.
Non-professional attempts to service the sys‐
tem could lead to failure in an emergency or
undesired triggering of the airbag, either of
which could result in injury.◀
Warnings and information on the airbags are
also found on the sun visors.
Automatic deactivation of the frontpassenger airbags
The occupation of the seat is detected by eval‐
uating the impression on the occupied seat
surface of the front passenger seat.
The front and side airbags on the front passen‐
ger side are activated or deactivated accord‐
ingly by the system.
The indicator lamp above the interior rearview
mirror shows the current status of the front
passenger airbags, deactivated or activated,
refer to Front passenger airbag indicator lamp
below.
Leave feet in the footwell
Make sure that the front passenger
keeps his or her feet in the footwell; otherwise,
the front passenger airbags may not function
properly.◀
Child restraint fixing system in the front
passenger seat
Before transporting a child on the front pas‐
senger seat, refer to the safety notes and in‐
structions under Children on the front passen‐
ger seat, refer to page 61.◀
Malfunction of the automatic
deactivation system
When transporting older children and adults,
the front passenger airbags may be deacti‐
vated in certain sitting positions. In this case,
the indicator lamp for the front passenger air‐ bags lights up.
In this case, change the sitting position so that
the front passenger airbags are activated and
the indicator lamp goes out.Seite 96ControlsSafety96
Online Edition for Part no. 01 40 2 918 395 - III/13
Page 103 of 345
Switching on/off
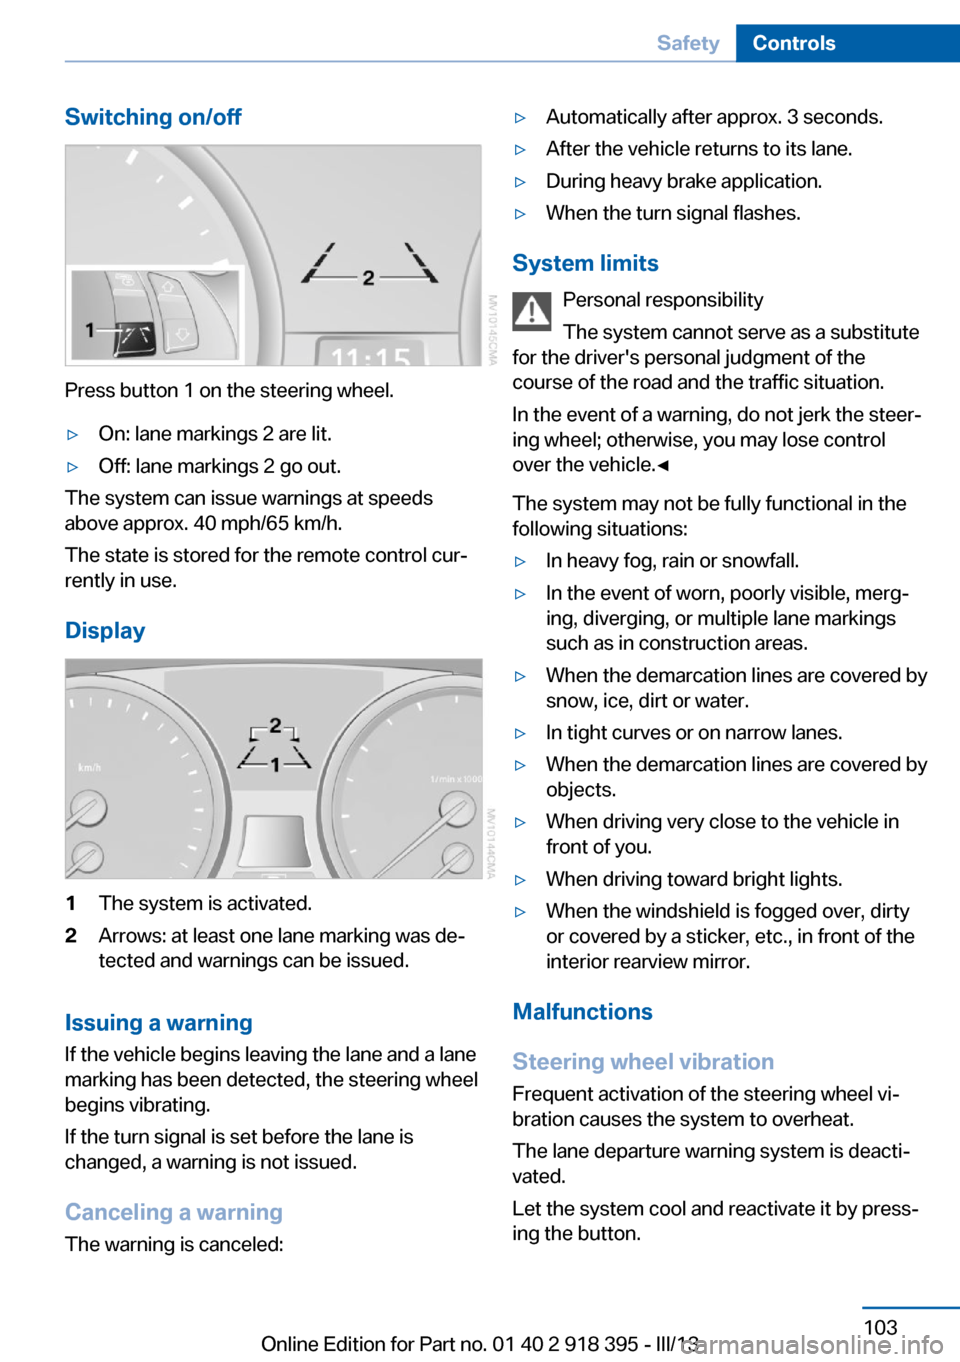
Press button 1 on the steering wheel.
▷On: lane markings 2 are lit.▷Off: lane markings 2 go out.
The system can issue warnings at speeds
above approx. 40 mph/65 km/h.
The state is stored for the remote control cur‐
rently in use.
Display
1The system is activated.2Arrows: at least one lane marking was de‐
tected and warnings can be issued.
Issuing a warning
If the vehicle begins leaving the lane and a lane
marking has been detected, the steering wheel
begins vibrating.
If the turn signal is set before the lane is
changed, a warning is not issued.
Canceling a warning The warning is canceled:
▷Automatically after approx. 3 seconds.▷After the vehicle returns to its lane.▷During heavy brake application.▷When the turn signal flashes.
System limits
Personal responsibility
The system cannot serve as a substitute
for the driver's personal judgment of the
course of the road and the traffic situation.
In the event of a warning, do not jerk the steer‐
ing wheel; otherwise, you may lose control
over the vehicle.◀
The system may not be fully functional in the
following situations:
▷In heavy fog, rain or snowfall.▷In the event of worn, poorly visible, merg‐
ing, diverging, or multiple lane markings
such as in construction areas.▷When the demarcation lines are covered by
snow, ice, dirt or water.▷In tight curves or on narrow lanes.▷When the demarcation lines are covered by
objects.▷When driving very close to the vehicle in
front of you.▷When driving toward bright lights.▷When the windshield is fogged over, dirty
or covered by a sticker, etc., in front of the
interior rearview mirror.
Malfunctions
Steering wheel vibration
Frequent activation of the steering wheel vi‐
bration causes the system to overheat.
The lane departure warning system is deacti‐
vated.
Let the system cool and reactivate it by press‐
ing the button.
Seite 103SafetyControls103
Online Edition for Part no. 01 40 2 918 395 - III/13
Page 104 of 345
Camera
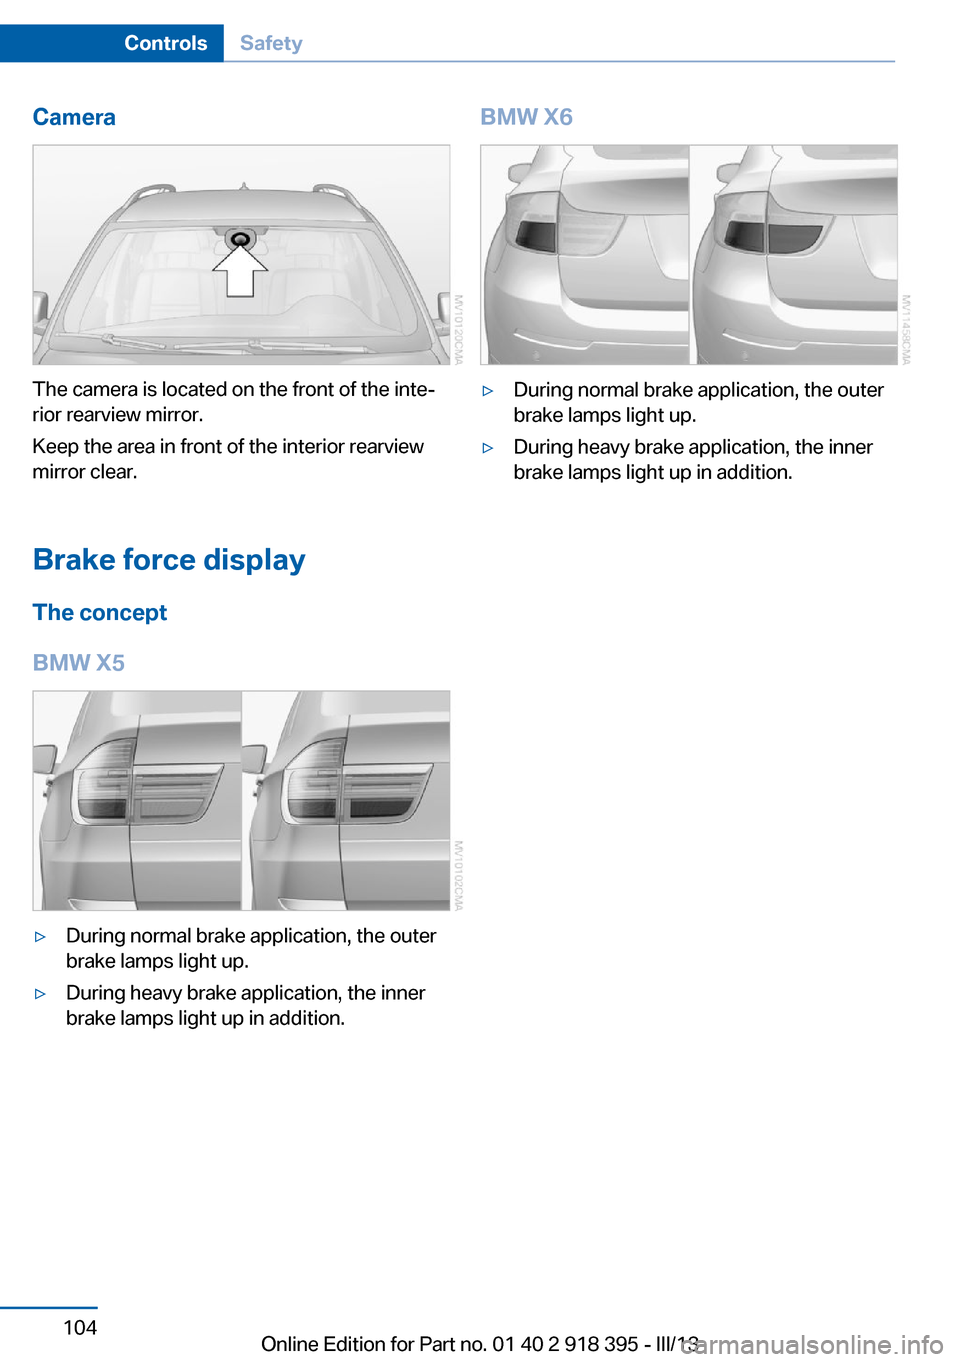
The camera is located on the front of the inte‐
rior rearview mirror.
Keep the area in front of the interior rearview
mirror clear.
Brake force display The concept
BMW X5
▷During normal brake application, the outer
brake lamps light up.▷During heavy brake application, the inner
brake lamps light up in addition.BMW X6▷During normal brake application, the outer
brake lamps light up.▷During heavy brake application, the inner
brake lamps light up in addition.Seite 104ControlsSafety104
Online Edition for Part no. 01 40 2 918 395 - III/13
Page 124 of 345
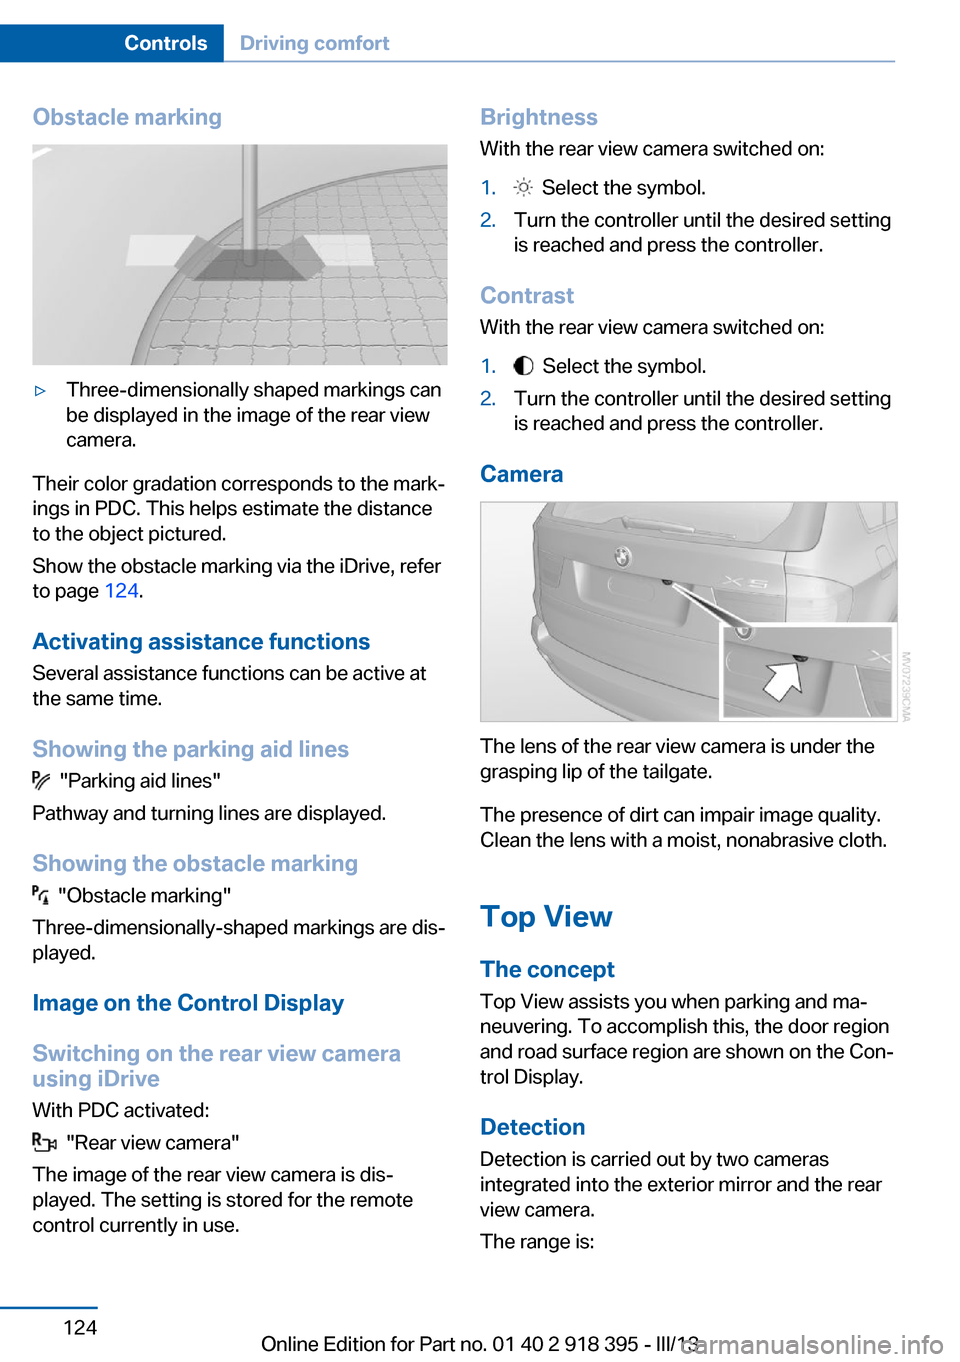
Obstacle marking▷Three-dimensionally shaped markings can
be displayed in the image of the rear view
camera.
Their color gradation corresponds to the mark‐
ings in PDC. This helps estimate the distance
to the object pictured.
Show the obstacle marking via the iDrive, refer
to page 124.
Activating assistance functions
Several assistance functions can be active at
the same time.
Showing the parking aid lines
"Parking aid lines"
Pathway and turning lines are displayed.
Showing the obstacle marking
"Obstacle marking"
Three-dimensionally-shaped markings are dis‐
played.
Image on the Control Display
Switching on the rear view camera
using iDrive
With PDC activated:
"Rear view camera"
The image of the rear view camera is dis‐
played. The setting is stored for the remote
control currently in use.
Brightness
With the rear view camera switched on:1. Select the symbol.2.Turn the controller until the desired setting
is reached and press the controller.
Contrast
With the rear view camera switched on:
1. Select the symbol.2.Turn the controller until the desired setting
is reached and press the controller.
Camera
The lens of the rear view camera is under the
grasping lip of the tailgate.
The presence of dirt can impair image quality.
Clean the lens with a moist, nonabrasive cloth.
Top View
The concept
Top View assists you when parking and ma‐
neuvering. To accomplish this, the door region
and road surface region are shown on the Con‐
trol Display.
Detection
Detection is carried out by two cameras
integrated into the exterior mirror and the rear
view camera.
The range is:
Seite 124ControlsDriving comfort124
Online Edition for Part no. 01 40 2 918 395 - III/13
Page 125 of 345
▷Approx. 7 ft/2 m to the side.▷Approx. 7 ft/2 m to the rear.
Obstacles up to the height of the exterior mir‐
rors are thus detected in a timely fashion.
System limits
Top View cannot be used in the following sit‐
uations:
▷With a door open.▷With the tailgate open.▷With an exterior mirror folded in.▷In poor light.
The arrows next to the vehicle are displayed in
a shaded form on the Control Display and a
symbol appears at the corresponding location
on the vehicle.
Check the traffic situation as well
Check the traffic situation around the ve‐
hicle with your own eyes. Otherwise, an acci‐
dent could result from road users or objects lo‐
cated outside the picture area of the
cameras.◀
Switching on automatically
Select transmission position R with the engine
running.
The images from Top View and PDC are dis‐
played when the system has been switched on
using iDrive.
Switching off automatically when
driving forward
The system switches off when a certain dis‐
tance or speed is exceeded.
Switch on the system again if necessary.
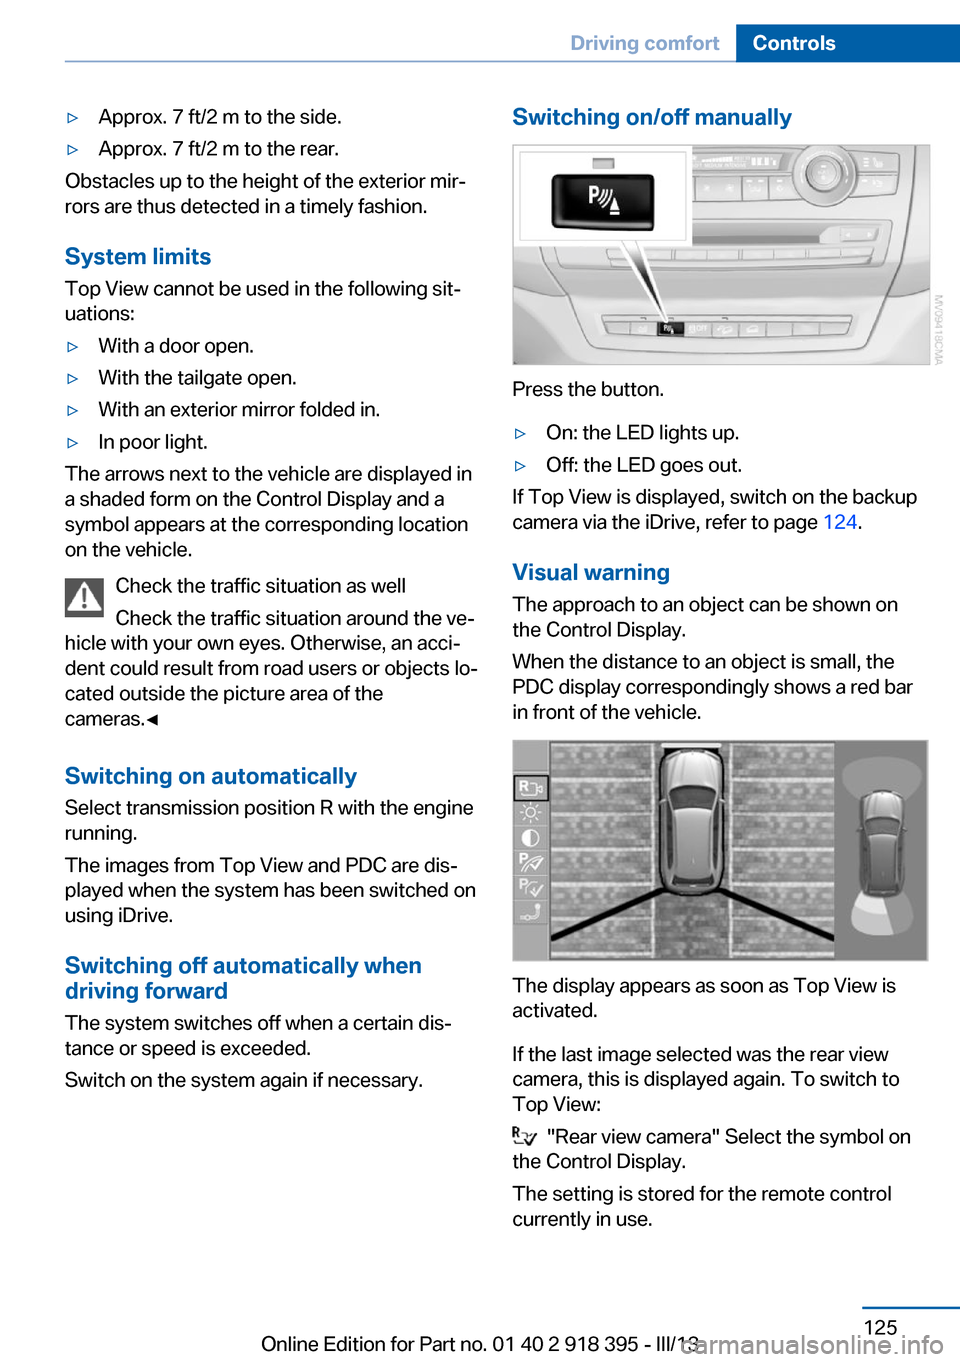
Switching on/off manually
Press the button.
▷On: the LED lights up.▷Off: the LED goes out.
If Top View is displayed, switch on the backup
camera via the iDrive, refer to page 124.
Visual warning
The approach to an object can be shown on
the Control Display.
When the distance to an object is small, the
PDC display correspondingly shows a red bar
in front of the vehicle.
The display appears as soon as Top View is
activated.
If the last image selected was the rear view
camera, this is displayed again. To switch to
Top View:
"Rear view camera" Select the symbol on
the Control Display.
The setting is stored for the remote control
currently in use.
Seite 125Driving comfortControls125
Online Edition for Part no. 01 40 2 918 395 - III/13
Page 126 of 345
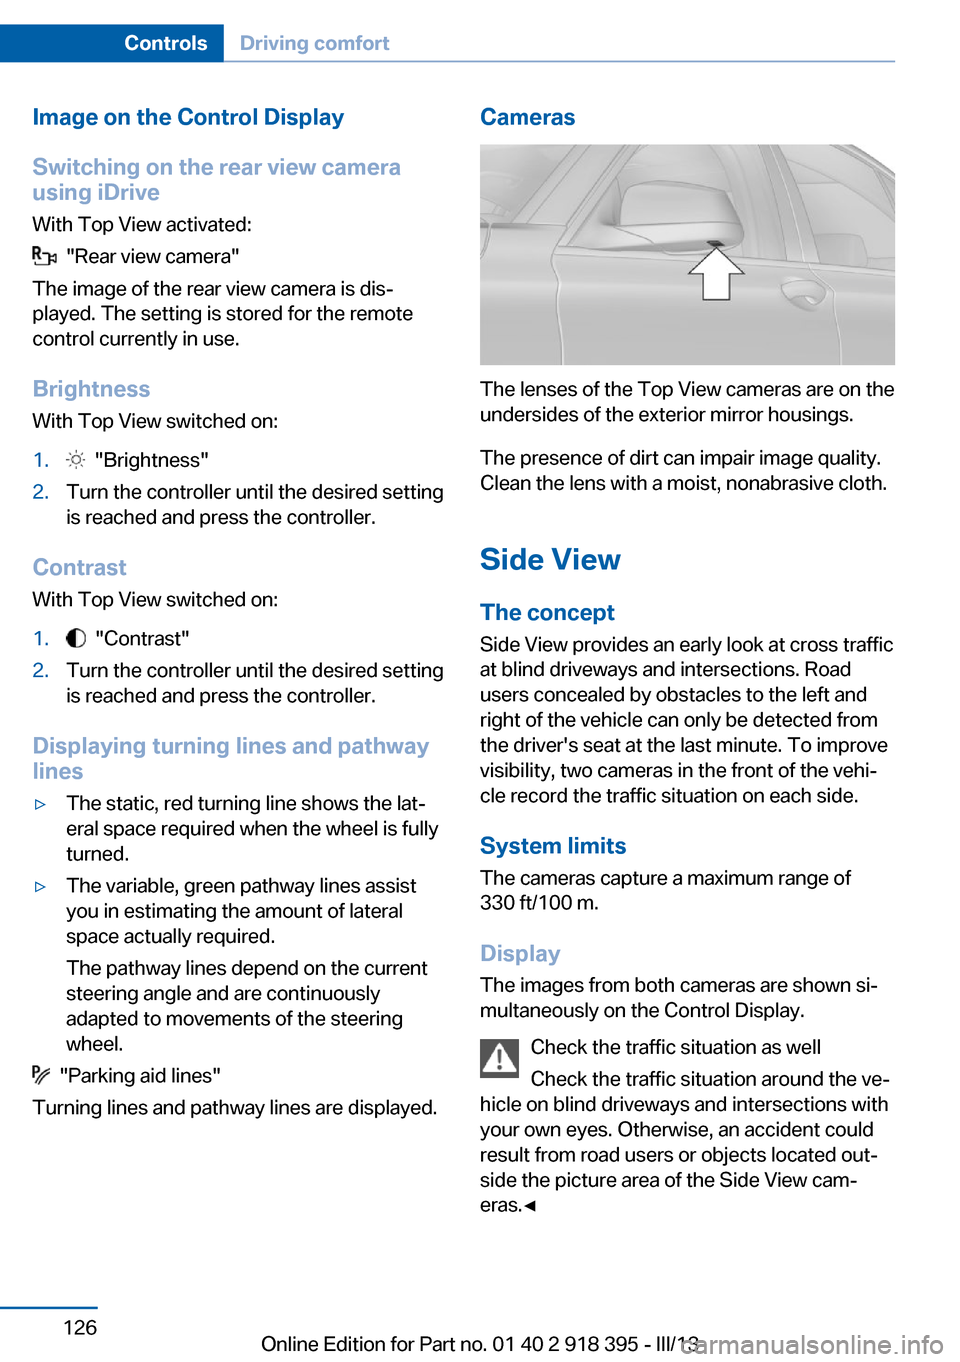
Image on the Control Display
Switching on the rear view camera
using iDrive
With Top View activated:
"Rear view camera"
The image of the rear view camera is dis‐
played. The setting is stored for the remote
control currently in use.
Brightness
With Top View switched on:
1. "Brightness"2.Turn the controller until the desired setting
is reached and press the controller.
Contrast
With Top View switched on:
1. "Contrast"2.Turn the controller until the desired setting
is reached and press the controller.
Displaying turning lines and pathway
lines
▷The static, red turning line shows the lat‐
eral space required when the wheel is fully
turned.▷The variable, green pathway lines assist
you in estimating the amount of lateral
space actually required.
The pathway lines depend on the current
steering angle and are continuously
adapted to movements of the steering
wheel.
"Parking aid lines"
Turning lines and pathway lines are displayed.
Cameras
The lenses of the Top View cameras are on the
undersides of the exterior mirror housings.
The presence of dirt can impair image quality.
Clean the lens with a moist, nonabrasive cloth.
Side ViewThe concept
Side View provides an early look at cross traffic
at blind driveways and intersections. Road
users concealed by obstacles to the left and
right of the vehicle can only be detected from
the driver's seat at the last minute. To improve
visibility, two cameras in the front of the vehi‐
cle record the traffic situation on each side.
System limits
The cameras capture a maximum range of
330 ft/100 m.
Display
The images from both cameras are shown si‐
multaneously on the Control Display.
Check the traffic situation as well
Check the traffic situation around the ve‐
hicle on blind driveways and intersections with
your own eyes. Otherwise, an accident could
result from road users or objects located out‐
side the picture area of the Side View cam‐
eras.◀
Seite 126ControlsDriving comfort126
Online Edition for Part no. 01 40 2 918 395 - III/13
Page 139 of 345
Interior equipmentVehicle equipmentThis chapter describes all series equipment as
well as country-specific and special equipment
offered for this model series.Therefore, it also
describes equipment that may not be found in
your vehicle, for instance due to the selected
special equipment or the country version. This
also applies to safety-related functions and
systems.
Universal Garage Door
Opener
The concept The Universal Garage Door Opener can be
used to operate up to 3 functions in remote-
controlled systems, such as garage door drives or lighting systems. The Universal Garage
Door Opener replaces up to 3 different hand-
held transmitters. To operate it, the buttons on
the interior rearview mirror must be program‐
med for the desired functions. The hand-held
transmitter for the system is needed for the
programming procedure.
During programming
During programming and before activat‐
ing a device using the Universal Garage Door
Opener, ensure that there are no people, ani‐
mals, or objects in the range of movement of
the remote-controlled device; otherwise, there
is a risk of injury or damage.
Also follow the safety instructions of the hand-
held transmitter.◀
Before selling the vehicle, delete the stored
functions for security reasons.
Compatibility If this symbol is printed on the packag‐
ing or in the operating instructions ofthe system being operated, the system is gen‐
erally compatible with the Universal Garage
Door Opener.
If you have any questions, please contact:▷Your service center.▷www.homelink.com on the Internet.
HomeLink is a registered trademark of John‐
son Controls, Inc.
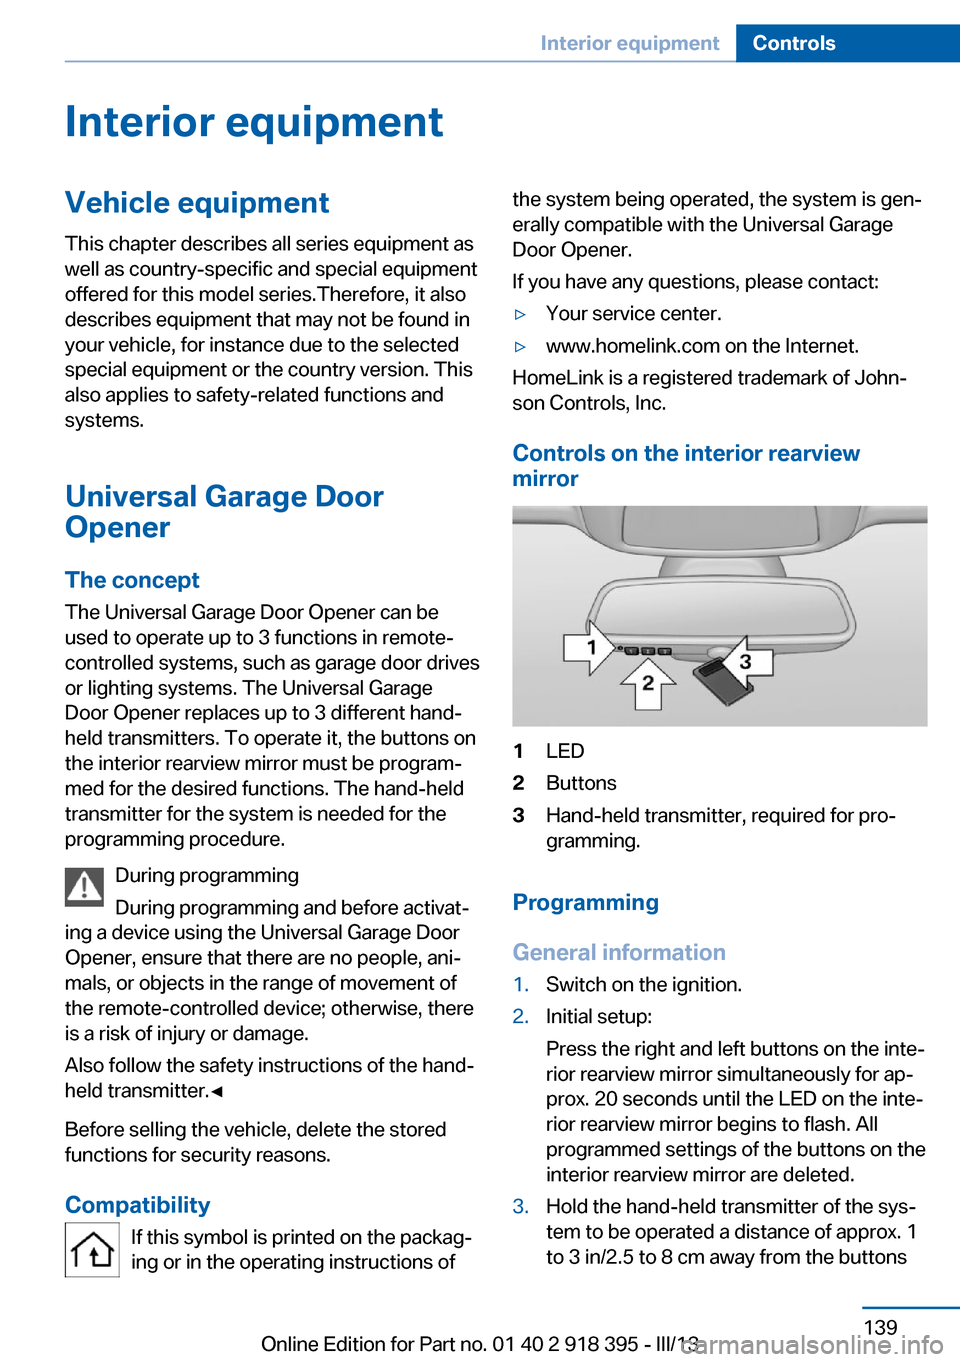
Controls on the interior rearview
mirror
1LED2Buttons3Hand-held transmitter, required for pro‐
gramming.
Programming
General information
1.Switch on the ignition.2.Initial setup:
Press the right and left buttons on the inte‐
rior rearview mirror simultaneously for ap‐
prox. 20 seconds until the LED on the inte‐
rior rearview mirror begins to flash. All
programmed settings of the buttons on the
interior rearview mirror are deleted.3.Hold the hand-held transmitter of the sys‐
tem to be operated a distance of approx. 1
to 3 in/2.5 to 8 cm away from the buttonsSeite 139Interior equipmentControls139
Online Edition for Part no. 01 40 2 918 395 - III/13
Page 140 of 345
on the interior rearview mirror. The re‐
quired distance depends on the particular
hand-held transmitter.4.Press the button of the desired function on
the hand-held transmitter and the button
being programmed on the interior rearview
mirror simultaneously and hold. The LED
on the interior rearview mirror flashes
slowly at first.5.When the LED flashes more rapidly, re‐
lease both buttons. Rapid flashing indi‐
cates that the button on the interior rear‐
view mirror has been programmed.
If the LED does not flash faster after
60 seconds, change the distance between
the interior rearview mirror and the hand-
held transmitter and repeat the step. Multi‐
ple trials at different distances may be nec‐
essary. Wait at least 15 seconds between
trials.6.To program additional functions on other
buttons, repeat steps 3 to 5.
The systems can be operated with the buttons
on the interior rearview mirror.
Special characteristics of alternating-
code radio systems
If the system cannot be operated after re‐
peated programming, check whether the sys‐
tem to be operated uses an alternating-code
system.
Read the operating instructions of the system
or press and hold the programmed button on
the interior rearview mirror. If the LED on the
interior rearview mirror flashes rapidly at first
and then lights up continuously for 2 seconds,
the system is equipped with an alternating-
code system. This flashing LED pattern re‐
peats itself for approx. 20 seconds.
In systems with an alternating-code system,
the Universal Garage Door Opener and the
system must be additionally synchronized.
Please obtain additional information on syn‐
chronization in the operating instructions of
the system being set up.
The systems will be easier to synchronize with
the aid of a second person.
Synchronization:1.Park the vehicle within range of the re‐
mote-controlled system.2.Program the corresponding button on the
interior rearview mirror as described.3.Identify and press the synchronization but‐
ton on the system being set up. You have
approx. 30 seconds for the next step.4.Press and hold the button on the interior
rearview mirror for approx. 3 seconds and
then release it. Repeat this step up to three
times if necessary to complete the syn‐
chronization procedure. When synchroni‐
zation is completed, the programmed func‐
tion is executed.
Reprogramming individual buttons
1.Switch on the ignition.2.Hold the hand-held transmitter at a dis‐
tance of approx. 1 to 3 in/2.5 to 8 cm from
the memory buttons.
The required distance depends on the par‐
ticular hand-held transmitter.3.Press the memory button of the Universal
Garage Door Opener.4.If the LED flashes slowly after approx.
20 seconds, press the transmit button on
the hand-held transmitter.5.Release both buttons when the LED
flashes rapidly.
If the LED does not flash rapidly after ap‐
prox. 60 seconds, change the distance and
repeat the step.
Canada: if the LED does not flash rapidly
after approx. 60 seconds, change the dis‐
tance and repeat the step. If programmingSeite 140ControlsInterior equipment140
Online Edition for Part no. 01 40 2 918 395 - III/13
Page 141 of 345
was aborted by the hand-held transmitter,
hold down the memory button and press
and release the button on the hand-held
transmitter several times for 2 seconds.
Controls
Prior to operation
Before operating a unit with the Universal
Garage Door Opener, ensure that there are no
people, animals, or objects in the range of
movement of the system; otherwise, there is a
risk of injury or damage.
Also follow the safety instructions of the hand-
held transmitter.◀
The system, such as the garage door, can be
operated using the button on the interior rear‐
view mirror with the engine running or the igni‐
tion switched on. When you are within the re‐
ception range of the system, press and hold
the button until the function is initiated. The
LED on the interior rearview mirror lights up
continuously while the radio signal is being
transmitted.
Deleting stored functions Press the right and left buttons on the interior
rearview mirror simultaneously for approx.
20 seconds until the LED flashes rapidly. All
stored functions are deleted. The functions
cannot be deleted individually.
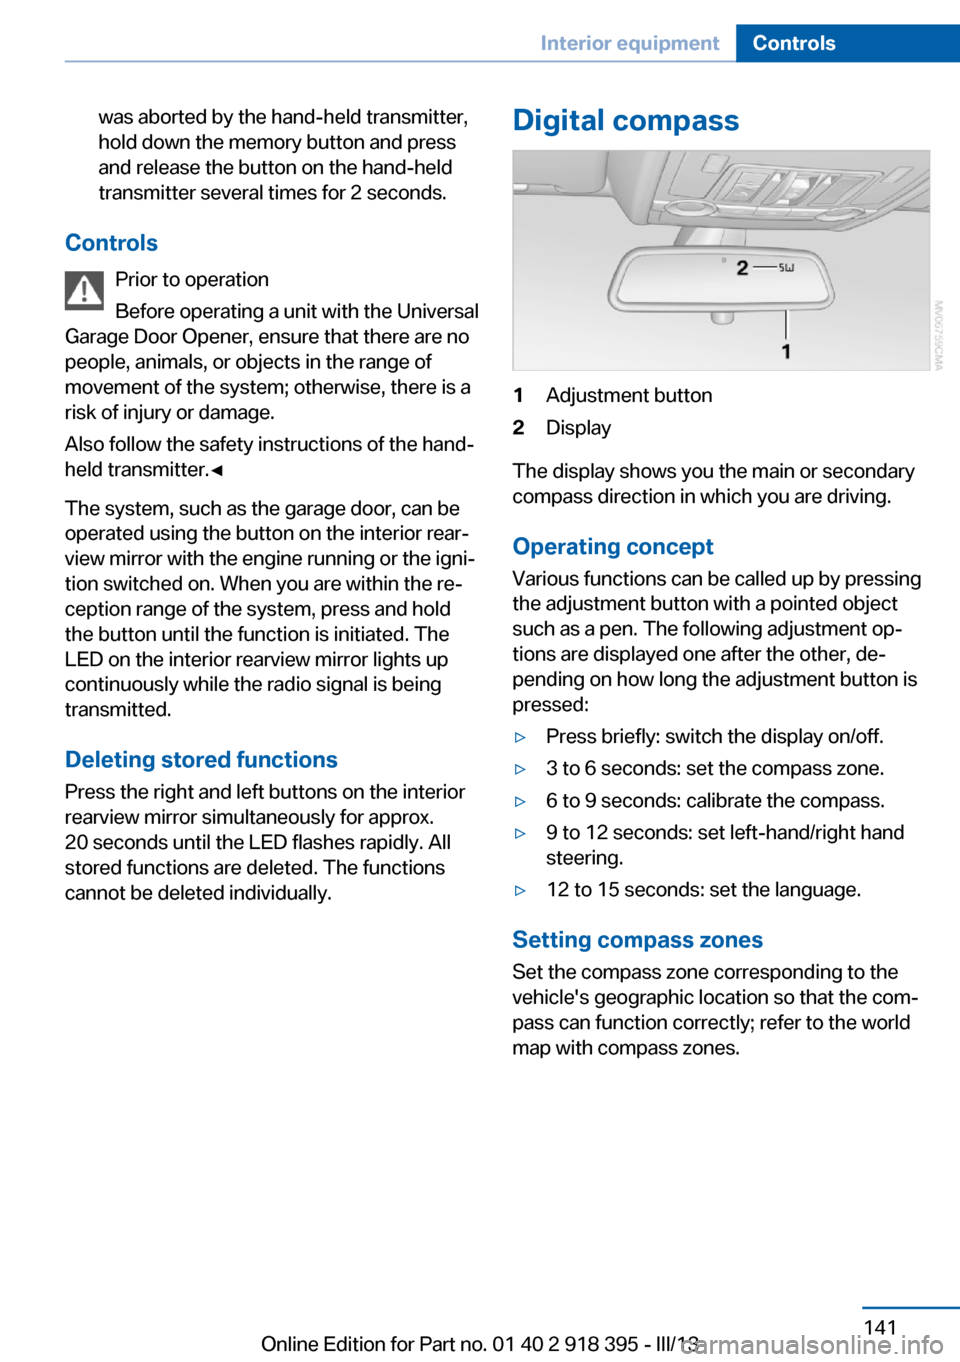
Digital compass1Adjustment button2Display
The display shows you the main or secondary
compass direction in which you are driving.
Operating concept
Various functions can be called up by pressing
the adjustment button with a pointed object
such as a pen. The following adjustment op‐
tions are displayed one after the other, de‐
pending on how long the adjustment button is
pressed:
▷Press briefly: switch the display on/off.▷3 to 6 seconds: set the compass zone.▷6 to 9 seconds: calibrate the compass.▷9 to 12 seconds: set left-hand/right hand
steering.▷12 to 15 seconds: set the language.
Setting compass zones
Set the compass zone corresponding to the
vehicle's geographic location so that the com‐
pass can function correctly; refer to the world
map with compass zones.
Seite 141Interior equipmentControls141
Online Edition for Part no. 01 40 2 918 395 - III/13
Page 333 of 345
Combination instrument, referto Instrument cluster 14
Combination switch, refer to Turn signal/high beams/
headlamp flasher 72
Combination switch, refer to Washer/wiper system 73
Comfort Access– Battery replacement 42
Comfort area, refer to Around
the center console 16
Compact wheel, inflation pressure 275, 276
Compartment for remote control, refer to Ignition
lock 67
Compartments, refer to Stor‐ age compart‐
ments 147, 148
Compass, digital 141
Computer 81
Computer, displaying infor‐ mation 81
Computer, displays on the Control Display 82
Concierge service 261
Condensation on windows, removing 132
Condensation under the vehi‐ cle 158
Condition Based Service CBS 293
Confirmation signals for lock‐ ing/unlocking the vehicle 33
Connecting, mobile phone, refer to Pairing the mobile
phone 237
Consumption, refer to Aver‐ age fuel consumption 82
Contacts 250, 258
Control Display 19
Control Display, care 315
Control Display, setting the brightness 88
Controller, refer to Con‐ trols 18
Controls and displays 12
Controls, rear DVD sys‐
tem 220
Control systems, driving sta‐ bility 105
Convenient operation– Glass sunroof 33– Window 33
Coolant 292
Coolant, checking the level 292
Coolant temperature 80
Cooling function, switching on and off 133
Cooling, maximum 133
Cooling system, refer to Cool‐ ant 292
Cornering Brake Control CBC 105
Corrosion on brake discs 158
Courtesy lamps, refer to Inte‐ rior lamps 94
Cradle for telephone or mo‐ bile phone, refer to Snap-in
adapter 247
Cruise control 118
Cruise control
– Malfunction 119
Cruise control, active 111
Cupholder 149
Curb weight, refer to Weights 320
Current fuel consumption 80
Current location, storing 172
Curve lights, refer to Adaptive Light Control 91
D
Dashboard lighting, refer to Instrument lighting 94
Dashboard, refer to Cock‐ pit 12
Data, technical 318
Date 79
Date, display format 88
Date, retrieving 79
Date, setting 87
Daytime running lights 91
Defroster, rear window 132
Defrosting windows 132
Defrost setting, refer to De‐ frosting windows 132
Destination entry via the ad‐ dress book 172
Destination guidance 179
Destination guidance with in‐ termediate destinations 177
Destination input, naviga‐ tion 170
Diesel exhaust fluid, at low temperatures 272
Diesel exhaust fluid, at mini‐ mum 272
Diesel exhaust fluid, having refilled 272
Diesel exhaust fluid, refilling yourself 272
Diesel particulate filter 157
Digital clock 79
Digital compass 141
Digital radio 193
Dimming mirrors 59
Directional indicators, refer to Turn signals 72
Display in front wind‐ shield 127
Display lighting, refer to In‐ strument lighting 94
Displays and controls 12
Displays, care 315
Displays, cleaning 315
Displays, refer to Instrument cluster 14
Disposal, coolant 292
Disposal, vehicle battery 305
Distance control, refer to Ac‐ tive Cruise Control 111
Distance, selecting, with Ac‐ tive Cruise Control 113
Distance warning, refer to Park Distance Control
PDC 120 Seite 333Everything from A to ZReference333
Online Edition for Part no. 01 40 2 918 395 - III/13