rear view mirror BMW X5 2013 E70 User Guide
[x] Cancel search | Manufacturer: BMW, Model Year: 2013, Model line: X5, Model: BMW X5 2013 E70Pages: 345, PDF Size: 9.45 MB
Page 125 of 345
▷Approx. 7 ft/2 m to the side.▷Approx. 7 ft/2 m to the rear.
Obstacles up to the height of the exterior mir‐
rors are thus detected in a timely fashion.
System limits
Top View cannot be used in the following sit‐
uations:
▷With a door open.▷With the tailgate open.▷With an exterior mirror folded in.▷In poor light.
The arrows next to the vehicle are displayed in
a shaded form on the Control Display and a
symbol appears at the corresponding location
on the vehicle.
Check the traffic situation as well
Check the traffic situation around the ve‐
hicle with your own eyes. Otherwise, an acci‐
dent could result from road users or objects lo‐
cated outside the picture area of the
cameras.◀
Switching on automatically
Select transmission position R with the engine
running.
The images from Top View and PDC are dis‐
played when the system has been switched on
using iDrive.
Switching off automatically when
driving forward
The system switches off when a certain dis‐
tance or speed is exceeded.
Switch on the system again if necessary.
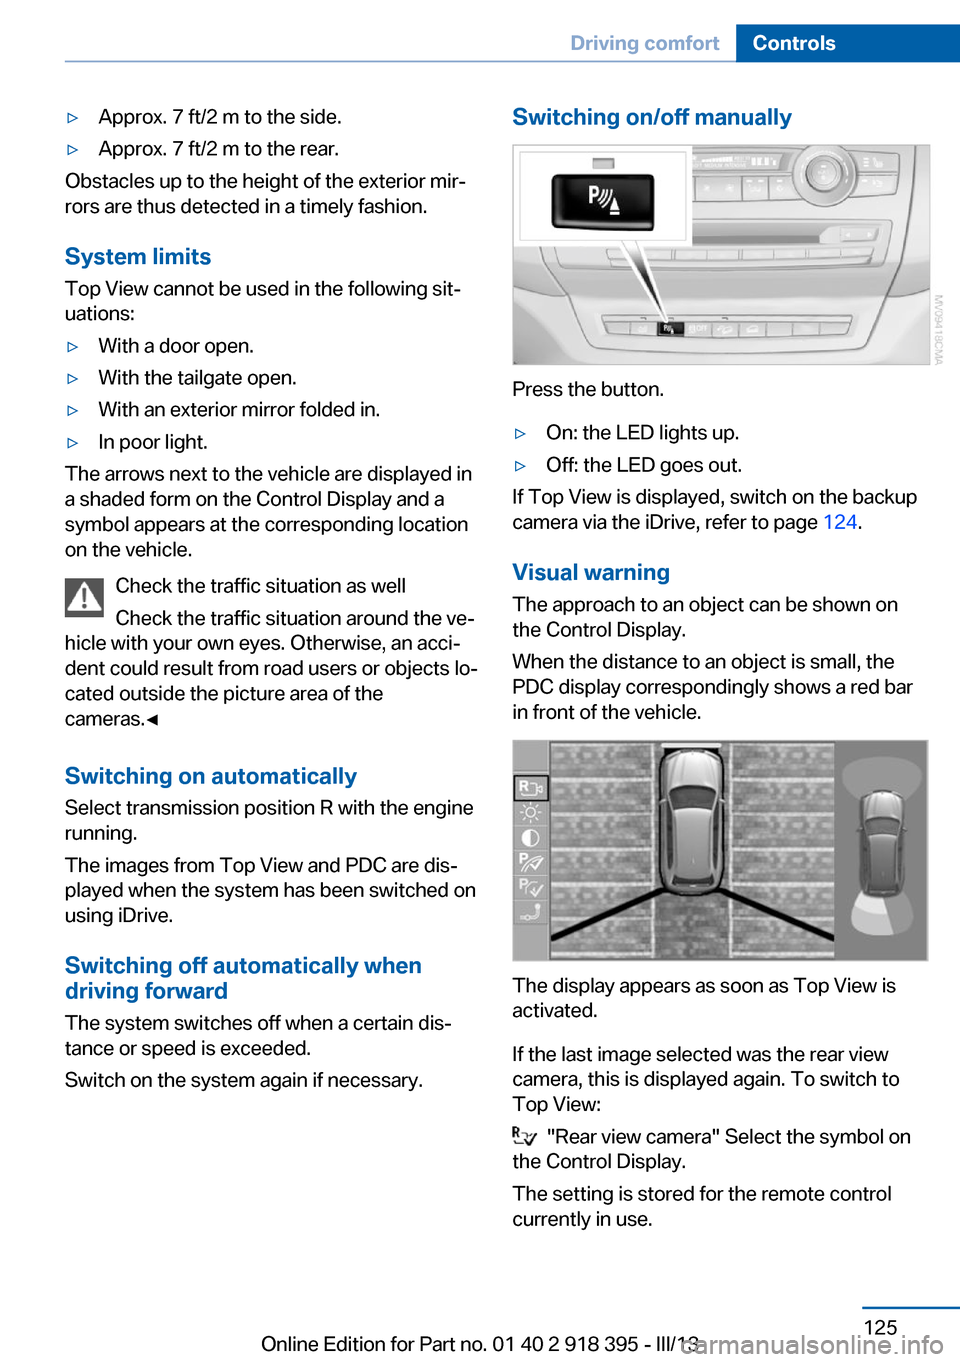
Switching on/off manually
Press the button.
▷On: the LED lights up.▷Off: the LED goes out.
If Top View is displayed, switch on the backup
camera via the iDrive, refer to page 124.
Visual warning
The approach to an object can be shown on
the Control Display.
When the distance to an object is small, the
PDC display correspondingly shows a red bar
in front of the vehicle.
The display appears as soon as Top View is
activated.
If the last image selected was the rear view
camera, this is displayed again. To switch to
Top View:
"Rear view camera" Select the symbol on
the Control Display.
The setting is stored for the remote control
currently in use.
Seite 125Driving comfortControls125
Online Edition for Part no. 01 40 2 918 395 - III/13
Page 126 of 345
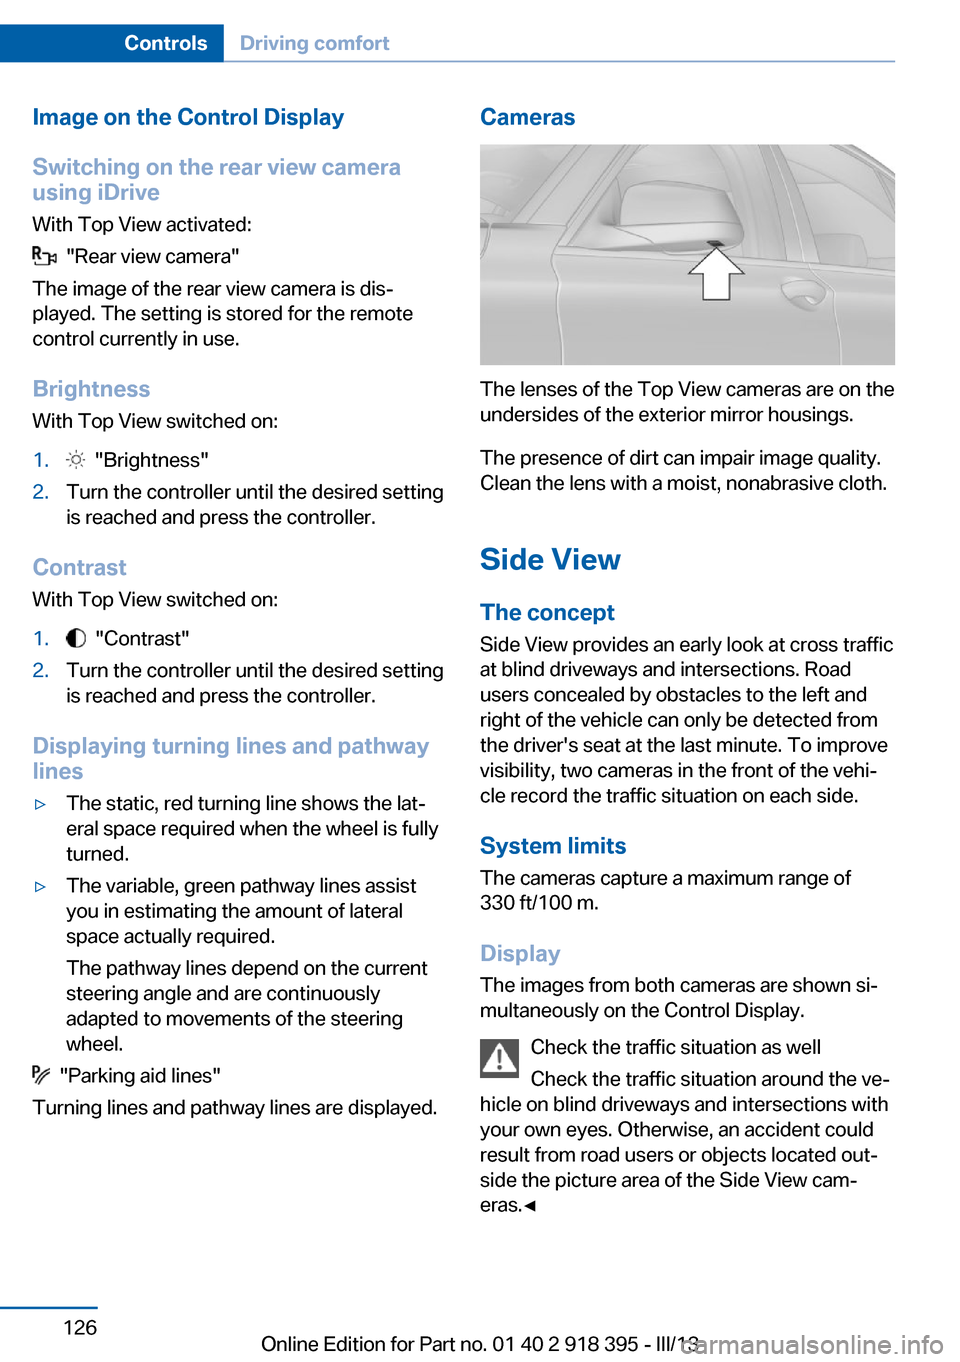
Image on the Control Display
Switching on the rear view camera
using iDrive
With Top View activated:
"Rear view camera"
The image of the rear view camera is dis‐
played. The setting is stored for the remote
control currently in use.
Brightness
With Top View switched on:
1. "Brightness"2.Turn the controller until the desired setting
is reached and press the controller.
Contrast
With Top View switched on:
1. "Contrast"2.Turn the controller until the desired setting
is reached and press the controller.
Displaying turning lines and pathway
lines
▷The static, red turning line shows the lat‐
eral space required when the wheel is fully
turned.▷The variable, green pathway lines assist
you in estimating the amount of lateral
space actually required.
The pathway lines depend on the current
steering angle and are continuously
adapted to movements of the steering
wheel.
"Parking aid lines"
Turning lines and pathway lines are displayed.
Cameras
The lenses of the Top View cameras are on the
undersides of the exterior mirror housings.
The presence of dirt can impair image quality.
Clean the lens with a moist, nonabrasive cloth.
Side ViewThe concept
Side View provides an early look at cross traffic
at blind driveways and intersections. Road
users concealed by obstacles to the left and
right of the vehicle can only be detected from
the driver's seat at the last minute. To improve
visibility, two cameras in the front of the vehi‐
cle record the traffic situation on each side.
System limits
The cameras capture a maximum range of
330 ft/100 m.
Display
The images from both cameras are shown si‐
multaneously on the Control Display.
Check the traffic situation as well
Check the traffic situation around the ve‐
hicle on blind driveways and intersections with
your own eyes. Otherwise, an accident could
result from road users or objects located out‐
side the picture area of the Side View cam‐
eras.◀
Seite 126ControlsDriving comfort126
Online Edition for Part no. 01 40 2 918 395 - III/13
Page 139 of 345
Interior equipmentVehicle equipmentThis chapter describes all series equipment as
well as country-specific and special equipment
offered for this model series.Therefore, it also
describes equipment that may not be found in
your vehicle, for instance due to the selected
special equipment or the country version. This
also applies to safety-related functions and
systems.
Universal Garage Door
Opener
The concept The Universal Garage Door Opener can be
used to operate up to 3 functions in remote-
controlled systems, such as garage door drives or lighting systems. The Universal Garage
Door Opener replaces up to 3 different hand-
held transmitters. To operate it, the buttons on
the interior rearview mirror must be program‐
med for the desired functions. The hand-held
transmitter for the system is needed for the
programming procedure.
During programming
During programming and before activat‐
ing a device using the Universal Garage Door
Opener, ensure that there are no people, ani‐
mals, or objects in the range of movement of
the remote-controlled device; otherwise, there
is a risk of injury or damage.
Also follow the safety instructions of the hand-
held transmitter.◀
Before selling the vehicle, delete the stored
functions for security reasons.
Compatibility If this symbol is printed on the packag‐
ing or in the operating instructions ofthe system being operated, the system is gen‐
erally compatible with the Universal Garage
Door Opener.
If you have any questions, please contact:▷Your service center.▷www.homelink.com on the Internet.
HomeLink is a registered trademark of John‐
son Controls, Inc.
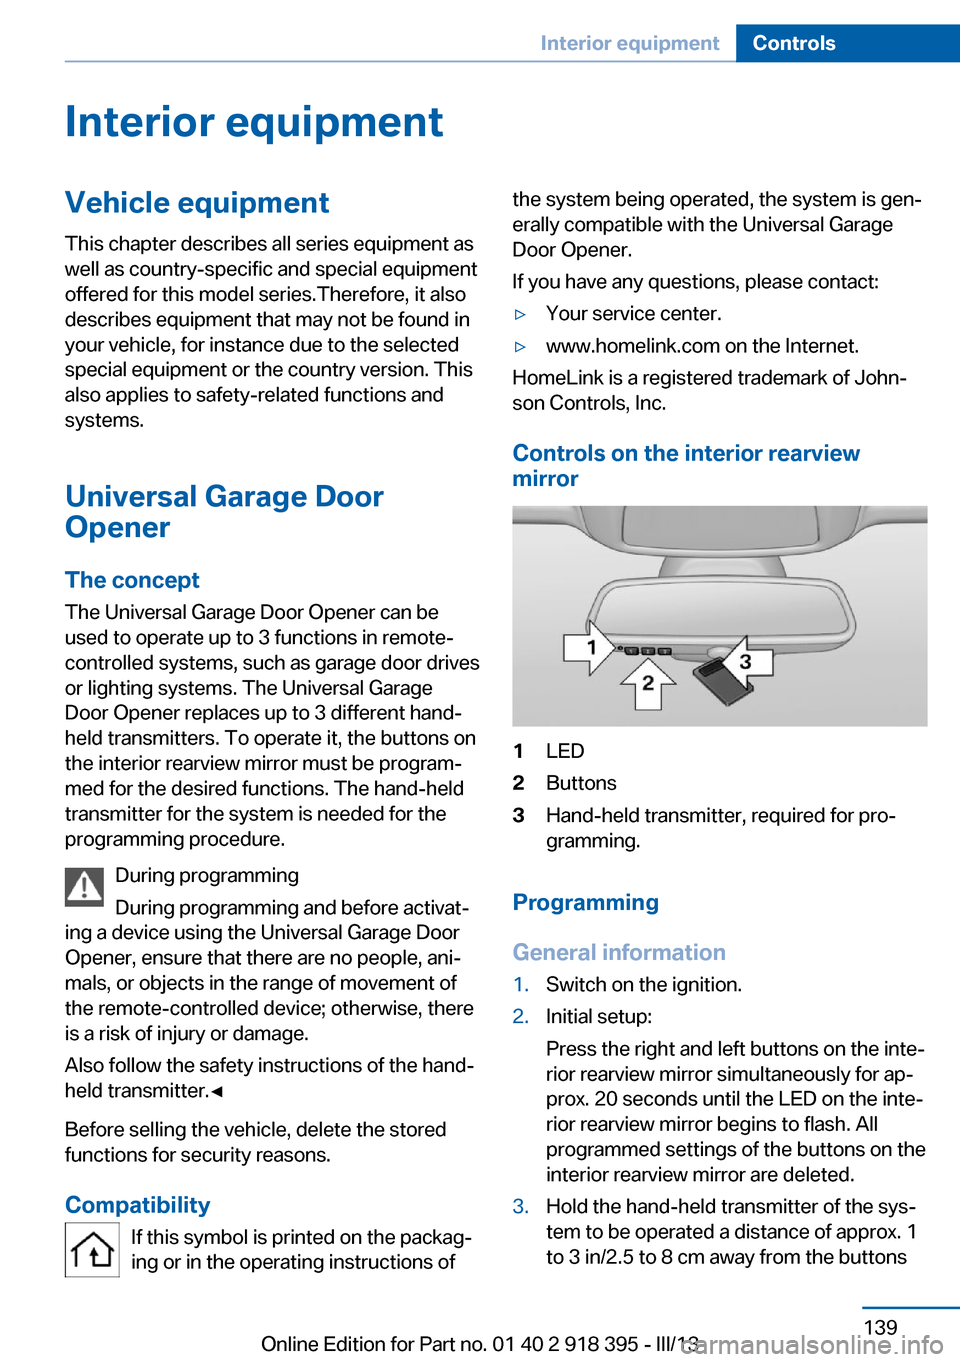
Controls on the interior rearview
mirror
1LED2Buttons3Hand-held transmitter, required for pro‐
gramming.
Programming
General information
1.Switch on the ignition.2.Initial setup:
Press the right and left buttons on the inte‐
rior rearview mirror simultaneously for ap‐
prox. 20 seconds until the LED on the inte‐
rior rearview mirror begins to flash. All
programmed settings of the buttons on the
interior rearview mirror are deleted.3.Hold the hand-held transmitter of the sys‐
tem to be operated a distance of approx. 1
to 3 in/2.5 to 8 cm away from the buttonsSeite 139Interior equipmentControls139
Online Edition for Part no. 01 40 2 918 395 - III/13
Page 140 of 345
on the interior rearview mirror. The re‐
quired distance depends on the particular
hand-held transmitter.4.Press the button of the desired function on
the hand-held transmitter and the button
being programmed on the interior rearview
mirror simultaneously and hold. The LED
on the interior rearview mirror flashes
slowly at first.5.When the LED flashes more rapidly, re‐
lease both buttons. Rapid flashing indi‐
cates that the button on the interior rear‐
view mirror has been programmed.
If the LED does not flash faster after
60 seconds, change the distance between
the interior rearview mirror and the hand-
held transmitter and repeat the step. Multi‐
ple trials at different distances may be nec‐
essary. Wait at least 15 seconds between
trials.6.To program additional functions on other
buttons, repeat steps 3 to 5.
The systems can be operated with the buttons
on the interior rearview mirror.
Special characteristics of alternating-
code radio systems
If the system cannot be operated after re‐
peated programming, check whether the sys‐
tem to be operated uses an alternating-code
system.
Read the operating instructions of the system
or press and hold the programmed button on
the interior rearview mirror. If the LED on the
interior rearview mirror flashes rapidly at first
and then lights up continuously for 2 seconds,
the system is equipped with an alternating-
code system. This flashing LED pattern re‐
peats itself for approx. 20 seconds.
In systems with an alternating-code system,
the Universal Garage Door Opener and the
system must be additionally synchronized.
Please obtain additional information on syn‐
chronization in the operating instructions of
the system being set up.
The systems will be easier to synchronize with
the aid of a second person.
Synchronization:1.Park the vehicle within range of the re‐
mote-controlled system.2.Program the corresponding button on the
interior rearview mirror as described.3.Identify and press the synchronization but‐
ton on the system being set up. You have
approx. 30 seconds for the next step.4.Press and hold the button on the interior
rearview mirror for approx. 3 seconds and
then release it. Repeat this step up to three
times if necessary to complete the syn‐
chronization procedure. When synchroni‐
zation is completed, the programmed func‐
tion is executed.
Reprogramming individual buttons
1.Switch on the ignition.2.Hold the hand-held transmitter at a dis‐
tance of approx. 1 to 3 in/2.5 to 8 cm from
the memory buttons.
The required distance depends on the par‐
ticular hand-held transmitter.3.Press the memory button of the Universal
Garage Door Opener.4.If the LED flashes slowly after approx.
20 seconds, press the transmit button on
the hand-held transmitter.5.Release both buttons when the LED
flashes rapidly.
If the LED does not flash rapidly after ap‐
prox. 60 seconds, change the distance and
repeat the step.
Canada: if the LED does not flash rapidly
after approx. 60 seconds, change the dis‐
tance and repeat the step. If programmingSeite 140ControlsInterior equipment140
Online Edition for Part no. 01 40 2 918 395 - III/13
Page 141 of 345
was aborted by the hand-held transmitter,
hold down the memory button and press
and release the button on the hand-held
transmitter several times for 2 seconds.
Controls
Prior to operation
Before operating a unit with the Universal
Garage Door Opener, ensure that there are no
people, animals, or objects in the range of
movement of the system; otherwise, there is a
risk of injury or damage.
Also follow the safety instructions of the hand-
held transmitter.◀
The system, such as the garage door, can be
operated using the button on the interior rear‐
view mirror with the engine running or the igni‐
tion switched on. When you are within the re‐
ception range of the system, press and hold
the button until the function is initiated. The
LED on the interior rearview mirror lights up
continuously while the radio signal is being
transmitted.
Deleting stored functions Press the right and left buttons on the interior
rearview mirror simultaneously for approx.
20 seconds until the LED flashes rapidly. All
stored functions are deleted. The functions
cannot be deleted individually.
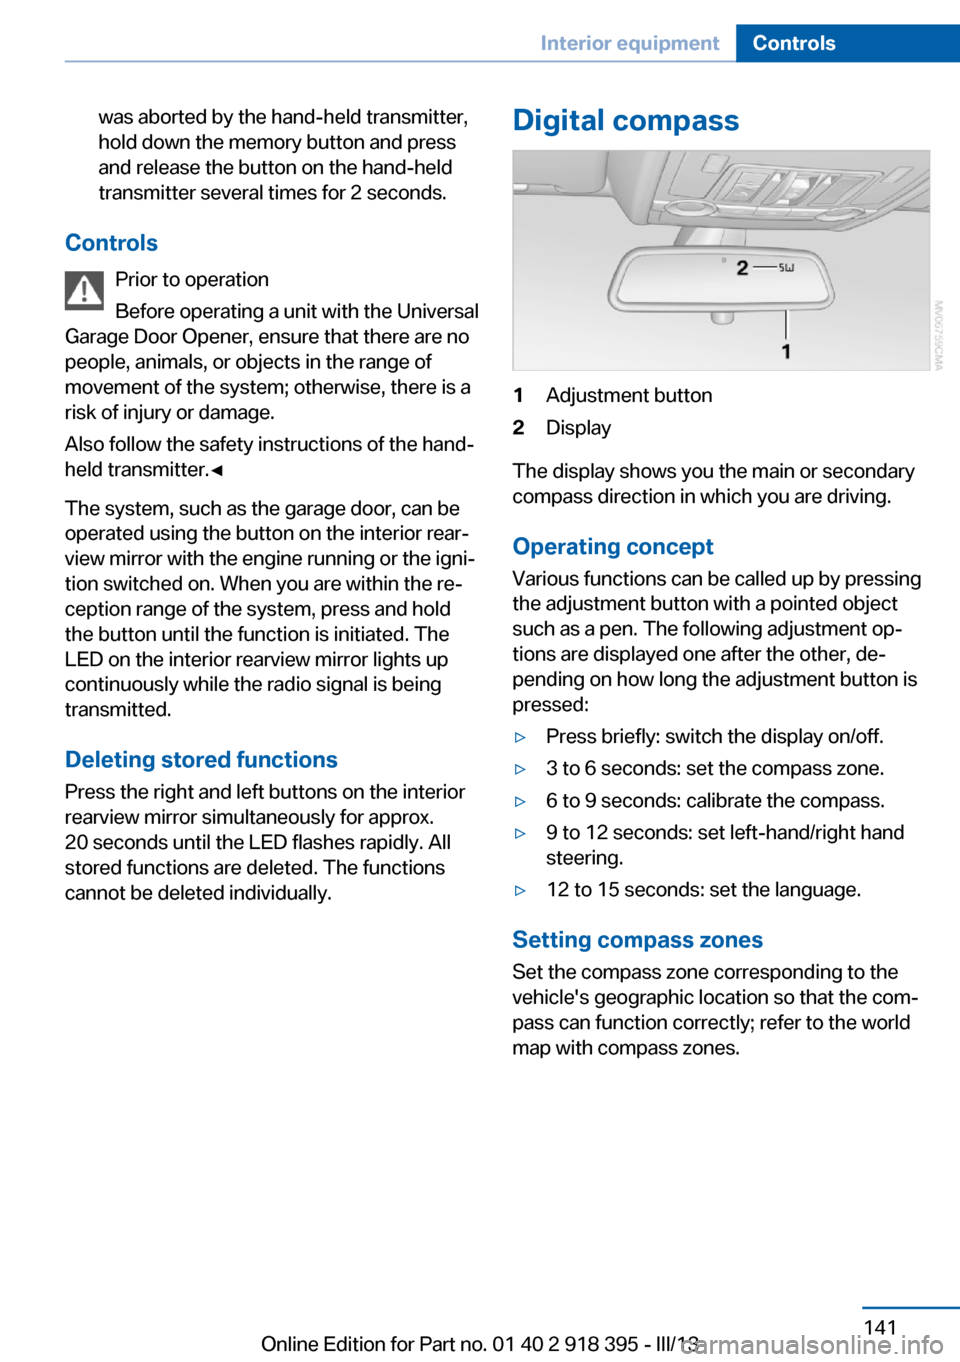
Digital compass1Adjustment button2Display
The display shows you the main or secondary
compass direction in which you are driving.
Operating concept
Various functions can be called up by pressing
the adjustment button with a pointed object
such as a pen. The following adjustment op‐
tions are displayed one after the other, de‐
pending on how long the adjustment button is
pressed:
▷Press briefly: switch the display on/off.▷3 to 6 seconds: set the compass zone.▷6 to 9 seconds: calibrate the compass.▷9 to 12 seconds: set left-hand/right hand
steering.▷12 to 15 seconds: set the language.
Setting compass zones
Set the compass zone corresponding to the
vehicle's geographic location so that the com‐
pass can function correctly; refer to the world
map with compass zones.
Seite 141Interior equipmentControls141
Online Edition for Part no. 01 40 2 918 395 - III/13
Page 334 of 345
Divided screen view, splitscreen 22
Door key, refer to Remote control with integrated
key 30
Door lock 34
Doors, manual operation 34
Doors, unlocking and locking– Confirmation signals 33– From the inside 35– From the outside 32
DOT Quality Grades 283
Downhill control 108
Draft-free ventilation 134
Drive-off assistant 109
Driver's seat, calibrating 55
Driving away on inclines, refer to Drive-off assistant 109
Driving notes, breaking in 156
Driving notes, general 156
Driving on poor roads 158
Driving stability control sys‐ tems 105
Driving through water 157
Driving tips, refer to Driving notes 156
Dry air, refer to Cooling func‐ tion 133
DSC Dynamic Stability Con‐ trol 105
DTC Dynamic Traction Con‐ trol 106
DTMF suffix dialing 242
DVD/CD 200
DVDs, storing 207
DVD system in rear 220
DVD, video 202
Dynamic destination guid‐ ance 186
Dynamic Performance Con‐ trol 107
Dynamic Stability Control DSC 105
Dynamic Traction Control DTC 106
E
Easy entry/exit 60
EfficientDynamics, refer to Saving fuel 164
Electrical malfunction– Door lock 34– Driver's door 34– Fuel filler flap 268
Electrical malfunction of up‐
per tailgate 36
Electrical malfunction, park‐ ing brake 71
Electric seat adjustment 50
Electric steering wheel ad‐ justment 60
Electronic brake-force distri‐ bution 105
Electronic engine oil level check 290
Electronic Stability Program ESP, refer to Dynamic Sta‐
bility Control DSC 105
Emergency operation
– Door lock, refer to Manual
operation 34
Emergency operation, fuel
filler flap, unlocking man‐
ually 268
Emergency Request 307
Emergency service, refer to Roadside Assistance 308
Energy-conscious driving, re‐ fer to Current fuel consump‐
tion 80
Energy, saving, refer to Sav‐ ing fuel 164
Engine, breaking in 156
Engine compartment 288
Engine coolant, refer to Cool‐ ant 292
Engine oil, adding 291
Engine oil, additives, refer to Approved engine oils 291
Engine oil, alternative oil types 292
Engine oil, BMW maintenance
system 293
Engine oil change intervals, refer to Service require‐
ments 83
Engine oil, checking the level 290
Engine oil, filling ca‐ pacity 321
Engine oil temperature 80
Engine oil types, alterna‐ tive 291
Engine oil types, ap‐ proved 291
Engine, overheating, refer to Coolant temperature 80
Engine start, assistance 308
Engine, starting 68
Engine, starting– Comfort Access 40
Engine, starting, Start/Stop
button 67
Engine, stopping, Start/Stop
button 67
Engine, switching off 69
Environmentally friendly driv‐ ing, refer to Current fuel
consumption 80
Equalizer 190
Equipment, interior 139
ESP Electronic Stability Pro‐ gram, refer to Dynamic Sta‐
bility Control DSC 105
Exchanging wheels/tires 285
Exhaust system 157
Exterior mirrors 58
Exterior mirrors, adjusting 58
Exterior mirrors, automatic dimming 59
Exterior mirrors, automatic heating 59
Exterior mirrors, folding in and out 59
External audio device 148
External devices 212
External temperature dis‐ play 79
Seite 334ReferenceEverything from A to Z334
Online Edition for Part no. 01 40 2 918 395 - III/13
Page 337 of 345
Interior rearview mirror, auto‐matic dimming 59
Interior rearview mirror, com‐ pass 141
Interior temperature, setting, automatic climate con‐
trol 130
Intermediate destina‐ tions 177
Internet page 6
Intersection, entering for navi‐ gation 171
iPod/iPhone 212
J
Jacking points for the vehicle jack 302
Jack, refer to Vehicle jack 302
Joystick, refer to Selector lever 76
Jump-starting 308
K
Keyless Go, refer to Comfort Access 40
Keyless opening and closing, refer to Comfort Access 40
Key Memory, refer to Per‐ sonal Profile 30
Key, refer to Integrated key/ remote control 30
Kickdown– Automatic transmission with
Steptronic 75
Knocking control 270
L
Label, run-flat tire 286
Lamp and bulb replacement, lamp replacement 295
Lamps 90
Lamps, automatic headlamp control 90, 91
Lamps, High-beam Assis‐
tant 92
Lamps, parking lamps/low beams 90
Lamps, replacing, refer to Lamp and bulb replace‐
ment 295
Lane departure warning 102
Lane margin, warning 102
Language, changing on Con‐ trol Display 88
Lap-and-shoulder belt, refer to Safety belts 54
Lashing eyes, securing cargo 162
LATCH child restraint fixing system 62
Leather, care 313
LEDs, light-emitting di‐ odes 296
Length, refer to Dimen‐ sions 318
Letters and numbers, enter‐ ing 23
License plate lamps, replac‐ ing bulbs 298, 301
Light-alloy wheels, care 314
Light-emitting diodes, LEDs 296
Lighter 143
Lighting– Instruments 94
Lighting, vehicle, refer to
Lamps 90
Light switch 90
Limit, refer to Speed limit 86
Load 160
Loading 160
Lock buttons, doors, refer to Locking 35
Locking
– From the inside 35– From the outside 33– Setting the confirmation
signals 33– Without remote control, re‐
fer to Comfort Access 40Locking the vehicle– From the inside 35– From the outside 32
Locks, doors, and win‐
dows 66
Longlife oils, alternative oil types 292
Longlife oils, refer to Ap‐ proved engine oils 291
Low beams 90
Low beams
– Automatic 91
Low beams, automatic 90
Low beams, automatic, refer to High-beam Assistant 92
Lower back support, refer to Lumbar support 50
Lower tailgate 38
Low-sulfur diesel 270
Luggage compartment roller cover 145
Luggage rack, refer to Roof- mounted luggage rack 162
Lumbar support 50
M
Main inspection, refer to Service requirements 83
Maintenance 293
Maintenance, refer to Service booklet
Maintenance, refer to Service requirements 83
Maintenance require‐ ments 293
Maintenance system BMW 293
Malfunction
– Door lock 34– Fuel filler flap 268
Malfunction of upper tail‐
gate 36
Malfunction, parking brake 71
Malfunction warnings, refer to Check Control 85
Seite 337Everything from A to ZReference337
Online Edition for Part no. 01 40 2 918 395 - III/13
Page 339 of 345
Panoramic glass sunroof– Convenient operation 33– Initializing 46– Opening, closing 45– Pinch protection 46– Power failure 46– Remote control 33– Tilting 45
Park Distance Control
PDC 120
Parked-car ventilation 137
Parked vehicle, condensa‐ tion 158
Parking aid, refer to Park Dis‐ tance Control PDC 120
Parking assistant, refer to Park Distance Control
PDC 120
Parking brake 69
Parking brake, Automatic Hold 70
Parking brake, releasing man‐ ually 70, 71
Parking brake, setting man‐ ually 69
Parking lamps 90
Parking lamps/low beams 90
Parking with Automatic Hold 71
Particulate filter, refer to Die‐ sel particulate filter 157
Passenger airbags, deactivat‐ ing 96
Passenger side mirror, tilt‐ ing 58
PDC Park Distance Con‐ trol 120
Personal information 249
Personal Profile 30
Pinch protection
– Panoramic glass sunroof 46– Windows 44
Pinch protection, glass sun‐
roof 47
Plastic, care 314
Playing videos, rear DVD sys‐ tem 223
Pollen, refer to Microfilter/
activated-charcoal filter 135
Poor road operation 158
Position, storing 172
Postal code, entering in navi‐ gation 171
Power windows– Safety switch 44
Power windows, opening and
closing 44
Power windows, refer to Win‐ dows 43
Preheating, refer to Diesel en‐ gine 68
Prescribed engine oils, refer to Approved engine oils 291
Pressure, tires 275
Pressure warning, tires 97
Profile depth, refer to Mini‐ mum tread depth 284
Profile, tires 284
Programmable memory but‐ tons, iDrive 23
Protection function, refer to Pinch protection 47
Protection function, refer to
Pinch protection
– Panoramic glass sunroof 46
Protective function, refer to
Pinch protection
– Windows 44
Push-and-turn switch, refer to
Controls 18
R Radiator fluid, refer to Cool‐ ant 292
Radio-operated key, refer to Remote control with
integrated key 30
Radio ready state 67
Radio ready state, switched off 68
Radio ready state, switched on 67
Radio setting, refer to Radio
ready state 67
Rain sensor 74
Random 201
Random playback 201
Range 81
RDS 193
Reading lamps 94
Reading out loud 256
Rear entertainment, refer to DVD system in rear 220
Rear lamps, refer to Tail lamps 297, 300
Rear seat backrest, folda‐ ble 146
Rear seats, adjusting 51
Rear seats, adjusting the head restraints 57
Rear seats, heating 52
Rear socket 144
Rear ventilation 135
Rear ventilation, 3rd row seats 135
Rear ventilation, automatic climate control in rear 135
Rearview mirror, refer to Mir‐ rors 58
Rear window defroster 132
Rear window, washing 74
Rear window wiper 74
Recirculated air mode 133
Recommended tire brands 286
Redialing 243
Refueling 268
Remaining distance to desti‐ nation, refer to Com‐
puter 82
Remaining range for service, refer to Service require‐
ments 83
Remaining range, refer to Range 81
Reminders 256 Seite 339Everything from A to ZReference339
Online Edition for Part no. 01 40 2 918 395 - III/13