audio BMW X5 2013 E70 Owner's Guide
[x] Cancel search | Manufacturer: BMW, Model Year: 2013, Model line: X5, Model: BMW X5 2013 E70Pages: 345, PDF Size: 9.45 MB
Page 215 of 345
Random playbackThe current list of tracks is played back in ran‐dom order.1."CD/Multimedia"2."External devices"3.Open "Options".4."Random"
Fast forward/reverse
Press and hold the button.
Notes Do not expose the audio device to extreme en‐
vironmental conditions, such as very high tem‐
peratures; refer to the audio device operating
instructions.
Depending on the configuration of the audio
files, e.g., bit rates greater than 256 kbit/s, the
files may not play back correctly in each case.
Information on connection
▷The connected audio device is supplied
with a max. power of 500 mA if supported
by the device. Therefore, do not addition‐
ally connect the device to a socket in the
vehicle; otherwise, playback may be com‐
promised.▷Do not use force when plugging the con‐
nector into the USB interface.▷Do not connect devices such as fans or
lamps to the USB audio interface.▷Do not connect USB hard drives.▷Do not use the USB audio interface to re‐
charge external devices.
Bluetooth audio
At a glance
▷Music files on external devices such as au‐
dio devices or mobile phones can be
played back via Bluetooth.Use of a mobile phone as an audio source,
refer to page 238.▷Bluetooth® is a registered trademark of
Bluetooth® SIG, Inc.▷The sound is output on the vehicle loud‐
speakers.▷The volume of the sound output is de‐
pendent on the device. If necessary, adjust
the volume on the device.▷Up to four external devices can be paired
with the vehicle.
Requirements
▷The device is suitable. Information at
www.bmwusa.com/bluetooth.▷The device is ready for operation.▷The ignition is switched on.▷Bluetooth is activated on the vehicle, refer
to page 237, and on the device.▷Bluetooth presettings must be made on
the device, such as for a connection with‐
out confirmation or visibility; refer to the
device operating instructions.▷A number with at least four and a maximum
of 16 digits is defined as the Bluetooth
passkey. It is only required once for pairing.
Pairing and connecting
Pairing a device
To avoid becoming distracted and pos‐
ing an unnecessary hazard both to your own
vehicle's occupants and to other road users,
only pair the device while the vehicle is station‐
ary.◀
1."CD/Multimedia"2."Bluetooth® (audio)"3.If necessary, "Bluetooth® audio".4."Add new phone"Seite 215CD/multimediaEntertainment215
Online Edition for Part no. 01 40 2 918 395 - III/13
Page 216 of 345
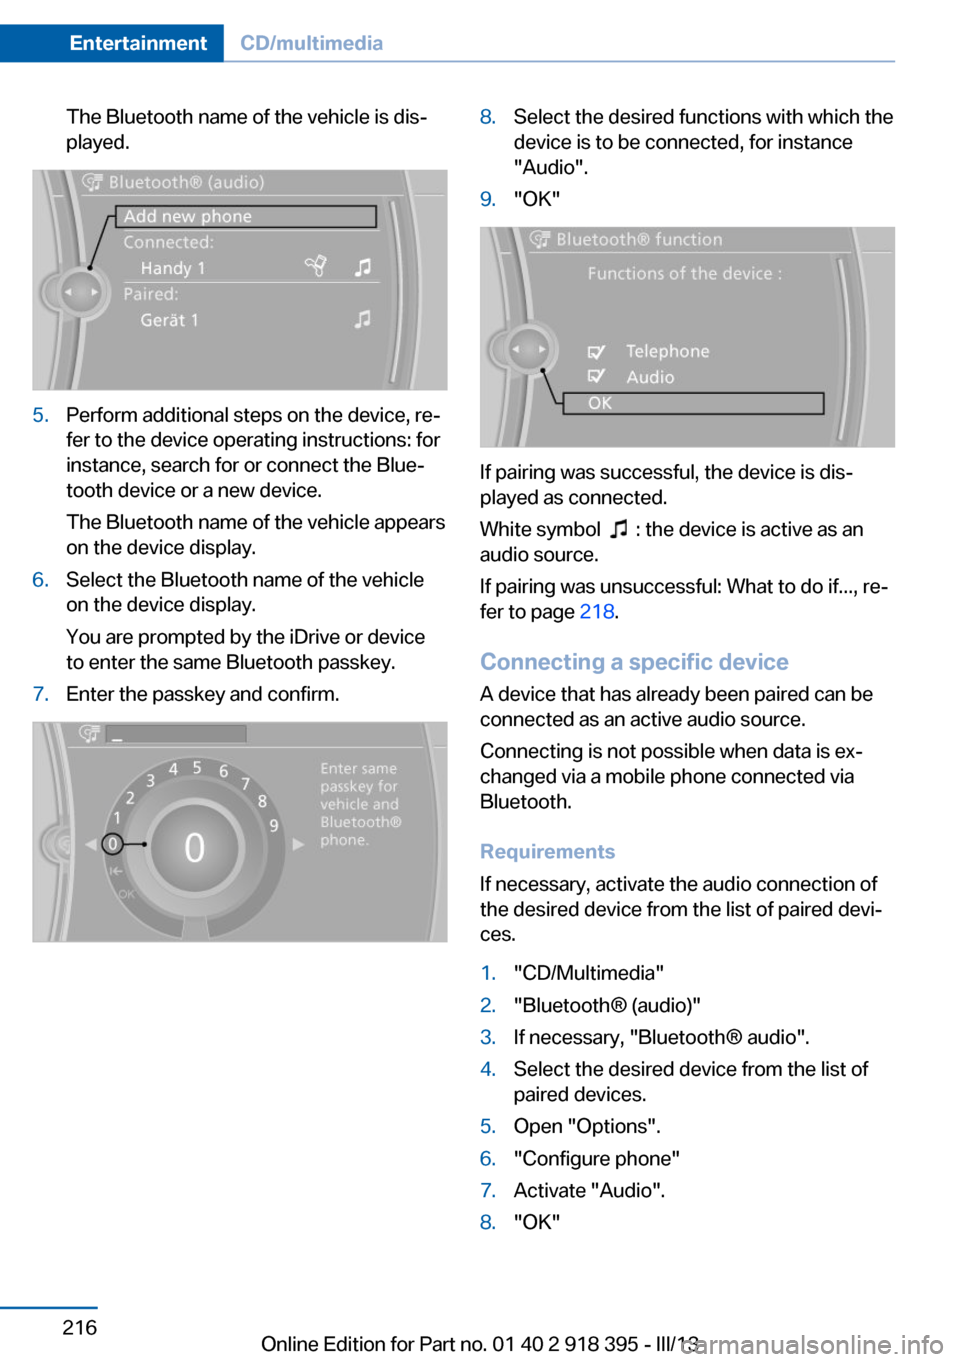
The Bluetooth name of the vehicle is dis‐
played.5.Perform additional steps on the device, re‐
fer to the device operating instructions: for
instance, search for or connect the Blue‐
tooth device or a new device.
The Bluetooth name of the vehicle appears
on the device display.6.Select the Bluetooth name of the vehicle
on the device display.
You are prompted by the iDrive or device
to enter the same Bluetooth passkey.7.Enter the passkey and confirm.8.Select the desired functions with which the
device is to be connected, for instance
"Audio".9."OK"
If pairing was successful, the device is dis‐
played as connected.
White symbol
: the device is active as an
audio source.
If pairing was unsuccessful: What to do if..., re‐
fer to page 218.
Connecting a specific device A device that has already been paired can be
connected as an active audio source.
Connecting is not possible when data is ex‐
changed via a mobile phone connected via
Bluetooth.
Requirements
If necessary, activate the audio connection of
the desired device from the list of paired devi‐
ces.
1."CD/Multimedia"2."Bluetooth® (audio)"3.If necessary, "Bluetooth® audio".4.Select the desired device from the list of
paired devices.5.Open "Options".6."Configure phone"7.Activate "Audio".8."OK"Seite 216EntertainmentCD/multimedia216
Online Edition for Part no. 01 40 2 918 395 - III/13
Page 217 of 345
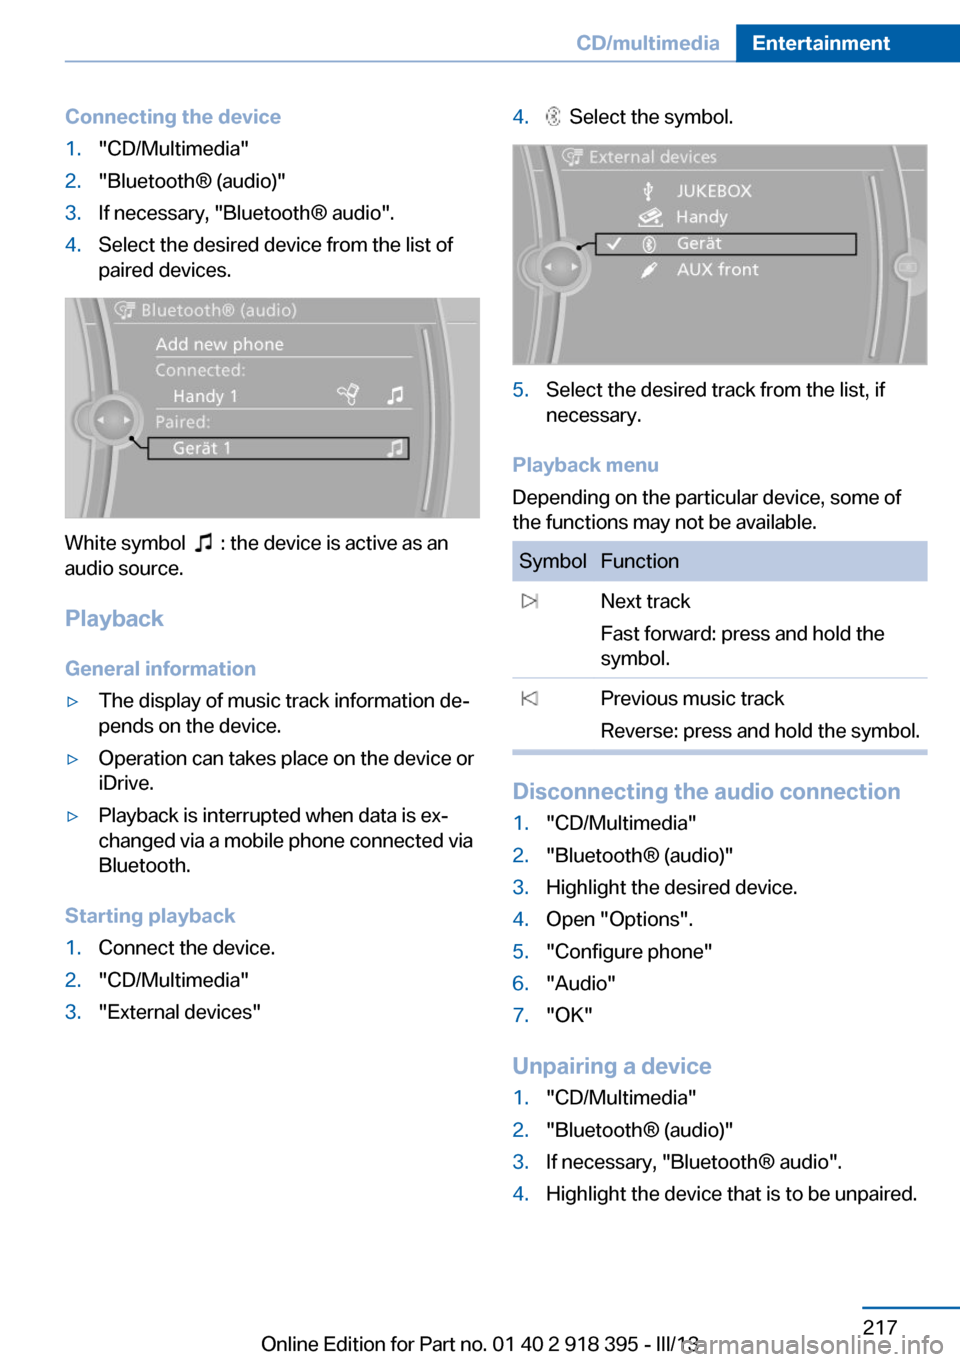
Connecting the device1."CD/Multimedia"2."Bluetooth® (audio)"3.If necessary, "Bluetooth® audio".4.Select the desired device from the list of
paired devices.
White symbol : the device is active as an
audio source.
Playback General information
▷The display of music track information de‐
pends on the device.▷Operation can takes place on the device or
iDrive.▷Playback is interrupted when data is ex‐
changed via a mobile phone connected via
Bluetooth.
Starting playback
1.Connect the device.2."CD/Multimedia"3."External devices"4. Select the symbol.5.Select the desired track from the list, if
necessary.
Playback menu
Depending on the particular device, some of
the functions may not be available.
SymbolFunction Next track
Fast forward: press and hold the
symbol. Previous music track
Reverse: press and hold the symbol.
Disconnecting the audio connection
1."CD/Multimedia"2."Bluetooth® (audio)"3.Highlight the desired device.4.Open "Options".5."Configure phone"6."Audio"7."OK"
Unpairing a device
1."CD/Multimedia"2."Bluetooth® (audio)"3.If necessary, "Bluetooth® audio".4.Highlight the device that is to be unpaired.Seite 217CD/multimediaEntertainment217
Online Edition for Part no. 01 40 2 918 395 - III/13
Page 218 of 345
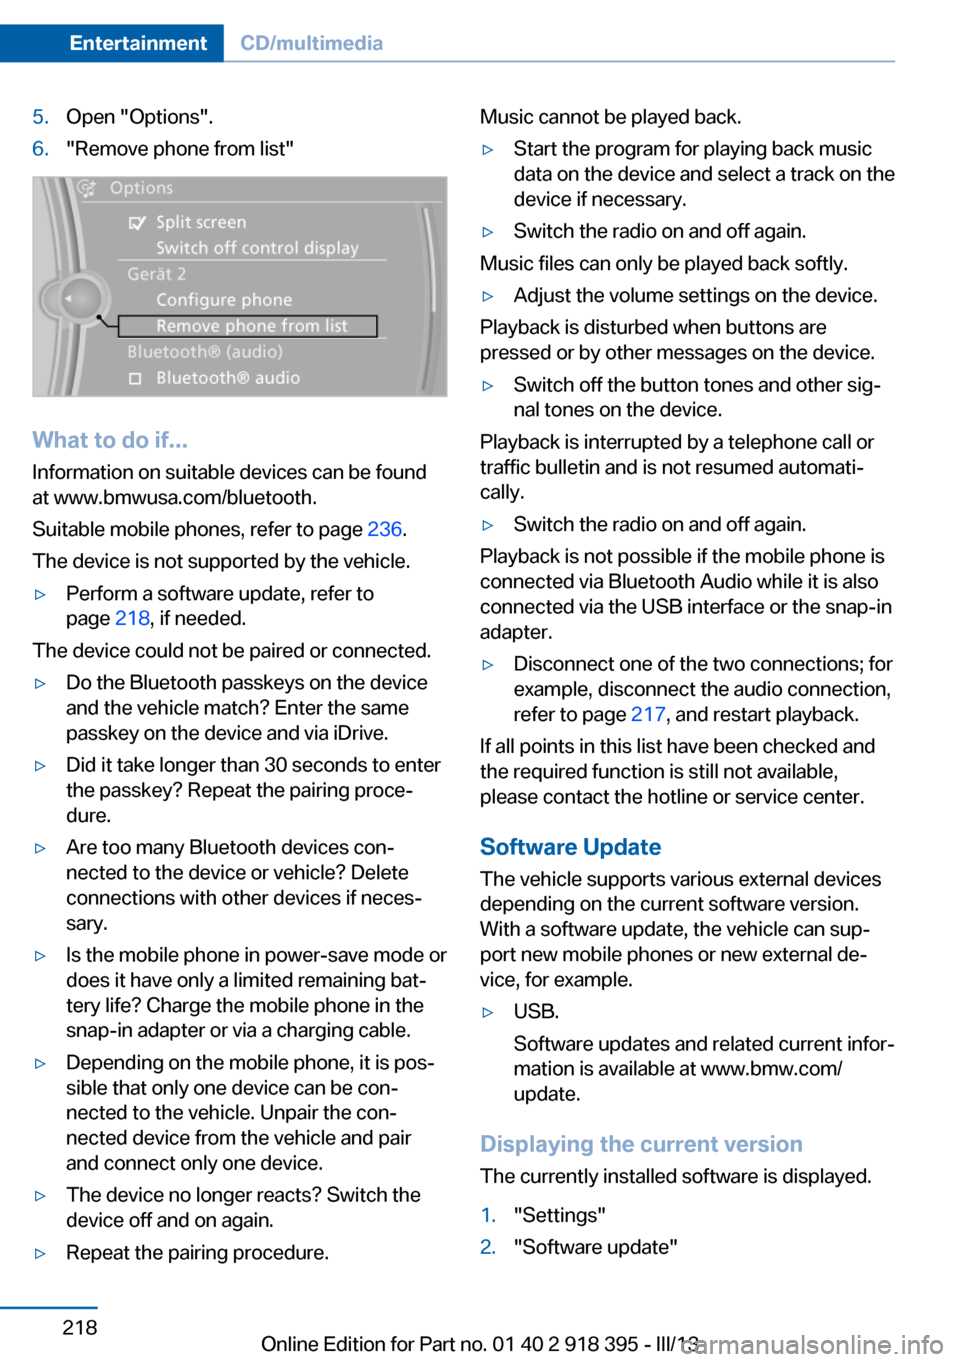
5.Open "Options".6."Remove phone from list"
What to do if...
Information on suitable devices can be found
at www.bmwusa.com/bluetooth.
Suitable mobile phones, refer to page 236.
The device is not supported by the vehicle.
▷Perform a software update, refer to
page 218, if needed.
The device could not be paired or connected.
▷Do the Bluetooth passkeys on the device
and the vehicle match? Enter the same
passkey on the device and via iDrive.▷Did it take longer than 30 seconds to enter
the passkey? Repeat the pairing proce‐
dure.▷Are too many Bluetooth devices con‐
nected to the device or vehicle? Delete
connections with other devices if neces‐
sary.▷Is the mobile phone in power-save mode or
does it have only a limited remaining bat‐
tery life? Charge the mobile phone in the
snap-in adapter or via a charging cable.▷Depending on the mobile phone, it is pos‐
sible that only one device can be con‐
nected to the vehicle. Unpair the con‐
nected device from the vehicle and pair
and connect only one device.▷The device no longer reacts? Switch the
device off and on again.▷Repeat the pairing procedure.Music cannot be played back.▷Start the program for playing back music
data on the device and select a track on the
device if necessary.▷Switch the radio on and off again.
Music files can only be played back softly.
▷Adjust the volume settings on the device.
Playback is disturbed when buttons are
pressed or by other messages on the device.
▷Switch off the button tones and other sig‐
nal tones on the device.
Playback is interrupted by a telephone call or
traffic bulletin and is not resumed automati‐
cally.
▷Switch the radio on and off again.
Playback is not possible if the mobile phone is
connected via Bluetooth Audio while it is also
connected via the USB interface or the snap-in
adapter.
▷Disconnect one of the two connections; for
example, disconnect the audio connection,
refer to page 217, and restart playback.
If all points in this list have been checked and
the required function is still not available,
please contact the hotline or service center.
Software Update
The vehicle supports various external devices
depending on the current software version.
With a software update, the vehicle can sup‐
port new mobile phones or new external de‐
vice, for example.
▷USB.
Software updates and related current infor‐
mation is available at www.bmw.com/
update.
Displaying the current version
The currently installed software is displayed.
1."Settings"2."Software update"Seite 218EntertainmentCD/multimedia218
Online Edition for Part no. 01 40 2 918 395 - III/13
Page 220 of 345
DVD system in rearVehicle equipmentThis chapter describes all series equipment as
well as country-specific and special equipment
offered for this model series.Therefore, it also
describes equipment that may not be found in
your vehicle, for instance due to the selected
special equipment or the country version. This
also applies to safety-related functions and
systems.
General information
With the DVD system in the rear you can play
CDs and DVDs with audio, video and image
data. The DVD system can also play data from
attached external audio and video devices. Au‐
dio output is possible both via headphones
and via the vehicle speakers.
You can control the DVD system using the but‐
tons on the CD-/DVD player or using the re‐
mote control.
Some functions are operated using the remote
control.
Enabling DVD system
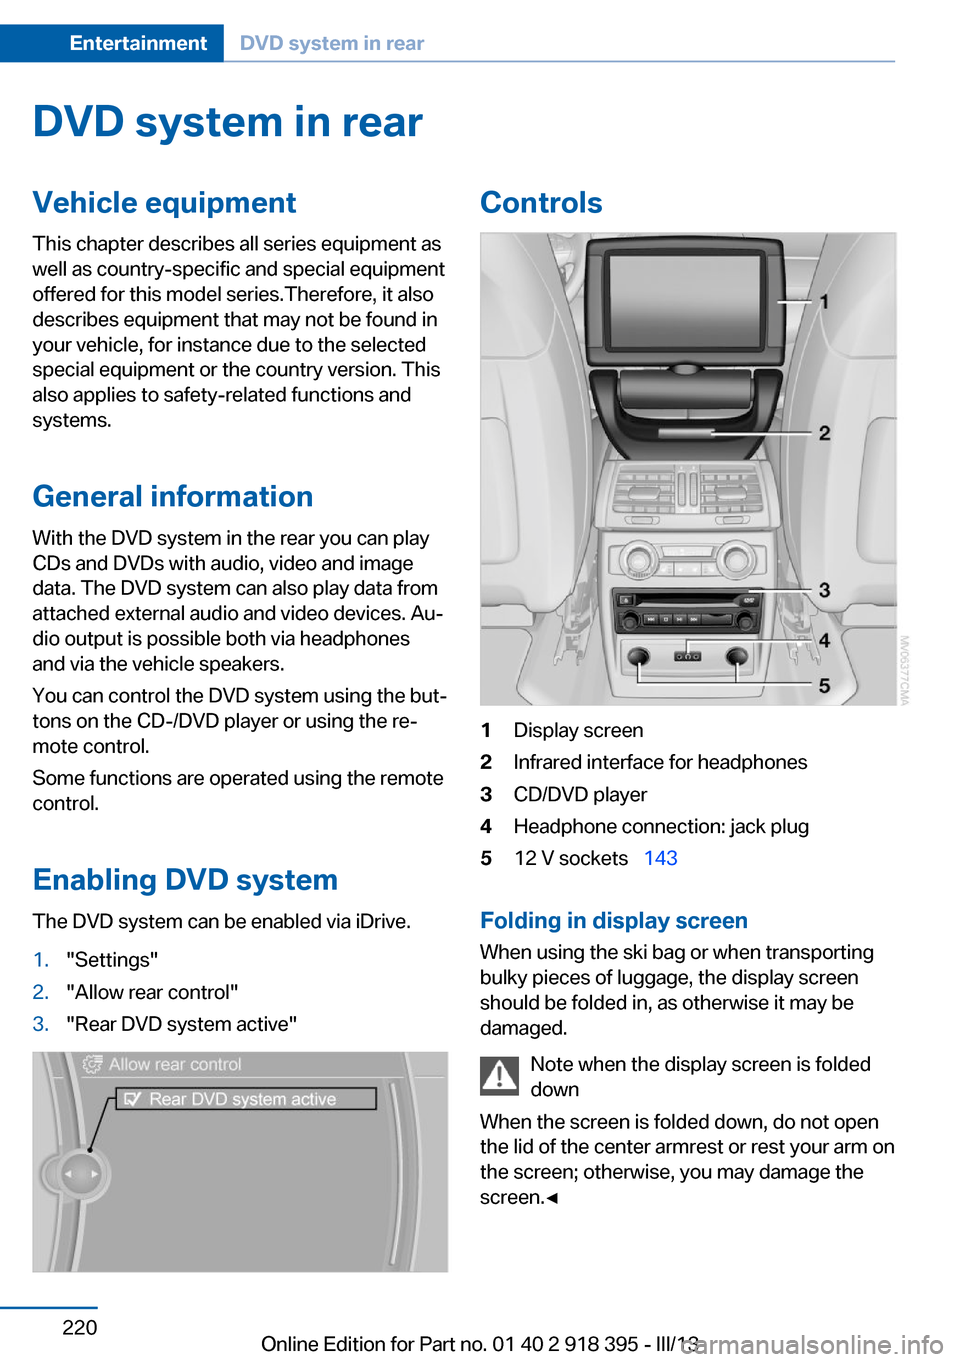
The DVD system can be enabled via iDrive.1."Settings"2."Allow rear control"3."Rear DVD system active"Controls1Display screen2Infrared interface for headphones3CD/DVD player4Headphone connection: jack plug512 V sockets 143
Folding in display screen
When using the ski bag or when transporting
bulky pieces of luggage, the display screen
should be folded in, as otherwise it may be
damaged.
Note when the display screen is folded
down
When the screen is folded down, do not open
the lid of the center armrest or rest your arm on
the screen; otherwise, you may damage the
screen.◀
Seite 220EntertainmentDVD system in rear220
Online Edition for Part no. 01 40 2 918 395 - III/13
Page 222 of 345
Menu navigation
You can use the thumbwheel and buttons 1 to
navigate through the menus.▷Turn the thumbwheel: select a menu item.▷Press the arrow buttons: change between
fields.▷ Press the button: activate the menu
item.
Changing batteries
1.Press the detent and remove the cover.2.Change the batteries. The type and instal‐
lation position are marked on the bottom of
the battery compartment.3.Close the cover.
Take the used battery to a recycling
center or to your service center.
Setting the language of the
DVD system
1.Select a CD/DVD track.2. Press the button.3.Select "Tone".4. Press the button.5.Switch to the top window.6.Select "Language".7. Press the button.8.Select the desired language.9. Press the button.Sound output via speakers
In addition to the headphones, you can also
play the sound via the vehicle speakers.1."CD/Multimedia"2."External devices"3."AUX rear"4."Volume"5.Turn the controller until the desired volume
is set and press the controller.
Switching DVD system on/off
Press the button on the CD-/DVD player or un‐
der the desired screen.
The DVD system switches on automatically
when a CD or DVD is inserted.
Playing CD/DVD
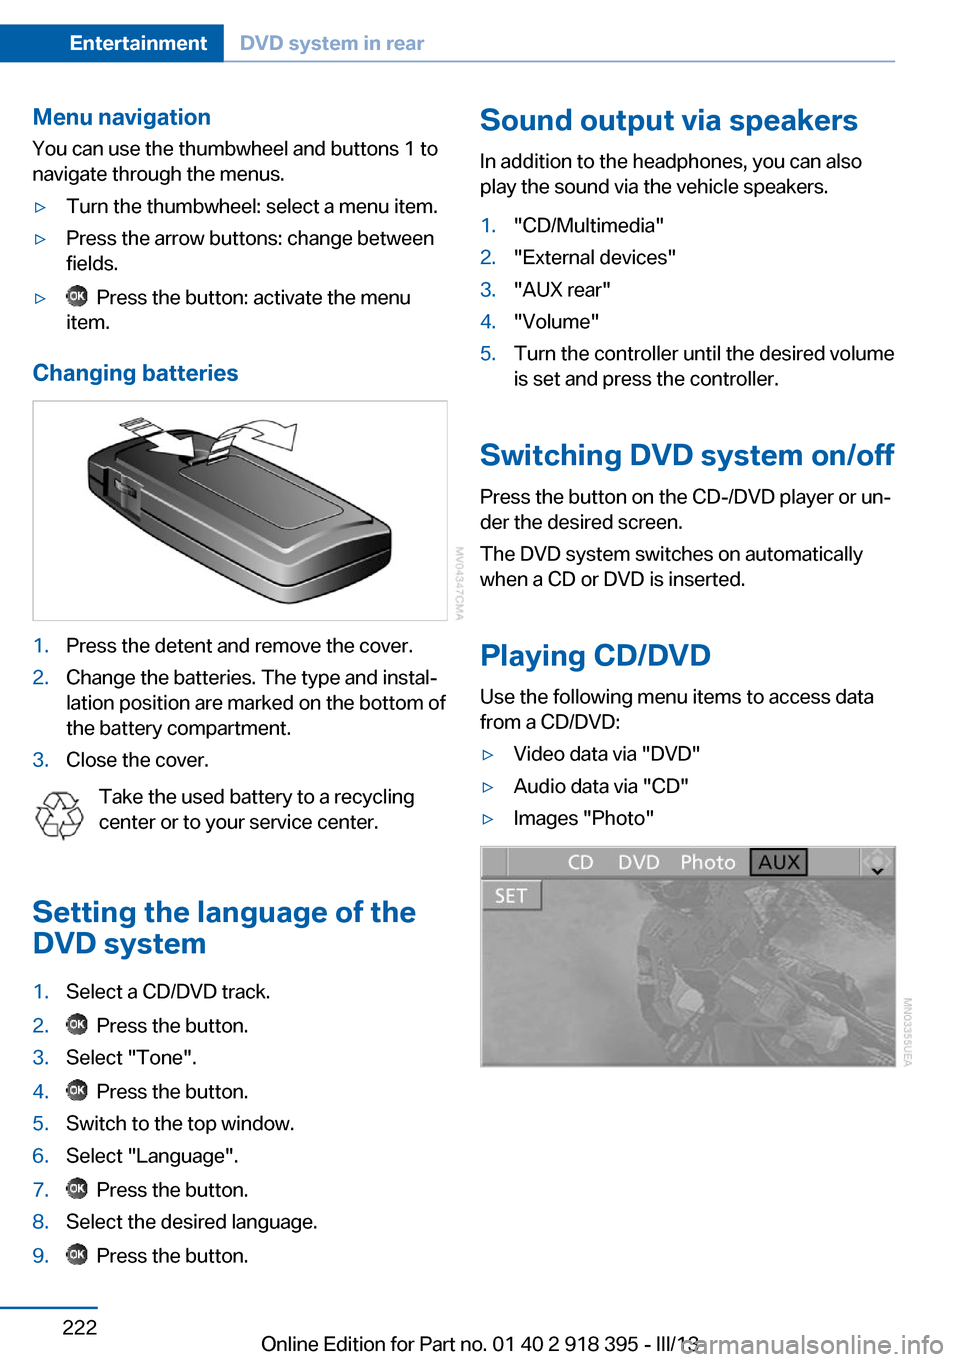
Use the following menu items to access data
from a CD/DVD:
▷Video data via "DVD"▷Audio data via "CD"▷Images "Photo"Seite 222EntertainmentDVD system in rear222
Online Edition for Part no. 01 40 2 918 395 - III/13
Page 226 of 345
Consult the information accompanying your
DVD.
Compressed video files
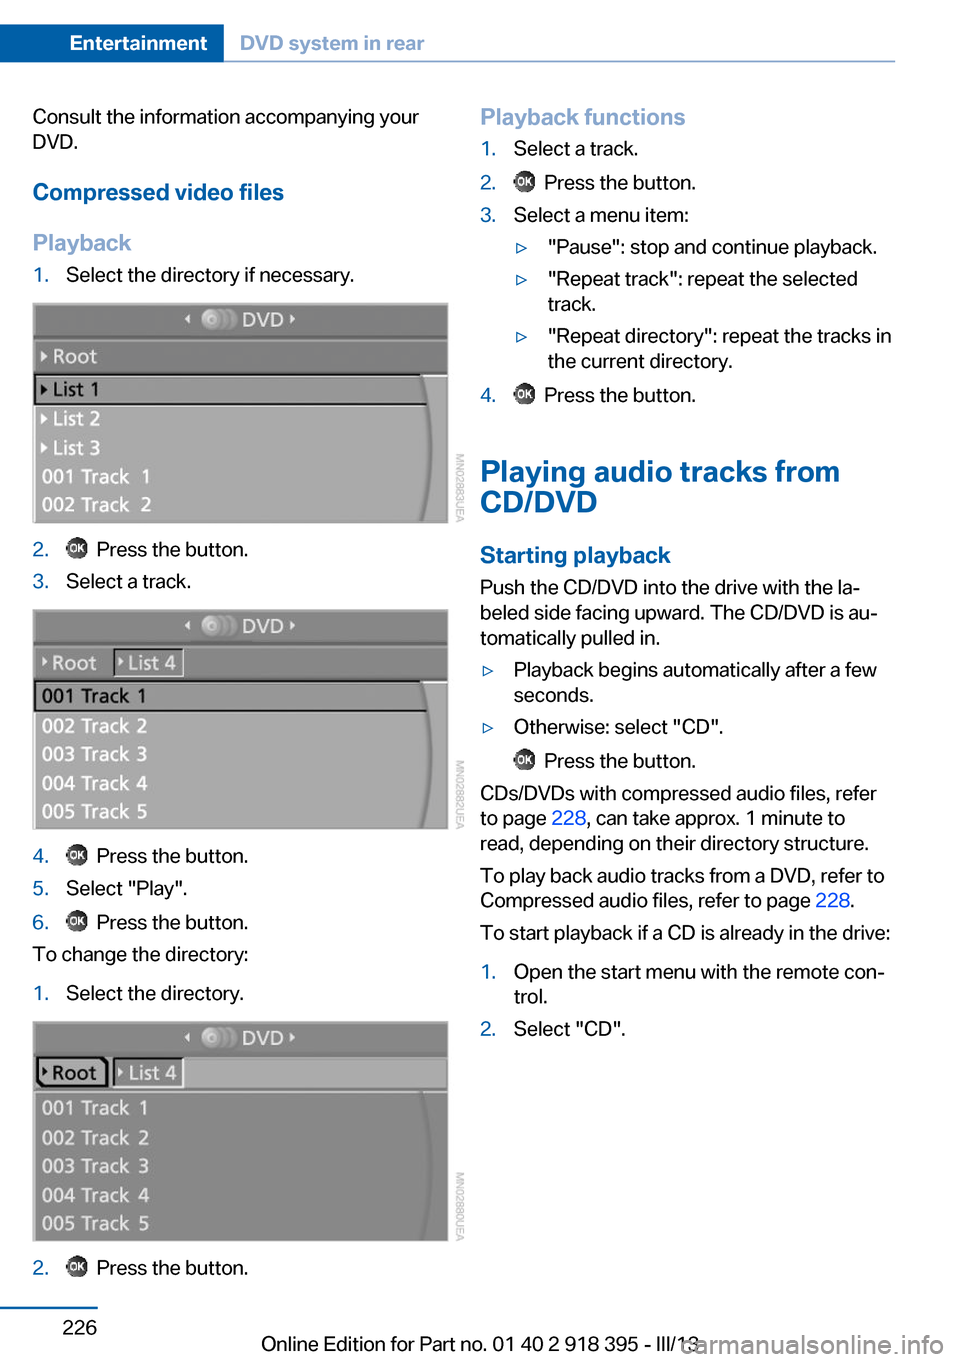
Playback1.Select the directory if necessary.2. Press the button.3.Select a track.4. Press the button.5.Select "Play".6. Press the button.
To change the directory:
1.Select the directory.2. Press the button.Playback functions1.Select a track.2. Press the button.3.Select a menu item:▷"Pause": stop and continue playback.▷"Repeat track": repeat the selected
track.▷"Repeat directory": repeat the tracks in
the current directory.4. Press the button.
Playing audio tracks from
CD/DVD
Starting playback Push the CD/DVD into the drive with the la‐
beled side facing upward. The CD/DVD is au‐
tomatically pulled in.
▷Playback begins automatically after a few
seconds.▷Otherwise: select "CD".
Press the button.
CDs/DVDs with compressed audio files, refer
to page 228, can take approx. 1 minute to
read, depending on their directory structure.
To play back audio tracks from a DVD, refer to
Compressed audio files, refer to page 228.
To start playback if a CD is already in the drive:
1.Open the start menu with the remote con‐
trol.2.Select "CD".Seite 226EntertainmentDVD system in rear226
Online Edition for Part no. 01 40 2 918 395 - III/13
Page 227 of 345
3. Press the button.
As an alternative, you can also control the play‐
back with the buttons on the CD/DVD player.
To eject CD/DVD:
Press the button on the CD/DVD player.
Selecting a track
Buttons on CD/DVD player
Press the button for the correspond‐
ing direction repeatedly until you reach the de‐
sired track.
Playback begins at the start of the track.
Using the remote control
Press the button for the corresponding
direction repeatedly or turn the thumbwheel
until you reach the desired track.
Playback begins at the start of the track.
Settings and playback functions for
audio CDs
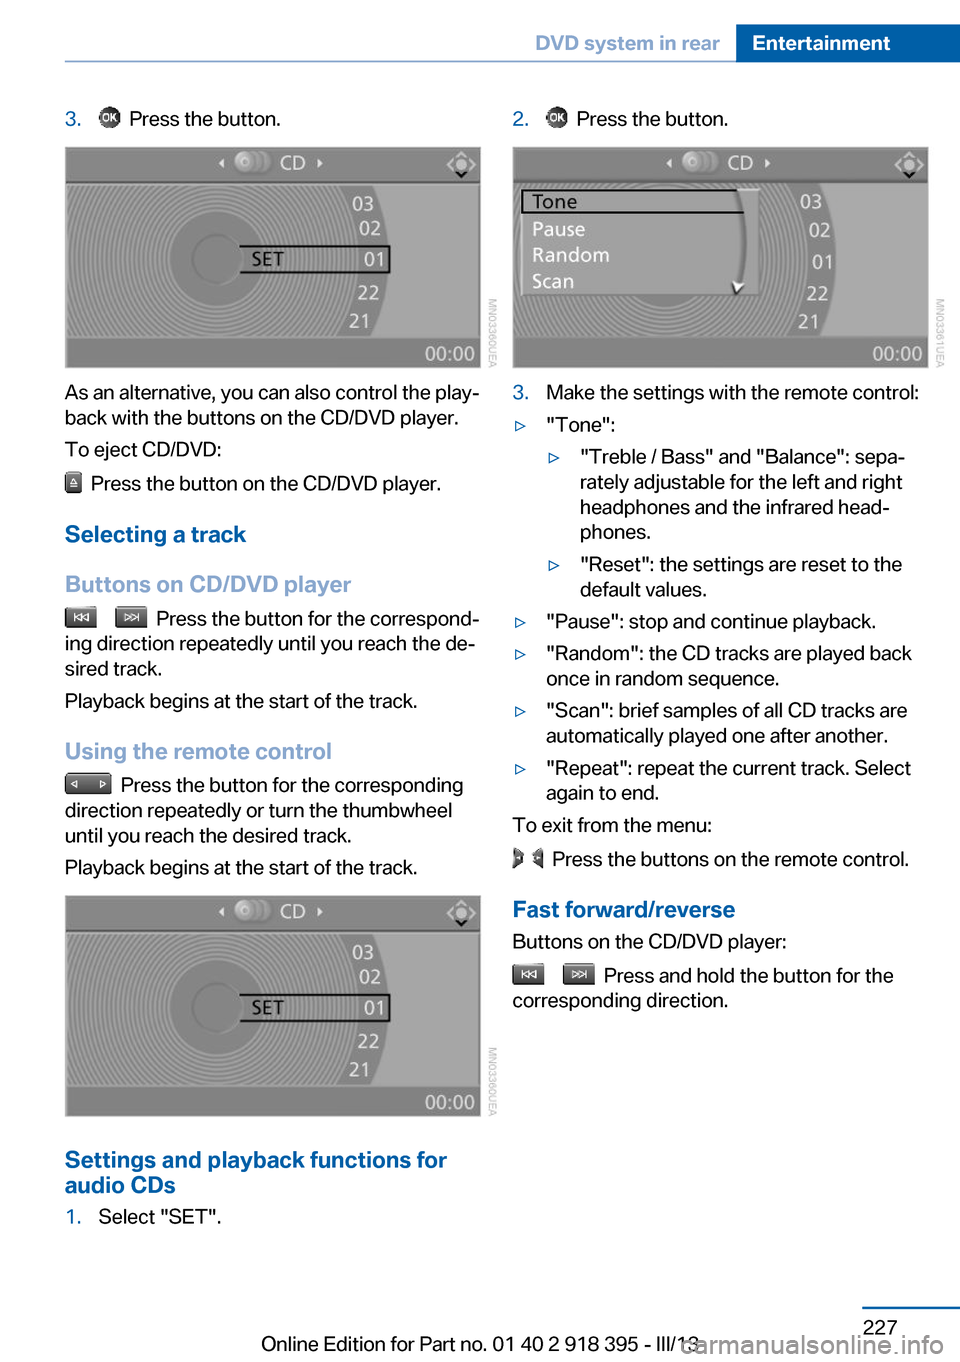
1.Select "SET".2. Press the button.3.Make the settings with the remote control:▷"Tone":▷"Treble / Bass" and "Balance": sepa‐
rately adjustable for the left and right
headphones and the infrared head‐
phones.▷"Reset": the settings are reset to the
default values.▷"Pause": stop and continue playback.▷"Random": the CD tracks are played back
once in random sequence.▷"Scan": brief samples of all CD tracks are
automatically played one after another.▷"Repeat": repeat the current track. Select
again to end.
To exit from the menu:
Press the buttons on the remote control.
Fast forward/reverse Buttons on the CD/DVD player:
Press and hold the button for the
corresponding direction.
Seite 227DVD system in rearEntertainment227
Online Edition for Part no. 01 40 2 918 395 - III/13
Page 228 of 345
Compressed audio files
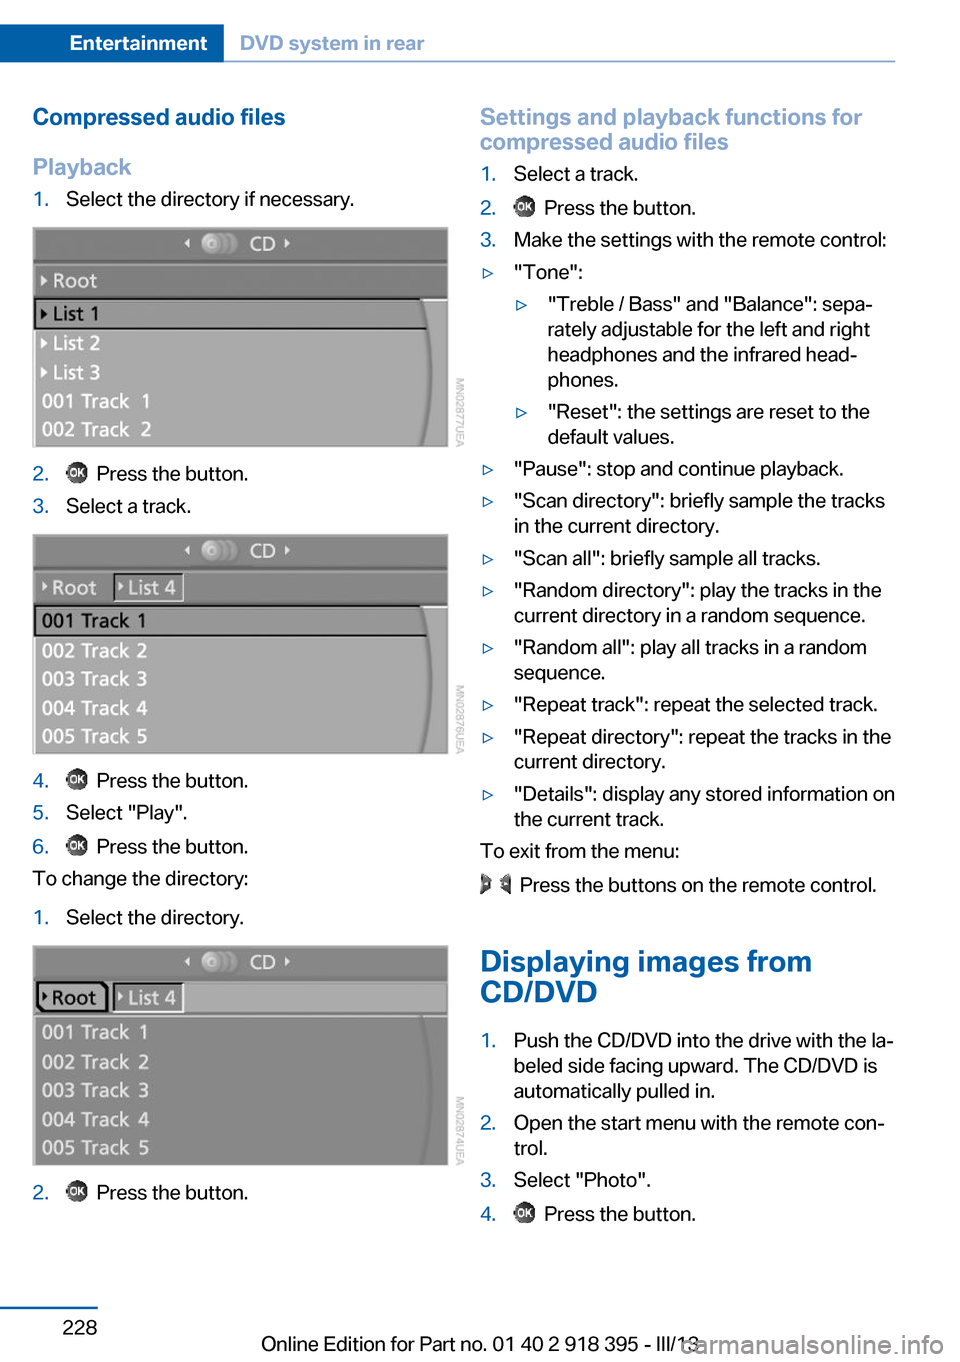
Playback1.Select the directory if necessary.2. Press the button.3.Select a track.4. Press the button.5.Select "Play".6. Press the button.
To change the directory:
1.Select the directory.2. Press the button.Settings and playback functions for
compressed audio files1.Select a track.2. Press the button.3.Make the settings with the remote control:▷"Tone":▷"Treble / Bass" and "Balance": sepa‐
rately adjustable for the left and right
headphones and the infrared head‐
phones.▷"Reset": the settings are reset to the
default values.▷"Pause": stop and continue playback.▷"Scan directory": briefly sample the tracks
in the current directory.▷"Scan all": briefly sample all tracks.▷"Random directory": play the tracks in the
current directory in a random sequence.▷"Random all": play all tracks in a random
sequence.▷"Repeat track": repeat the selected track.▷"Repeat directory": repeat the tracks in the
current directory.▷"Details": display any stored information on
the current track.
To exit from the menu:
Press the buttons on the remote control.
Displaying images from
CD/DVD
1.Push the CD/DVD into the drive with the la‐
beled side facing upward. The CD/DVD is
automatically pulled in.2.Open the start menu with the remote con‐
trol.3.Select "Photo".4. Press the button.Seite 228EntertainmentDVD system in rear228
Online Edition for Part no. 01 40 2 918 395 - III/13
Page 230 of 345
Information on CD/DVD
player
Safety notes Do not remove the cover
The BMW CD/DVD player is a Class 1 la‐
ser product. Do not operate if the cover is
damaged; otherwise, severe eye damage can
result.◀
Suitable media Use of CDs/DVDs▷Do not use self-recorded CDs/DVDs
with labels applied, as these can be‐
come detached during playback due
to heat buildup and can cause irrep‐
arable damage to the device.▷Only use round CDs/DVDs with a standard
diameter of 4.7 in/12 cm and do not play
CDs/DVDs with an adapter, e.g., single
CDs; otherwise, the CDs or the adapter
may jam and no longer eject.▷Do not use combined CDs/DVDs, e.g., DVD
Plus, as the CDs/DVDs can jam and will no
longer eject.◀
The CD/DVD player can play the following me‐
dia:
▷Video DVD.▷CD-DA (audio CD).▷CDs/DVDs with compressed image data.▷CDs/DVDs with compressed audio data.▷CDs/DVDs with compressed video data.
The DVD player does not support DVD audio.
However, many audio DVDs available in stores
also contain a video track in the DVD Video for‐
mat in addition to the audio track. These DVDs
can be played back by the DVD player. Refer to
the information on your DVD to determine
whether your audio DVD contains an additional
video track. Depending on the authoring used,
it is possible that not all functions are available
during playback.
Dual-sided DVDs available from retail suppliers
are coated on both sides and bear no mark‐
ings. This means both sides are information
carriers. To play the information on the other
side, turn over the DVD.
Supported formats
Depending on the compression method used,
not all files of the specified formats can be
opened.
Images▷JPEG/JPG.
With very large image files, it can take longer
for the images to be displayed.
Compressed audio files
▷MP3.▷WMA.▷OGG.▷AAC.
Compressed video files
▷SVCD.▷MPEG1.▷MPEG2.▷MPEG4/DivX.
Digital Rights Management (DRM)
In some cases, it may not be possible to play
CDs/DVDs with integrated Digital Rights Man‐
agement (DRM).
General malfunctions
▷CD/DVD changers and players have been
optimized for performance in vehicles. In
some instances they may be more sensi‐
tive to faulty CDs/DVDs than stationary de‐
vices would be.▷If a CD/DVD cannot be played, first check
whether it has been inserted correctly.Seite 230EntertainmentDVD system in rear230
Online Edition for Part no. 01 40 2 918 395 - III/13