key BMW X5 2014 F15 Owner's Manual
[x] Cancel search | Manufacturer: BMW, Model Year: 2014, Model line: X5, Model: BMW X5 2014 F15Pages: 265, PDF Size: 6.2 MB
Page 24 of 265
Split screen
General information Additional information can be displayed on the
right side of the split screen, e.g., information
from the onboard computer.
In the divided screen view, the so-called split
screen, this information remains visible even when you change to another menu.
Switching the split screen on and off1. Press the button.2."Split screen"
Selecting the display
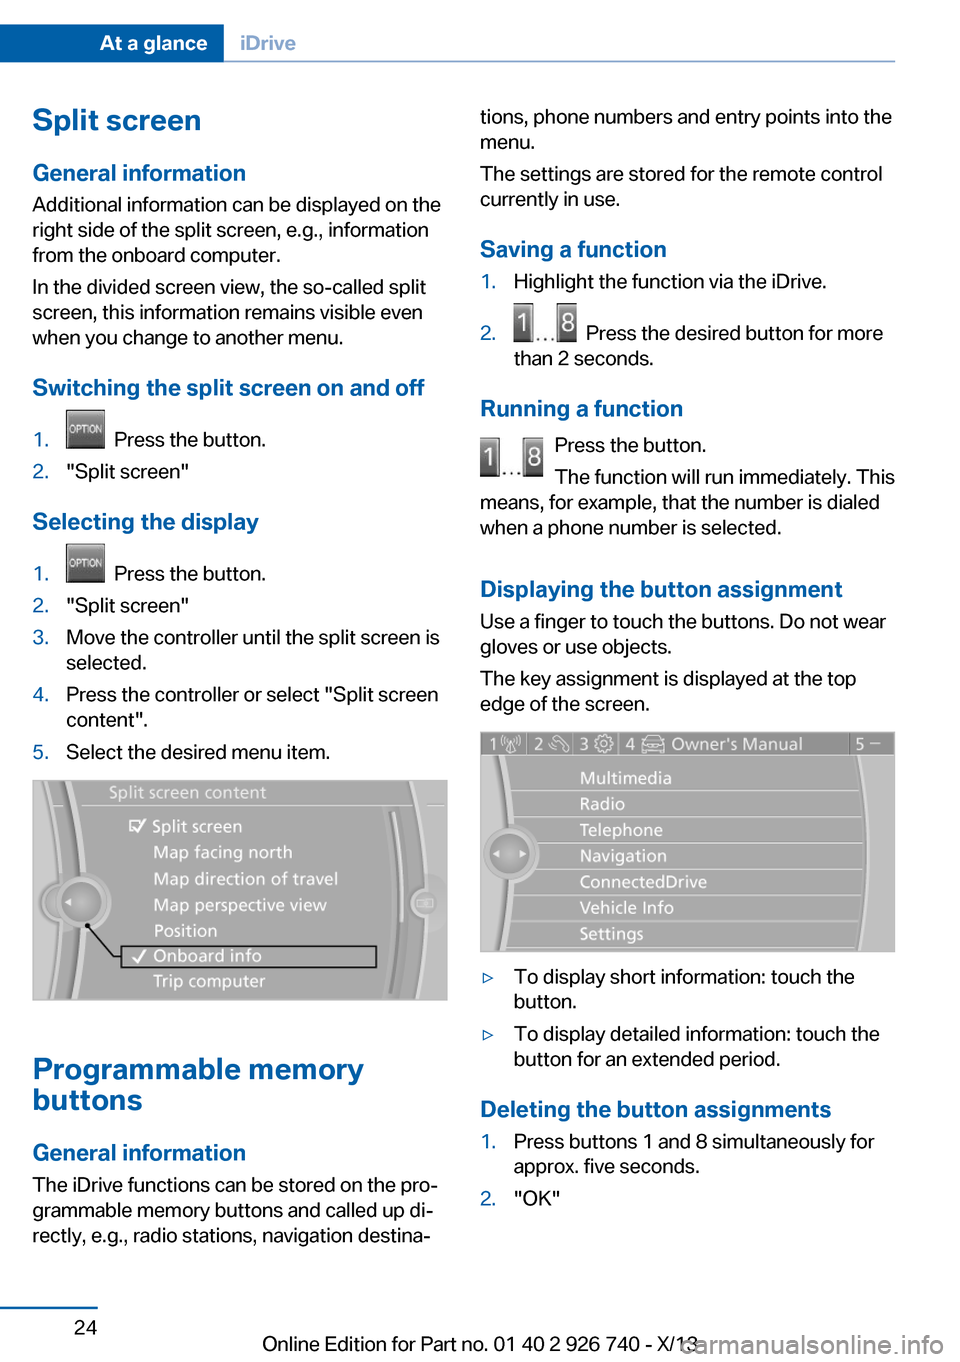
1. Press the button.2."Split screen"3.Move the controller until the split screen is
selected.4.Press the controller or select "Split screen
content".5.Select the desired menu item.
Programmable memory
buttons
General information
The iDrive functions can be stored on the pro‐
grammable memory buttons and called up di‐
rectly, e.g., radio stations, navigation destina‐
tions, phone numbers and entry points into the
menu.
The settings are stored for the remote control
currently in use.
Saving a function1.Highlight the function via the iDrive.2. Press the desired button for more
than 2 seconds.
Running a function
Press the button.
The function will run immediately. This
means, for example, that the number is dialed
when a phone number is selected.
Displaying the button assignment Use a finger to touch the buttons. Do not wear
gloves or use objects.
The key assignment is displayed at the top
edge of the screen.
▷To display short information: touch the
button.▷To display detailed information: touch the
button for an extended period.
Deleting the button assignments
1.Press buttons 1 and 8 simultaneously for
approx. five seconds.2."OK"Seite 24At a glanceiDrive24
Online Edition for Part no. 01 40 2 926 740 - X/13
Page 34 of 265
Opening and closingVehicle equipment
All standard, country-specific and optional
equipment that is offered in the model series is
described in this chapter. Therefore, equip‐
ment is also described that is not available in a
vehicle, e. g., because of the selected optional
equipment or country variant. This also applies
for safety-related functions and systems.
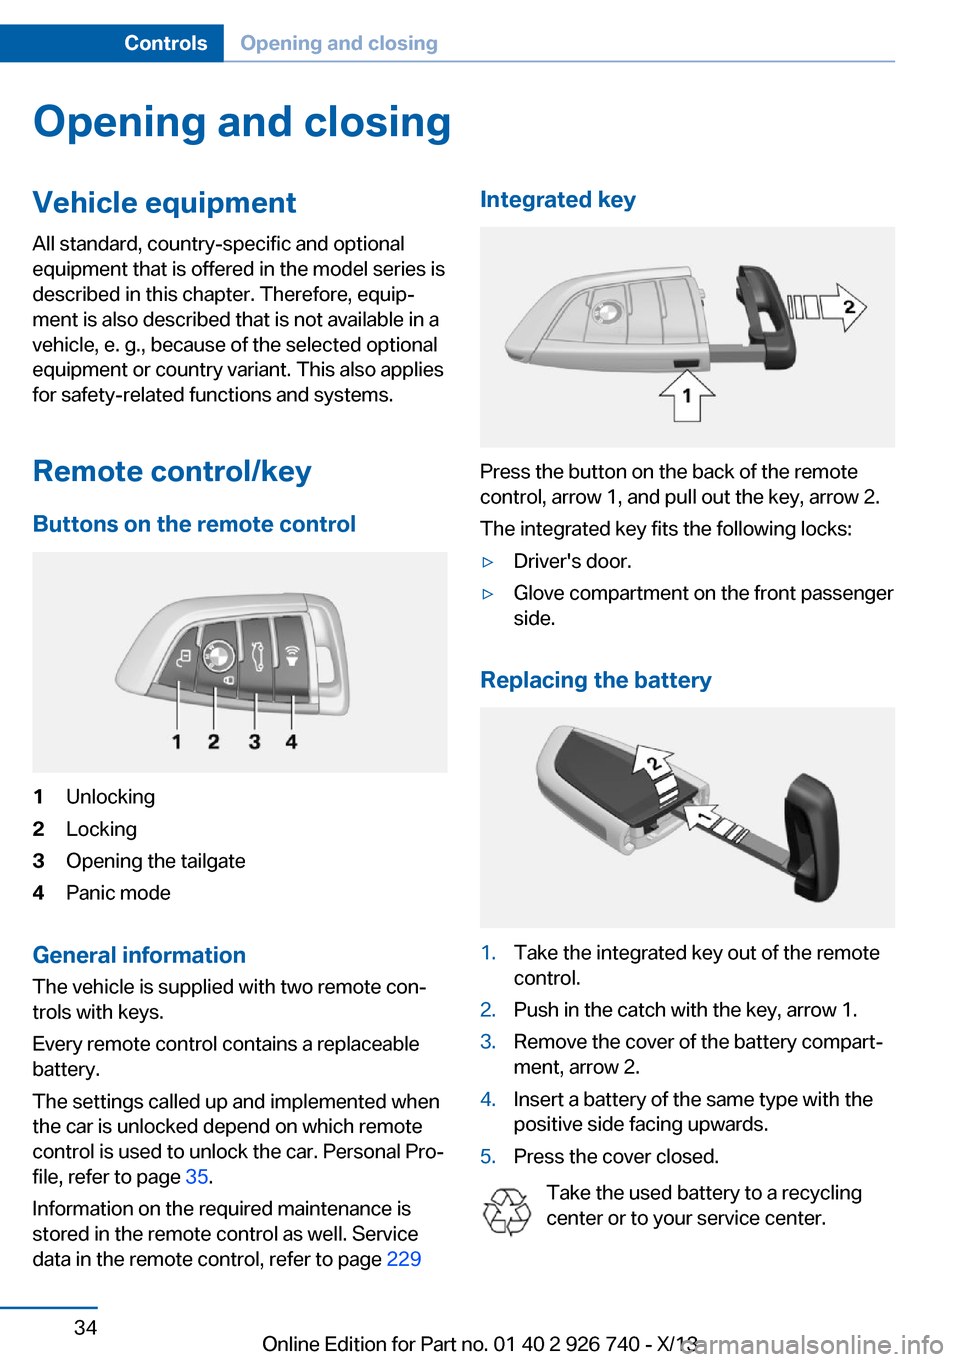
Remote control/key Buttons on the remote control1Unlocking2Locking3Opening the tailgate4Panic mode
General information
The vehicle is supplied with two remote con‐
trols with keys.
Every remote control contains a replaceable
battery.
The settings called up and implemented when
the car is unlocked depend on which remote
control is used to unlock the car. Personal Pro‐
file, refer to page 35.
Information on the required maintenance is
stored in the remote control as well. Service
data in the remote control, refer to page 229
Integrated key
Press the button on the back of the remote
control, arrow 1, and pull out the key, arrow 2.
The integrated key fits the following locks:
▷Driver's door.▷Glove compartment on the front passenger
side.
Replacing the battery
1.Take the integrated key out of the remote
control.2.Push in the catch with the key, arrow 1.3.Remove the cover of the battery compart‐
ment, arrow 2.4.Insert a battery of the same type with the
positive side facing upwards.5.Press the cover closed.
Take the used battery to a recycling
center or to your service center.
Seite 34ControlsOpening and closing34
Online Edition for Part no. 01 40 2 926 740 - X/13
Page 39 of 265
The tailgate is locked again as soon as it is
pushed closed.
Provide edge protection
Sharp or angular objects can hit the rear
window while driving and damage the heating
wires of the rear window. Provide edge protec‐
tion.◀
Malfunction
If the vehicle can no longer be locked or un‐
locked with the remote control, the battery
may be discharged or there may be interfer‐
ence from external sources such as mobile
phones, metal objects, overhead power lines,
transmission towers, etc.
If this occurs, lock or unlock the driver's door at
the door lock using the integrated key.
For US owners only
The transmitter and receiver units comply with
part 15 of the FCC/Federal Communication
Commission regulations. Operation is gov‐
erned by the following:
FCC ID:▷LX8766S.▷LX8766E.▷LX8CAS.▷LX8CAS2.▷MYTCAS4.
Compliance statement:
This device complies with part 15 of the FCC
Rules. Operation is subject to the following
two conditions:
▷This device may not cause harmful inter‐
ference, and▷this device must accept any interference
received, including interference that may
cause undesired operation.
Any unauthorized modifications or changes to
these devices could void the user's authority to
operate this equipment.
Using the door lock
General information Locking from the outside
Do not lock the vehicle from the outside
if there are people in it, as the vehicle cannot
be unlocked from inside without special knowl‐
edge.◀
The alarm system is triggered when the door is
opened, if the vehicle is unlocked via the door
lock.
In order to terminate this alarm, unlock vehicle
with the remote control or switch on the igni‐
tion, if necessary, by emergency detection of
the remote control.
Only the driver's door is unlocked or locked via
the door lock.
Locking the doors and tailgate at onceTo lock all doors and the tailgate at once:1.With the doors closed, lock the vehicle us‐
ing the button for the central locking sys‐
tem in the interior.2.Unlock and open the driver's or front pas‐
senger door.3.Lock the vehicle.▷Lock the driver's door using the
integrated key in the door lock, or▷Press down the lock button of the front
passenger door and close the door
from the outside.
The fuel filler flap can only be locked using the
remote control.
Seite 39Opening and closingControls39
Online Edition for Part no. 01 40 2 926 740 - X/13
Page 40 of 265
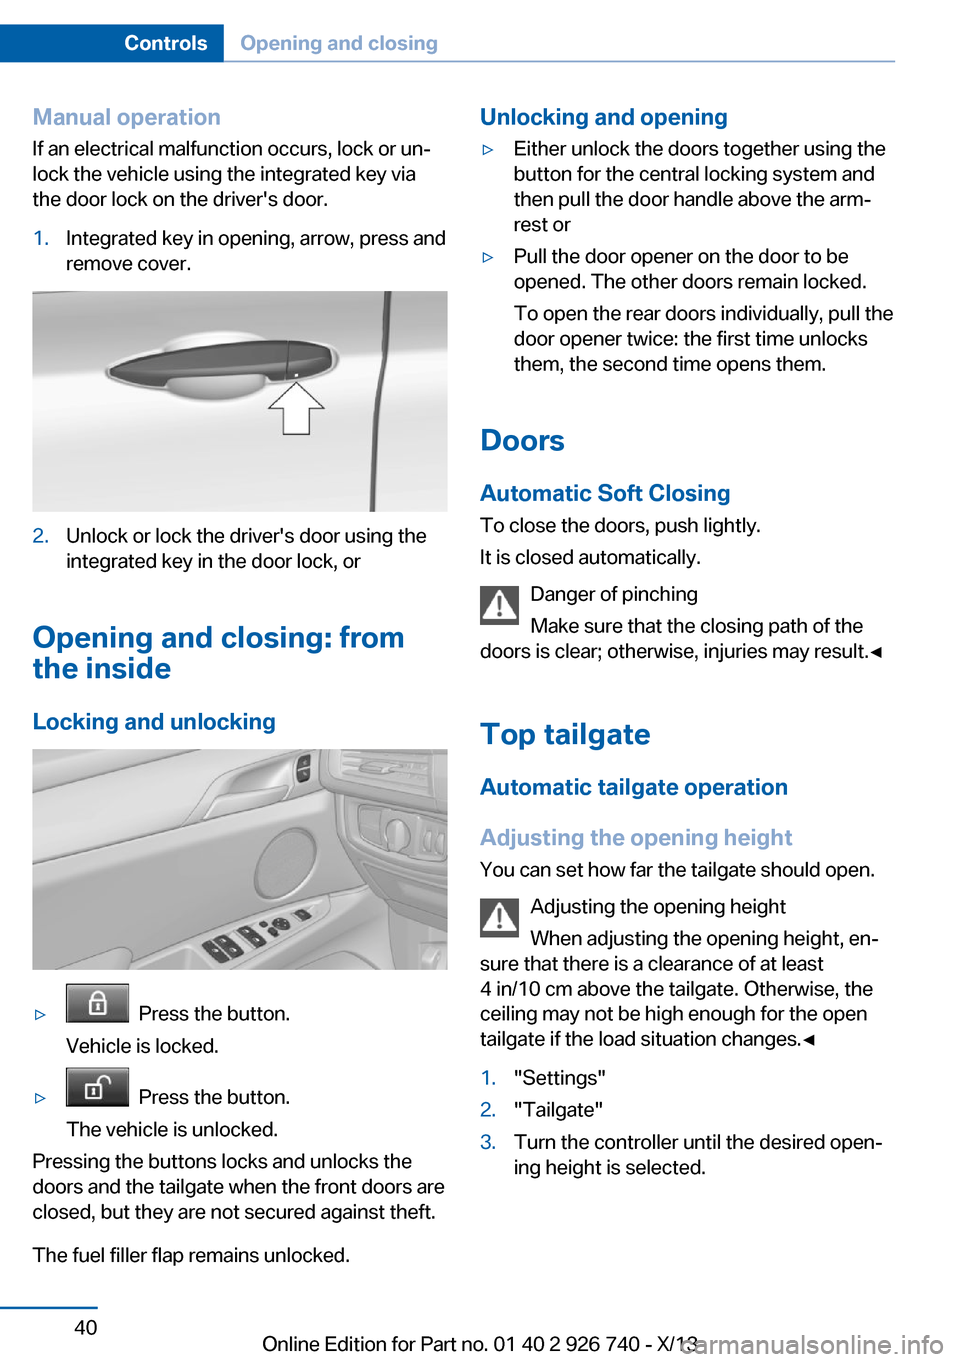
Manual operationIf an electrical malfunction occurs, lock or un‐
lock the vehicle using the integrated key via
the door lock on the driver's door.1.Integrated key in opening, arrow, press and
remove cover.2.Unlock or lock the driver's door using the
integrated key in the door lock, or
Opening and closing: from
the inside
Locking and unlocking
▷ Press the button.
Vehicle is locked.▷ Press the button.
The vehicle is unlocked.
Pressing the buttons locks and unlocks the
doors and the tailgate when the front doors are
closed, but they are not secured against theft.
The fuel filler flap remains unlocked.
Unlocking and opening▷Either unlock the doors together using the
button for the central locking system and
then pull the door handle above the arm‐
rest or▷Pull the door opener on the door to be
opened. The other doors remain locked.
To open the rear doors individually, pull the
door opener twice: the first time unlocks
them, the second time opens them.
Doors
Automatic Soft Closing
To close the doors, push lightly.
It is closed automatically.
Danger of pinching
Make sure that the closing path of the
doors is clear; otherwise, injuries may result.◀
Top tailgateAutomatic tailgate operation
Adjusting the opening height
You can set how far the tailgate should open.
Adjusting the opening height
When adjusting the opening height, en‐
sure that there is a clearance of at least
4 in/10 cm above the tailgate. Otherwise, the
ceiling may not be high enough for the open
tailgate if the load situation changes.◀
1."Settings"2."Tailgate"3.Turn the controller until the desired open‐
ing height is selected.Seite 40ControlsOpening and closing40
Online Edition for Part no. 01 40 2 926 740 - X/13
Page 44 of 265
sumers are switched off before locking the ve‐
hicle.
Convenient closing Press the area on the door handle, arrow 2,
with the finger and hold it down.
In addition to locking, the windows and the
glass sunroof are closed.
Monitor the closing process
Monitor the closing process to ensure
that no one becomes trapped.◀
Unlocking the tailgate separately
Press the button on the exterior of the tailgate.
This corresponds to pressing the
but‐
ton on the remote control.
Do not place the remote control in the
cargo area
Take the remote control with you and do not
leave it in the cargo area; otherwise, the re‐
mote control is locked inside the vehicle when
the tailgate is closed.◀
Malfunction
Comfort Access may not function properly if it
experiences interference from external sour‐
ces such as mobile phones, metal objects,
overhead power lines, transmission towers,
etc.
In this case, open or close the vehicle using the
buttons on the remote control or use the
integrated key in the door lock.
Adjusting
Unlocking The setting is stored for the remote control
currently in use.
1."Settings"2."Doors/key"3. Select symbol or "Unlock button:"4.Select the desired function:▷"Driver's door only"
Only the driver's door and the fuel filler
flap are unlocked. Pressing again un‐
locks the entire vehicle.▷"All doors"
The entire vehicle is unlocked.
Depending on how the vehicle is equipped or
the country-specific variant, you can set
whether the doors are also unlocked with the
button on the remote control.
Confirmation signals from the vehicle
The setting is stored for the remote control
currently in use.
1."Settings"2."Doors/key"3.Deactivate or activate the desired confir‐
mation signals.▷"Acoustic sig. lock/unlock"▷"Flash when lock/unlock"
Automatic locking
The setting is stored for the remote control
currently in use.
1."Settings"2."Doors/key"3.Select the desired function:▷"Lock if no door is opened"
The vehicle locks automatically after a
short period of time if a door is not
opened.▷"Lock after start driving"
The vehicle locks automatically after
you drive away.Seite 44ControlsOpening and closing44
Online Edition for Part no. 01 40 2 926 740 - X/13
Page 45 of 265
Retrieving the seat, mirror, and
steering wheel settings
The driver's seat, exterior mirror, and steering
wheel positions selected last are stored for the
currently used remote control.
When the vehicle is unlocked, these positions
are automatically retrieved if this function was
activated.
Pinch hazard when moving back the seat
If this function is used, first make sure
that the footwell behind the driver's seat is
empty. Otherwise, people can be injured or ob‐
jects damaged when the seat is moved back.◀
The adjustment procedure is interrupted:▷When a seat position switch is pressed.▷When a button of the seat, mirror, and
steering wheel memory is pressed briefly.
Activating the setting
1."Settings"2."Doors/key"3."Last seat position autom."
Alarm system
The conceptThe vehicle alarm system responds to:
▷Opening of a door, the hood or the tailgate.▷Movements in the vehicle.▷Changes in the vehicle tilt, e.g., during at‐
tempts to steal a wheel or when towing the
car.▷Interruptions in battery voltage.
The alarm system briefly indicates tampering:
▷By sounding an acoustic alarm.▷By switching on the hazard warning sys‐
tem.▷By flashing the high beams.Arming and disarming the alarm
system
General information
When you lock or unlock the vehicle, either
with the remote control or via the Comfort Ac‐
cess at the door lock, the alarm system is
armed or disarmed at the same time.
Door lock and armed alarm systemThe alarm system is triggered when the door is
opened, if the vehicle is unlocked via the door
lock.
In order to terminate this alarm, unlock vehicle
with the remote control or switch on the igni‐
tion, if necessary, by emergency detection of
the remote control.
Tailgate and armed alarm system
The tailgate can be opened even when the
alarm system is armed.
Press the button on the remote con‐
trol for approx. 1 second.
After the tailgate is closed, it is locked and
monitored again if the doors are locked. The
hazard warning system flashes once.
In some vehicle equipment variants, the tail‐
gate can only be opened using the remote
control if the vehicle was unlocked first.
Panic mode
You can trigger the alarm system if you find
yourself in a dangerous situation.
Press the button on the remote con‐
trol for at least 3 seconds.
To switch off the alarm: press any button.
Switching off the alarm
To terminate the alarm:▷Unlock the vehicle using the remote con‐
trol.Seite 45Opening and closingControls45
Online Edition for Part no. 01 40 2 926 740 - X/13
Page 182 of 265
Storage compartmentsVehicle equipmentAll standard, country-specific and optional
equipment that is offered in the model series is
described in this chapter. Therefore, equip‐
ment is also described that is not available in a
vehicle, e. g., because of the selected optional
equipment or country variant. This also applies
for safety-related functions and systems.
Notes No loose objects in the passenger com‐
partment
Do not stow any objects in the passenger
compartment without securing them; other‐
wise, they may present a danger to occupants
for instance during braking and avoidance ma‐
neuvers.◀
Do not place anti-slip mats on the dash‐
board
Do not place anti-slip mats on the dashboard.
The mat materials could damage the dash‐
board.◀
Storage compartments
The following storage compartments are avail‐
able in the vehicle interior:▷Glove compartment on the front passenger
side, refer to page 182.▷Glove compartment on the driver's side,
refer to page 183.▷Compartments in the doors, refer to
page 183.▷Storage compartment on the center arm‐
rest, refer to page 183.▷Center armrest, refer to page 183▷Glasses compartment, refer to page 184.Glove compartment
Front passenger side
Note Close the glove compartment again im‐
mediately
Close the glove compartment immediately af‐
ter use while driving; otherwise, injury may oc‐
cur during accidents.◀
Opening
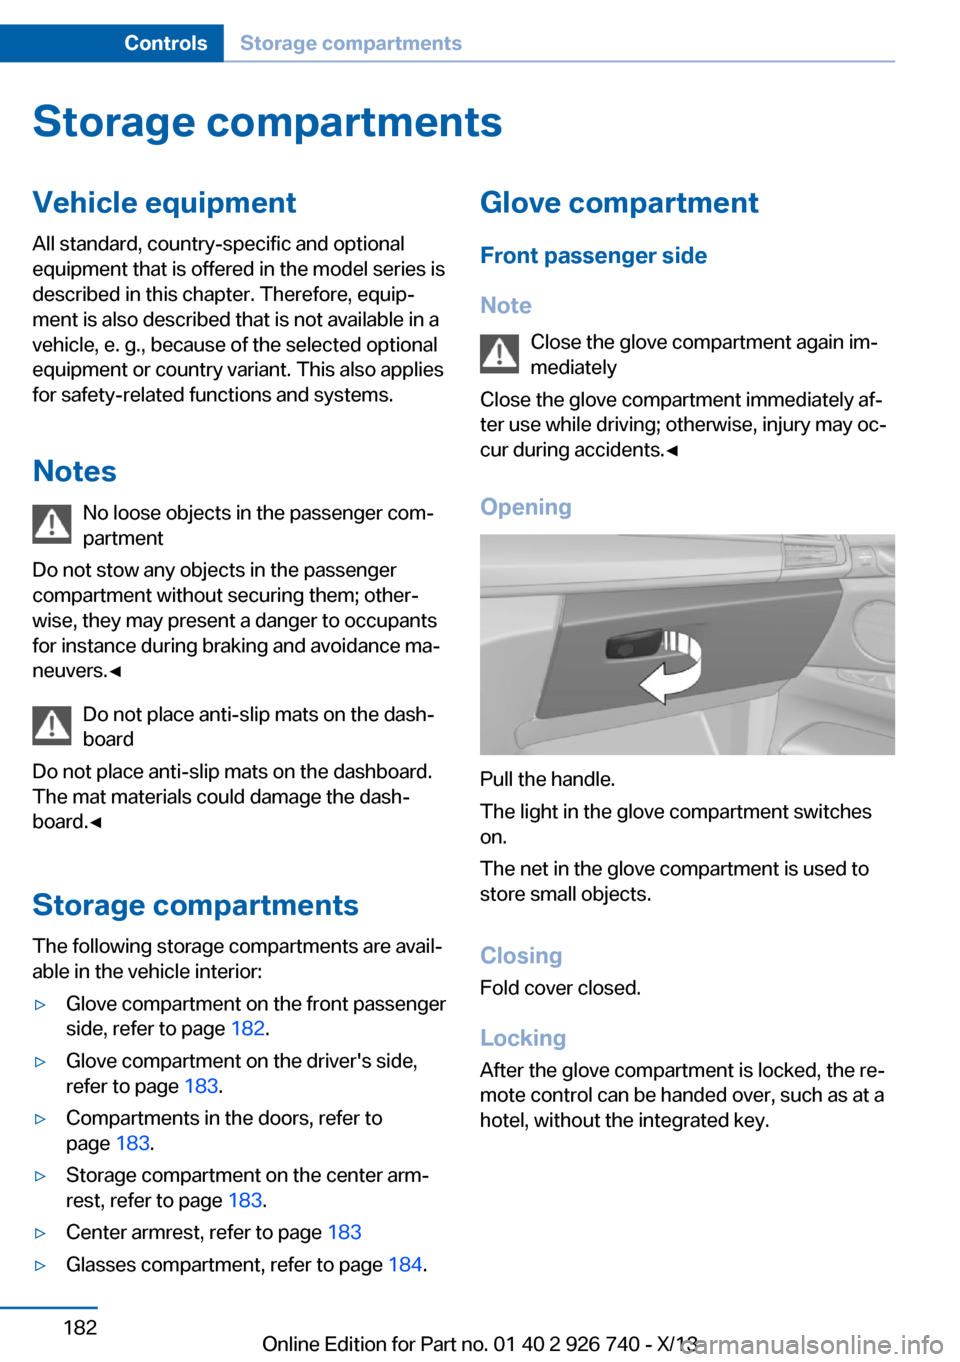
Pull the handle.
The light in the glove compartment switches
on.
The net in the glove compartment is used to
store small objects.
Closing Fold cover closed.
Locking After the glove compartment is locked, the re‐
mote control can be handed over, such as at a
hotel, without the integrated key.
Seite 182ControlsStorage compartments182
Online Edition for Part no. 01 40 2 926 740 - X/13
Page 255 of 265
tertainment and Communi‐
cation
BMW Homepage 6
BMW Internet page 6
BMW maintenance sys‐ tem 229
Bonus range, ECO PRO 199
Bottle holder, refer to Cu‐ pholder 185
Brake assistant 131
Brake discs, breaking in 190
Brake force display 128
Brake lamps, brake force dis‐ play 128
Brake lights, adaptive 128
Brake pads, breaking in 190
Braking, hints 192
Breakdown assis‐ tance 239, 240
Breaking in 190
Brightness of Control Dis‐ play 96
Bulb replacement 232
Bulb replacement, front 233
Bulb replacement, rear 235
Bulbs and lamps 232
Button, RES 141
Button, Start/Stop 67
Bypassing, refer to Jump- starting 241
C
California Proposition 65 Warning 7
Calling up mirror adjust‐ ment 45
Calling up seat adjust‐ ment 45
Calling up steering wheel ad‐ justment 45
Camera, care 247
Camera, Panorama View 158
Camera, rearview cam‐ era 153
Camera, Top View 156 Can holder, refer to Cu‐
pholder 185
Car battery 237
Car care products 245
Care, displays 247
Care, vehicle 245
Cargo 194
Cargo area 180
Cargo area, enlarging 180
Cargo area lid 40
Cargo area, storage compart‐ ments 186
Cargo cover 180
Cargo, securing 195
Cargo straps, securing cargo 195
Car key, refer to Remote con‐ trol 34
Carpet, care 247
Car wash 244
Catalytic converter, refer to Hot exhaust system 190
CBS Condition Based Serv‐ ice 229
CD/Multimedia, see user's manual for Navigation, En‐
tertainment and Communi‐
cation
Center armrest 183
Center console 16
Center-Lock, see button for central locking 37
Central locking system 37
Central screen, refer to Con‐ trol Display 18
Changes, technical, refer to Safety 7
Changing parts 231
Changing wheels 235
Changing wheels/tires 218
Check Control 86
Checking the oil level elec‐ tronically 224
Children, seating position 63
Children, transporting safely 63 Child restraint fixing sys‐
tem 63
Child restraint fixing system LATCH 65
Child restraint fixing systems, mounting 63
Child safety locks 66
Child seat, mounting 63
Child seats 63
Chrome parts, care 246
Cigarette lighter 177
Cleaning, displays 247
Climate control 165
Climate control wind‐ shield 191
Clock 89
Closing/opening from in‐ side 40
Closing/opening via door lock 39
Closing/opening with remote control 38
Clothes hooks 186
Coasting 200
Coasting with engine decou‐ pled, coasting 200
Coasting with idling en‐ gine 200
Cockpit 14
Cold starting, refer to Starting the engine 68
Collision warning with braking function 116
Collision warning with City Braking function 113
Combination switch, refer to Turn signals 74
Combination switch, refer to Wiper system 75
Comfort Access 43
COMFORT program, Driving Dynamics Control 137
Compact wheel 235
Compartments in the doors 183
Compass 94 Seite 255Everything from A to ZReference255
Online Edition for Part no. 01 40 2 926 740 - X/13
Page 258 of 265
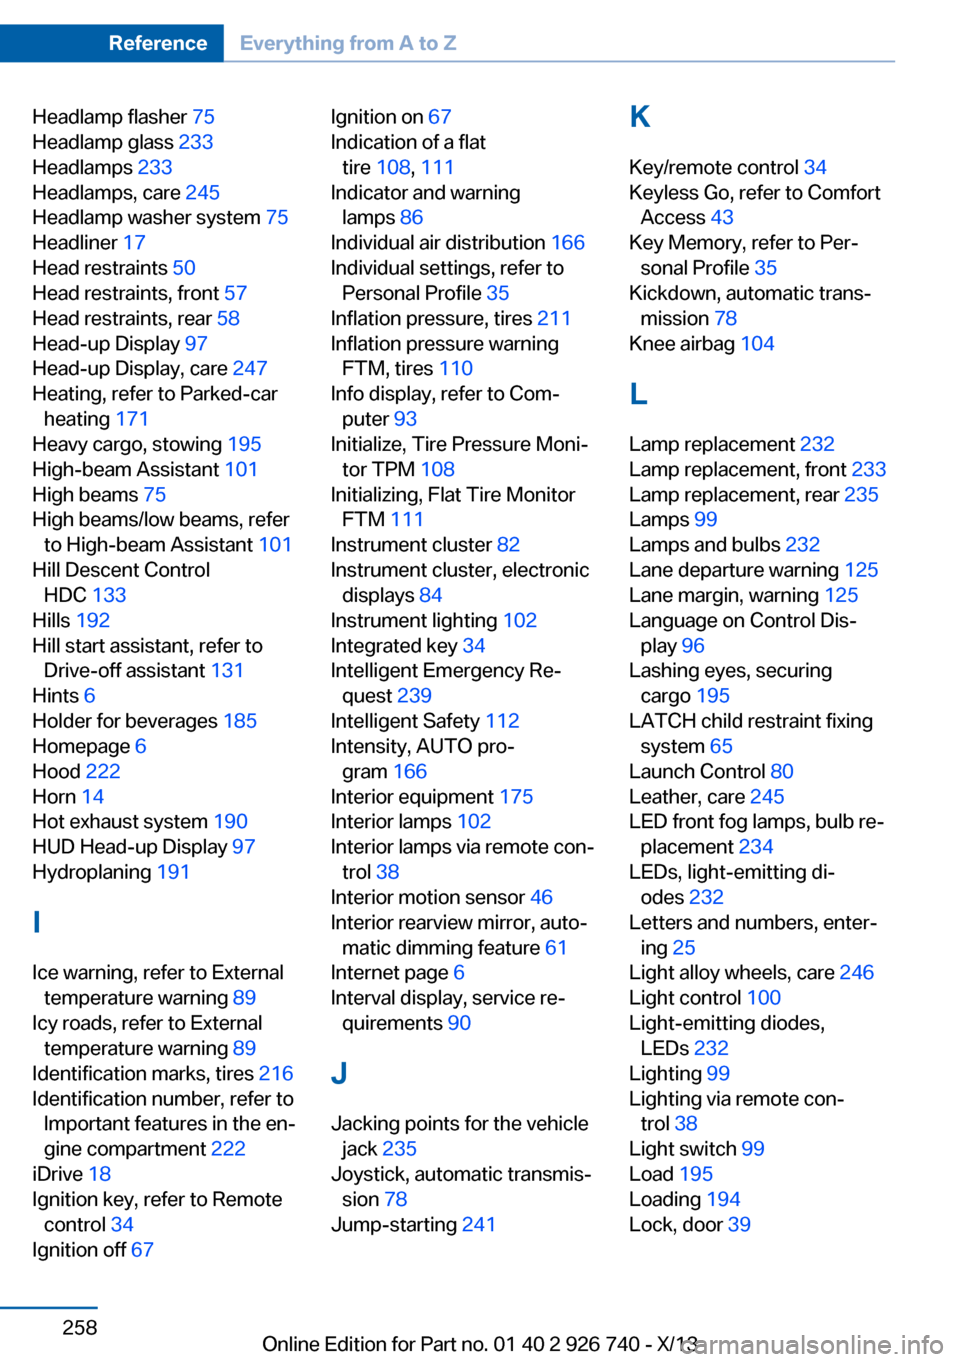
Headlamp flasher 75
Headlamp glass 233
Headlamps 233
Headlamps, care 245
Headlamp washer system 75
Headliner 17
Head restraints 50
Head restraints, front 57
Head restraints, rear 58
Head-up Display 97
Head-up Display, care 247
Heating, refer to Parked-car heating 171
Heavy cargo, stowing 195
High-beam Assistant 101
High beams 75
High beams/low beams, refer to High-beam Assistant 101
Hill Descent Control HDC 133
Hills 192
Hill start assistant, refer to Drive-off assistant 131
Hints 6
Holder for beverages 185
Homepage 6
Hood 222
Horn 14
Hot exhaust system 190
HUD Head-up Display 97
Hydroplaning 191
I Ice warning, refer to External temperature warning 89
Icy roads, refer to External temperature warning 89
Identification marks, tires 216
Identification number, refer to Important features in the en‐
gine compartment 222
iDrive 18
Ignition key, refer to Remote control 34
Ignition off 67 Ignition on 67
Indication of a flat tire 108 , 111
Indicator and warning lamps 86
Individual air distribution 166
Individual settings, refer to Personal Profile 35
Inflation pressure, tires 211
Inflation pressure warning FTM, tires 110
Info display, refer to Com‐ puter 93
Initialize, Tire Pressure Moni‐ tor TPM 108
Initializing, Flat Tire Monitor FTM 111
Instrument cluster 82
Instrument cluster, electronic displays 84
Instrument lighting 102
Integrated key 34
Intelligent Emergency Re‐ quest 239
Intelligent Safety 112
Intensity, AUTO pro‐ gram 166
Interior equipment 175
Interior lamps 102
Interior lamps via remote con‐ trol 38
Interior motion sensor 46
Interior rearview mirror, auto‐ matic dimming feature 61
Internet page 6
Interval display, service re‐ quirements 90
J Jacking points for the vehicle jack 235
Joystick, automatic transmis‐ sion 78
Jump-starting 241 K
Key/remote control 34
Keyless Go, refer to Comfort Access 43
Key Memory, refer to Per‐ sonal Profile 35
Kickdown, automatic trans‐ mission 78
Knee airbag 104
L
Lamp replacement 232
Lamp replacement, front 233
Lamp replacement, rear 235
Lamps 99
Lamps and bulbs 232
Lane departure warning 125
Lane margin, warning 125
Language on Control Dis‐ play 96
Lashing eyes, securing cargo 195
LATCH child restraint fixing system 65
Launch Control 80
Leather, care 245
LED front fog lamps, bulb re‐ placement 234
LEDs, light-emitting di‐ odes 232
Letters and numbers, enter‐ ing 25
Light alloy wheels, care 246
Light control 100
Light-emitting diodes, LEDs 232
Lighting 99
Lighting via remote con‐ trol 38
Light switch 99
Load 195
Loading 194
Lock, door 39 Seite 258ReferenceEverything from A to Z258
Online Edition for Part no. 01 40 2 926 740 - X/13
Page 259 of 265
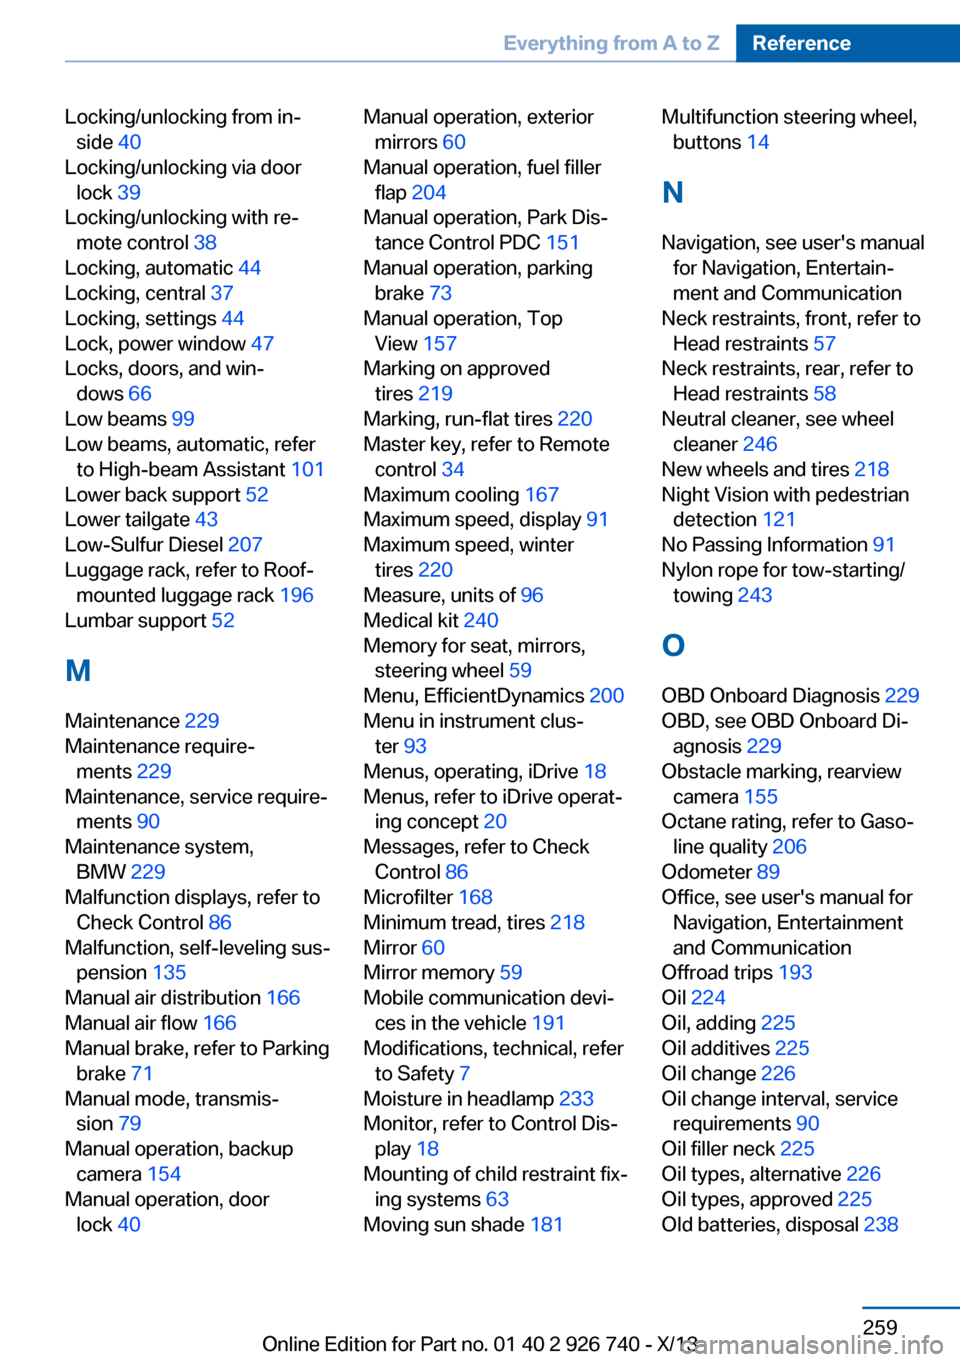
Locking/unlocking from in‐side 40
Locking/unlocking via door lock 39
Locking/unlocking with re‐ mote control 38
Locking, automatic 44
Locking, central 37
Locking, settings 44
Lock, power window 47
Locks, doors, and win‐ dows 66
Low beams 99
Low beams, automatic, refer to High-beam Assistant 101
Lower back support 52
Lower tailgate 43
Low-Sulfur Diesel 207
Luggage rack, refer to Roof- mounted luggage rack 196
Lumbar support 52
M
Maintenance 229
Maintenance require‐ ments 229
Maintenance, service require‐ ments 90
Maintenance system, BMW 229
Malfunction displays, refer to Check Control 86
Malfunction, self-leveling sus‐ pension 135
Manual air distribution 166
Manual air flow 166
Manual brake, refer to Parking brake 71
Manual mode, transmis‐ sion 79
Manual operation, backup camera 154
Manual operation, door lock 40 Manual operation, exterior
mirrors 60
Manual operation, fuel filler flap 204
Manual operation, Park Dis‐ tance Control PDC 151
Manual operation, parking brake 73
Manual operation, Top View 157
Marking on approved tires 219
Marking, run-flat tires 220
Master key, refer to Remote control 34
Maximum cooling 167
Maximum speed, display 91
Maximum speed, winter tires 220
Measure, units of 96
Medical kit 240
Memory for seat, mirrors, steering wheel 59
Menu, EfficientDynamics 200
Menu in instrument clus‐ ter 93
Menus, operating, iDrive 18
Menus, refer to iDrive operat‐ ing concept 20
Messages, refer to Check Control 86
Microfilter 168
Minimum tread, tires 218
Mirror 60
Mirror memory 59
Mobile communication devi‐ ces in the vehicle 191
Modifications, technical, refer to Safety 7
Moisture in headlamp 233
Monitor, refer to Control Dis‐ play 18
Mounting of child restraint fix‐ ing systems 63
Moving sun shade 181 Multifunction steering wheel,
buttons 14
N
Navigation, see user's manual for Navigation, Entertain‐
ment and Communication
Neck restraints, front, refer to Head restraints 57
Neck restraints, rear, refer to Head restraints 58
Neutral cleaner, see wheel cleaner 246
New wheels and tires 218
Night Vision with pedestrian detection 121
No Passing Information 91
Nylon rope for tow-starting/ towing 243
O OBD Onboard Diagnosis 229
OBD, see OBD Onboard Di‐ agnosis 229
Obstacle marking, rearview camera 155
Octane rating, refer to Gaso‐ line quality 206
Odometer 89
Office, see user's manual for Navigation, Entertainment
and Communication
Offroad trips 193
Oil 224
Oil, adding 225
Oil additives 225
Oil change 226
Oil change interval, service requirements 90
Oil filler neck 225
Oil types, alternative 226
Oil types, approved 225
Old batteries, disposal 238 Seite 259Everything from A to ZReference259
Online Edition for Part no. 01 40 2 926 740 - X/13