Service BMW X5 2015 F15 Owner's Guide
[x] Cancel search | Manufacturer: BMW, Model Year: 2015, Model line: X5, Model: BMW X5 2015 F15Pages: 275, PDF Size: 6.46 MB
Page 117 of 275
Indication of a flat tireThe yellow warning lamp lights up. A
Check Control message is displayed.
There is a flat tire or a major loss in tire
inflation pressure.1.Reduce your speed and stop cautiously.
Avoid sudden braking and steering maneu‐
vers.2.Check whether the vehicle is fitted with
normal tires or run-flat tires.
Run-flat tires, refer to page 225, are la‐
beled with a circular symbol containing the
letters RSC marked on the tire's sidewall.
WARNING
A damaged regular tire with low or miss‐
ing tire inflation pressure impacts handling,
such as steering and braking response. Run-
flat tires can maintain limited stability. There is
risk of an accident. Do not continue driving if
the vehicle is not equipped with run-flat tires.
Observe the information on run-flat tires and
continued driving with these tires.◀
When a flat tire is indicated, DSC Dynamic Sta‐
bility Control is switched on if needed.
System limits
A natural, even tire inflation pressure loss in all four tires will not be recognized. Therefore,
check the tire inflation pressure regularly.
Sudden serious tire damage caused by exter‐
nal circumstances cannot be recognized in ad‐
vance.
The system could be delayed or malfunction in
the following situations:
▷When the system has not been initialized.▷When driving on a snowy or slippery road
surface.▷Sporty driving style: spinning traction
wheels, high lateral acceleration (drifting).▷When driving with snow chains.Actions in the event of a flat tire
Normal tires1.Identify the damaged tire.
Do this by checking the air pressure in all
four tires.
The tire pressure gage of the Mobility Sys‐
tem, refer to page 225, can possibly be
used for this purpose.
If the tire inflation pressure in all four tires
is correct, the Flat Tire Monitor may not
have been initialized. In this case, initialize
the system.
If identification of flat tire damage is not
possible, please contact a dealer’s service
center or another qualified service center
or repair shop.2.Replace the damaged tire with the emer‐
gency wheel as needed or fix it where ap‐
plicable with the Mobility System.
Run-flat tires
Maximum speed
You may continue driving with a damaged tire
at speeds up to 50 mph/80 km/h.
Continued driving with a flat tire
If continuing to drive with a damaged tire:
1.Avoid sudden braking and steering maneu‐
vers.2.Do not exceed a speed of 50 mph/80 km/h.3.Check the air pressure in all four tires at
the next opportunity.
If the tire inflation pressure in all four tires
is correct, the Flat Tire Monitor may not
have been initialized. In this case, initialize
the system.
Possible driving distance with complete loss of
tire inflation pressure:
Seite 117SafetyControls117
Online Edition for Part no. 01 40 2 963 410 - VI/15
Page 118 of 275
The possible driving distance after a loss of tire
inflation pressure depends on cargo load, driv‐
ing style and road conditions.
A vehicle with an average load has a possible
driving range of approx. 50 miles/80 km.
A vehicle with a damaged tire reacts differ‐
ently, e.g., it has reduced lane stability during
braking, a longer braking distance and different
self-steering properties. Adjust your driving
style accordingly. Avoid abrupt steering ma‐
neuvers or driving over obstacles, e.g., curbs,
potholes, etc.
Because the possible driving distance de‐
pends on how the vehicle is used during the
trip, the actual distance may be shorter or lon‐
ger depending on the driving speed, road con‐
ditions, external temperature, cargo load, etc.
WARNING
Your vehicle handles differently when a
run-flat tire is damaged and has low or missing
tire inflation pressure, e.g., your lane stability is
reduced when braking, braking distances are
longer and the self-steering properties will
change. There is risk of an accident.
Drive moderately and do not exceed a speed of
50 mph/80 km/h.◀
Final tire failure
Vibrations or loud noises while driving can indi‐
cate the final failure of a tire.
Reduce speed and stop; otherwise, pieces of
the tire could come loose and cause an acci‐
dent.
Do not continue driving. Contact a dealer’s
service center or another qualified service cen‐
ter or repair shop.
Intelligent Safety The concept
Intelligent Safety enables central operation of
the driver assistance system. Depending onhow the vehicle is equipped, Intelligent Safety
consists of one or more systems that can help
prevent a imminent collision.▷Front-end collision warning, refer to
page 119.▷Pedestrian warning, refer to page 125.▷Lane departure warning, refer to
page 131.▷Active Blind Spot Detection, refer to
page 133.
Information
WARNING
Indicators and warnings do not relieve
from the personal responsibility. Due to sys‐
tem limits, warnings or reactions of the system
may not be output or they may be output too
late or incorrectly. There is risk of an accident.
Adjust the driving style to the traffic condi‐
tions. Watch traffic closely and actively inter‐
fere in the respective situations.◀
WARNING
Due to system limits, individual functions
can malfunction during tow-starting/towing
with the Intelligent Safety systems activated,
e.g. approach control warning with light brak‐
ing function. There is risk of an accident.
Switch all Intelligent Safety systems off prior to
tow-starting/towing.◀
Overview
Button in the vehicle
Seite 118ControlsSafety118
Online Edition for Part no. 01 40 2 963 410 - VI/15
Page 142 of 275
The system ensures consistent comfort by
keeping spring travel constant in all driving sit‐
uations.
Malfunction
A Check Control message is displayed. The system is disrupted. Vehicle handling may be altered and driving comfort may be noticeably
reduced. Visit the nearest dealer’s service cen‐ ter or another qualified service center or repair
shop.
Driving Dynamics Control
The concept The Driving Dynamics Control can be used to
adjust the driving dynamics of the vehicle. For
this purpose various programs are available for
selection that are activated via the two buttons
of the Driving Dynamics Control and the DSC
OFF-button.
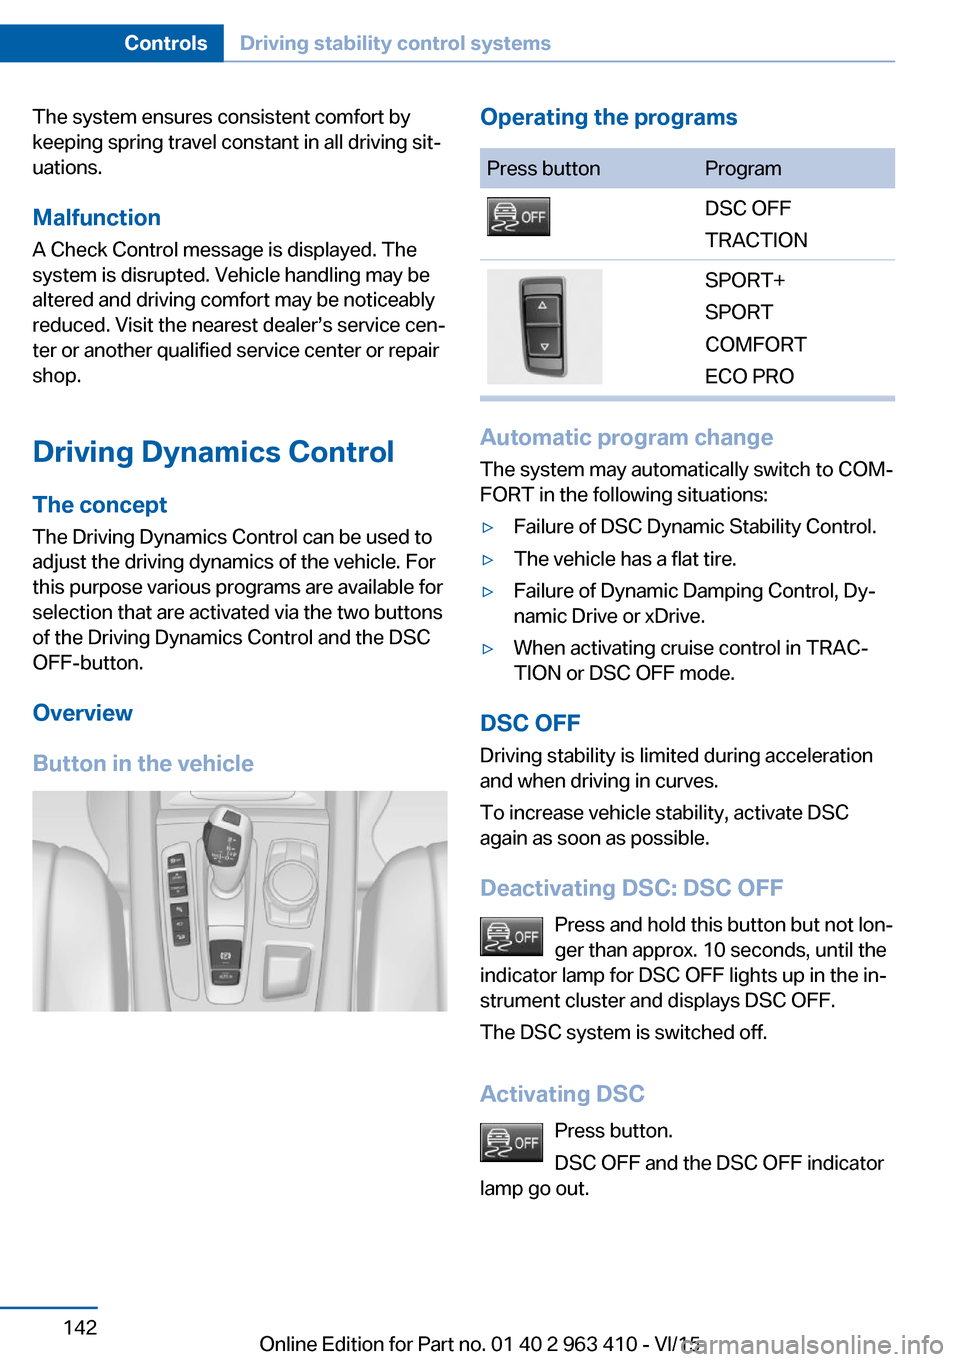
Overview
Button in the vehicleOperating the programsPress buttonProgramDSC OFF
TRACTIONSPORT+
SPORT
COMFORT
ECO PRO
Automatic program change
The system may automatically switch to COM‐
FORT in the following situations:
▷Failure of DSC Dynamic Stability Control.▷The vehicle has a flat tire.▷Failure of Dynamic Damping Control, Dy‐
namic Drive or xDrive.▷When activating cruise control in TRAC‐
TION or DSC OFF mode.
DSC OFF
Driving stability is limited during acceleration
and when driving in curves.
To increase vehicle stability, activate DSC
again as soon as possible.
Deactivating DSC: DSC OFF Press and hold this button but not lon‐
ger than approx. 10 seconds, until the
indicator lamp for DSC OFF lights up in the in‐
strument cluster and displays DSC OFF.
The DSC system is switched off.
Activating DSC Press button.
DSC OFF and the DSC OFF indicator
lamp go out.
Seite 142ControlsDriving stability control systems142
Online Edition for Part no. 01 40 2 963 410 - VI/15
Page 174 of 275
Interior equipmentVehicle features and optionsThis chapter describes all standard, country-
specific and optional features offered with the
series. It also describes features that are not
necessarily available in your car, e. g., due to
the selected options or country versions. This
also applies to safety-related functions and
systems. The respectively applicable country
provisions must be observed when using the
respective features and systems.
Universal Integrated Remote Control
The concept The universal garage door opener can operate
up to 3 functions of remote-controlled sys‐
tems such as garage door drives or lighting
systems. The universal garage door opener re‐
places up to 3 different hand-held transmitters.
To operate the remote control, the buttons on
the interior rearview mirror must be program‐
med with the desired functions. The hand-held
transmitter for the particular system is required
in order to program the remote control.
Before selling the vehicle, delete the stored
functions for the sake of security.
Information WARNING
Body parts can be jammed when operat‐
ing remote-controlled systems, e.g. the garage
door, using the universal garage door opener.
There is risk of injuries or risk of property dam‐
age. Make sure that the area of movement of
the respective system is clear during program‐
ming and operation. Also follow the safety in‐
structions of the hand-held transmitter.◀Compatibility
If this symbol is printed on the packag‐
ing or in the instructions of the system
to be controlled, the system is gener‐
ally compatible with the universal garage door opener.
If you have any questions, please contact:▷A dealer’s service center or another quali‐
fied service center or repair shop.▷www.homelink.com on the Internet.
HomeLink is a registered trademark of Gentex
Corporation.
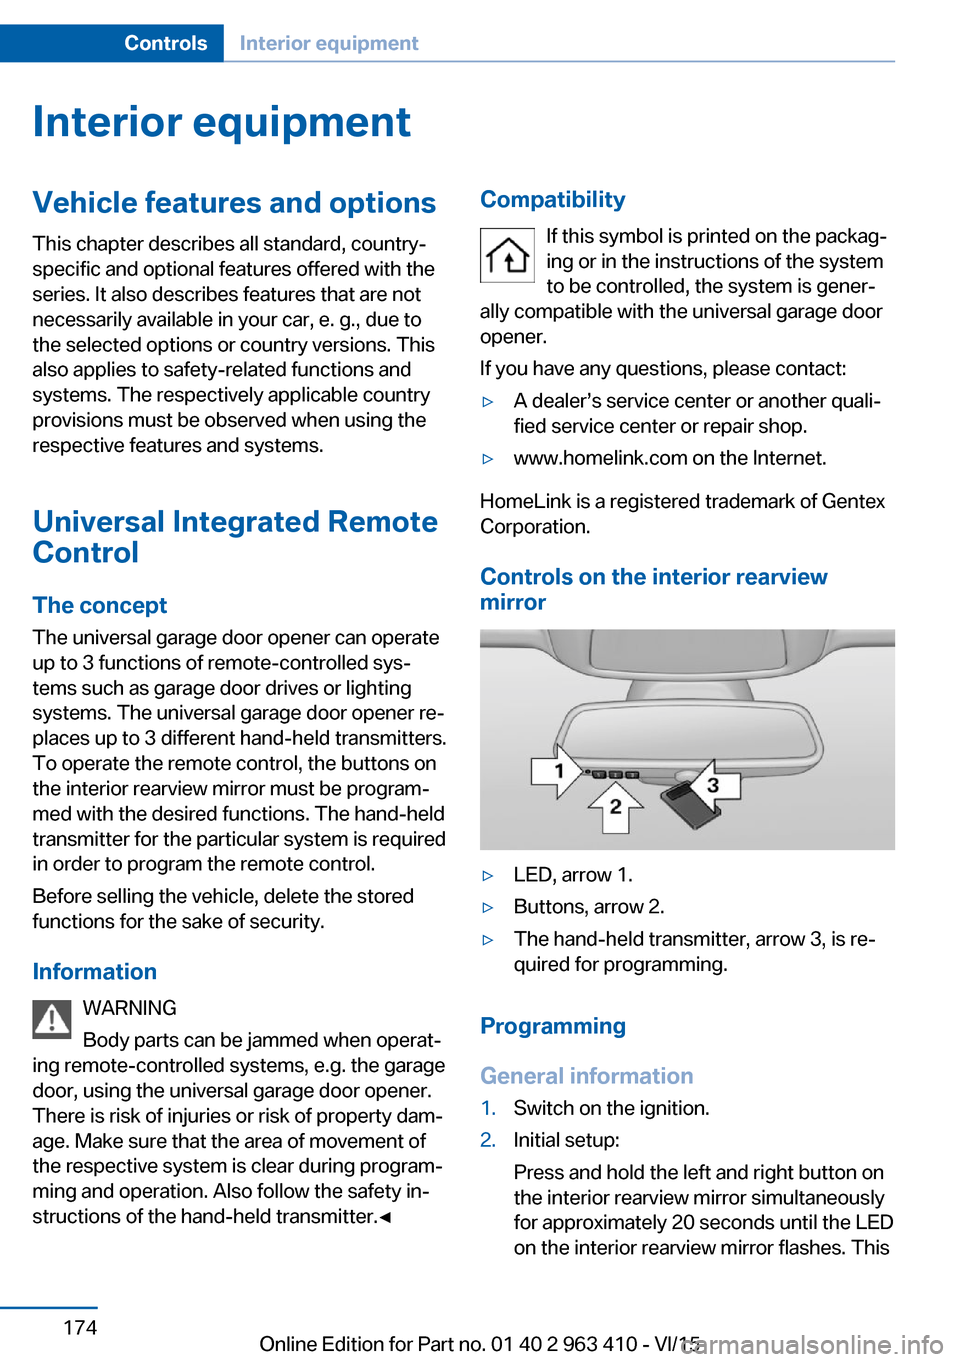
Controls on the interior rearview
mirror
▷LED, arrow 1.▷Buttons, arrow 2.▷The hand-held transmitter, arrow 3, is re‐
quired for programming.
Programming
General information
1.Switch on the ignition.2.Initial setup:
Press and hold the left and right button on
the interior rearview mirror simultaneously
for approximately 20 seconds until the LED
on the interior rearview mirror flashes. ThisSeite 174ControlsInterior equipment174
Online Edition for Part no. 01 40 2 963 410 - VI/15
Page 180 of 275
The highest cooling power is active when
two LEDs are lit.
If the cooler was switched on the last time the
ignition was switched on, it will likewise be
switched on the next time the ignition is
switched on.
Switch off
Press button repeatedly until the LEDs go out.
Removing
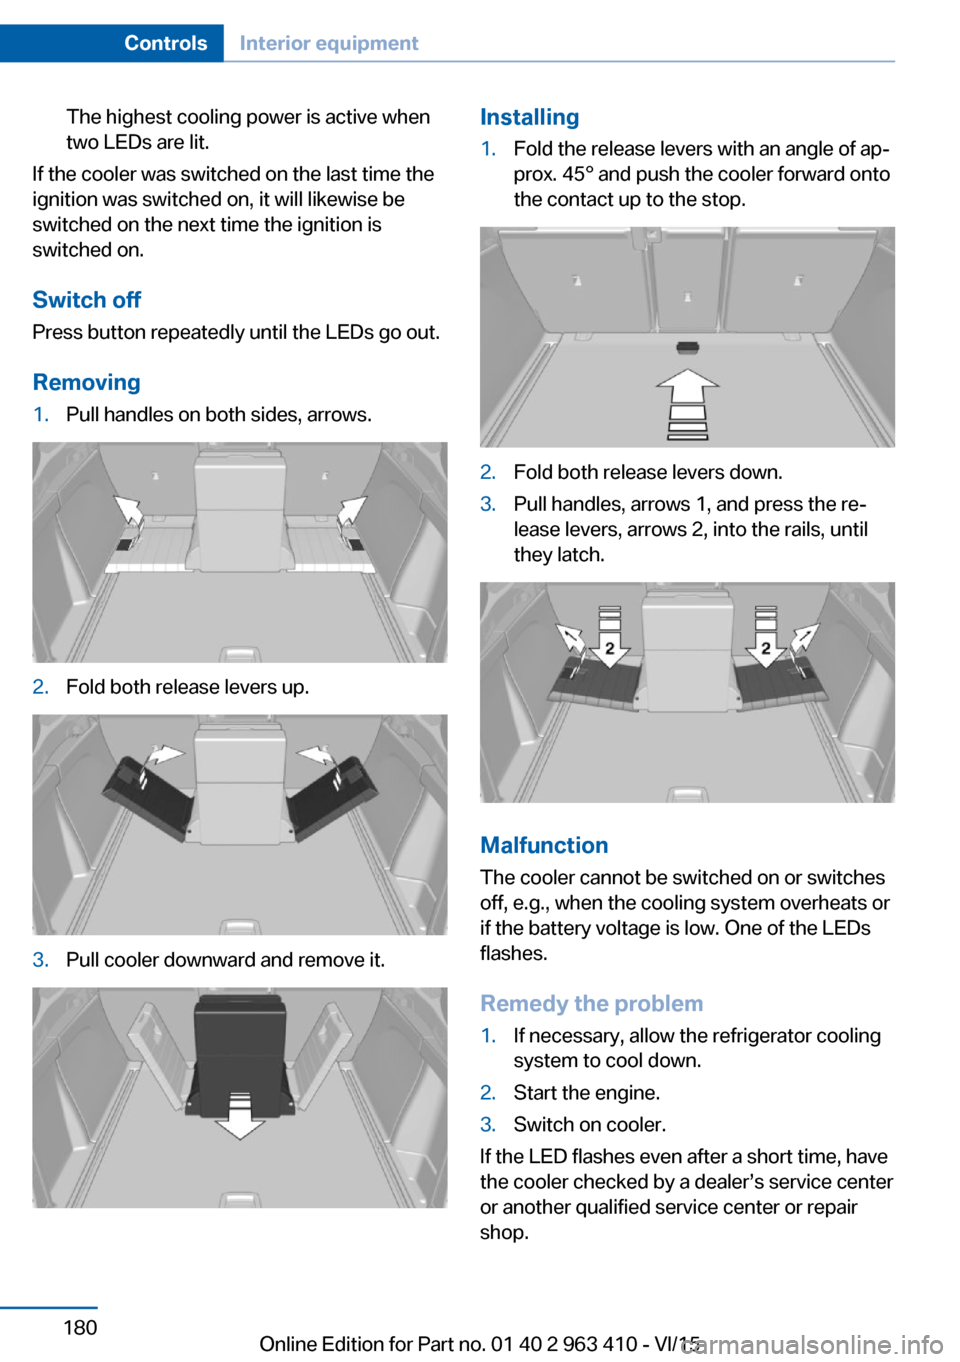
1.Pull handles on both sides, arrows.2.Fold both release levers up.3.Pull cooler downward and remove it.Installing1.Fold the release levers with an angle of ap‐
prox. 45° and push the cooler forward onto
the contact up to the stop.2.Fold both release levers down.3.Pull handles, arrows 1, and press the re‐
lease levers, arrows 2, into the rails, until
they latch.
Malfunction
The cooler cannot be switched on or switches
off, e.g., when the cooling system overheats or
if the battery voltage is low. One of the LEDs
flashes.
Remedy the problem
1.If necessary, allow the refrigerator cooling
system to cool down.2.Start the engine.3.Switch on cooler.
If the LED flashes even after a short time, have
the cooler checked by a dealer’s service center
or another qualified service center or repair
shop.
Seite 180ControlsInterior equipment180
Online Edition for Part no. 01 40 2 963 410 - VI/15
Page 200 of 275
Avoid high engine speeds
As a rule: driving at low engine speeds lowers
fuel consumption and reduces wear.
If necessary, observe the gear shift indicator of
the vehicle, refer to page 96.
Use coasting
When approaching a red light, take your foot
off the accelerator and let the vehicle coast to
a halt.
For going downhill take your foot off the accel‐
erator and let the vehicle roll.
The flow of fuel is interrupted while coasting.
Switch off the engine during longer stops
Switch off the engine during longer stops, e.g.,
at traffic lights, railroad crossings or in traffic
congestion.
Auto Start/Stop function The Auto Start/Stop function of your vehicle
automatically switches off the engine during a
stop.
If the engine is switched off and then restarted
rather than leaving the engine running con‐
stantly, fuel consumption and emissions are
reduced. Savings can begin within a few sec‐
onds of switching off the engine.
In addition, fuel consumption is also deter‐
mined by other factors, such as driving style,
road conditions, maintenance or environmental
factors.
Switch off any functions that
are not currently needed
Functions such as seat heating and the rear
window defroster require a lot of energy andreduce the range, especially in city and stop-
and-go traffic.
Switch off these functions if they are not needed.
The ECO PRO driving program supports the
energy conserving use of comfort features.
These functions are automatically deactivated
partially or completely.
Have maintenance carriedout
Have vehicles maintained regularly to achieve
optimal vehicle efficiency and service life.
BMW recommends that maintenance work be
performed by a BMW dealer’s service center.
For information on the BMW Maintenance
System, refer to page 238.
ECO PRO
The concept ECO PRO supports a driving style that saves
on fuel consumption. For this purpose, the en‐
gine control and comfort features, e. g. the cli‐
mate control output, are adjusted.
Under certain conditions the engine is auto‐
matically decoupled from the transmission in
the D selector lever position. The vehicle con‐
tinues traveling with the engine idling to re‐
duce fuel consumption. Selector lever position
D remains engaged.
In addition, context-sensitive instructions are
displayed to assist with an optimized fuel con‐
sumption driving style.
The achieved extended range is displayed in
the instrument cluster as bonus range.
Overview The system includes the following
EfficientDynamics functions and displays:▷ECO PRO bonus range, refer to page 201.Seite 200Driving tipsSaving fuel200
Online Edition for Part no. 01 40 2 963 410 - VI/15
Page 210 of 275
FuelVehicle features and optionsThis chapter describes all standard, country-
specific and optional features offered with the
series. It also describes features that are not
necessarily available in your car, e. g., due to
the selected options or country versions. This
also applies to safety-related functions and
systems. The respectively applicable country
provisions must be observed when using the
respective features and systems.
Fuel recommendation General information
Depending on the region, many gas stations
sell fuel that has been customized to winter or
summer conditions. Fuel that is available in
winter helps make a cold start easier, e.g.
Information CAUTION
Even fuels that conform to the specifica‐
tions can be of low quality. This may cause en‐
gine problems, for instance poor engine start-
up behavior, poor handling and/or poor
performance. There is risk of property damage.
In case of engine problems, switch gas sta‐
tions or use a brand name fuel with a higher
octane rating.◀
Gasoline For the best fuel efficiency, the gasoline
should be sulfur-free or very low in sulfur con‐
tent.
Fuels that are marked on the gas pump as con‐
taining metal must not be used.CAUTION
Even small amounts of wrong fuel or
wrong fuel additives can damage the fuel sys‐
tem and the engine. Furthermore, the catalytic
converter is permanently damaged. There is
risk of property damage. Do not refuel or add
the following in the case of gasoline engines:▷Leaded gasoline.▷Metallic additives, e.g. manganese or iron.
Do not press the Start/Stop button after refuel‐
ing the wrong fuel. Contact a dealer’s service
center or another qualified service center or re‐
pair shop.◀
Fuels with a maximum ethanol content of
10 %, i. e., E10, may be used for refueling.
Ethanol should satisfy the following quality
standards:
US: ASTM 4806–xx
CAN: CGSB-3.511–xx
xx: comply with the current standard in each
case.
CAUTION
Wrong fuels can damage the fuel system
and the engine. There is risk of property dam‐
age. Do not use a fuel with a higher ethanol
percentage than recommended or one with
other types of alcohol, e.g. M5 to M100.◀
Recommended fuel grade
BMW recommends AKI 91.
Minimum fuel grade
BMW recommends AKI 89.
CAUTION
Fuel that does not comply with the mini‐
mum quality can compromise engine function
or cause engine damage. There is risk of prop‐
Seite 210MobilityFuel210
Online Edition for Part no. 01 40 2 963 410 - VI/15
Page 211 of 275
erty damage. Do not fill with fuel that does not
comply with the minimum quality.◀
If you use gasoline with this minimum AKI Rat‐
ing, the engine may produce knocking sounds
when starting at high outside temperatures.
This has no effect on the engine life.
CAUTION
The use of poor-quality fuels may result
in harmful engine deposits or damage. Addi‐
tionally, problems relating to drivability, start‐
ing and stalling, especially under certain envi‐
ronmental conditions such as high ambient
temperature and high altitude, may occur.
If drivability problems are encountered, we rec‐
ommend switching to a high quality gasoline
brand and a higher octane grade — AKI num‐
ber — for a few tank fills. To avoid harmful en‐
gine deposits, it is highly recommended to
purchase gasoline from Top Tier retailers.
Failure to comply with these recommendations
may result in the need for unscheduled main‐
tenance.◀
Diesel CAUTION
Even small amounts of wrong fuel or
wrong fuel additives can damage the fuel sys‐
tem and the engine. There is risk of property
damage.
Observe the following for diesel engines:▷Use only Ultra-Low Sulfur Diesel. Maxi‐
mum content of biodiesel: 5 %, B5.▷Do not use rapeseed methyl ester RME.▷Do not use biodiesel above 5 %, B5.▷Do not use gasoline.▷No diesel additives.
Do not press the Start/Stop button after refuel‐
ing the wrong fuel. Contact a dealer’s service
center or another qualified service center or re‐
pair shop.◀
Low-Sulfur Diesel
The engine of your BMW is designed for diesel
with low sulfur content:
Ultra-Low Sulfur Diesel ASTM D 975-xx.
xx: comply with the current standard in each
case.
Use only Ultra-Low Sulfur Diesel.
The fraction of biodiesel in the fuel must not
exceed 5%, referred to as B5. Do not use gas‐
oline. If you do fill the tank with the wrong fuel,
e.g., gasoline, do not start the engine as this
may damage the engine.
In the case of incorrect refueling, contact a
dealer’s service center or another qualified
service center or repair shop or Roadside As‐
sistance.
If the fuel pump nozzle does not fit in the filler
pipe of your BMW, please check to ensure that
you are refueling at a diesel fuel pump that is
equipped with a diesel fuel pump nozzle.
In the event the Ultra-Low Sulfur Diesel fuel
cannot be fully inserted into the fuel filler neck,
please contact BMW Roadside Assistance for
instructions on how to add fuel.
For more information on Roadside Assistance,
refer to Owner's Manual for Navigation, Enter‐
tainment and Communication.
BMW Advanced Diesel The conceptBMW Advanced Diesel reduces nitrogen ox‐
ides in the diesel emissions by injecting Diesel
exhaust fluid into the exhaust system. A chem‐
ical reaction takes place inside the catalytic
converter that minimizes nitrogen oxides.
The vehicle has two tanks, the active tank and
the passive tank. The active tank can be refil‐
led in the engine compartment. BMW recom‐
mends that the passive tank is filled up by the
dealer’s service center within the course of
regular maintenance.Seite 211FuelMobility211
Online Edition for Part no. 01 40 2 963 410 - VI/15
Page 212 of 275
To be able to start the engine as usual, there
must be an adequate Diesel exhaust fluid.
Warming up the system In order to warm the engine up to its operating
temperature after a cold start, the Steptronic
transmission may subsequently shift up to the
next higher gear.
Displays in the instrument cluster
Reserve indication
This display in the instrument cluster provides
information about the distance that can still be
driven with the current reserve level.
Do not continue driving to the limit of the re‐
maining travel distance. It is not possible to re‐
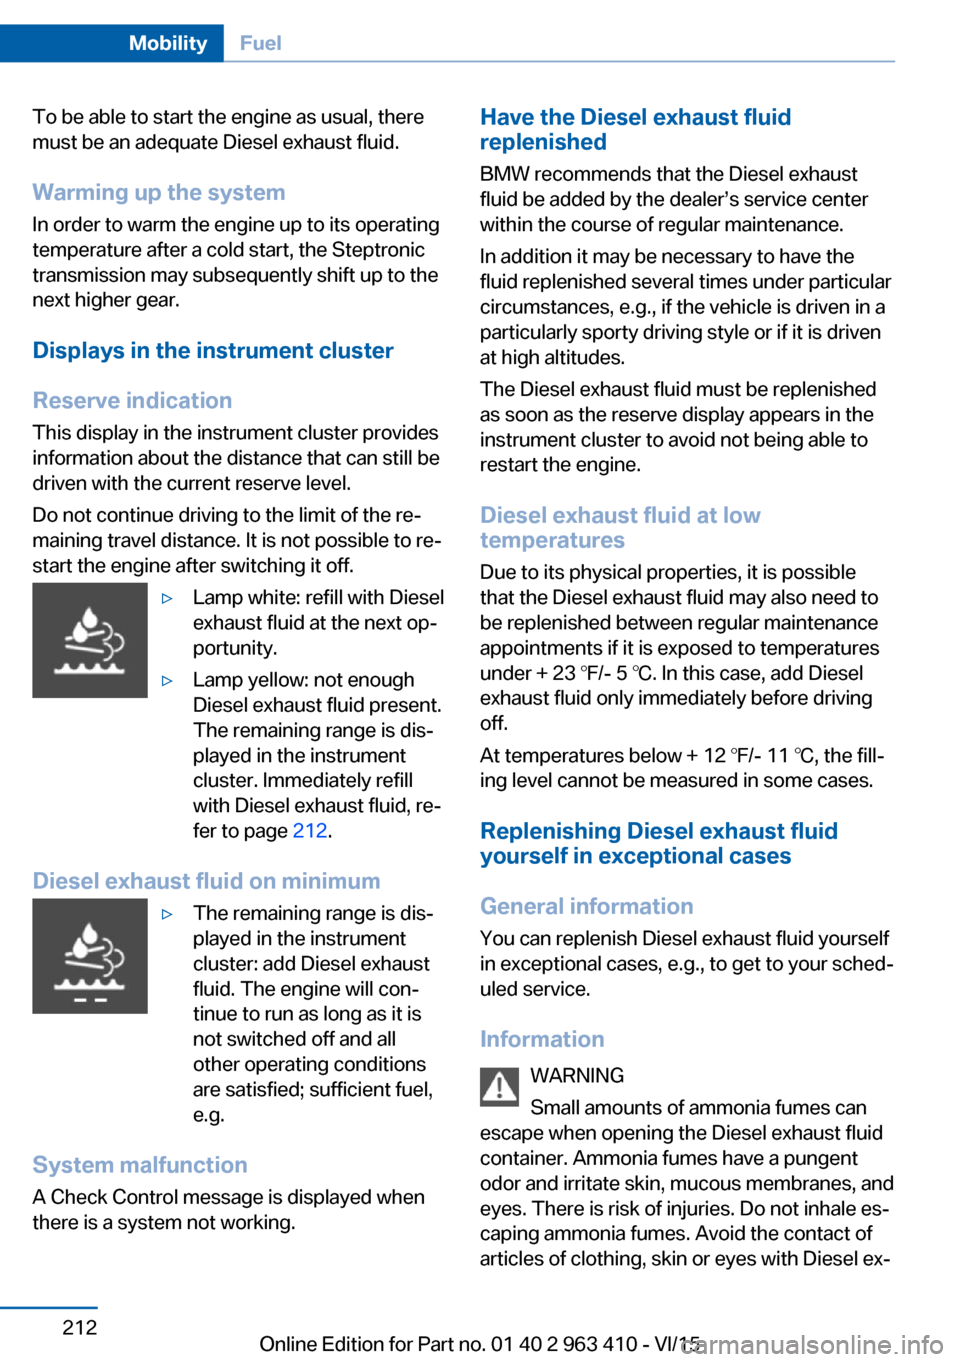
start the engine after switching it off.▷Lamp white: refill with Diesel
exhaust fluid at the next op‐
portunity.▷Lamp yellow: not enough
Diesel exhaust fluid present.
The remaining range is dis‐
played in the instrument
cluster. Immediately refill
with Diesel exhaust fluid, re‐
fer to page 212.
Diesel exhaust fluid on minimum
▷The remaining range is dis‐
played in the instrument
cluster: add Diesel exhaust
fluid. The engine will con‐
tinue to run as long as it is
not switched off and all
other operating conditions
are satisfied; sufficient fuel,
e.g.
System malfunction
A Check Control message is displayed when
there is a system not working.
Have the Diesel exhaust fluid
replenished
BMW recommends that the Diesel exhaust
fluid be added by the dealer’s service center
within the course of regular maintenance.
In addition it may be necessary to have the
fluid replenished several times under particular
circumstances, e.g., if the vehicle is driven in a
particularly sporty driving style or if it is driven
at high altitudes.
The Diesel exhaust fluid must be replenished
as soon as the reserve display appears in the
instrument cluster to avoid not being able to
restart the engine.
Diesel exhaust fluid at low
temperatures
Due to its physical properties, it is possible
that the Diesel exhaust fluid may also need to
be replenished between regular maintenance
appointments if it is exposed to temperatures
under + 23 ℉/- 5 ℃. In this case, add Diesel
exhaust fluid only immediately before driving
off.
At temperatures below + 12 ℉/- 11 ℃, the fill‐
ing level cannot be measured in some cases.
Replenishing Diesel exhaust fluid
yourself in exceptional cases
General information
You can replenish Diesel exhaust fluid yourself
in exceptional cases, e.g., to get to your sched‐
uled service.
Information WARNING
Small amounts of ammonia fumes can
escape when opening the Diesel exhaust fluid
container. Ammonia fumes have a pungent
odor and irritate skin, mucous membranes, and
eyes. There is risk of injuries. Do not inhale es‐
caping ammonia fumes. Avoid the contact of
articles of clothing, skin or eyes with Diesel ex‐Seite 212MobilityFuel212
Online Edition for Part no. 01 40 2 963 410 - VI/15
Page 213 of 275
haust fluid. Do not swallow any Diesel exhaust
fluid. Keep children away from Diesel exhaust
fluids.◀
WARNING
Operating materials, e.g. oils, greases,
coolants, fuels, can contain harmful ingredi‐
ents. There is risk of injuries or danger to life.
Observe the instructions on the containers.
Avoid the contact of articles of clothing, skin or
eyes with operating materials. Do not refill op‐
erating materials into different bottles. Store
operating materials out of reach of children.◀
CAUTION
The Diesel exhaust fluid ingredients are
very aggressive. There is risk of property dam‐
age. Avoid contact of Diesel exhaust fluid with
surfaces of the vehicle.◀
Suitable Diesel exhaust fluid▷Recommended: BMW Diesel Exhaust
Fluid. With this bottle and its special
adapter, Diesel exhaust fluid can be replen‐
ished simply and safely.▷Alternatively recommended: NOx Diesel
exhaust fluid AUS 32.
Diesel exhaust fluid can be purchased at a
dealer’s service center or another qualified
service center or repair shop.
Refill quantity
When the Reserve display starts, add at least
3 bottles of Diesel exhaust fluid.
This corresponds to approx. 1.5 US gal/6 liters.
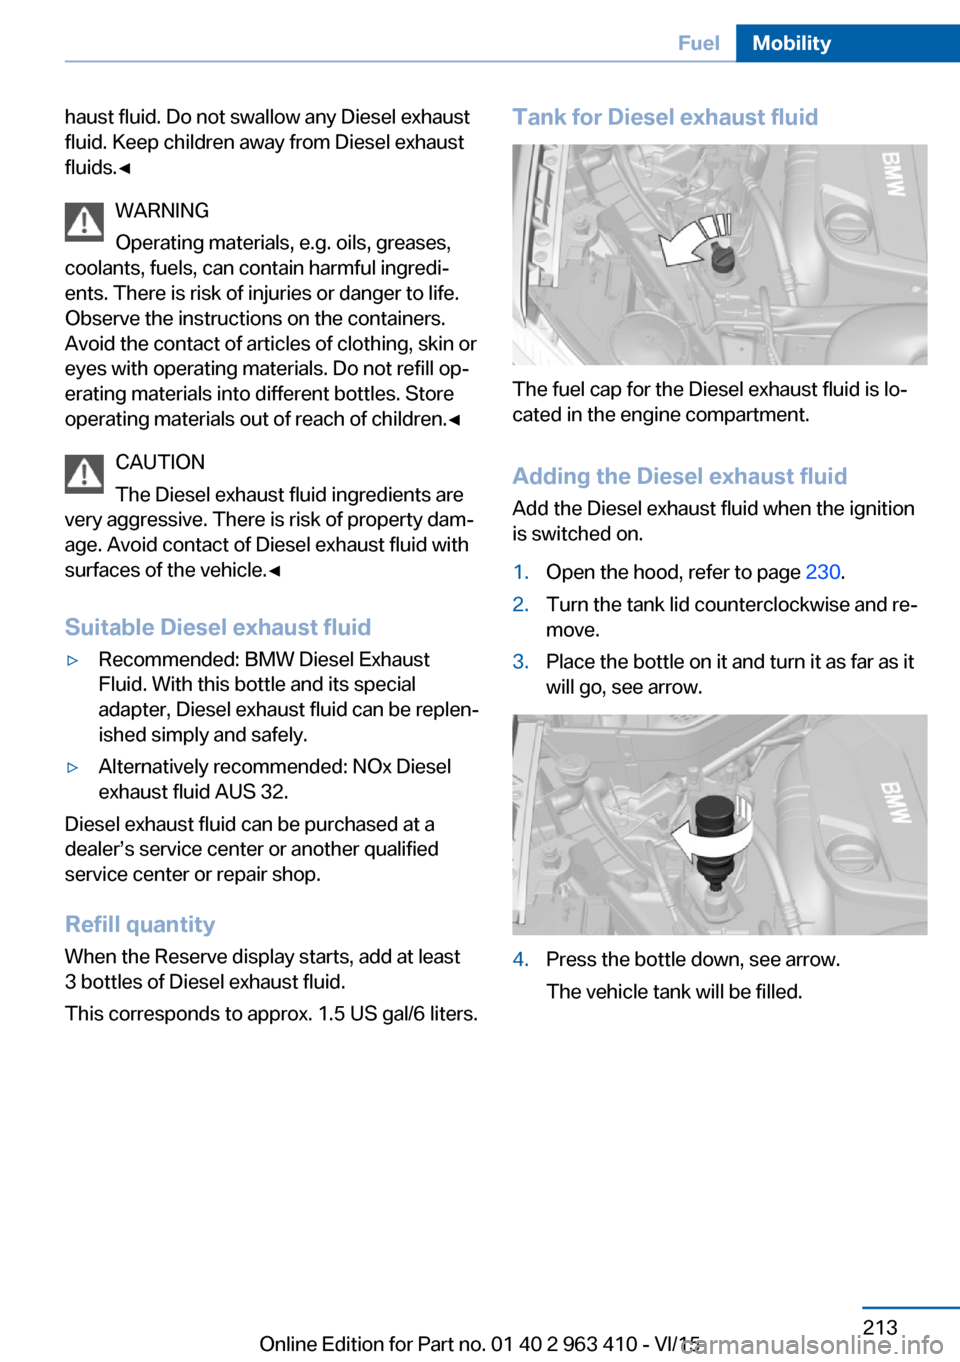
Tank for Diesel exhaust fluid
The fuel cap for the Diesel exhaust fluid is lo‐
cated in the engine compartment.
Adding the Diesel exhaust fluid
Add the Diesel exhaust fluid when the ignition
is switched on.
1.Open the hood, refer to page 230.2.Turn the tank lid counterclockwise and re‐
move.3.Place the bottle on it and turn it as far as it
will go, see arrow.4.Press the bottle down, see arrow.
The vehicle tank will be filled.Seite 213FuelMobility213
Online Edition for Part no. 01 40 2 963 410 - VI/15