door lock BMW X5 3.0I 2002 User Guide
[x] Cancel search | Manufacturer: BMW, Model Year: 2002, Model line: X5 3.0I, Model: BMW X5 3.0I 2002Pages: 185, PDF Size: 2.7 MB
Page 50 of 185
50n
Seat, mirror and steering wheel memory
*
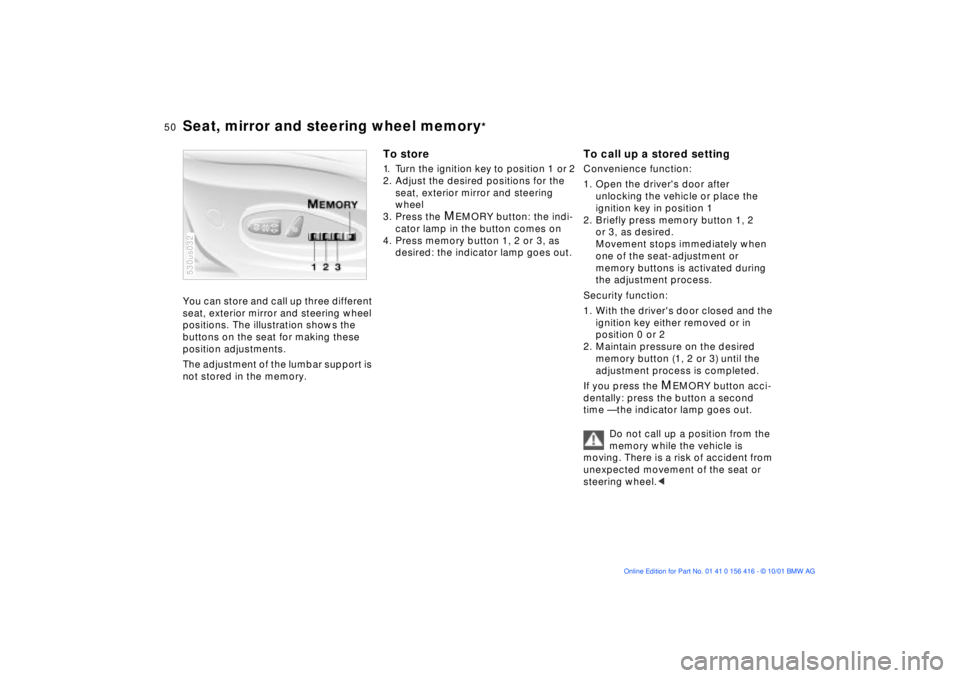
You can store and call up three different
seat, exterior mirror and steering wheel
positions. The illustration shows the
buttons on the seat for making these
position adjustments.
The adjustment of the lumbar support is
not stored in the memory.530us032
To store 1. Turn the ignition key to position 1 or 2
2. Adjust the desired positions for the
seat, exterior mirror and steering
wheel
3. Press the
MEMORY button: the indi-
cator lamp in the button comes on
4. Press memory button 1, 2 or 3, as
desired: the indicator lamp goes out.
To call up a stored settingConvenience function:
1. Open the driver's door after
unlocking the vehicle or place the
ignition key in position 1
2. Briefly press memory button 1, 2
or 3, as desired.
Movement stops immediately when
one of the seat-adjustment or
memory buttons is activated during
the adjustment process.
Security function:
1. With the driver's door closed and the
ignition key either removed or in
position 0 or 2
2. Maintain pressure on the desired
memory button (1, 2 or 3) until the
adjustment process is completed.
If you press the
MEMORY button acci-
dentally: press the button a second
time Ñ the indicator lamp goes out.
Do not call up a position from the
memory while the vehicle is
moving. There is a risk of accident from
unexpected movement of the seat or
steering wheel.<
Page 60 of 185
60n
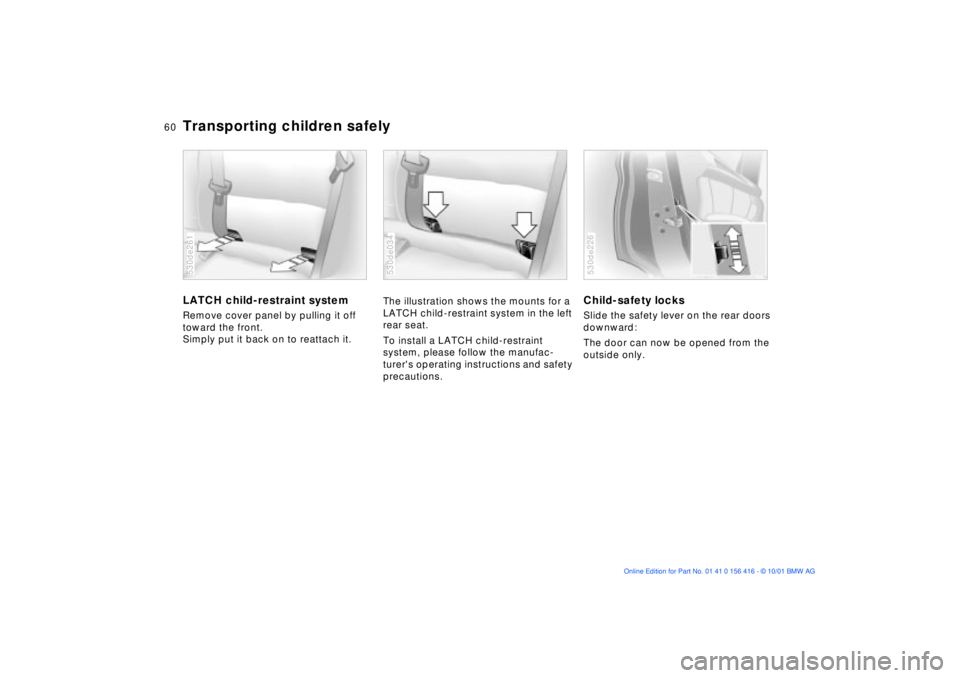
Transporting children safelyLATCH child-restraint systemRemove cover panel by pulling it off
toward the front.
Simply put it back on to reattach it. 530de261
The illustration shows the mounts for a
LATCH child-restraint system in the left
rear seat.
To install a LATCH child-restraint
system, please follow the manufac-
turer's operating instructions and safety
precautions.530de034
Child-safety locksSlide the safety lever on the rear doors
downward:
The door can now be opened from the
outside only. 530de226
Page 62 of 185
62n
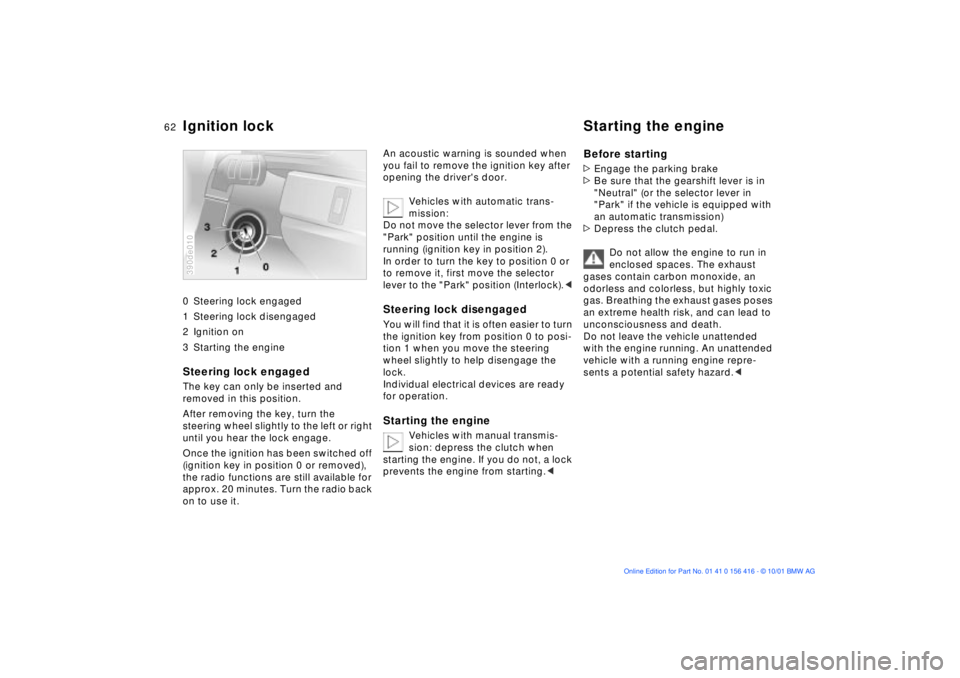
0 Steering lock engaged
1 Steering lock disengaged
2 Ignition on
3 Starting the engine
Steering lock engaged The key can only be inserted and
removed in this position.
After removing the key, turn the
steering wheel slightly to the left or right
until you hear the lock engage.
Once the ignition has been switched off
(ignition key in position 0 or removed),
the radio functions are still available for
approx. 20 minutes. Turn the radio back
on to use it.390de010
An acoustic warning is sounded when
you fail to remove the ignition key after
opening the driver's door.
Vehicles with automatic trans-
mission:
Do not move the selector lever from the
"Park" position until the engine is
running (ignition key in position 2).
In order to turn the key to position 0 or
to remove it, first move the selector
lever to the "Park" position (Interlock).< Steering lock disengaged You will find that it is often easier to turn
the ignition key from position 0 to posi-
tion 1 when you move the steering
wheel slightly to help disengage the
lock.
Individual electrical devices are ready
for operation. Starting the engine
Vehicles with manual transmis-
sion: depress the clutch when
starting the engine. If you do not, a lock
prevents the engine from starting.<
Before starting >Engage the parking brake
>Be sure that the gearshift lever is in
"Neutral" (or the selector lever in
"Park" if the vehicle is equipped with
an automatic transmission)
>Depress the clutch pedal.
Do not allow the engine to run in
enclosed spaces. The exhaust
gases contain carbon monoxide, an
odorless and colorless, but highly toxic
gas. Breathing the exhaust gases poses
an extreme health risk, and can lead to
unconsciousness and death.
Do not leave the vehicle unattended
with the engine running. An unattended
vehicle with a running engine repre-
sents a potential safety hazard.<
Ignition lock Starting the engine
Page 77 of 185
77n
OverviewControlsMaintenanceRepairsDataIndex
Check Control Graphic display
*
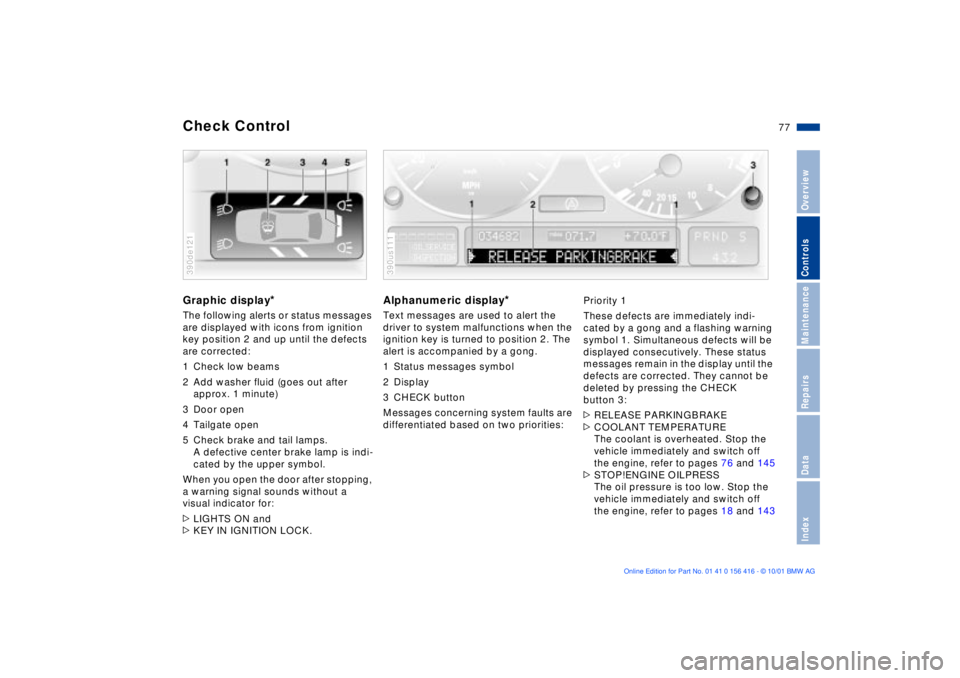
The following alerts or status messages
are displayed with icons from ignition
key position 2 and up until the defects
are corrected:
1 Check low beams
2 Add washer fluid (goes out after
approx. 1 minute)
3 Door open
4 Tailgate open
5 Check brake and tail lamps.
A defective center brake lamp is indi-
cated by the upper symbol.
When you open the door after stopping,
a warning signal sounds without a
visual indicator for:
>LIGHTS ON and
>KEY IN IGNITION LOCK. 390de121
Alphanumeric display
*
Text messages are used to alert the
driver to system malfunctions when the
ignition key is turned to position 2. The
alert is accompanied by a gong.
1 Status messages symbol
2 Display
3 CHECK button
Messages concerning system faults are
differentiated based on two priorities: 390us111
Priority 1
These defects are immediately indi-
cated by a gong and a flashing warning
symbol 1. Simultaneous defects will be
displayed consecutively. These status
messages remain in the display until the
defects are corrected. They cannot be
deleted by pressing the CHECK
button 3:
>RELEASE PARKINGBRAKE
>COOLANT TEMPERATURE
The coolant is overheated. Stop the
vehicle immediately and switch off
the engine, refer to pages 76 and 145
>STOP!ENGINE OILPRESS
The oil pressure is too low. Stop the
vehicle immediately and switch off
the engine, refer to pages 18 and 143
Page 79 of 185
79n
OverviewControlsMaintenanceRepairsDataIndex
Check Control >CHECK LOWBEAM LIGHTS
CHECK SIDE LIGHTS
CHECK REAR LIGHTS
CHECK FRONT FOGLAMPS
CHECK LICPLATE LIGHT
CHECK HIGHBEAM LIGHT
CHECK BACK UP LIGHTS
Defective bulb or circuit, refer to
page 153 or consult a BMW Sports
Activity Vehicle center
>TRANS. FAILSAFE PROG
Please consult the nearest
BMW Sports Activity Vehicle center,
refer to page 68
>CHECK BRAKE LININGS
Have the brake pads inspected by
your BMW Sports Activity Vehicle
center, refer to page 135
>CHECK COOLANT LEVEL
Coolant too low, top off at the next
opportunity, refer to page 145
>ENGINE FAILSAFE PROG
There is a fault in the engine's elec-
tronic control system.
You can continue to drive with
reduced engine output or engine
speed. Have the system checked by
your BMW Sports Activity Vehicle
center.
Displays after completion of trip All of the malfunctions registered during
the trip appear consecutively when the
ignition key is turned to position 0.
The following displays will appear when
appropriate:
>LIGHTS ON
>KEY IN IGNITION LOCK
>CHECK ENGINE OIL LEV
Add engine oil at the next opportunity
(next stop to refuel), refer to
page 143.
This display appears when you open
the driver's door after parking the
vehicle. A supplementary gong is also
heard.
Status messages remain available for a
period of approx. three minutes after
the display goes out and the key is
removed from the ignition lock. Press
the CHECK button 3. If there were
multiple messages, press the CHECK
button repeatedly to view them all in
sequence.
To check the Check Control Press the CHECK button 3 with the
ignition key in position 2:
CHECK CONTROL OK appears in the
display.
No malfunctions are present in the
monitored systems.Computer You can find a description of the
computer on pages 80 and 86 as well
as in the Owner's Manual for the
Onboard Computer.
You can have the Check Control
and computer messages
displayed in a different language.<
Page 113 of 185
113n
OverviewControlsMaintenanceRepairsDataIndex
The concept The BMW Universal Transmitter
replaces up to three hand-held trans-
mitters of different devices such as
garage door openers, alarm systems, or
door locking systems. The BMW
Universal Transmitter recognizes and
"learns" the transmitted signal of each
of the original hand-held transmitters.
The signal of an original hand-held
transmitter can be programmed on one
of the three channel keys. Following
that, each of the devices can be actu-ated with the appropriately-programmed
channel key. The indicator lamp flashes
to confirm transmission of the signal.
If the vehicle is sold, the memory of the
channel keys should be cleared as
described on page 115.
During programming and before
every remote actuation of a
programmed device by the BMW
Universal Transmitter, check to be sure
that there are no persons, animals or
objects within the actuation range of
the device in order to prevent possible
injuries or damage. Also, comply with
the safety precautions of the original
hand-held transmitter.<
To Canadian residents:
During programming, your hand-
held transmitter may automatically stop
transmitting after two seconds. This
may not be long enough to program the
BMW Universal Transmitter. If you are
programming from one of these hand-
held transmitters, the Universal Trans-
mitter's light may begin to flash in a
series of double-blinks. If this occurs,
continue to hold the button of the
Universal Transmitter while you reacti-
vate your hand-held transmitter. You
may have to repeat this function several
times while programming.<
Before programming, read the
"User information" section on
page 115.<
Original hand-held transmitter
If this symbol is present on the
packaging or in the instructions
of the original hand-held trans-
mitter, it may be assumed that this
hand-held transmitter is compatible
with the BMW Universal Transmitter.
Checking for the conversion code To determine whether the original
hand-held transmitter is provided with
a conversion-code system, you may
either read the instructions for the orig-
inal hand-held transmitter or program a
channel key as described on the next
page (left-hand column under
"Programming").
Then press and hold the programmed
channel key of the BMW Universal
Transmitter. If the indicator lamp of the
BMW Universal Transmitter flashes for
two seconds and then comes on
steadily, the original hand-held trans-
mitter is provided with a conversion-
code system. With a conversion-code
system, program the channel keys as
described on the next page (right-hand
column under "Programming a hand-
held transmitter with conversion code").
If you have additional questions,
please consult your BMW Sports
Activity Vehicle center or call
1-800-355-3515.
You can also visit this website:
www.bmwusa.com.<
BMW Universal Transmitter
Page 116 of 185
116n
Glove compartment Storage compartments To open Pull the handle. The lamp inside the
glove compartment comes on.To closeFold the cover up.
To prevent injury in the event of an
accident, close the glove
compartment immediately after use.< 530de275
To lock Use one of the master keys. A master
key is also required for unlocking.
If you turn over only your door and
ignition key for valet parking (refer
to page 30), for example, access to the
glove compartment is not possible.< Rechargeable flashlight
*
Located on the left-hand side of the
glove compartment.
Features integral overload-protection,
so it can be left in its holder continu-
ously.
To avoid completely discharging
and possibly damaging the lamp,
always ensure that it is switched off
before inserting it in the socket.<
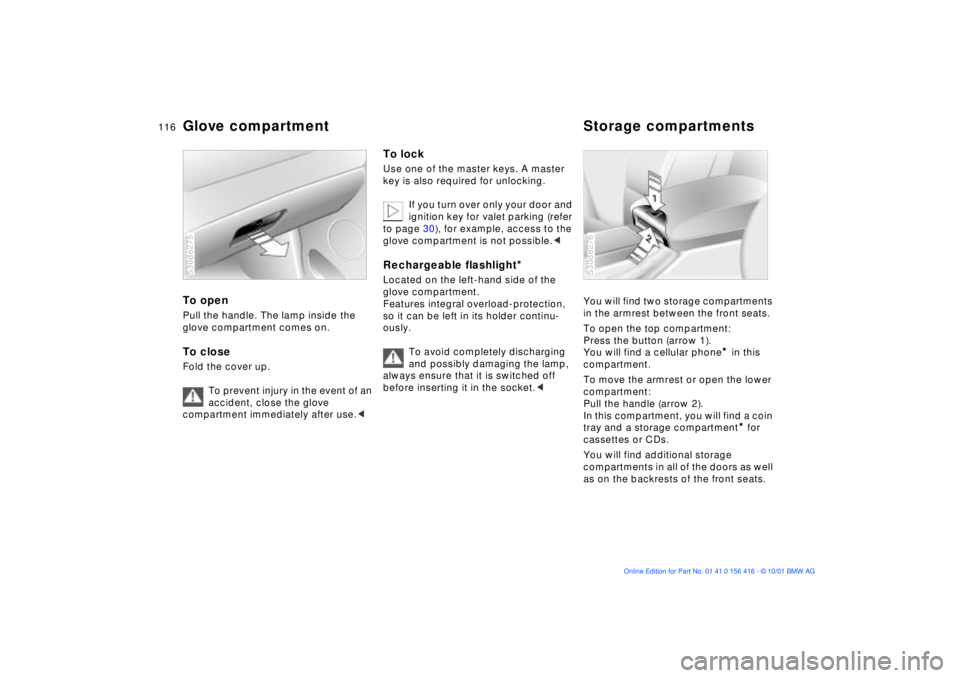
You will find two storage compartments
in the armrest between the front seats.
To open the top compartment:
Press the button (arrow 1).
You will find a cellular phone
* in this
compartment.
To move the armrest or open the lower
compartment:
Pull the handle (arrow 2).
In this compartment, you will find a coin
tray and a storage compartment* for
cassettes or CDs.
You will find additional storage
compartments in all of the doors as well
as on the backrests of the front seats.
530de276
Page 177 of 185
Everything from A to Z
177n
OverviewControlsMaintenanceRepairsDataIndex
Check Control77
Check tire pressures26t
Checking
engine oil level144
Child's seat58
Child-restraint systems58
Child-safety locks60
Cigarette lighter
front118
rear119
socket119t
Clean the windshield70
Climate control in the rear
passenger area110
Clock83
refer also to the Owner's
Manual for the Onboard
Computer
Cockpit14
Code89
activating89
deactivating89
selecting89
Comfort seat46
Compartments116
Computer80, 82, 86
refer also to the Owner's
Manual for the Onboard
Computer
remote control90Configuring individual
settings via Vehicle and
Key Memory61
Consumption, fuel88
Convenience operation of
windows and sliding/tilt
sunroof31
Convenience starting
feature63
Coolant145
temperature gauge76
Copyright notice4
Correct sitting posture44
seat adjustment44
Cruise control71
Cruising range80, 88
Cup holder117
Curb weight172
DData link connector for On-
board Diagnostics149
Date
calling up83
changing83
refer also to the Owner's
Manual for the Onboard
Computer
Daytime driving lamp100
DBC (Dynamic Brake
Control)20, 93Deactivating the interior
motion
sensor33t, 40t
Deep water133
Defrosting the
windows105t, 108t
Digital clock83
refer also to the Owner's
Manual for the Onboard
Computer
Dimensions171
Dipstick, engine oil144t
Disc brakes135
Displacement170
Display lighting101
Displays15, 17
Disposal
used batteries162
used oil144t
Distance from
destination87
Distance warning91
Divided rear backrest122
Door keys30
Doors
manual operation31
remote control33
unlocking and locking31
DOT Quality Grades137
Drink holder, refer to
beverage holder117
Driving notes134Driving through water133
Driving your BMW X5133
DSC (Dynamic Stability
Control)20, 92
Dynamic Brake Control
(DBC)20, 93
Dynamic Stability Control
(DSC)20, 92
EElectric power seat46
Electric power windows40
Electrical malfunction
liftgate36t
sliding/tilt sunroof43t
tailgate38t
Elements of operation14
Emergency operation
doors31t
liftgate36t
sliding/tilt sunroof43t
tailgate38t
Energy Control75
Engine
output170
power rating170
specifications170
Engine compartment
essentials142
Engine coolant145
Page 178 of 185
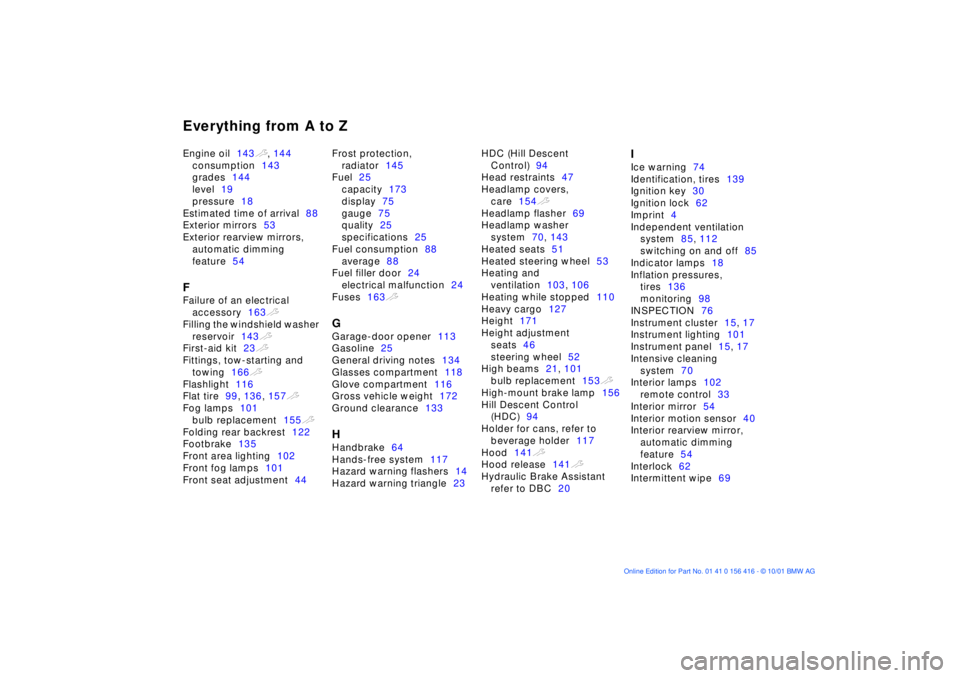
Everything from A to ZEngine oil143t, 144
consumption143
grades144
level19
pressure18
Estimated time of arrival88
Exterior mirrors53
Exterior rearview mirrors,
automatic dimming
feature54FFailure of an electrical
accessory163t
Filling the windshield washer
reservoir143t
First-aid kit23t
Fittings, tow-starting and
towing166t
Flashlight116
Flat tire99, 136, 157t
Fog lamps101
bulb replacement155t
Folding rear backrest122
Footbrake135
Front area lighting102
Front fog lamps101
Front seat adjustment44Frost protection,
radiator145
Fuel25
capacity173
display75
gauge75
quality25
specifications25
Fuel consumption88
average88
Fuel filler door24
electrical malfunction24
Fuses163t
GGarage-door opener113
Gasoline25
General driving notes134
Glasses compartment118
Glove compartment116
Gross vehicle weight172
Ground clearance133HHandbrake64
Hands-free system117
Hazard warning flashers14
Hazard warning triangle23HDC (Hill Descent
Control)94
Head restraints47
Headlamp covers,
care154t
Headlamp flasher69
Headlamp washer
system70, 143
Heated seats51
Heated steering wheel53
Heating and
ventilation103, 106
Heating while stopped110
Heavy cargo127
Height171
Height adjustment
seats46
steering wheel52
High beams21, 101
bulb replacement153t
High-mount brake lamp156
Hill Descent Control
(HDC)94
Holder for cans, refer to
beverage holder117
Hood141t
Hood release141t
Hydraulic Brake Assistant
refer to DBC20
IIce warning74
Identification, tires139
Ignition key30
Ignition lock62
Imprint4
Independent ventilation
system85, 112
switching on and off85
Indicator lamps18
Inflation pressures,
tires136
monitoring98
INSPECTION76
Instrument cluster15, 17
Instrument lighting101
Instrument panel15, 17
Intensive cleaning
system70
Interior lamps102
remote control33
Interior mirror54
Interior motion sensor40
Interior rearview mirror,
automatic dimming
feature54
Interlock62
Intermittent wipe69
Page 179 of 185
Everything from A to Z
179n
OverviewControlsMaintenanceRepairsDataIndex
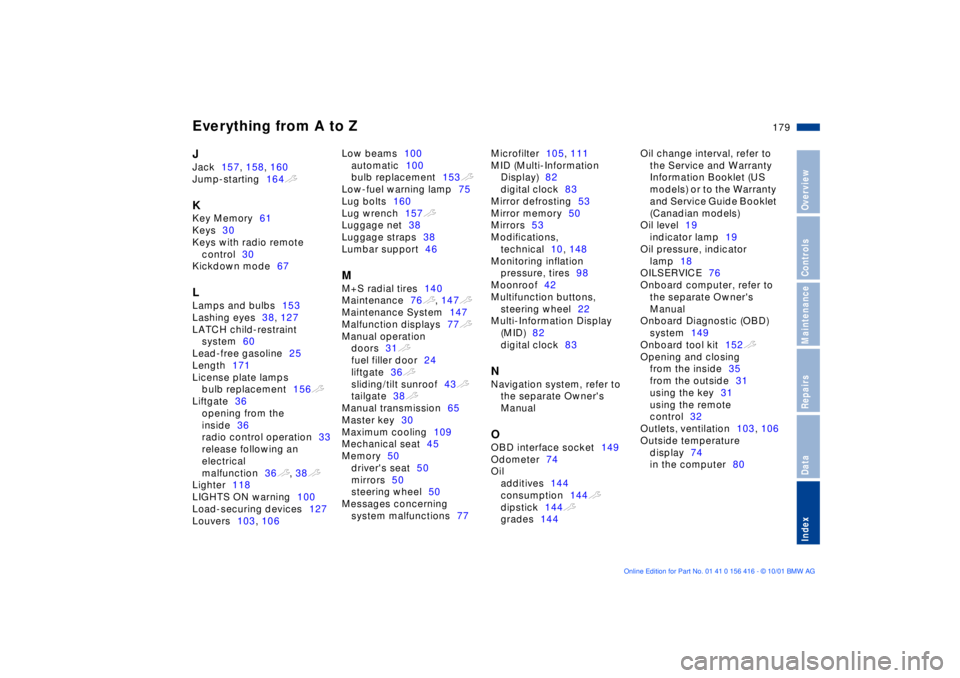
JJack157, 158, 160
Jump-starting164tKKey Memory61
Keys30
Keys with radio remote
control30
Kickdown mode67LLamps and bulbs153
Lashing eyes38, 127
LATCH child-restraint
system60
Lead-free gasoline25
Length171
License plate lamps
bulb replacement156t
Liftgate36
opening from the
inside36
radio control operation33
release following an
electrical
malfunction36t, 38t
Lighter118
LIGHTS ON warning100
Load-securing devices127
Louvers103, 106Low beams100
automatic100
bulb replacement153t
Low-fuel warning lamp75
Lug bolts160
Lug wrench157t
Luggage net38
Luggage straps38
Lumbar support46
MM+S radial tires140
Maintenance76t, 147t
Maintenance System147
Malfunction displays77t
Manual operation
doors31t
fuel filler door24
liftgate36t
sliding/tilt sunroof43t
tailgate38t
Manual transmission65
Master key30
Maximum cooling109
Mechanical seat45
Memory50
driver's seat50
mirrors50
steering wheel50
Messages concerning
system malfunctions77Microfilter105, 111
MID (Multi-Information
Display)82
digital clock83
Mirror defrosting53
Mirror memory50
Mirrors53
Modifications,
technical10, 148
Monitoring inflation
pressure, tires98
Moonroof42
Multifunction buttons,
steering wheel22
Multi-Information Display
(MID)82
digital clock83
NNavigation system, refer to
the separate Owner's
ManualOOBD interface socket149
Odometer74
Oil
additives144
consumption144t
dipstick144t
grades144Oil change interval, refer to
the Service and Warranty
Information Booklet (US
models) or to the Warranty
and Service Guide Booklet
(Canadian models)
Oil level19
indicator lamp19
Oil pressure, indicator
lamp18
OILSERVICE76
Onboard computer, refer to
the separate Owner's
Manual
Onboard Diagnostic (OBD)
system149
Onboard tool kit152t
Opening and closing
from the inside35
from the outside31
using the key31
using the remote
control32
Outlets, ventilation103, 106
Outside temperature
display74
in the computer80