sound BMW X5 3.0I 2003 Owners Manual
[x] Cancel search | Manufacturer: BMW, Model Year: 2003, Model line: X5 3.0I, Model: BMW X5 3.0I 2003Pages: 183, PDF Size: 2.31 MB
Page 19 of 183
19n
OverviewControlsMaintenanceRepairsDataIndex
Indicator and warning lamps
Technology that monitors itself
Indicator and warning lamps that are
identified by
l
are tested for proper
functioning whenever the ignition key is
turned. They each light up once for
different periods of time.
If a fault should occur in one of these
systems, the corresponding lamp does
not go out after the engine is started or
it lights up while the vehicle is moving.
You will see how to react to this in the
following section.
Red: stop immediately
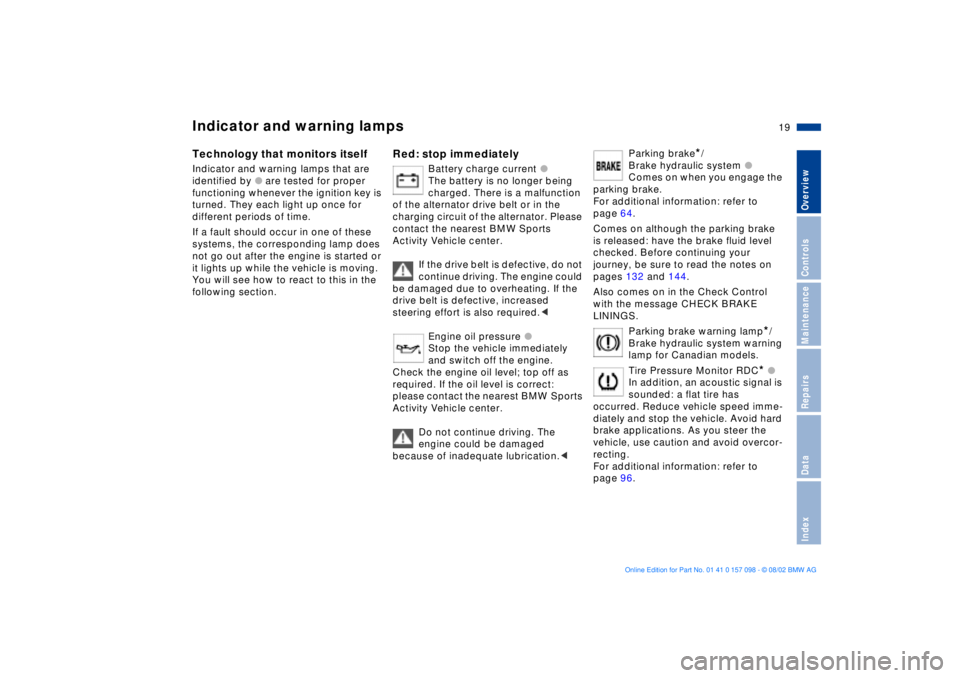
Battery charge current
l
The battery is no longer being
charged. There is a malfunction
of the alternator drive belt or in the
charging circuit of the alternator. Please
contact the nearest BMW Sports
Activity Vehicle center.
If the drive belt is defective, do not
continue driving. The engine could
be damaged due to overheating. If the
drive belt is defective, increased
steering effort is also required.
<
Engine oil pressure
l
Stop the vehicle immediately
and switch off the engine.
Check the engine oil level; top off as
required. If the oil level is correct:
please contact the nearest BMW Sports
Activity Vehicle center.
Do not continue driving. The
engine could be damaged
because of inadequate lubrication.
<
Parking brake
*
/
Brake hydraulic system
l
Comes on when you engage the
parking brake.
For additional information: refer to
page 64.
Comes on although the parking brake
is released: have the brake fluid level
checked. Before continuing your
journey, be sure to read the notes on
pages 132 and 144.
Also comes on in the Check Control
with the message CHECK BRAKE
LININGS.
Parking brake warning lamp
*
/
Brake hydraulic system warning
lamp for Canadian models.
Tire Pressure Monitor RDC
*
l
In addition, an acoustic signal is
sounded: a flat tire has
occurred. Reduce vehicle speed imme-
diately and stop the vehicle. Avoid hard
brake applications. As you steer the
vehicle, use caution and avoid overcor-
recting.
For additional information: refer to
page 96.
Page 39 of 183
39n
OverviewControlsMaintenanceRepairsDataIndex
Alarm system The concept The vehicle alarm system responds:
>When a door, the hood, or the liftgate
is opened
>To movement inside the vehicle Ð
interior motion sensor
>To variations in the vehicle tilt angle
such as occur during attempts to
steal the wheels or tow the vehicle
>To interruption of battery voltage.
The system responds to unauthorized
vehicle entry and attempted theft by
simultaneously activating the following:
>Sounding an acoustical alarm for
30 seconds
>The hazard warning flashers are acti-
vated for approx. five minutes
>The high beams flash on and off in
the same rhythm.
To arm and disarm the alarm
system When the vehicle is locked or unlocked
with the key or the remote control, the
alarm system is also simultaneously
armed or disarmed.
You can have different acknowl-
edgment signals set to confirm
system arming and disarming.<
You can still open the liftgate after the
system has been armed by pressing the
button of the remote control, refer to
page 32. When you close the liftgate, it
is secured again.
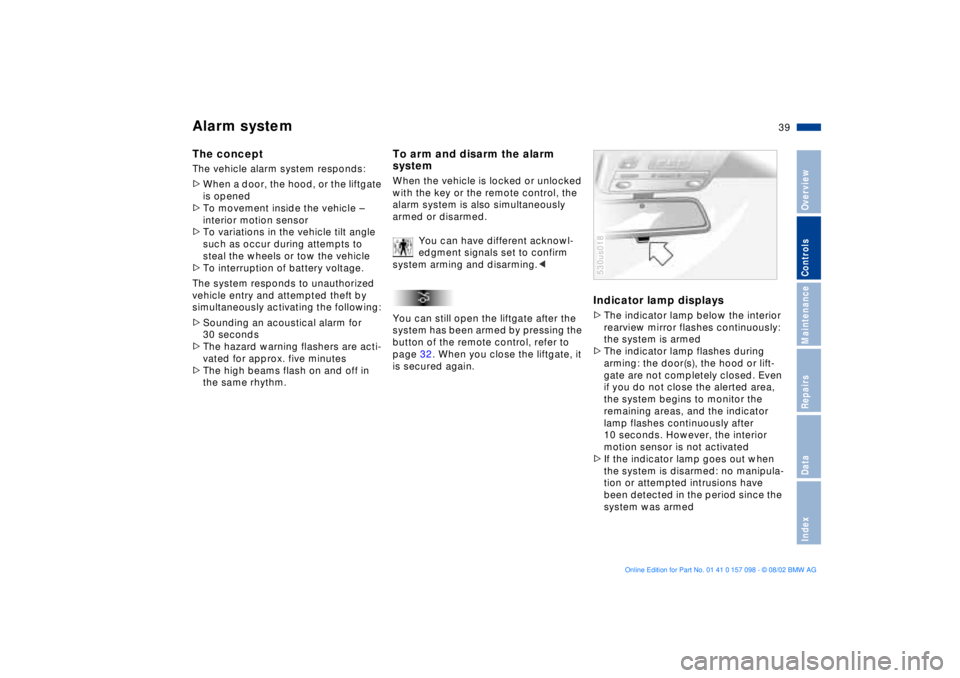
Indicator lamp displays>The indicator lamp below the interior
rearview mirror flashes continuously:
the system is armed
>The indicator lamp flashes during
arming: the door(s), the hood or lift-
gate are not completely closed. Even
if you do not close the alerted area,
the system begins to monitor the
remaining areas, and the indicator
lamp flashes continuously after
10 seconds. However, the interior
motion sensor is not activated
>If the indicator lamp goes out when
the system is disarmed: no manipula-
tion or attempted intrusions have
been detected in the period since the
system was armed530us018
Page 62 of 183
62n
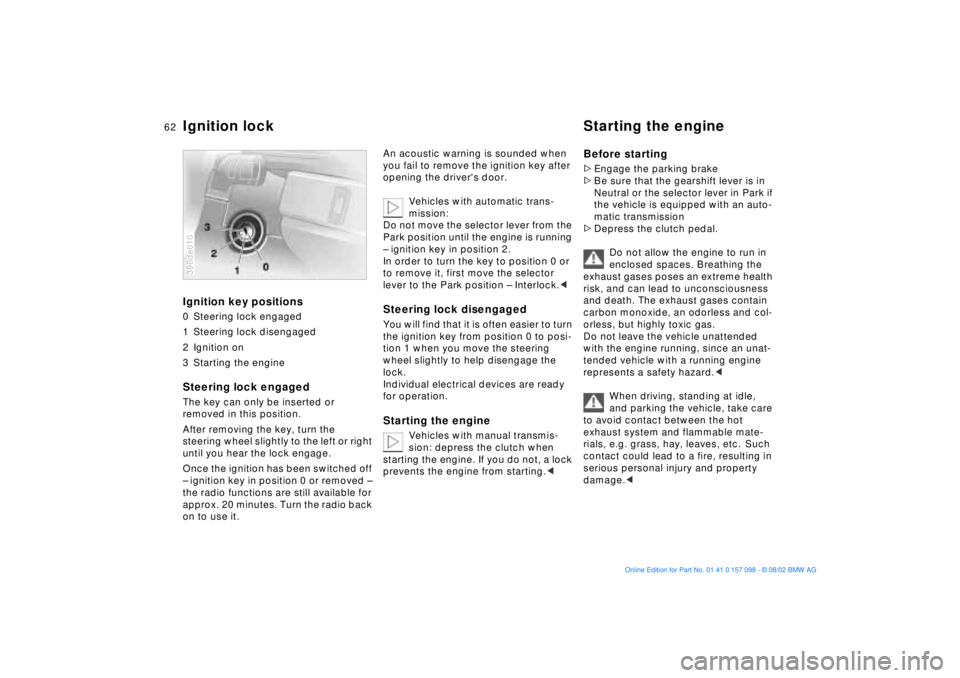
Ignition key positions0 Steering lock engaged
1 Steering lock disengaged
2 Ignition on
3 Starting the engineSteering lock engaged The key can only be inserted or
removed in this position.
After removing the key, turn the
steering wheel slightly to the left or right
until you hear the lock engage.
Once the ignition has been switched off
Ð ignition key in position 0 or removed Ð
the radio functions are still available for
approx. 20 minutes. Turn the radio back
on to use it.390de010
An acoustic warning is sounded when
you fail to remove the ignition key after
opening the driver's door.
Vehicles with automatic trans-
mission:
Do not move the selector lever from the
Park position until the engine is running
Ð ignition key in position 2.
In order to turn the key to position 0 or
to remove it, first move the selector
lever to the Park position Ð Interlock.< Steering lock disengaged You will find that it is often easier to turn
the ignition key from position 0 to posi-
tion 1 when you move the steering
wheel slightly to help disengage the
lock.
Individual electrical devices are ready
for operation. Starting the engine
Vehicles with manual transmis-
sion: depress the clutch when
starting the engine. If you do not, a lock
prevents the engine from starting.<
Before starting >Engage the parking brake
>Be sure that the gearshift lever is in
Neutral or the selector lever in Park if
the vehicle is equipped with an auto-
matic transmission
>Depress the clutch pedal.
Do not allow the engine to run in
enclosed spaces. Breathing the
exhaust gases poses an extreme health
risk, and can lead to unconsciousness
and death. The exhaust gases contain
carbon monoxide, an odorless and col-
orless, but highly toxic gas.
Do not leave the vehicle unattended
with the engine running, since an unat-
tended vehicle with a running engine
represents a safety hazard.<
When driving, standing at idle,
and parking the vehicle, take care
to avoid contact between the hot
exhaust system and flammable mate-
rials, e.g. grass, hay, leaves, etc. Such
contact could lead to a fire, resulting in
serious personal injury and property
damage.<
Ignition lock Starting the engine
Page 68 of 183
68n
Indicator/Headlamp ßasher
Washer/Wiper system/Rain sensor
*
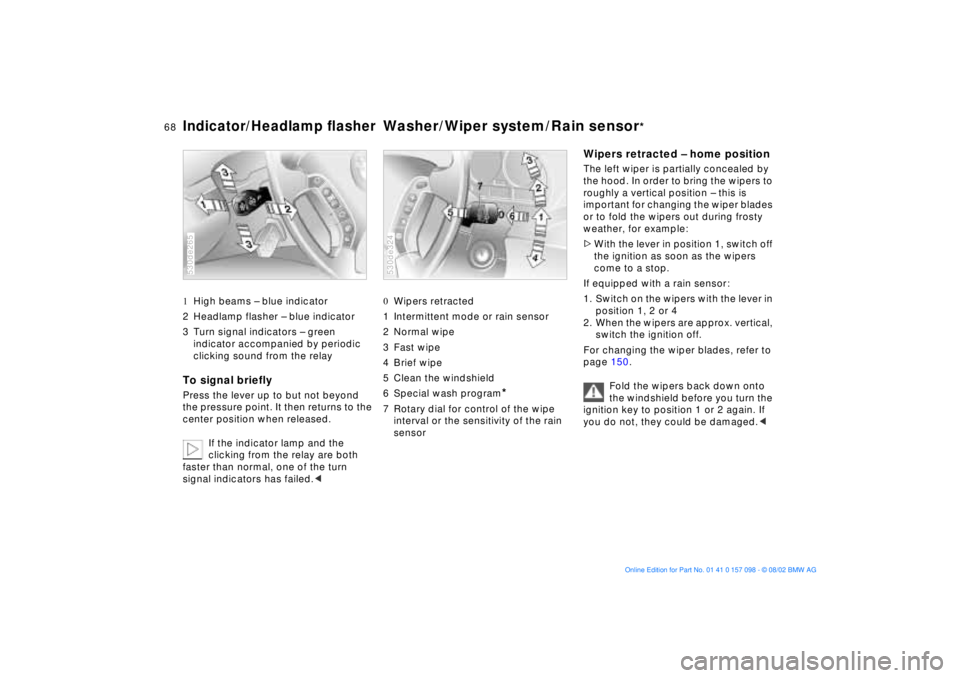
1High beams Ð blue indicator
2 Headlamp flasher Ð blue indicator
3 Turn signal indicators Ð green
indicator accompanied by periodic
clicking sound from the relayTo signal brieflyPress the lever up to but not beyond
the pressure point. It then returns to the
center position when released.
If the indicator lamp and the
clicking from the relay are both
faster than normal, one of the turn
signal indicators has failed.< 530de265
0Wipers retracted
1 Intermittent mode or rain sensor
2 Normal wipe
3 Fast wipe
4 Brief wipe
5 Clean the windshield
6 Special wash program
*
7 Rotary dial for control of the wipe
interval or the sensitivity of the rain
sensor
530de324
Wipers retracted Ð home positionThe left wiper is partially concealed by
the hood. In order to bring the wipers to
roughly a vertical position Ð this is
important for changing the wiper blades
or to fold the wipers out during frosty
weather, for example:
>With the lever in position 1, switch off
the ignition as soon as the wipers
come to a stop.
If equipped with a rain sensor:
1. Switch on the wipers with the lever in
position 1, 2 or 4
2. When the wipers are approx. vertical,
switch the ignition off.
For changing the wiper blades, refer to
page 150.
Fold the wipers back down onto
the windshield before you turn the
ignition key to position 1 or 2 again. If
you do not, they could be damaged.<
Page 73 of 183
73n
OverviewControlsMaintenanceRepairsDataIndex
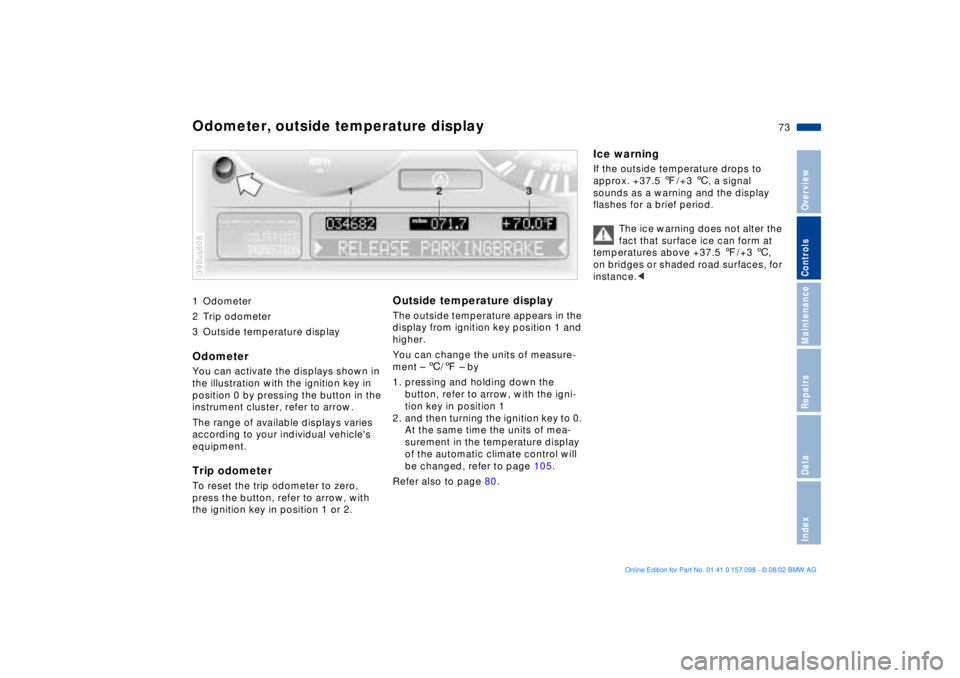
1 Odometer
2 Trip odometer
3 Outside temperature displayOdometerYou can activate the displays shown in
the illustration with the ignition key in
position 0 by pressing the button in the
instrument cluster, refer to arrow.
The range of available displays varies
according to your individual vehicle's
equipment.Trip odometer To reset the trip odometer to zero,
press the button, refer to arrow, with
the ignition key in position 1 or 2. 390us608
Outside temperature display The outside temperature appears in the
display from ignition key position 1 and
higher.
You can change the units of measure-
ment Ð 6/7 Ð by
1. pressing and holding down the
button, refer to arrow, with the igni-
tion key in position 1
2. and then turning the ignition key to 0.
At the same time the units of mea-
surement in the temperature display
of the automatic climate control will
be changed, refer to page 105.
Refer also to page 80.
Ice warning If the outside temperature drops to
approx. +37.5 7/+3 6, a signal
sounds as a warning and the display
flashes for a brief period.
The ice warning does not alter the
fact that surface ice can form at
temperatures above +37.5 7/+3 6,
on bridges or shaded road surfaces, for
instance.<
Odometer, outside temperature display
Page 77 of 183
77n
OverviewControlsMaintenanceRepairsDataIndex
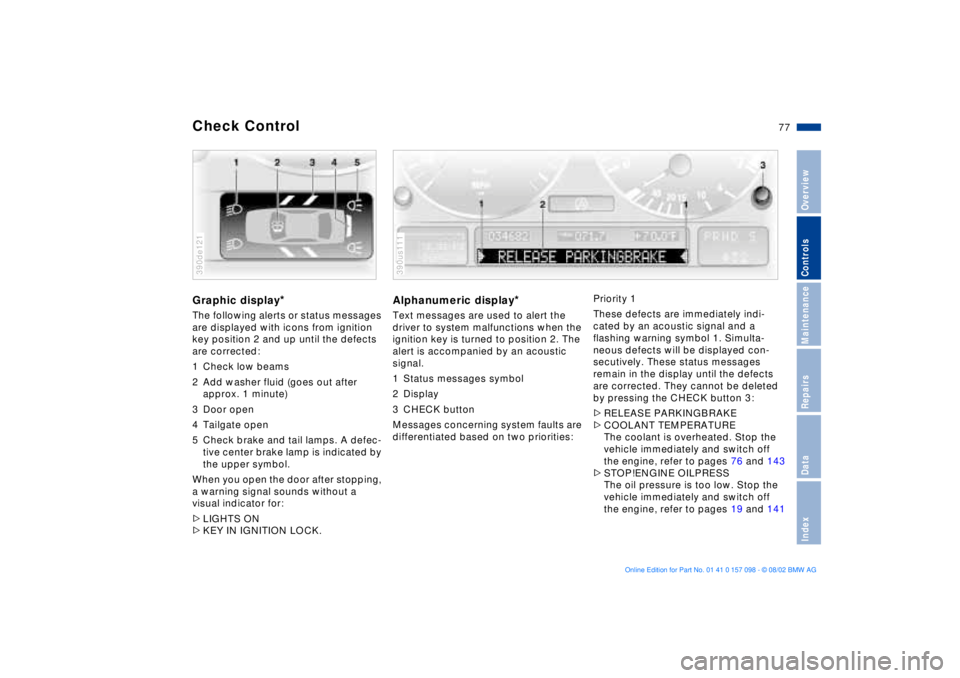
Check Control Graphic display
*
The following alerts or status messages
are displayed with icons from ignition
key position 2 and up until the defects
are corrected:
1 Check low beams
2 Add washer fluid (goes out after
approx. 1 minute)
3 Door open
4 Tailgate open
5 Check brake and tail lamps. A defec-
tive center brake lamp is indicated by
the upper symbol.
When you open the door after stopping,
a warning signal sounds without a
visual indicator for:
>LIGHTS ON
>KEY IN IGNITION LOCK. 390de121
Alphanumeric display
*
Text messages are used to alert the
driver to system malfunctions when the
ignition key is turned to position 2. The
alert is accompanied by an acoustic
signal.
1 Status messages symbol
2 Display
3 CHECK button
Messages concerning system faults are
differentiated based on two priorities: 390us111
Priority 1
These defects are immediately indi-
cated by an acoustic signal and a
flashing warning symbol 1. Simulta-
neous defects will be displayed con-
secutively. These status messages
remain in the display until the defects
are corrected. They cannot be deleted
by pressing the CHECK button 3:
>RELEASE PARKINGBRAKE
>COOLANT TEMPERATURE
The coolant is overheated. Stop the
vehicle immediately and switch off
the engine, refer to pages 76 and 143
>STOP!ENGINE OILPRESS
The oil pressure is too low. Stop the
vehicle immediately and switch off
the engine, refer to pages 19 and 141
Page 78 of 183

78n
Check Control>CHECK BRAKE FLUID
Indicates that brake fluid is down to
approximately the minimum level.
Top off the brake fluid at the next
opportunity, refer to page 144. Have
the cause of the brake fluid loss diag-
nosed and corrected by your BMW
Sports Activity Vehicle center
>TIRE LOW/FLAT
*
Reduce vehicle speed immediately
and stop the vehicle. Avoid hard
brake applications. Do not oversteer,
refer to page 98
>SELFLEVEL SUSP.INACT
*
Please consult the nearest
BMW Sports Activity Vehicle center
>SELFLEVEL SUSP.INACT
*
max. 35 mph/max. 60 km/h
*
These displays appear consecutively.
Do not exceed a maximum speed of
35 mph/60 km/h.
Please consult the nearest BMW
Sports Activity Vehicle center
>LIMIT
*
You will see this message if the pro-
grammed speed limit has been
exceeded, refer to page 85.Priority 2
These displays appear for 20 seconds
when the ignition key is turned to posi-
tion 2. The warning symbols remain
after the message disappears. You can
call up the messages again for display
by pressing the CHECK button.
>TRUNKLID OPEN
This message appears only at the
start of a trip
>DOOR OPEN
This message appears after a min-
imal defined road speed has been
exceeded
>FASTEN SEAT BELTS
*
In addition to this message, an indi-
cator lamp with the safety belt icon
appears and an acoustical signal is
sounded
>WASHER FLUID LOW
The fluid level is too low; top off at
the next opportunity, refer to
page 141
>CHECK ENGINE OIL LEV
The oil level is at the absolute min-
imum; refill as soon as possible, refer
to page 141. Do not drive more than
approx. 30 miles/50 km until you add
oil >CHECK FILLER CAP
Check to see whether the fuel filler
cap has been closed properly, refer
to page 25
>OUTSIDE TEMP. +23 7/Ð5 6
This display is only an example. The
current temperature is displayed at
outside temperatures of +37.5 7/
+3 6 and below, refer also to
page 73
>TIRE PRESSURE SET
*
The RDC has imported the current
inflation pressure in the tires as the
target values which the system will
monitor, refer to page 97
>CHECK TIRE PRESSURE
*
Check and correct the tire inflation
pressure to specifications at the ear-
liest opportunity, e.g. next stop to
refuel, refer to page 97
>TIRECONTROL INACTIVE
*
A temporary interference of the RDC
or a system fault, refer to page 98
>CHECK BRAKE LIGHTS
A lamp has failed or the electrical
circuit has a fault, refer to page 153
or consult a BMW Sports Activity
Vehicle center
Page 85 of 183
85n
OverviewControlsMaintenanceRepairsDataIndex
Computer
** * * in the MID
Only make entries when the
vehicle is stationary Ð to avoid
endangering yourself or other road
users.<
Computer calculations begin at the
start of the journey.
Information can also be called up in the
display by remote control, refer to
page 89.
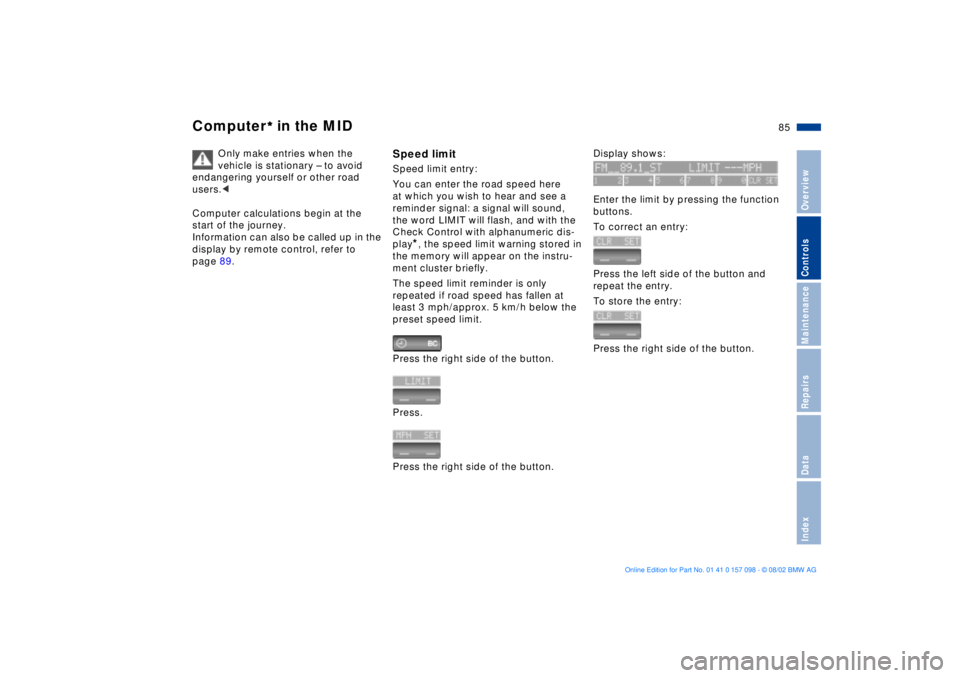
Speed limitSpeed limit entry:
You can enter the road speed here
at which you wish to hear and see a
reminder signal: a signal will sound,
the word LIMIT will flash, and with the
Check Control with alphanumeric dis-
play
*, the speed limit warning stored in
the memory will appear on the instru-
ment cluster briefly.
The speed limit reminder is only
repeated if road speed has fallen at
least 3 mph/approx. 5 km/h below the
preset speed limit.
Press the right side of the button.
Press.
Press the right side of the button.
Display shows:
Enter the limit by pressing the function
buttons.
To correct an entry:
Press the left side of the button and
repeat the entry.
To store the entry:
Press the right side of the button.
Page 89 of 183
89n
OverviewControlsMaintenanceRepairsDataIndex
Computer
** * * in the MID
After three incorrect code entries, or
three attempts to start the engine
without a code entry, the alarm will
sound for 30 seconds on vehicles fitted
with an alarm system.
Deactivating the alarm in an
emergency:
If you have forgotten the code, proceed
as follows:
1. Disconnect the battery, wait approx.
2 minutes, then reconnect it. Note
that on vehicles with an alarm
system, the alarm will sound
2. Set the ignition key to position 1:
The time display will count down for
the next ten minutes
3. After ten minutes, start the engine.
If the code becomes available
again in the meantime, it can be
entered during the waiting period after
pressing the CODE button.<
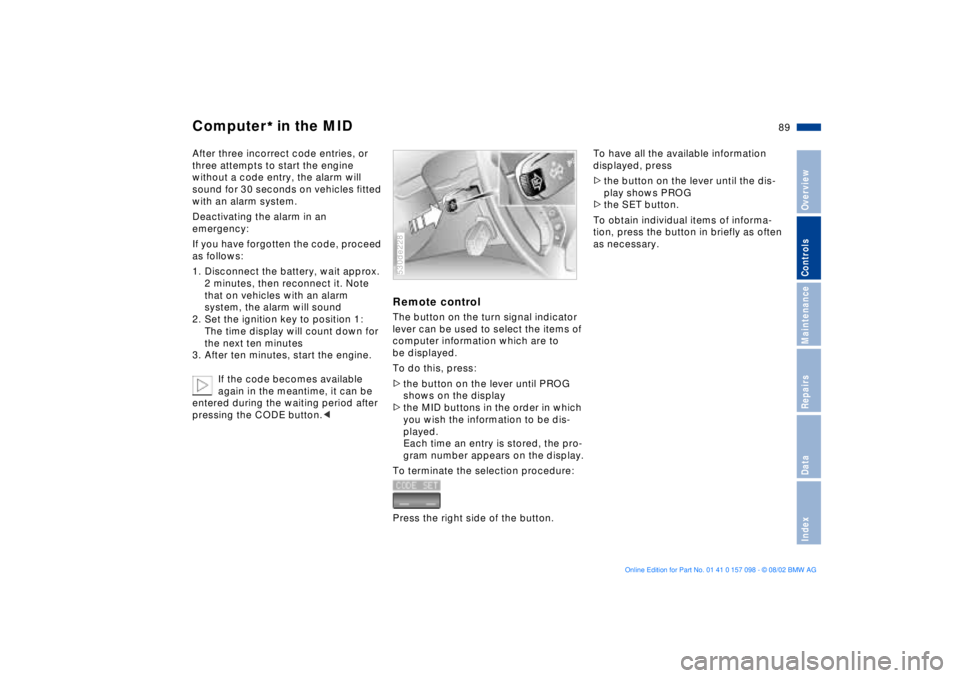
Remote control The button on the turn signal indicator
lever can be used to select the items of
computer information which are to
be displayed.
To do this, press:
>the button on the lever until PROG
shows on the display
>the MID buttons in the order in which
you wish the information to be dis-
played.
Each time an entry is stored, the pro-
gram number appears on the display.
To terminate the selection procedure:
Press the right side of the button.530de228
To have all the available information
displayed, press
>the button on the lever until the dis-
play shows PROG
>the SET button.
To obtain individual items of informa-
tion, press the button in briefly as often
as necessary.
Page 90 of 183
90n
The concept PDC provides extra safety and conve-
nience during parking maneuvers by pro-
viding an acoustic signal to indicate the
distance between your front and rear
bumpers and the nearest object. To do
this, four ultrasonic sensors in the front
and rear bumpers each measure the dis-
tance to the nearest object. The detection
range of the front sensors and the two
sensors located at the ends of the rear
bumper is approx. 2 ft/60 cm, while the
rear center sensors can detect objects to
a distance of approx. 5 ft/1.50 m.
PDC is a parking aid which regis-
ters objects when approaching
slowly, as is the case during usual
parking maneuvers. Avoid approaching
objects too fast, otherwise the system
may give warning of physical obstacles
too late.
select reverse or move the selector
lever into the R position with the igni-
tion key in position 2.
Wait for this brief period before
you start reversing.<
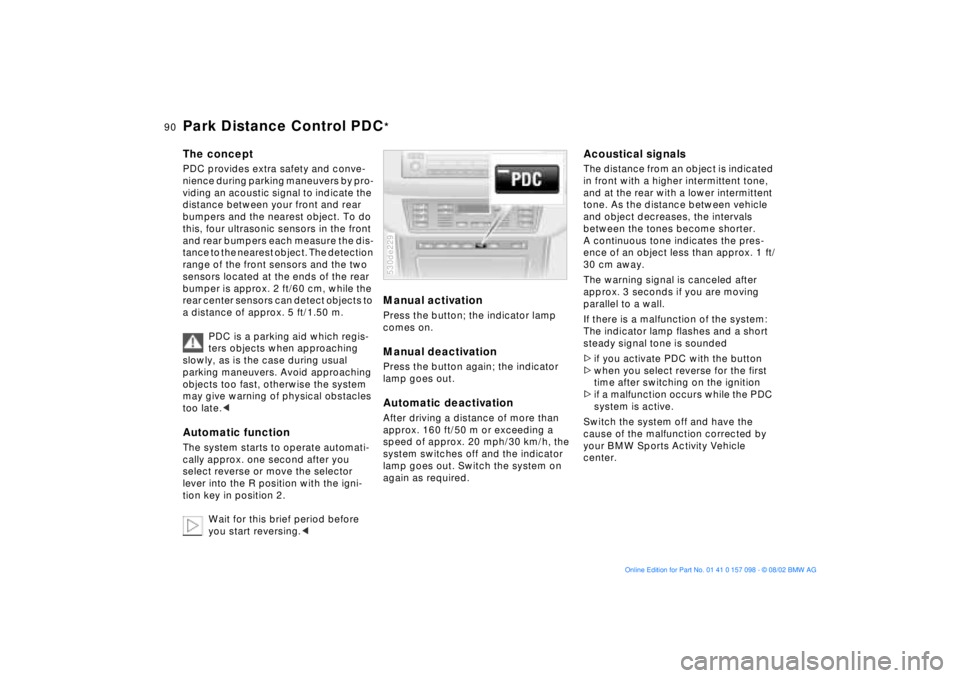
Manual activation Press the button; the indicator lamp
comes on. Manual deactivationPress the button again; the indicator
lamp goes out.Automatic deactivationAfter driving a distance of more than
approx. 160 ft/50 m or exceeding a
speed of approx. 20 mph/30 km/h, the
system switches off and the indicator
lamp goes out. Switch the system on
again as required. 530de229
Acoustical signals The distance from an object is indicated
in front with a higher intermittent tone,
and at the rear with a lower intermittent
tone. As the distance between vehicle
and object decreases, the intervals
between the tones become shorter.
A continuous tone indicates the pres-
ence of an object less than approx. 1 ft/
30 cm away.
The warning signal is canceled after
approx. 3 seconds if you are moving
parallel to a wall.
If there is a malfunction of the system:
The indicator lamp flashes and a short
steady signal tone is sounded
>if you activate PDC with the button
>when you select reverse for the first
time after switching on the ignition
>if a malfunction occurs while the PDC
system is active.
Switch the system off and have the
cause of the malfunction corrected by
your BMW Sports Activity Vehicle
center.
Park Distance Control PDC
*