buttons BMW X5 3.0I 2004 E53 User Guide
[x] Cancel search | Manufacturer: BMW, Model Year: 2004, Model line: X5 3.0I, Model: BMW X5 3.0I 2004 E53Pages: 200, PDF Size: 3.91 MB
Page 90 of 200
88n
Computer
* in MID
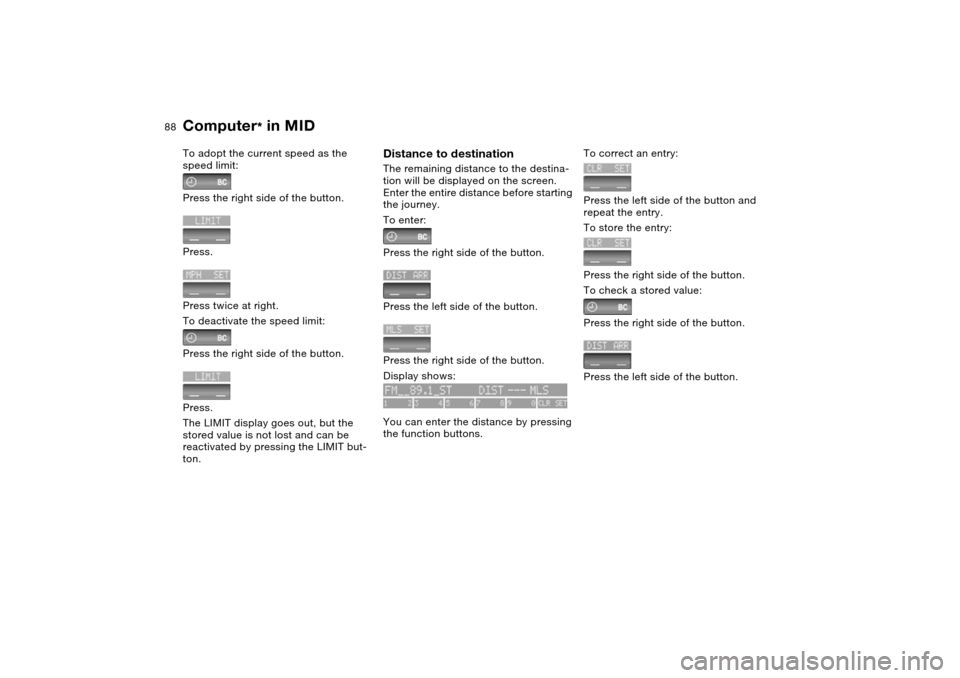
To adopt the current speed as the
speed limit:
Press the right side of the button.
Press.
Press twice at right.
To deactivate the speed limit:
Press the right side of the button.
Press.
The LIMIT display goes out, but the
stored value is not lost and can be
reactivated by pressing the LIMIT but-
ton.
Distance to destination The remaining distance to the destina-
tion will be displayed on the screen.
Enter the entire distance before starting
the journey.
To enter:
Press the right side of the button.
Press the left side of the button.
Press the right side of the button.
Display shows:
You can enter the distance by pressing
the function buttons.
To correct an entry:
Press the left side of the button and
repeat the entry.
To store the entry:
Press the right side of the button.
To check a stored value:
Press the right side of the button.
Press the left side of the button.
Page 93 of 200
91n
OverviewControlsMaintenanceRepairsDataIndex
Computer
* in MID
After three incorrect code entries, or
three attempts to start the engine with-
out a code entry, the alarm will sound
for 30 seconds on vehicles fitted with
an alarm system.
To deactivate the alarm in an emer-
gency:
If you have forgotten the code, proceed
as follows:
1. Disconnect the battery, wait approx.
2 minutes, then reconnect it. Note
that on vehicles with an alarm sys-
tem, the alarm will sound
2. Set the ignition key to position 1: the
time display will count down for the
next ten minutes
3. After ten minutes, start the engine.
If the code becomes available
again in the meantime, it can be
entered during the waiting period after
pressing the CODE button.<
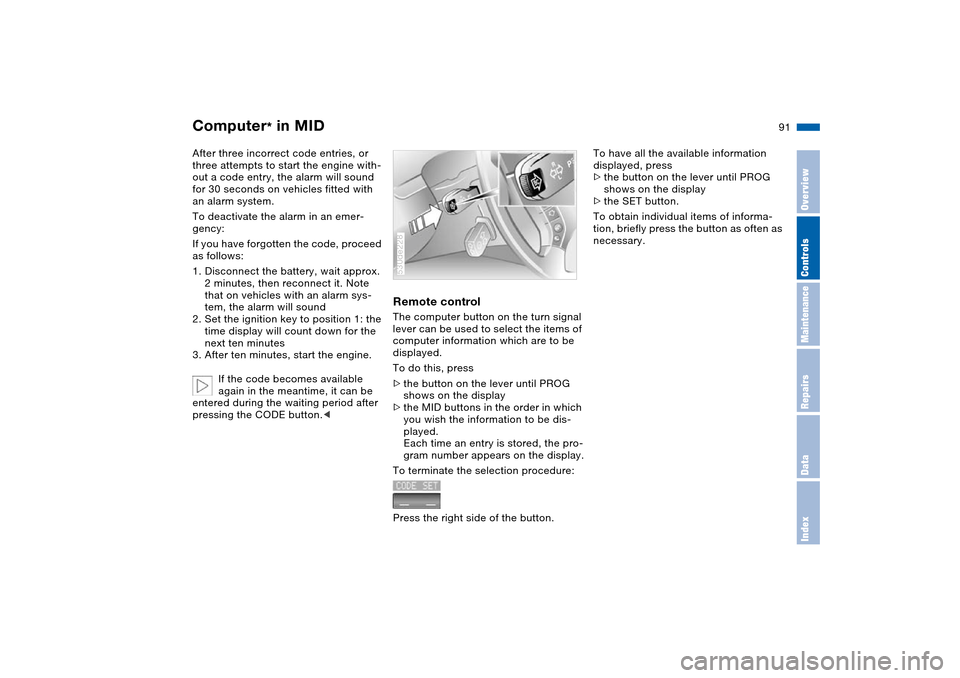
Remote controlThe computer button on the turn signal
lever can be used to select the items of
computer information which are to be
displayed.
To do this, press
>the button on the lever until PROG
shows on the display
>the MID buttons in the order in which
you wish the information to be dis-
played.
Each time an entry is stored, the pro-
gram number appears on the display.
To terminate the selection procedure:
Press the right side of the button.530de228
To have all the available information
displayed, press
>the button on the lever until PROG
shows on the display
>the SET button.
To obtain individual items of informa-
tion, briefly press the button as often as
necessary.
Page 118 of 200
116n
The concept The integrated universal remote control
can replace as many as three hand-
held transmitters for various remote-
controlled accessories, such as door
openers and house alarm systems. The
integrated universal remote control rec-
ognizes and learns the transmitted sig-
nal of each of the original hand-held
transmitters.
The signal of an original hand-held
transmitter can be programmed on one
of the three memory buttons 1. Follow-
ing that, each of the devices can be
actuated with the appropriately-pro-
grammed memory button 1. The indica-
tor lamp 2 flashes to confirm transmis-
sion of the signal.
Should you sell your vehicle one day,
be sure to delete the stored programs
beforehand for your safety, refer to
page 118. Before programming or using the
integrated universal remote con-
trol, always inspect the immediate area
to make certain that no people, animals
or objects are within the swiveling and
movement range of the device, as oth-
erwise injuries or damage can occur.
Also, comply with the safety precau-
tions of the original hand-held transmit-
ter.<
To Canadian residents:
During programming, your hand-
held transmitter may automatically stop
transmitting after two seconds, which
may not be long enough to program the
integrated universal remote control. If
you are programming from one of these
hand-held transmitters, the integrated
universal remote control's light may
begin to flash in a series of double-
blinks. If this occurs, continue to hold
the button of the integrated universal
remote control while you reactivate
your hand-held transmitter. You may
have to repeat this function several
times while programming.<
Checking compatibility
If you see this symbol on the
packaging or in the manual sup-
plied with the original hand-held
transmitter, it is safe to assume that it is
compatible with the integrated univer-
sal remote control.
A list of compatible hand transmitters
is available via fax polling by calling
+49 (0)6838 907283 3333. For details,
please call the toll-free HomeLink
Hotline at +49 (0)6838 907 277 or
0800 0466 35465 in Germany.
HomeLink is a registered trademark of
Johnson Controls.
Integrated universal remote control
*
Page 119 of 200
117n
OverviewControlsMaintenanceRepairsDataIndex
Integrated universal remote control
*
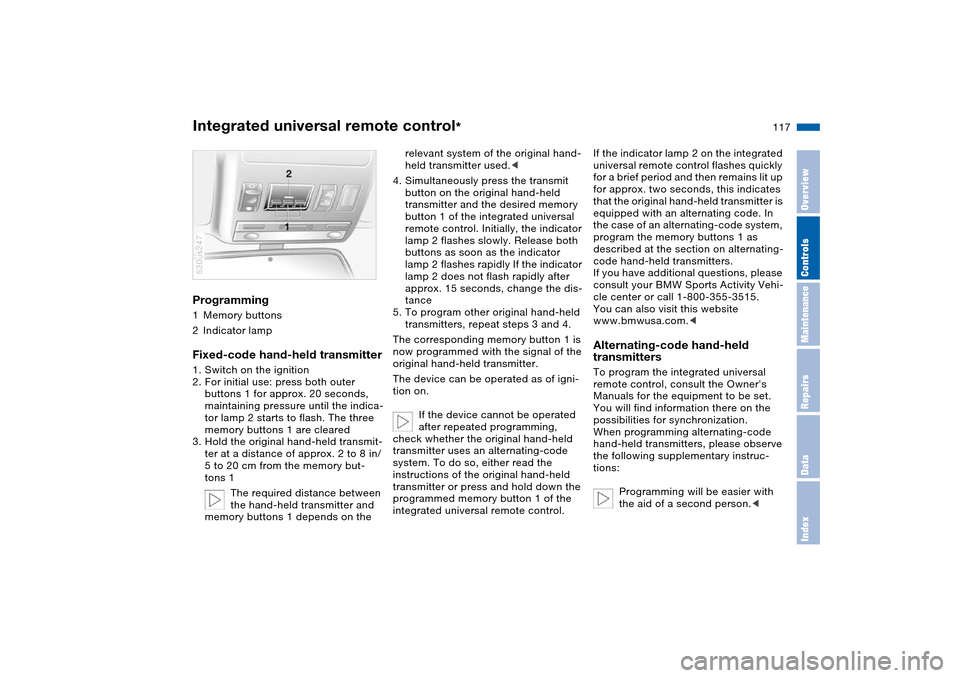
Programming 1Memory buttons
2Indicator lampFixed-code hand-held transmitter1. Switch on the ignition
2. For initial use: press both outer
buttons 1 for approx. 20 seconds,
maintaining pressure until the indica-
tor lamp 2 starts to flash. The three
memory buttons 1 are cleared
3. Hold the original hand-held transmit-
ter at a distance of approx. 2 to 8 in/
5 to 20 cm from the memory but-
tons 1
The required distance between
the hand-held transmitter and
memory buttons 1 depends on the 530us247
relevant system of the original hand-
held transmitter used.<
4. Simultaneously press the transmit
button on the original hand-held
transmitter and the desired memory
button 1 of the integrated universal
remote control. Initially, the indicator
lamp 2 flashes slowly. Release both
buttons as soon as the indicator
lamp 2 flashes rapidly If the indicator
lamp 2 does not flash rapidly after
approx. 15 seconds, change the dis-
tance
5. To program other original hand-held
transmitters, repeat steps 3 and 4.
The corresponding memory button 1 is
now programmed with the signal of the
original hand-held transmitter.
The device can be operated as of igni-
tion on.
If the device cannot be operated
after repeated programming,
check whether the original hand-held
transmitter uses an alternating-code
system. To do so, either read the
instructions of the original hand-held
transmitter or press and hold down the
programmed memory button 1 of the
integrated universal remote control.
If the indicator lamp 2 on the integrated
universal remote control flashes quickly
for a brief period and then remains lit up
for approx. two seconds, this indicates
that the original hand-held transmitter is
equipped with an alternating code. In
the case of an alternating-code system,
program the memory buttons 1 as
described at the section on alternating-
code hand-held transmitters.
If you have additional questions, please
consult your BMW Sports Activity Vehi-
cle center or call 1-800-355-3515.
You can also visit this website
www.bmwusa.com.
remote control, consult the Owner's
Manuals for the equipment to be set.
You will find information there on the
possibilities for synchronization.
When programming alternating-code
hand-held transmitters, please observe
the following supplementary instruc-
tions:
Programming will be easier with
the aid of a second person.<
Page 120 of 200
118n
Integrated universal remote control
*
Telephone
*
1. Park your vehicle within the range of
the remote-controlled device
2. Program the integrated universal
remote control as described at the
section on fixed-code hand-held
transmitters
3. Localize the button on the receiver of
the device you want to set up, e.g.
on the upper section of the motor
4. Press the button on the receiver of
the device you want to set up. After
step 4, you have approx. 30 seconds
for step 5
5. Press the programmed memory
button 1 on the integrated universal
remote control three times.
The corresponding memory button 1 is
now programmed with the signal of the
original hand-held transmitter.
If you have any additional ques-
tions, please contact your BMW
Sports Activity Vehicle center.<
Clearing memory buttonsIndividual memory buttons 1 cannot be
cleared. However, you clear all three
memory buttons 1 together as follows:
Press both outer buttons 1 of the inte-
grated universal remote control for
approx. 20 seconds, maintaining pres-
sure until the indicator lamp 2 starts to
flash.
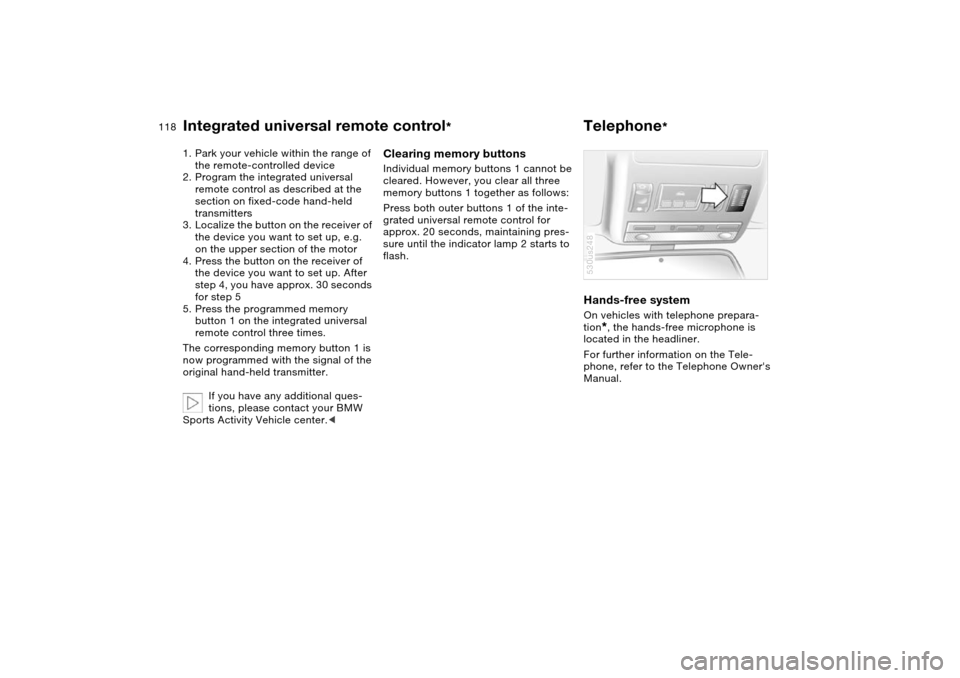
Hands-free system On vehicles with telephone prepara-
tion
*, the hands-free microphone is
located in the headliner.
For further information on the Tele-
phone, refer to the Telephone Owner's
Manual.
530us248
Page 172 of 200
170n
The Roadside Assistance of the BMW
Group offers you assistance in the
event of a breakdown around the clock,
also at weekends and on public holi-
days.
The phone numbers of the Roadside
Assistance control center in your home
country can be found in the BMW
Dealer Directory.
In the case of vehicles with the corre-
sponding equipment, you can use
buttons in the headlining to contact
Roadside Assistance or initiate an
emergency call.
When the emergency call is initiated, a
telephone connection is established to
the BMW Assist response center.
If the current location of your vehicle
can be determined with vehicles with
an activated BMW Assist, it will be
transmitted to the BMW Assist
response center.
The condition for initiating an emer-
gency call or contacting Roadside
Assistance:
>Ignition key from position 1
>The car phone is logged on to a
mobile telephone network
>The emergency call system is opera-
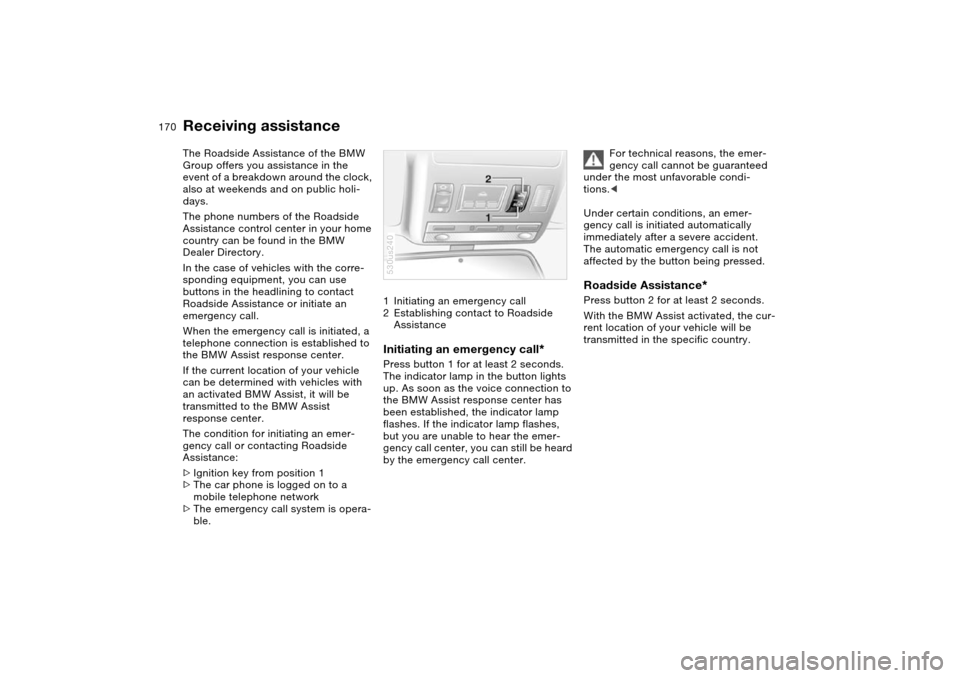
ble.1Initiating an emergency call
2Establishing contact to Roadside
Assistance
Initiating an emergency call
*
Press button 1 for at least 2 seconds.
The indicator lamp in the button lights
up. As soon as the voice connection to
the BMW Assist response center has
been established, the indicator lamp
flashes. If the indicator lamp flashes,
but you are unable to hear the emer-
gency call center, you can still be heard
by the emergency call center.530us240
For technical reasons, the emer-
gency call cannot be guaranteed
under the most unfavorable condi-
tions.<
Under certain conditions, an emer-
gency call is initiated automatically
immediately after a severe accident.
The automatic emergency call is not
affected by the button being pressed.
Roadside Assistance
*
Press button 2 for at least 2 seconds.
With the BMW Assist activated, the cur-
rent location of your vehicle will be
transmitted in the specific country.
Receiving assistance
Page 189 of 200
Everything from A to Z
187n
OverviewControlsMaintenanceRepairsDataIndex
Courtesy lighting 105
Cruise control 73
buttons on steering
wheel 23
indicator lamp 22
Cruising range 82, 89
Cup holders 120
Curb weight, refer to
Weights 180
Current consumption, refer
to Energy Control 76
Cylinders, refer to Engine
data 178
D
Data, technical 178
dimensions 179
engine 178
filling capacities 181
weights 180
Date
also refer to Owner's
Manual for Onboard
Computer
calling up 84
changing 84
Daytime driving lamps 102
Deactivating the alarm in an
emergency 91Defect
door lock 33
driver's door 33
fuel filler door 24
liftgate 35
panorama glass roof 42
tailgate 37
Defective lamp 159
Defrost position, refer to
Defrosting
windows 108, 111
Defrosting
windows 108, 111
air conditioner 108
automatic climate
control 111
Defrosting windows and
removing condensation
air conditioner 108
automatic climate
control 111
Defrosting windshield, refer
to Defrosting
windows 108, 111
Digital clock 84
also refer to Owner's
Manual for Onboard
Computer
Dimensions 179
Dipstick, engine oil 148Directional indicators, refer
to Turn signals 70
Disk brakes 139
Displacement, refer to
Engine specifications 178
Display lighting, refer to
Instrument lighting 104
Displays, refer to Instrument
cluster 15, 17, 18
Disposal
used oil 149
vehicle battery 168
Distance 88
Distance to destination 88
Distance warning 92
Divided rear seat backrest,
refer to Folding rear seat
back 124
Door keys 30
Door lock 33
DOT Quality Grades 142
Draft-free
ventilation 108, 113
Driving lamps, refer to
Parking lamps/low
beams 102
Driving notes
break-in procedures 136
driving hints 137, 138
Driving on bad roads 137
Driving stability control 94Driving your X5 137
Dry air, refer to Air
conditioning 107, 112
DSC Dynamic Stability
Control 94
indicator lamp 22
E
Electric steering wheel
adjustment 52
Electrical malfunction
door lock 33
driver's door 33
fuel filler door 24
liftgate 35
panorama glass roof 42
tailgate 37
Electronic transmission
control module 69
Emergency call 170
Emergency operation, refer
to Manual operation
driver's door 33
fuel filler door 24
liftgate 35
panorama glass roof 42
tailgate 37
Energy Control 76
Energy-conscious driving,
refer to Energy Control 76
Page 192 of 200
Everything from A to ZInterface socket for onboard
diagnosis 153
Interior lamps 104
remote control 31
Interior mirror
automatic dimming
feature 55
compass 55
Interior motion sensor 39
switching off 31, 39
Interior rearview mirror 54
Interlock, refer to Locking
steering 64
Intermittent operation,
wipers 71
J
Jumpering, refer to Jump-
starting 171
Jump-starting 171
K
Key Memory 63
Keys 30
Kickdown 68
L
Lamps and bulbs 159
Lamps, refer to Parking
lamps/low beams 102
Lashing eyes, refer to
Securing the load 131LATCH child-restraint
fixing 62
LEDs light-emitting
diodes 163
Length, refer to
Dimensions 179
License plate lamp, bulb
replacement 162
Liftgate 35
emergency operation,
refer to Unlocking
manually 35
opening, remote
control 31
Liftgate/tailgate
opening from inside 35
opening from outside 35
remote control 31
unlocking manually 35
Light switch 102
Light-alloy wheels, care,
refer to Caring for your
vehicle brochure
Light-emitting diodes
LEDs 163
Lighter 121, 122
Lighter socket 121
Lighting of instruments 104
Lights on warning 102
Limit 87
Load, refer to Cargo
loading 130Lock buttons, doors, refer to
Locking 34
Locking
from inside 34
from outside 31, 33
Locking and unlocking doors
from inside 34
from outside 31, 33
Locking, vehicle
from inside 34
from outside 31, 33
Low beams 102
automatic 102
bulb replacement 159
Lower back support, refer to
Lumbar support 46
Low-fuel warning light, refer
to Fuel gauge 77
Lug bolts 167
Lug wrench 164
Luggage compartment lid,
refer to Liftgate/tailgate 36
Luggage net 37
Luggage rack, refer to Roof-
mounted luggage rack 132
Luggage straps 37
Lumbar support 46
M
M+S tires, refer to Winter
tires 145
Maintenance system 152Maintenance, refer to
Service Interval Display 78
Manual operation
door lock 33
driver's door 33
fuel filler door 24
liftgate 35
panorama glass roof 42
tailgate 37
Manual transmission 66
Marking, tires 142
Master key 30
with remote control 30
Maximum cooling 112
Maximum roof weight 180
Maximum speed with winter
tires 145
Measurements, refer to
Dimensions 179
Mechanical key, refer to
Spare key 30
Mechanical seats 45
Memo 85
Memory, refer to
Seat, mirror and steering
wheel memory 50
Vehicle Memory, Key
Memory 63
Microfilter
air conditioner 108
automatic climate
control 114