height adjustment BMW X5 3.0I 2004 E53 Owner's Manual
[x] Cancel search | Manufacturer: BMW, Model Year: 2004, Model line: X5 3.0I, Model: BMW X5 3.0I 2004 E53Pages: 200, PDF Size: 3.91 MB
Page 47 of 200
45n
OverviewControlsMaintenanceRepairsDataIndex
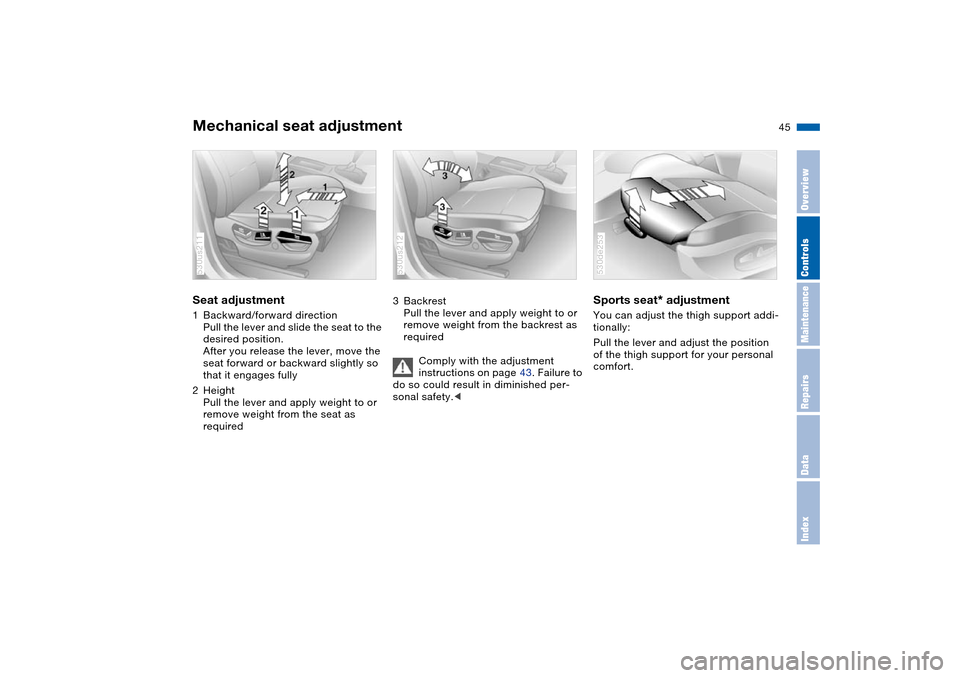
Mechanical seat adjustment Seat adjustment 1Backward/forward direction
Pull the lever and slide the seat to the
desired position.
After you release the lever, move the
seat forward or backward slightly so
that it engages fully
2Height
Pull the lever and apply weight to or
remove weight from the seat as
required 530us211
3Backrest
Pull the lever and apply weight to or
remove weight from the backrest as
required
Comply with the adjustment
instructions on page 43. Failure to
do so could result in diminished per-
sonal safety.< 530us212
Sports seat
* adjustment
You can adjust the thigh support addi-
tionally:
Pull the lever and adjust the position
of the thigh support for your personal
comfort. 530de253
Page 48 of 200
46n
Power seat adjustment
*
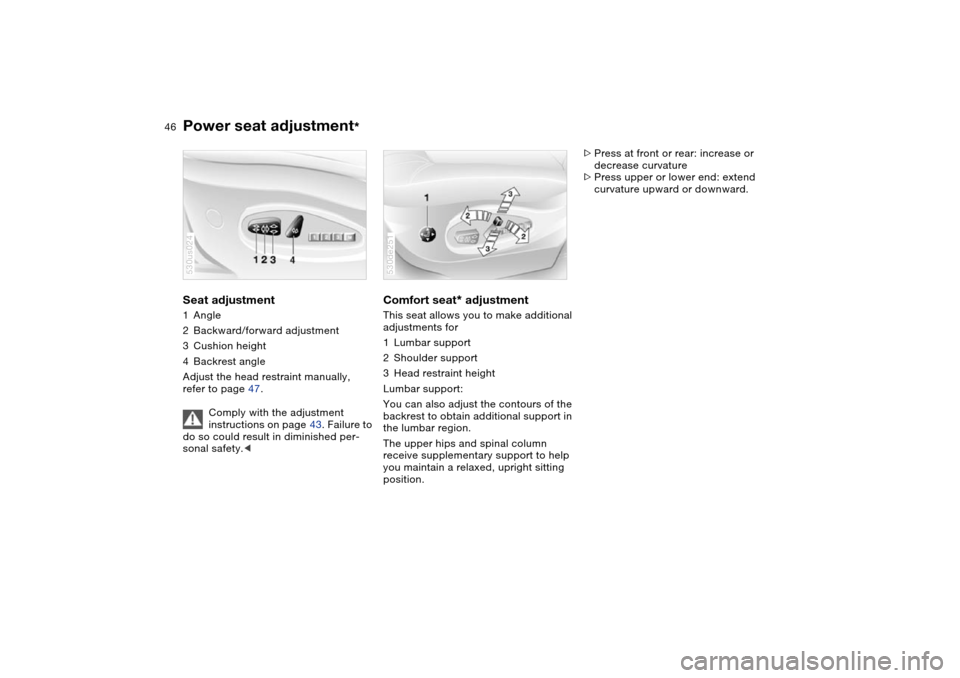
Seat adjustment 1Angle
2Backward/forward adjustment
3Cushion height
4Backrest angle
Adjust the head restraint manually,
refer to page 47.
Comply with the adjustment
instructions on page 43. Failure to
do so could result in diminished per-
sonal safety.< 530us024
Comfort seat
* adjustment
This seat allows you to make additional
adjustments for
1Lumbar support
2Shoulder support
3Head restraint height
Lumbar support:
You can also adjust the contours of the
backrest to obtain additional support in
the lumbar region.
The upper hips and spinal column
receive supplementary support to help
you maintain a relaxed, upright sitting
position.530de251
>Press at front or rear: increase or
decrease curvature
>Press upper or lower end: extend
curvature upward or downward.
Page 49 of 200
47n
OverviewControlsMaintenanceRepairsDataIndex
Power seat adjustment
*
Head restraints
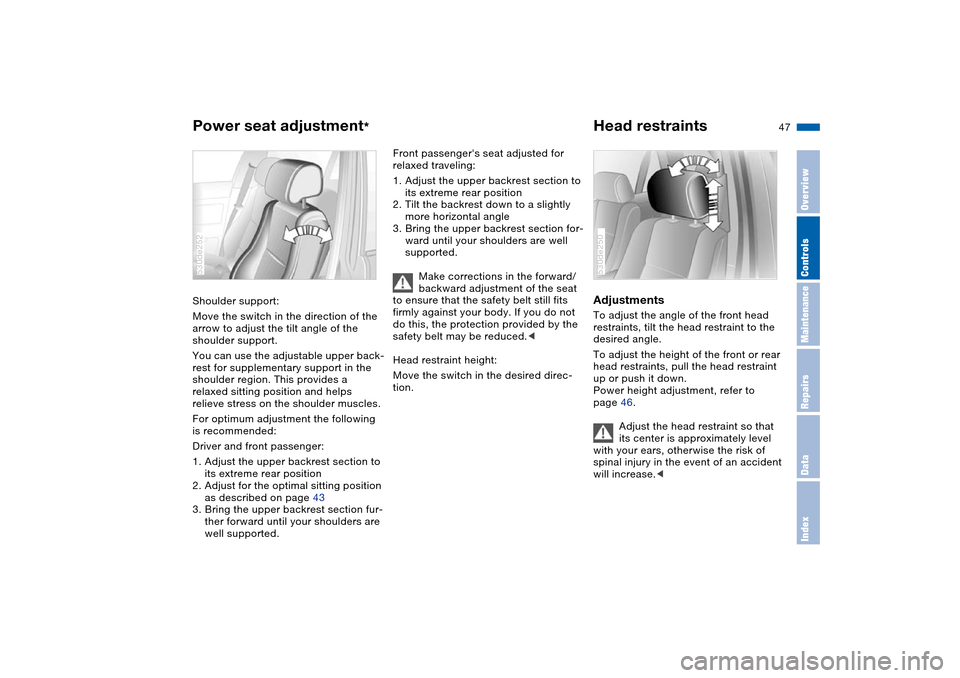
Shoulder support:
Move the switch in the direction of the
arrow to adjust the tilt angle of the
shoulder support.
You can use the adjustable upper back-
rest for supplementary support in the
shoulder region. This provides a
relaxed sitting position and helps
relieve stress on the shoulder muscles.
For optimum adjustment the following
is recommended:
Driver and front passenger:
1. Adjust the upper backrest section to
its extreme rear position
2. Adjust for the optimal sitting position
as described on page 43
3. Bring the upper backrest section fur-
ther forward until your shoulders are
well supported.530de252
Front passenger's seat adjusted for
relaxed traveling:
1. Adjust the upper backrest section to
its extreme rear position
2. Tilt the backrest down to a slightly
more horizontal angle
3. Bring the upper backrest section for-
ward until your shoulders are well
supported.
Make corrections in the forward/
backward adjustment of the seat
to ensure that the safety belt still fits
firmly against your body. If you do not
do this, the protection provided by the
safety belt may be reduced.<
Head restraint height:
Move the switch in the desired direc-
tion.
Adjustments To adjust the angle of the front head
restraints, tilt the head restraint to the
desired angle.
To adjust the height of the front or rear
head restraints, pull the head restraint
up or push it down.
Power height adjustment, refer to
page 46.
Adjust the head restraint so that
its center is approximately level
with your ears, otherwise the risk of
spinal injury in the event of an accident
will increase.<530de250
Page 51 of 200
49n
OverviewControlsMaintenanceRepairsDataIndex
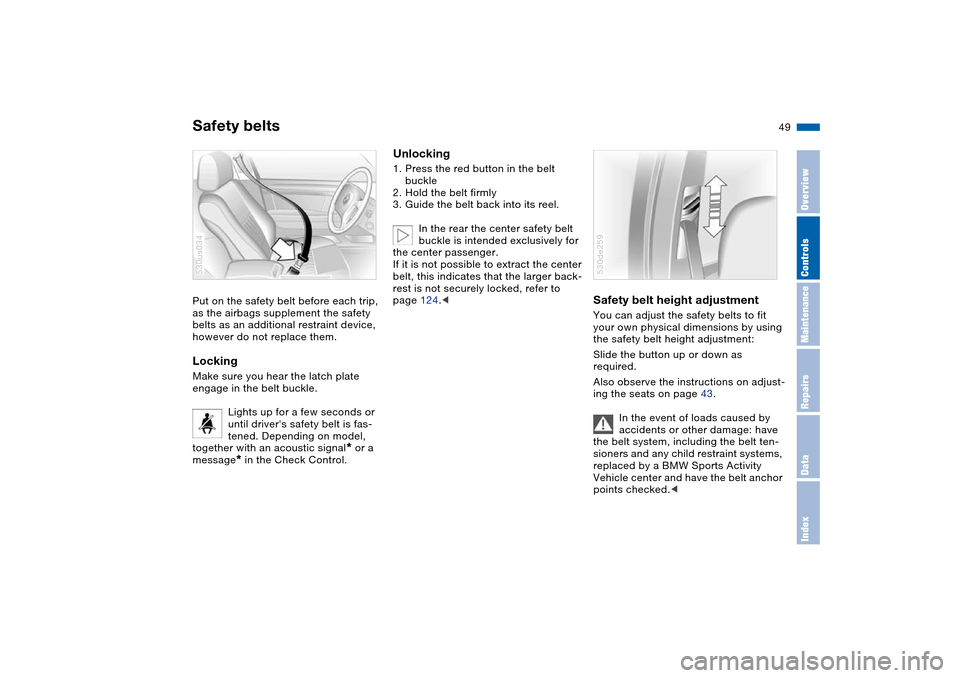
Safety beltsPut on the safety belt before each trip,
as the airbags supplement the safety
belts as an additional restraint device,
however do not replace them.Locking Make sure you hear the latch plate
engage in the belt buckle.
Lights up for a few seconds or
until driver's safety belt is fas-
tened. Depending on model,
together with an acoustic signal
* or a
message
* in the Check Control.
530us034
Unlocking1. Press the red button in the belt
buckle
2. Hold the belt firmly
3. Guide the belt back into its reel.
In the rear the center safety belt
buckle is intended exclusively for
the center passenger.
If it is not possible to extract the center
belt, this indicates that the larger back-
rest is not securely locked, refer to
page 124.<
Safety belt height adjustment You can adjust the safety belts to fit
your own physical dimensions by using
the safety belt height adjustment:
Slide the button up or down as
required.
Also observe the instructions on adjust-
ing the seats on page 43.
In the event of loads caused by
accidents or other damage: have
the belt system, including the belt ten-
sioners and any child restraint systems,
replaced by a BMW Sports Activity
Vehicle center and have the belt anchor
points checked.c530de259
Page 99 of 200
97n
OverviewControlsMaintenanceRepairsDataIndex
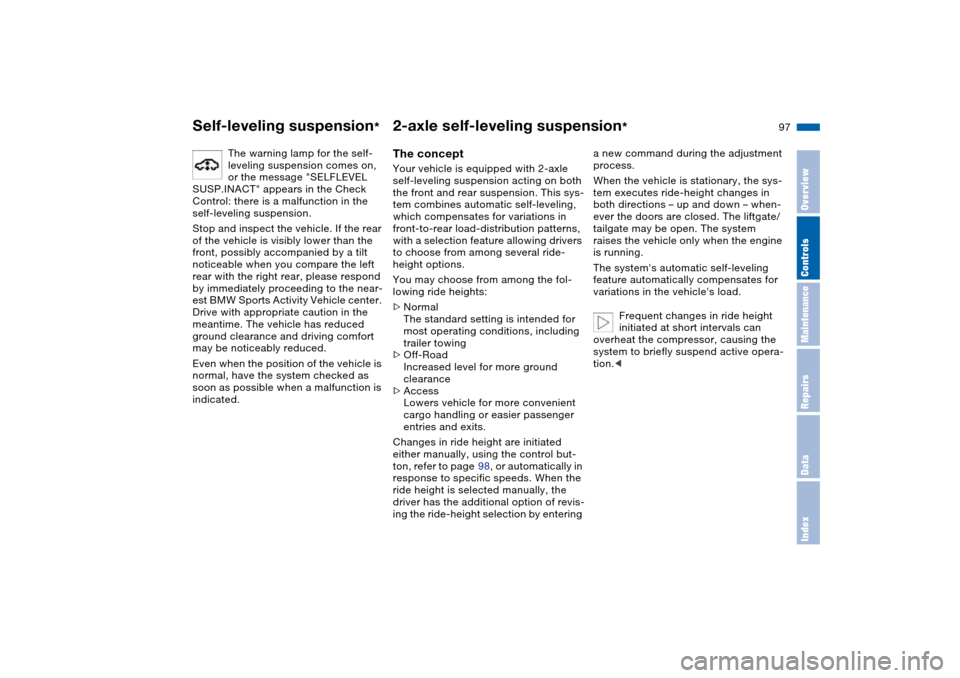
Self-leveling suspension
*
2-axle self-leveling suspension
*
The warning lamp for the self-
leveling suspension comes on,
or the message "SELFLEVEL
SUSP.INACT" appears in the Check
Control: there is a malfunction in the
self-leveling suspension.
Stop and inspect the vehicle. If the rear
of the vehicle is visibly lower than the
front, possibly accompanied by a tilt
noticeable when you compare the left
rear with the right rear, please respond
by immediately proceeding to the near-
est BMW Sports Activity Vehicle center.
Drive with appropriate caution in the
meantime. The vehicle has reduced
ground clearance and driving comfort
may be noticeably reduced.
Even when the position of the vehicle is
normal, have the system checked as
soon as possible when a malfunction is
indicated.
The concept Your vehicle is equipped with 2-axle
self-leveling suspension acting on both
the front and rear suspension. This sys-
tem combines automatic self-leveling,
which compensates for variations in
front-to-rear load-distribution patterns,
with a selection feature allowing drivers
to choose from among several ride-
height options.
You may choose from among the fol-
lowing ride heights:
>Normal
The standard setting is intended for
most operating conditions, including
trailer towing
>Off-Road
Increased level for more ground
clearance
>Access
Lowers vehicle for more convenient
cargo handling or easier passenger
entries and exits.
Changes in ride height are initiated
either manually, using the control but-
ton, refer to page 98, or automatically in
response to specific speeds. When the
ride height is selected manually, the
driver has the additional option of revis-
ing the ride-height selection by entering a new command during the adjustment
process.
When the vehicle is stationary, the sys-
tem executes ride-height changes in
both directions – up and down – when-
ever the doors are closed. The liftgate/
tailgate may be open. The system
raises the vehicle only when the engine
is running.
The system's automatic self-leveling
feature automatically compensates for
variations in the vehicle's load.
Frequent changes in ride height
initiated at short intervals can
overheat the compressor, causing the
system to briefly suspend active opera-
tion.<
Page 191 of 200
Everything from A to Z
189n
OverviewControlsMaintenanceRepairsDataIndex
Gear display 67
Gearshift lever
automatic transmission
with Steptronic 67
manual transmission 66
General driving notes 138
Glove compartment 119
Grills, refer to
Ventilation 108, 113
Gross weight, refer to
Weights 180
Ground clearance 137
H
Hand lamp, refer to Rechar-
geable flashlight 119
Handbrake 66
indicator lamp 19, 21
Hands-free microphone,
refer to Portable
phone 118
Hands-free system 118
Having vehicle towed 173
Hazard warning flashers 14
HDC Hill Descent Control 96
Head airbags 57
Head restraints 47
Headlamp control,
automatic 102
Headlamp cover, care, refer
to Caring for your vehicle
brochureHeadlamp flasher 70
indicator lamp 22
Headlamp washer fluid
tank 148
capacity, refer to Filling
capacities 181
Headlamp washer system
cleaning headlamps 72
washer fluid 148
Headlamps
bulb replacement 159
care, refer to Caring for
your vehicle brochure
Heated mirrors 54
Heated rear window
air conditioner 107
automatic climate
control 112
Heated seats 52
Heated steering wheel 53
Heating
exterior mirror 54
rear window 107, 112
seats 52
steering wheel 53
Heating and
ventilation 106, 109
Heating while stopped 113
Heavy cargo 131
Height adjustment
seats 45, 46
steering wheel 52Height, refer to
Dimensions 179
High beams 103
bulb replacement 160
headlight flasher 70
indicator lamp 22
Hills 137, 139
Holder for cups 120
Horn 14
Hydroplaning 138, 143
I
Ice warning 75
Ignition 64
Ignition key 30
Ignition lock 64
Immobilizer function 90
Imprint 4
Independent ventilation 115
entering switch-on
times 86
switching on and off 86
switching on and off, also
refer to Owner's Manual
for Onboard Computer
Indicating
elements 15, 17, 18
Indicator and warning lamps,
overview 19Indicator/warning lamp
airbags 59
alarm system 38
coolant temperature 78
DSC 94
engine temperature 78
fasten safety belts 49
Flat Tire Monitor 101
front fog lamps 104
reserve 77
self-leveling
suspension 97
Individual air distribution 111
Individual settings, refer to
Vehicle Memory, Key
Memory 63
Inflation pressure
monitoring, refer to Flat
Tire Monitor 100
INSPECTION 78
Instrument cluster 15, 17, 18
Instrument illumination, refer
to Instrument lighting 104
Instrument lighting 104
Instrument panel lighting,
refer to Instrument
lighting 104
Instrument panel, refer to
Instrument
cluster 15, 17, 18
Integrated universal remote
control 116
Page 194 of 200
Everything from A to ZR
Radio navigation, refer to
separate Owner's Manual
Radio, refer to Owner's
Manual for Radio/Onboard
Computer
Radio-control key, refer to
Master key with remote
control 30
Rain sensor 71
Reading lamps
front 104
rear 105
Real wood, refer to Caring
for your vehicle brochure
Rear climate control 113
air supply 114
temperature 114
Rear lamps
bulb replacement 161
refer to Tail lamps 161
Rear seats, heating 52
Rear window blind, refer to
Roller sun blinds 115
Rear window defroster
air conditioner 107
automatic climate
control 112
Rear window safety
switch 40
Rear window wiper 73
blade replacement 158Rear-seat backrest
electric 48
folding down 124
power 48
Rearview mirror 54
Recirculated-air mode
air conditioner 107
automatic climate
control 112
Refueling 24
fuel filler door 24
Remaining distance for
service, refer to Service
Interval Display 78
Remaining distance, refer to
Cruising range 82, 89
Remote control 31
garage door opener, refer
to Integrated universal
remote control 116
liftgate 31
malfunctions 32
Removal aid for spare
wheel 165
Removing condensation,
windows
air conditioner 108
automatic climate
control 111
Replacement fuses 169
Replacement keys 30Replacement of tires
tire replacement 142
wheel changes 163
Replacement tire 165
Replacing light bulbs, refer
to Lamps and bulbs 159
Reporting safety defects 10
Reservoir, washer
system 148
Residual heat 113
Restraint systems for
children 59
Restraint systems, refer to
Safety belts 49
Reverse gear
automatic transmission
with Steptronic 68
manual transmission 67
Roadside Assistance 170
Roadside parking lamps 103
bulb replacement 160
Roller sun blinds 115
Roll-up cover 125
Roof-mounted luggage
rack 132
Rotating coin holder, refer to
Storage
compartments 119S
Safety belt height
adjustment 49
Safety belt tensioners, refer
to Safety belts 49
Safety belts 49
adjusting belt height 49
care, refer to Caring for
your vehicle brochure
sitting safely 43
warning lamp 21, 49
Safety feature, power
windows 40
Safety systems, refer to
Antilock Brake System 93
Brake system 139
DSC Dynamic Stability
Control 94
xDrive 95
Screwdriver, refer to
Onboard tool kit 158
Seats 44
seat heating 52
seat memory, refer to Seat,
mirror and steering wheel
memory 50
Securing cargo, refer to
Cargo loading 131
Selector lever interlock, refer
to Changing selector lever
positions 68