lock BMW X5 3.0I 2005 E53 Owner's Manual
[x] Cancel search | Manufacturer: BMW, Model Year: 2005, Model line: X5 3.0I, Model: BMW X5 3.0I 2005 E53Pages: 200, PDF Size: 3.55 MB
Page 4 of 200
Contents© 2004 Bayerische Motoren Werke
Aktiengesellschaft
Munich, Germany
Reprinting, including excerpts,
only with the written consent of
BMW AG, Munich.
Order No. 01 41 0 158 701
US English IX/04
Printed in Germany
Printed on environmentally friendly paper,
bleached without chlorine, suitable for recycling.Notes
Overview
Controls and features
About this Owner's Manual8
Symbols used8
Your individual vehicle8
Status at time of printing9
For your own safety9
Symbol on vehicle parts10
Service and Warranty10
Reporting safety defects11Cockpit14
Instrument cluster15
Indicator and warning lamps19
Buttons on steering wheel23
Warning triangle24
First-aid kit24
Refueling24
Fuel specifications26Locks and security systems:
Keys30
Central locking system30
Opening and closing:
from outside31
Opening and closing:
from inside34
Liftgate35
Tailgate36
Alarm system38
Windows39
Panorama glass sunroof41
Adjustments:
Sitting safely43
Seats44
Mechanical seat adjustment45
Power seat adjustment46
Head restraints47
Power rear-seat backrest
adjustment48
Safety belts49
Seat, mirror and steering wheel
memory50
Heated seats52
Steering wheel52
Steering wheel heater53
Mirrors54
Page 5 of 200
5n
OverviewControlsMaintenanceRepairsDataIndex
Controls and features
Passenger safety systems:
Airbags57
Transporting children safely59
Vehicle Memory,
Key Memory63
Driving:
Ignition lock64
Starting engine64
Switching off engine65
Handbrake66
Manual transmission66
Automatic transmission with
Steptronic67
Turn signals/
headlamp flasher70
Washer/wiper system/
rain sensor71
Cruise control74
Everything under control:
Odometer, outside temperature
display76
Tachometer77
Energy control77
Engine oil thermometer78
Fuel gage78
Coolant temperature gage79
Service Interval Display79
Check Control80
Computer82
MID Multi-Information
Display84Digital clock in MID85
Computer in MID88
Technology for safety and
driving convenience:
PDC Park Distance Control 93
Antilock Brake System94
DSC Dynamic Stability
Control95
xDrive97
HDC Hill Descent Control97
Self-leveling suspension98
2-axle self-leveling
suspension99
Brake Force Display101
Flat Tire Monitor101
Lamps:
Parking lamps/low beams103
Adaptive Head Light104
High beams/roadside parking
lamps104
Front fog lamps105
Instrument lighting105
Interior lamps105
Controlling the climate for
pleasant driving:
Air conditioner107
Automatic climate control110
Roller sun blinds115
Independent ventilation116Cabin convenience:
Integrated universal remote
control117
Portable phone119
Glove compartment120
Storage compartments120
Cup holders121
Ashtray, front122
Ashtray, rear122
Cigarette lighter, rear123
Loading and transporting:
Ski bag124
Cargo area
Folding rear backrests
down126
Roll-up cover126
Partition net127
Flaps in cargo area128
Power outlets129
Pull-out floor in cargo
area130
Cargo loading131
Roof-mounted luggage rack133
Page 14 of 200
14n
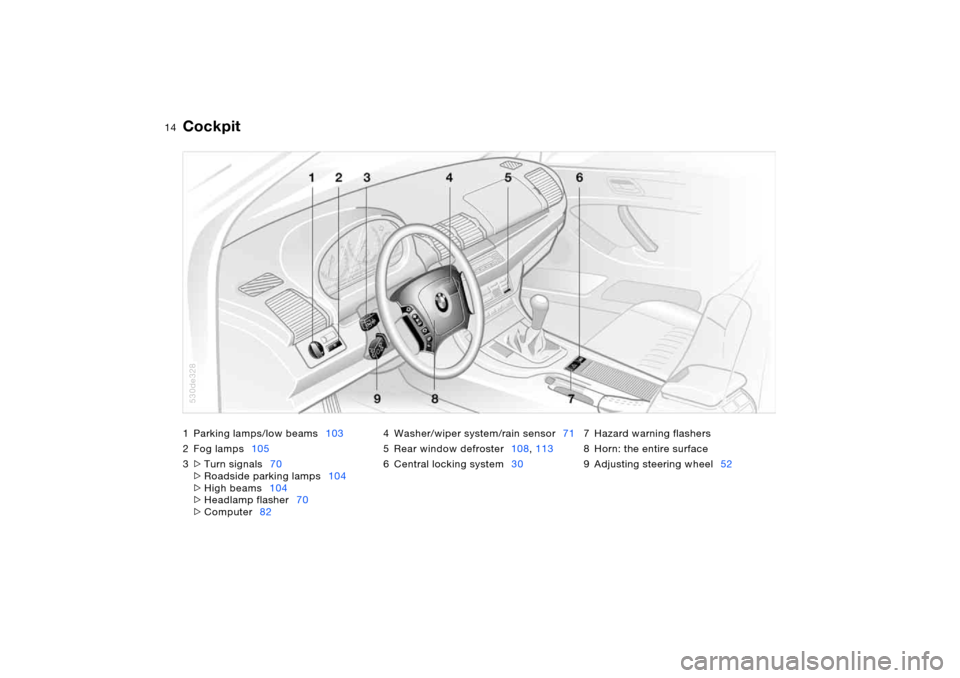
1 Parking lamps/low beams103
2Fog lamps105
3>Turn signals70
>Roadside parking lamps104
>High beams104
>Headlamp flasher70
>Computer824 Washer/wiper system/rain sensor71
5Rear window defroster108, 113
6 Central locking system307 Hazard warning flashers
8 Horn: the entire surface
9 Adjusting steering wheel52
Cockpit
530de328
Page 25 of 200
25n
OverviewControlsMaintenanceRepairsDataIndex
Refueling
When handling fuels always
observe any safety guidelines
posted at the service station. Never
carry spare fuel containers in your vehi-
cle. Whether empty or full, these con-
tainers can leak, cause an explosion, or
lead to fire in the event of a collision.<
Observe the following when
refueling
Open the filler cap carefully to
prevent fuel from spraying out.
Fuel spray may cause injury.
Do not top off. Topping off may cause
fuel spillage.<
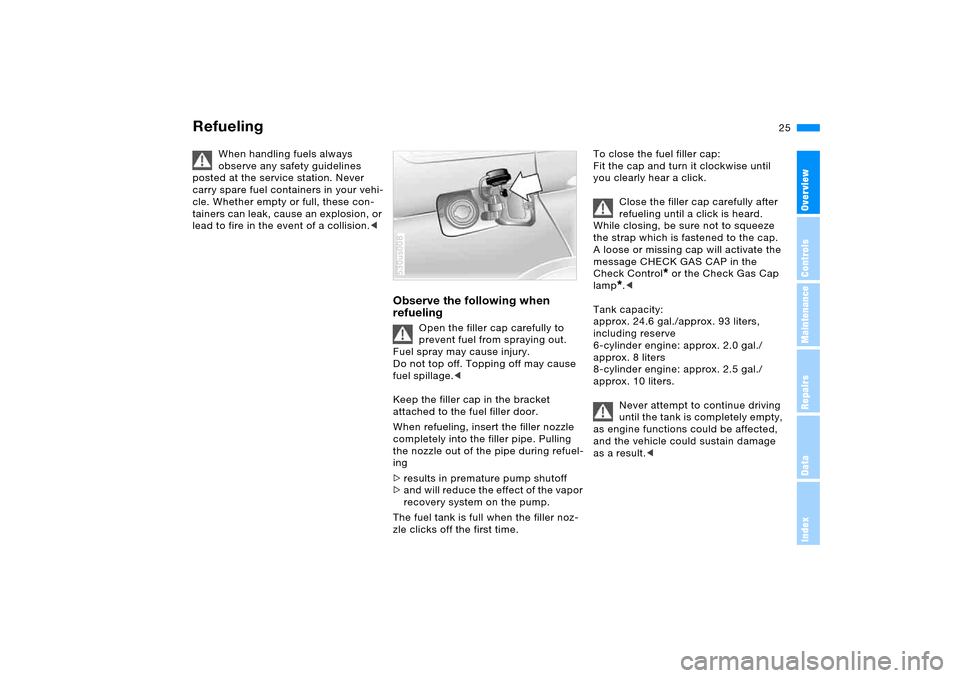
Keep the filler cap in the bracket
attached to the fuel filler door.
When refueling, insert the filler nozzle
completely into the filler pipe. Pulling
the nozzle out of the pipe during refuel-
ing
>results in premature pump shutoff
>and will reduce the effect of the vapor
recovery system on the pump.
The fuel tank is full when the filler noz-
zle clicks off the first time.
530us008
To close the fuel filler cap:
Fit the cap and turn it clockwise until
you clearly hear a click.
Close the filler cap carefully after
refueling until a click is heard.
While closing, be sure not to squeeze
the strap which is fastened to the cap.
A loose or missing cap will activate the
message CHECK GAS CAP in the
Check Control
* or the Check Gas Cap
lamp
*.<
Tank capacity:
approx. 24.6 gal./approx. 93 liters,
including reserve
6-cylinder engine: approx. 2.0 gal./
approx. 8 liters
8-cylinder engine: approx. 2.5 gal./
approx. 10 liters.
Never attempt to continue driving
until the tank is completely empty,
as engine functions could be affected,
and the vehicle could sustain damage
as a result.<
Page 30 of 200
30n
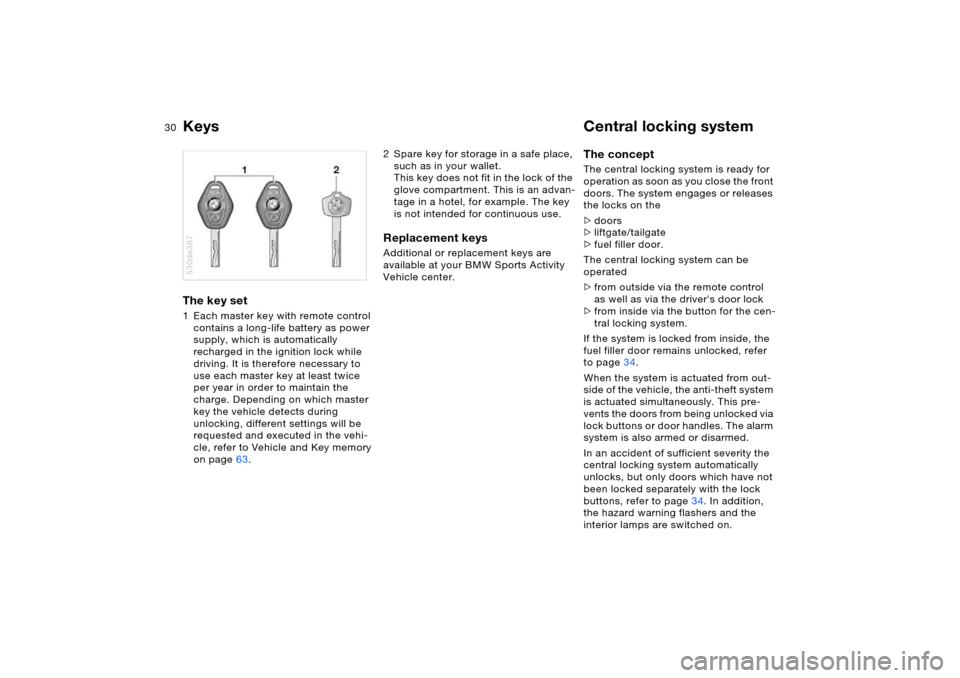
Keys Central locking system The key set 1 Each master key with remote control
contains a long-life battery as power
supply, which is automatically
recharged in the ignition lock while
driving. It is therefore necessary to
use each master key at least twice
per year in order to maintain the
charge. Depending on which master
key the vehicle detects during
unlocking, different settings will be
requested and executed in the vehi-
cle, refer to Vehicle and Key memory
on page63.530de367
2 Spare key for storage in a safe place,
such as in your wallet.
This key does not fit in the lock of the
glove compartment. This is an advan-
tage in a hotel, for example. The key
is not intended for continuous use.Replacement keys Additional or replacement keys are
available at your BMW Sports Activity
Vehicle center.
The concept The central locking system is ready for
operation as soon as you close the front
doors. The system engages or releases
the locks on the
>doors
>liftgate/tailgate
>fuel filler door.
The central locking system can be
operated
>from outside via the remote control
as well as via the driver's door lock
>from inside via the button for the cen-
tral locking system.
If the system is locked from inside, the
fuel filler door remains unlocked, refer
to page34.
When the system is actuated from out-
side of the vehicle, the anti-theft system
is actuated simultaneously. This pre-
vents the doors from being unlocked via
lock buttons or door handles. The alarm
system is also armed or disarmed.
In an accident of sufficient severity the
central locking system automatically
unlocks, but only doors which have not
been locked separately with the lock
buttons, refer to page34. In addition,
the hazard warning flashers and the
interior lamps are switched on.
Page 31 of 200
OverviewControlsMaintenanceRepairsDataIndex
31n
Opening and closing: from outsideUsing remote control When you engage/release the vehicle
locks, you also activate/deactivate the
anti-theft system, arm/disarm the alarm
system, and switch the interior lamps
on/off.
Protect the remote control against
unauthorized use by handing over
only the spare key, for example when
using hotel valet parking.<
You can find more detailed information
on the alarm system on page38.
Since passengers or animals
remaining in the vehicle might be
able to lock the doors from the inside,
take the vehicle's keys with you so that
the vehicle can be opened again from
the outside at any time.<
Unlocking vehiclePress button.
Press the button once to unlock the
driver's door and the fuel filler door
only; press a second time to unlock all
remaining doors as well as the tailgate/
liftgate. Convenience opening modePress the button briefly and then hold
down.
The windows and the panorama glass
sunroof open. Locking and securing Press button.
As a confirmation that the vehicle is
correctly locked, the hazard warning
flashers light up.
If you so desire, you can have this
function deactivated if your vehi-
cle is not equipped with an alarm sys-
tem.<
Switching on interior lamps If the vehicle is locked, press button.
With this function, you can also search
for your vehicle, e.g. when parked in an
underground garage.Switching off tilt alarm sensor and
interior motion sensor
Press button once again directly after
locking.
For more detailed information, refer to
page39. Opening liftgate Briefly press the button.
The liftgate will open slightly, regardless
of whether it was previously locked or
unlocked.
Page 32 of 200
32n
Opening and closing: from outside
If the vehicle is locked, the tail-
gate/liftgate is also locked again
when closed.
Before and after a trip, be sure that the
tailgate/liftgate was not opened unin-
tentionally.<
Panic modeBy pressing and holding the button for
more than two seconds, you can start
the alarm system if there is an impend-
ing danger if it is armed.
To switch off the alarm
Press button.
Malfunction The remote control can be subjected
to malfunctions by local radio waves.
Should the remote control fail to oper-
ate owing to interference of this kind,
unlock and lock the vehicle via the door
lock using the master key.
If it is no longer possible to lock the
vehicle via the remote control, the bat-
tery is discharged. Use this remote con-
trol during an extended drive; this will
recharge the battery, refer to page30.
For US owners onlyThe transmitter and receiver units com-
ply with part 15 of the FCC/Federal
Communication Commission regula-
tions. Operation is governed by the fol-
lowing:
FCC ID: LX8EWS
LX8FZVS
LX8FZVE
Compliance statement:
This device complies with part 15 of the
FCC Rules. Operation is subject to the
following two conditions:
>This device may not cause harmful
interference, and
>this device must accept any interfer-
ence received, including interference
that may cause undesired operation.
Any unauthorized modifications
to these devices could void the
user's authority to operate this equip-
ment.<
Page 33 of 200
OverviewControlsMaintenanceRepairsDataIndex
33n
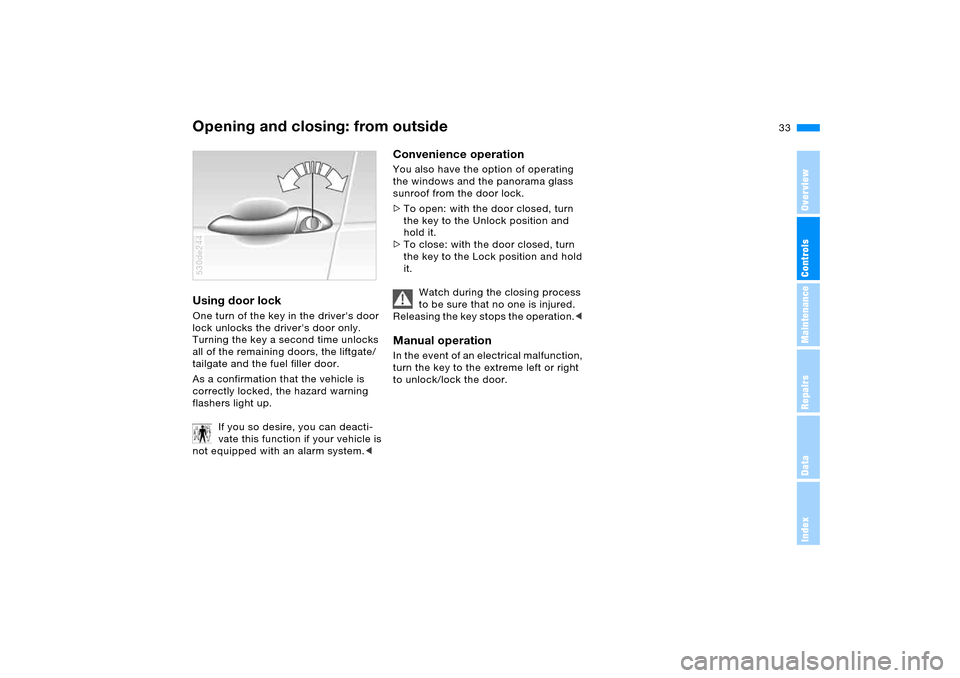
Opening and closing: from outsideUsing door lock One turn of the key in the driver's door
lock unlocks the driver's door only.
Turning the key a second time unlocks
all of the remaining doors, the liftgate/
tailgate and the fuel filler door.
As a confirmation that the vehicle is
correctly locked, the hazard warning
flashers light up.
If you so desire, you can deacti-
vate this function if your vehicle is
not equipped with an alarm system.< 530de244
Convenience operation You also have the option of operating
the windows and the panorama glass
sunroof from the door lock.
>To open: with the door closed, turn
the key to the Unlock position and
hold it.
>To close: with the door closed, turn
the key to the Lock position and hold
it.
Watch during the closing process
to be sure that no one is injured.
Releasing the key stops the operation.< Manual operation In the event of an electrical malfunction,
turn the key to the extreme left or right
to unlock/lock the door.
Page 34 of 200
34n
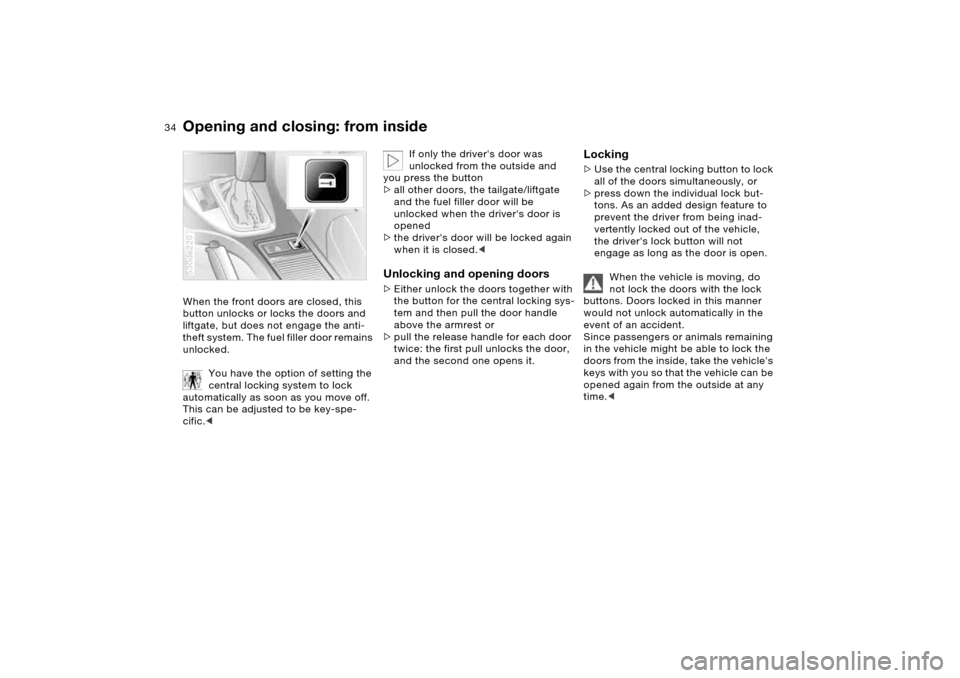
Opening and closing: from insideWhen the front doors are closed, this
button unlocks or locks the doors and
liftgate, but does not engage the anti-
theft system. The fuel filler door remains
unlocked.
You have the option of setting the
central locking system to lock
automatically as soon as you move off.
This can be adjusted to be key-spe-
cific.<530de220
If only the driver's door was
unlocked from the outside and
you press the button
>all other doors, the tailgate/liftgate
and the fuel filler door will be
unlocked when the driver's door is
opened
>the driver's door will be locked again
when it is closed.<
Unlocking and opening doors >Either unlock the doors together with
the button for the central locking sys-
tem and then pull the door handle
above the armrest or
>pull the release handle for each door
twice: the first pull unlocks the door,
and the second one opens it.
Locking >Use the central locking button to lock
all of the doors simultaneously, or
>press down the individual lock but-
tons. As an added design feature to
prevent the driver from being inad-
vertently locked out of the vehicle,
the driver's lock button will not
engage as long as the door is open.
When the vehicle is moving, do
not lock the doors with the lock
buttons. Doors locked in this manner
would not unlock automatically in the
event of an accident.
Since passengers or animals remaining
in the vehicle might be able to lock the
doors from the inside, take the vehicle's
keys with you so that the vehicle can be
opened again from the outside at any
time.<
Page 38 of 200
38n
Alarm system The concept The vehicle alarm system responds:
>When a door, the hood, or the liftgate
is opened
>To movement in the vehicle interior:
interior protection, refer to Tilt alarm
sensor and interior motion sensor
>To variations in the vehicle tilt angle
such as occur during attempts to
steal the wheels or tow the vehicle
>To interruption of battery voltage.
The system responds to unauthorized
vehicle entry and attempted theft by
simultaneously activating the following:
>Sounding an acoustical alarm for
30 seconds
>The hazard warning flashers are acti-
vated for approx. five minutes
>The high beams flash on and off in
the same rhythm.
Arming and disarming alarm
system When you lock or unlock the vehicle,
either with the remote control or at the
door lock, the alarm system is armed or
disarmed at the same time.
You can have different acknowl-
edgment signals set to confirm
arming and disarming.<
The liftgate can also be opened with the
system armed using the button on the
remote control, refer to page31. The
liftgate is locked again when closed.
Pressing the button longer triggers the
alarm: panic mode, refer to page32.
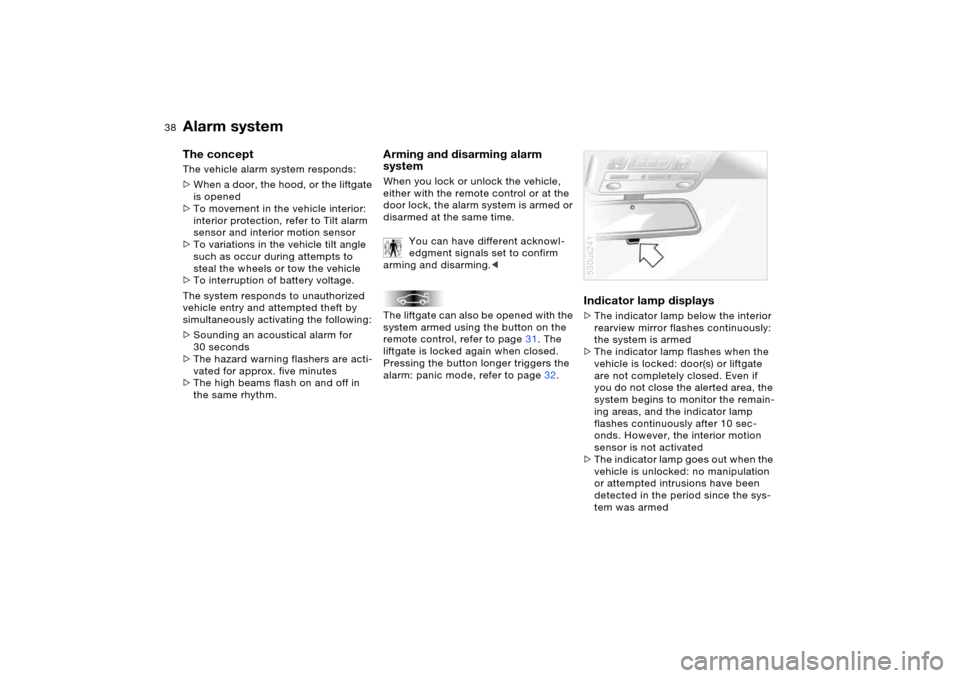
Indicator lamp displays >The indicator lamp below the interior
rearview mirror flashes continuously:
the system is armed
>The indicator lamp flashes when the
vehicle is locked: door(s) or liftgate
are not completely closed. Even if
you do not close the alerted area, the
system begins to monitor the remain-
ing areas, and the indicator lamp
flashes continuously after 10 sec-
onds. However, the interior motion
sensor is not activated
>The indicator lamp goes out when the
vehicle is unlocked: no manipulation
or attempted intrusions have been
detected in the period since the sys-
tem was armed530us241