display BMW X5 3.0I 2006 E53 User Guide
[x] Cancel search | Manufacturer: BMW, Model Year: 2006, Model line: X5 3.0I, Model: BMW X5 3.0I 2006 E53Pages: 202, PDF Size: 4.13 MB
Page 65 of 202
OverviewControlsMaintenanceRepairsDataIndex
65n
Manual transmission Automatic transmission with Steptronic
*
Reverse Select only when the vehicle is station-
ary. Press the gearshift lever to the left
to overcome the resistance.
As you do this, the backup lamps will
turn on automatically when the ignition
key is in position 2.
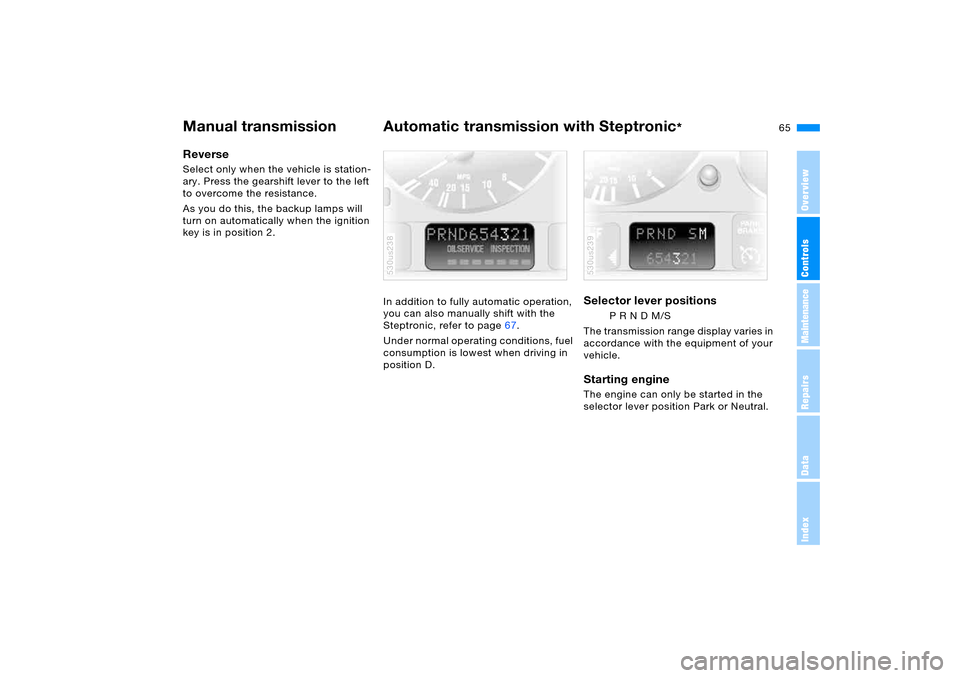
In addition to fully automatic operation,
you can also manually shift with the
Steptronic, refer to page67.
Under normal operating conditions, fuel
consumption is lowest when driving in
position D.
530us238
Selector lever positions
P R N D M/S
The transmission range display varies in
accordance with the equipment of your
vehicle.
Starting engine The engine can only be started in the
selector lever position Park or Neutral. 530us239
Page 67 of 202
OverviewControlsMaintenanceRepairsDataIndex
67n
Automatic transmission with Steptronic
*
Sport Program and manual
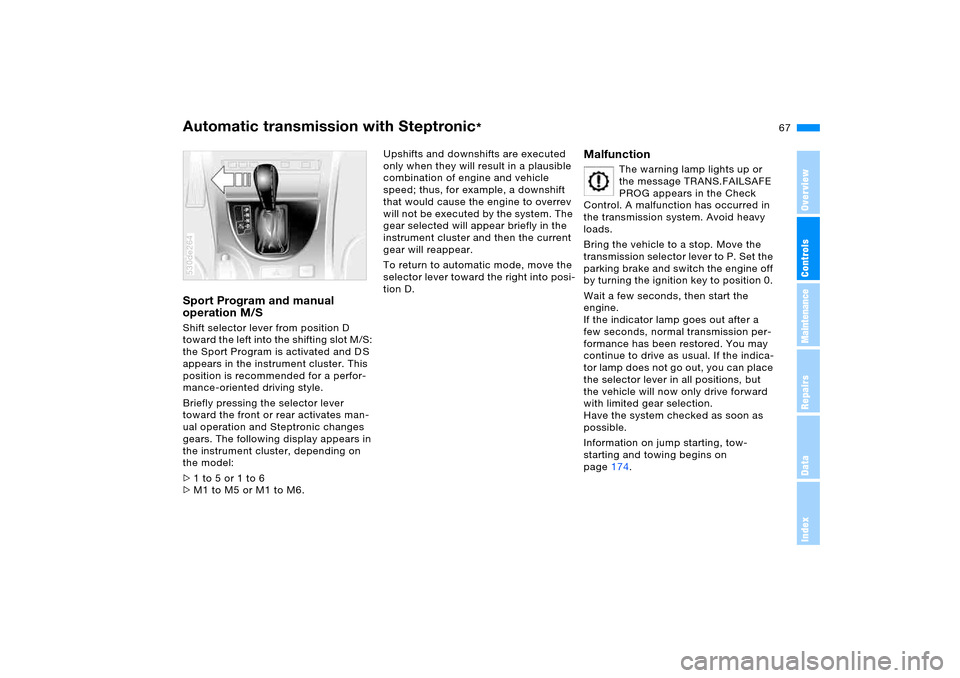
operation M/S Shift selector lever from position D
toward the left into the shifting slot M/S:
the Sport Program is activated and D S
appears in the instrument cluster. This
position is recommended for a perfor-
mance-oriented driving style.
Briefly pressing the selector lever
toward the front or rear activates man-
ual operation and Steptronic changes
gears. The following display appears in
the instrument cluster, depending on
the model:
>1 to 5 or 1 to 6
>M1 to M5 or M1 to M6. 530de264
Upshifts and downshifts are executed
only when they will result in a plausible
combination of engine and vehicle
speed; thus, for example, a downshift
that would cause the engine to overrev
will not be executed by the system. The
gear selected will appear briefly in the
instrument cluster and then the current
gear will reappear.
To return to automatic mode, move the
selector lever toward the right into posi-
tion D.
Malfunction
The warning lamp lights up or
the message TRANS.FAILSAFE
PROG appears in the Check
Control. A malfunction has occurred in
the transmission system. Avoid heavy
loads.
Bring the vehicle to a stop. Move the
transmission selector lever to P. Set the
parking brake and switch the engine off
by turning the ignition key to position 0.
Wait a few seconds, then start the
engine.
If the indicator lamp goes out after a
few seconds, normal transmission per-
formance has been restored. You may
continue to drive as usual. If the indica-
tor lamp does not go out, you can place
the selector lever in all positions, but
the vehicle will now only drive forward
with limited gear selection.
Have the system checked as soon as
possible.
Information on jump starting, tow-
starting and towing begins on
page174.
Page 73 of 202
73n
OverviewControlsMaintenanceRepairsDataIndex
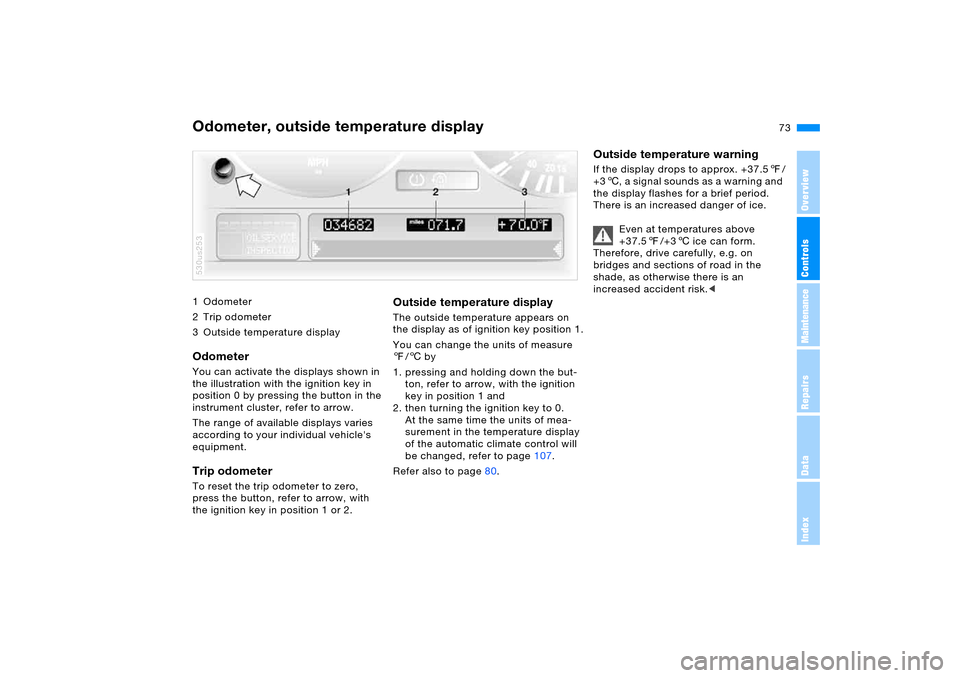
1Odometer
2 Trip odometer
3 Outside temperature displayOdometer You can activate the displays shown in
the illustration with the ignition key in
position 0 by pressing the button in the
instrument cluster, refer to arrow.
The range of available displays varies
according to your individual vehicle's
equipment.Trip odometer To reset the trip odometer to zero,
press the button, refer to arrow, with
the ignition key in position 1 or 2. 530us253
Outside temperature display The outside temperature appears on
the display as of ignition key position 1.
You can change the units of measure
7/6 by
1. pressing and holding down the but-
ton, refer to arrow, with the ignition
key in position 1 and
2. then turning the ignition key to 0.
At the same time the units of mea-
surement in the temperature display
of the automatic climate control will
be changed, refer to page107.
Refer also to page80.
Outside temperature warning If the display drops to approx. +37.57/
+36, a signal sounds as a warning and
the display flashes for a brief period.
There is an increased danger of ice.
Even at temperatures above
+37.57/+36 ice can form.
Therefore, drive carefully, e.g. on
bridges and sections of road in the
shade, as otherwise there is an
increased accident risk.<
Odometer, outside temperature display
Page 76 of 202
76n
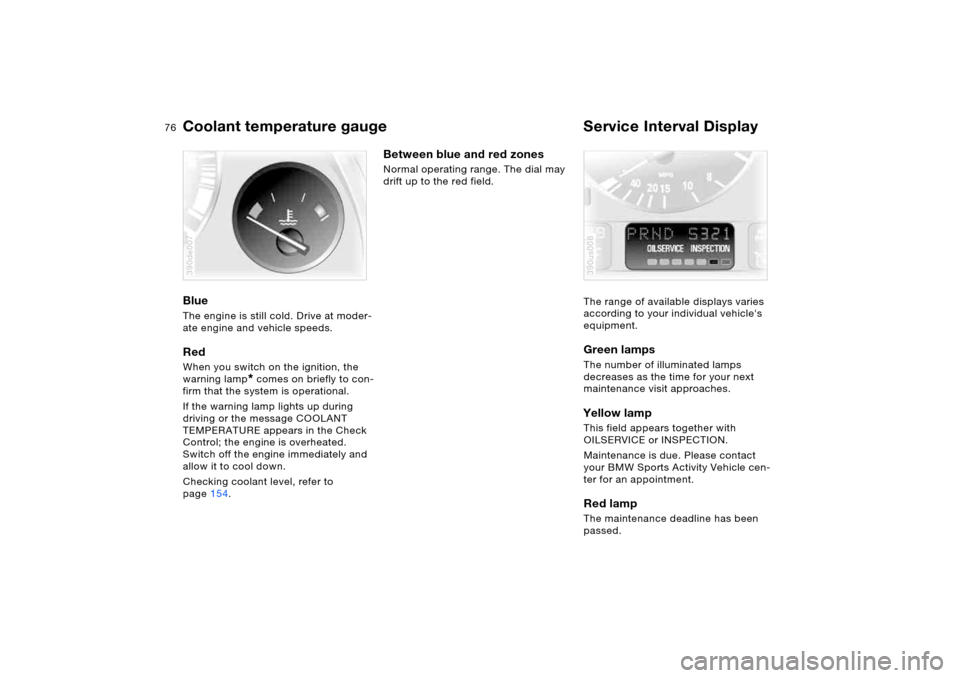
Coolant temperature gauge Service Interval Display Blue The engine is still cold. Drive at moder-
ate engine and vehicle speeds.Red When you switch on the ignition, the
warning lamp
* comes on briefly to con-
firm that the system is operational.
If the warning lamp lights up during
driving or the message COOLANT
TEMPERATURE appears in the Check
Control; the engine is overheated.
Switch off the engine immediately and
allow it to cool down.
Checking coolant level, refer to
page154.
390de007
Between blue and red zones Normal operating range. The dial may
drift up to the red field.
The range of available displays varies
according to your individual vehicle's
equipment.
Green lamps The number of illuminated lamps
decreases as the time for your next
maintenance visit approaches.Yellow lamp This field appears together with
OILSERVICE or INSPECTION.
Maintenance is due. Please contact
your BMW Sports Activity Vehicle cen-
ter for an appointment.Red lamp The maintenance deadline has been
passed.390us008
Page 77 of 202
77n
OverviewControlsMaintenanceRepairsDataIndex
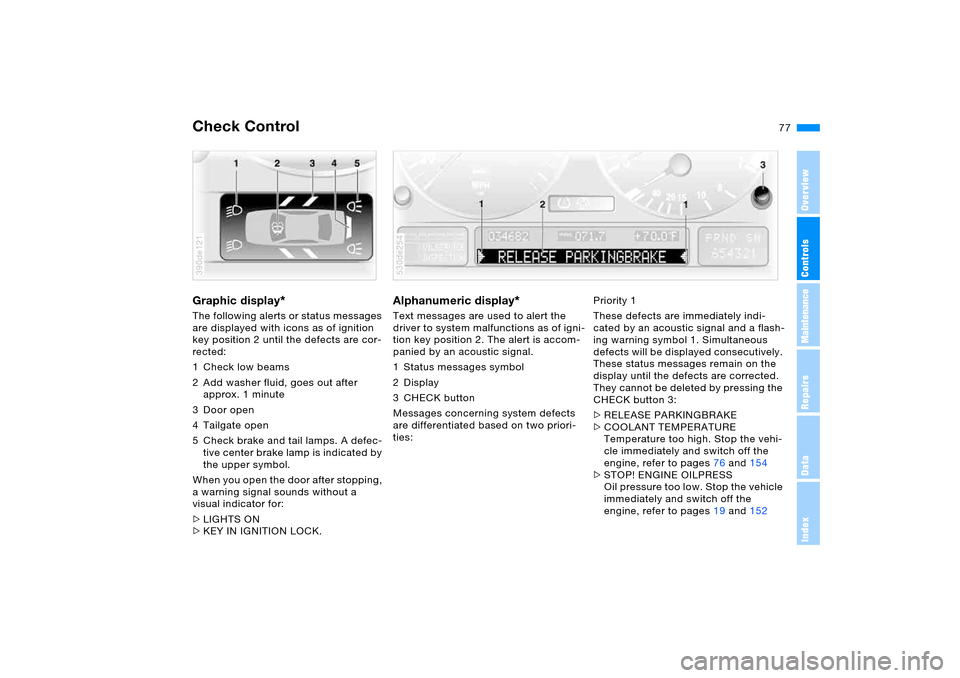
Check Control Graphic display
*
The following alerts or status messages
are displayed with icons as of ignition
key position 2 until the defects are cor-
rected:
1 Check low beams
2 Add washer fluid, goes out after
approx. 1 minute
3Door open
4 Tailgate open
5 Check brake and tail lamps. A defec-
tive center brake lamp is indicated by
the upper symbol.
When you open the door after stopping,
a warning signal sounds without a
visual indicator for:
>LIGHTS ON
>KEY IN IGNITION LOCK. 390de121
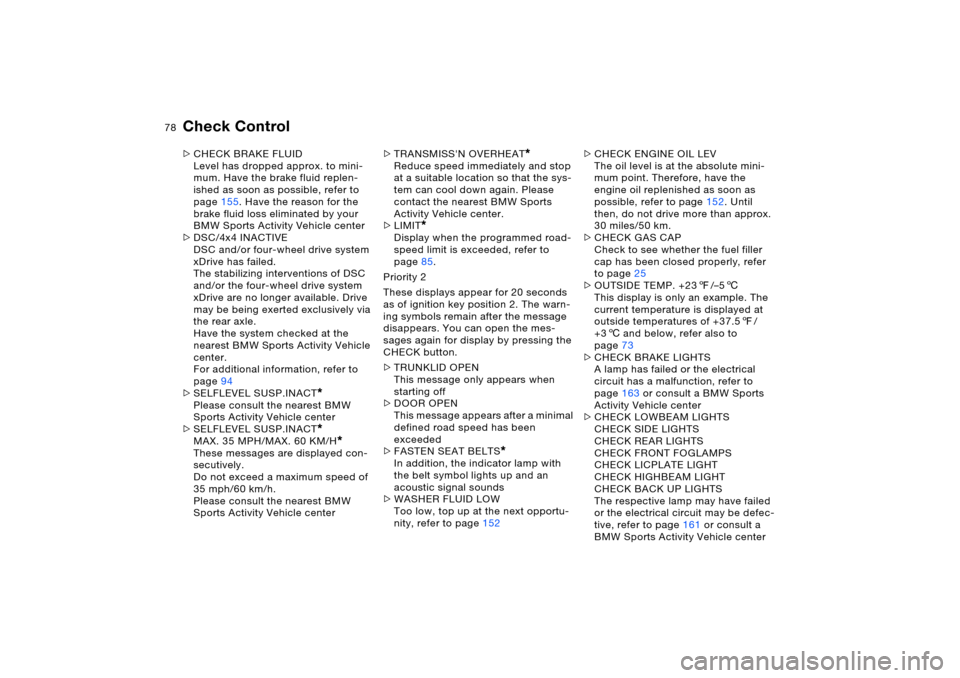
Alphanumeric display
*
Text messages are used to alert the
driver to system malfunctions as of igni-
tion key position 2. The alert is accom-
panied by an acoustic signal.
1 Status messages symbol
2Display
3CHECK button
Messages concerning system defects
are differentiated based on two priori-
ties: 530de254
Priority 1
These defects are immediately indi-
cated by an acoustic signal and a flash-
ing warning symbol 1. Simultaneous
defects will be displayed consecutively.
These status messages remain on the
display until the defects are corrected.
They cannot be deleted by pressing the
CHECK button 3:
>RELEASE PARKINGBRAKE
>COOLANT TEMPERATURE
Temperature too high. Stop the vehi-
cle immediately and switch off the
engine, refer to pages76 and154
>STOP! ENGINE OILPRESS
Oil pressure too low. Stop the vehicle
immediately and switch off the
engine, refer to pages19 and152
Page 78 of 202
78n
Check Control >CHECK BRAKE FLUID
Level has dropped approx. to mini-
mum. Have the brake fluid replen-
ished as soon as possible, refer to
page155. Have the reason for the
brake fluid loss eliminated by your
BMW Sports Activity Vehicle center
>DSC/4x4 INACTIVE
DSC and/or four-wheel drive system
xDrive has failed.
The stabilizing interventions of DSC
and/or the four-wheel drive system
xDrive are no longer available. Drive
may be being exerted exclusively via
the rear axle.
Have the system checked at the
nearest BMW Sports Activity Vehicle
center.
For additional information, refer to
page94
>SELFLEVEL SUSP.INACT
*
Please consult the nearest BMW
Sports Activity Vehicle center
>SELFLEVEL SUSP.INACT*
MAX. 35 MPH/MAX. 60 KM/H
*
These messages are displayed con-
secutively.
Do not exceed a maximum speed of
35 mph/60 km/h.
Please consult the nearest BMW
Sports Activity Vehicle center>TRANSMISS'N OVERHEAT
*
Reduce speed immediately and stop
at a suitable location so that the sys-
tem can cool down again. Please
contact the nearest BMW Sports
Activity Vehicle center.
>LIMIT
*
Display when the programmed road-
speed limit is exceeded, refer to
page85.
Priority 2
These displays appear for 20 seconds
as of ignition key position 2. The warn-
ing symbols remain after the message
disappears. You can open the mes-
sages again for display by pressing the
CHECK button.
>TRUNKLID OPEN
This message only appears when
starting off
>DOOR OPEN
This message appears after a minimal
defined road speed has been
exceeded
>FASTEN SEAT BELTS
*
In addition, the indicator lamp with
the belt symbol lights up and an
acoustic signal sounds
>WASHER FLUID LOW
Too low, top up at the next opportu-
nity, refer to page152>CHECK ENGINE OIL LEV
The oil level is at the absolute mini-
mum point. Therefore, have the
engine oil replenished as soon as
possible, refer to page152. Until
then, do not drive more than approx.
30 miles/50 km.
>CHECK GAS CAP
Check to see whether the fuel filler
cap has been closed properly, refer
to page25
>OUTSIDE TEMP. +237/–56
This display is only an example. The
current temperature is displayed at
outside temperatures of +37.57/
+36 and below, refer also to
page73
>CHECK BRAKE LIGHTS
A lamp has failed or the electrical
circuit has a malfunction, refer to
page163 or consult a BMW Sports
Activity Vehicle center
>CHECK LOWBEAM LIGHTS
CHECK SIDE LIGHTS
CHECK REAR LIGHTS
CHECK FRONT FOGLAMPS
CHECK LICPLATE LIGHT
CHECK HIGHBEAM LIGHT
CHECK BACK UP LIGHTS
The respective lamp may have failed
or the electrical circuit may be defec-
tive, refer to page161 or consult a
BMW Sports Activity Vehicle center
Page 79 of 202
79n
OverviewControlsMaintenanceRepairsDataIndex
Check Control Computer>TRANS. FAILSAFE PROG
*
Please consult the nearest BMW
Sports Activity Vehicle center, refer to
page67
>CHECK BRAKE LININGS
Have the brake pads inspected by
your BMW Sports Activity Vehicle
center, refer to page140
>CHECK COOLANT LEVEL
Coolant too low, top off at the next
opportunity, refer to page154
>ENGINE FAILSAFE PROG
Fault in the engine electronics.
You can continue to drive with
reduced engine output or engine
speed.
Please have the system inspected by
your BMW Sports Activity Vehicle
center.
Displays after completion of trip All of the malfunctions registered during
the trip appear consecutively when the
ignition key is turned to position 0.
The following displays will appear when
appropriate:
>LIGHTS ON
>KEY IN IGNITION LOCK
>CHECK ENGINE OIL LEV
Replenish engine oil at the next
opportunity, e.g. while refueling, refer
to page152. This display appears when you open
the driver's door after parking the vehi-
cle. A supplementary acoustic signal
also sounds.
Status messages remain available with
the CHECK button 3 for a period of
approx. three minutes after the display
goes out and the key is removed from
the ignition lock. If there are multiple
messages, press the CHECK button
repeatedly to view them all in
sequence.
Checking Check Control Press the CHECK button 3 with the
ignition key in position 2:
CHECK CONTROL OK appears on the
display.
No malfunctions are present in the
monitored systems. Computer You can find a description of the com-
puter below and on page85 as well as
in the Owner's Manual for Onboard
Computer.
You can have the Check Control
and computer messages dis-
played in a different language.<
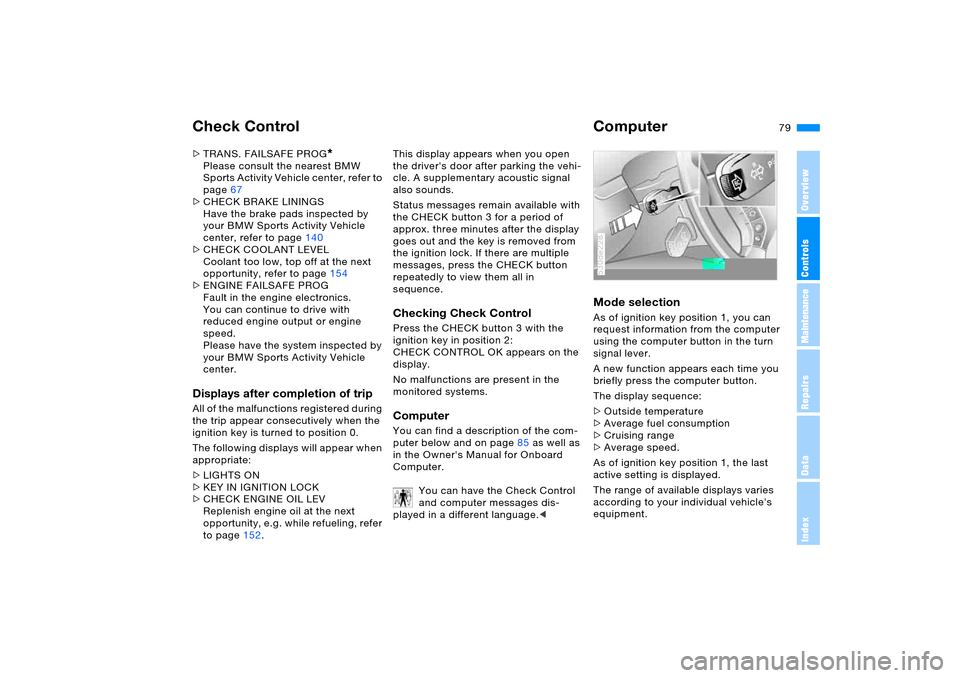
Mode selection As of ignition key position 1, you can
request information from the computer
using the computer button in the turn
signal lever.
A new function appears each time you
briefly press the computer button.
The display sequence:
>Outside temperature
>Average fuel consumption
>Cruising range
>Average speed.
As of ignition key position 1, the last
active setting is displayed.
The range of available displays varies
according to your individual vehicle's
equipment.530de228
Page 80 of 202
80n
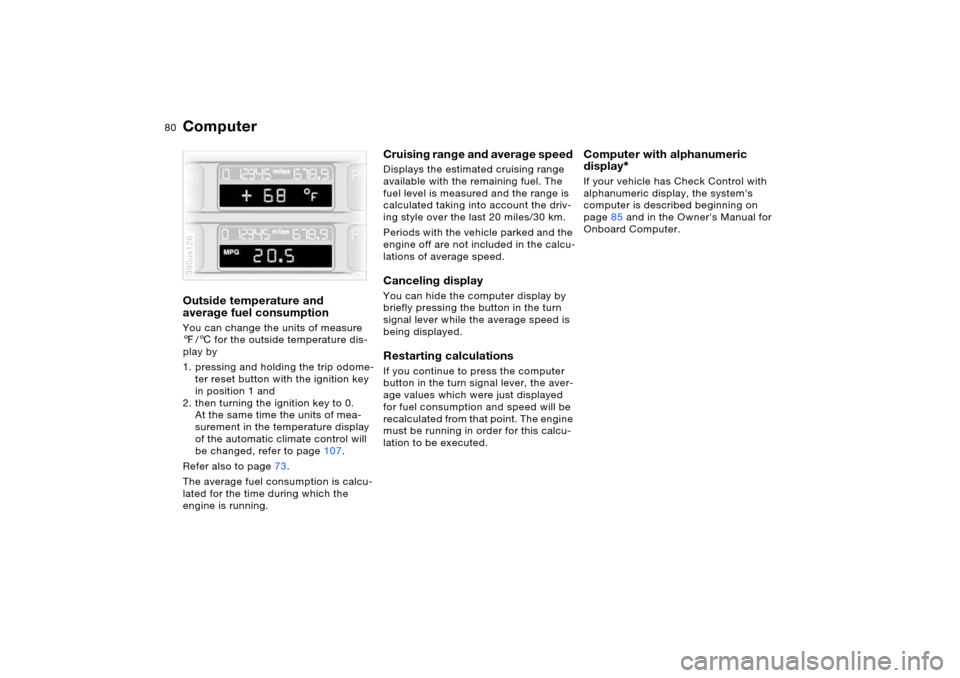
ComputerOutside temperature and
average fuel consumption You can change the units of measure
7/6 for the outside temperature dis-
play by
1. pressing and holding the trip odome-
ter reset button with the ignition key
in position 1 and
2. then turning the ignition key to 0.
At the same time the units of mea-
surement in the temperature display
of the automatic climate control will
be changed, refer to page107.
Refer also to page73.
The average fuel consumption is calcu-
lated for the time during which the
engine is running.390us126
Cruising range and average speed Displays the estimated cruising range
available with the remaining fuel. The
fuel level is measured and the range is
calculated taking into account the driv-
ing style over the last 20 miles/30 km.
Periods with the vehicle parked and the
engine off are not included in the calcu-
lations of average speed.Canceling display You can hide the computer display by
briefly pressing the button in the turn
signal lever while the average speed is
being displayed. Restarting calculations If you continue to press the computer
button in the turn signal lever, the aver-
age values which were just displayed
for fuel consumption and speed will be
recalculated from that point. The engine
must be running in order for this calcu-
lation to be executed.
Computer with alphanumeric
display
*
If your vehicle has Check Control with
alphanumeric display, the system's
computer is described beginning on
page85 and in the Owner's Manual for
Onboard Computer.
Page 81 of 202
81n
OverviewControlsMaintenanceRepairsDataIndex
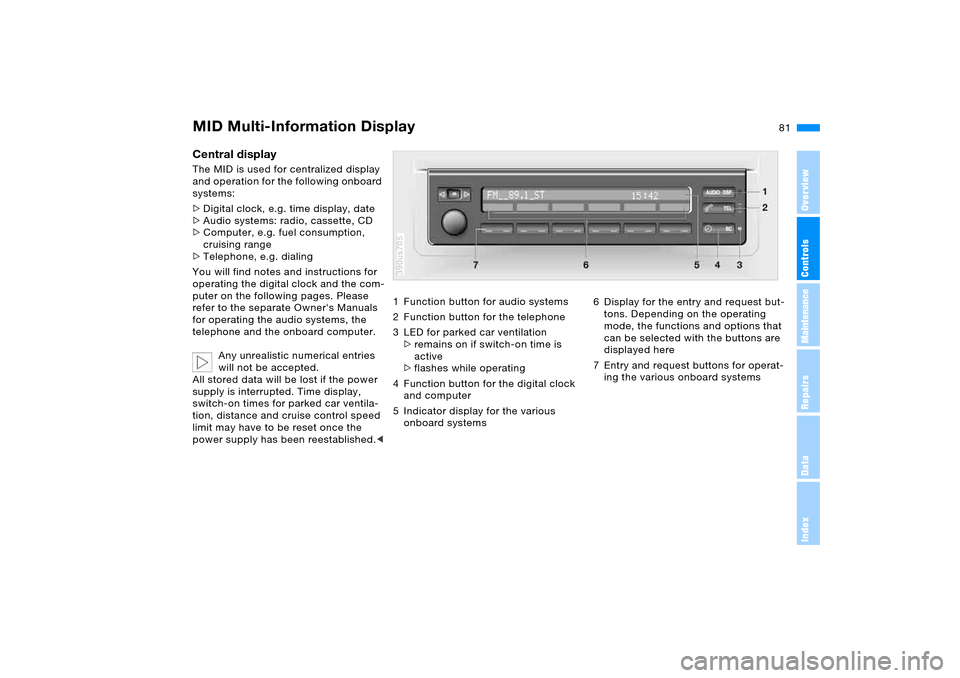
MID Multi-Information Display Central display The MID is used for centralized display
and operation for the following onboard
systems:
>Digital clock, e.g. time display, date
>Audio systems: radio, cassette, CD
>Computer, e.g. fuel consumption,
cruising range
>Telephone, e.g. dialing
You will find notes and instructions for
operating the digital clock and the com-
puter on the following pages. Please
refer to the separate Owner's Manuals
for operating the audio systems, the
telephone and the onboard computer.
Any unrealistic numerical entries
will not be accepted.
All stored data will be lost if the power
supply is interrupted. Time display,
switch-on times for parked car ventila-
tion, distance and cruise control speed
limit may have to be reset once the
power supply has been reestablished.<
1 Function button for audio systems
2 Function button for the telephone
3 LED for parked car ventilation
>remains on if switch-on time is
active
>flashes while operating
4 Function button for the digital clock
and computer
5 Indicator display for the various
onboard systems390us705
6 Display for the entry and request but-
tons. Depending on the operating
mode, the functions and options that
can be selected with the buttons are
displayed here
7 Entry and request buttons for operat-
ing the various onboard systems
Page 82 of 202
82n
Digital clock in MID
To avoid endangering yourself or
other road users, only make
entries when the vehicle is stationary.<
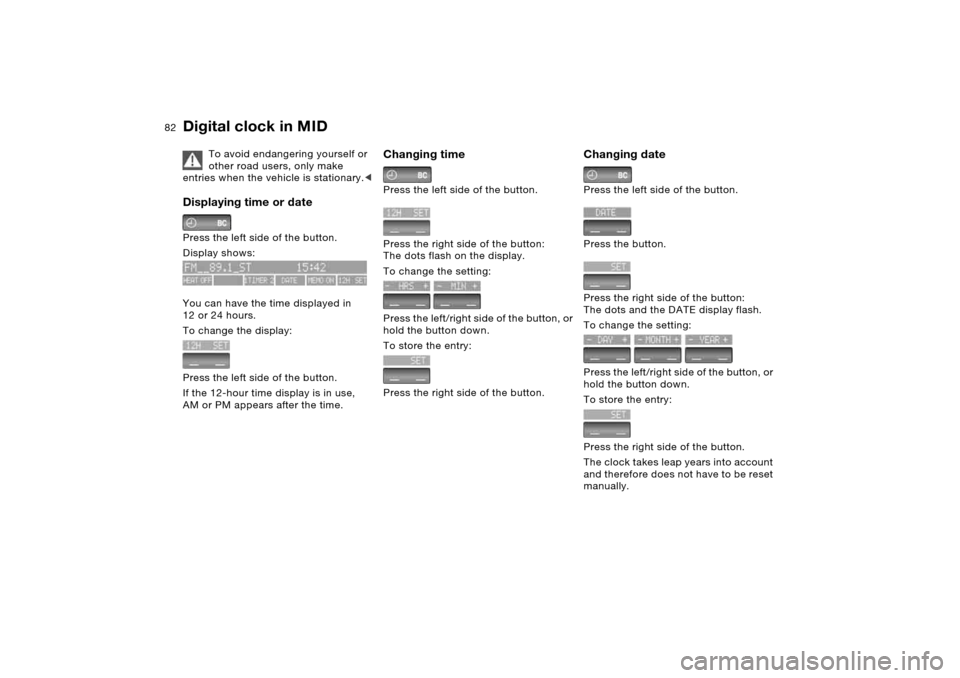
Displaying time or date Press the left side of the button.
Display shows:
You can have the time displayed in
12 or 24 hours.
To change the display:
Press the left side of the button.
If the 12-hour time display is in use,
AM or PM appears after the time.
Changing time Press the left side of the button.
Press the right side of the button:
The dots flash on the display.
To change the setting:
Press the left/right side of the button, or
hold the button down.
To store the entry:
Press the right side of the button.
Changing date Press the left side of the button.
Press the button.
Press the right side of the button:
The dots and the DATE display flash.
To change the setting:
Press the left/right side of the button, or
hold the button down.
To store the entry:
Press the right side of the button.
The clock takes leap years into account
and therefore does not have to be reset
manually.