high beam BMW X5 3.0I 2007 E70 Owner's Manual
[x] Cancel search | Manufacturer: BMW, Model Year: 2007, Model line: X5 3.0I, Model: BMW X5 3.0I 2007 E70Pages: 272, PDF Size: 9.03 MB
Page 13 of 272
At a glance
11Reference
Controls
Driving tips
Communications
Navigation
Entertainment
Mobility
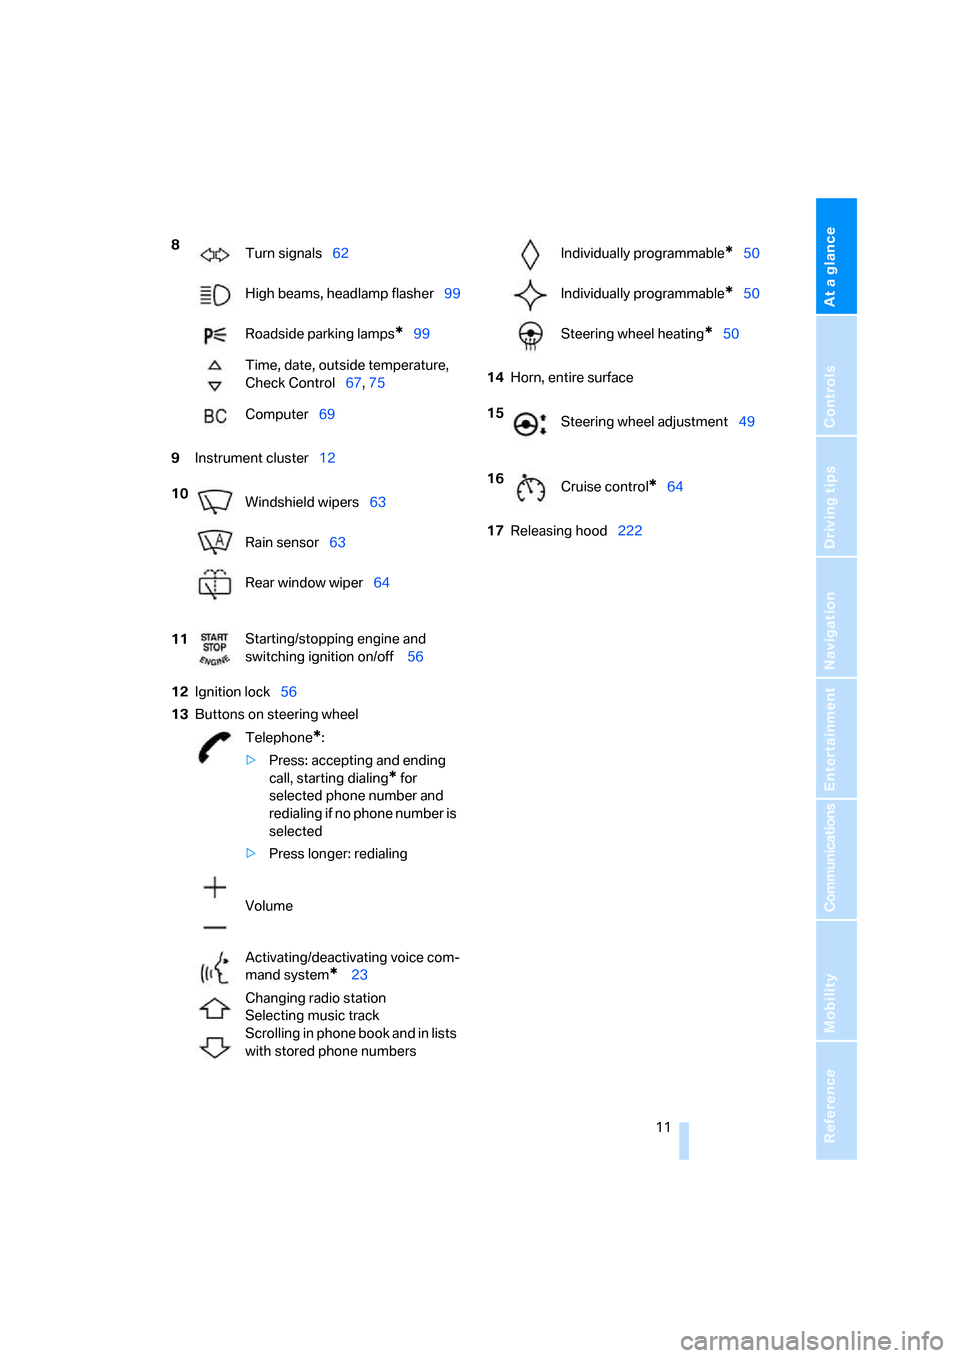
9Instrument cluster12
12Ignition lock56
13Buttons on steering wheel14Horn, entire surface
17Releasing hood222 8
Turn signals62
High beams, headlamp flasher99
Roadside parking lamps
*99
Time, date, outside temperature,
Check Control67, 75
Computer69
10
Windshield wipers63
Rain sensor63
Rear window wiper64
11Starting/stopping engine and
switching ignition on/off 56
Telephone
*:
>Press: accepting and ending
call, starting dialing
* for
selected phone number and
redialing if no phone number is
selected
>Press longer: redialing
Volume
Activating/deactivating voice com-
mand system
* 23
Changing radio station
Selecting music track
Scrolling in phone book and in lists
with stored phone numbers
Individually programmable*50
Individually programmable
*50
Steering wheel heating
*50
15
Steering wheel adjustment49
16
Cruise control
*64
Page 15 of 272
At a glance
13Reference
Controls
Driving tips
Communications
Navigation
Entertainment
Mobility
Indicator and warning lamps
The concept
The indicator and warning lamps can light up in
different combinations and colors.
Some lamps are tested for proper function by
briefly lighting up during starting of the engine
or when the ignition is switched on.
Explanatory text messages
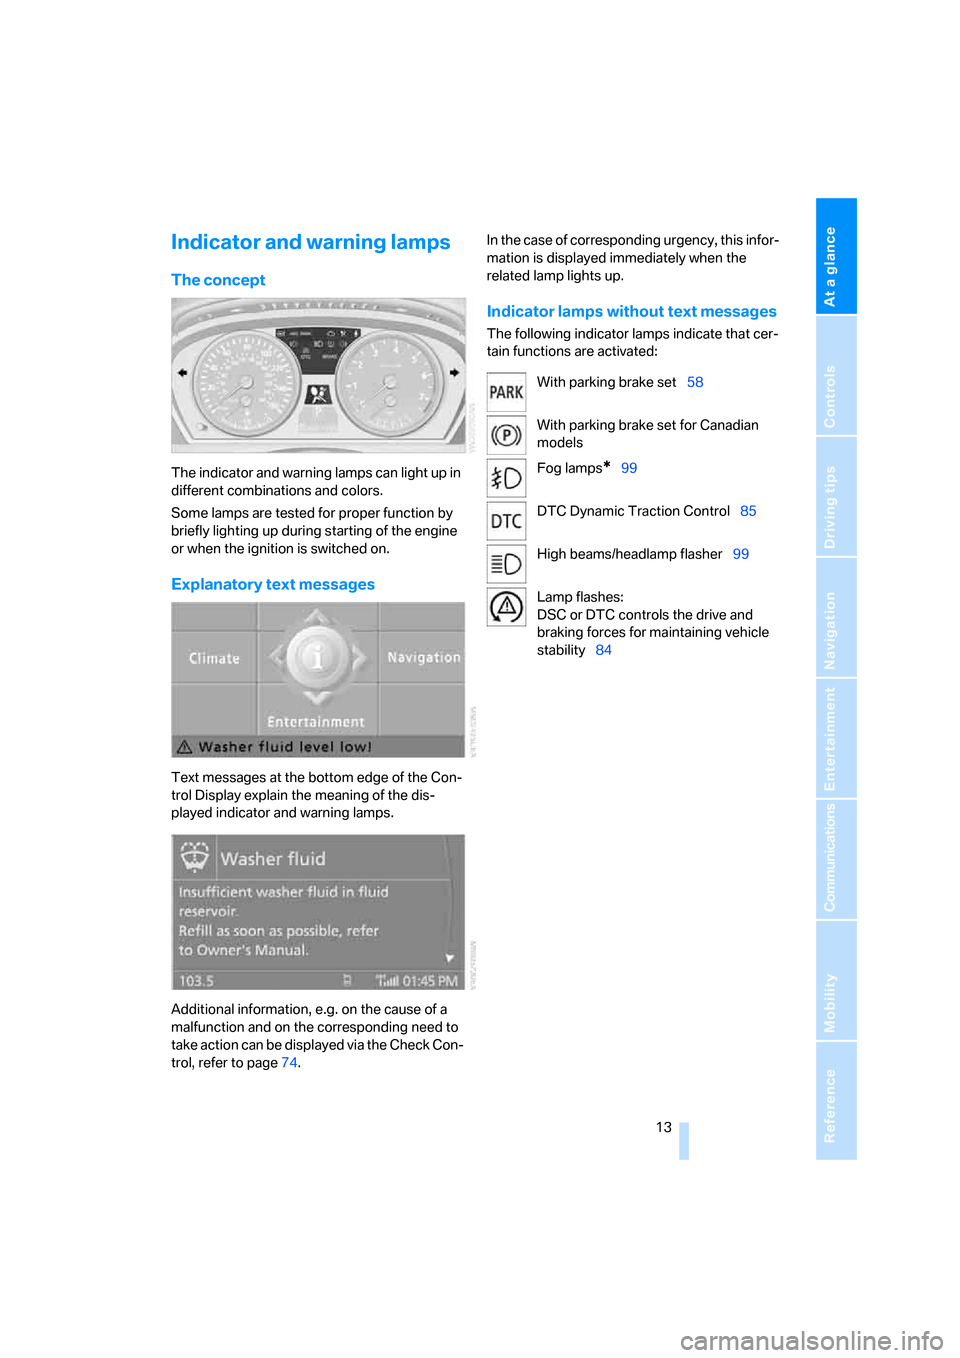
Text messages at the bottom edge of the Con-
trol Display explain the meaning of the dis-
played indicator and warning lamps.
Additional information, e.g. on the cause of a
malfunction and on the corresponding need to
take action can be displayed via the Check Con-
trol, refer to page74.In the case of corresponding urgency, this infor-
mation is displayed immediately when the
related lamp lights up.
Indicator lamps without text messages
The following indicator lamps indicate that cer-
tain functions are activated:
With parking brake set58
With parking brake set for Canadian
models
Fog lamps
*99
DTC Dynamic Traction Control85
High beams/headlamp flasher99
Lamp flashes:
DSC or DTC controls the drive and
braking forces for maintaining vehicle
stability84
Page 36 of 272
Opening and closing
34
Tailgate
Opening
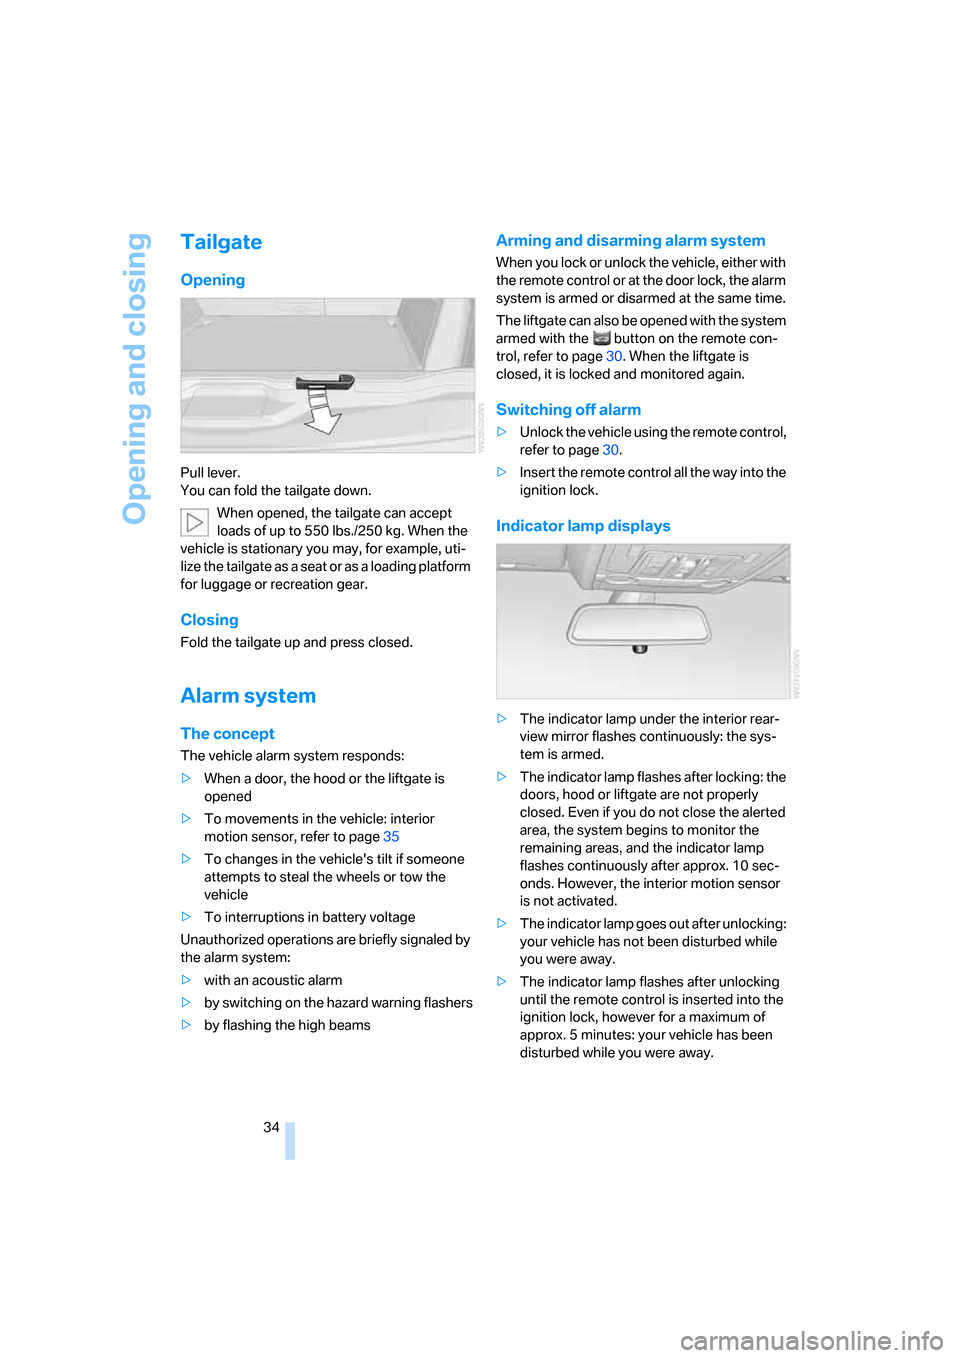
Pull lever.
You can fold the tailgate down.
When opened, the tailgate can accept
loads of up to 550lbs./250kg. When the
vehicle is stationary you may, for example, uti-
lize the tailgate as a seat or as a loading platform
for luggage or recreation gear.
Closing
Fold the tailgate up and press closed.
Alarm system
The concept
The vehicle alarm system responds:
>When a door, the hood or the liftgate is
opened
>To movements in the vehicle: interior
motion sensor, refer to page35
>To changes in the vehicle's tilt if someone
attempts to steal the wheels or tow the
vehicle
>To interruptions in battery voltage
Unauthorized operations are briefly signaled by
the alarm system:
>with an acoustic alarm
>by switching on
the hazard warning flashers
>by flashing the high beams
Arming and disarming alarm system
When you lock or unlock the vehicle, either with
the remote control or at the door lock, the alarm
system is armed or disarmed at the same time.
The liftgate can also be opened with the system
armed with the button on the remote con-
trol, refer to page30. When the liftgate is
closed, it is locked and monitored again.
Switching off alarm
>Unlock the vehicle using the remote control,
refer to page30.
>Insert the remote control all the way into the
ignition lock.
Indicator lamp displays
>The indicator lamp under the interior rear-
view mirror flashes continuously: the sys-
tem is armed.
>The indicator lamp flashes after locking: the
doors, hood or liftgate are not properly
closed. Even if you do not close the alerted
area, the system begins to monitor the
remaining areas, and the indicator lamp
flashes continuously after approx. 10 sec-
onds. However, the interior motion sensor
is not activated.
>The indicator lamp goes out after unlocking:
your vehicle has not been disturbed while
you were away.
>The indicator lamp flashes after unlocking
until the remote control is inserted into the
ignition lock, however for a maximum of
approx. 5 minutes: your vehicle has been
disturbed while you were away.
Page 64 of 272
Driving
62 3.Insert the releasing tool, contained in the
onboard tool kit under the floor panel, refer
to page228, into the opening, arrow1.
4.Turn the releasing tool as far as possible,
arrow2, and then press downward. The
transmission lock is released.
Lock the transmission lock after parking
the vehicle at its destination. Otherwise
there is a danger of the vehicle rolling.<
Locking
1.Pull out the releasing tool.
The transmission lock is locked again.
2.Close the cover in the bottom of the cup
holder and lay in the mat again.
3.Close the cover of the cup holder and stow
the releasing tool.
The display in the instrument cluster
must change from N to P after locking the
transmission lock. Otherwise there is a danger
of the vehicle rolling.<
Information on jump starting and towing from
page237.
Turn signals/headlamp
flasher/high beams
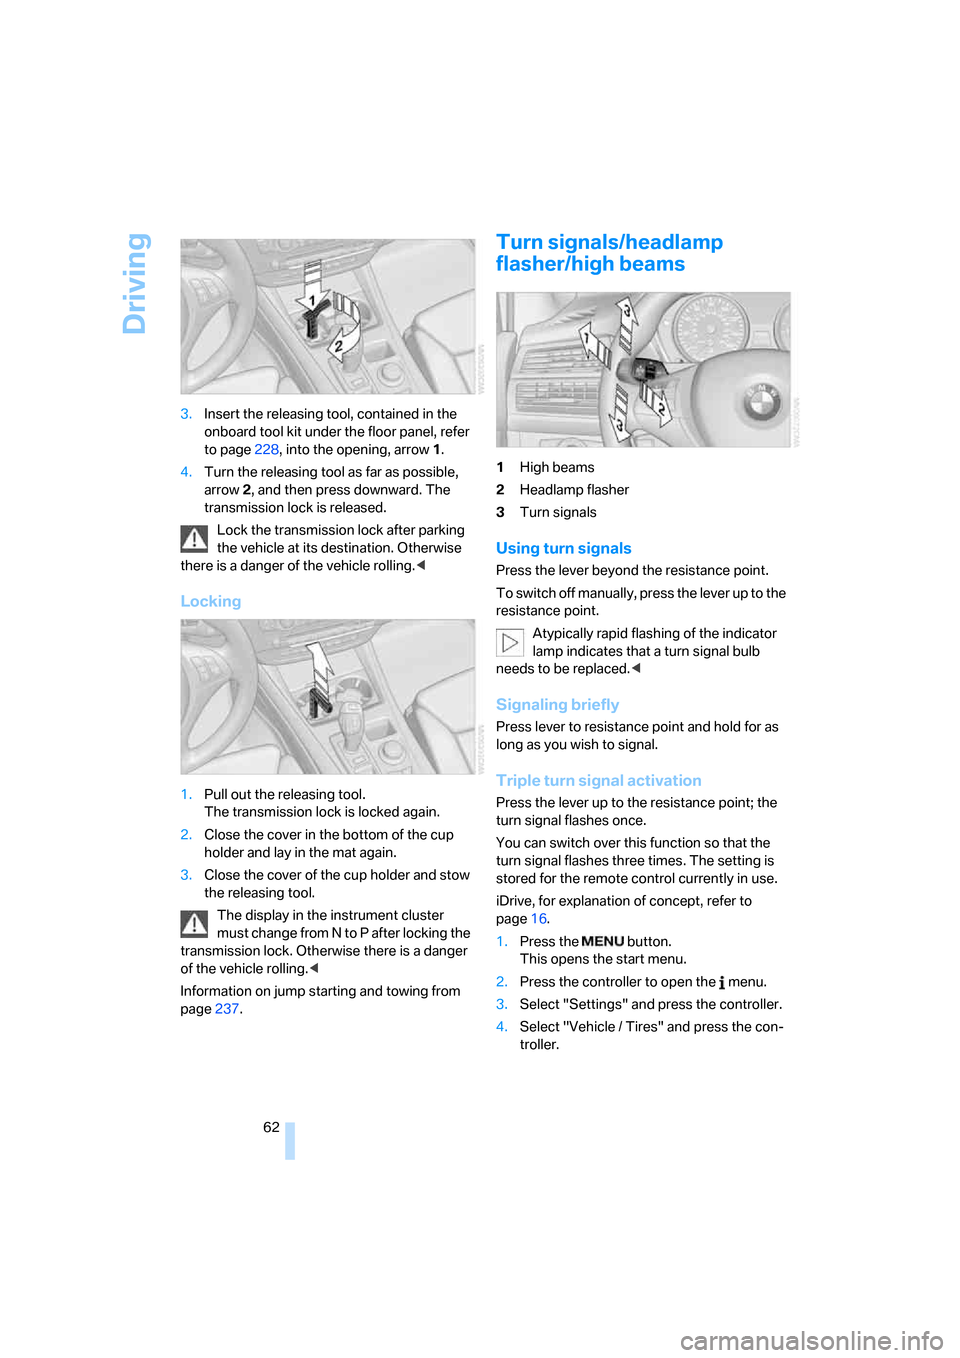
1High beams
2Headlamp flasher
3Turn signals
Using turn signals
Press the lever beyond the resistance point.
To switch off manually, press the lever up to the
resistance point.
Atypically rapid flashing of the indicator
lamp indicates that a turn signal bulb
needs to be replaced.<
Signaling briefly
Press lever to resistance point and hold for as
long as you wish to signal.
Triple turn signal activation
Press the lever up to the resistance point; the
turn signal flashes once.
You can switch over this function so that the
turn signal flashes three times. The setting is
stored for the remote control currently in use.
iDrive, for explanation of concept, refer to
page16.
1.Press the button.
This opens the start menu.
2.Press the controller to open the menu.
3.Select "Settings" and press the controller.
4.Select "Vehicle / Tires" and press the con-
troller.
Page 101 of 272
Controls
99Reference
At a glance
Driving tips
Communications
Navigation
Entertainment
Mobility
Activating Adaptive Head Light and
turning lamps
Turn the light switch to position 3, refer to
page97.
The Adaptive Head Light and the turning lamps
are active. The automatic headlamp control
is
switched on.
To avoid dazzling oncoming traffic, the Adap-
tive Head Light is not active when driving in
reverse and points toward the passenger side
when the vehicle is stopped. When driving in
reverse, only the turning lamps are active on
both sides.
Malfunction
The LED next to the symbol for automatic head-
lamp control flashes. Adaptive Head Light is
malfunctioning or has failed. Have the system
checked as soon as possible.
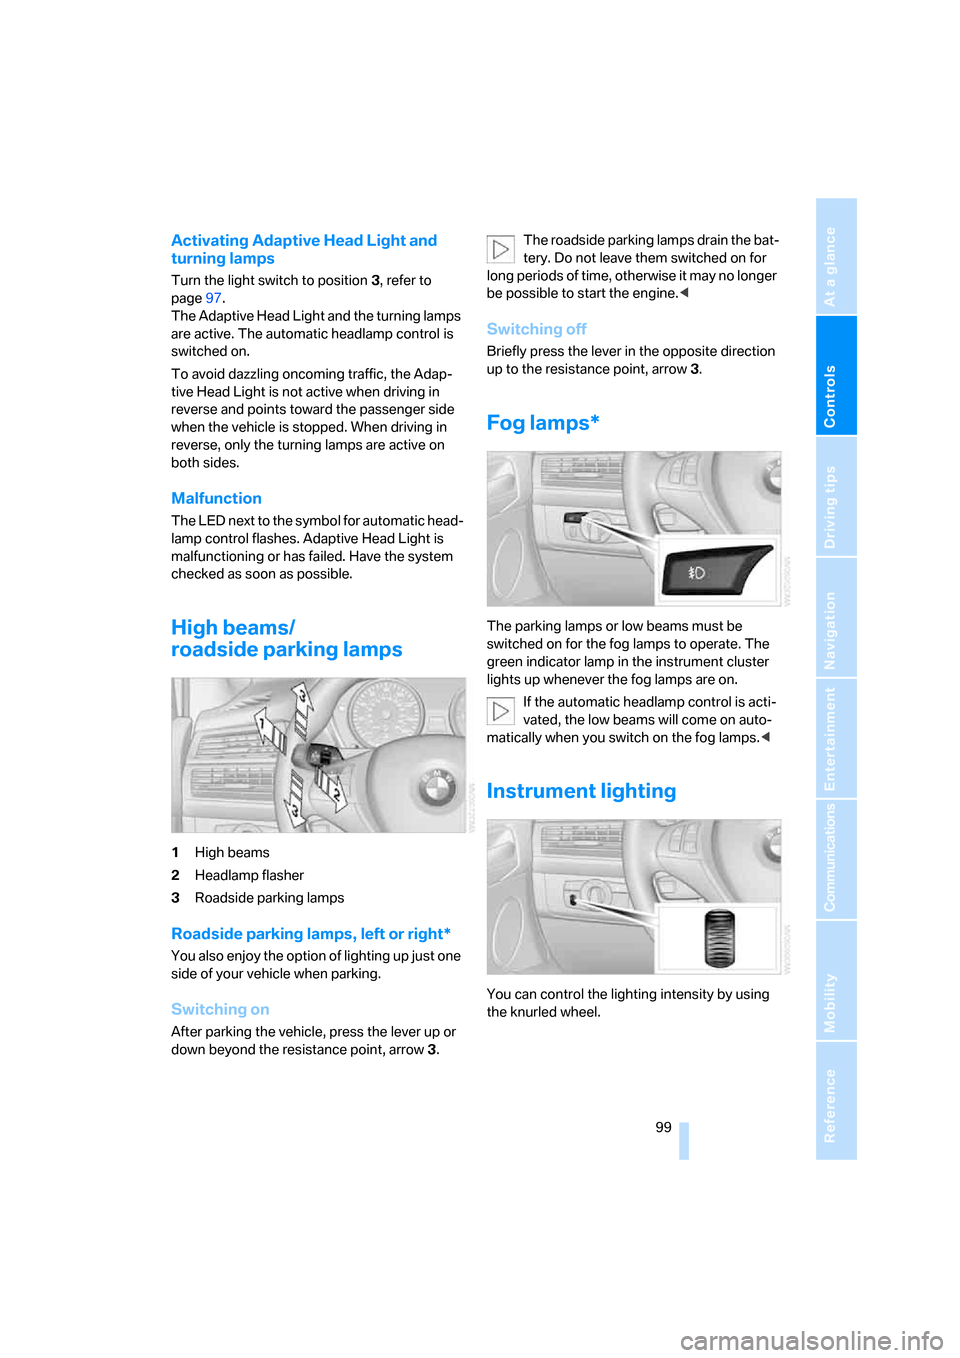
High beams/
roadside parking lamps
1High beams
2Headlamp flasher
3Roadside parking lamps
Roadside parking lamps, left or right*
You also enjoy the option of lighting up just one
side of your vehicle when parking.
Switching on
After parking the vehicle, press the lever up or
down beyond the resistance point, arrow 3.The roadside parking lamps drain the bat-
tery. Do not leave them switched on for
long periods of time, otherwise it may no longer
be possible to start the engine.<
Switching off
Briefly press the lever in the opposite direction
up to the resistance point, arrow 3.
Fog lamps*
The parking lamps or low beams must be
switched on for the fog lamps to operate. The
green indicator lamp in the instrument cluster
lights up whenever the fog lamps are on.
If the automatic headlamp control is acti-
vated, the low beams will come on auto-
matically when you switch on the fog lamps.<
Instrument lighting
You can control the lighting intensity by using
the knurled wheel.
Page 231 of 272
Mobility
229Reference
At a glance
Controls
Driving tips
Communications
Navigation
Entertainment
For care and maintenance of the headlamps,
please follow the instructions in the separate
Caring for your vehicle brochure.
For bulbs for which replacement is not
described and for checking and adjusting
headlamp aim, please contact your BMW
Sports Activity Vehicle Center.<
Light-emitting diodes LEDs
Light-emitting diodes installed behind translu-
cent lenses serve as the light source for many of
the controls and displays in your vehicle. These
light-emitting diodes, which operate using a
concept similar to that applied in conventional
lasers, are officially designated as Class 1 light-
emitting diodes.
Do not remove the covers, and never
stare into the unfiltered light for several
hours, as irritation of the retina could result.<
Xenon bulbs
The service life of these bulbs is very long and
the probability of a failure is very low, provided
that they are not switched on and off an unusual
number of times. If one of these bulbs should
nevertheless fail, it is possible to continue driv-
ing with great caution using the fog lamps, pro-
vided traffic laws in your area do not prohibit
this.
Have work on the xenon light unit includ-
ing changing the bulb carried out only by
your BMW Sports Activity Vehicle Center or a
workshop that works according to BMW repair
procedures with correspondingly trained per-
sonnel. Due to the high voltage present in the
system, there is a danger of fatal injuries when
work is carried out improperly.<
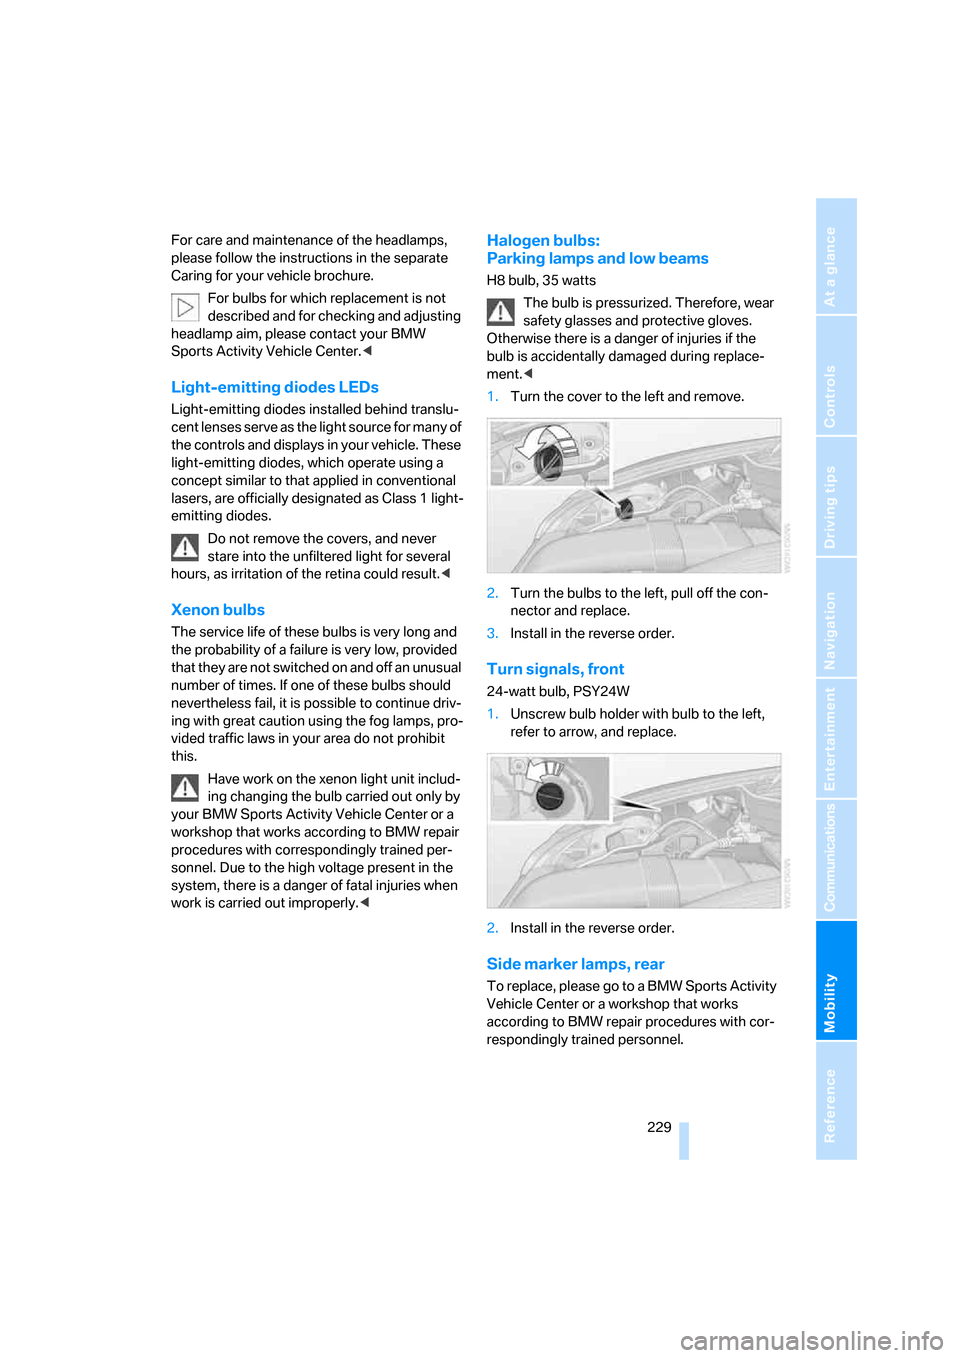
Halogen bulbs:
Parking lamps and low beams
H8 bulb, 35 watts
The bulb is pressurized. Therefore, wear
safety glasses and protective gloves.
Otherwise there is a danger of injuries if the
bulb is accidentally damaged during replace-
ment.<
1.Turn the cover to the left and remove.
2.Turn the bulbs to the left, pull off the con-
nector and replace.
3.Install in the reverse order.
Turn signals, front
24-watt bulb, PSY24W
1.Unscrew bulb holder with bulb to the left,
refer to arrow, and replace.
2.Install in the reverse order.
Side marker lamps, rear
To replace, please go to a BMW Sports Activity
Vehicle Center or a workshop that works
according to BMW repair procedures with cor-
respondingly trained personnel.
Page 259 of 272
Reference 257
At a glance
Controls
Driving tips
Communications
Navigation
Entertainment
Mobility
Glove compartment113
– lighting113
GPS navigation, refer to
Navigation system130
Grills, refer to Ventilation105
Grills of the automatic climate
control101
Gross vehicle weight, refer to
Weights244
H
Handbrake, refer to Parking
brake57
Hand lamp, refer to
Rechargeable flashlight113
Hands-free system, refer to
Microphone14
Hazard warning flashers15
HDC Hill Descent Control85
Head airbags92
Headlamp control,
automatic97
Headlamp flasher62
Headlamps97
– care, refer to Caring for your
vehicle brochure
– cleaning, refer to Washer/
wiper system63
Head Light, refer to Adaptive
Head Light98
Head restraints43
– removing43
– sitting safely40
"Head-Up Display"95
Head-Up Display94
Heated
– mirrors49
– rear window103
– seats47
– steering wheel50
Heating101
– exterior mirrors49
– interior101
– rear window103
– residual heat105
– seats47
– steering wheel50Heating with engine switched
off, refer to Residual
heat105
Heavy cargo, refer to Securing
cargo125
Height, refer to
Dimensions243
Height adjustment
– seats41
– steering wheel49
High beams62,99
– headlamp flasher99
– indicator lamp13
Highs, refer to Treble and
bass155
High water, refer to Driving
through water123
Highway, refer to Route
criteria141
Hill Descent Control HDC85
Hills123
Holder for cups114
Home address141
"Home address" for
navigation141
Homepage4
Hood222
Horn10
Hot exhaust system122
"Hour memo"78
"House number" for
destination entry134
Hydraulic brake assistant,
refer to DBC Dynamic Brake
Control84
Hydroplaning123
I
Ice, refer to Outside
temperature warning67
ID3 tag, refer to Information on
track167iDrive16
– assistance window20
– changing language79
– changing menu page19
– changing settings77
– changing units of measure
and display type79
– confirming selection or
entry19
– controller16
– controls16
– displays, menus17
– selecting menu item19
– setting brightness78
– setting date78
– setting time77
– start menu17
– status information20
– symbols18
Ignition56
– switched off56
– switched on56
Ignition key, refer to Keys/
remote control28
Ignition key position 1, refer to
Radio readiness56
Ignition key position 2, refer to
Ignition on56
Ignition lock56
– starting engine with comfort
access36
Independent ventilation, refer
to Parked car ventilation108
Indicator/warning lamps13
– active steering91
– airbags94
– DSC13,84
– DTC13,85
– fasten safety belt46
– Flat Tire Monitor88
– fog lamps13
– TPM Tire Pressure
Monitor90
Individual air distribution104
Individually programmable
buttons on steering
wheel50
Individual settings, refer to
Personal Profile28