language BMW X5 3.0Si 2008 E70 Owner's Manual
[x] Cancel search | Manufacturer: BMW, Model Year: 2008, Model line: X5 3.0Si, Model: BMW X5 3.0Si 2008 E70Pages: 292, PDF Size: 9.32 MB
Page 25 of 292
At a glance
23Reference
Controls
Driving tips
Communications
Navigation
Entertainment
Mobility
Voice command system
The concept
The voice command system allows you to con-
trol operation of various vehicle systems with-
out ever removing your hands from the steering
wheel.
Individual menu items on the Control Display
can be spoken as commands. This frees you of
having to use the controller.
The voice command system transforms your
oral commands into control signals for the
selected systems and provides support in the
form of instructions or questions.
The voice command system uses a special
microphone located in the area of the interior
rearview mirror, refer to page14.
Precondition
Via iDrive, set the language that applies for the
voice command system in order to enable iden-
tification of the spoken commands. To set the
language of iDrive, refer to page83.
Symbols in Owner's Manual
Voice commands
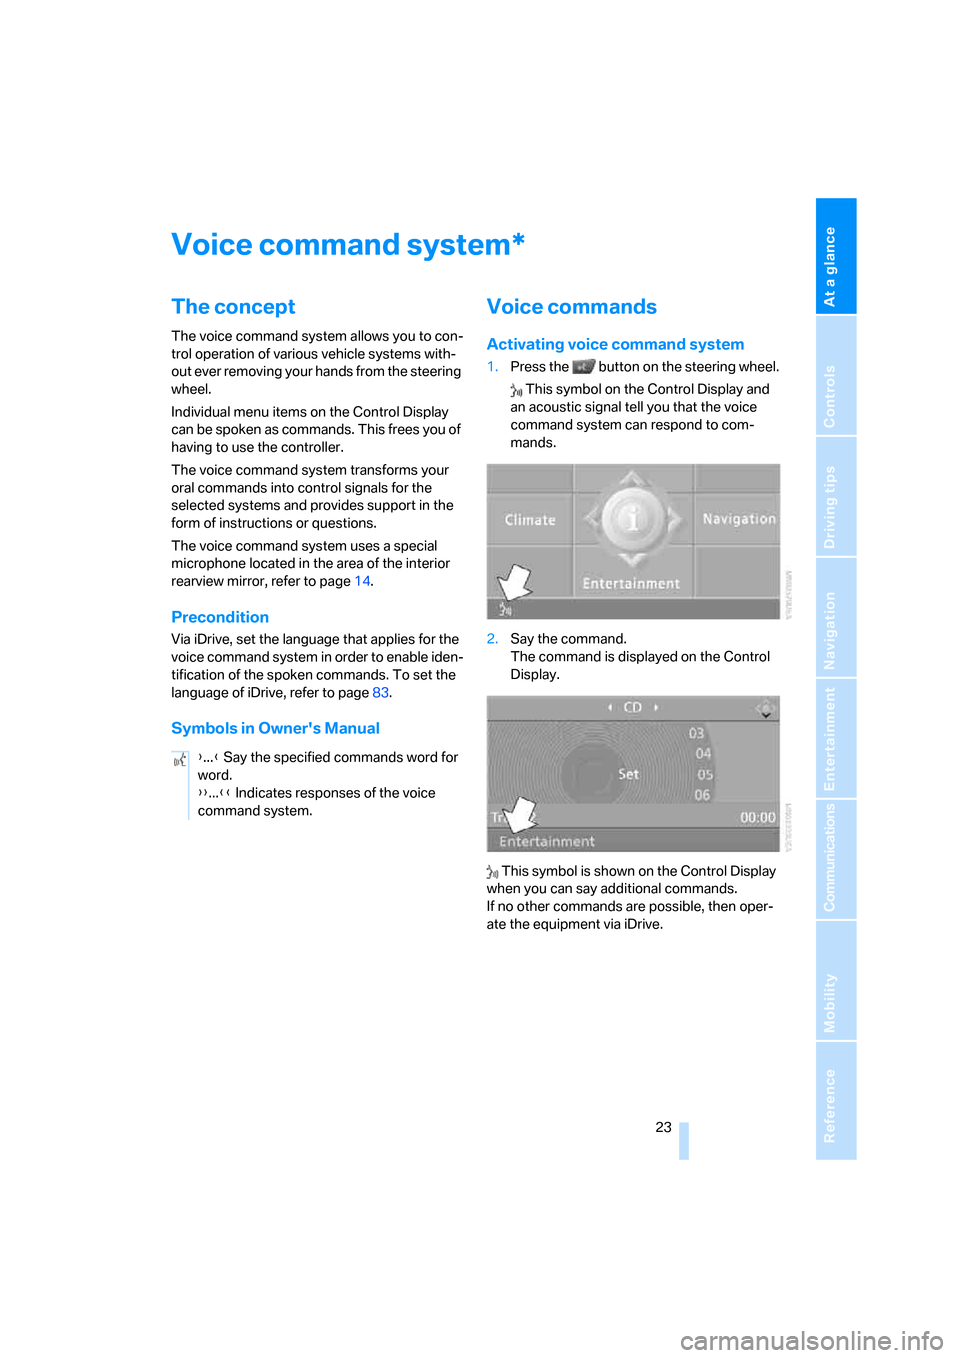
Activating voice command system
1.Press the button on the steering wheel.
This symbol on the Control Display and
an acoustic signal tell you that the voice
command system can respond to com-
mands.
2.Say the command.
The command is displayed on the Control
Display.
This symbol is shown on the Control Display
when you can say additional commands.
If no other commands are possible, then oper-
ate the equipment via iDrive.
*
{...} Say the specified commands word for
word.
{{...}} Indicates responses of the voice
command system.
Page 27 of 292
At a glance
25Reference
Controls
Driving tips
Communications
Navigation
Entertainment
Mobility
Notes
The mobile phone can also be operated
with voice commands, refer to
page219.<
For voice commands, bear the following in
mind:
>Say the commands and numbers smoothly
and at normal volume, avoiding excessive
emphases and pauses. This also applies to
spelling when entering the destination.
>Always issue commands in the language of
the voice command system.
>When selecting a radio station, use the
common pronunciation of the station name.
>For entries in the voice-activated phone
book, only use names in the language of the
voice command system and no abbrevia-
tions.
>Keep the doors, windows and panorama
glass sunroof
* closed to prevent interfer-
ence from ambient noise.
>Avoid making other noise in the vehicle
while speaking.
Page 31 of 292
Controls
29Reference
At a glance
Driving tips
Communications
Navigation
Entertainment
Mobility
>Settings for the display on the Control Dis-
play:
>Brightness of the Control Display, refer
to page82
>Measuring units for consumption, route/
distances, temperature, and pressure,
refer to page82
>Language on Control Display, refer to
page83
>12h/24h mode of the clock, refer to
page82
>Date format, refer to page82
>Showing optical warning for PDC Park Dis-
tance Control
*, refer to page85
>Selection, brightness and position of dis-
play in Head-Up Display
*, refer to page99
>Settings of automatic climate control, refer
to page107
>Positions of driver's seat, exterior mirrors,
and steering wheel
*, refer to page44
>With Adaptive Drive
*, last selected chassis
and suspension tuning setting, refer to
page91
>Audio sources, volume and tone settings,
refer to page163
>Radio, displaying stored stations, refer to
page166
>Telephone, setting volume, refer to
pages214,220
>Pathway lighting, refer to page103, and
daytime running lamps
*, refer to page103
>Triple turn signal activation, refer to
page67
>With rear view camera
*, selection of func-
tions, refer to page86, and type of display,
refer to page88
>With programmable memory/direct selec-
tion buttons, selection of stored functions,
refer to page21
Central locking system
The concept
The central locking system is ready for opera-
tion whenever the driver's door is closed.
The system simultaneously engages and
releases the locks on the following:
>Doors
>Liftgate
>Fuel filler door
Operating from outside
>via the remote control
>via the door lock
>with comfort access
* via the door handles
At the same time, the anti-theft system is also
operated. It prevents the doors from being
unlocked using the lock buttons or door han-
dles. The interior lamps and the courtesy
lamps
* are also switched on and off with the
remote control. The alarm system
is armed/dis-
armed at the same time.
You can find more detailed information on the
alarm system
on page35.
Operating from inside
Via the button for central locking, refer to
page32. The fuel filler door is not locked.
In an accident of sufficient severity, the central
locking system automatically unlocks the vehi-
cle. In addition, the hazard warning flashers and
interior lamps come on.
Opening and closing:
Using remote control
Persons or animals left unattended in a
parked vehicle can lock the doors from
the inside. Always take along the remote control
when leaving the vehicle so that the vehicle can
then be opened from the outside.<
Page 84 of 292
Everything under control
82
Switching on hour signal*
You will hear tones just before each full hour.
Select "Hour memo" and press the controller.
The hour signal is activated.
The setting is stored for the remote control cur-
rently in use.
Setting time format
1.Select "Time format" and press the control-
ler.
2.Select the desired format and press the
controller.
The setting is stored for the remote control cur-
rently in use.
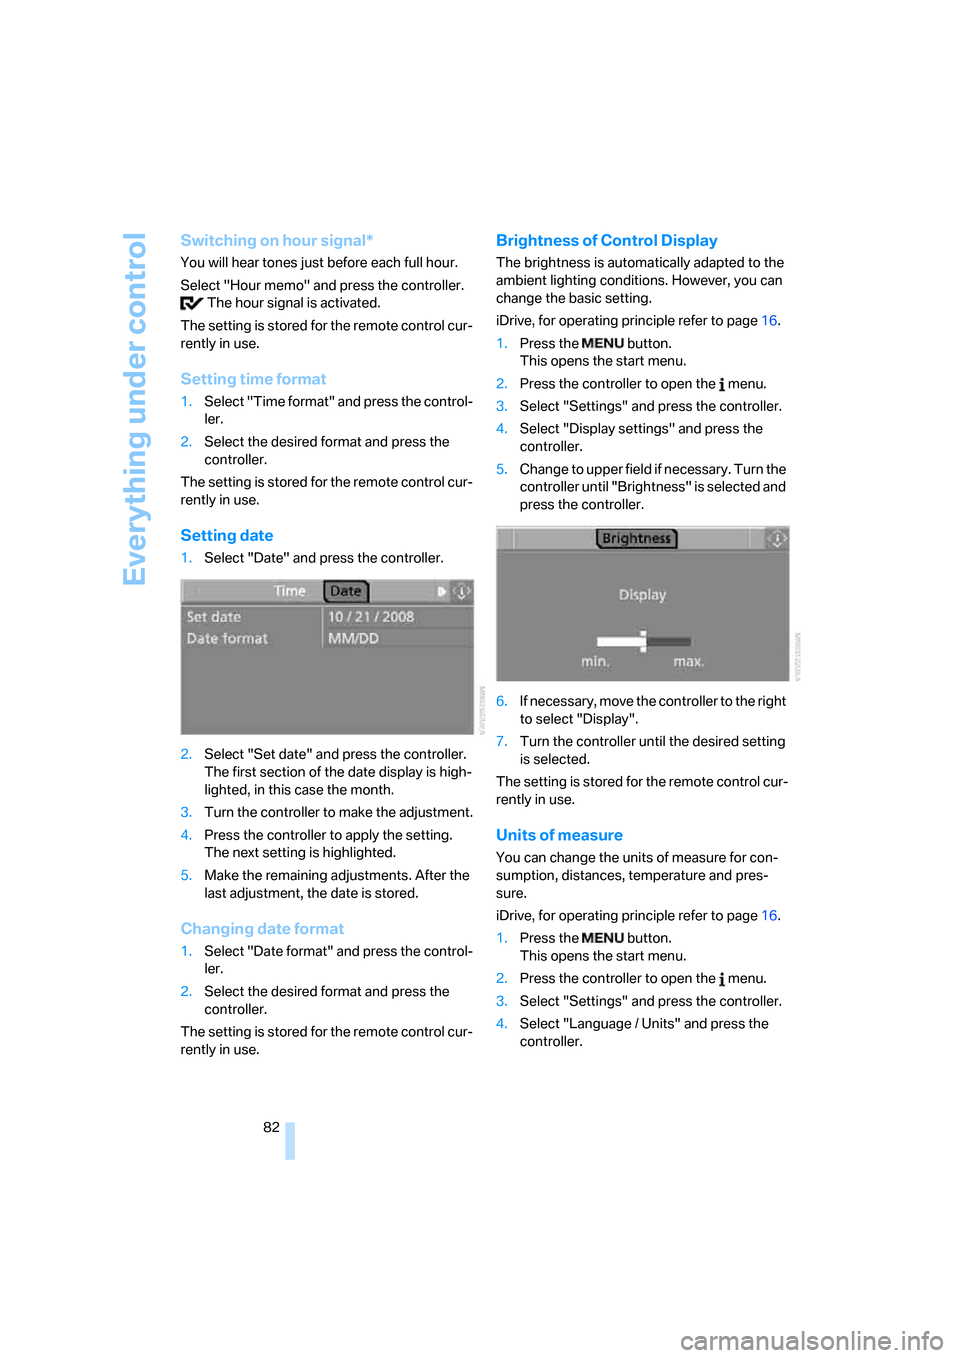
Setting date
1.Select "Date" and press the controller.
2.Select "Set date" and press the controller.
The first section of the date display is high-
lighted, in this case the month.
3.Turn the controller to make the adjustment.
4.Press the controller to apply the setting.
The next setting is highlighted.
5.Make the remaining adjustments. After the
last adjustment, the date is stored.
Changing date format
1.Select "Date format" and press the control-
ler.
2.Select the desired format and press the
controller.
The setting is stored for the remote control cur-
rently in use.
Brightness of Control Display
The brightness is automatically adapted to the
ambient lighting conditions. However, you can
change the basic setting.
iDrive, for operating principle refer to page16.
1.Press the button.
This opens the start menu.
2.Press the controller to open the menu.
3.Select "Settings" and press the controller.
4.Select "Display settings" and press the
controller.
5.Change to upper field if necessary. Turn the
controller until "Brightness" is selected and
press the controller.
6.If necessary, move the controller to the right
to select "Display".
7.Turn the controller until the desired setting
is selected.
The setting is stored for the remote control cur-
rently in use.
Units of measure
You can change the units of measure for con-
sumption, distances, temperature and pres-
sure.
iDrive, for operating principle refer to page16.
1.Press the button.
This opens the start menu.
2.Press the controller to open the menu.
3.Select "Settings" and press the controller.
4.Select "Language / Units" and press the
controller.
Page 85 of 292
Controls
83Reference
At a glance
Driving tips
Communications
Navigation
Entertainment
Mobility
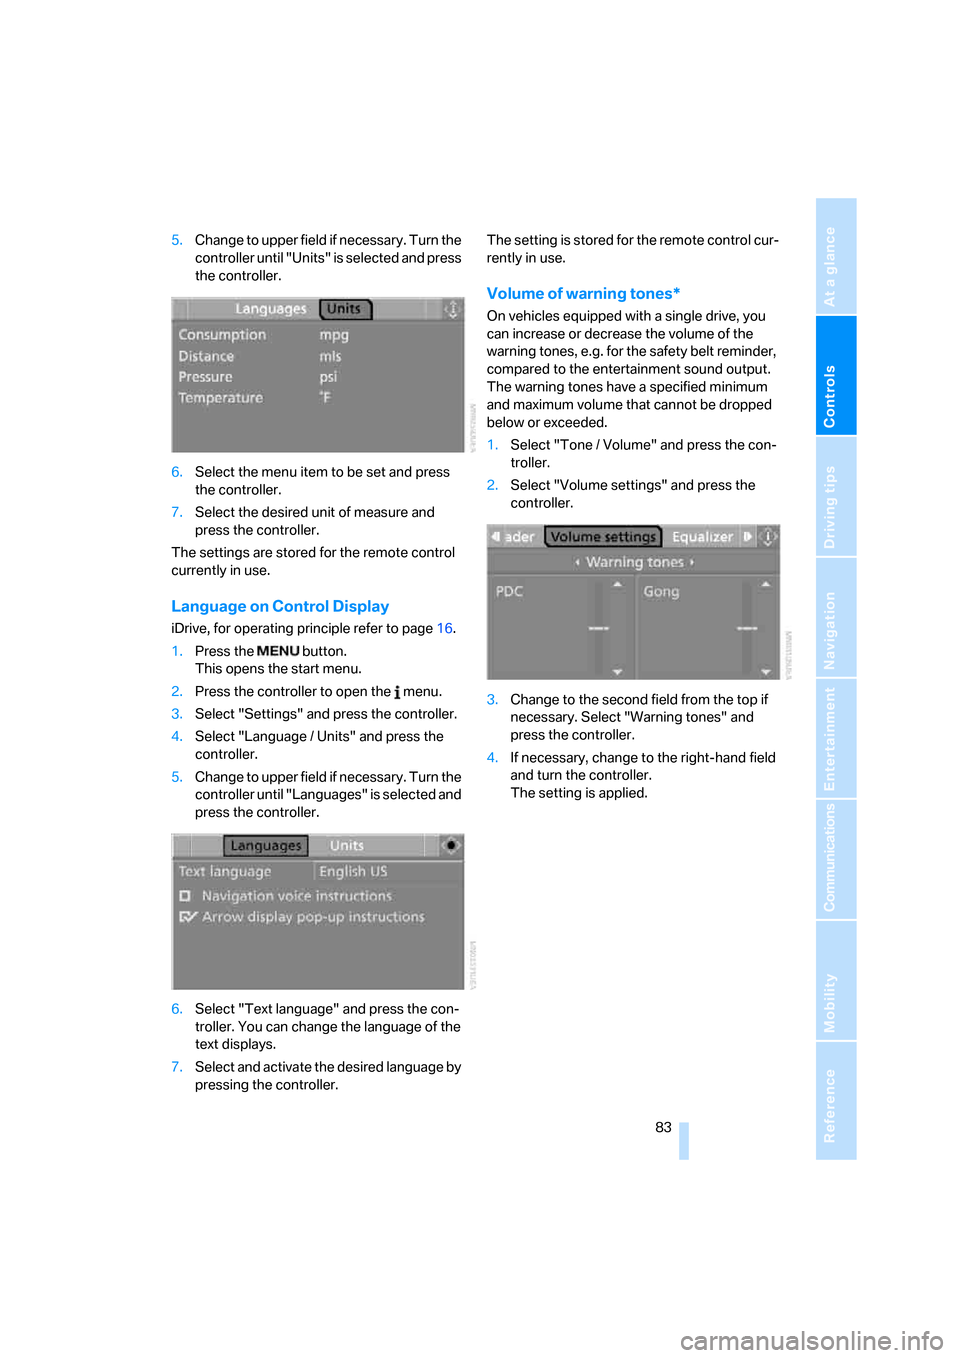
5.Change to upper field if necessary. Turn the
controller until "Units" is selected and press
the controller.
6.Select the menu item to be set and press
the controller.
7.Select the desired unit of measure and
press the controller.
The settings are stored for the remote control
currently in use.
Language on Control Display
iDrive, for operating principle refer to page16.
1.Press the button.
This opens the start menu.
2.Press the controller to open the menu.
3.Select "Settings" and press the controller.
4.Select "Language / Units" and press the
controller.
5.Change to upper field if necessary. Turn the
controller until "Languages" is selected and
press the controller.
6.Select "Text language" and press the con-
troller. You can change the language of the
text displays.
7.Select and activate the desired language by
pressing the controller.The setting is stored for the remote control cur-
rently in use.
Volume of warning tones*
On vehicles equipped with a single drive, you
can increase or decrease the volume of the
warning tones, e.g. for the safety belt reminder,
compared to the entertainment sound output.
The warning tones have a specified minimum
and maximum volume that cannot be dropped
below or exceeded.
1.Select "Tone / Volume" and press the con-
troller.
2.Select "Volume settings" and press the
controller.
3.Change to the second field from the top if
necessary. Select "Warning tones" and
press the controller.
4.If necessary, change to the right-hand field
and turn the controller.
The setting is applied.
Page 119 of 292
Controls
117Reference
At a glance
Driving tips
Communications
Navigation
Entertainment
Mobility
Digital compass*
1Adjustment button
2Display
The display indicates the cardinal or intercardi-
nal direction in which you are currently driving.
Operating principle
You can run various functions by pressing the
adjustment button with a pointed object, e.g. a
ball-point pen etc. The following setting options
are displayed consecutively, depending on how
long the adjustment button is pressed:
>Press briefly: switch display on/off
>3 to 6 seconds: set compass zone
>6 to 9 seconds: calibrate compass
>9 to 12 seconds: set left/right-hand drive
vehicle
>12 to 15 seconds: setting language
Setting compass zones
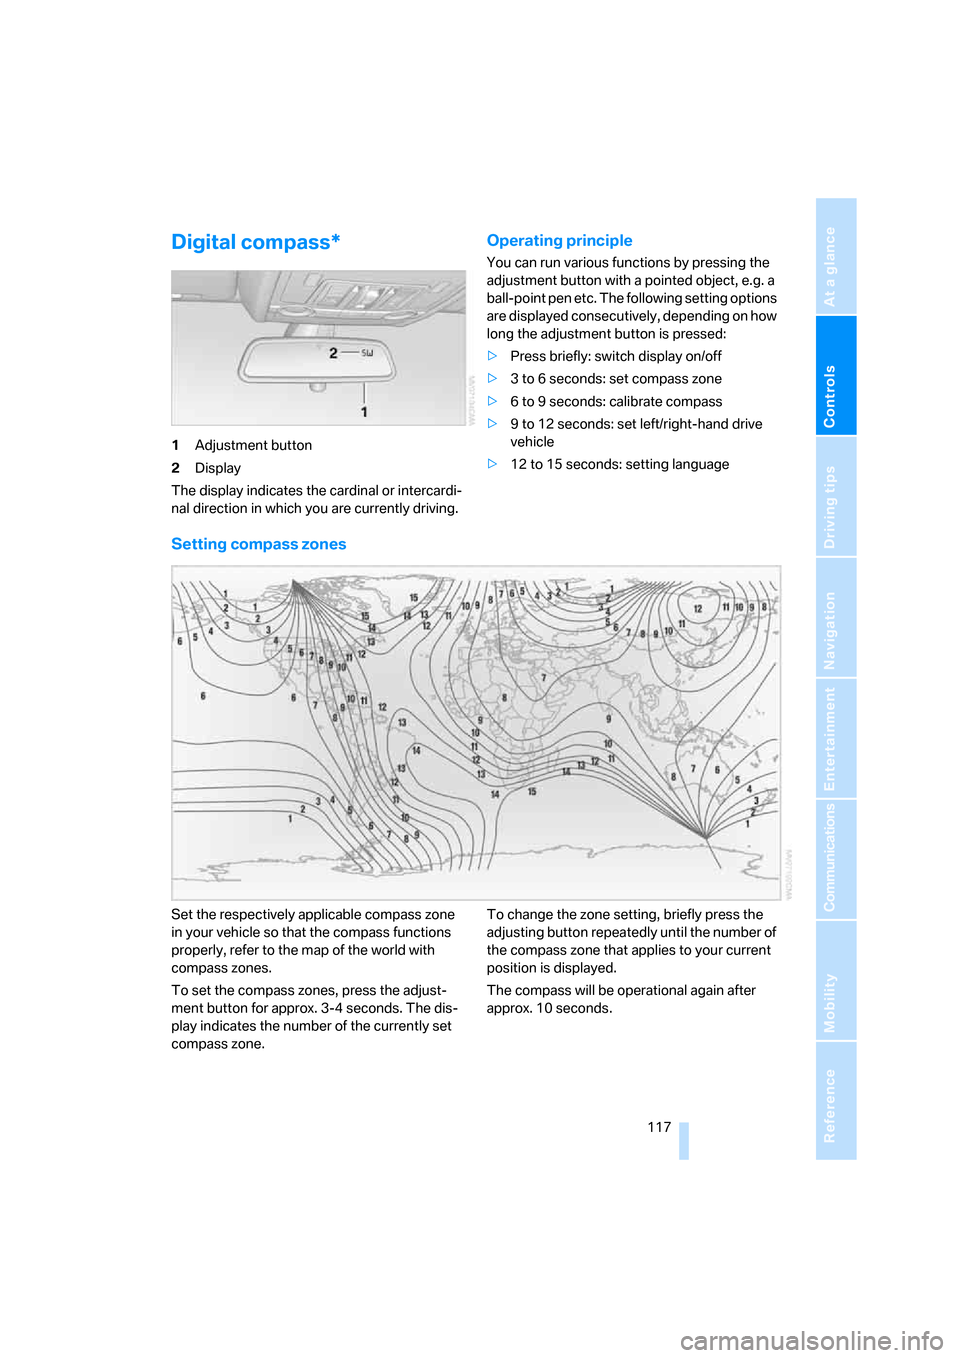
Set the respectively applicable compass zone
in your vehicle so that the compass functions
properly, refer to the map of the world with
compass zones.
To set the compass zones, press the adjust-
ment button for approx. 3-4 seconds. The dis-
play indicates the number of the currently set
compass zone.To change the zone setting, briefly press the
adjusting button repeatedly until the number of
the compass zone that applies to your current
position is displayed.
The compass will be operational again after
approx. 10 seconds.
Page 120 of 292
Practical interior accessories
118
Calibrating digital compass
In the following situations, the digital compass
must be calibrated:
>The wrong cardinal direction appears on
the display.
>The cardinal direction displayed does not
change despite a change in the direction of
travel.
>Not all cardinal directions are displayed.
Procedure
1.Make sure that there are no large metal
objects or overhead power lines in the vicin-
ity of your vehicle and that you have enough
space to drive in a circle.
2.Input the currently applicable compass
zone.
3.Press the adjustment button for approx.
6-7 seconds to display C. Then drive in a
complete circle at least once at a maximum
speed of 4 mph/7 km/h.
If the calibration is successful, display C is
replaced with the points of the compass.
Setting right/left-hand drive vehicle
Your digital compass is already set to right or
left-hand drive vehicle to match your vehicle at
the factory.
Setting language
You can set the language of the display.
Press the adjustment button for approx.
12-13 seconds. Briefly press the adjustment
button again to change between English "E"
and German "O".
The setting is automatically stored after approx.
10 seconds.
Roller sun blinds for rear side
windows*
Pull the loop of the roller sun blind and hook
onto bracket.
Do not open the window with the roller
blind raised, as otherwise there is a dan-
ger of damage, and therefore a danger of inju-
ries at higher speeds.<
Glove compartment
Opening
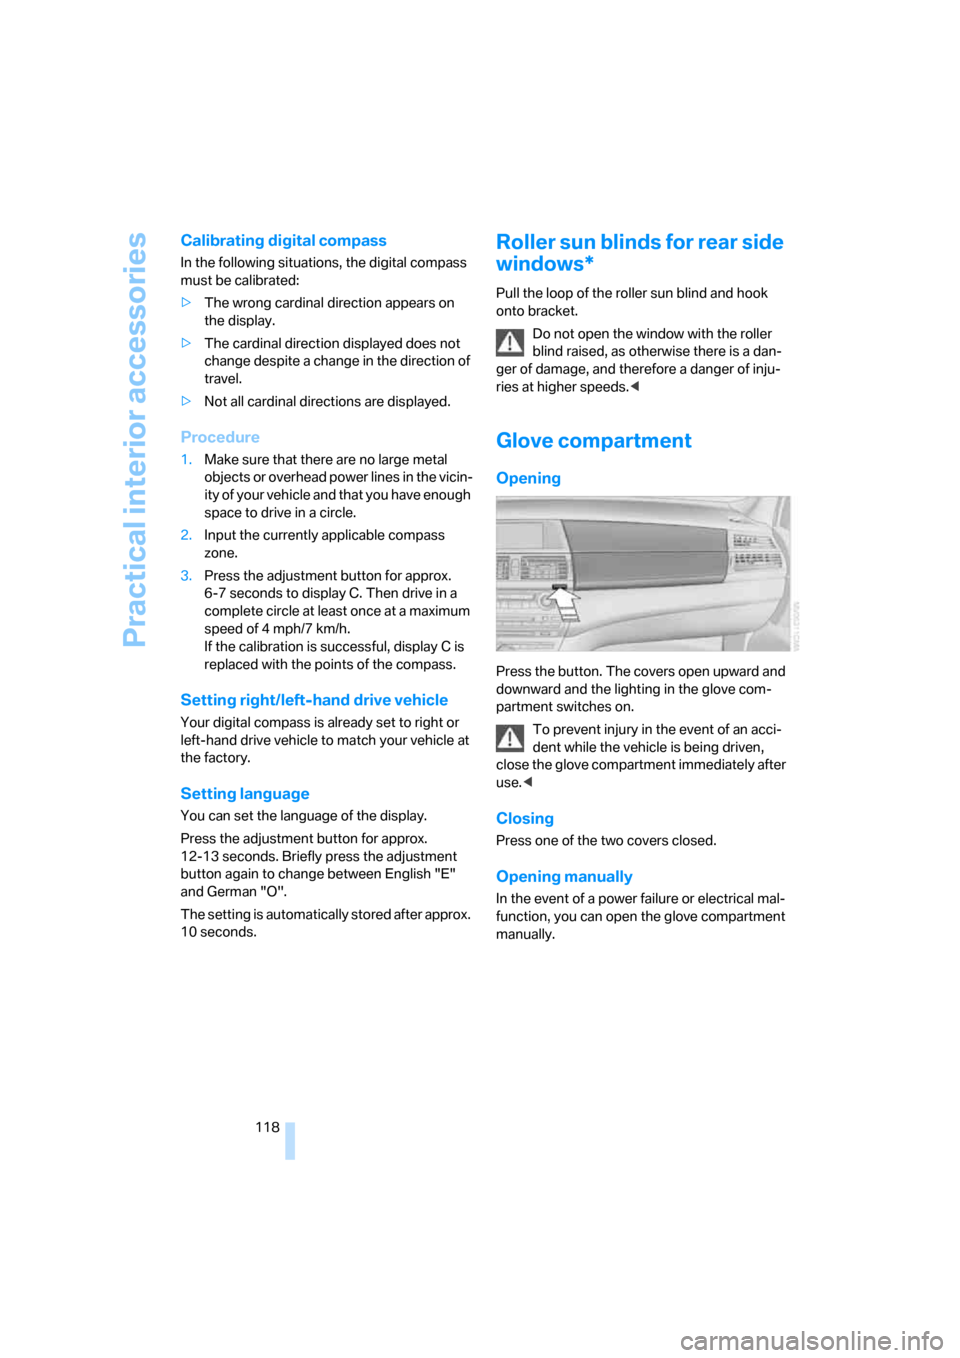
Press the button. The covers open upward and
downward and the lighting in the glove com-
partment switches on.
To prevent injury in the event of an acci-
dent while the vehicle is being driven,
close the glove compartment immediately after
use.<
Closing
Press one of the two covers closed.
Opening manually
In the event of a power failure or electrical mal-
function, you can open the glove compartment
manually.
Page 139 of 292
Navigation
Driving tips
137Reference
At a glance
Controls
Communications
Entertainment
Mobility
Displaying arrow view in map view
If the navigation system suggests a change of
direction, the arrow view is briefly displayed.
1.Press the button.
This opens the start menu.
2.Press the controller to open the menu.
3.Turn the controller until "Settings" is
selected and press the controller.
4.Turn the controller until "Language / Units"
is selected and press the controller.
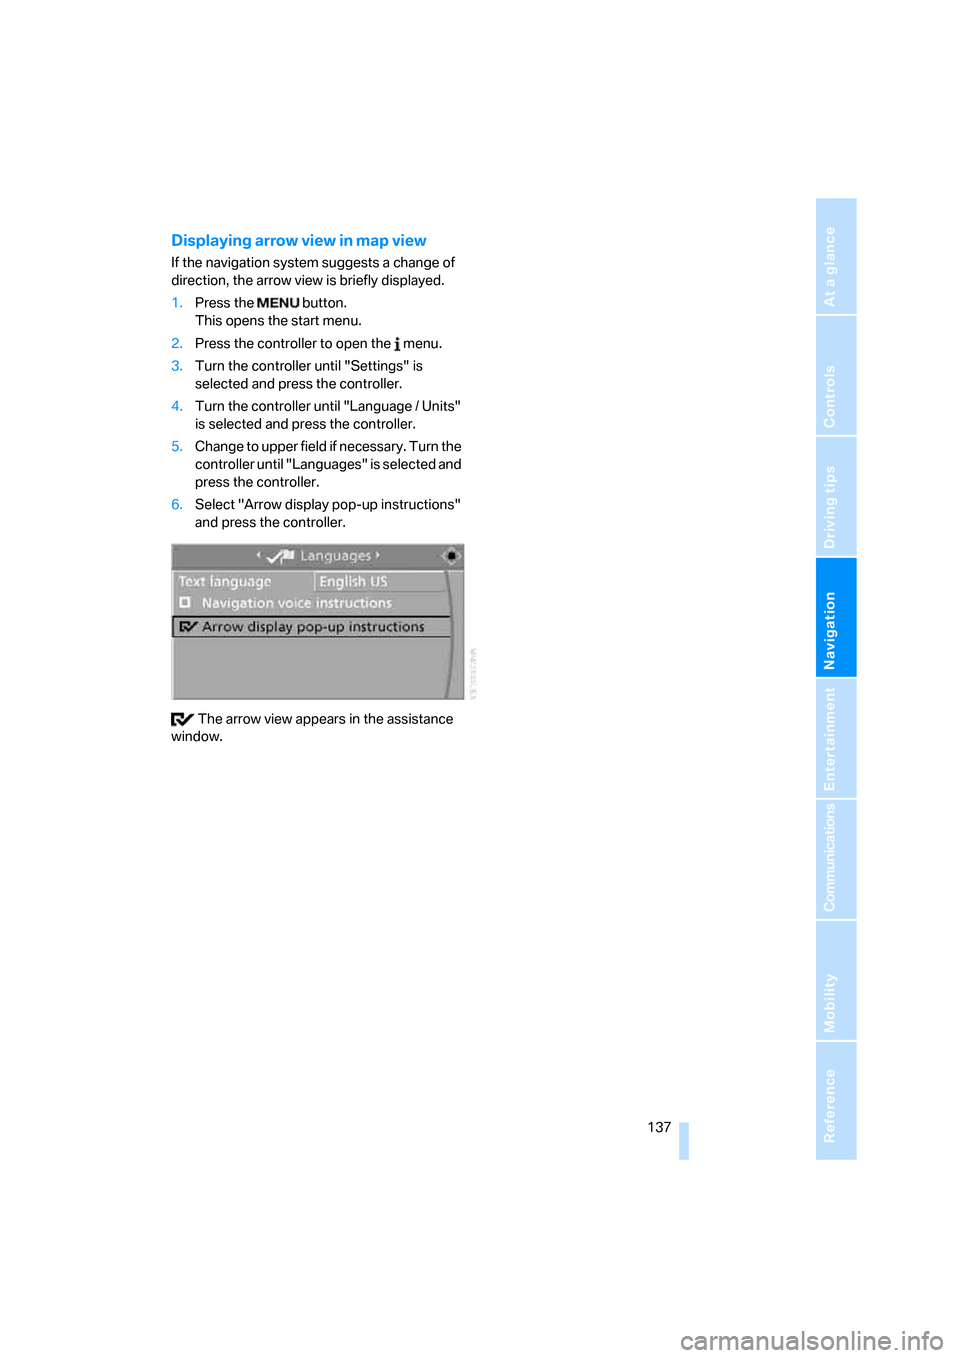
5.Change to upper field if necessary. Turn the
controller until "Languages" is selected and
press the controller.
6.Select "Arrow display pop-up instructions"
and press the controller.
The arrow view appears in the assistance
window.
Page 144 of 292
Destination entry
142
Selecting country
1.Wait for the system to ask for the country of
destination.
Say the name of the country of destination in
the language of the voice command system.
Entering destination
The destination can be spelled or entered as an
entire word.
Spelling destination
To enter the destination, spell it using the
orthography of the country of destination.
Pronounce the letters smoothly and at normal
volume, avoiding excessive emphasis and
pauses.
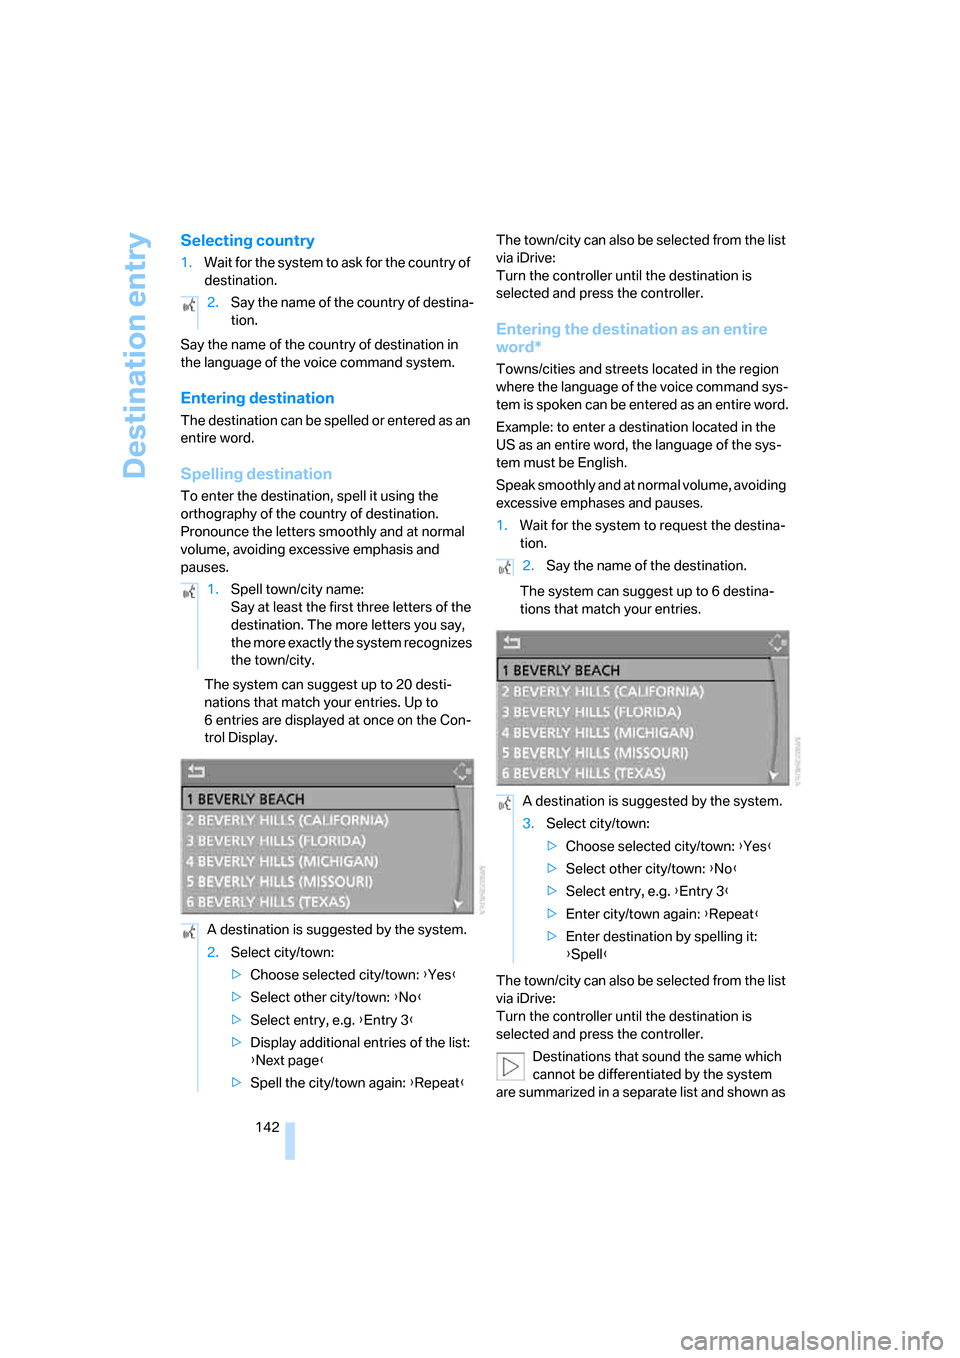
The system can suggest up to 20 desti-
nations that match your entries. Up to
6 entries are displayed at once on the Con-
trol Display.The town/city can also be selected from the list
via iDrive:
Turn the controller until the destination is
selected and press the controller.
Entering the destination as an entire
word*
Towns/cities and streets located in the region
where the language of the voice command sys-
tem is spoken can be entered as an entire word.
Example: to enter a destination located in the
US as an entire word, the language of the sys-
tem must be English.
Speak smoothly and at normal volume, avoiding
excessive emphases and pauses.
1.Wait for the system to request the destina-
tion.
The system can suggest up to 6 destina-
tions that match your entries.
The town/city can also be selected from the list
via iDrive:
Turn the controller until the destination is
selected and press the controller.
Destinations that sound the same which
cannot be differentiated by the system
are summarized in a separate list and shown as 2.Say the name of the country of destina-
tion.
1.Spell town/city name:
Say at least the first three letters of the
destination. The more letters you say,
the more exactly the system recognizes
the town/city.
A destination is suggested by the system.
2.Select city/town:
>Choose selected city/town: {Yes}
>Select other city/town: {No}
>Select entry, e.g. {Entry 3}
>Display additional entries of the list:
{Next page}
>Spell the city/town again: {Repeat}
2.Say the name of the destination.
A destination is suggested by the system.
3.Select city/town:
>Choose selected city/town: {Yes}
>Select other city/town: {No}
>Select entry, e.g. {Entry 3}
>Enter city/town again: {Repeat}
>Enter destination by spelling it:
{Spell}
Page 155 of 292
Navigation
Driving tips
153Reference
At a glance
Controls
Communications
Entertainment
Mobility
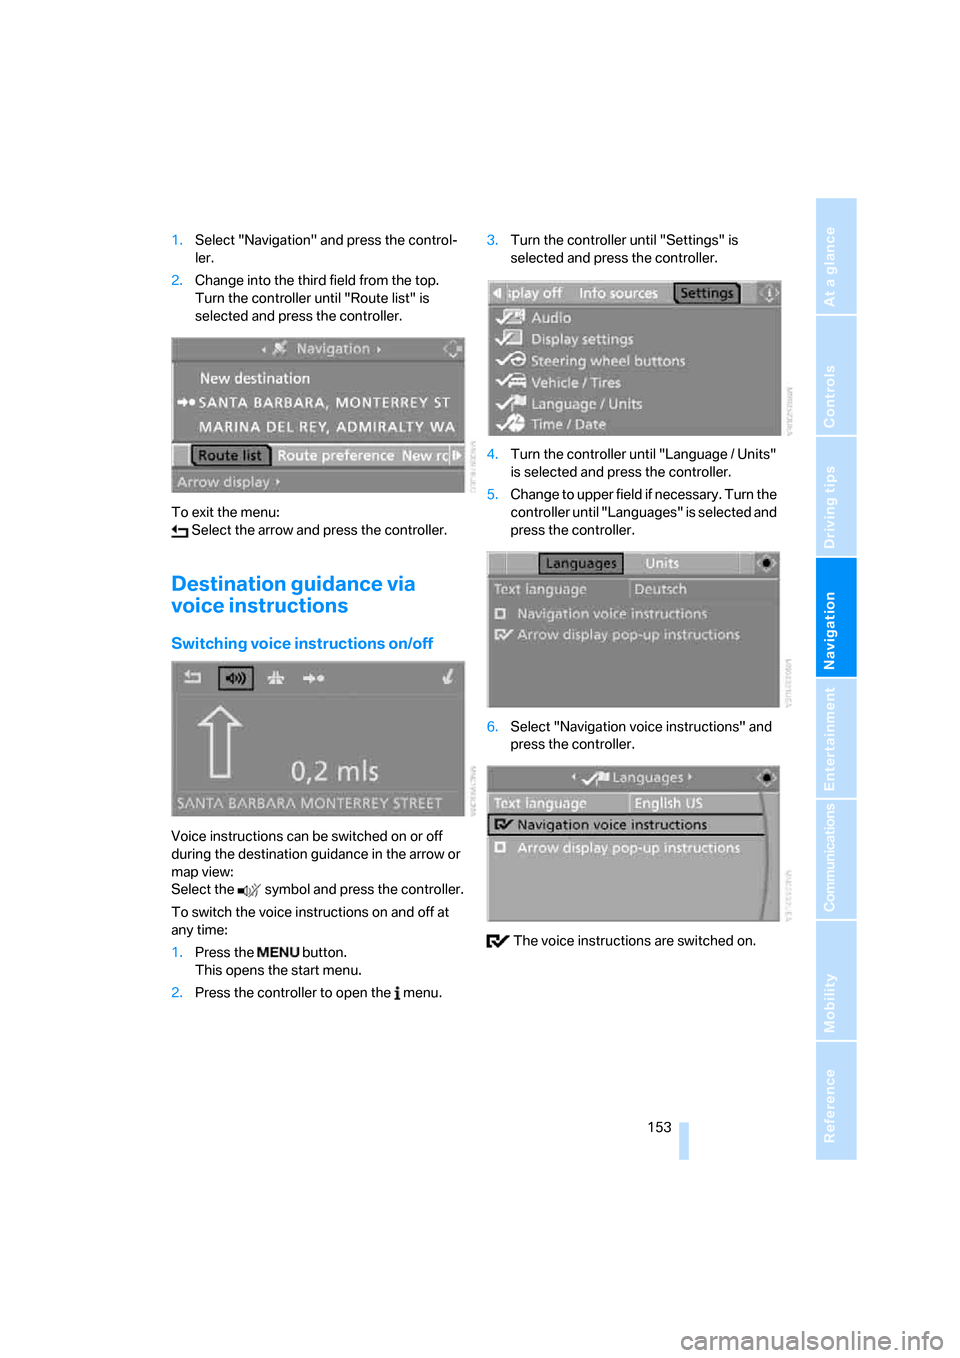
1.Select "Navigation" and press the control-
ler.
2.Change into the third field from the top.
Turn the controller until "Route list" is
selected and press the controller.
To exit the menu:
Select the arrow and press the controller.
Destination guidance via
voice instructions
Switching voice instructions on/off
Voice instructions can be switched on or off
during the destination guidance in the arrow or
map view:
Select the symbol and press the controller.
To switch the voice instructions on and off at
any time:
1.Press the button.
This opens the start menu.
2.Press the controller to open the menu.3.Turn the controller until "Settings" is
selected and press the controller.
4.Turn the controller until "Language / Units"
is selected and press the controller.
5.Change to upper field if necessary. Turn the
controller until "Languages" is selected and
press the controller.
6.Select "Navigation voice instructions" and
press the controller.
The voice instructions are switched on.