Lights BMW X5 3.0Si 2010 E70 User Guide
[x] Cancel search | Manufacturer: BMW, Model Year: 2010, Model line: X5 3.0Si, Model: BMW X5 3.0Si 2010 E70Pages: 300, PDF Size: 12.41 MB
Page 62 of 300
Driving
60 The ignition switches off automatically
* if the
driver's door is opened. Pressing the start/stop
button again switches the ignition back on.
For example, the ignition is not switched off in
the following situations:
>the brakes are actuated
>the low beams are switched on
Starting engine
Do not run the engine in closed rooms,
otherwise the inhalation of toxic exhaust
gases can cause unconsciousness and death.
The exhaust gases contain carbon monoxide,
an odorless and colorless, but highly toxic gas.
Never leave an unattended vehicle with the
engine running, as such a vehicle represents a
potential safety hazard.
To prevent the vehicle from rolling, always
engage transmission position N or P and set the
parking brake before leaving the vehicle with
the engine running.<
Do not allow the engine to warm up by leaving it
running while the vehicle remains stationary.
Instead, begin to drive at a moderate engine
speed.
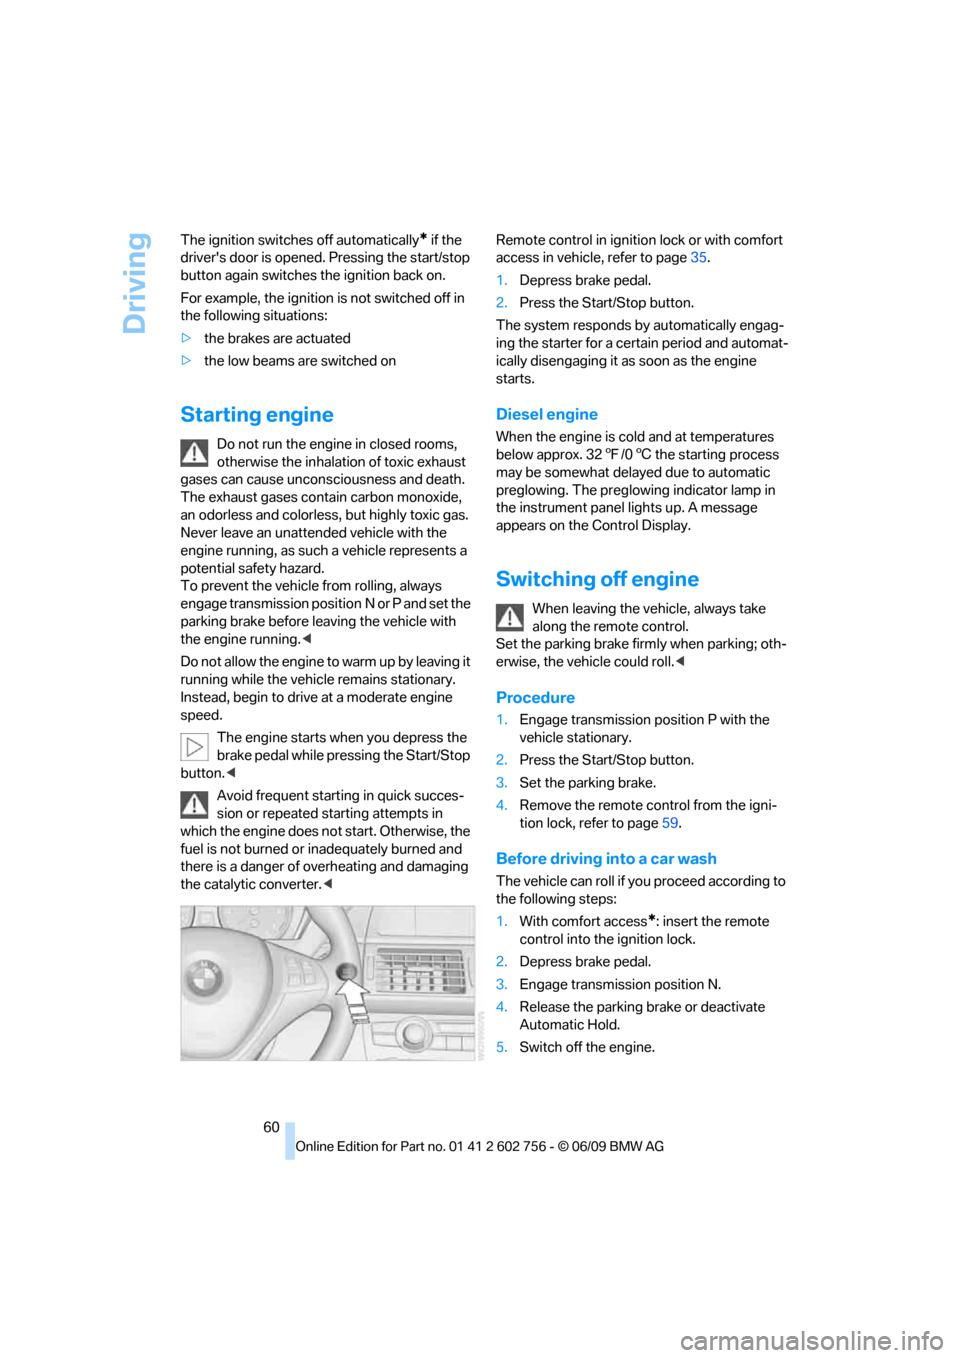
The engine starts when you depress the
brake pedal while pressing the Start/Stop
button.<
Avoid frequent starting in quick succes-
sion or repeated starting attempts in
which the engine does not start. Otherwise, the
fuel is not burned or inadequately burned and
there is a danger of overheating and damaging
the catalytic converter.
1.Depress brake pedal.
2.Press the Start/Stop button.
The system responds by automatically engag-
ing the starter for a certain period and automat-
ically disengaging it as soon as the engine
starts.
Diesel engine
When the engine is cold and at temperatures
below approx. 327/06 the starting process
may be somewhat delayed due to automatic
preglowing. The preglowing indicator lamp in
the instrument panel lights up. A message
appears on the Control Display.
Switching off engine
When leaving the vehicle, always take
along the remote control.
Set the parking brake firmly when parking; oth-
erwise, the vehicle could roll.<
Procedure
1.Engage transmission position P with the
vehicle stationary.
2.Press the Start/Stop button.
3.Set the parking brake.
4.Remove the remote control from the igni-
tion lock, refer to page59.
Before driving into a car wash
The vehicle can roll if you proceed according to
the following steps:
1.With comfort access
*: insert the remote
control into the ignition lock.
2.Depress brake pedal.
3.Engage transmission position N.
4.Release the parking brake or deactivate
Automatic Hold.
5.Switch off the engine.
ba8_e70ag.book Seite 60 Freitag, 5. Juni 2009 11:42 11
Page 63 of 300
Controls
61Reference
At a glance
Driving tips
Communications
Navigation
Entertainment
Mobility
Transmission position P will be engaged:
>automatically after approx. 30 minutes
>if you remove the remote control from the
ignition lock
Parking brake
The concept
Your BMW is equipped with an electromechan-
ical parking brake.
The parking brake is primarily intended to pre-
vent the vehicle from rolling while parked.
You can use the parking brake in two ways:
>manually, by pulling and pushing the button
>automatically, by activating Automatic
Hold, refer to page61
With the engine stopped, the parking brake acts
on the rear wheels via an electromechanical
system. When the engine is running, the park-
ing brake acts on the disk brakes of the front
and rear wheels via the brake hydraulics.
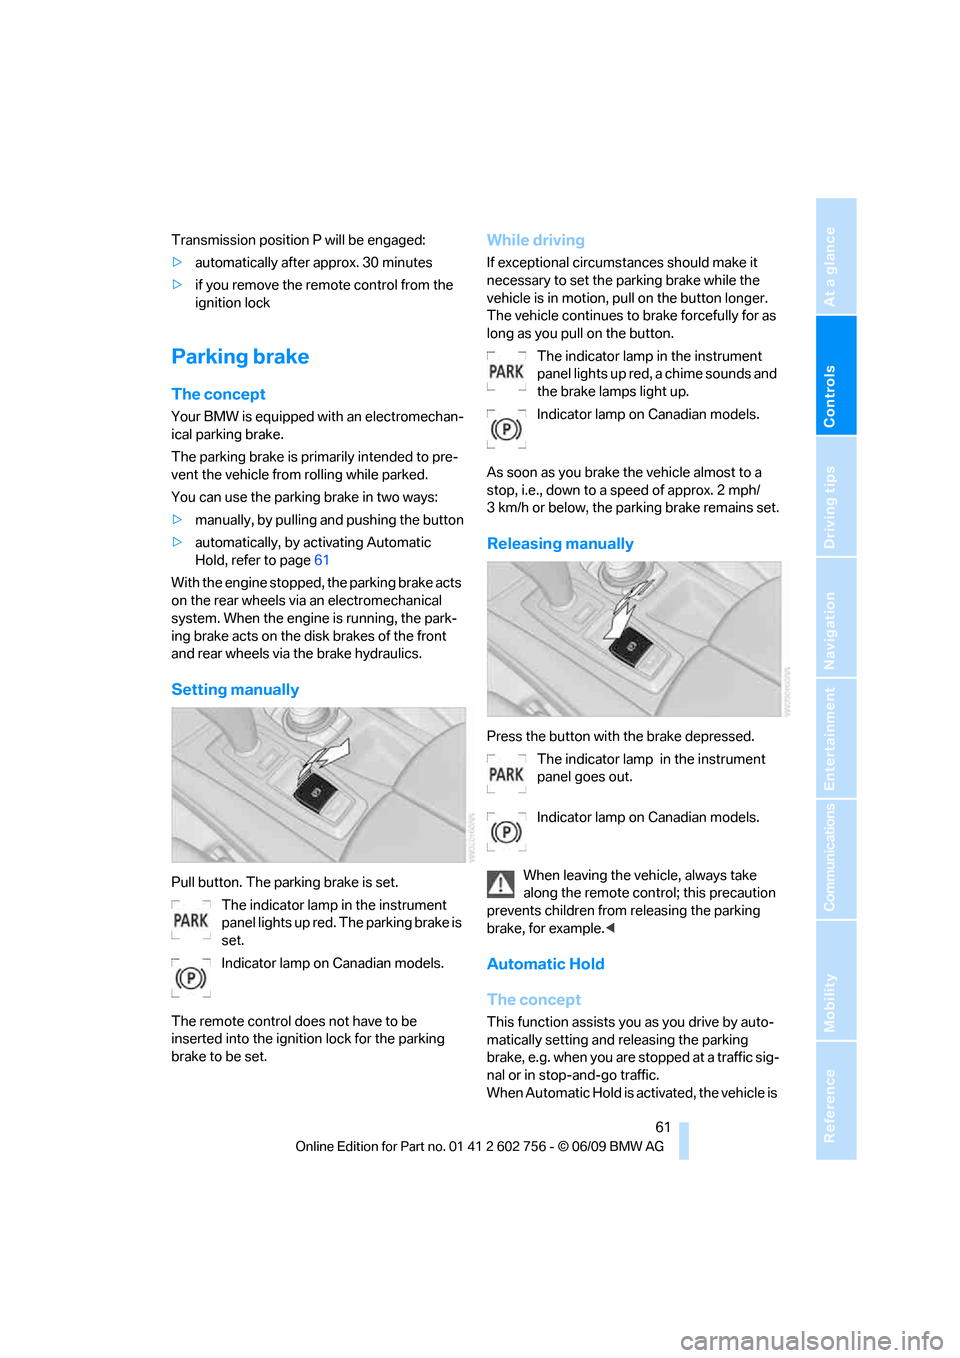
Setting manually
Pull button. The parking brake is set.
The indicator lamp in the instrument
panel lights up red. The parking brake is
set.
Indicator lamp on Canadian models.
The remote control does not have to be
inserted into the ignition lock for the parking
brake to be set.
While driving
If exceptional circumstances should make it
necessary to set the parking brake while the
vehicle is in motion, pull on the button longer.
The vehicle continues to brake forcefully for as
long as you pull on the button.
The indicator lamp in the instrument
panel lights up red, a chime sounds and
the brake lamps light up.
Indicator lamp on Canadian models.
As soon as you brake the vehicle almost to a
stop, i.e., down to a speed of approx. 2 mph/
3 km/h or below, the parking brake remains set.
Releasing manually
Press the button with the brake depressed.
The indicator lamp in the instrument
panel goes out.
Indicator lamp on Canadian models.
When leaving the vehicle, always take
along the remote control; this precaution
prevents children from releasing the parking
brake, for example.<
Automatic Hold
The concept
This function assists you as you drive by auto-
matically setting and releasing the parking
brake, e.g. when you are stopped at a traffic sig-
nal or in stop-and-go traffic.
When Automatic Hold is activated, the vehicle is
ba8_e70ag.book Seite 61 Freitag, 5. Juni 2009 11:42 11
Page 64 of 300
Driving
62 automatically held in place when standing.
When driving up inclines, the system prevents
your vehicle from rolling backward in an undes-
ired way.
After the engine is started, the system can be
activated and deactivated at any time the
driver's seat is occupied until the next time the
engine is switched off.
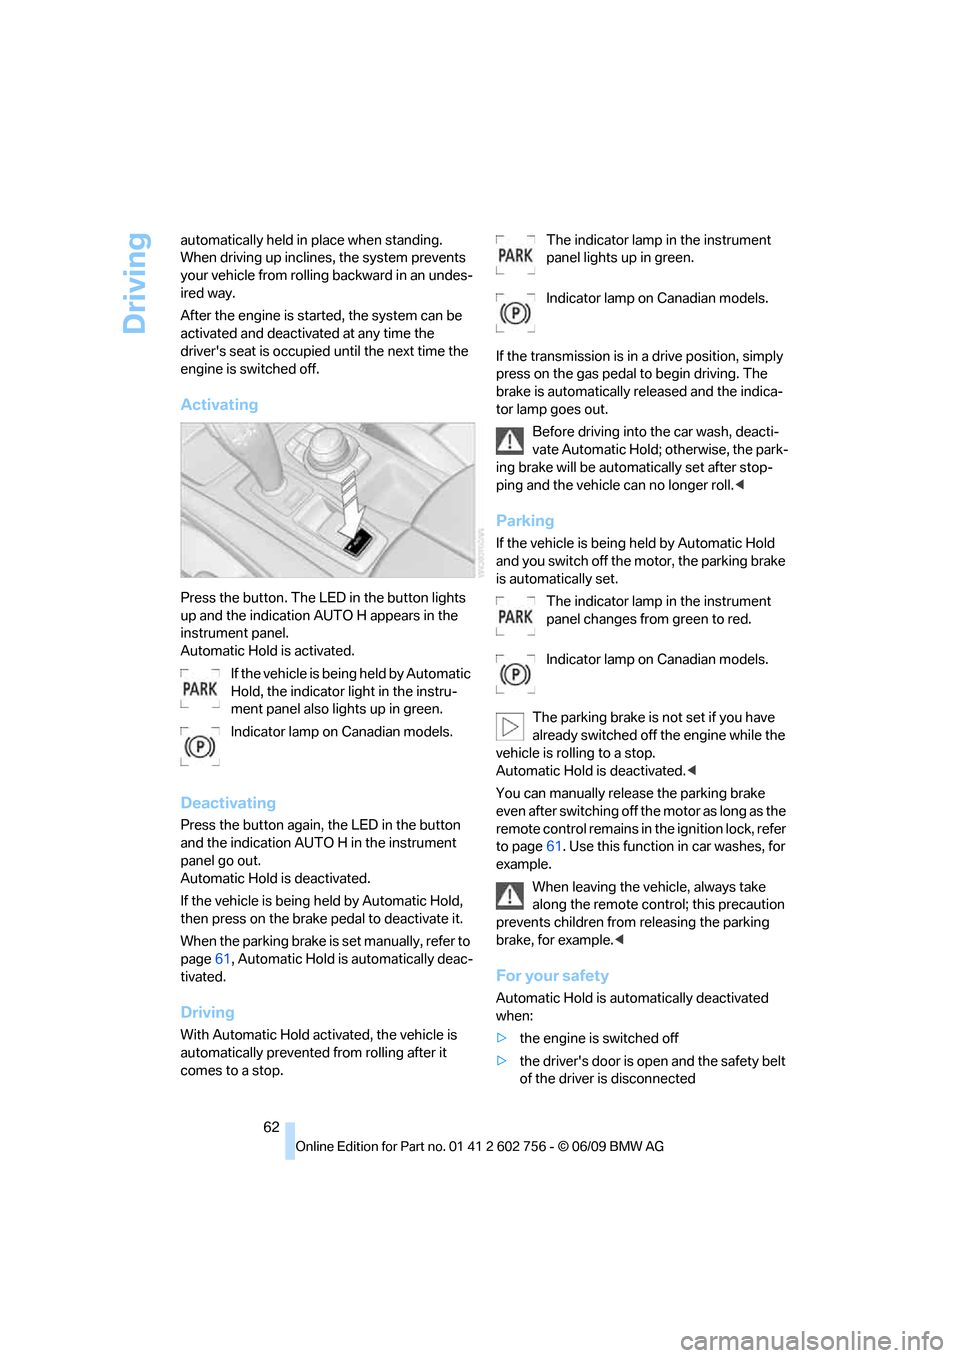
Activating
Press the button. The LED in the button lights
up and the indication AUTO H appears in the
instrument panel.
Automatic Hold is activated.
If the vehicle is being held by Automatic
Hold, the indicator light in the instru-
ment panel also lights up in green.
Indicator lamp on Canadian models.
Deactivating
Press the button again, the LED in the button
and the indication AUTO H in the instrument
panel go out.
Automatic Hold is deactivated.
If the vehicle is being held by Automatic Hold,
then press on the brake pedal to deactivate it.
When the parking brake is set manually, refer to
page61, Automatic Hold is automatically deac-
tivated.
Driving
With Automatic Hold activated, the vehicle is
automatically prevented from rolling after it
comes to a stop.The indicator lamp in the instrument
panel lights up in green.
Indicator lamp on Canadian models.
If the transmission is in a drive position, simply
press on the gas pedal to begin driving. The
brake is automatically released and the indica-
tor lamp goes out.
Before driving into the car wash, deacti-
vate Automatic Hold; otherwise, the park-
ing brake will be automatically set after stop-
ping and the vehicle can no longer roll.<
Parking
If the vehicle is being held by Automatic Hold
and you switch off the motor, the parking brake
is automatically set.
The indicator lamp in the instrument
panel changes from green to red.
Indicator lamp on Canadian models.
The parking brake is not set if you have
already switched off the engine while the
vehicle is rolling to a stop.
Automatic Hold is deactivated.<
You can manually release the parking brake
even after switching off the motor as long as the
remote control remains in the ignition lock, refer
to page61. Use this function in car washes, for
example.
When leaving the vehicle, always take
along the remote control; this precaution
prevents children from releasing the parking
brake, for example.<
For your safety
Automatic Hold is automatically deactivated
when:
>the engine is switched off
>the driver's door is open and the safety belt
of the driver is disconnected
ba8_e70ag.book Seite 62 Freitag, 5. Juni 2009 11:42 11
Page 70 of 300
Driving
68
Switching on wipers
Pull the lever upward, arrow1.
The lever automatically returns to its initial posi-
tion when released.
Normal wiper speed
Press once.
The system reverts to operation in the intermit-
tent mode with the vehicle stationary.
Fast wiper speed
Press twice or press beyond the resistance
point.
The system reverts to normal speed with the
vehicle stationary.
Intermittent operation or rain sensor*
With the rain sensor, the wiper operation is con-
trolled automatically as a function of the rain
intensity. The rain sensor is located on the
windshield, directly in front of the interior rear-
view mirror.
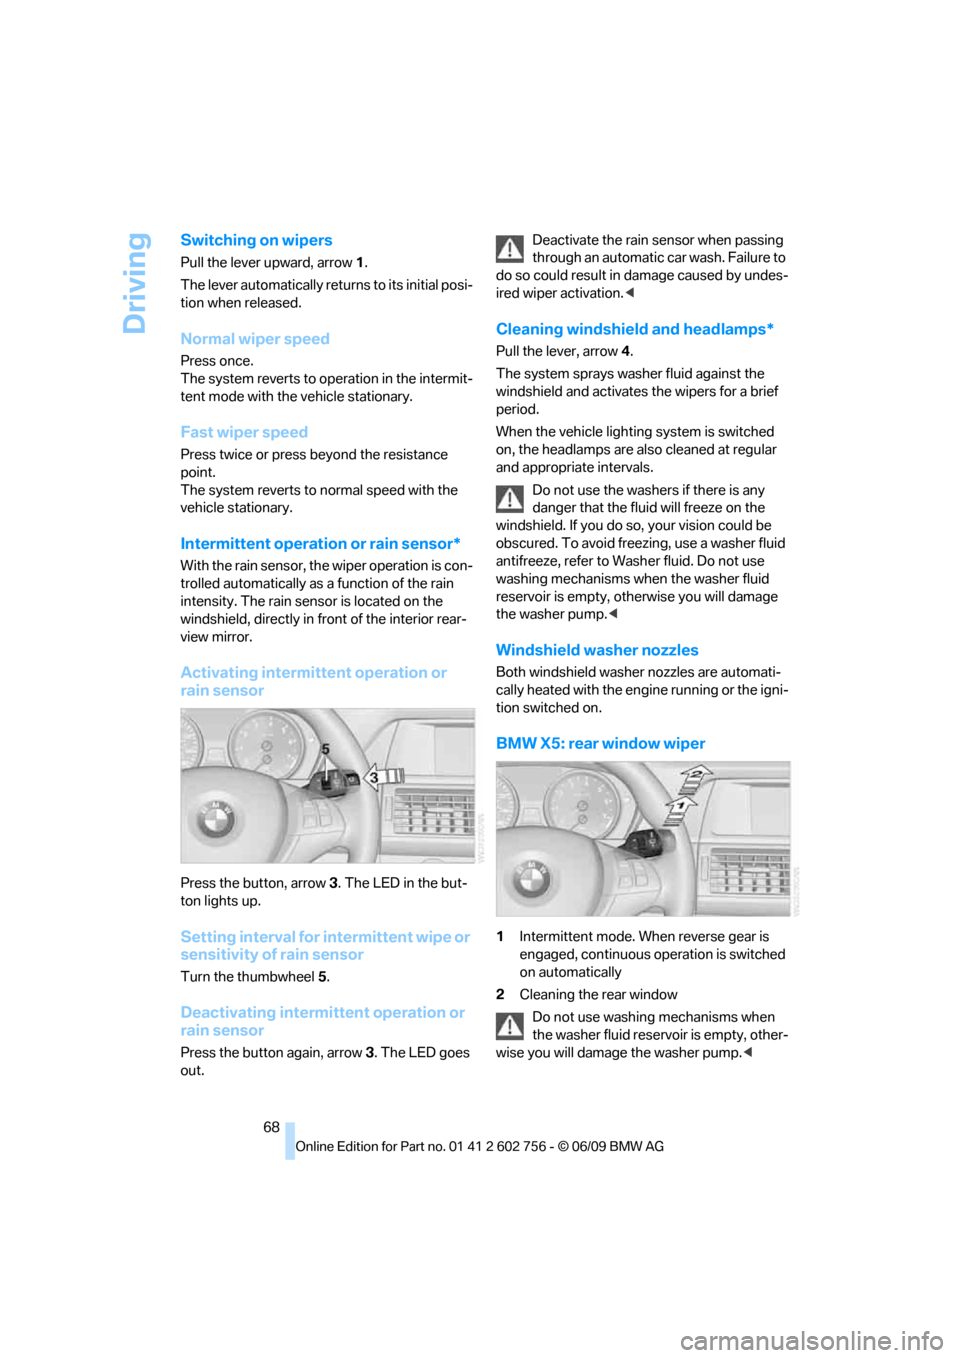
Activating intermittent operation or
rain sensor
Press the button, arrow3. The LED in the but-
ton lights up.
Setting interval for intermittent wipe or
sensitivity of rain sensor
Turn the thumbwheel5.
Deactivating intermittent operation or
rain sensor
Press the button again, arrow3. The LED goes
out.Deactivate the rain sensor when passing
through an automatic car wash. Failure to
do so could result in damage caused by undes-
ired wiper activation.<
Cleaning windshield and headlamps*
Pull the lever, arrow4.
The system sprays washer fluid against the
windshield and activates the wipers for a brief
period.
When the vehicle lighting system is switched
on, the headlamps are also cleaned at regular
and appropriate intervals.
Do not use the washers if there is any
danger that the fluid will freeze on the
windshield. If you do so, your vision could be
obscured. To avoid freezing, use a washer fluid
antifreeze, refer to Washer fluid. Do not use
washing mechanisms when the washer fluid
reservoir is empty, otherwise you will damage
the washer pump.<
Windshield washer nozzles
Both windshield washer nozzles are automati-
cally heated with the engine running or the igni-
tion switched on.
BMW X5: rear window wiper
1Intermittent mode. When reverse gear is
engaged, continuous operation is switched
on automatically
2Cleaning the rear window
Do not use washing mechanisms when
the washer fluid reservoir is empty, other-
wise you will damage the washer pump.<
ba8_e70ag.book Seite 68 Freitag, 5. Juni 2009 11:42 11
Page 72 of 300
Driving
70 >Each time the lever is pressed beyond the
resistance point, the desired speed
increases by a maximum of 5 mph or 10 km/
h.
The system stores the setting and maintains
the set speed.
Accelerating with lever
Accelerate slightly:
Press the lever up to the resistance point,
arrow1, until the desired speed is reached.
Accelerate more rapidly:
Press the lever beyond the resistance point,
arrow1, until the desired speed is reached.
The vehicle accelerates without pressure on
the accelerator pedal. The system stores the
setting and maintains the set speed.
Reducing speed
Repeatedly pull the lever up to the resistance
point or beyond, arrow2, until the desired
speed is displayed.
>Each time the lever is pulled up to the resis-
tance point, the desired speed decreases
by approx. 1 mph or 1 km/h.
>Each time the lever is pulled beyond the
resistance point, the desired speed is
decreased by a maximum of 5 mph or
10 km/h until the minimum speed of
20 mph or 30 km/h is reached.
The system stores the setting and maintains
the set speed.
Deactivating cruise control
Briefly press the lever up or down, arrow3.
The displays in the speedometer go out.
In addition, the system is automatically deacti-
vated:
>when braking
>when transmission position N is engaged
>when DTC is activated or DSC is deacti-
vated
>when HDC is activated>when the parking brake is set
>when driving stability control systems inter-
vene
Accelerating does not deactivate the cruise
control. After releasing the accelerator pedal,
the stored speed is reached and maintained
again.
Warning lamp
The warning lamp lights up if the
cruise control has been deactivated
automatically, e.g. by a control inter-
vention of the DSC. A message appears on the
Control Display.
Resuming stored speed
Briefly press the button, arrow4. The stored
speed is resumed and maintained.
With the ignition switched off, the stored speed
value is deleted and cannot be resumed again.
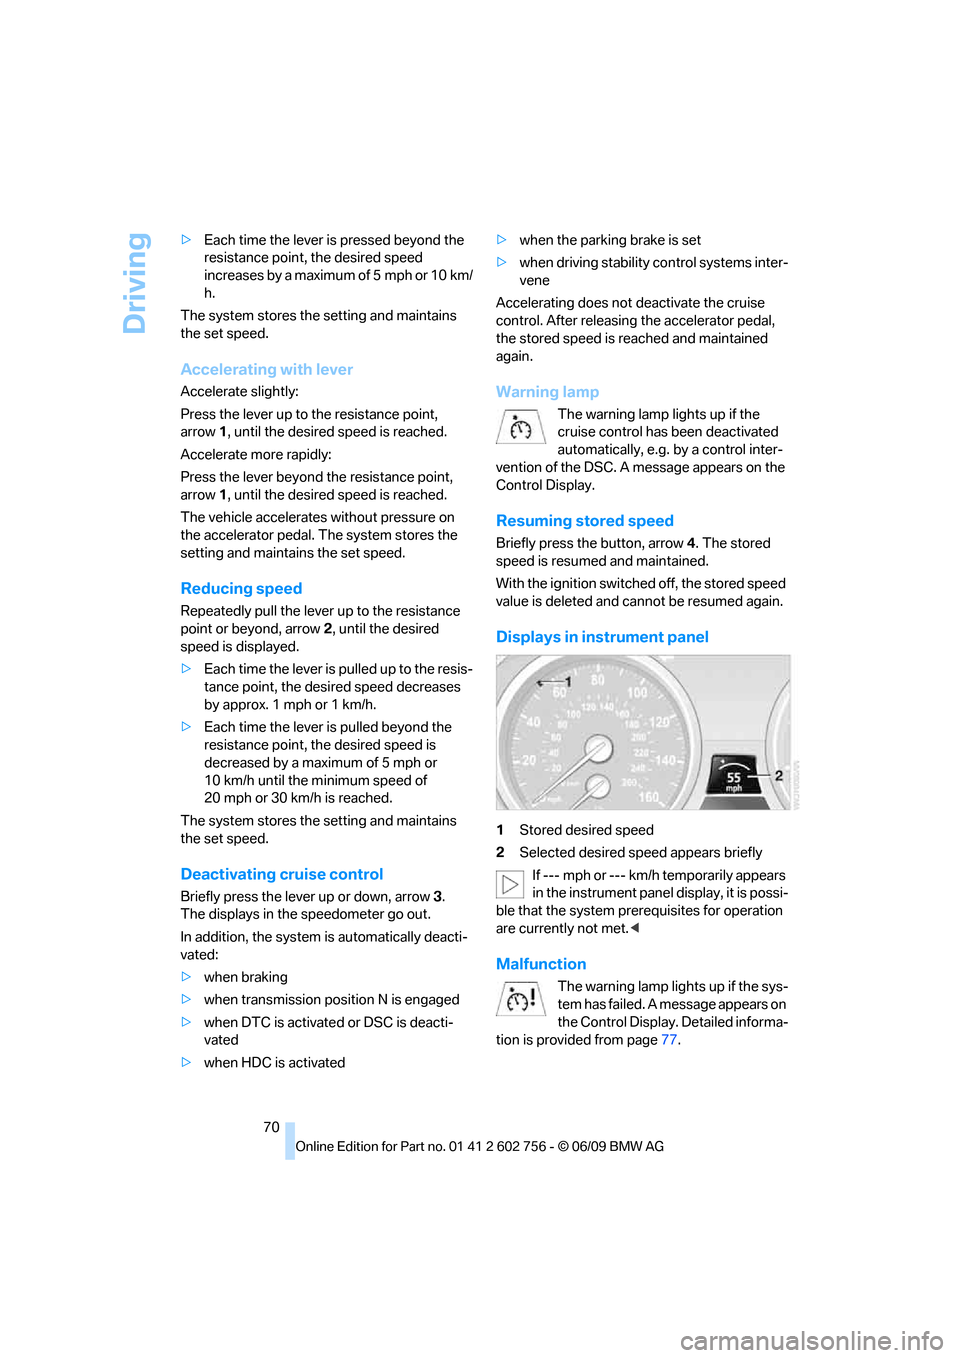
Displays in instrument panel
1Stored desired speed
2Selected desired speed appears briefly
If --- mph or --- km/h temporarily appears
in the instrument panel display, it is possi-
ble that the system prerequisites for operation
are currently not met.<
Malfunction
The warning lamp lights up if the sys-
tem has failed. A message appears on
the Control Display. Detailed informa-
tion is provided from page77.
ba8_e70ag.book Seite 70 Freitag, 5. Juni 2009 11:42 11
Page 73 of 300
Controls
71Reference
At a glance
Driving tips
Communications
Navigation
Entertainment
Mobility
Everything under control
Odometer, outside
temperature display, clock
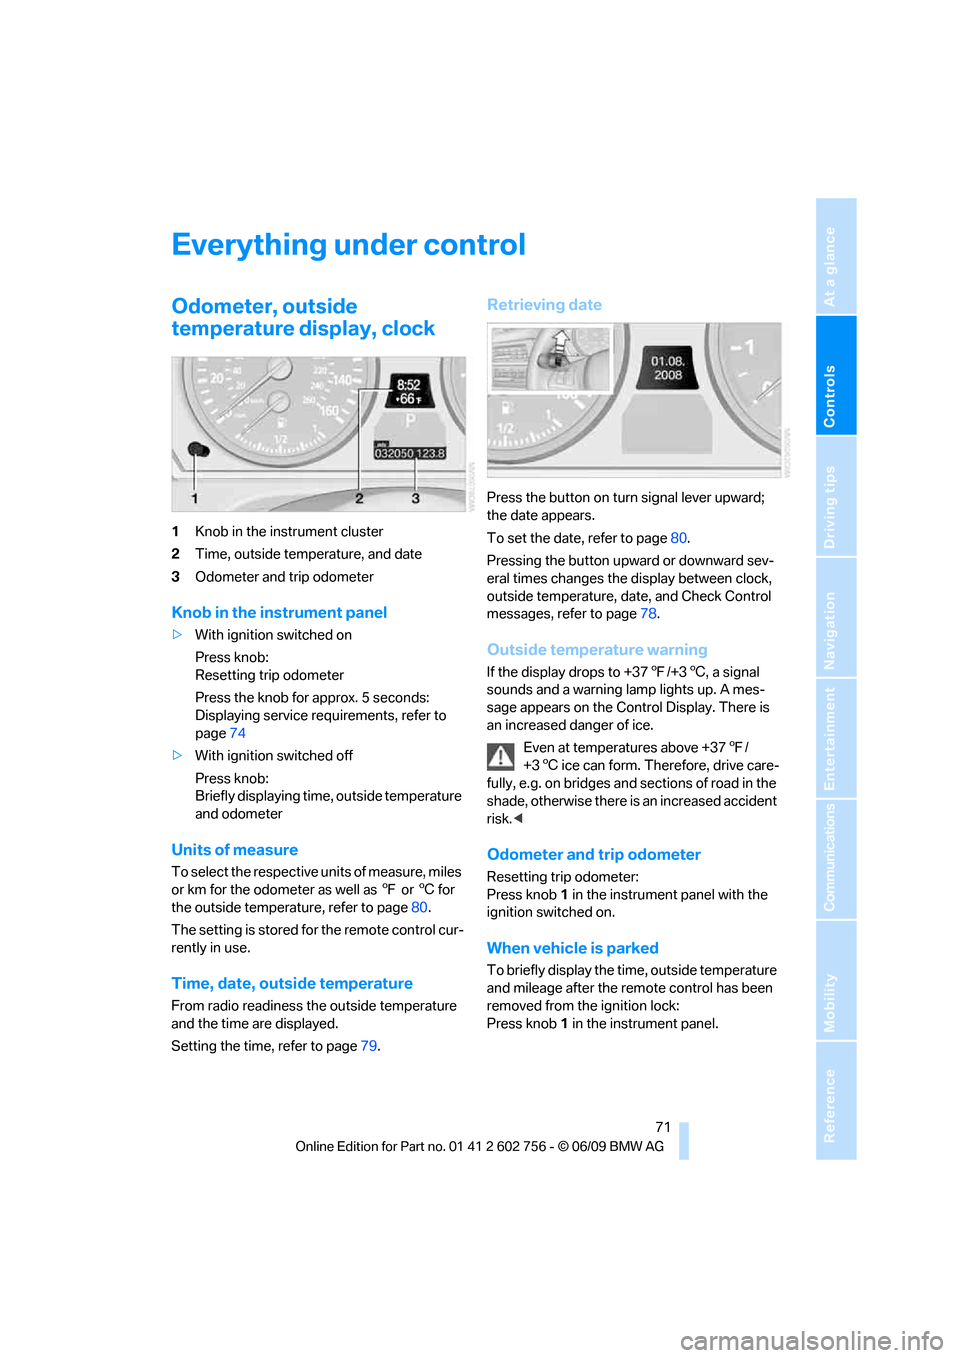
1Knob in the instrument cluster
2Time, outside temperature, and date
3Odometer and trip odometer
Knob in the instrument panel
>With ignition switched on
Press knob:
Resetting trip odometer
Press the knob for approx. 5 seconds:
Displaying service requirements, refer to
page74
>With ignition switched off
Press knob:
Briefly displaying time, outside temperature
and odometer
Units of measure
To select the respective units of measure, miles
or km for the odometer as well as 7 or 6 for
the outside temperature, refer to page80.
The setting is stored for the remote control cur-
rently in use.
Time, date, outside temperature
From radio readiness the outside temperature
and the time are displayed.
Setting the time, refer to page79.
Retrieving date
Press the button on turn signal lever upward;
the date appears.
To set the date, refer to page80.
Pressing the button upward or downward sev-
eral times changes the display between clock,
outside temperature, date, and Check Control
messages, refer to page78.
Outside temperature warning
If the display drops to +377/+36, a signal
sounds and a warning lamp lights up. A mes-
sage appears on the Control Display. There is
an increased danger of ice.
Even at temperatures above +377/
+36 ice can form. Therefore, drive care-
fully, e.g. on bridges and sections of road in the
shade, otherwise there is an increased accident
risk.<
Odometer and trip odometer
Resetting trip odometer:
Press knob 1 in the instrument panel with the
ignition switched on.
When vehicle is parked
To briefly display the time, outside temperature
and mileage after the remote control has been
removed from the ignition lock:
Press knob 1 in the instrument panel.
ba8_e70ag.book Seite 71 Freitag, 5. Juni 2009 11:42 11
Page 74 of 300
Everything under control
72
Tachometer
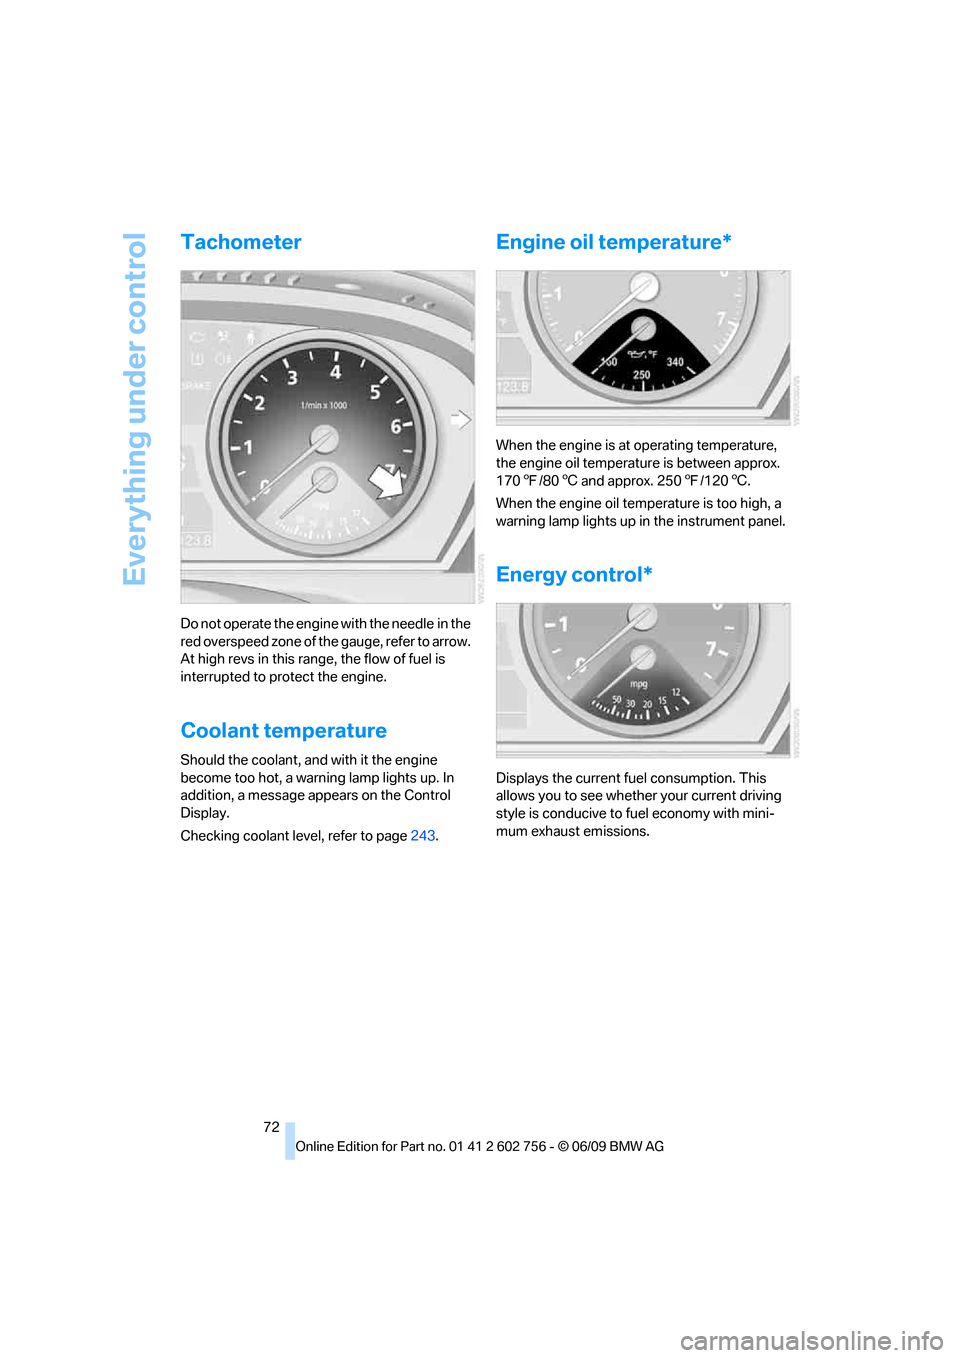
Do not operate the engine with the needle in the
red overspeed zone of the gauge, refer to arrow.
At high revs in this range, the flow of fuel is
interrupted to protect the engine.
Coolant temperature
Should the coolant, and with it the engine
become too hot, a warning lamp lights up. In
addition, a message appears on the Control
Display.
Checking coolant level, refer to page243.
Engine oil temperature*
When the engine is at operating temperature,
the engine oil temperature is between approx.
1707/806 and approx. 2507/1206.
When the engine oil temperature is too high, a
warning lamp lights up in the instrument panel.
Energy control*
Displays the current fuel consumption. This
allows you to see whether your current driving
style is conducive to fuel economy with mini-
mum exhaust emissions.
ba8_e70ag.book Seite 72 Freitag, 5. Juni 2009 11:42 11
Page 85 of 300
Controls
83Reference
At a glance
Driving tips
Communications
Navigation
Entertainment
Mobility
Automatic deactivation
The system switches off and the LED goes out:
>after approx. 165 ft/50 m when driving for-
ward
>at speeds over approx. 25 mph/35 km/h
when driving forward
Switch the system back on as needed.
Switching on/off manually
Press the button.
>On: LED lights up
>Off: LED goes out
Signal tones
When nearing an object, the position is corre-
spondingly indicated by an interval tone. Thus,
an object detected to the left rear of the vehicle
will be indicated by a signal tone from the left
rear speaker, etc.
The shorter the distance to the object
becomes, the shorter the intervals become.
If the distance to the nearest object falls to
below roughly 1 ft/30 cm, then a continuous
tone sounds.
If objects are present both in front of and behind
the vehicle, then an alternating, continuous
tone sounds.
An intermittent tone is interrupted after approx.
3seconds:
>when the vehicle remains stationary in front
of an object that has only been detected by
one of the corner sensors
>when driving parallel to a wallThe signal tone is switched off:
>when the vehicle is more than approx.
4.0 in/10 cm away from an object
>when the selector lever is in the P position
Volume
You can adjust the volume of the signal tone,
refer to page81.
The setting is stored for the remote control cur-
rently in use.
Optical warning
The approach to an object can be shown on the
Control Display. Objects that are farther away
are displayed on the Control Display before a
signal tone sounds.
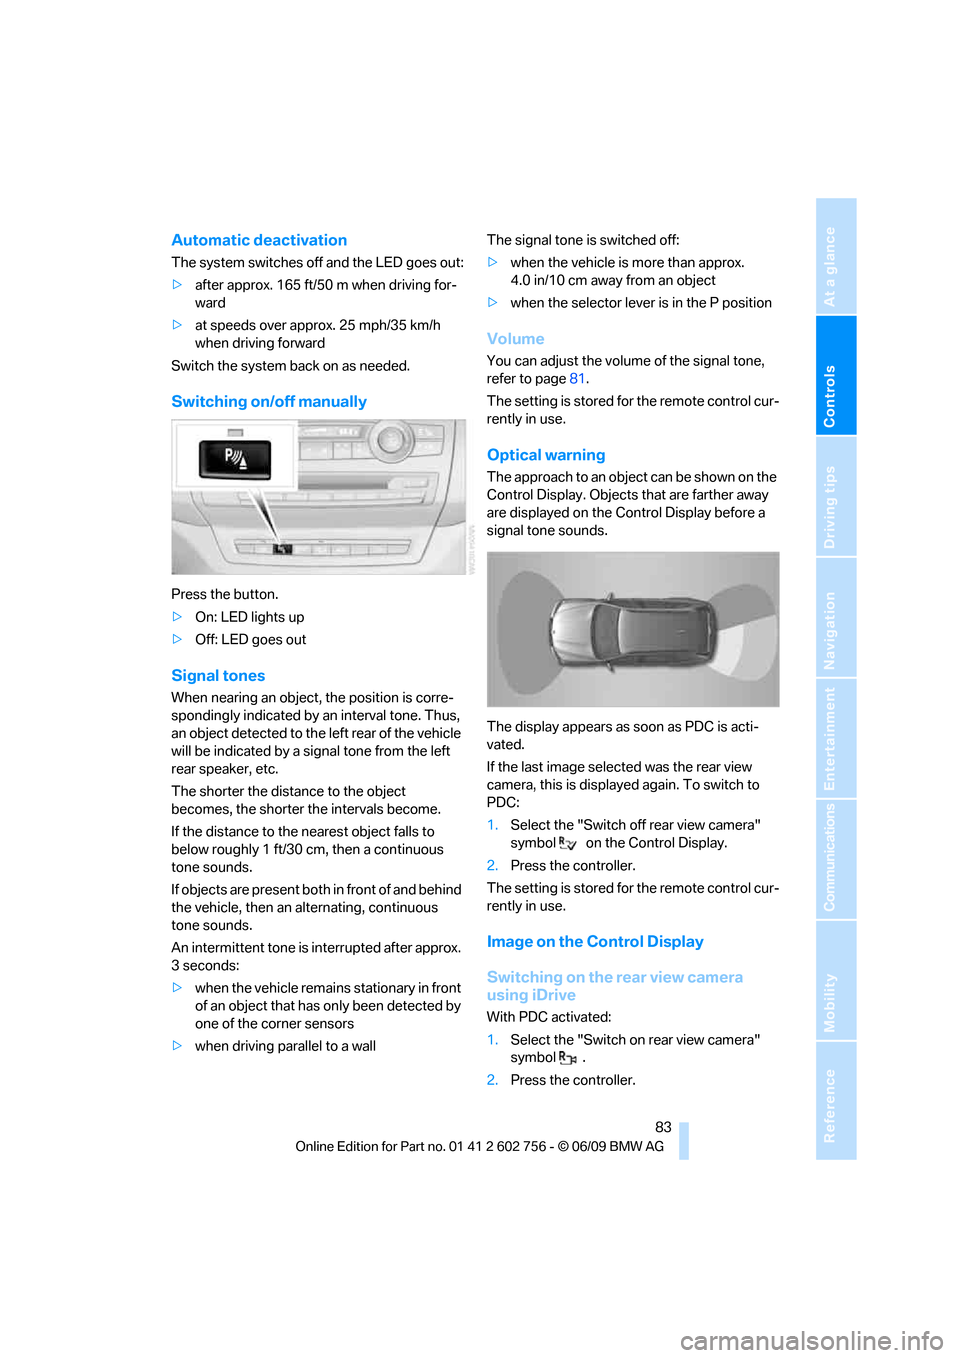
The display appears as soon as PDC is acti-
vated.
If the last image selected was the rear view
camera, this is displayed again. To switch to
PDC:
1.Select the "Switch off rear view camera"
symbol on the Control Display.
2.Press the controller.
The setting is stored for the remote control cur-
rently in use.
Image on the Control Display
Switching on the rear view camera
using iDrive
With PDC activated:
1.Select the "Switch on rear view camera"
symbol .
2.Press the controller.
ba8_e70ag.book Seite 83 Freitag, 5. Juni 2009 11:42 11
Page 86 of 300
Technology for comfort, convenience and safety
84 The image of the rear view camera is displayed.
The setting is stored for the remote control cur-
rently in use.
Malfunction
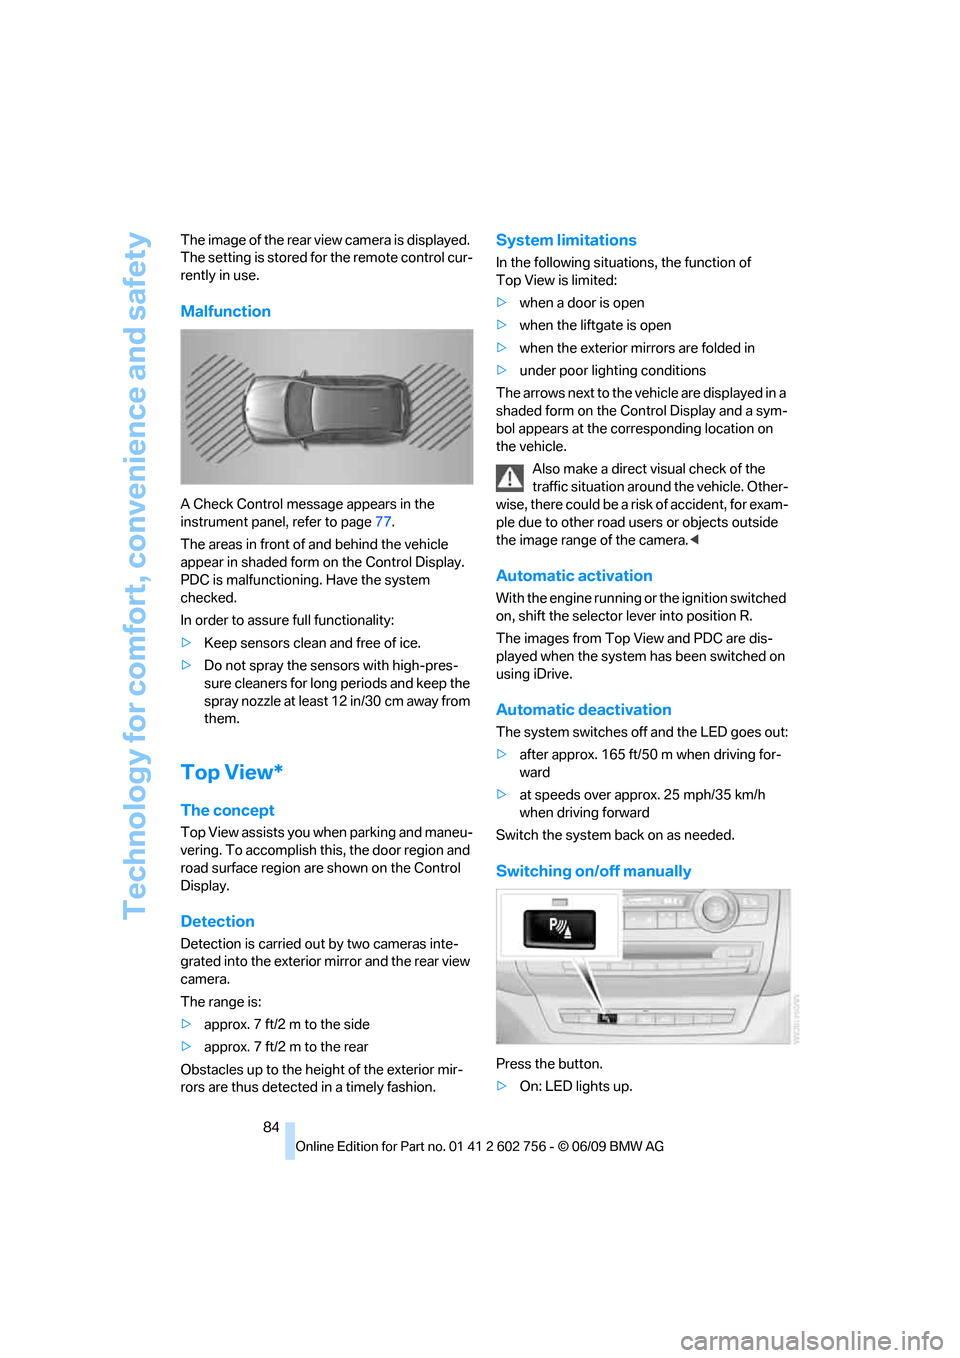
A Check Control message appears in the
instrument panel, refer to page77.
The areas in front of and behind the vehicle
appear in shaded form on the Control Display.
PDC is malfunctioning. Have the system
checked.
In order to assure full functionality:
>Keep sensors clean and free of ice.
>Do not spray the sensors with high-pres-
sure cleaners for long periods and keep the
spray nozzle at least 12 in/30 cm away from
them.
Top View*
The concept
Top View assists you when parking and maneu-
vering. To accomplish this, the door region and
road surface region are shown on the Control
Display.
Detection
Detection is carried out by two cameras inte-
grated into the exterior mirror and the rear view
camera.
The range is:
>approx. 7 ft/2 m to the side
>approx. 7 ft/2 m to the rear
Obstacles up to the height of the exterior mir-
rors are thus detected in a timely fashion.
System limitations
In the following situations, the function of
Top View is limited:
>when a door is open
>when the liftgate is open
>when the exterior mirrors are folded in
>under poor lighting conditions
The arrows next to the vehicle are displayed in a
shaded form on the Control Display and a sym-
bol appears at the corresponding location on
the vehicle.
Also make a direct visual check of the
traffic situation around the vehicle. Other-
wise, there could be a risk of accident, for exam-
ple due to other road users or objects outside
the image range of the camera.<
Automatic activation
With the engine running or the ignition switched
on, shift the selector lever into position R.
The images from Top View and PDC are dis-
played when the system has been switched on
using iDrive.
Automatic deactivation
The system switches off and the LED goes out:
>after approx. 165 ft/50 m when driving for-
ward
>at speeds over approx. 25 mph/35 km/h
when driving forward
Switch the system back on as needed.
Switching on/off manually
Press the button.
>On: LED lights up.
ba8_e70ag.book Seite 84 Freitag, 5. Juni 2009 11:42 11
Page 88 of 300
Technology for comfort, convenience and safety
86
Rear view camera*
The concept
The rear view camera assists you when parking
and maneuvering in reverse. To accomplish
this, the region behind your vehicle is shown on
the Control Display.
System limitations
Also make a direct visual check of the
traffic situation around the vehicle. Other-
wise, there could be a risk of accident, for exam-
ple due to other road users or objects outside
the image range of the rear view camera.<
The rear view camera is not able to detect
objects at greater heights or protruding
objects such as projections from walls.<
Automatic activation
With the engine running or the ignition switched
on, shift the selector lever into position R.
The image of the rear view camera is displayed
when the system has been switched on using
iDrive.
Automatic deactivation
The system switches off and the LED goes out:
>after approx. 33 ft/10 m when driving for-
ward
>at speeds over approx. 9 mph/15 km/h
when driving forward
Switch the system back on as needed.
Switching on/off manually
Press the button.
>On: LED lights up.>Off: LED goes out.
If PDC is displayed, switch on the rear view
camera using iDrive, refer to page83.
Assistance functions
Function requirements
>Rear view camera is switched on.
>Liftgate is completely closed.
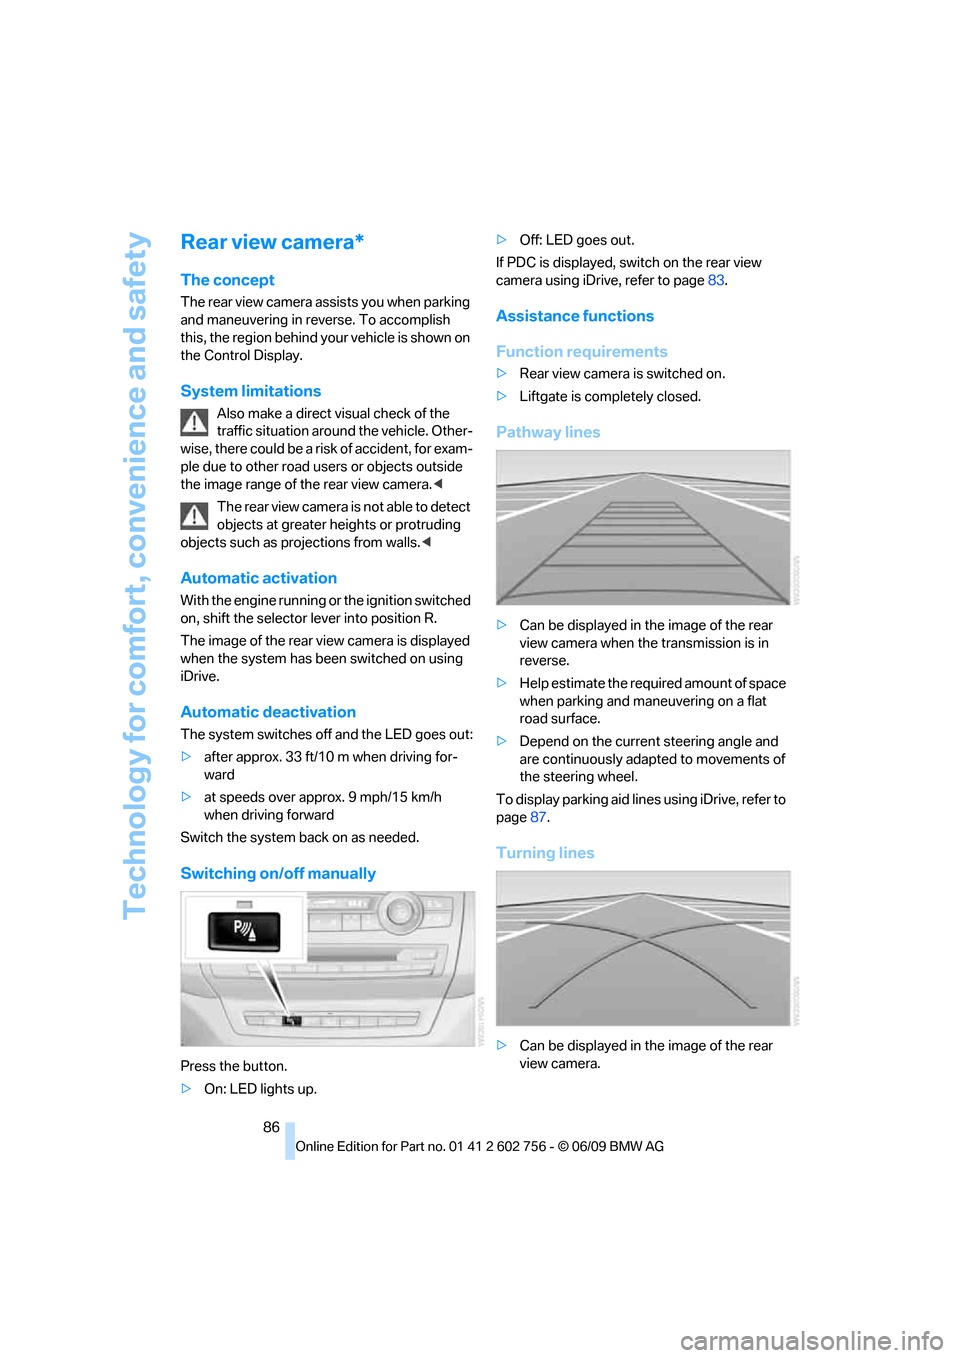
Pathway lines
>Can be displayed in the image of the rear
view camera when the transmission is in
reverse.
>Help estimate the required amount of space
when parking and maneuvering on a flat
road surface.
>Depend on the current steering angle and
are continuously adapted to movements of
the steering wheel.
To display parking aid lines using iDrive, refer to
page87.
Turning lines
>Can be displayed in the image of the rear
view camera.
ba8_e70ag.book Seite 86 Freitag, 5. Juni 2009 11:42 11