Symbol BMW X5 3.0Si 2010 E70 User Guide
[x] Cancel search | Manufacturer: BMW, Model Year: 2010, Model line: X5 3.0Si, Model: BMW X5 3.0Si 2010 E70Pages: 300, PDF Size: 12.41 MB
Page 104 of 300
Lamps
102
Lamps
Parking lamps/low beams
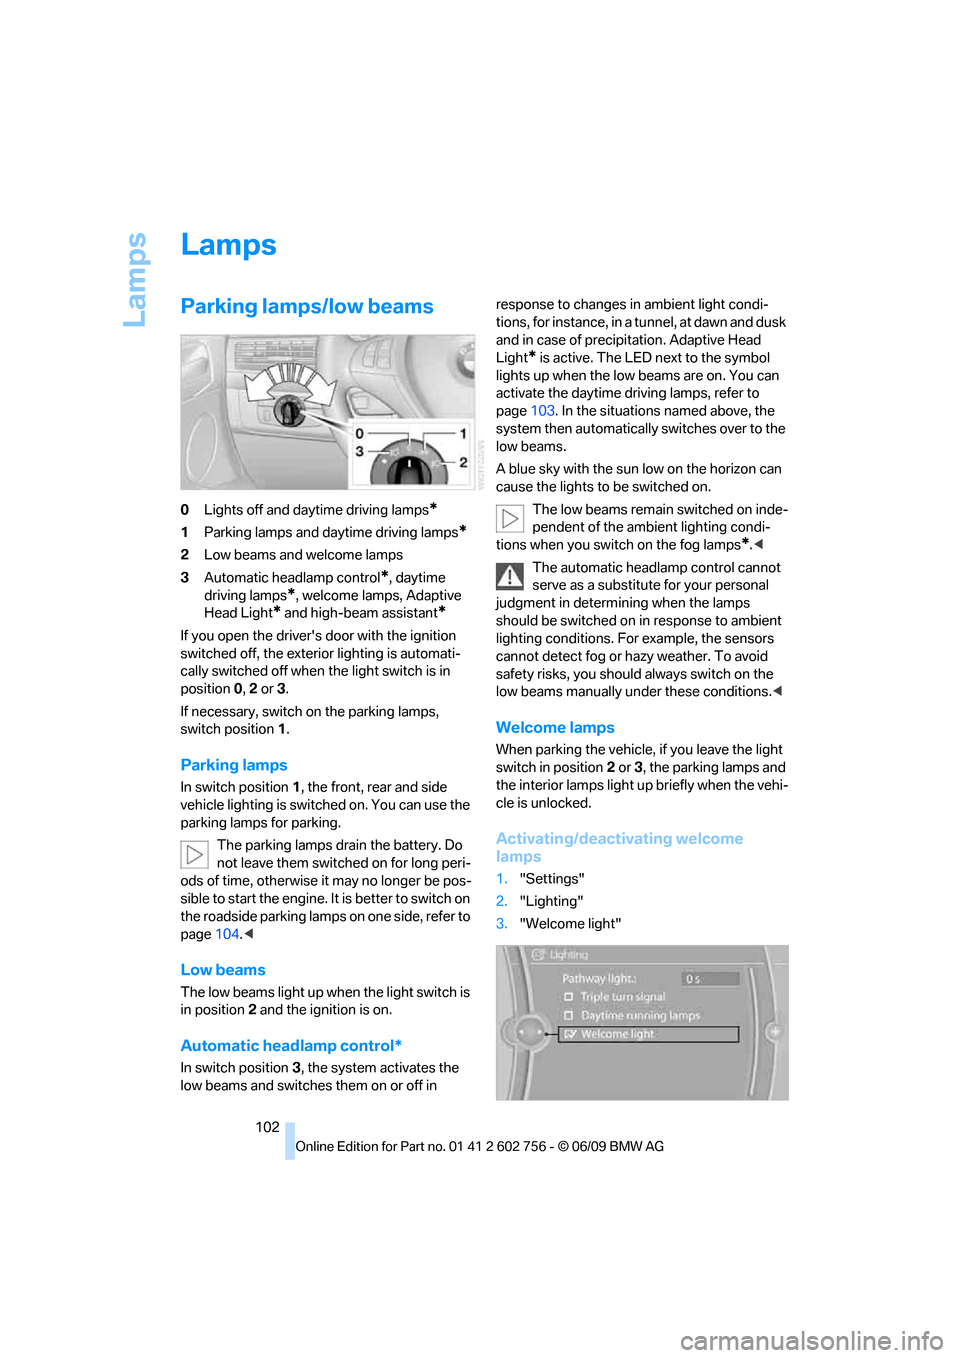
0Lights off and daytime driving lamps*
1Parking lamps and daytime driving lamps*
2Low beams and welcome lamps
3Automatic headlamp control
*, daytime
driving lamps
*, welcome lamps, Adaptive
Head Light
* and high-beam assistant*
If you open the driver's door with the ignition
switched off, the exterior lighting is automati-
cally switched off when the light switch is in
position0, 2 or 3.
If necessary, switch on the parking lamps,
switch position1.
Parking lamps
In switch position1, the front, rear and side
vehicle lighting is switched on. You can use the
parking lamps for parking.
The parking lamps drain the battery. Do
not leave them switched on for long peri-
ods of time, otherwise it may no longer be pos-
sible to start the engine. It is better to switch on
the roadside parking lamps on one side, refer to
page104.<
Low beams
The low beams light up when the light switch is
in position 2 and the ignition is on.
Automatic headlamp control*
In switch position3, the system activates the
low beams and switches them on or off in response to changes in ambient light condi-
tions, for instance, in a tunnel, at dawn and dusk
and in case of precipitation. Adaptive Head
Light
* is active. The LED next to the symbol
lights up when the low beams are on. You can
activate the daytime driving lamps, refer to
page103. In the situations named above, the
system then automatically switches over to the
low beams.
A blue sky with the sun low on the horizon can
cause the lights to be switched on.
The low beams remain switched on inde-
pendent of the ambient lighting condi-
tions when you switch on the fog lamps
*.<
The automatic headlamp control cannot
serve as a substitute for your personal
judgment in determining when the lamps
should be switched on in response to ambient
lighting conditions. For example, the sensors
cannot detect fog or hazy weather. To avoid
safety risks, you should always switch on the
low beams manually under these conditions.<
Welcome lamps
When parking the vehicle, if you leave the light
switch in position2 or3, the parking lamps and
the interior lamps light up briefly when the vehi-
cle is unlocked.
Activating/deactivating welcome
lamps
1."Settings"
2."Lighting"
3."Welcome light"
ba8_e70ag.book Seite 102 Freitag, 5. Juni 2009 11:42 11
Page 116 of 300
Climate
114
Parked-car ventilation*
The concept
The parked-car ventilation blows air into the
passenger compartment to lower interior tem-
peratures.
It is ready to use in the parked car mode at any
outside temperature.
You can set two different times for the system
to start. The parked-car ventilation can also be
switched on and off directly. It remains
switched on for 30 minutes.
Since the system uses a substantial amount of
electrical current, you should refrain from acti-
vating it twice in succession without allowing
the battery to be recharged in normal operation
between use.
The air emerges through the upper body region
air vents in the instrument cluster. Therefore,
please open the air vents.
The parked-car ventilation is operated via
iDrive.
Switching on and off directly
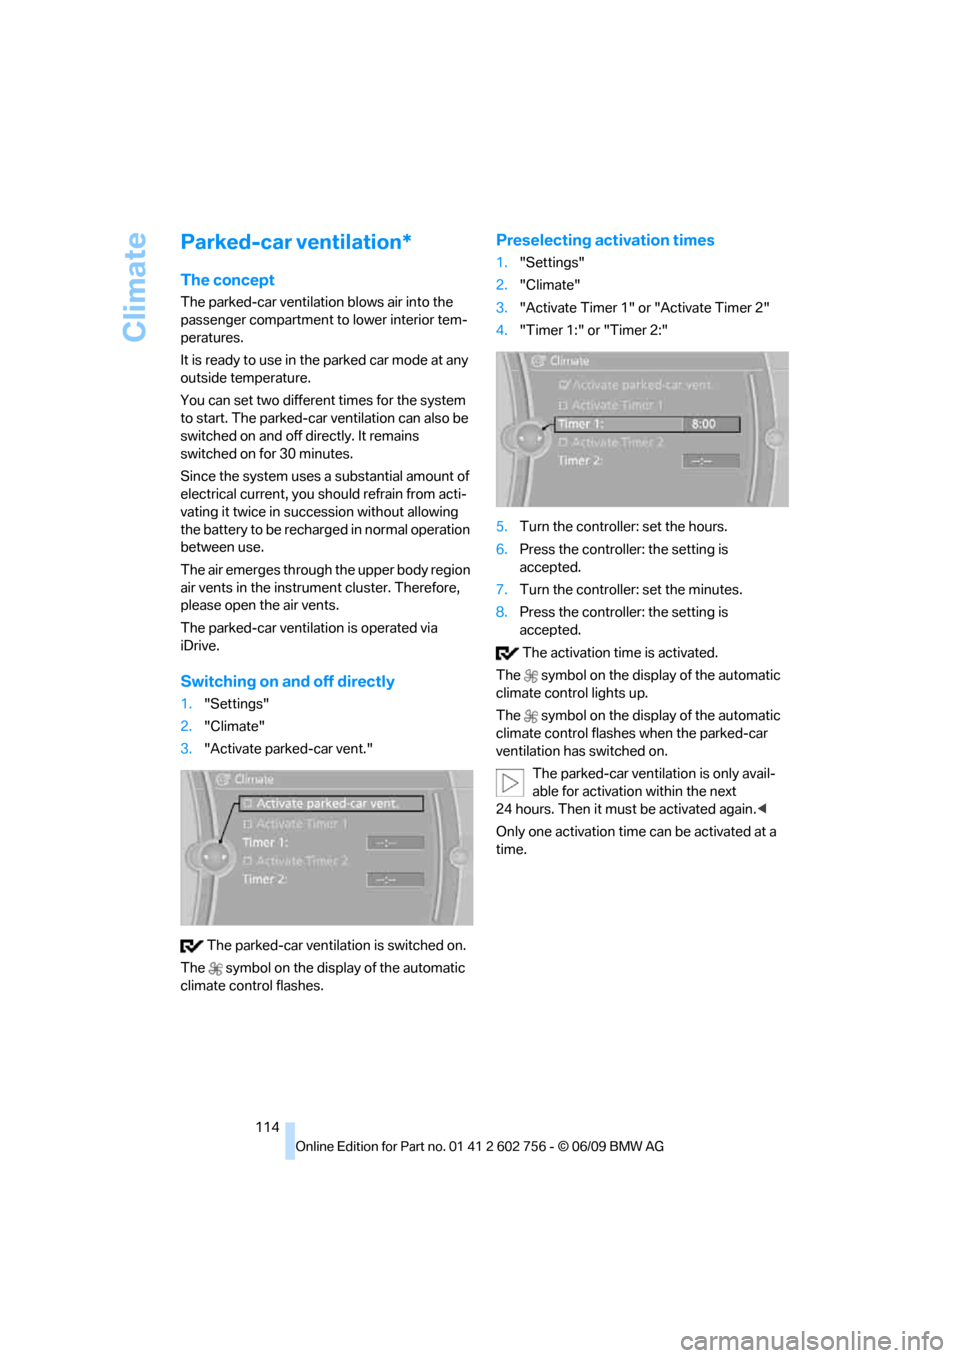
1."Settings"
2."Climate"
3."Activate parked-car vent."
The parked-car ventilation is switched on.
The symbol on the display of the automatic
climate control flashes.
Preselecting activation times
1."Settings"
2."Climate"
3."Activate Timer 1" or "Activate Timer 2"
4."Timer 1:" or "Timer 2:"
5.Turn the controller: set the hours.
6.Press the controller: the setting is
accepted.
7.Turn the controller: set the minutes.
8.Press the controller: the setting is
accepted.
The activation time is activated.
The symbol on the display of the automatic
climate control lights up.
The symbol on the display of the automatic
climate control flashes when the parked-car
ventilation has switched on.
The parked-car ventilation is only avail-
able for activation within the next
24 hours. Then it must be activated again.<
Only one activation time can be activated at a
time.
ba8_e70ag.book Seite 114 Freitag, 5. Juni 2009 11:42 11
Page 117 of 300
Controls
115Reference
At a glance
Driving tips
Communications
Navigation
Entertainment
Mobility
Practical interior accessories
Integrated universal remote
control*
The concept
The integrated universal remote control can
replace as many as three hand-held transmit-
ters for various remote-controlled accessories,
such as garage and gate or lighting systems.
The integrated universal remote control regis-
ters and stores signals from the original hand-
held transmitters.
The signal of an original hand-held transmitter
can be programmed on one of the three mem-
ory buttons1. Then with the ignition switched
on, this programmed memory button1 can be
used to operate the respective feature. The
LED2 flashes to confirm transmission of the
signal.
Should you sell your vehicle one day, be sure to
delete the stored programs beforehand for your
safety, refer to page116.
To prevent possible damage or injury,
before programming or using the inte-
grated universal remote control, always inspect
the immediate area to make certain that no peo-
ple, animals or objects are within the travel
range of the device. Also, comply with the
safety precautions of the original hand-held
transmitter.<
Checking compatibility
If you see this symbol on the packaging
or in the manual supplied with the orig-
inal hand-held transmitter, it is safe to
assume that it is compatible with the integrated
universal remote control.
Should you have additional questions,
please contact your BMW Sports Activity
Vehicle Center or call: 1-800-355-3515.
Information is also provided on the Internet at:
www.bmwusa.com or
www.homelink.com.HomeLink is a registered trademark of Johnson
Controls, Inc.<
Programming
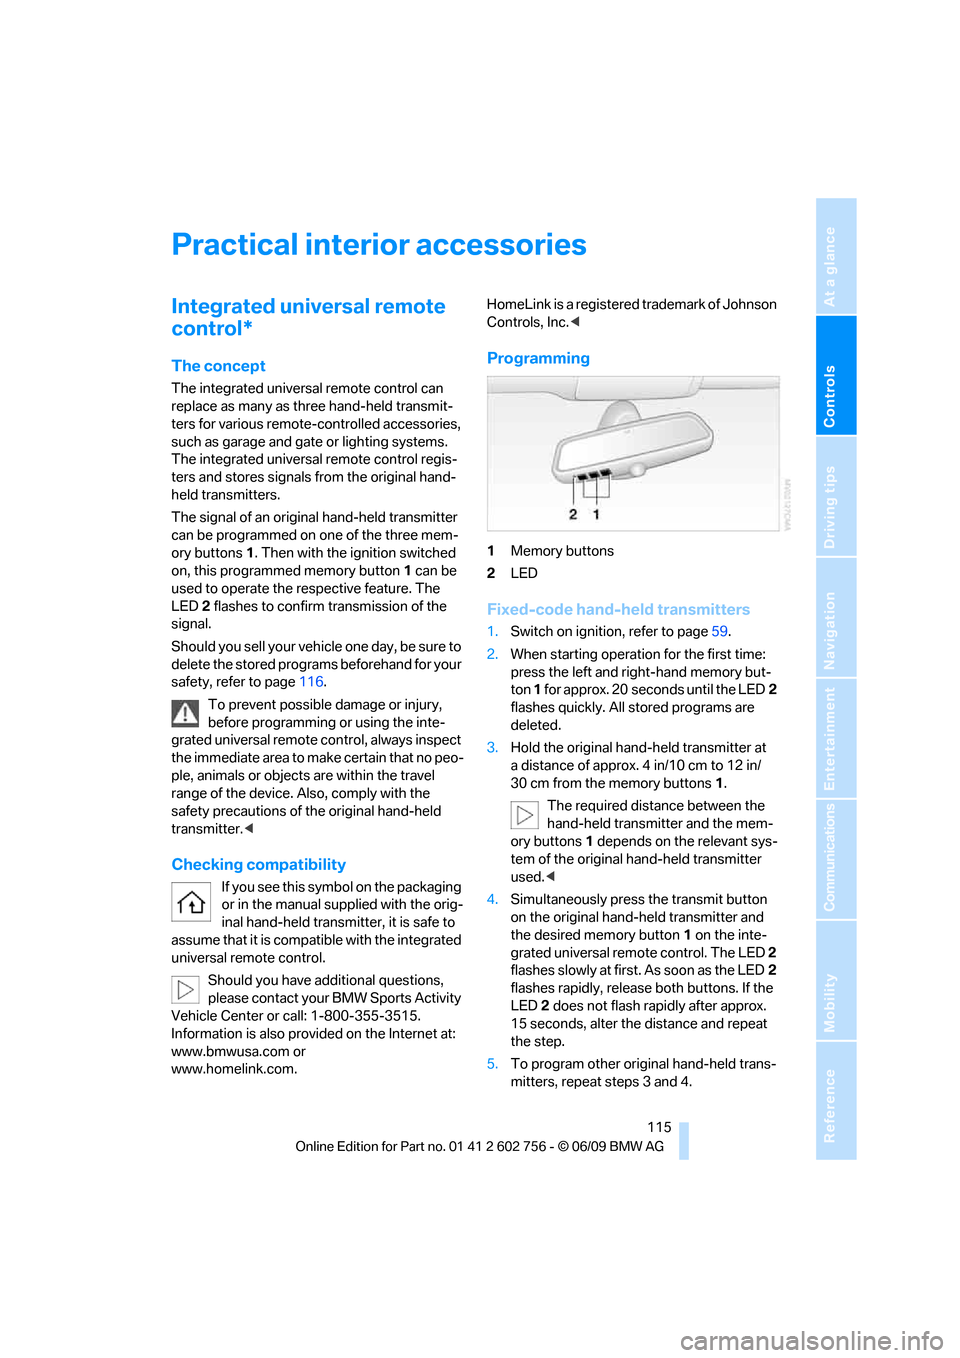
1Memory buttons
2LED
Fixed-code hand-held transmitters
1.Switch on ignition, refer to page59.
2.When starting operation for the first time:
press the left and right-hand memory but-
ton 1 for approx. 20 seconds until the LED2
flashes quickly. All stored programs are
deleted.
3.Hold the original hand-held transmitter at
a distance of approx. 4 in/10 cm to 12 in/
30 cm from the memory buttons1.
The required distance between the
hand-held transmitter and the mem-
ory buttons1 depends on the relevant sys-
tem of the original hand-held transmitter
used.<
4.Simultaneously press the transmit button
on the original hand-held transmitter and
the desired memory button1 on the inte-
grated universal remote control. The LED 2
flashes slowly at first. As soon as the LED2
flashes rapidly, release both buttons. If the
LED2 does not flash rapidly after approx.
15 seconds, alter the distance and repeat
the step.
5.To program other original hand-held trans-
mitters, repeat steps 3 and 4.
ba8_e70ag.book Seite 115 Freitag, 5. Juni 2009 11:42 11
Page 144 of 300
Destination entry
142 Delete letters, if necessary:
>To delete individual letters:
Turn the controller to select , and
then press the controller.
>To delete all letters:
Turn the controller to select , and
then press the controller for an extended
period.
>To enter spaces:
Select the symbol.
The list gradually grows smaller each time
you enter a new letter.
2.Move the controller to the right.
3.Select the name of the town/city from the
list. The three destinations stored last are
displayed.
If there are several towns/cities with the same
name:
1.Change to the list of town/city names.
2.Highlight the town/city: a preview map is
displayed.
3.Select the town/city.
Entering the postal code
1.Select "Town/City/Postal Code" or the dis-
played town/city.
2.Select the symbol.
3.Select the digits.
4.Change to the list of postal codes and
towns/cities.
5.Highlight postal code: a preview map is dis-
played.
6.Select the postal code.
Entering street and intersection
1.Select "Street" or the displayed street.
2.Enter a street and intersection as you would
the town/city.
After the street you can also enter the intersec-
tion or the house number.If there are several streets with the same name:
1.Change to the list of street names.
2.Highlight the street: a preview map is dis-
played.
3.Select the street.
Entering a street without a destination
town/city
You can also enter a street without entering a
town/city of destination. In this case all streets
of the entered country are offered for selection.
The related town/city is displayed after the
street name.
If a town/city has already been entered, you can
undo this entry. This may be practical if the
desired street does not exist in the entered des-
tination, because, for example, it belongs to
another part of the town/city.
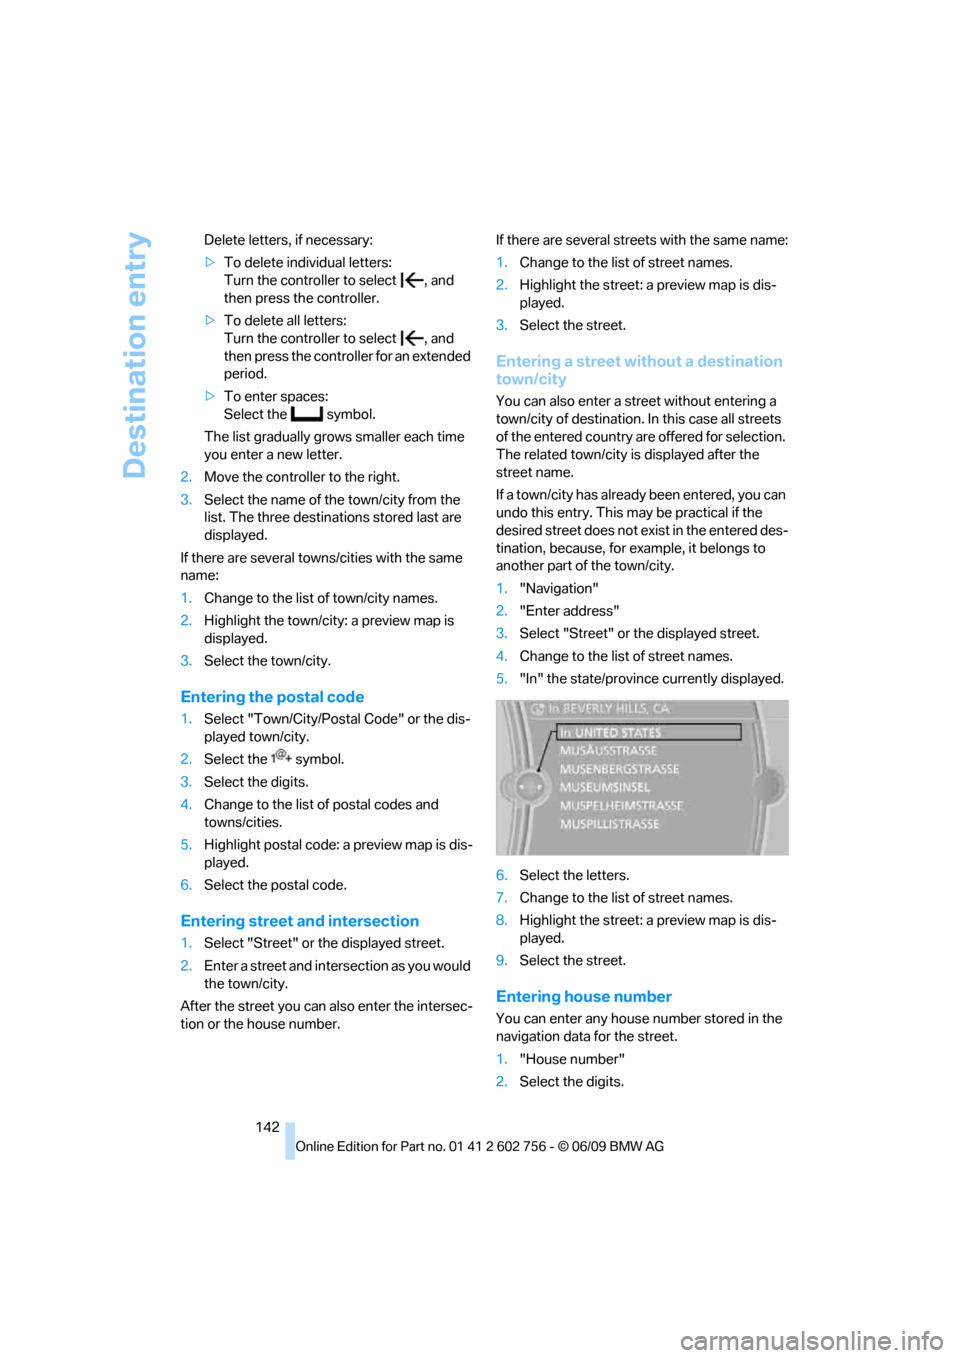
1."Navigation"
2."Enter address"
3.Select "Street" or the displayed street.
4.Change to the list of street names.
5."In" the state/province currently displayed.
6.Select the letters.
7.Change to the list of street names.
8.Highlight the street: a preview map is dis-
played.
9.Select the street.
Entering house number
You can enter any house number stored in the
navigation data for the street.
1."House number"
2.Select the digits.
ba8_e70ag.book Seite 142 Freitag, 5. Juni 2009 11:42 11
Page 147 of 300
Navigation
Driving tips
145Reference
At a glance
Controls
Communications
Entertainment
Mobility
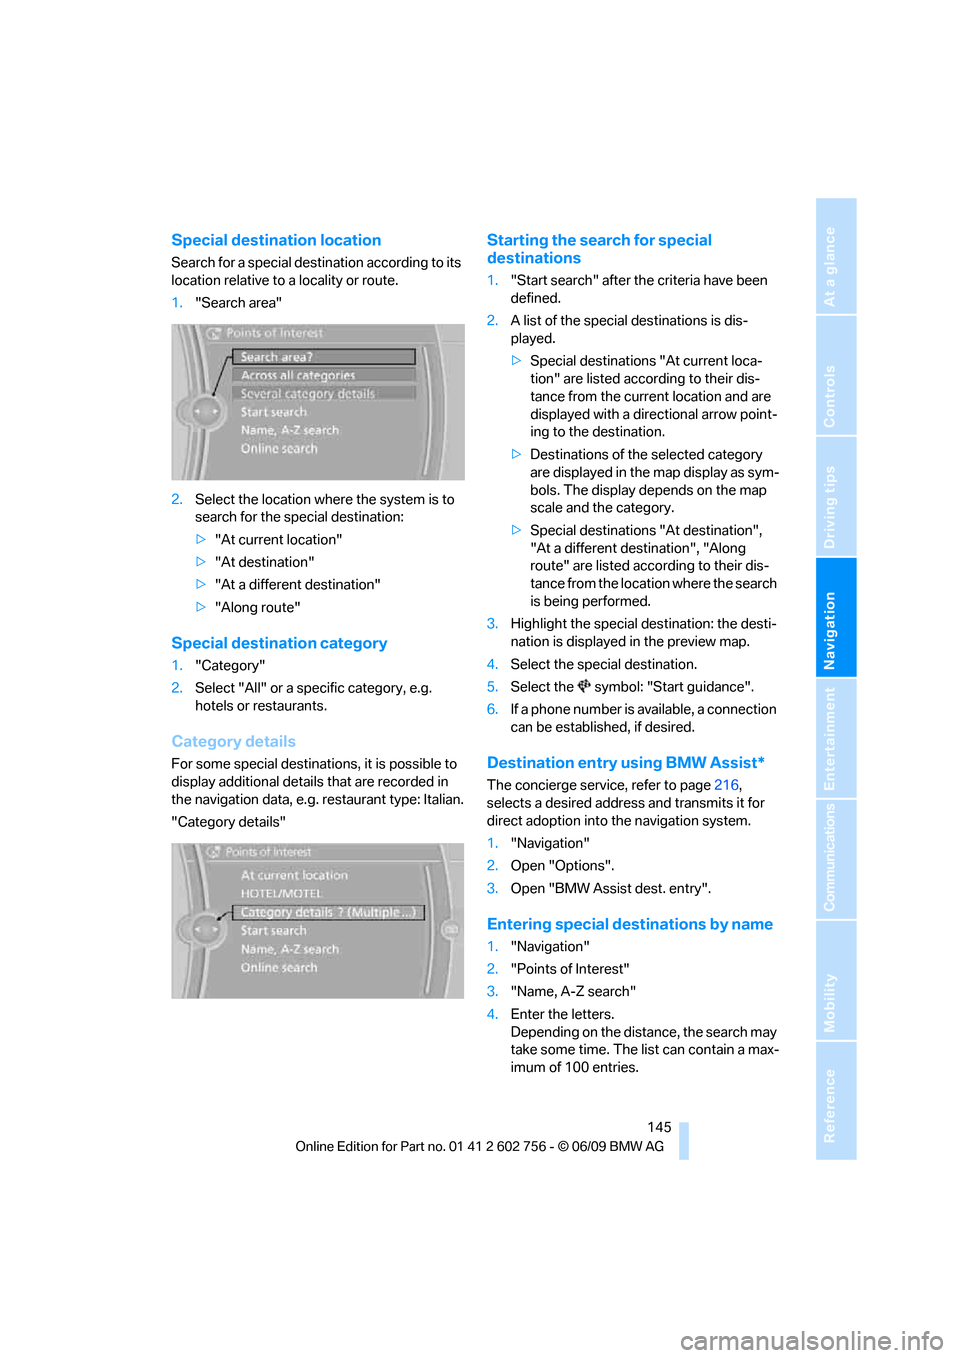
Special destination location
Search for a special destination according to its
location relative to a locality or route.
1."Search area"
2.Select the location where the system is to
search for the special destination:
>"At current location"
>"At destination"
>"At a different destination"
>"Along route"
Special destination category
1."Category"
2.Select "All" or a specific category, e.g.
hotels or restaurants.
Category details
For some special destinations, it is possible to
display additional details that are recorded in
the navigation data, e.g. restaurant type: Italian.
"Category details"
Starting the search for special
destinations
1."Start search" after the criteria have been
defined.
2.A list of the special destinations is dis-
played.
>Special destinations "At current loca-
tion" are listed according to their dis-
tance from the current location and are
displayed with a directional arrow point-
ing to the destination.
>Destinations of the selected category
are displayed in the map display as sym-
bols. The display depends on the map
scale and the category.
>Special destinations "At destination",
"At a different destination", "Along
route" are listed according to their dis-
tance from the location where the search
is being performed.
3.Highlight the special destination: the desti-
nation is displayed in the preview map.
4.Select the special destination.
5.Select the symbol: "Start guidance".
6.If a phone number is available, a connection
can be established, if desired.
Destination entry using BMW Assist*
The concierge service, refer to page216,
selects a desired address and transmits it for
direct adoption into the navigation system.
1."Navigation"
2.Open "Options".
3.Open "BMW Assist dest. entry".
Entering special destinations by name
1."Navigation"
2."Points of Interest"
3."Name, A-Z search"
4.Enter the letters.
Depending on the distance, the search may
take some time. The list can contain a max-
imum of 100 entries.
ba8_e70ag.book Seite 145 Freitag, 5. Juni 2009 11:42 11
Page 148 of 300
Destination entry
146 5.Change to the list of special destinations.
6.Highlight the special destination. The desti-
nation is displayed in the preview map.
7.Select the special destination.
8.Select the symbol: "Start guidance".
Displaying special destinations in the
map
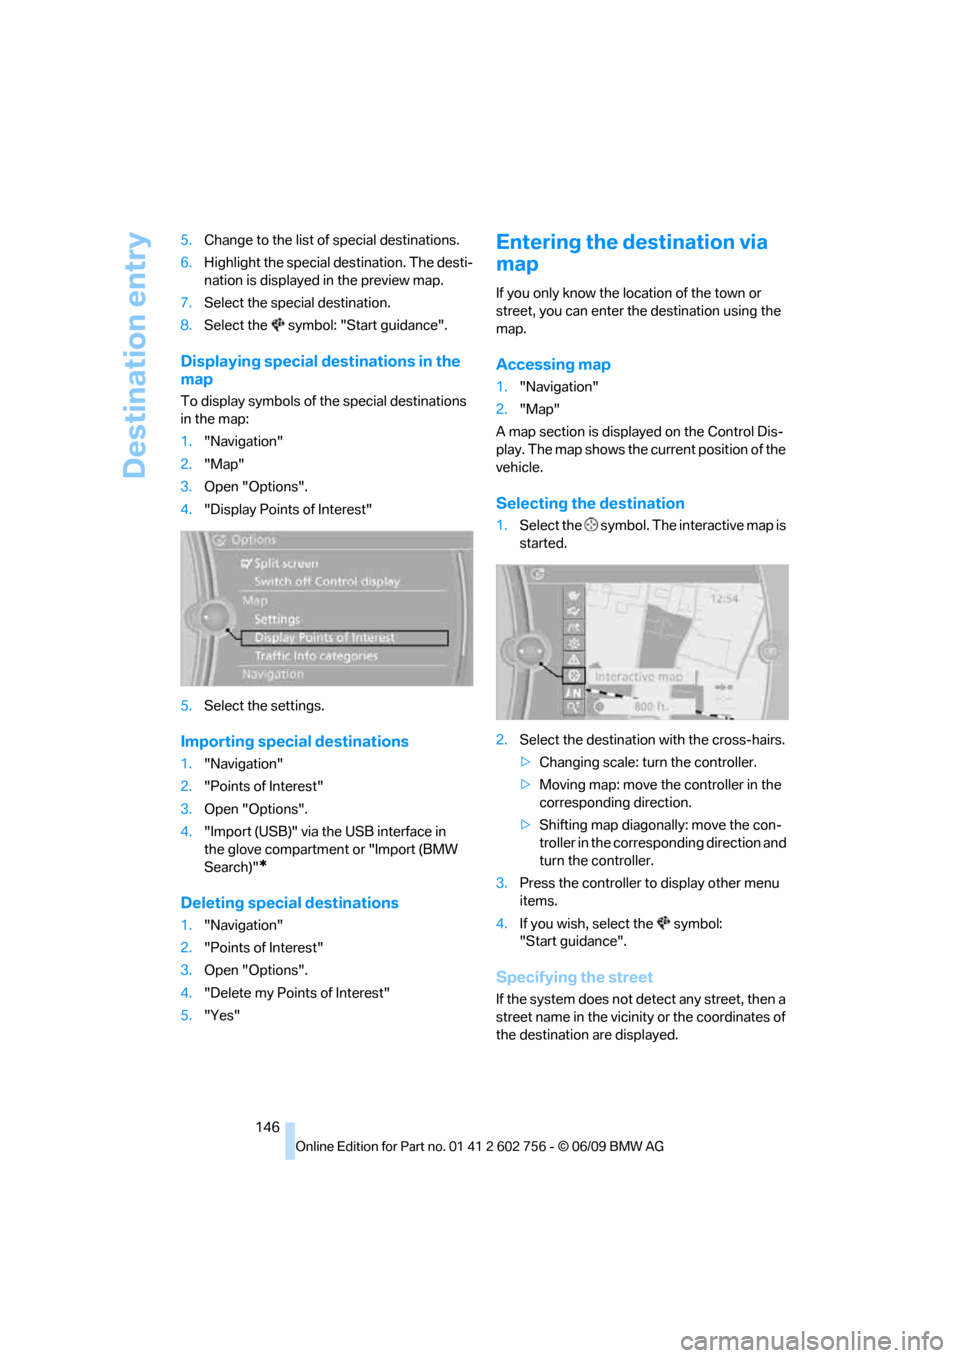
To display symbols of the special destinations
in the map:
1."Navigation"
2."Map"
3.Open "Options".
4."Display Points of Interest"
5.Select the settings.
Importing special destinations
1."Navigation"
2."Points of Interest"
3.Open "Options".
4."Import (USB)" via the USB interface in
the glove compartment or "Import (BMW
Search)"
*
Deleting special destinations
1."Navigation"
2."Points of Interest"
3.Open "Options".
4."Delete my Points of Interest"
5."Yes"
Entering the destination via
map
If you only know the location of the town or
street, you can enter the destination using the
map.
Accessing map
1."Navigation"
2."Map"
A map section is displayed on the Control Dis-
play. The map shows the current position of the
vehicle.
Selecting the destination
1.Select the symbol. The interactive map is
started.
2.Select the destination with the cross-hairs.
>Changing scale: turn the controller.
>Moving map: move the controller in the
corresponding direction.
>Shifting map diagonally: move the con-
troller in the corresponding direction and
turn the controller.
3.Press the controller to display other menu
items.
4.If you wish, select the symbol:
"Start guidance".
Specifying the street
If the system does not detect any street, then a
street name in the vicinity or the coordinates of
the destination are displayed.
ba8_e70ag.book Seite 146 Freitag, 5. Juni 2009 11:42 11
Page 149 of 300
Navigation
Driving tips
147Reference
At a glance
Controls
Communications
Entertainment
Mobility
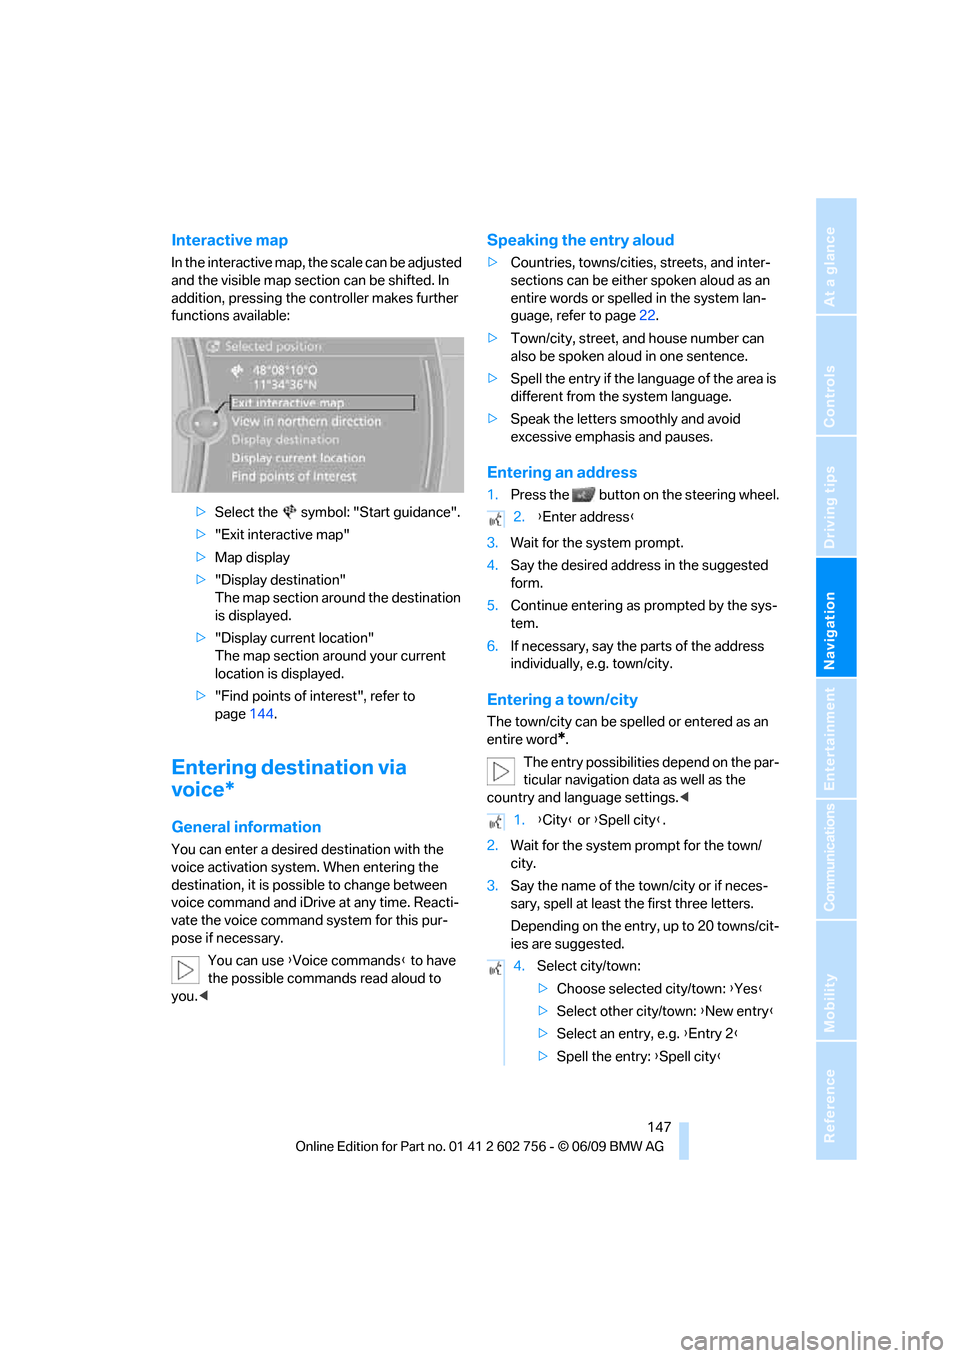
Interactive map
In the interactive map, the scale can be adjusted
and the visible map section can be shifted. In
addition, pressing the controller makes further
functions available:
>Select the symbol: "Start guidance".
>"Exit interactive map"
>Map display
>"Display destination"
The map section around the destination
is displayed.
>"Display current location"
The map section around your current
location is displayed.
>"Find points of interest", refer to
page144.
Entering destination via
voice*
General information
You can enter a desired destination with the
voice activation system. When entering the
destination, it is possible to change between
voice command and iDrive at any time. Reacti-
vate the voice command system for this pur-
pose if necessary.
You can use {Voice commands} to have
the possible commands read aloud to
you.<
Speaking the entry aloud
>Countries, towns/cities, streets, and inter-
sections can be either spoken aloud as an
entire words or spelled in the system lan-
guage, refer to page22.
>Town/city, street, and house number can
also be spoken aloud in one sentence.
>Spell the entry if the language of the area is
different from the system language.
>Speak the letters smoothly and avoid
excessive emphasis and pauses.
Entering an address
1.Press the button on the steering wheel.
3.Wait for the system prompt.
4.Say the desired address in the suggested
form.
5.Continue entering as prompted by the sys-
tem.
6.If necessary, say the parts of the address
individually, e.g. town/city.
Entering a town/city
The town/city can be spelled or entered as an
entire word
*.
The entry possibilities depend on the par-
ticular navigation data as well as the
country and language settings.<
2.Wait for the system prompt for the town/
city.
3.Say the name of the town/city or if neces-
sary, spell at least the first three letters.
Depending on the entry, up to 20 towns/cit-
ies are suggested.
2.{Enter address}
1.{City} or {Spell city}.
4.Select city/town:
>Choose selected city/town: {Yes}
>Select other city/town: {New entry}
>Select an entry, e.g. {Entry 2}
>Spell the entry: {Spell city}
ba8_e70ag.book Seite 147 Freitag, 5. Juni 2009 11:42 11
Page 150 of 300
Destination entry
148 Similar-sounding towns/cities that can-
not be differentiated by the system are
compiled in a separate list and displayed as a
town/city followed by three dots.
If necessary, select this entry with {Yes}. Then
select the desired city/town in this list.<
The town/city can also be selected from the list
using iDrive: turn the controller until the desired
town/city is displayed and press the controller.
Entering a street or intersection
The street or intersection is entered in the same
way as the town/city.
Entering house number
You can enter house numbers up to the
number 999:
Starting destination guidance
Destination guidance starts immediately.
Saving destination
The destination is added to the destination list
and is displayed in the list of last destinations.
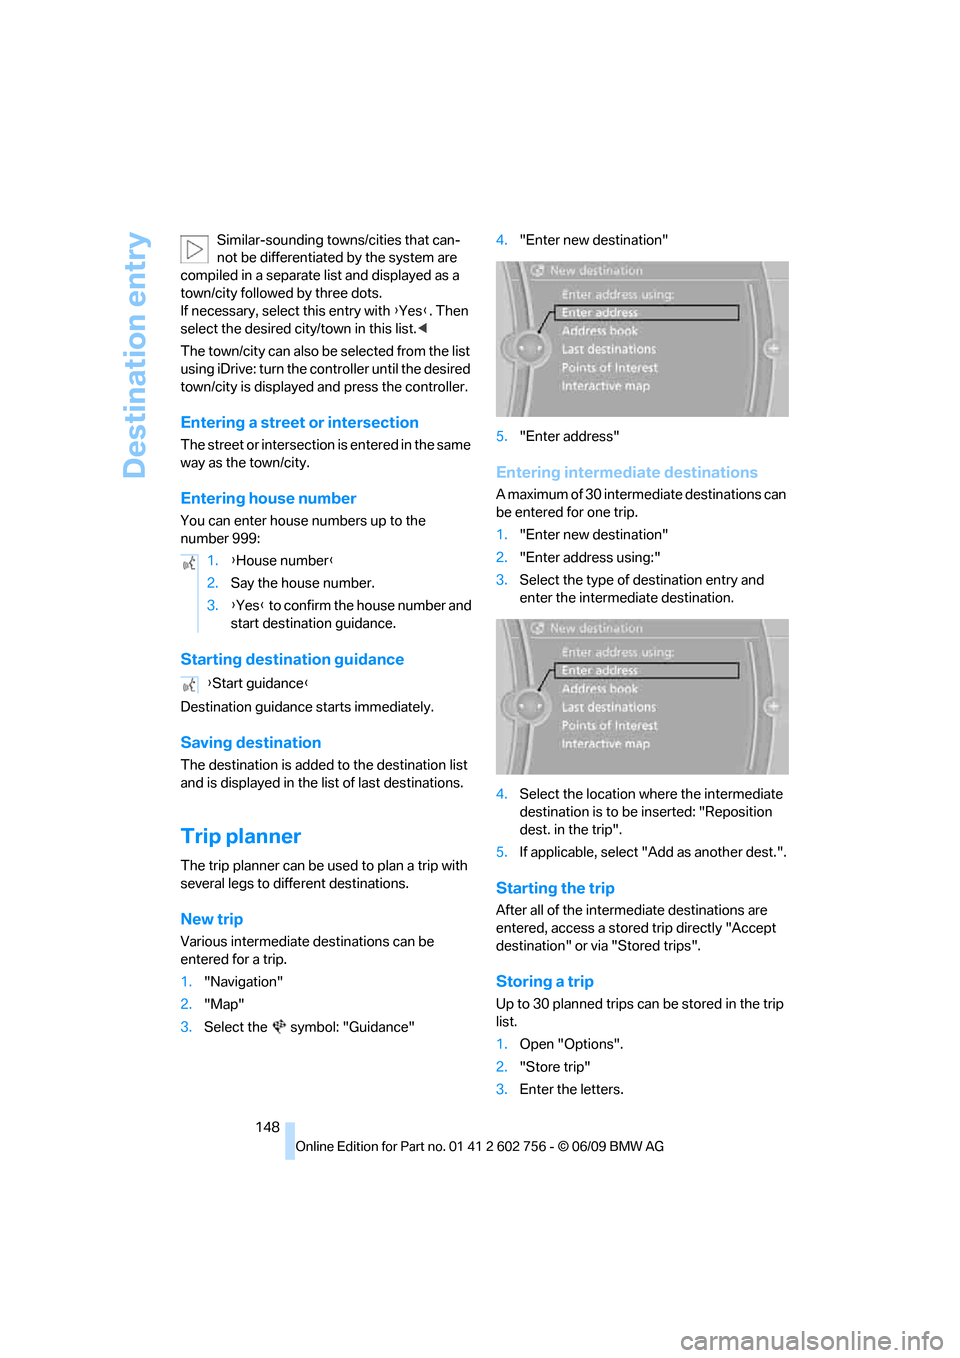
Trip planner
The trip planner can be used to plan a trip with
several legs to different destinations.
New trip
Various intermediate destinations can be
entered for a trip.
1."Navigation"
2."Map"
3.Select the symbol: "Guidance"4."Enter new destination"
5."Enter address"
Entering intermediate destinations
A maximum of 30 intermediate destinations can
be entered for one trip.
1."Enter new destination"
2."Enter address using:"
3.Select the type of destination entry and
enter the intermediate destination.
4.Select the location where the intermediate
destination is to be inserted: "Reposition
dest. in the trip".
5.If applicable, select "Add as another dest.".
Starting the trip
After all of the intermediate destinations are
entered, access a stored trip directly "Accept
destination" or via "Stored trips".
Storing a trip
Up to 30 planned trips can be stored in the trip
list.
1.Open "Options".
2."Store trip"
3.Enter the letters. 1.{House number}
2.Say the house number.
3.{Yes} to confirm the house number and
start destination guidance.
{Start guidance}
ba8_e70ag.book Seite 148 Freitag, 5. Juni 2009 11:42 11
Page 152 of 300
Destination guidance
150
Destination guidance
Starting destination
guidance
1."Navigation"
2."Enter address"
3.Select the destination.
4."Accept destination"
When the route has been calculated, it is dis-
played in the map on the Control Display.
Terminating destination
guidance
1."Navigation"
2."Map"
3.Select the symbol.
4."Stop guidance"
Continuing destination
guidance
If the destination was not reached at the end of
the last trip, the system asks whether it should
continue destination guidance.
Select "Resume guidance" or "Stop guidance".
Route criteria
General information
You can influence the calculated route by
choosing certain route criteria. You can change
the route criteria as often as you like while
entering the destination and whenever the des-
tination guidance is active.
The route is planned according to fixed rules.
The road type is taken into account, e.g.
whether it is a highway or a winding road. As a
result, the routes recommended by the naviga-
tion system may not always be the same ones that you would choose based on personal expe-
rience.
The settings are stored for the remote control
currently in use.
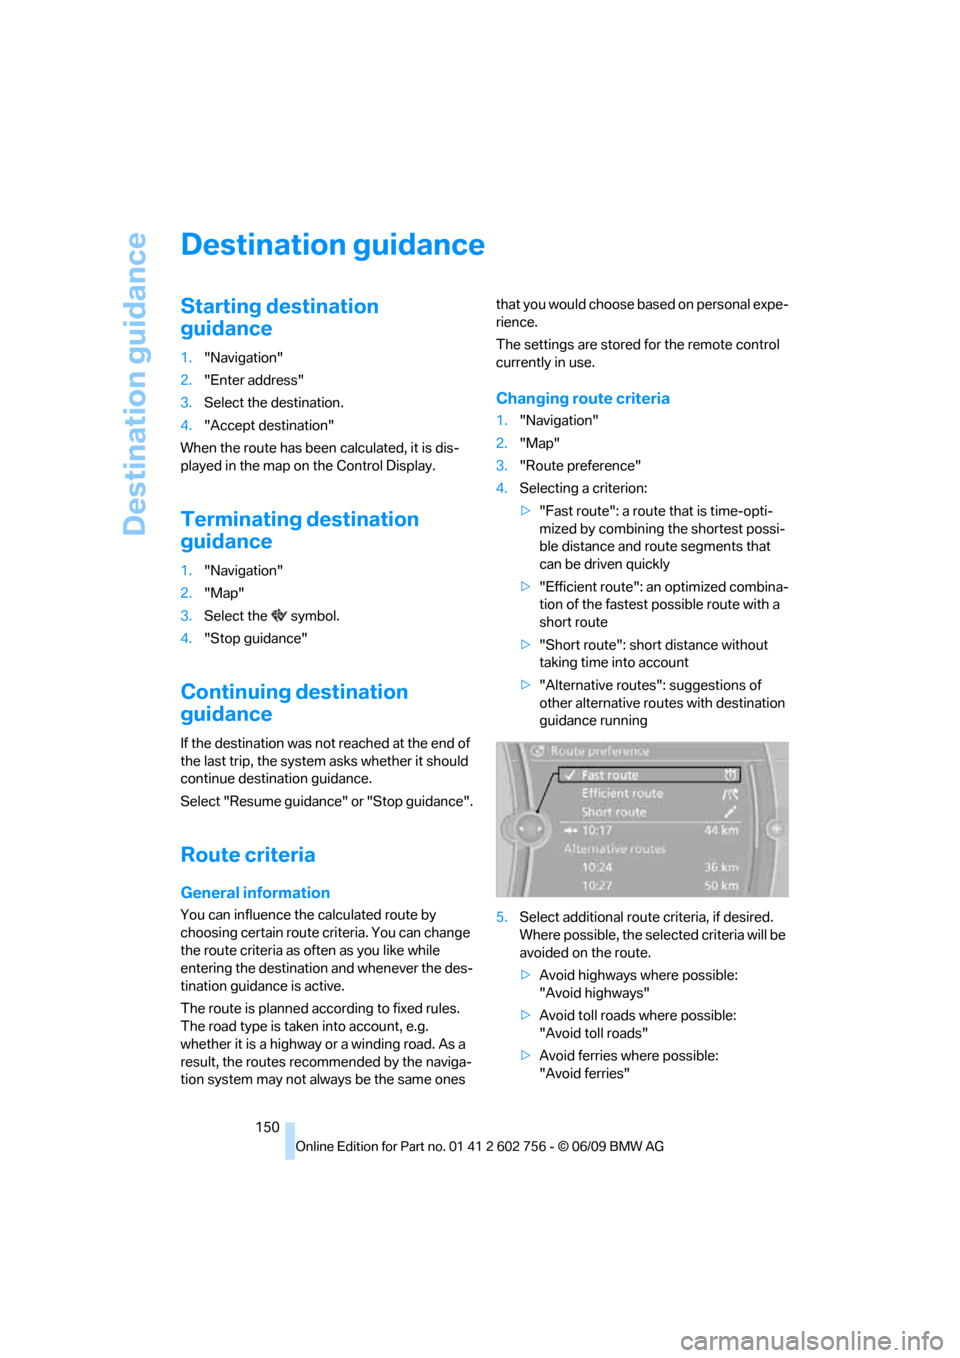
Changing route criteria
1."Navigation"
2."Map"
3."Route preference"
4.Selecting a criterion:
>"Fast route": a route that is time-opti-
mized by combining the shortest possi-
ble distance and route segments that
can be driven quickly
>"Efficient route": an optimized combina-
tion of the fastest possible route with a
short route
>"Short route": short distance without
taking time into account
>"Alternative routes": suggestions of
other alternative routes with destination
guidance running
5.Select additional route criteria, if desired.
Where possible, the selected criteria will be
avoided on the route.
>Avoid highways where possible:
"Avoid highways"
>Avoid toll roads where possible:
"Avoid toll roads"
>Avoid ferries where possible:
"Avoid ferries"
ba8_e70ag.book Seite 150 Freitag, 5. Juni 2009 11:42 11
Page 153 of 300
Navigation
Driving tips
151Reference
At a glance
Controls
Communications
Entertainment
Mobility
The setting applies to the current route and to
the planning of future routes.
Dynamic destination guidance
"Dynamic guidance" is switched on:
The route is automatically changed in the event
of traffic obstructions. The system does not
point out traffic obstructions along the original
route.
Depending on the type of road and the nature
and length of the traffic obstruction, the route
can also be calculated so that you travel
through the traffic obstruction.
1."Navigation"
2.Open "Options".
3."Dynamic guidance"
If the "Avoid highways", "Avoid toll roads"
or "Avoid ferries" route criteria are
selected, route calculation may take consider-
ably longer.<
Route
General information
Depending on the equipment in your vehicle,
various views of the route are available during
destination guidance.
>Map display
>Arrow display
>Display of the streets and towns/cities on
the route
Displaying a list of the streets or towns/
cities on the route
When destination guidance is started, a list of
the streets and towns/cities on the route is dis-
played. The driving distances and traffic bulle-
tins are displayed for each route section.
>Display a list of the streets and towns/cities
on the route.
>Display the traffic bulletins and the driving
distance for each route section.1."Navigation"
2."Route information"
3.Highlight a section.
The section is displayed in the preview map.
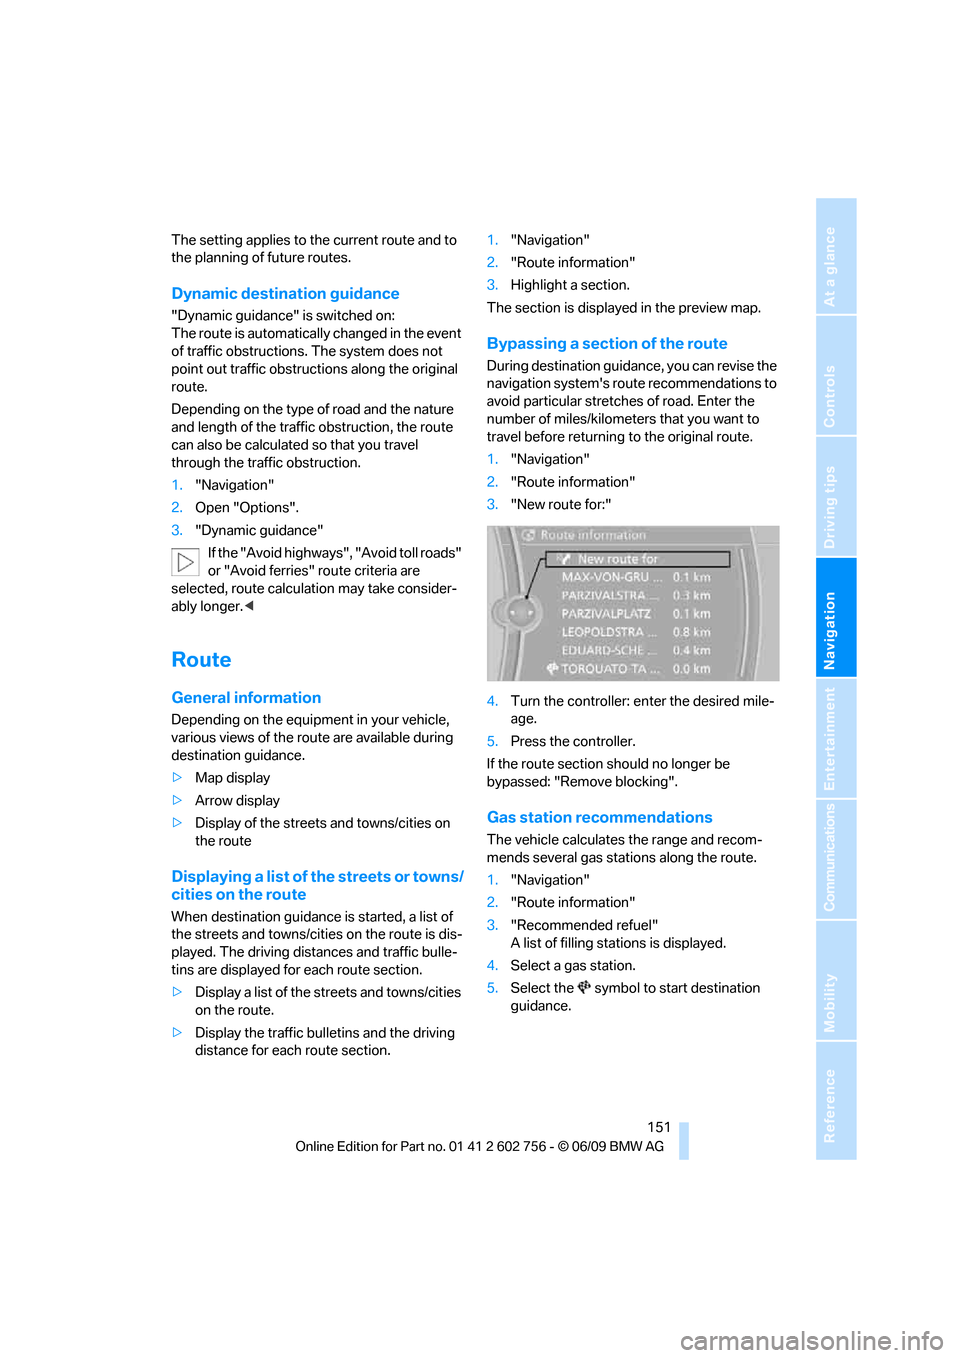
Bypassing a section of the route
During destination guidance, you can revise the
navigation system's route recommendations to
avoid particular stretches of road. Enter the
number of miles/kilometers that you want to
travel before returning to the original route.
1."Navigation"
2."Route information"
3."New route for:"
4.Turn the controller: enter the desired mile-
age.
5.Press the controller.
If the route section should no longer be
bypassed: "Remove blocking".
Gas station recommendations
The vehicle calculates the range and recom-
mends several gas stations along the route.
1."Navigation"
2."Route information"
3."Recommended refuel"
A list of filling stations is displayed.
4.Select a gas station.
5.Select the symbol to start destination
guidance.
ba8_e70ag.book Seite 151 Freitag, 5. Juni 2009 11:42 11