navigation system BMW X5 3.0Si 2010 E70 User Guide
[x] Cancel search | Manufacturer: BMW, Model Year: 2010, Model line: X5 3.0Si, Model: BMW X5 3.0Si 2010 E70Pages: 300, PDF Size: 12.41 MB
Page 51 of 300
Controls
49Reference
At a glance
Driving tips
Communications
Navigation
Entertainment
Mobility
When folding back the 2nd row seats,
make sure that the footwell under the
2nd row seats is clear. Otherwise persons in the
3rd row seats could be injured or objects dam-
aged.<
Warning lamp for 2nd row seats:
lights up when the 2nd row seats are
not locked. A message also appears
on the Control Display.
3rd row seats*
The 3rd row seats are divided and offer space
for two persons.
Folding up backrest
Before folding the seats up, remove the roll-up
cover, refer to page122, and if need be, slide
the 2nd row seats slightly forward.
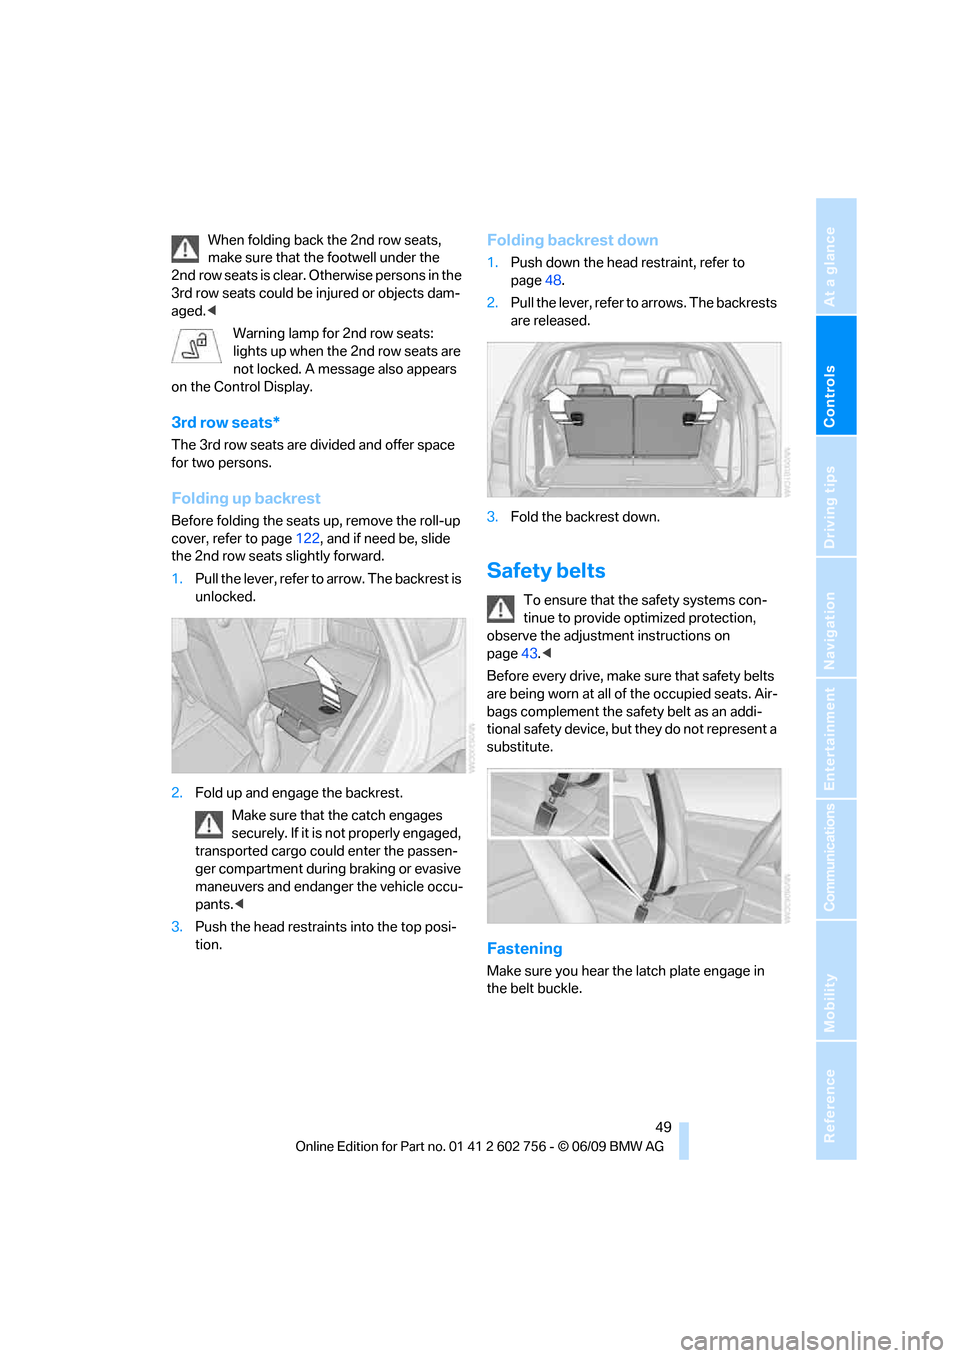
1.Pull the lever, refer to arrow. The backrest is
unlocked.
2.Fold up and engage the backrest.
Make sure that the catch engages
securely. If it is not properly engaged,
transported cargo could enter the passen-
ger compartment during braking or evasive
maneuvers and endanger the vehicle occu-
pants.<
3.Push the head restraints into the top posi-
tion.
Folding backrest down
1.Push down the head restraint, refer to
page48.
2.Pull the lever, refer to arrows. The backrests
are released.
3.Fold the backrest down.
Safety belts
To ensure that the safety systems con-
tinue to provide optimized protection,
observe the adjustment instructions on
page43.<
Before every drive, make sure that safety belts
are being worn at all of the occupied seats. Air-
bags complement the safety belt as an addi-
tional safety device, but they do not represent a
substitute.
Fastening
Make sure you hear the latch plate engage in
the belt buckle.
ba8_e70ag.book Seite 49 Freitag, 5. Juni 2009 11:42 11
Page 61 of 300
Controls
59Reference
At a glance
Driving tips
Communications
Navigation
Entertainment
Mobility
Driving
Ignition lock
Inserting remote control into ignition
lock
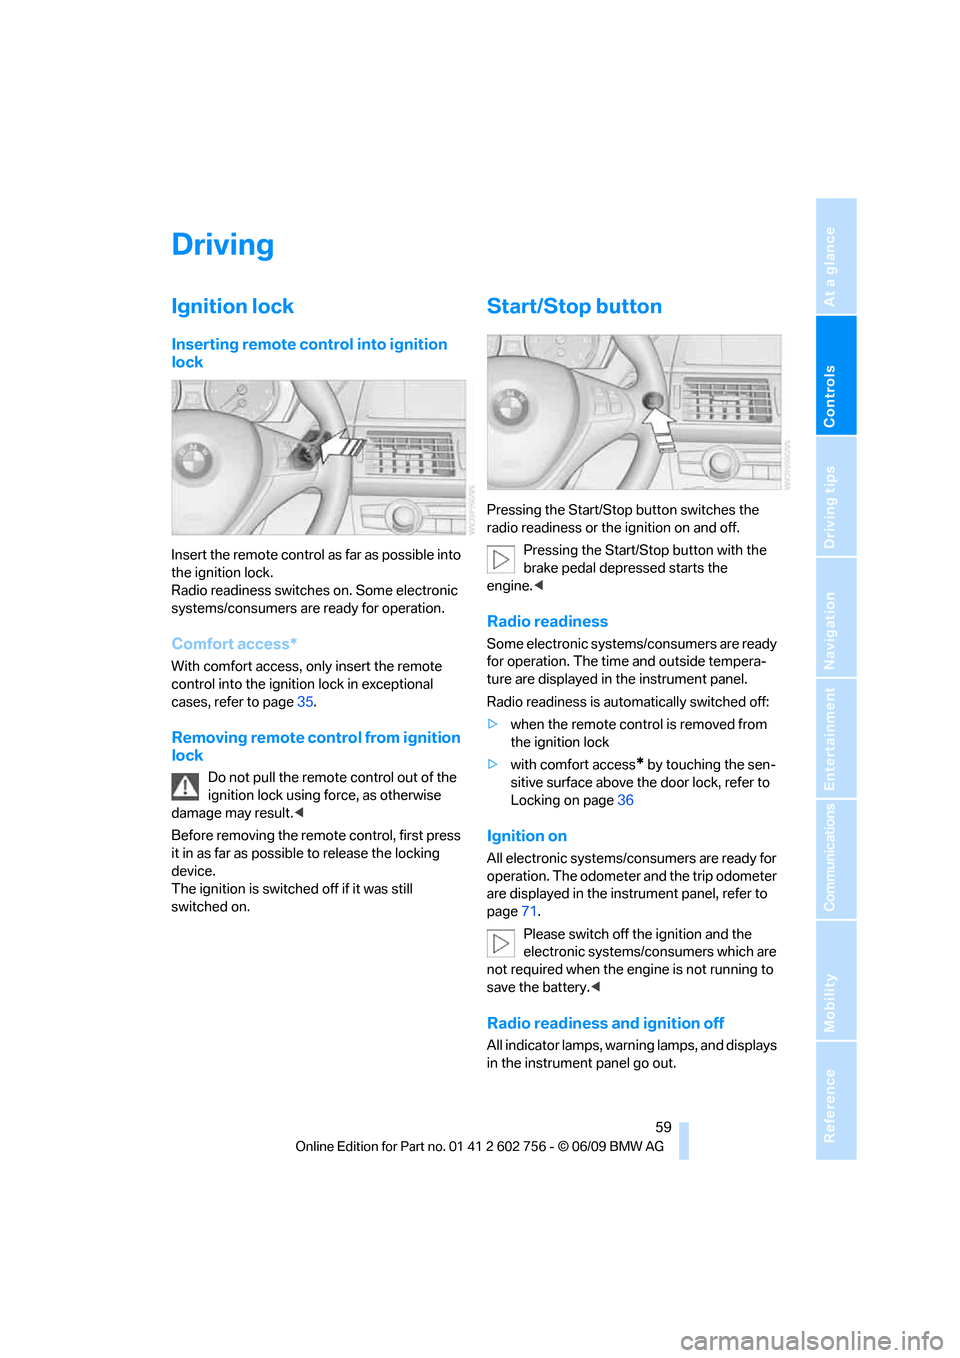
Insert the remote control as far as possible into
the ignition lock.
Radio readiness switches on. Some electronic
systems/consumers are ready for operation.
Comfort access*
With comfort access, only insert the remote
control into the ignition lock in exceptional
cases, refer to page35.
Removing remote control from ignition
lock
Do not pull the remote control out of the
ignition lock using force, as otherwise
damage may result.<
Before removing the remote control, first press
it in as far as possible to release the locking
device.
The ignition is switched off if it was still
switched on.
Start/Stop button
Pressing the Start/Stop button switches the
radio readiness or the ignition on and off.
Pressing the Start/Stop button with the
brake pedal depressed starts the
engine.<
Radio readiness
Some electronic systems/consumers are ready
for operation. The time and outside tempera-
ture are displayed in the instrument panel.
Radio readiness is automatically switched off:
>when the remote control is removed from
the ignition lock
>with comfort access
* by touching the sen-
sitive surface above the door lock, refer to
Locking on page36
Ignition on
All electronic systems/consumers are ready for
operation. The odometer and the trip odometer
are displayed in the instrument panel, refer to
page71.
Please switch off the ignition and the
electronic systems/consumers which are
not required when the engine is not running to
save the battery.<
Radio readiness and ignition off
All indicator lamps, warning lamps, and displays
in the instrument panel go out.
ba8_e70ag.book Seite 59 Freitag, 5. Juni 2009 11:42 11
Page 63 of 300
Controls
61Reference
At a glance
Driving tips
Communications
Navigation
Entertainment
Mobility
Transmission position P will be engaged:
>automatically after approx. 30 minutes
>if you remove the remote control from the
ignition lock
Parking brake
The concept
Your BMW is equipped with an electromechan-
ical parking brake.
The parking brake is primarily intended to pre-
vent the vehicle from rolling while parked.
You can use the parking brake in two ways:
>manually, by pulling and pushing the button
>automatically, by activating Automatic
Hold, refer to page61
With the engine stopped, the parking brake acts
on the rear wheels via an electromechanical
system. When the engine is running, the park-
ing brake acts on the disk brakes of the front
and rear wheels via the brake hydraulics.
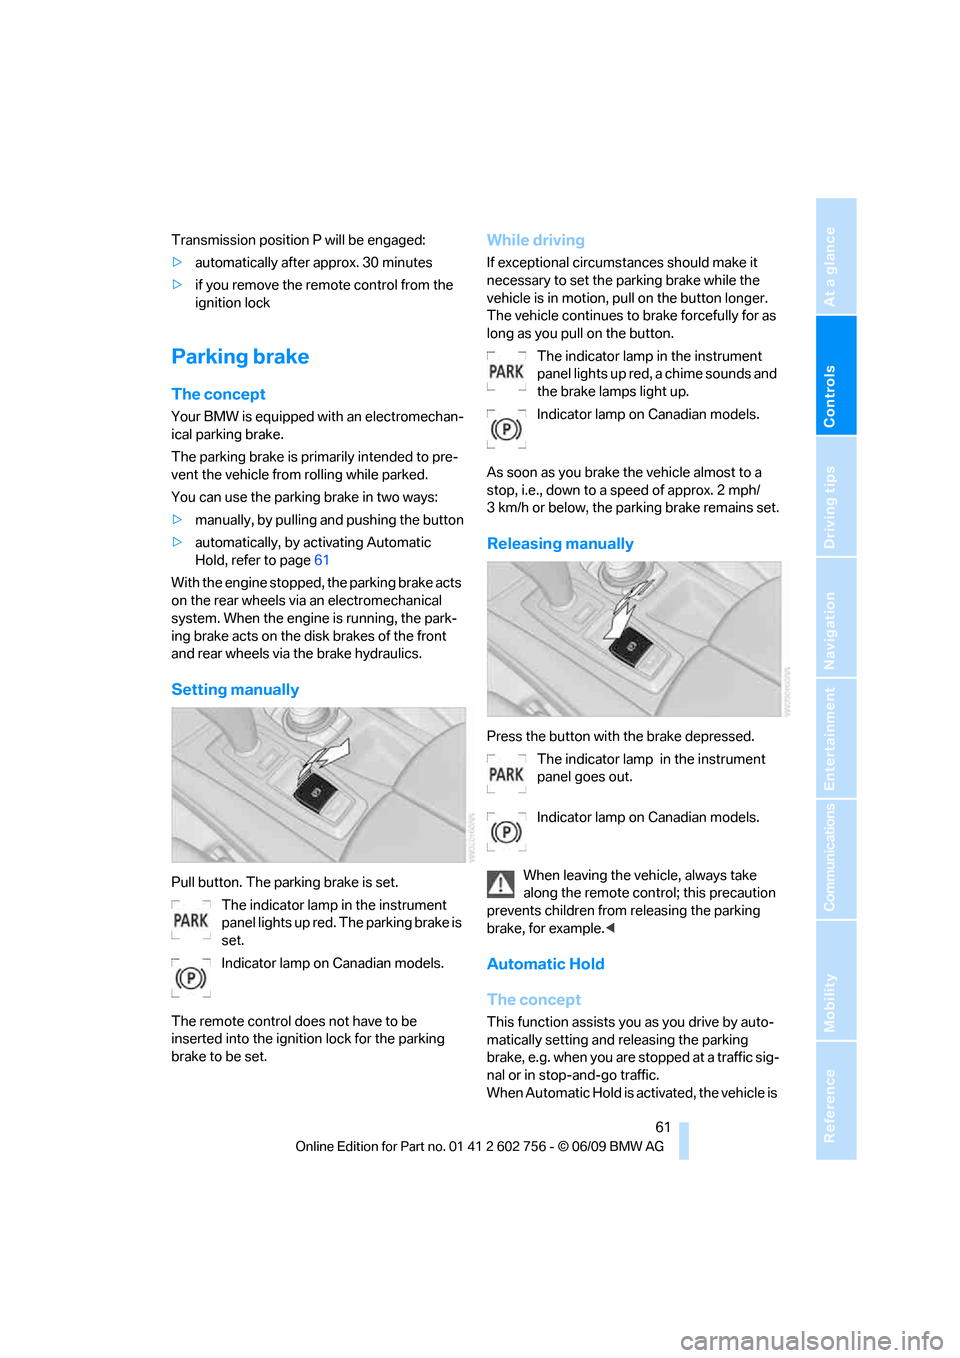
Setting manually
Pull button. The parking brake is set.
The indicator lamp in the instrument
panel lights up red. The parking brake is
set.
Indicator lamp on Canadian models.
The remote control does not have to be
inserted into the ignition lock for the parking
brake to be set.
While driving
If exceptional circumstances should make it
necessary to set the parking brake while the
vehicle is in motion, pull on the button longer.
The vehicle continues to brake forcefully for as
long as you pull on the button.
The indicator lamp in the instrument
panel lights up red, a chime sounds and
the brake lamps light up.
Indicator lamp on Canadian models.
As soon as you brake the vehicle almost to a
stop, i.e., down to a speed of approx. 2 mph/
3 km/h or below, the parking brake remains set.
Releasing manually
Press the button with the brake depressed.
The indicator lamp in the instrument
panel goes out.
Indicator lamp on Canadian models.
When leaving the vehicle, always take
along the remote control; this precaution
prevents children from releasing the parking
brake, for example.<
Automatic Hold
The concept
This function assists you as you drive by auto-
matically setting and releasing the parking
brake, e.g. when you are stopped at a traffic sig-
nal or in stop-and-go traffic.
When Automatic Hold is activated, the vehicle is
ba8_e70ag.book Seite 61 Freitag, 5. Juni 2009 11:42 11
Page 67 of 300
Controls
65Reference
At a glance
Driving tips
Communications
Navigation
Entertainment
Mobility
R Reverse
Select only with the vehicle stationary.
An interlock prevents inadvertent gearshifts
into transmission position R. To release the
lock, push the unlock button1.
P Park
Select only with the vehicle stationary. The rear
wheels are locked.
P is engaged automatically as soon as
you switch off the engine unless N is
engaged and on vehicles with comfort access
the remote control is inserted in the ignition
lock, refer to page59.<
N Neutral
Can, for example, be engaged in automatic car
washes. The vehicle can roll.
N remains engaged even after the engine
is switched off whenever you leave the
remote control in the ignition lock. This function
is used, for example, in a car wash, refer to
page60. After approx. 30 minutes P is auto-
matically engaged.<
D Drive, automatic position
Position for normal vehicle operation. All for-
ward gears are available.
Under normal operating conditions, the fuel
consumption is lowest when driving in posi-
tion D.
Kick-down
The kick-down mode provides maximum accel-
eration.
Press the accelerator pedal beyond the
increased resistance at full throttle.
Sport program and manual mode M/S
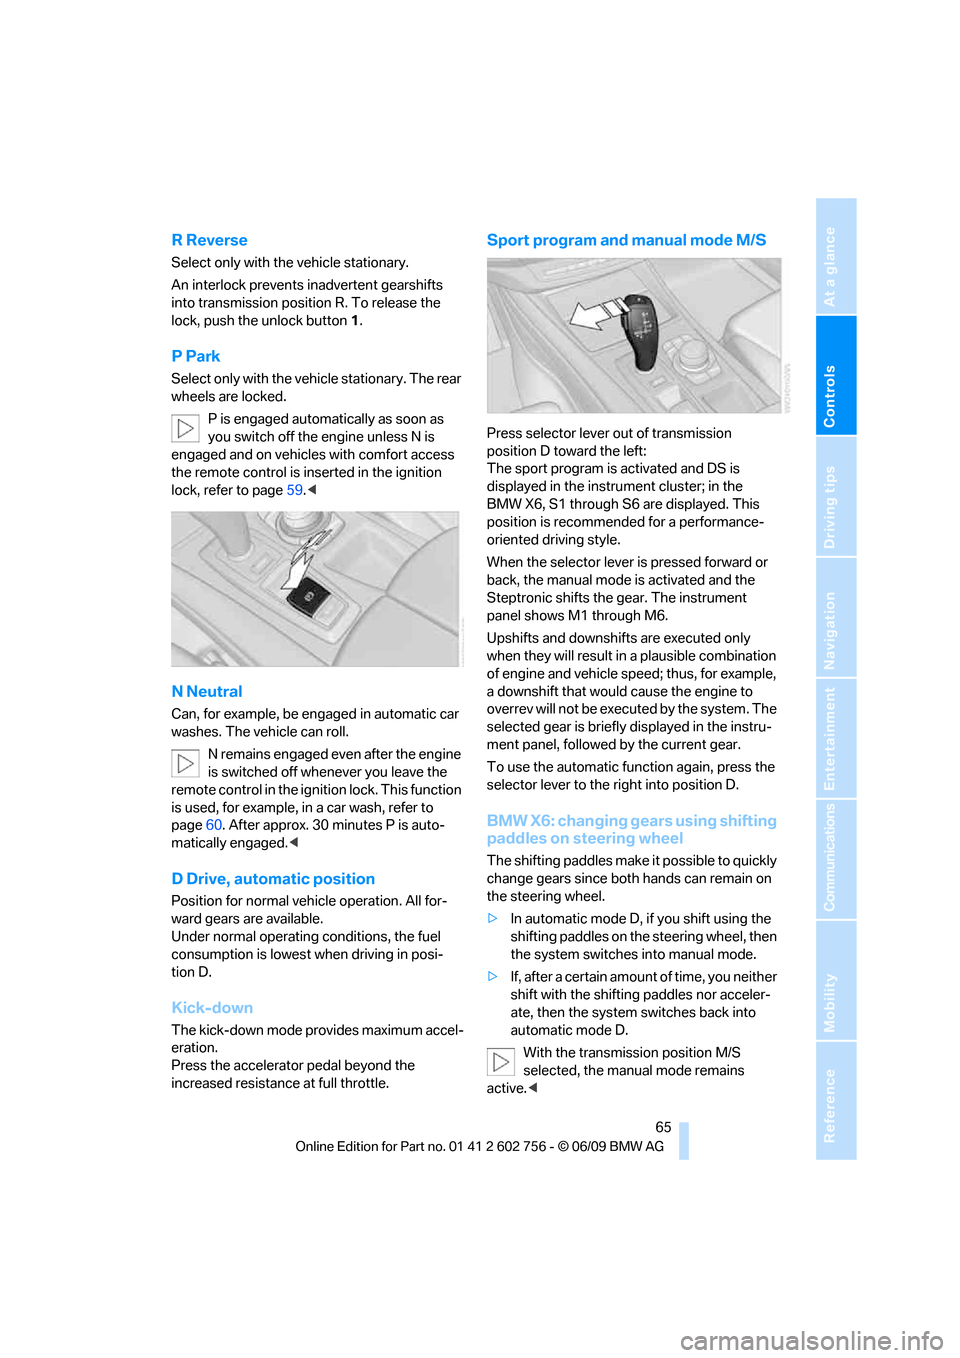
Press selector lever out of transmission
position D toward the left:
The sport program is activated and DS is
displayed in the instrument cluster; in the
BMW X6, S1 through S6 are displayed. This
position is recommended for a performance-
oriented driving style.
When the selector lever is pressed forward or
back, the manual mode is activated and the
Steptronic shifts the gear. The instrument
panel shows M1 through M6.
Upshifts and downshifts are executed only
when they will result in a plausible combination
of engine and vehicle speed; thus, for example,
a downshift that would cause the engine to
overrev will not be executed by the system. The
selected gear is briefly displayed in the instru-
ment panel, followed by the current gear.
To use the automatic function again, press the
selector lever to the right into position D.
BMW X6: changing gears using shifting
paddles on steering wheel
The shifting paddles make it possible to quickly
change gears since both hands can remain on
the steering wheel.
>In automatic mode D, if you shift using the
shifting paddles on the steering wheel, then
the system switches into manual mode.
>If, after a certain amount of time, you neither
shift with the shifting paddles nor acceler-
ate, then the system switches back into
automatic mode D.
With the transmission position M/S
selected, the manual mode remains
active.<
ba8_e70ag.book Seite 65 Freitag, 5. Juni 2009 11:42 11
Page 69 of 300
Controls
67Reference
At a glance
Driving tips
Communications
Navigation
Entertainment
Mobility
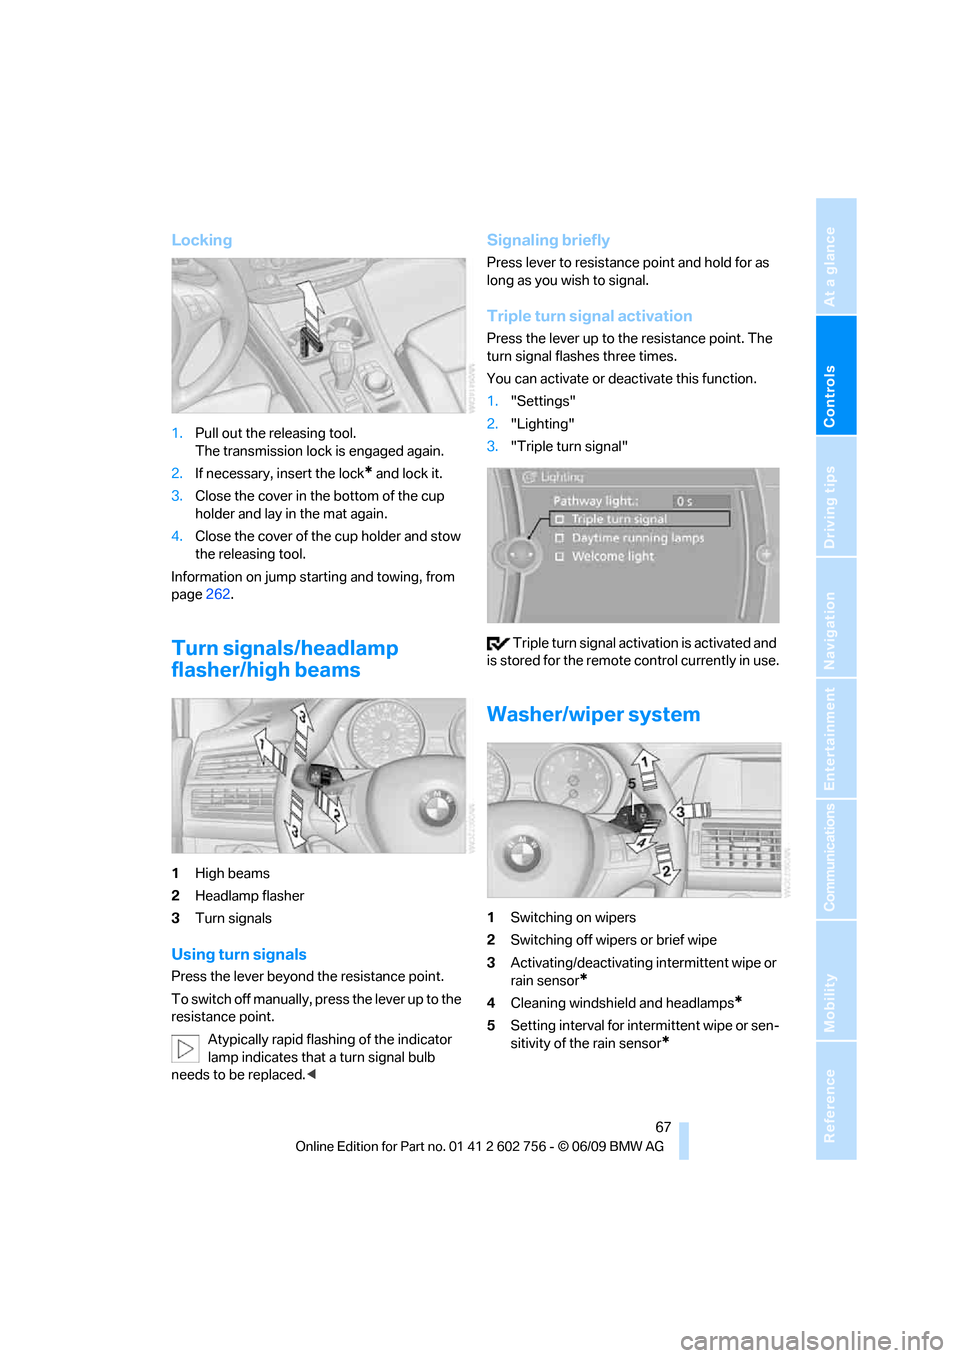
Locking
1.Pull out the releasing tool.
The transmission lock is engaged again.
2.If necessary, insert the lock
* and lock it.
3.Close the cover in the bottom of the cup
holder and lay in the mat again.
4.Close the cover of the cup holder and stow
the releasing tool.
Information on jump starting and towing, from
page262.
Turn signals/headlamp
flasher/high beams
1High beams
2Headlamp flasher
3Turn signals
Using turn signals
Press the lever beyond the resistance point.
To switch off manually, press the lever up to the
resistance point.
Atypically rapid flashing of the indicator
lamp indicates that a turn signal bulb
needs to be replaced.<
Signaling briefly
Press lever to resistance point and hold for as
long as you wish to signal.
Triple turn signal activation
Press the lever up to the resistance point. The
turn signal flashes three times.
You can activate or deactivate this function.
1."Settings"
2."Lighting"
3."Triple turn signal"
Triple turn signal activation is activated and
is stored for the remote control currently in use.
Washer/wiper system
1Switching on wipers
2Switching off wipers or brief wipe
3Activating/deactivating intermittent wipe or
rain sensor
*
4Cleaning windshield and headlamps*
5Setting interval for intermittent wipe or sen-
sitivity of the rain sensor
*
ba8_e70ag.book Seite 67 Freitag, 5. Juni 2009 11:42 11
Page 71 of 300
Controls
69Reference
At a glance
Driving tips
Communications
Navigation
Entertainment
Mobility
Washer fluid
Washer fluid antifreeze is flammable. For
this reason, keep it away from ignition
sources and store only in the closed original
container out of reach of children. Otherwise,
there is the danger of bodily injury. Always
observe the instructions for use provided on the
containers.<
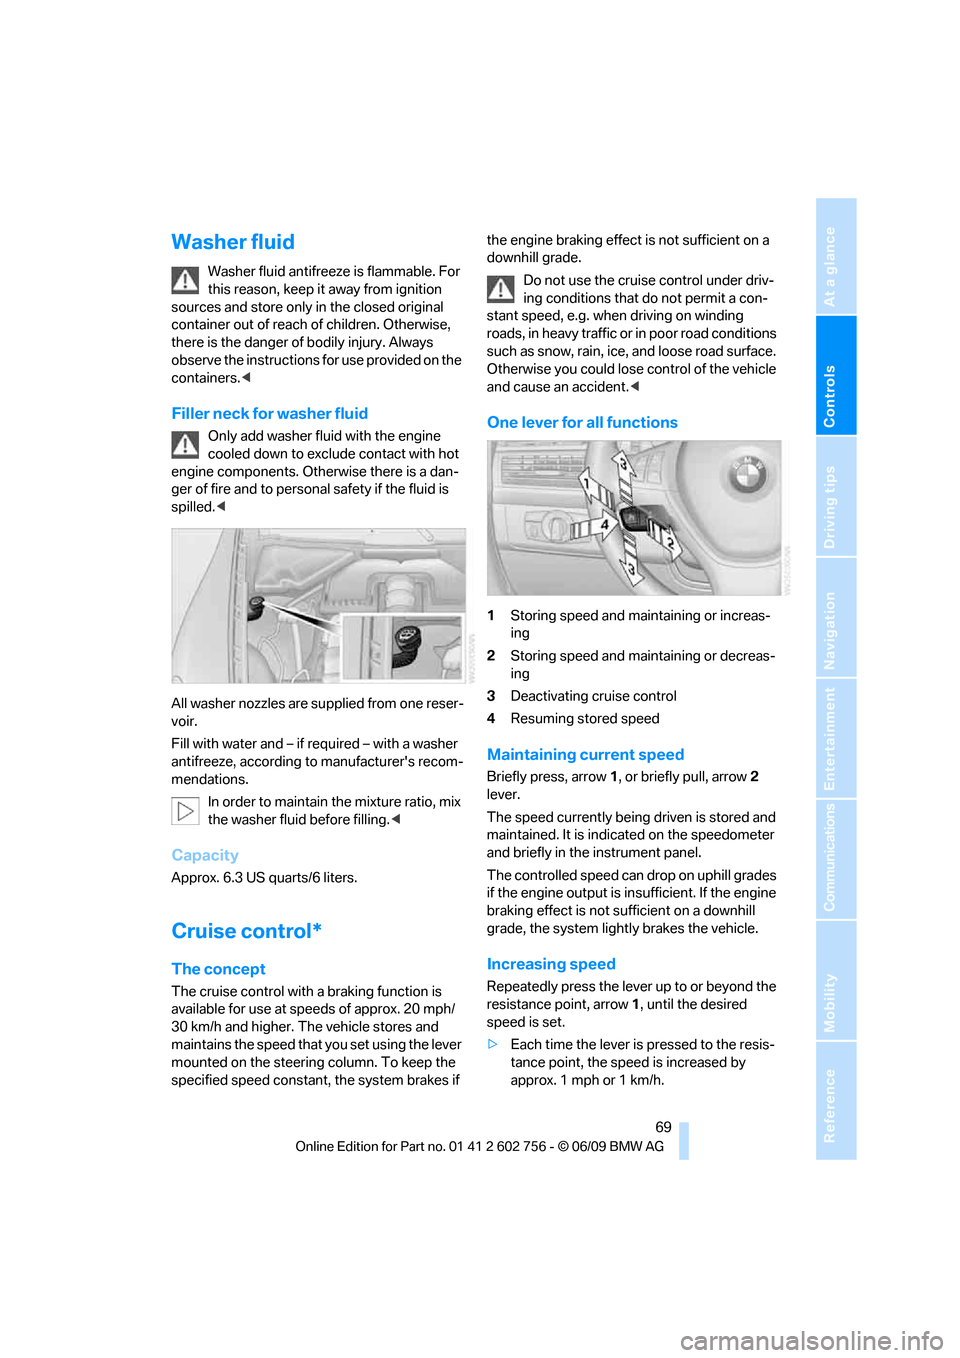
Filler neck for washer fluid
Only add washer fluid with the engine
cooled down to exclude contact with hot
engine components. Otherwise there is a dan-
ger of fire and to personal safety if the fluid is
spilled.<
All washer nozzles are supplied from one reser-
voir.
Fill with water and – if required – with a washer
antifreeze, according to manufacturer's recom-
mendations.
In order to maintain the mixture ratio, mix
the washer fluid before filling.<
Capacity
Approx. 6.3 US quarts/6 liters.
Cruise control*
The concept
The cruise control with a braking function is
available for use at speeds of approx. 20 mph/
30 km/h and higher. The vehicle stores and
maintains the speed that you set using the lever
mounted on the steering column. To keep the
specified speed constant, the system brakes if the engine braking effect is not sufficient on a
downhill grade.
Do not use the cruise control under driv-
ing conditions that do not permit a con-
stant speed, e.g. when driving on winding
roads, in heavy traffic or in poor road conditions
such as snow, rain, ice, and loose road surface.
Otherwise you could lose control of the vehicle
and cause an accident.<
One lever for all functions
1Storing speed and maintaining or increas-
ing
2Storing speed and maintaining or decreas-
ing
3Deactivating cruise control
4Resuming stored speed
Maintaining current speed
Briefly press, arrow1, or briefly pull, arrow2
lever.
The speed currently being driven is stored and
maintained. It is indicated on the speedometer
and briefly in the instrument panel.
The controlled speed can drop on uphill grades
if the engine output is insufficient. If the engine
braking effect is not sufficient on a downhill
grade, the system lightly brakes the vehicle.
Increasing speed
Repeatedly press the lever up to or beyond the
resistance point, arrow1, until the desired
speed is set.
>Each time the lever is pressed to the resis-
tance point, the speed is increased by
approx. 1 mph or 1 km/h.
ba8_e70ag.book Seite 69 Freitag, 5. Juni 2009 11:42 11
Page 79 of 300
Controls
77Reference
At a glance
Driving tips
Communications
Navigation
Entertainment
Mobility
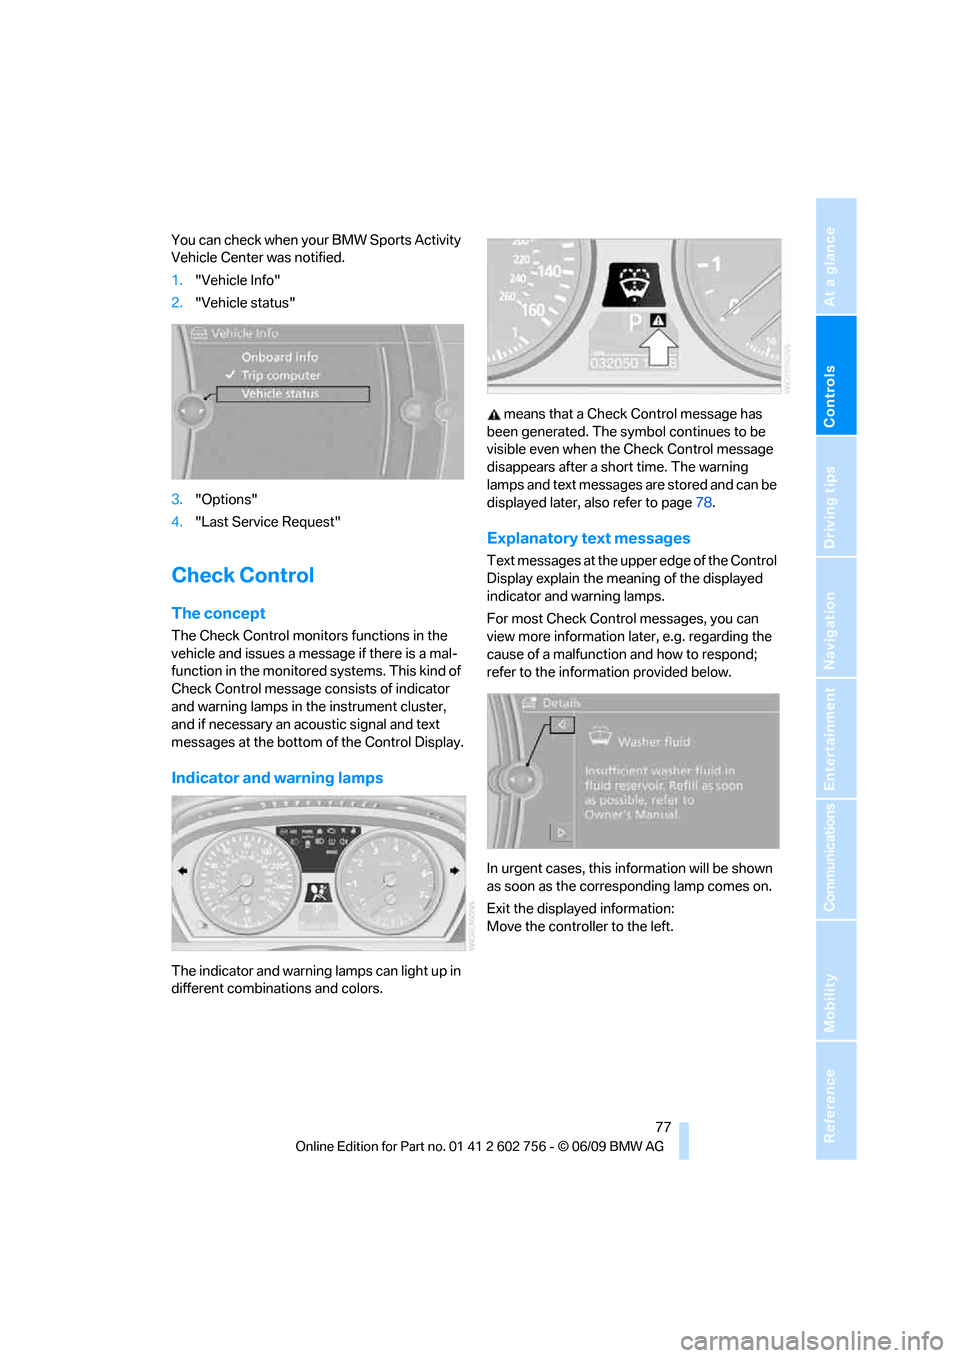
You can check when your BMW Sports Activity
Vehicle Center was notified.
1."Vehicle Info"
2."Vehicle status"
3."Options"
4."Last Service Request"
Check Control
The concept
The Check Control monitors functions in the
vehicle and issues a message if there is a mal-
function in the monitored systems. This kind of
Check Control message consists of indicator
and warning lamps in the instrument cluster,
and if necessary an acoustic signal and text
messages at the bottom of the Control Display.
Indicator and warning lamps
The indicator and warning lamps can light up in
different combinations and colors. means that a Check Control message has
been generated. The symbol continues to be
visible even when the Check Control message
disappears after a short time. The warning
lamps and text messages are stored and can be
displayed later, also refer to page78.
Explanatory text messages
Text messages at the upper edge of the Control
Display explain the meaning of the displayed
indicator and warning lamps.
For most Check Control messages, you can
view more information later, e.g. regarding the
cause of a malfunction and how to respond;
refer to the information provided below.
In urgent cases, this information will be shown
as soon as the corresponding lamp comes on.
Exit the displayed information:
Move the controller to the left.
ba8_e70ag.book Seite 77 Freitag, 5. Juni 2009 11:42 11
Page 81 of 300
Controls
79Reference
At a glance
Driving tips
Communications
Navigation
Entertainment
Mobility
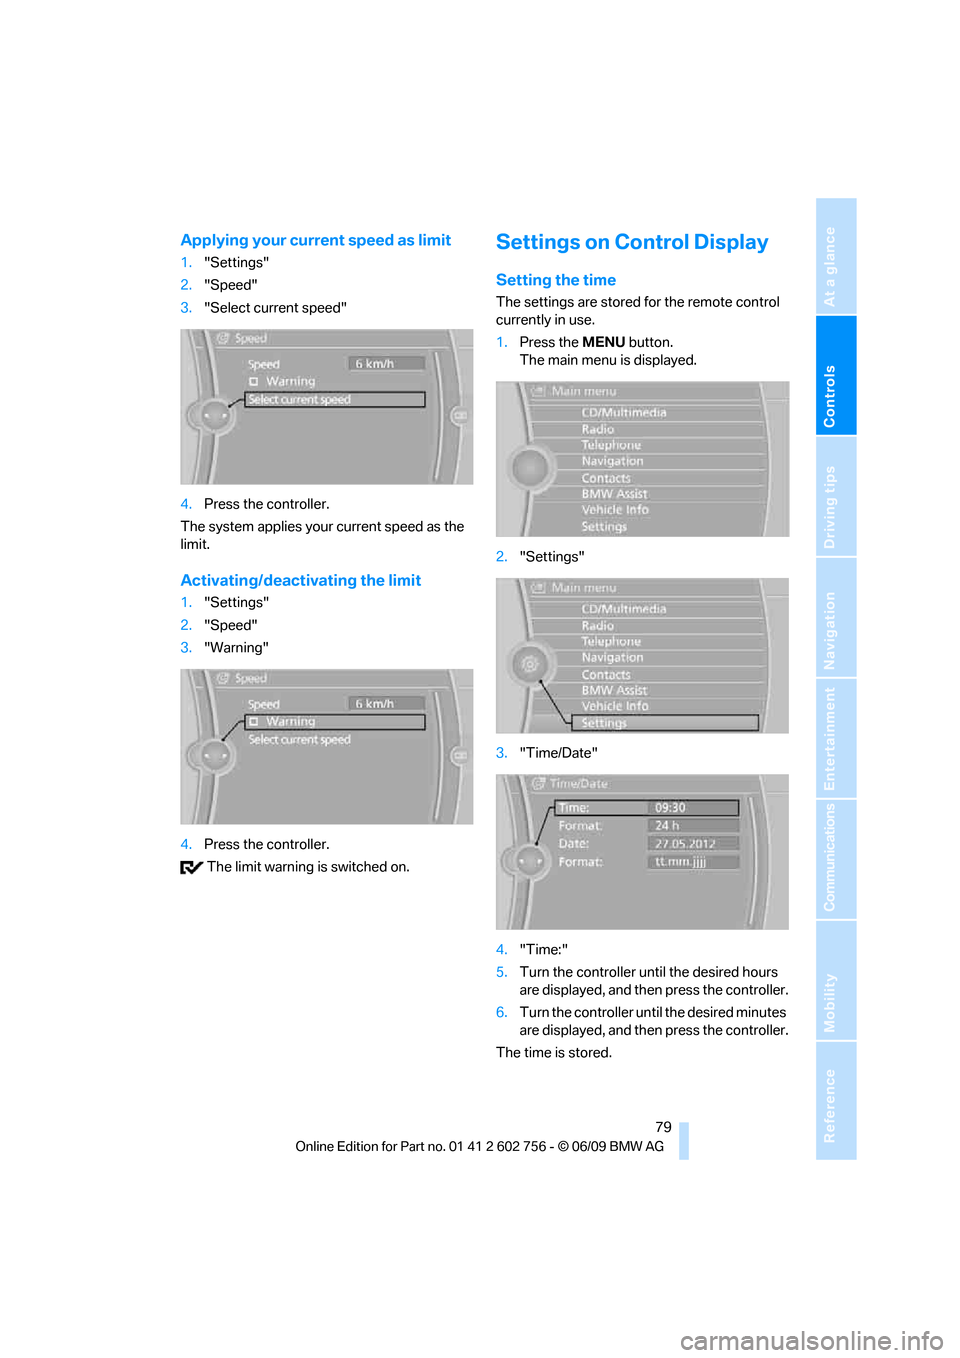
Applying your current speed as limit
1."Settings"
2."Speed"
3."Select current speed"
4.Press the controller.
The system applies your current speed as the
limit.
Activating/deactivating the limit
1."Settings"
2."Speed"
3."Warning"
4.Press the controller.
The limit warning is switched on.
Settings on Control Display
Setting the time
The settings are stored for the remote control
currently in use.
1.Press the MENUbutton.
The main menu is displayed.
2."Settings"
3."Time/Date"
4."Time:"
5.Turn the controller until the desired hours
are displayed, and then press the controller.
6.Turn the controller until the desired minutes
are displayed, and then press the controller.
The time is stored.
ba8_e70ag.book Seite 79 Freitag, 5. Juni 2009 11:42 11
Page 85 of 300
Controls
83Reference
At a glance
Driving tips
Communications
Navigation
Entertainment
Mobility
Automatic deactivation
The system switches off and the LED goes out:
>after approx. 165 ft/50 m when driving for-
ward
>at speeds over approx. 25 mph/35 km/h
when driving forward
Switch the system back on as needed.
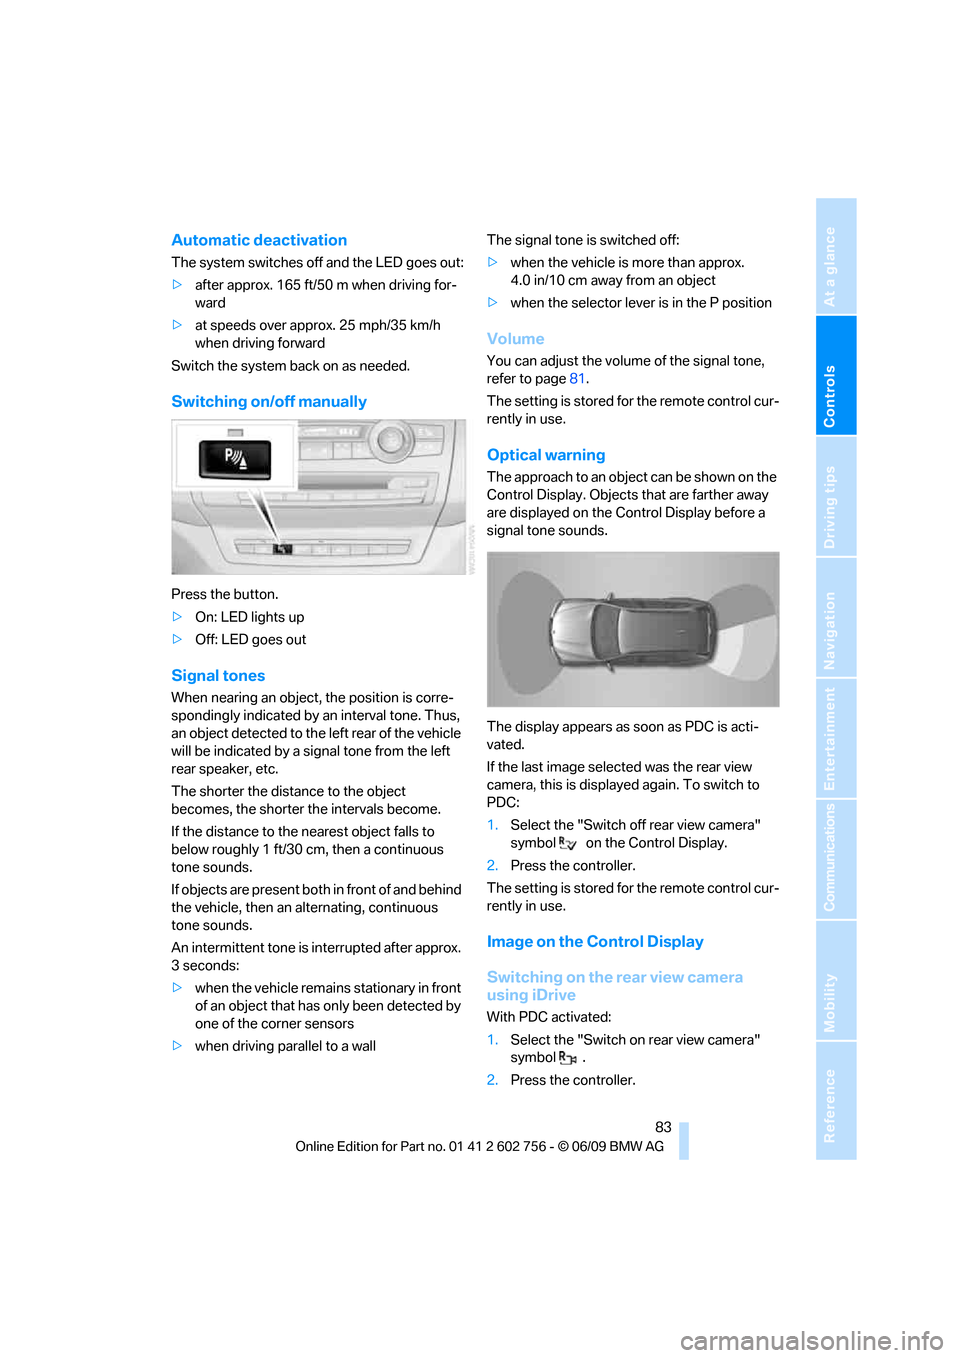
Switching on/off manually
Press the button.
>On: LED lights up
>Off: LED goes out
Signal tones
When nearing an object, the position is corre-
spondingly indicated by an interval tone. Thus,
an object detected to the left rear of the vehicle
will be indicated by a signal tone from the left
rear speaker, etc.
The shorter the distance to the object
becomes, the shorter the intervals become.
If the distance to the nearest object falls to
below roughly 1 ft/30 cm, then a continuous
tone sounds.
If objects are present both in front of and behind
the vehicle, then an alternating, continuous
tone sounds.
An intermittent tone is interrupted after approx.
3seconds:
>when the vehicle remains stationary in front
of an object that has only been detected by
one of the corner sensors
>when driving parallel to a wallThe signal tone is switched off:
>when the vehicle is more than approx.
4.0 in/10 cm away from an object
>when the selector lever is in the P position
Volume
You can adjust the volume of the signal tone,
refer to page81.
The setting is stored for the remote control cur-
rently in use.
Optical warning
The approach to an object can be shown on the
Control Display. Objects that are farther away
are displayed on the Control Display before a
signal tone sounds.
The display appears as soon as PDC is acti-
vated.
If the last image selected was the rear view
camera, this is displayed again. To switch to
PDC:
1.Select the "Switch off rear view camera"
symbol on the Control Display.
2.Press the controller.
The setting is stored for the remote control cur-
rently in use.
Image on the Control Display
Switching on the rear view camera
using iDrive
With PDC activated:
1.Select the "Switch on rear view camera"
symbol .
2.Press the controller.
ba8_e70ag.book Seite 83 Freitag, 5. Juni 2009 11:42 11
Page 93 of 300
Controls
91Reference
At a glance
Driving tips
Communications
Navigation
Entertainment
Mobility
3Pull beyond the resistance point:
With downhill grade over 10Ξ, reduce
speed to approx. 3 mph/4 km/h.
Activating HDC
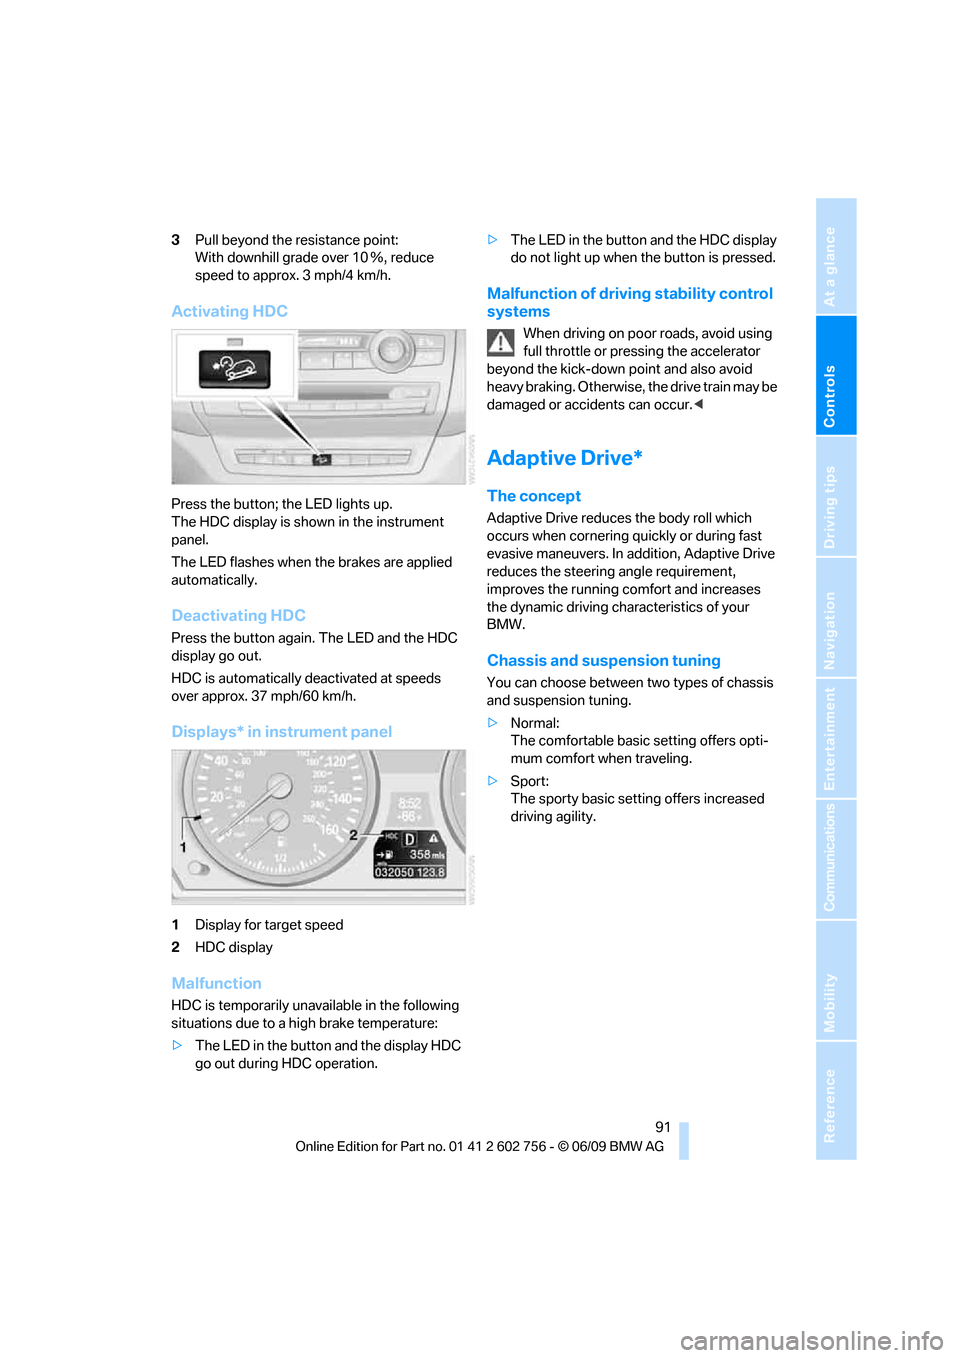
Press the button; the LED lights up.
The HDC display is shown in the instrument
panel.
The LED flashes when the brakes are applied
automatically.
Deactivating HDC
Press the button again. The LED and the HDC
display go out.
HDC is automatically deactivated at speeds
over approx. 37 mph/60 km/h.
Displays* in instrument panel
1Display for target speed
2HDC display
Malfunction
HDC is temporarily unavailable in the following
situations due to a high brake temperature:
>The LED in the button and the display HDC
go out during HDC operation.>The LED in the button and the HDC display
do not light up when the button is pressed.
Malfunction of driving stability control
systems
When driving on poor roads, avoid using
full throttle or pressing the accelerator
beyond the kick-down point and also avoid
heavy braking. Otherwise, the drive train may be
damaged or accidents can occur.<
Adaptive Drive*
The concept
Adaptive Drive reduces the body roll which
occurs when cornering quickly or during fast
evasive maneuvers. In addition, Adaptive Drive
reduces the steering angle requirement,
improves the running comfort and increases
the dynamic driving characteristics of your
BMW.
Chassis and suspension tuning
You can choose between two types of chassis
and suspension tuning.
>Normal:
The comfortable basic setting offers opti-
mum comfort when traveling.
>Sport:
The sporty basic setting offers increased
driving agility.
ba8_e70ag.book Seite 91 Freitag, 5. Juni 2009 11:42 11