reset BMW X5 3.0Si 2010 E70 User Guide
[x] Cancel search | Manufacturer: BMW, Model Year: 2010, Model line: X5 3.0Si, Model: BMW X5 3.0Si 2010 E70Pages: 300, PDF Size: 12.41 MB
Page 167 of 300
Navigation
Entertainment
Driving tips
165Reference
At a glance
Controls
Communications
Mobility
Displaying additional information
Some stations broadcast additional information
on the current track, such as the name of the
artist.
1.Select the desired station.
2.Open "Options".
3."Station info"
Selecting a substation
1.Select the desired station.
2.Press the controller.
3.Select the substation.
Stored stations
It is possible to store up to 40 stations.
Selecting a station
1."Radio"
2."Presets"
3.Call up the desired station.
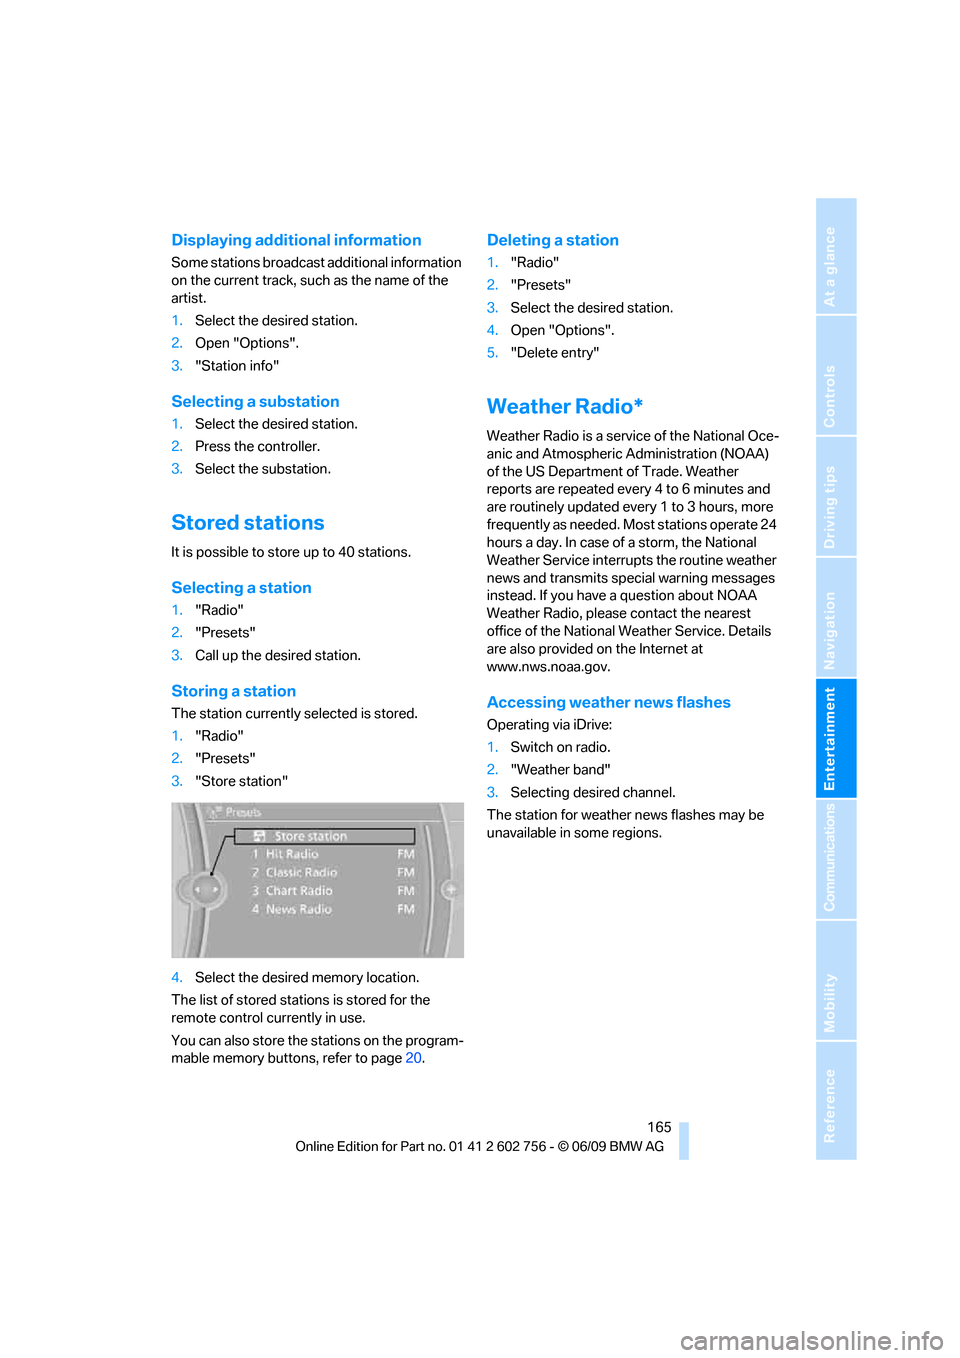
Storing a station
The station currently selected is stored.
1."Radio"
2."Presets"
3."Store station"
4.Select the desired memory location.
The list of stored stations is stored for the
remote control currently in use.
You can also store the stations on the program-
mable memory buttons, refer to page20.
Deleting a station
1."Radio"
2."Presets"
3.Select the desired station.
4.Open "Options".
5."Delete entry"
Weather Radio*
Weather Radio is a service of the National Oce-
anic and Atmospheric Administration (NOAA)
of the US Department of Trade. Weather
reports are repeated every 4 to 6 minutes and
are routinely updated every 1 to 3 hours, more
frequently as needed. Most stations operate 24
hours a day. In case of a storm, the National
Weather Service interrupts the routine weather
news and transmits special warning messages
instead. If you have a question about NOAA
Weather Radio, please contact the nearest
office of the National Weather Service. Details
are also provided on the Internet at
www.nws.noaa.gov.
Accessing weather news flashes
Operating via iDrive:
1.Switch on radio.
2."Weather band"
3.Selecting desired channel.
The station for weather news flashes may be
unavailable in some regions.
ba8_e70ag.book Seite 165 Freitag, 5. Juni 2009 11:42 11
Page 194 of 300
DVD system in rear
192 The system language of the DVD sys-
tem
"Display": background brightness of
screen.
>"Tone":
>"Treble / Bass" and "Balance":
Separately adjustable for the left and
right-hand headphones and the infrared
headphones.
>"Reset":
The settings are reset to the default
value.
>"DVD format":
>"Standard"
>"Zoom": full-screen playback
>"Language":
Language of the DVD playback. The lan-
guage advances one setting each time the
menu item is selected.
>"Subtitles":
Language of subtitles
or turn off subtitles
>"Title":
Selecting individual tracks on the DVD
>"Angle of view":
Camera angle
Notes or symbols that appear during the
playback of a film generally point out differ-
ent camera angles. These are usually only
briefly available.
>"Menu":
Call up the DVD-specific menu.
>"Return":
Exit menu or:
Press the buttons on the remote con-
trol.
Many DVDs offer dialogs and subtitles in vari-
ous languages or scene descriptions for the
hearing impaired. These functions are stored
on the DVD.
With some DVDs, it is only possible to
select language, subtitles, camera angle,
or title by using the DVD-specific menu.
Consult the information accompanying your
DVD.<
Opening the DVD-specific menu
Additional functions may be available on DVDs.
It is thus possible, for example, to select from
among several possible actions or to access
information about the film.
1.Press the button on the remote con-
trol during playback.
2.Select "Menu".
3.Press the button.
On some DVDs, you can use "Main
menu" and "Title" to access addi-
tional menus in which you can select maga-
zine segments about the music scene, for
example.<
To make a selection:
1.Select the symbol.
2.Press the button until the desired func-
tion is selected.
3.Select the arrow.
4.Press the button.
To return to the start menu:
1.Select the arrow.
2.Press the button.
You can also select language, subtitles,
camera angle, or title in the DVD-specific
menu.
Consult the information accompanying your
DVD.<
Compressed video files
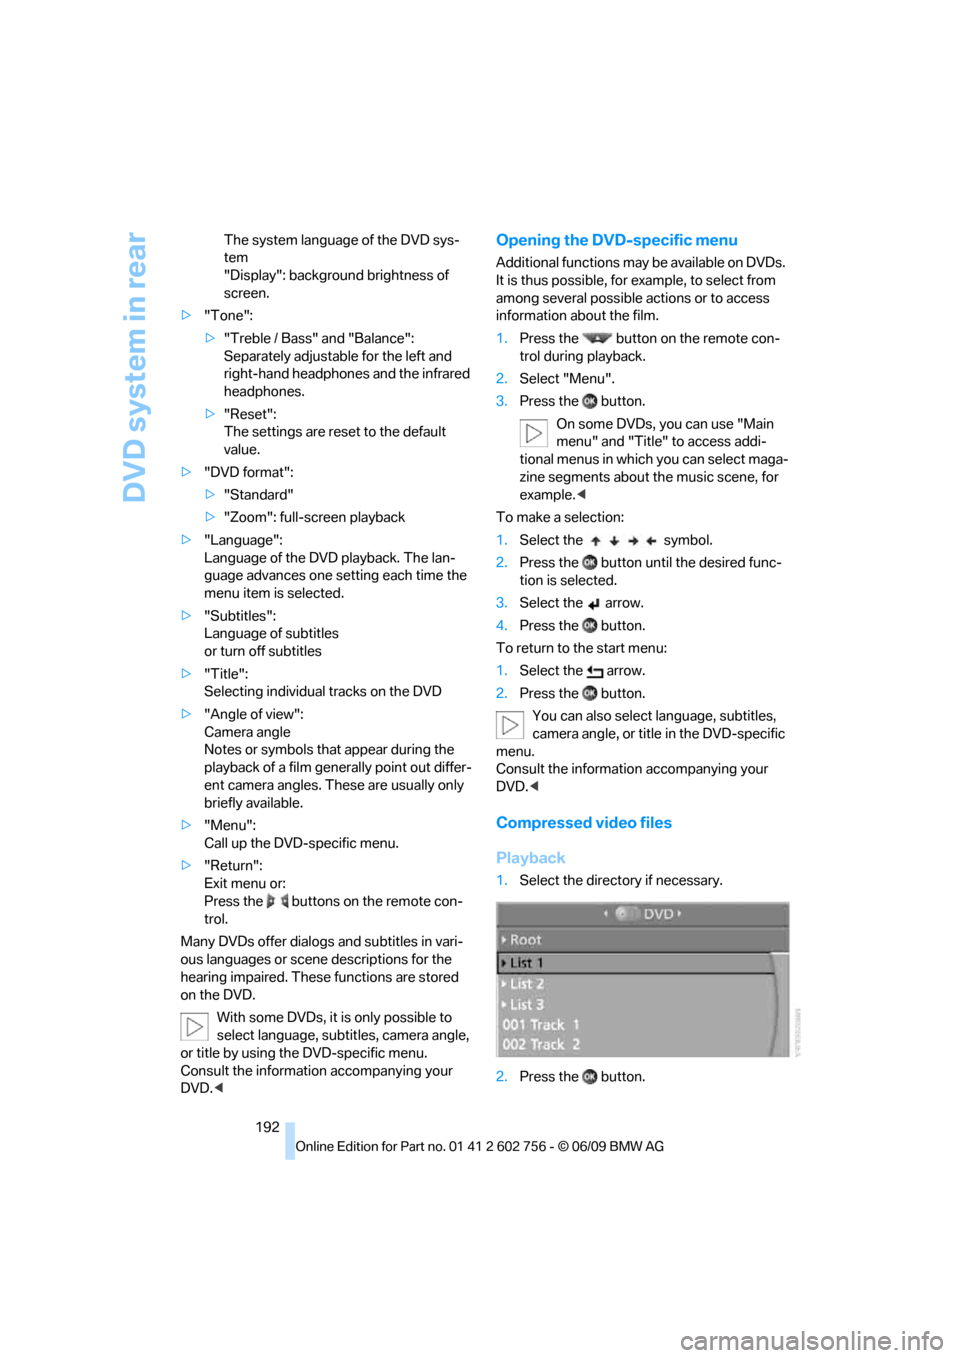
Playback
1.Select the directory if necessary.
2.Press the button.
ba8_e70ag.book Seite 192 Freitag, 5. Juni 2009 11:42 11
Page 196 of 300
DVD system in rear
194
Using the remote control
Press the button for the corresponding
direction repeatedly or turn the thumbwheel
until you reach the desired track.
Playback begins at the start of the track.
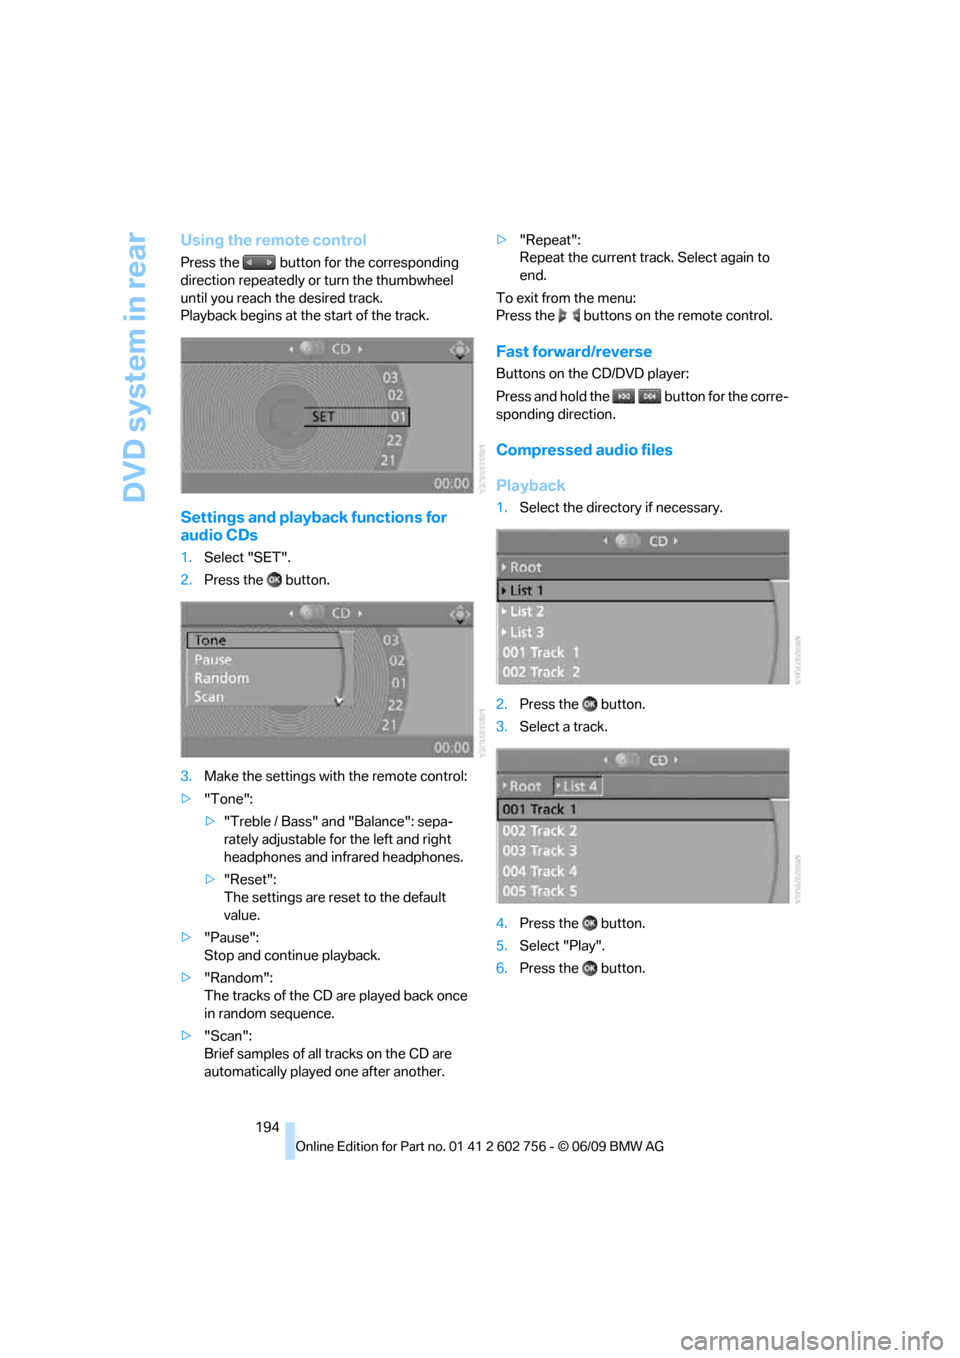
Settings and playback functions for
audio CDs
1.Select "SET".
2.Press the button.
3.Make the settings with the remote control:
>"Tone":
>"Treble / Bass" and "Balance": sepa-
rately adjustable for the left and right
headphones and infrared headphones.
>"Reset":
The settings are reset to the default
value.
>"Pause":
Stop and continue playback.
>"Random":
The tracks of the CD are played back once
in random sequence.
>"Scan":
Brief samples of all tracks on the CD are
automatically played one after another.>"Repeat":
Repeat the current track. Select again to
end.
To exit from the menu:
Press the buttons on the remote control.
Fast forward/reverse
Buttons on the CD/DVD player:
Press and hold the button for the corre-
sponding direction.
Compressed audio files
Playback
1.Select the directory if necessary.
2.Press the button.
3.Select a track.
4.Press the button.
5.Select "Play".
6.Press the button.
ba8_e70ag.book Seite 194 Freitag, 5. Juni 2009 11:42 11
Page 197 of 300
Navigation
Entertainment
Driving tips
195Reference
At a glance
Controls
Communications
Mobility
To change the directory:
1.Select the directory.
2.Press the button.
Settings and playback functions for
compressed audio files
1.Select a track.
2.Press the button.
3.Make the settings with the remote control:
>"Tone":
>"Treble / Bass" and "Balance":
Separately adjustable for the left and
right-hand headphones and the infrared
headphones.
>"Reset":
The settings are reset to the default
value.
>"Pause":
Stop and continue playback.
>"Scan directory":
Briefly sample the tracks in the current
directory.
>"Scan all":
Briefly sample all tracks.
>"Random directory":
Play the tracks in the current directory in a
random sequence.
>"Random all":
Play all tracks in a random sequence.
>"Repeat track":
Repeat the selected track.
>"Repeat directory":
Repeat the tracks in the current directory.>"Details":
Display any stored information on the cur-
rent track.
To exit from the menu:
Press the buttons on the remote control.
Displaying images from
CD/DVD
1.Push the CD/DVD into the drive with the
labeled side facing upward.
The CD/DVD is automatically pulled in.
2.Open the start menu with the remote con-
trol.
3.Select "Photo".
4.Press the button.
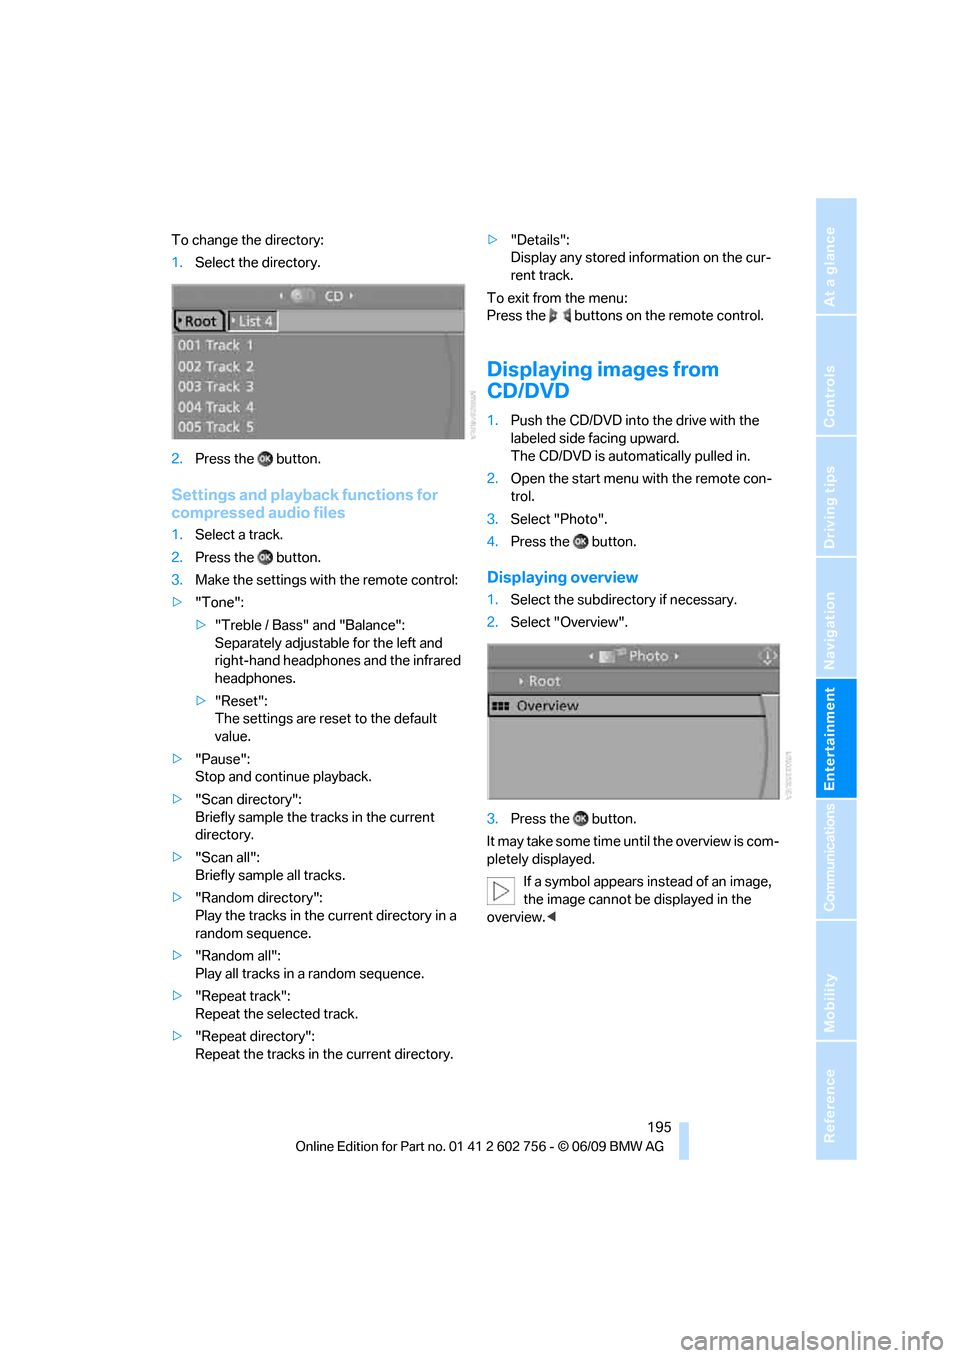
Displaying overview
1.Select the subdirectory if necessary.
2.Select "Overview".
3.Press the button.
It may take some time until the overview is com-
pletely displayed.
If a symbol appears instead of an image,
the image cannot be displayed in the
overview.<
ba8_e70ag.book Seite 195 Freitag, 5. Juni 2009 11:42 11
Page 200 of 300
DVD system in rear
198 some CDs/DVDs cannot be played, can only be
played to a limited degree, or cause the system
to switch off. In this case, wait a short while and
then switch the system back on again. Then
remove the CD/DVD from the drive.
CDs/DVDs with compressed audio files
If the language set for the CD/DVD player does
not match the language of the music track, the
music tracks may be displayed incorrectly.
Care instructions
More information about this can be found under
Care, starting on page246.
External device
Connecting
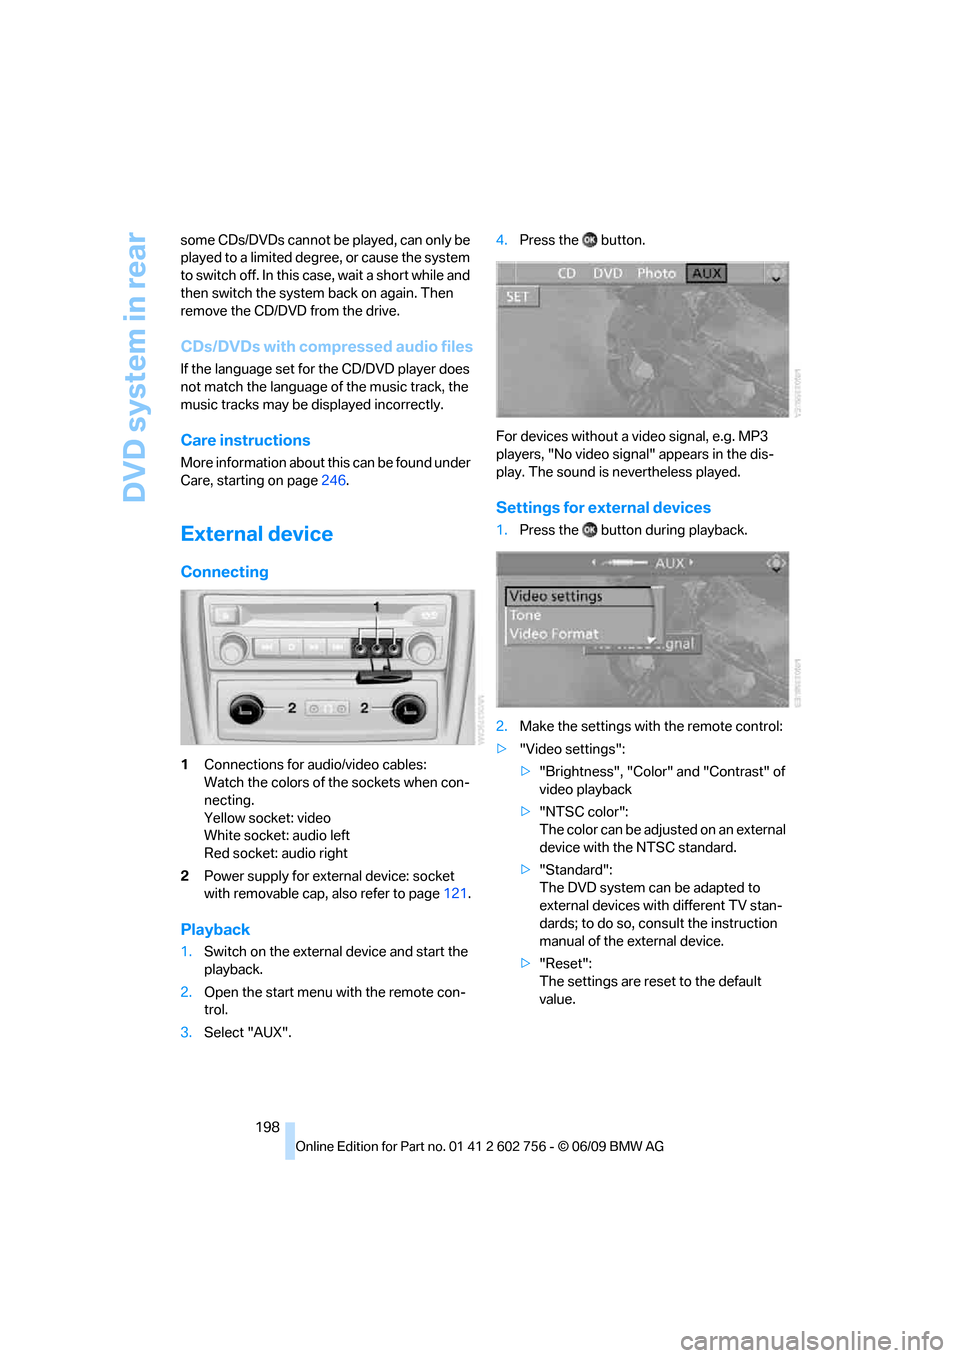
1Connections for audio/video cables:
Watch the colors of the sockets when con-
necting.
Yellow socket: video
White socket: audio left
Red socket: audio right
2Power supply for external device: socket
with removable cap, also refer to page121.
Playback
1.Switch on the external device and start the
playback.
2.Open the start menu with the remote con-
trol.
3.Select "AUX".4.Press the button.
For devices without a video signal, e.g. MP3
players, "No video signal" appears in the dis-
play. The sound is nevertheless played.
Settings for external devices
1.Press the button during playback.
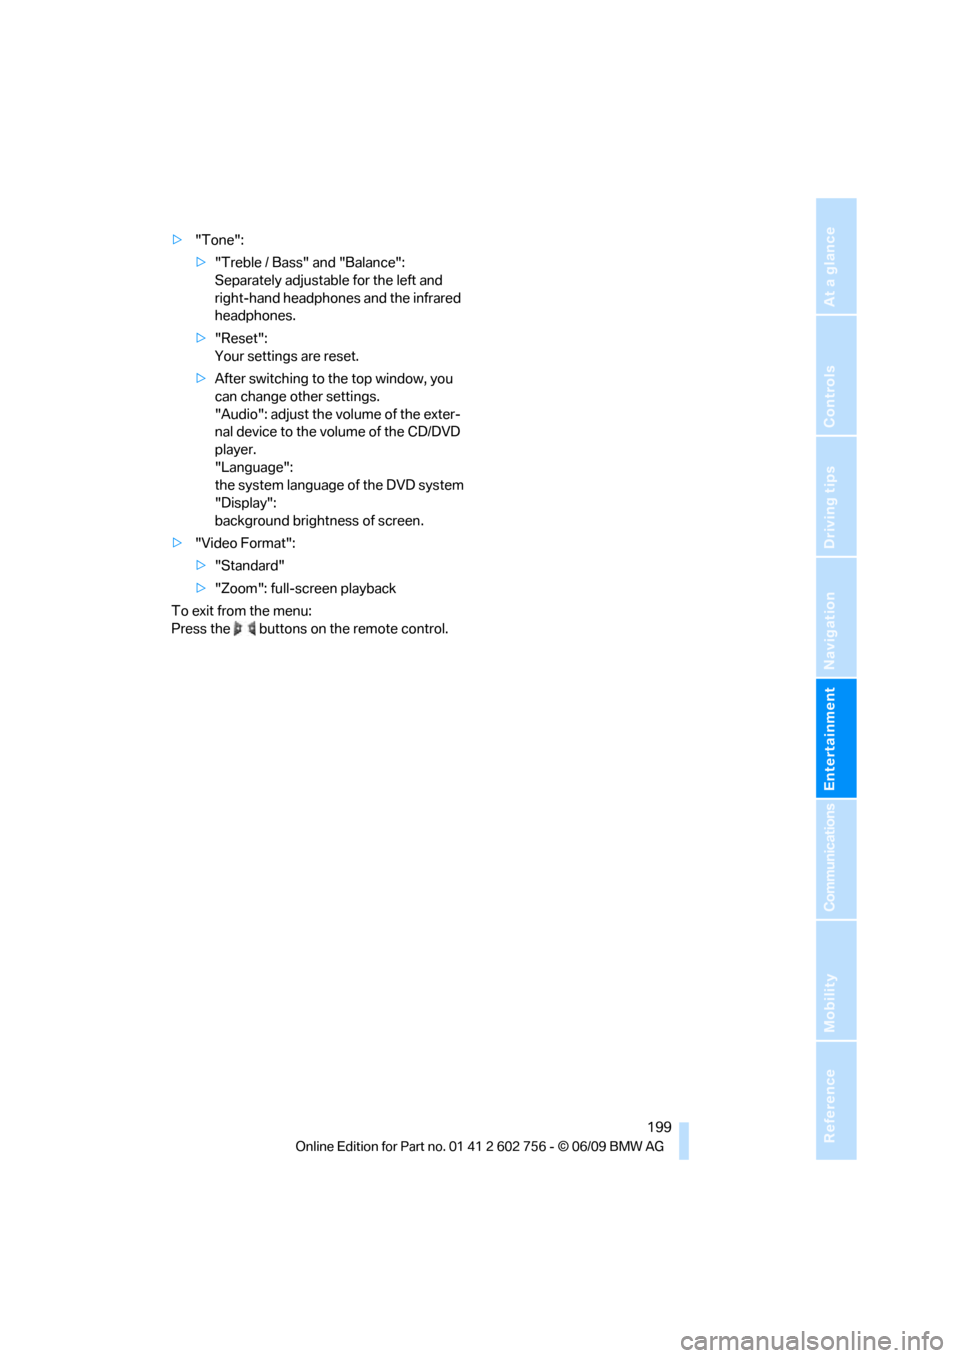
2.Make the settings with the remote control:
>"Video settings":
>"Brightness", "Color" and "Contrast" of
video playback
>"NTSC color":
The color can be adjusted on an external
device with the NTSC standard.
>"Standard":
The DVD system can be adapted to
external devices with different TV stan-
dards; to do so, consult the instruction
manual of the external device.
>"Reset":
The settings are reset to the default
value.
ba8_e70ag.book Seite 198 Freitag, 5. Juni 2009 11:42 11
Page 201 of 300
Navigation
Entertainment
Driving tips
199Reference
At a glance
Controls
Communications
Mobility
>"Tone":
>"Treble / Bass" and "Balance":
Separately adjustable for the left and
right-hand headphones and the infrared
headphones.
>"Reset":
Your settings are reset.
>After switching to the top window, you
can change other settings.
"Audio": adjust the volume of the exter-
nal device to the volume of the CD/DVD
player.
"Language":
the system language of the DVD system
"Display":
background brightness of screen.
>"Video Format":
>"Standard"
>"Zoom": full-screen playback
To exit from the menu:
Press the buttons on the remote control.
ba8_e70ag.book Seite 199 Freitag, 5. Juni 2009 11:42 11
Page 231 of 300
Mobility
229Reference
At a glance
Controls
Driving tips
Communications
Navigation
Entertainment
Wheels and tires
Tire inflation pressure
Information for your safety
The condition of the tires and the maintenance
of the specified tire pressure are crucial not only
to the tire's service life, but also to driving com-
fort and most importantly, driving safety.
Checking pressure
Only check tire inflation pressure when the tires
are cold. This means after a maximum of
1.25 miles/2 km driving or when the vehicle has
been parked for at least 2 hours. When tires are
warm, the tire inflation pressure increases.
Check the tire inflation pressure regularly
and correct it as needed, even on the
compact tire
*: at least twice a month and before
starting long trips. If you fail to observe this pre-
caution, you may be driving on tires with incor-
rect tire pressures, a condition that can not only
compromise your vehicle's driving stability, but
also lead to tire damage and the risk of an acci-
dent. Do not drive with depressurized, i.e. flat
tires, except run-flat tires. A flat tire will seri-
ously impair your vehicle's handling and braking
response. Attempts to drive on a flat tire can
lead to a loss of control over the vehicle.<
After correcting the tire inflation pressure,
reinitialize the Flat Tire Monitor, refer to
page93, or reset the Tire Pressure Monitor,
refer to page94.<
Pressure specifications
The tables below provide all the correct inflation
pressures for the specified tire sizes at ambient
temperature.
The inflation pressures apply to the tire
sizes and tire brands respectively
approved and recommended by BMW; a list of
these is available from your BMW Sports Activ-
ity Vehicle Center.
ing:
>Tire sizes of your vehicle
>Load conditions
>Maximum allowable driving speed
Tire inflation pressures for speeds
up to 100 mph/160 km/h
For normal driving up to 100 mph/160 km/h,
adjust pressures to the respective tire inflation
pressures listed on the following pages in the
column Traveling speeds up to max. of
100 mph/160 km/h to achieve optimum driving
comfort.
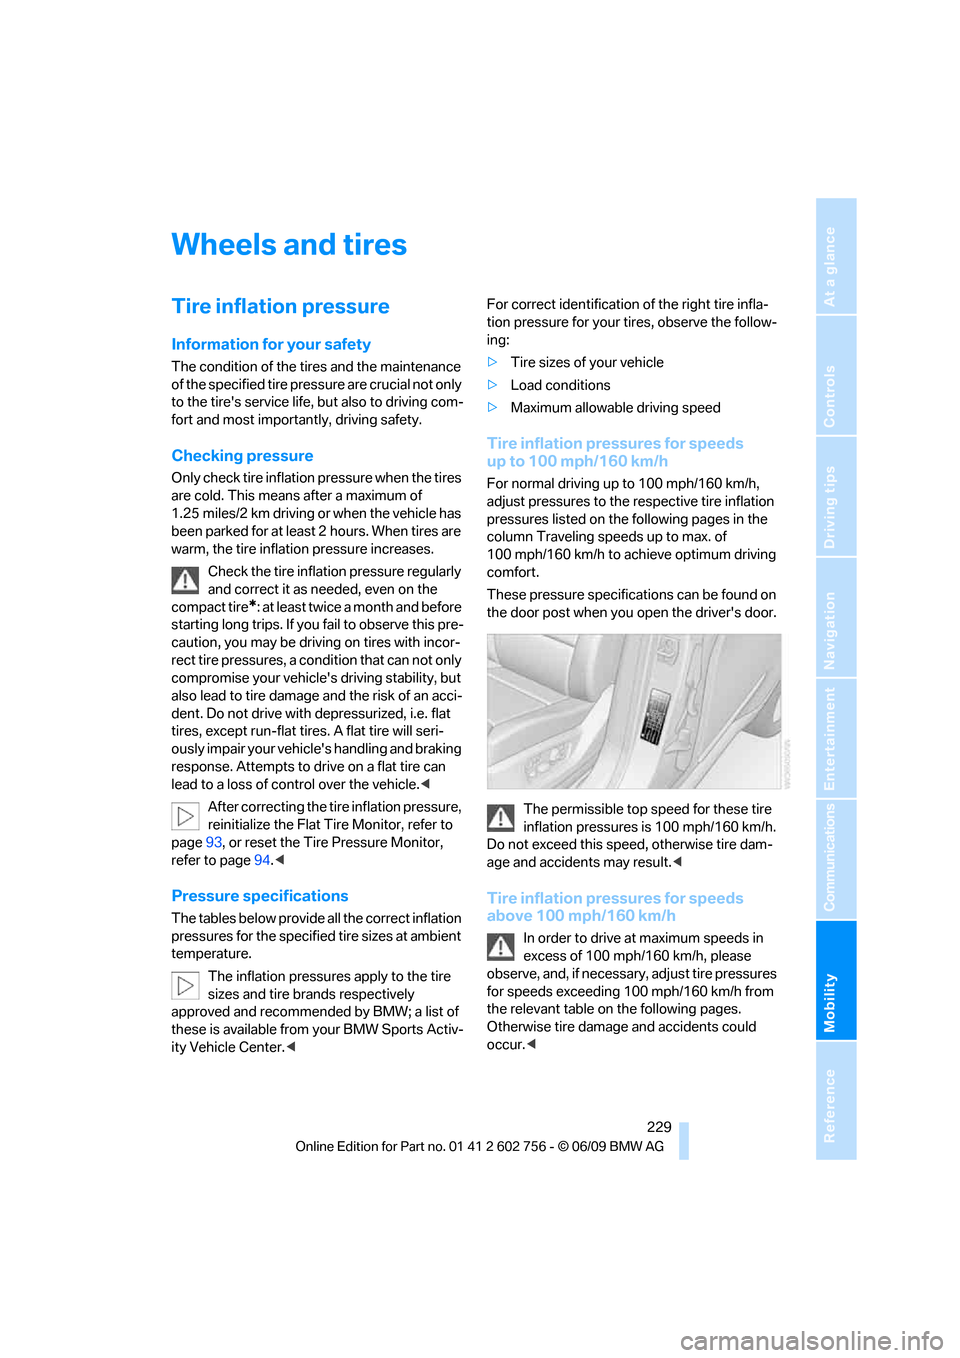
These pressure specifications can be found on
the door post when you open the driver's door.
The permissible top speed for these tire
inflation pressures is 100 mph/160 km/h.
Do not exceed this speed, otherwise tire dam-
age and accidents may result.<
Tire inflation pressures for speeds
above 100 mph/160 km/h
In order to drive at maximum speeds in
excess of 100 mph/160 km/h, please
observe, and, if necessary, adjust tire pressures
for speeds exceeding 100 mph/160 km/h from
the relevant table on the following pages.
Otherwise tire damage and accidents could
occur.<
ba8_e70ag.book Seite 229 Freitag, 5. Juni 2009 11:42 11
Page 260 of 300
Replacing components
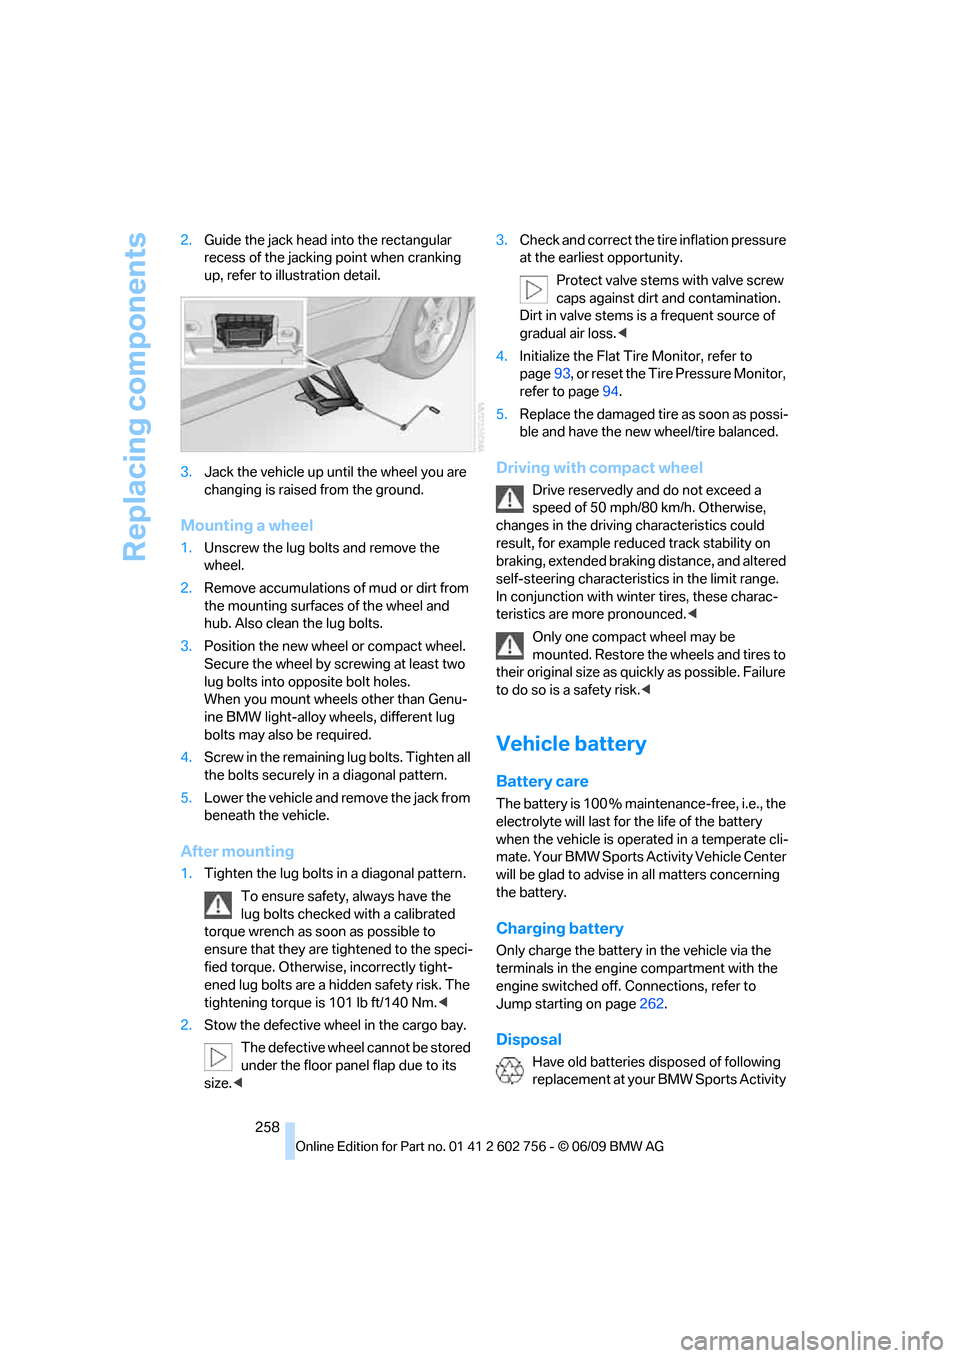
258 2.Guide the jack head into the rectangular
recess of the jacking point when cranking
up, refer to illustration detail.
3.Jack the vehicle up until the wheel you are
changing is raised from the ground.
Mounting a wheel
1.Unscrew the lug bolts and remove the
wheel.
2.Remove accumulations of mud or dirt from
the mounting surfaces of the wheel and
hub. Also clean the lug bolts.
3.Position the new wheel or compact wheel.
Secure the wheel by screwing at least two
lug bolts into opposite bolt holes.
When you mount wheels other than Genu-
ine BMW light-alloy wheels, different lug
bolts may also be required.
4.Screw in the remaining lug bolts. Tighten all
the bolts securely in a diagonal pattern.
5.Lower the vehicle and remove the jack from
beneath the vehicle.
After mounting
1.Tighten the lug bolts in a diagonal pattern.
To ensure safety, always have the
lug bolts checked with a calibrated
torque wrench as soon as possible to
ensure that they are tightened to the speci-
fied torque. Otherwise, incorrectly tight-
ened lug bolts are a hidden safety risk. The
tightening torque is 101 lb ft/140 Nm.<
2.Stow the defective wheel in the cargo bay.
The defective wheel cannot be stored
under the floor panel flap due to its
size.<3.Check and correct the tire inflation pressure
at the earliest opportunity.
Protect valve stems with valve screw
caps against dirt and contamination.
Dirt in valve stems is a frequent source of
gradual air loss.<
4.Initialize the Flat Tire Monitor, refer to
page93, or reset the Tire Pressure Monitor,
refer to page94.
5.Replace the damaged tire as soon as possi-
ble and have the new wheel/tire balanced.
Driving with compact wheel
Drive reservedly and do not exceed a
speed of 50 mph/80 km/h. Otherwise,
changes in the driving characteristics could
result, for example reduced track stability on
braking, extended braking distance, and altered
self-steering characteristics in the limit range.
In conjunction with winter tires, these charac-
teristics are more pronounced.<
Only one compact wheel may be
mounted. Restore the wheels and tires to
their original size as quickly as possible. Failure
to do so is a safety risk.<
Vehicle battery
Battery care
The battery is 100 % maintenance-free, i.e., the
electrolyte will last for the life of the battery
when the vehicle is operated in a temperate cli-
mate. Your BMW Sports Activity Vehicle Center
will be glad to advise in all matters concerning
the battery.
Charging battery
Only charge the battery in the vehicle via the
terminals in the engine compartment with the
engine switched off. Connections, refer to
Jump starting on page262.
Disposal
Have old batteries disposed of following
replacement at your BMW Sports Activity
ba8_e70ag.book Seite 258 Freitag, 5. Juni 2009 11:42 11
Page 277 of 300
Reference 275
At a glance
Controls
Driving tips
Communications
Navigation
Entertainment
Mobility
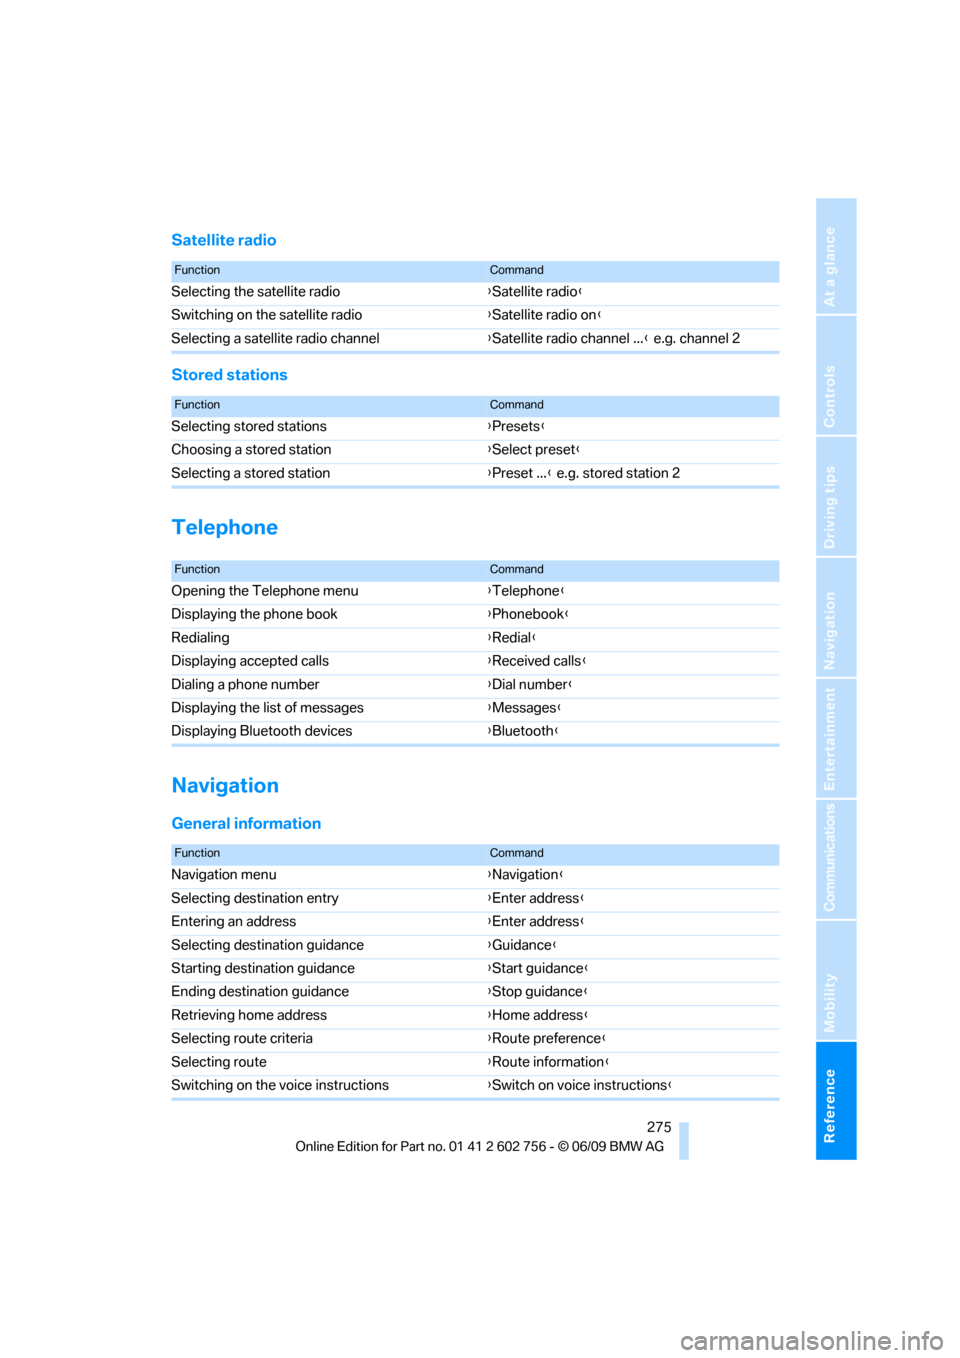
Satellite radio
Stored stations
Telephone
Navigation
General information
FunctionCommand
Selecting the satellite radio{Satellite radio}
Switching on the satellite radio{Satellite radio on}
Selecting a satellite radio channel{Satellite radio channel ...} e.g. channel 2
FunctionCommand
Selecting stored stations{Presets}
Choosing a stored station{Select preset}
Selecting a stored station{Preset ...} e.g. stored station 2
FunctionCommand
Opening the Telephone menu{Telephone}
Displaying the phone book{Phonebook}
Redialing{Redial}
Displaying accepted calls{Received calls}
Dialing a phone number{Dial number}
Displaying the list of messages{Messages}
Displaying Bluetooth devices{Bluetooth}
FunctionCommand
Navigation menu{Navigation}
Selecting destination entry{Enter address}
Entering an address{Enter address}
Selecting destination guidance{Guidance}
Starting destination guidance{Start guidance}
Ending destination guidance{Stop guidance}
Retrieving home address{Home address}
Selecting route criteria{Route preference}
Selecting route{Route information}
Switching on the voice instructions{Switch on voice instructions}
ba8_e70ag.book Seite 275 Freitag, 5. Juni 2009 11:42 11
Page 291 of 300
Reference 289
At a glance
Controls
Driving tips
Communications
Navigation
Entertainment
Mobility
Playing videos, DVD system in
rear190
Plug-in unit for remote
control, refer to Ignition
lock59
Postal code, entering for
navigation142
Power failure259
Power steering-wheel
adjustment54
Power windows, refer to
Windows37
Preglowing, refer to Diesel
engine60
Preselecting activation times
of parked-car
ventilation114
Pressure, tires229
Pressure monitoring of tires,
refer to TPM Tire Pressure
Monitor94
Protective function, refer to
Pinch protection system
– glass sunroof, electric41
– panorama glass sunroof39
– windows38
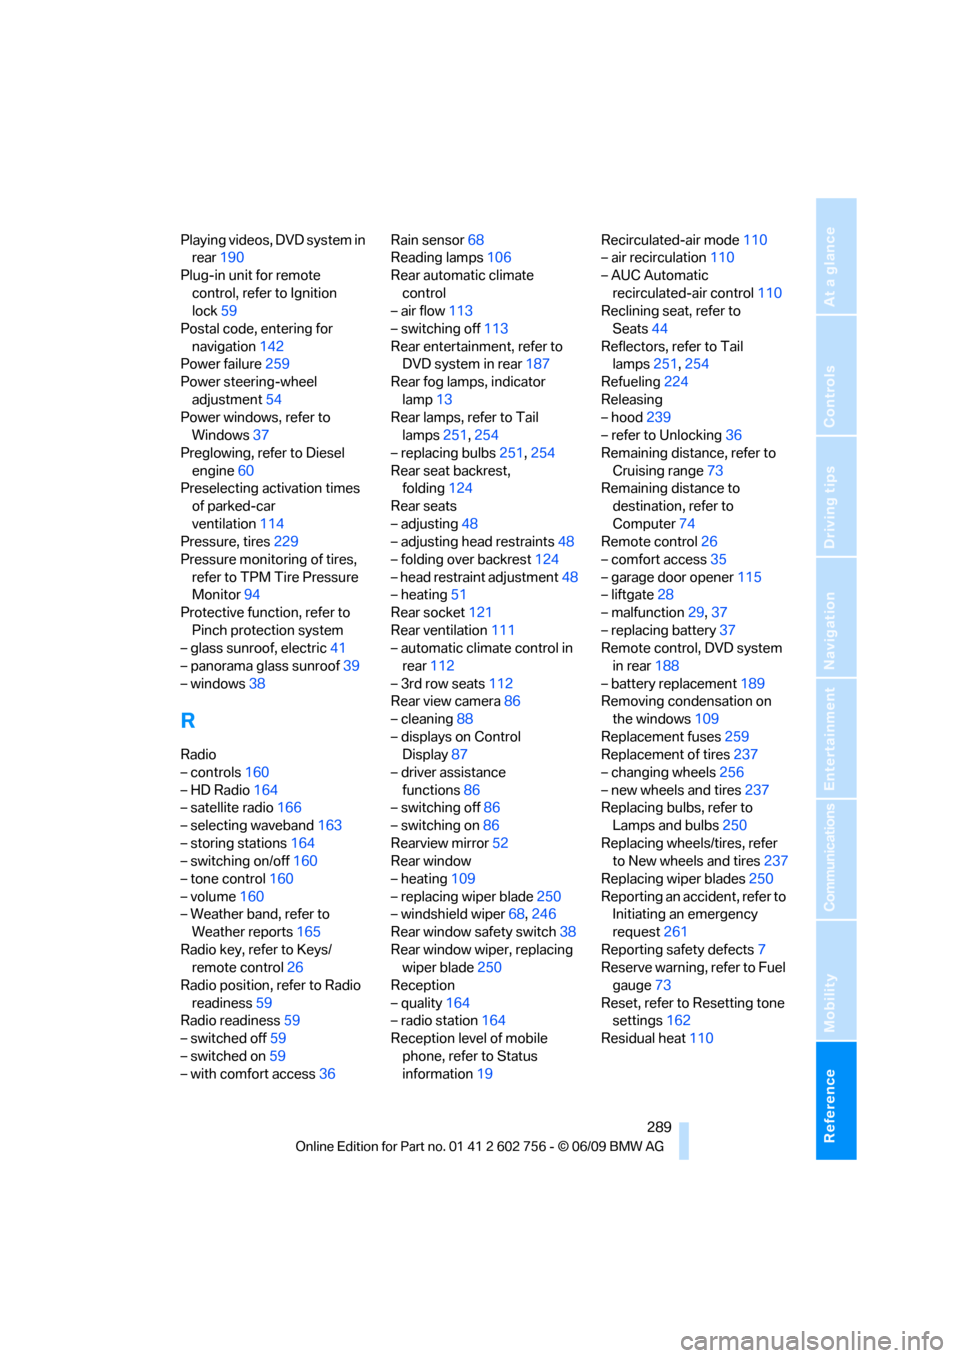
R
Radio
– controls160
– HD Radio164
– satellite radio166
– selecting waveband163
– storing stations164
– switching on/off160
– tone control160
– volume160
– Weather band, refer to
Weather reports165
Radio key, refer to Keys/
remote control26
Radio position, refer to Radio
readiness59
Radio readiness59
– switched off59
– switched on59
– with comfort access36Rain sensor68
Reading lamps106
Rear automatic climate
control
– air flow113
– switching off113
Rear entertainment, refer to
DVD system in rear187
Rear fog lamps, indicator
lamp13
Rear lamps, refer to Tail
lamps251,254
– replacing bulbs251,254
Rear seat backrest,
folding124
Rear seats
– adjusting48
– adjusting head restraints48
– folding over backrest124
– head restraint adjustment48
– heating51
Rear socket121
Rear ventilation111
– automatic climate control in
rear112
– 3rd row seats112
Rear view camera86
– cleaning88
– displays on Control
Display87
– driver assistance
functions86
– switching off86
– switching on86
Rearview mirror52
Rear window
– heating109
– replacing wiper blade
250
– windshield wiper68,246
Rear window safety switch38
Rear window wiper, replacing
wiper blade250
Reception
– quality164
– radio station164
Reception level of mobile
phone, refer to Status
information19Recirculated-air mode110
– air recirculation110
– AUC Automatic
recirculated-air control110
Reclining seat, refer to
Seats44
Reflectors, refer to Tail
lamps251,254
Refueling224
Releasing
– hood239
– refer to Unlocking36
Remaining distance, refer to
Cruising range73
Remaining distance to
destination, refer to
Computer74
Remote control26
– comfort access35
– garage door opener115
– liftgate28
– malfunction29,37
– replacing battery37
Remote control, DVD system
in rear188
– battery replacement189
Removing condensation on
the windows109
Replacement fuses259
Replacement of tires237
– changing wheels256
– new wheels and tires237
Replacing bulbs, refer to
Lamps and bulbs250
Replacing wheels/tires, refer
to New wheels and tires237
Replacing wiper blades250
Reporting an accident, refer to
Initiating an emergency
request261
Reporting safety defects7
Reserve warning, refer to Fuel
gauge73
Reset, refer to Resetting tone
settings162
Residual heat110
ba8_e70ag.book Seite 289 Freitag, 5. Juni 2009 11:42 11