tailgate BMW X5 4.4I 2000 Owners Manual
[x] Cancel search | Manufacturer: BMW, Model Year: 2000, Model line: X5 4.4I, Model: BMW X5 4.4I 2000Pages: 201, PDF Size: 1.93 MB
Page 10 of 201
Contents
Overview
Controls and features
Cockpit16
Instrument cluster18
Indicator and warning lamps22
Multifunction steering wheel26
Sports steering wheel27
Hazard warning flashers28
Warning triangle28
First-aid kit28
Refueling29
Fuel specifications30
Tire inflation pressure30
Locks and security systems:
Keys34
Electronic vehicle
immobilizer35
Central locking system36
Opening and closing
Ð from the outside36
Using the key36
Using the remote control37
Opening and closing
Ð from the inside40
Liftgate41
Tailgate41
Alarm system43
Electric power windows45
Sliding/Tilt sunroof with glass
moonroof46
Adjustments:
Seats48
Steering wheel51
Mirrors52
Seat, mirror and steering wheel
memory54
Car Memory, Key Memory55
Passenger safety systems:
Safety belts56
Airbags57
Child restraints60
Child seat security61
Child-safety locks62
Driving:
Steering/Ignition lock63
Starting the engine64
Switching off the engine65
Parking brake65
Automatic transmission with
Steptronic66
Turn signal indicator/Headlamp
flasher69
Washer/Wiper system/Rain
sensor69
Rear window defroster71
Cruise control72
Everything under control:
Odometer, outside temperature
display74
Tachometer75
Energy control75
Fuel gauge75
Coolant temperature gauge76
Service Interval Display76
Check Control77
Onboard computer80
Technology for safety and
driving convenience:
Park Distance Control (PDC)82
Dynamic Stability Control
(DSC)83
Hill Descent Control (HDC)84
Contents
Page 12 of 201
Contents
Operation, care and maintenance
Owner service procedures
Advanced technology
Under the hood:
Hood133
Engine compartment134
Washer fluid136
Washer nozzles136
Engine oil137
Coolant140
Brake fluid141
Vehicle Identification No.141
Care and maintenance:
The BMW Maintenance
System142
Caring for your vehicle143
Airbags148
Vehicle storage148
Laws and regulations:
Technical modifications149
OBD interface socket150
Replacement procedures:
Onboard tool kit154
Wiper blades154
Lamps and bulbs155
Changing a wheel160
Battery165
Fuses167
In case of electrical
malfunction:
Fuel filler door168
Sliding/Tilt sunroof168
Liftgate168
Tailgate169
Assistance, giving and
receiving:
Jump-starting170
Towing the vehicle171Airbags176
Adaptive Transmission Control
(ATC)176
Four-wheel drive177
Dynamic Stability Control
(DSC)177
Radio reception178
Safety belt tensioner178
DSP sound system179
Rearview mirrors with automatic
dimmer179
Rain sensor180
Integrated rear suspension180
Level control system181
Xenon lamps181
Page 32 of 201
32n
Locks and security systems:
Keys34
Electronic vehicle
immobilizer35
Central locking system36
Opening and closing
Ð from the outside36
Using the key36
Using the remote control37
Opening and closing
Ð from the inside40
Liftgate41
Tailgate41
Alarm system43
Electric power windows45
Sliding/Tilt sunroof with glass
moonroof46
Adjustments:
Seats48
Steering wheel51
Mirrors52
Seat, mirror and steering wheel
memory54
Car Memory, Key Memory55
Passenger safety systems:
Safety belts56
Airbags57
Child restraints60
Child seat security61
Child-safety locks62Driving:
Steering/Ignition lock63
Starting the engine64
Switching off the engine65
Parking brake65
Automatic transmission with
Steptronic66
Turn signal indicator/Headlamp
flasher69
Washer/Wiper system/Rain
sensor69
Rear window defroster71
Cruise control72
Everything under control:
Odometer, outside temperature
display74
Tachometer75
Energy control75
Fuel gauge75
Coolant temperature gauge76
Service Interval Display76
Check Control77
Onboard computer80
Technology for safety and
driving convenience:
Park Distance Control (PDC)82
Dynamic Stability Control
(DSC)83
Hill Descent Control (HDC)84
Controls
Page 36 of 201
36n
Central locking system Opening and closing Ð from the outside The concept The central locking system is ready for
operation as soon as you close the front
doors. The system engages and re-
leases the locks on the
>doors
>liftgate
>fuel filler door.
The central locking system can be
operated
>from outside via the driver's door lock
as well as via the remote control.
>from inside via the button for the
central locking system.
If the system is locked from inside, the
fuel filler door remains unlocked. Refer
to page 40.
When the system is actuated from out-
side of the vehicle, the anti-theft pro-
tection is actuated simultaneously. The
alarm system is also activated or
deactivated.
In the event of an accident, the central
locking system unlocks automatically
(only those doors which were not
locked separately with the safety lock
buttons). Refer to page 40. In addition,
the hazard warning flashers and interior
lamps come on.
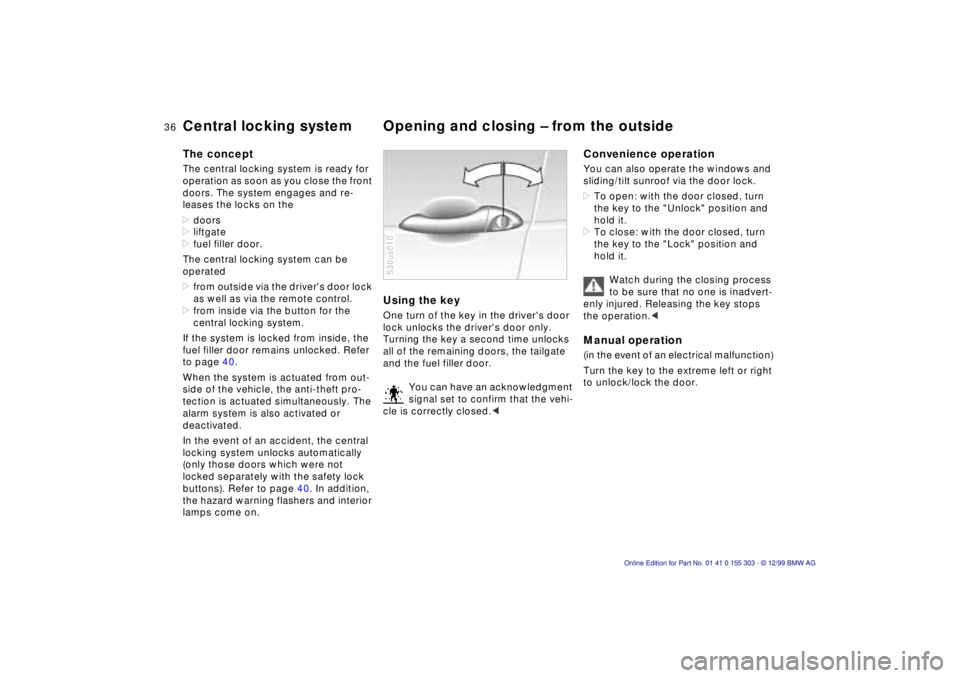
Using the key One turn of the key in the driver's door
lock unlocks the driver's door only.
Turning the key a second time unlocks
all of the remaining doors, the tailgate
and the fuel filler door.
You can have an acknowledgment
signal set to confirm that the vehi-
cle is correctly closed.< 530us010
Convenience operation You can also operate the windows and
sliding/tilt sunroof via the door lock.
>To open: with the door closed, turn
the key to the "Unlock" position and
hold it.
>To close: with the door closed, turn
the key to the "Lock" position and
hold it.
Watch during the closing process
to be sure that no one is inadvert-
enly injured. Releasing the key stops
the operation.< Manual operation (in the event of an electrical malfunction)
Turn the key to the extreme left or right
to unlock/lock the door.
Page 38 of 201
38n
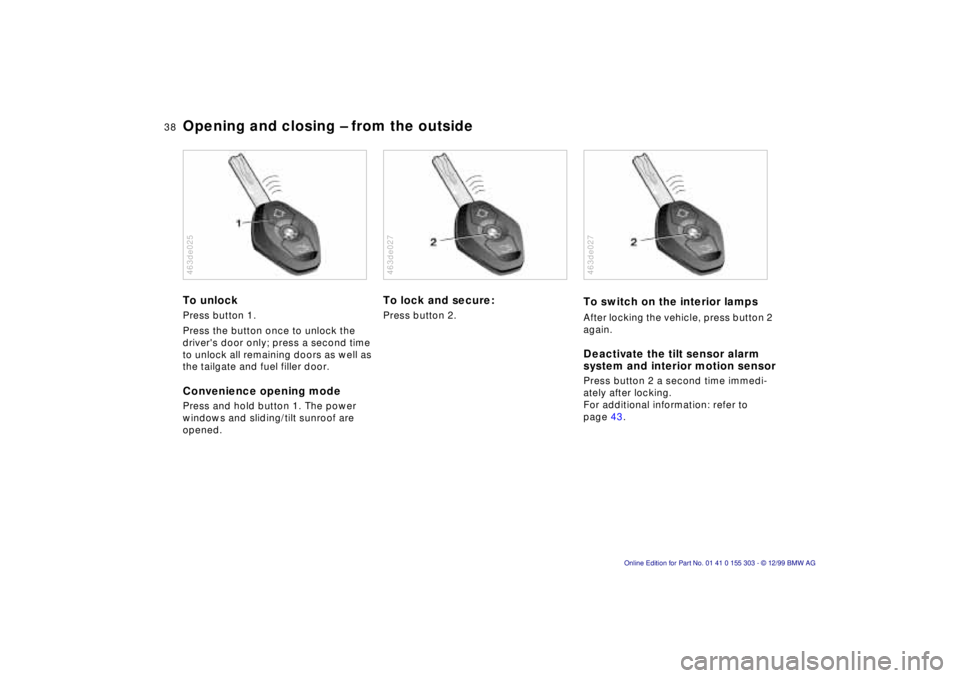
Opening and closing Ð from the outside To unlock Press button 1.
Press the button once to unlock the
driver's door only; press a second time
to unlock all remaining doors as well as
the tailgate and fuel filler door. Convenience opening mode Press and hold button 1. The power
windows and sliding/tilt sunroof are
opened. 463de025
To lock and secure: Press button 2. 463de027
To switch on the interior lamps After locking the vehicle, press button 2
again. Deactivate the tilt sensor alarm
system and interior motion sensorPress button 2 a second time immedi-
ately after locking.
For additional information: refer to
page 43. 463de027
Page 41 of 201
IndexDataTechnologyRepairsCar careControlsOverview
41n
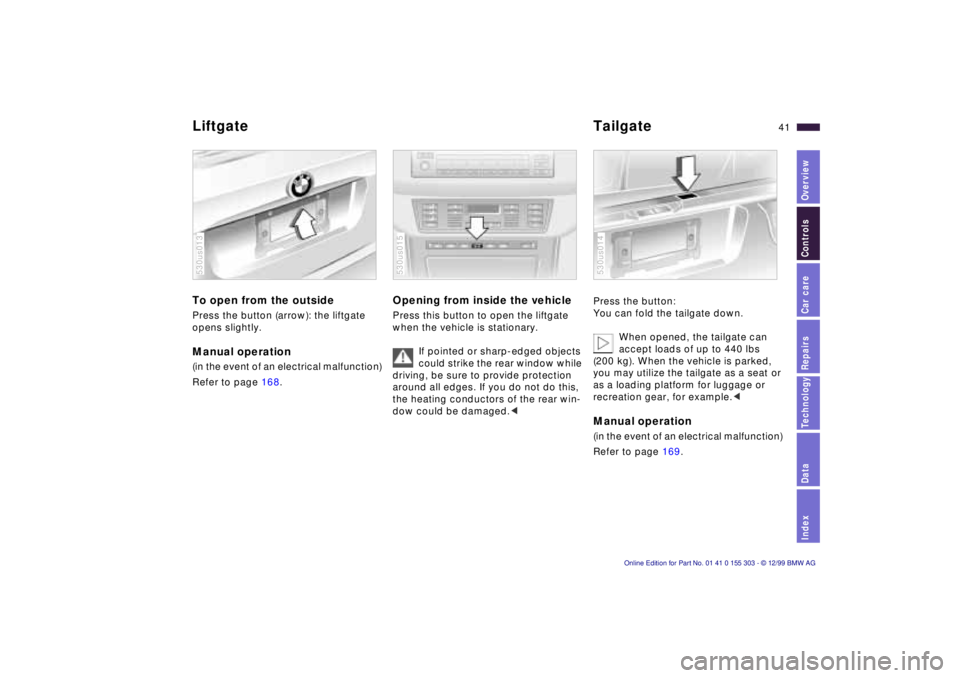
Liftgate Tailgate To open from the outside Press the button (arrow): the liftgate
opens slightly.Manual operation (in the event of an electrical malfunction)
Refer to page 168.530us013
Opening from inside the vehicle Press this button to open the liftgate
when the vehicle is stationary.
If pointed or sharp-edged objects
could strike the rear window while
driving, be sure to provide protection
around all edges. If you do not do this,
the heating conductors of the rear win-
dow could be damaged.< 530us015
Press the button:
You can fold the tailgate down.
When opened, the tailgate can
accept loads of up to 440 lbs
(200 kg). When the vehicle is parked,
you may utilize the tailgate as a seat or
as a loading platform for luggage or
recreation gear, for example.< Manual operation (in the event of an electrical malfunction)
Refer to page 169.530us014
Page 77 of 201
IndexDataTechnologyRepairsCar careControlsOverview
77n
Check Control Graphic display
*
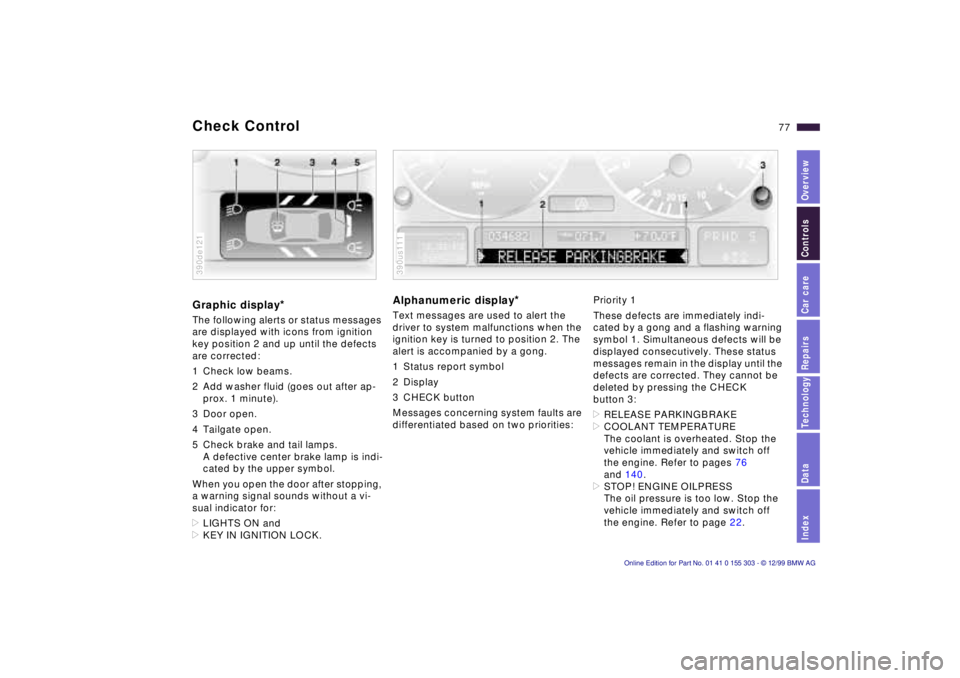
The following alerts or status messages
are displayed with icons from ignition
key position 2 and up until the defects
are corrected:
1 Check low beams.
2 Add washer fluid (goes out after ap-
prox. 1 minute).
3 Door open.
4 Tailgate open.
5 Check brake and tail lamps.
A defective center brake lamp is indi-
cated by the upper symbol.
When you open the door after stopping,
a warning signal sounds without a vi-
sual indicator for:
>LIGHTS ON and
>KEY IN IGNITION LOCK. 390de121
Alphanumeric display
*
Text messages are used to alert the
driver to system malfunctions when the
ignition key is turned to position 2. The
alert is accompanied by a gong.
1 Status report symbol
2 Display
3 CHECK button
Messages concerning system faults are
differentiated based on two priorities: 390us111
Priority 1
These defects are immediately indi-
cated by a gong and a flashing warning
symbol 1. Simultaneous defects will be
displayed consecutively. These status
messages remain in the display until the
defects are corrected. They cannot be
deleted by pressing the CHECK
button 3:
>RELEASE PARKINGBRAKE
>COOLANT TEMPERATURE
The coolant is overheated. Stop the
vehicle immediately and switch off
the engine. Refer to pages 76
and 140.
>STOP! ENGINE OILPRESS
The oil pressure is too low. Stop the
vehicle immediately and switch off
the engine. Refer to page 22.
Page 124 of 201
124n
Winter operation Rubber seals and components In order to prevent the weather-strip-
ping from freezing, apply BMW rubber
treatment or silicone spray to the seals
on the doors, hood and tailgate.
A full range of car care products is
available from your BMW center.< Snow chains Mount BMW snow chains
* only on tire
size 235/65 R 17. Always mount chains
in pairs and on the rear wheels only.
Read and comply with the chain manu-
facturer's safety precautions. Do not
exceed a maximum speed of 30 mph
(50 km/h).
Starting offWhen starting in deep snow or "rock-
ing" the vehicle free, it may be advis-
able to deactivate the DSC system
briefly. Refer to page 83.
Driving on low-traction road
surfaces Use smooth, gentle pressure to control
the accelerator pedal and avoid exces-
sive engine speeds. Maintain an ade-
quate distance between yourself and
the car ahead. BrakingWinter road conditions substantially re-
duce the amount of traction available
between the tires and the road surface.
The resulting increases in braking dis-
tance are considerable and should be
kept in mind at all times.
ABS is intended to prevent the wheels
from locking during brake applications,
thus helping to maintain vehicle stability
and steering response. If the ABS does not respond in a critical
braking situation and the wheels lock:
Reduce the pressure on the brake
pedal until the wheels just start to roll
again while still maintaining enough
force to continue braking. Following
that, increase pedal pressure again.
Reduce the pressure as the wheels
lock, then reapply pressure. Repeat this
braking sequence.
This type of staggered braking will re-
duce the braking distance, and the ve-
hicle still remains responsive to steer-
ing.
You can then attempt to steer around
hazards after you have reduced pres-
sure on the brake pedal.
Do not shift down on slick road
surfaces if you want to decelerate.
Doing so could cause the wheels to
lose traction and skid, thus resulting in
the loss of vehicle control.<
Page 153 of 201
IndexDataTechnologyRepairsCar careControlsOverview
Overview
Controls and features
Operation, care
and maintenance
Owner service procedures
Technical data
Index Advanced technology
153n
Replacement procedures:
Onboard tool kit154
Wiper blades154
Lamps and bulbs155
Changing a wheel161
Battery165
Fuses167
In case of electrical
malfunction:
Fuel filler door168
Sliding/Tilt sunroof168
Liftgate168
Tailgate169
Assistance, giving and
receiving:
Jump-starting170
Towing the vehicle171
Repairs
Page 157 of 201
IndexDataTechnologyRepairsCar careControlsOverview
157n
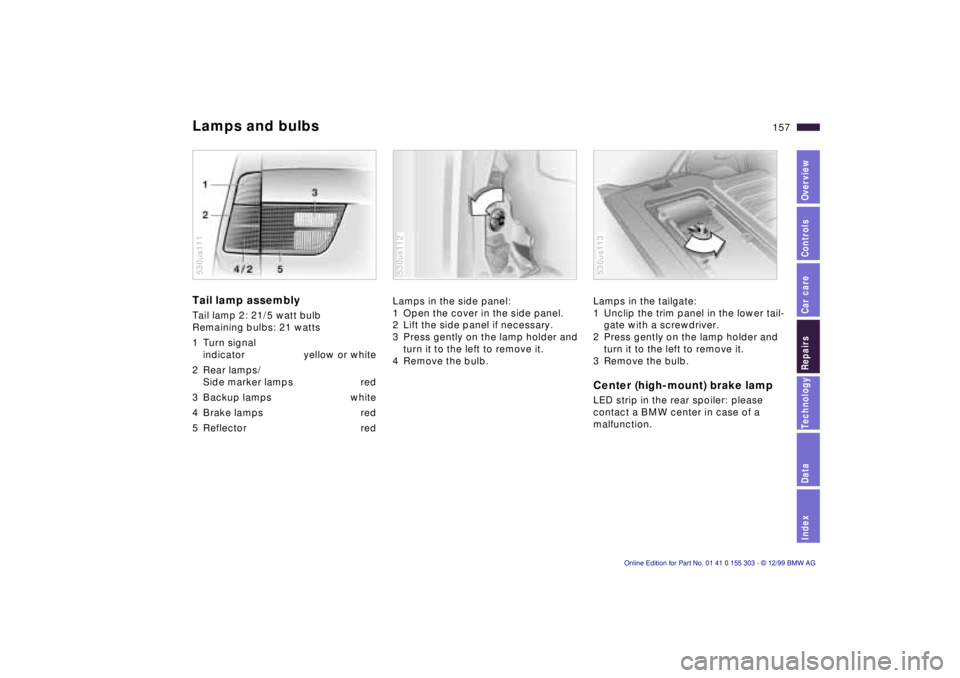
Lamps and bulbs Tail lamp assembly Tail lamp 2: 21/5 watt bulb
Remaining bulbs: 21 watts
1 Turn signal
indicator yellow or white
2 Rear lamps/
Side marker lamps red
3 Backup lamps white
4 Brake lamps red
5 Reflector red530us111
Lamps in the side panel:
1 Open the cover in the side panel.
2 Lift the side panel if necessary.
3 Press gently on the lamp holder and
turn it to the left to remove it.
4 Remove the bulb. 530us112
Lamps in the tailgate:
1 Unclip the trim panel in the lower tail-
gate with a screwdriver.
2 Press gently on the lamp holder and
turn it to the left to remove it.
3 Remove the bulb. Center (high-mount) brake lamp LED strip in the rear spoiler: please
contact a BMW center in case of a
malfunction. 530us113