Axle BMW X5 4.4I 2002 Owners Manual
[x] Cancel search | Manufacturer: BMW, Model Year: 2002, Model line: X5 4.4I, Model: BMW X5 4.4I 2002Pages: 185, PDF Size: 2.7 MB
Page 5 of 185
5n
OverviewControlsMaintenanceRepairsDataIndex
Controls and features
Operation, maintenance
Technology for safety and
driving convenience:
Park Distance Control (PDC)91
Dynamic Stability Control
(DSC)92
Hill Descent Control (HDC)94
Variable Ride Height95
Variable Ride Height on both
axles95
Tire Pressure Monitor (RDC)98
Adaptive brake light99
Lamps:
Parking lamps/Low beams100
Instrument lighting101
High beams/Standing
lamps101
Fog lamps101
Interior lamps102
Reading lamps102
Controlling the climate for
pleasant driving:
Air conditioner103
Automatic climate control106
Sunshades
Independent ventilation
system112
Cabin convenience:
BMW Universal Transmitter113
Glove compartment116
Storage compartments116
Cellular phone117
Beverage holder117
Glasses compartment118
Ashtray, front118
Cigarette lighter, front118
Ashtray, rear119
Cigarette lighter, rear119
Loading and transporting:
Ski bag120
Cargo area
Fold the rear backrests
down122
Cargo area cover122
Partition net123
Cover panels in the cargo
area124
Power outlets125
Pull-out cargo floor126
Stowing cargo127
Roof-mounted luggage rack128
Special operating instructions:
Break-in procedures132
Driving your BMW X5133
General driving notes134
Antilock Brake System
(ABS)134
Brake system135
Wheels and tires:
Tire inflation pressures136
Tire condition136
Tire replacement137
Wheel and tire
combinations139
Winter tires140
Snow chains140
Page 64 of 185
64n
Switching off the engine Parking brakeTurn the ignition key to position 1 or 0.
Do not remove the ignition key
while the vehicle is still moving. If
you do so, the steering will lock.
Always remove the ignition key and
engage the steering lock before leaving
the vehicle.
Vehicles with manual transmission:
Always engage the parking brake when
parking on slopes and inclined
surfaces. Even placing the gearshift
lever in 1st gear or reverse may not
provide adequate resistance to rolling.
Vehicles with automatic transmission:
Place the selector lever in "Park".<
Vehicles with automatic transmission:
The vehicle must be stationary and the
selector lever in "Park" before you can
remove the ignition key.
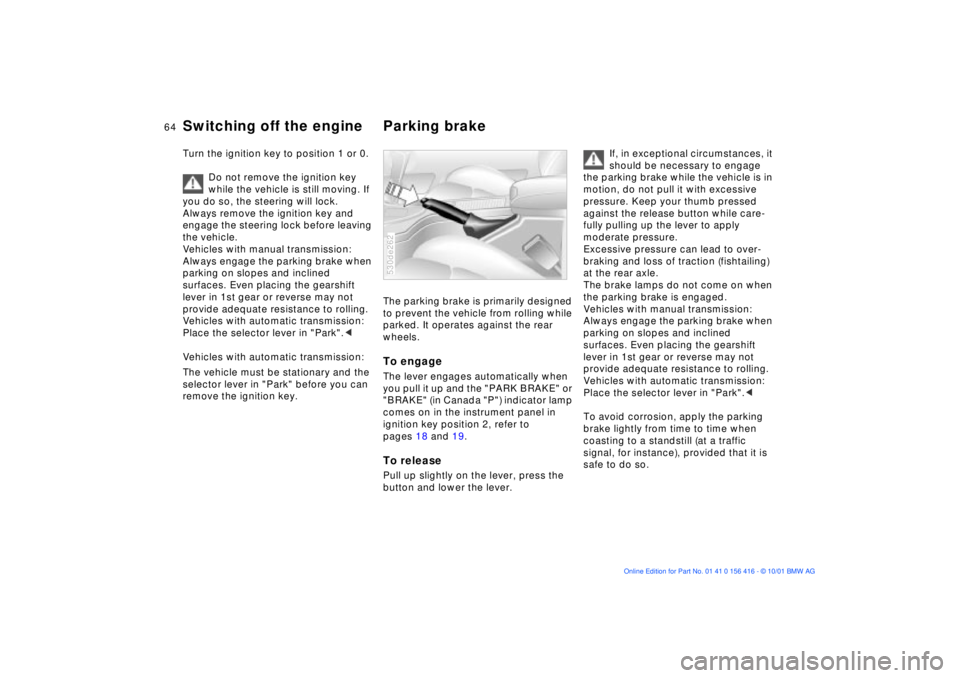
The parking brake is primarily designed
to prevent the vehicle from rolling while
parked. It operates against the rear
wheels.To engage The lever engages automatically when
you pull it up and the "PARK BRAKE" or
"BRAKE" (in Canada "P") indicator lamp
comes on in the instrument panel in
ignition key position 2, refer to
pages 18 and 19.To releasePull up slightly on the lever, press the
button and lower the lever. 530de262
If, in exceptional circumstances, it
should be necessary to engage
the parking brake while the vehicle is in
motion, do not pull it with excessive
pressure. Keep your thumb pressed
against the release button while care-
fully pulling up the lever to apply
moderate pressure.
Excessive pressure can lead to over-
braking and loss of traction (fishtailing)
at the rear axle.
The brake lamps do not come on when
the parking brake is engaged.
Vehicles with manual transmission:
Always engage the parking brake when
parking on slopes and inclined
surfaces. Even placing the gearshift
lever in 1st gear or reverse may not
provide adequate resistance to rolling.
Vehicles with automatic transmission:
Place the selector lever in "Park".<
To avoid corrosion, apply the parking
brake lightly from time to time when
coasting to a standstill (at a traffic
signal, for instance), provided that it is
safe to do so.
Page 95 of 185
95n
OverviewControlsMaintenanceRepairsDataIndex
Variable Ride Height
*
Variable Ride Height on both axles
*
The warning lamp for the Vari-
able Ride Height comes on, or
the message "SELFLEVEL
SUSP.INACT" appears in the Check
Control: there is a malfunction in the
Variable Ride Height.
Stop and inspect the vehicle. If it is
riding significantly lower in the rear than
in the front, or if it is sitting at an incline
(left rear compared to right rear),
consult the nearest BMW Sports
Activity Vehicle center. Drive with
appropriate caution in the meantime.
The vehicle has reduced ground clear-
ance or driving comfort is noticeably
reduced.
Even if the attitude of the vehicle is
normal, you should consult the nearest
BMW Sports Activity Vehicle center if
the warning lamp indicates a system
malfunction.
The conceptYour vehicle is equipped with Variable
Ride Height acting on both the front
and rear suspension. This system
combines automatic self-leveling,
which compensates for variations in
front-to-rear load-distribution patterns,
with a selection feature allowing drivers
to choose from among several ride-
height options.
You may choose from among the
following ride heights:
>Standard
The "standard" setting is intended for
most operating conditions, including
trailer towing
>Off-Road
Higher ride height for increased
ground clearance
>Access
Lowers vehicle for more convenient
cargo handling and easier passenger
ingress and exitsChanges in ride height are initiated
either manually, using the control
button (refer to page 96), or automati-
cally in response to specific speeds.
When the ride height is selected manu-
ally, the driver has the additional option
of revising the ride-height selection by
entering a new command during the
adjustment process.
When the vehicle is stationary, the
system executes ride-height changes in
both directions (up and down) when-
ever the doors are closed. The tailgate/
liftgate may be open. The system raises
the vehicle only when the engine is
running.
The system's automatic self-leveling
feature automatically compensates for
variations in the vehicle's load.
Frequent changes in ride height
initiated at short intervals can
overheat the compressor, causing the
system to briefly suspend active opera-
tion.<
Page 96 of 185
96n
Variable Ride Height on both axles
*
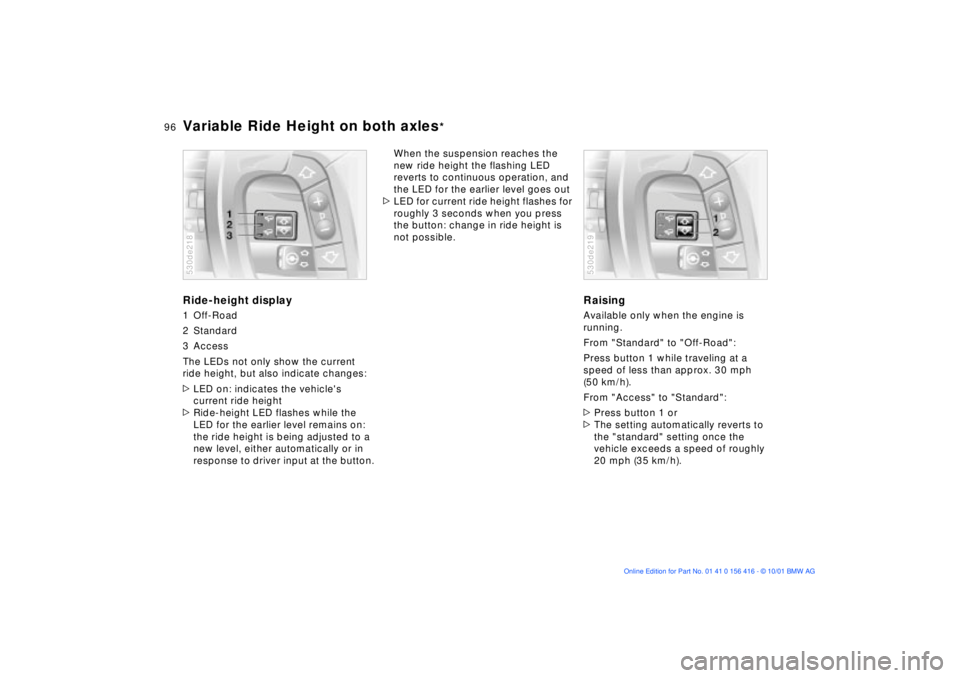
Ride-height display1 Off-Road
2 Standard
3 Access
The LEDs not only show the current
ride height, but also indicate changes:
>LED on: indicates the vehicle's
current ride height
>Ride-height LED flashes while the
LED for the earlier level remains on:
the ride height is being adjusted to a
new level, either automatically or in
response to driver input at the button.530de218
When the suspension reaches the
new ride height the flashing LED
reverts to continuous operation, and
the LED for the earlier level goes out
>LED for current ride height flashes for
roughly 3 seconds when you press
the button: change in ride height is
not possible.
RaisingAvailable only when the engine is
running.
From "Standard" to "Off-Road":
Press button 1 while traveling at a
speed of less than approx. 30 mph
(50 km/h).
From "Access" to "Standard":
>Press button 1 or
>The setting automatically reverts to
the "standard" setting once the
vehicle exceeds a speed of roughly
20 mph (35 km/h).530de219
Page 97 of 185

97n
OverviewControlsMaintenanceRepairsDataIndex
Variable Ride Height on both axles
*
LoweringAvailable with key in position 2.
From "Standard" to "Access":
1. Press button 2 while traveling at less
than approx. 50 mph (80 km/h). The
system enters its preselection mode.
The preselection mode is canceled
>by pressing button 1
>automatically once the vehicle
exceeds a speed of approx.
50 mph (80 km/h) or roughly
60 seconds after button 2 is
pressed
2. Reduce speed to below
approx. 15 mph (25 km/h) within
roughly 60 seconds after pressing
button 2.
When you press button 2 at
speeds below approx. 15 mph
(25 km/h) the system automatically
lowers the vehicle to the "Access"
level.<
From "Off-Road" to "Standard":
>Press button 2 or
>automatically once you exceed a
speed of approx. 30 mph (50 km/h).
Page 127 of 185
127n
OverviewControlsMaintenanceRepairsDataIndex
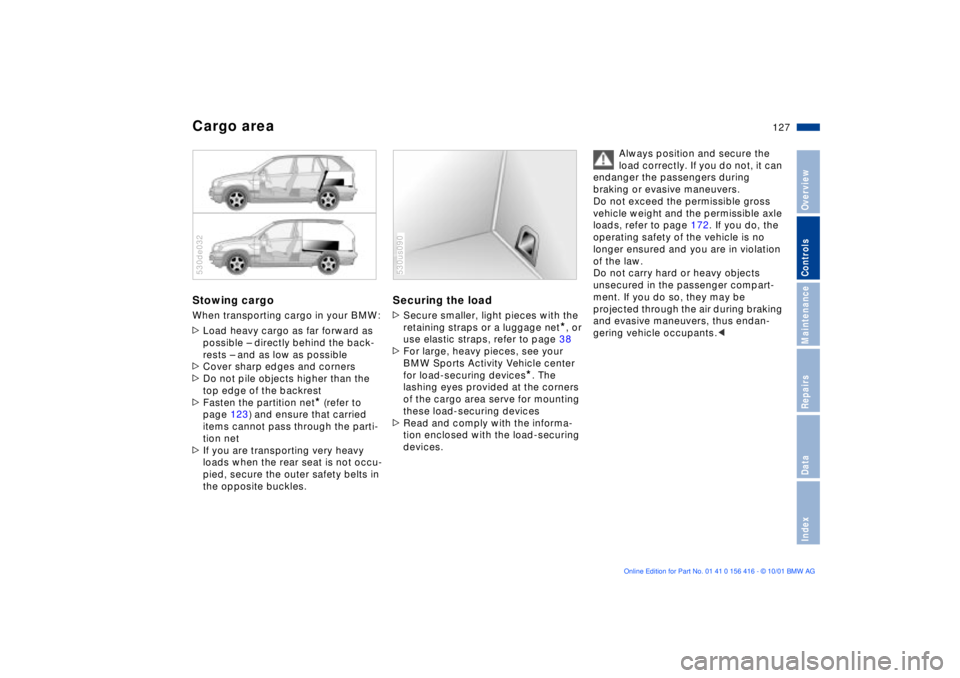
Cargo areaStowing cargo When transporting cargo in your BMW:
>Load heavy cargo as far forward as
possible Ð directly behind the back-
rests Ð and as low as possible
>Cover sharp edges and corners
>Do not pile objects higher than the
top edge of the backrest
>Fasten the partition net
* (refer to
page 123) and ensure that carried
items cannot pass through the parti-
tion net
>If you are transporting very heavy
loads when the rear seat is not occu-
pied, secure the outer safety belts in
the opposite buckles.
530de032
Securing the load >Secure smaller, light pieces with the
retaining straps or a luggage net
*, or
use elastic straps, refer to page 38
>For large, heavy pieces, see your
BMW Sports Activity Vehicle center
for load-securing devices
*. The
lashing eyes provided at the corners
of the cargo area serve for mounting
these load-securing devices
>Read and comply with the informa-
tion enclosed with the load-securing
devices.
530us090
Always position and secure the
load correctly. If you do not, it can
endanger the passengers during
braking or evasive maneuvers.
Do not exceed the permissible gross
vehicle weight and the permissible axle
loads, refer to page 172. If you do, the
operating safety of the vehicle is no
longer ensured and you are in violation
of the law.
Do not carry hard or heavy objects
unsecured in the passenger compart-
ment. If you do so, they may be
projected through the air during braking
and evasive maneuvers, thus endan-
gering vehicle occupants.<
Page 128 of 185
128n
Roof-mounted luggage rack
*
A special rack system is available as an
option for your BMW. Please comply
with the precautions included with the
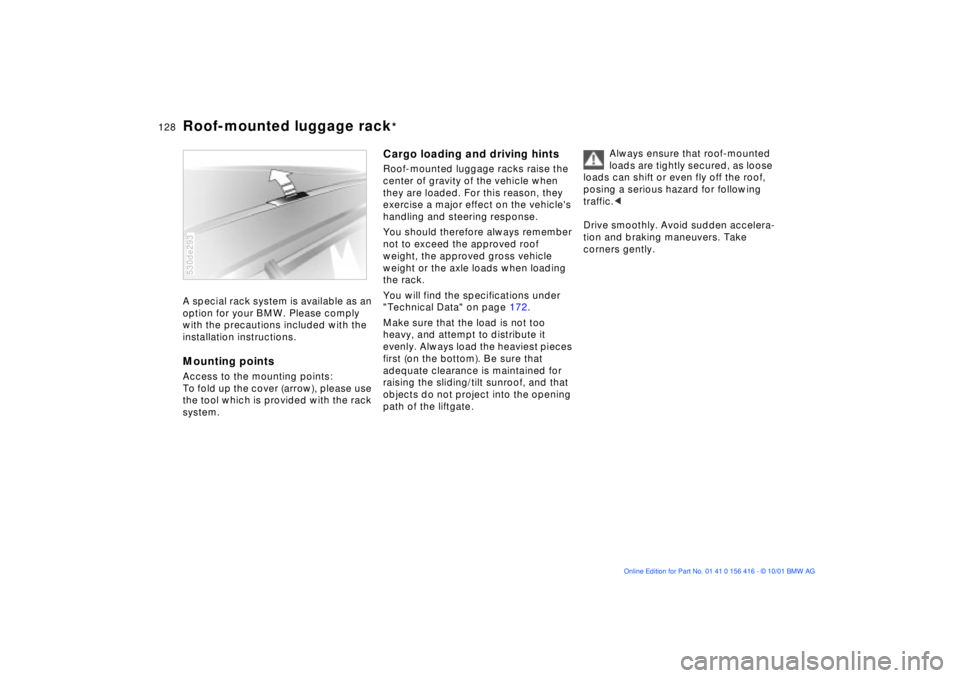
installation instructions.Mounting pointsAccess to the mounting points:
To fold up the cover (arrow), please use
the tool which is provided with the rack
system.530de293
Cargo loading and driving hintsRoof-mounted luggage racks raise the
center of gravity of the vehicle when
they are loaded. For this reason, they
exercise a major effect on the vehicle's
handling and steering response.
You should therefore always remember
not to exceed the approved roof
weight, the approved gross vehicle
weight or the axle loads when loading
the rack.
You will find the specifications under
"Technical Data" on page 172.
Make sure that the load is not too
heavy, and attempt to distribute it
evenly. Always load the heaviest pieces
first (on the bottom). Be sure that
adequate clearance is maintained for
raising the sliding/tilt sunroof, and that
objects do not project into the opening
path of the liftgate. Always ensure that roof-mounted
loads are tightly secured, as loose
loads can shift or even fly off the roof,
posing a serious hazard for following
traffic.<
Drive smoothly. Avoid sudden accelera-
tion and braking maneuvers. Take
corners gently.
Page 132 of 185

132n
Break-in proceduresTo ensure that your vehicle provides
maximum economy throughout a long
service life, we request that you
observe the following instructions: Engine and axle drive Up to 1,200 miles (2,000 km):
Drive at varying engine speeds and
road speeds, but do not exceed
4,500 rpm and the following road
speeds during this initial period:
6-cylinder engines: 100 mph (160 km/h)
8-cylinder engines: 106 mph (170 km/h)
Obey your local and state maximum
speed limits.
Refrain from using full throttle and avoid
pressing the accelerator beyond the
kickdown point.
Once you have driven 1,200 miles
(2,000 km), engine and vehicle speeds
can gradually be increased.
You should also comply with these
break-in procedures if the engine or
one of the axle drives is replaced later
in the course of the vehicle service life.
TiresDue to technical factors associated
with their manufacture, tires do not
achieve their full traction potential until
an initial break-in period has elapsed.
For this reason, drive with extra care
during the initial 200 miles (300 km).
Obey your local and state maximum
speed limits.
When the vehicle is operated on
wet or slushy roads, a wedge of
water may form between the tire and
the road surface. This phenomenon is
referred to as aquaplaning, or hydro-
planing, and can lead to partial or
complete loss of traction, vehicle
control and braking effectiveness.
Reduce your speed on wet roads.<
Brake systemApprox. 300 miles (500 km) must
elapse before the brake pads and
rotors achieve the optimal pad-surface
and wear patterns required for trouble-
free operation and long service life later
on.
To break in the separate parking brake
drums, apply the parking brake lightly
when coasting to a standstill (at a traffic
signal, for instance), provided that
traffic conditions allow you to do so.
To avoid corrosion, repeat this proce-
dure from time to time.
The brake lamps do not light up
when the parking brake is applied.
Vacuum for the brake system servo unit
on your BMW is available only when the
engine is running. When you move the
vehicle with the engine switched off Ð
when towing, for instance Ð substan-
tially higher levels of pedal force will be
required to brake the vehicle.<
Page 167 of 185
167n
OverviewControlsMaintenanceRepairsDataIndex
Towing the vehicle Towing a vehicle with automatic
transmission1. Place the selector lever in position N
2. Towing speed:
Max. 45 mph (70 km/h)
3. Towing distance:
Max. 95 miles (150 km)
4. Leave the ignition key at position 1 to
ensure that the brake lamps, turn
signals, horn and windshield wipers
remain operative, and to prevent the
steering lock from engaging
5. Switch on the hazard warning
flashers (comply with country-
specific regulations).
Find some means of identifying the
vehicle in tow, for instance, place a sign
or warning triangle in the rear window.
Make sure that the ignition key
remains in position 1 even when
the electrical system has failed. This will
prevent the steering lock from
engaging. The steering and brakes are
without power assist when the engine is
not running. This means that increased
effort is required for steering and
braking.<
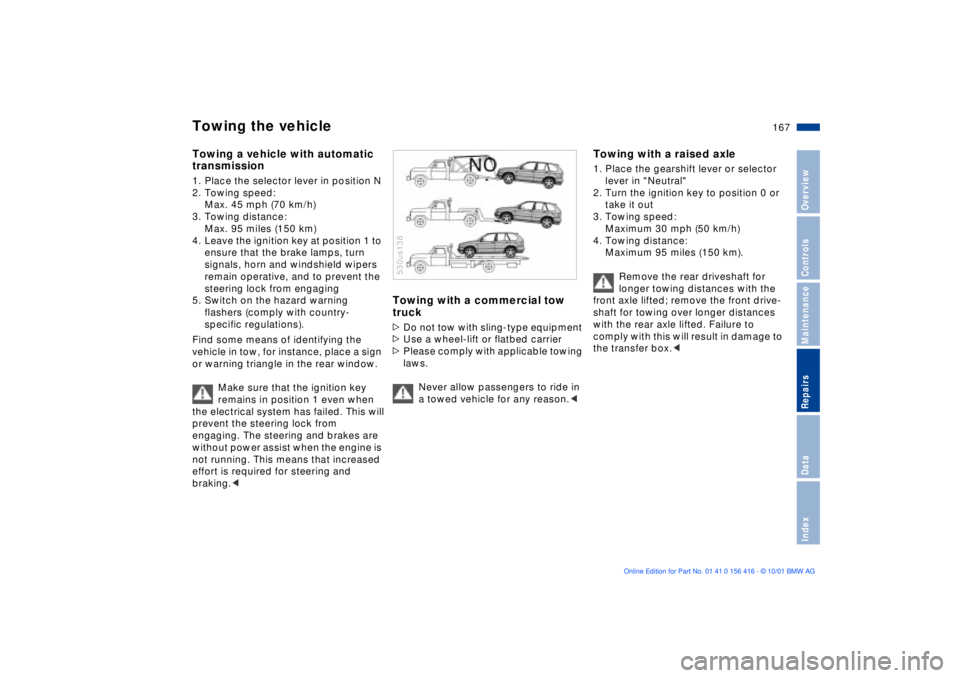
Towing with a commercial tow
truck >Do not tow with sling-type equipment
>Use a wheel-lift or flatbed carrier
>Please comply with applicable towing
laws.
Never allow passengers to ride in
a towed vehicle for any reason.< 530us138
Towing with a raised axle 1. Place the gearshift lever or selector
lever in "Neutral"
2. Turn the ignition key to position 0 or
take it out
3. Towing speed:
Maximum 30 mph (50 km/h)
4. Towing distance:
Maximum 95 miles (150 km).
Remove the rear driveshaft for
longer towing distances with the
front axle lifted; remove the front drive-
shaft for towing over longer distances
with the rear axle lifted. Failure to
comply with this will result in damage to
the transfer box.<
Page 172 of 185

172n
Weights BMW X5 3.0i BMW X5 4.4i BMW X5 4.6is
Curb weight (with one person, ready for operation, full tank of fuel, options not included)
with manual transmission
with automatic transmission Ibs (kg)
Ibs (kg)4533 (2056)
4586 (2080) Ð
4824 (2188) Ð
4824 (2188)
Approved gross vehicle weight
with manual transmission
with automatic transmission Ibs (kg)
Ibs (kg)6005 (2724)
6005 (2724) Ð
6005 (2724) Ð
6005 (2724)
Approved front axle load Ibs (kg)
2787 (1264) 2787 (1264) 2787 (1264)
Approved rear axle load Ibs (kg) 3307 (1500) 3307 (1500) 3307 (1500)
Approved roof load capacity Ibs (kg) 220 (100)
Never exceed either the approved axle loads or the gross vehicle weight .
Cargo area capacity cu ft (l) 16.4 Ð 54.4 (465 Ð 1540) Ð according to DIN
69.04 (1955) Ð according to SAE