change time BMW X5 4.4I 2003 Owners Manual
[x] Cancel search | Manufacturer: BMW, Model Year: 2003, Model line: X5 4.4I, Model: BMW X5 4.4I 2003Pages: 183, PDF Size: 2.31 MB
Page 73 of 183
73n
OverviewControlsMaintenanceRepairsDataIndex
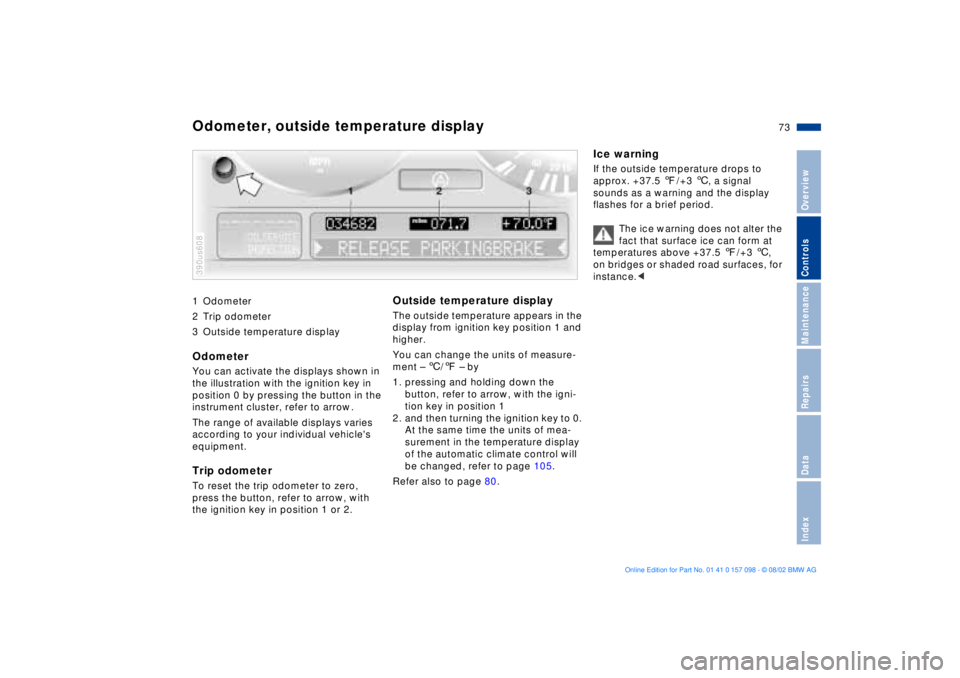
1 Odometer
2 Trip odometer
3 Outside temperature displayOdometerYou can activate the displays shown in
the illustration with the ignition key in
position 0 by pressing the button in the
instrument cluster, refer to arrow.
The range of available displays varies
according to your individual vehicle's
equipment.Trip odometer To reset the trip odometer to zero,
press the button, refer to arrow, with
the ignition key in position 1 or 2. 390us608
Outside temperature display The outside temperature appears in the
display from ignition key position 1 and
higher.
You can change the units of measure-
ment Ð 6/7 Ð by
1. pressing and holding down the
button, refer to arrow, with the igni-
tion key in position 1
2. and then turning the ignition key to 0.
At the same time the units of mea-
surement in the temperature display
of the automatic climate control will
be changed, refer to page 105.
Refer also to page 80.
Ice warning If the outside temperature drops to
approx. +37.5 7/+3 6, a signal
sounds as a warning and the display
flashes for a brief period.
The ice warning does not alter the
fact that surface ice can form at
temperatures above +37.5 7/+3 6,
on bridges or shaded road surfaces, for
instance.<
Odometer, outside temperature display
Page 80 of 183
80n
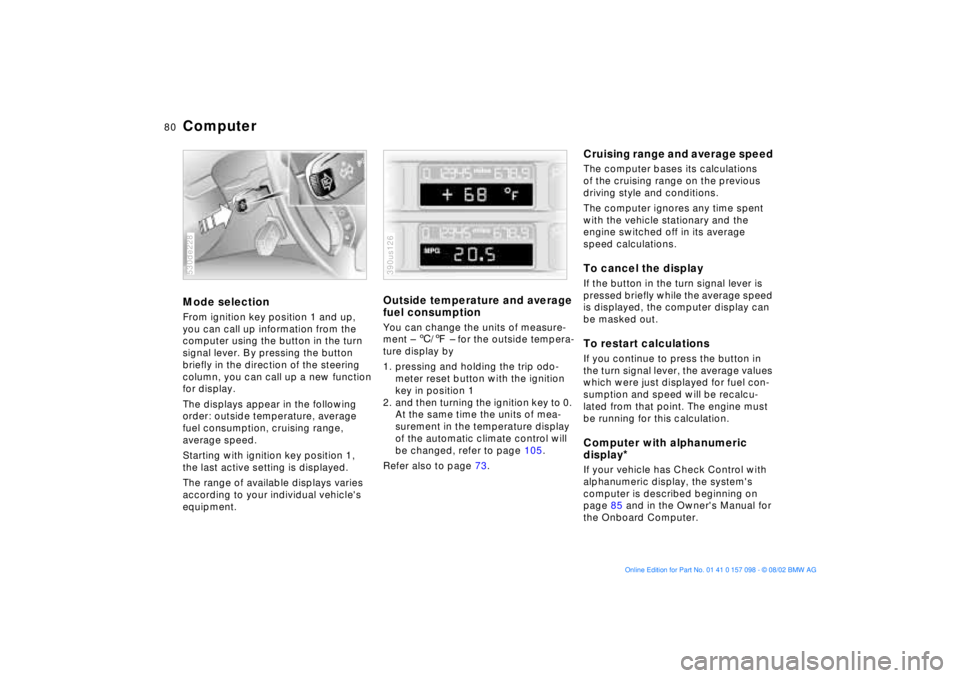
ComputerMode selection From ignition key position 1 and up,
you can call up information from the
computer using the button in the turn
signal lever. By pressing the button
briefly in the direction of the steering
column, you can call up a new function
for display.
The displays appear in the following
order: outside temperature, average
fuel consumption, cruising range,
average speed.
Starting with ignition key position 1,
the last active setting is displayed.
The range of available displays varies
according to your individual vehicle's
equipment.530de228
Outside temperature and average
fuel consumption You can change the units of measure-
ment Ð 6/7 Ð for the outside tempera-
ture display by
1. pressing and holding the trip odo-
meter reset button with the ignition
key in position 1
2. and then turning the ignition key to 0.
At the same time the units of mea-
surement in the temperature display
of the automatic climate control will
be changed, refer to page 105.
Refer also to page 73.390us126
Cruising range and average speed The computer bases its calculations
of the cruising range on the previous
driving style and conditions.
The computer ignores any time spent
with the vehicle stationary and the
engine switched off in its average
speed calculations.To cancel the display If the button in the turn signal lever is
pressed briefly while the average speed
is displayed, the computer display can
be masked out. To restart calculationsIf you continue to press the button in
the turn signal lever, the average values
which were just displayed for fuel con-
sumption and speed will be recalcu-
lated from that point. The engine must
be running for this calculation.Computer with alphanumeric
display
*
If your vehicle has Check Control with
alphanumeric display, the system's
computer is described beginning on
page 85 and in the Owner's Manual for
the Onboard Computer.
Page 82 of 183

82n
Digital clock in the MID
Only make entries when the
vehicle is stationary Ð to avoid
endangering yourself or other road
users.<
To call up time or date Press the left side of the button.
Display shows:
You can have the time displayed in
12 or 24 hours.
To change the display:
Press the left side of the button.
If the 12-hour time display is in use, AM
or PM appears after the time.
To change the timePress the left side of the button.
Press the right side of the button:
The dots flash in the display.
To change the setting:
Press on the left or right, or hold the
button down.
To store the entry:
Press the right side of the button.
To change the datePress the left side of the button.
Press.
Press the right side of the button:
The dots and the DATE display flash.
To change the setting:
Press on left or right, or hold the button
down.
To store the entry:
Press the right side of the button.
The clock takes leap years into account
and therefore does not have to be reset
manually.
Page 84 of 183
84n
Digital clock in the MIDEnter the switch-on times for the
independent ventilationYou can enter two different switch-on
times.
The ventilation will shut off automati-
cally after 30 minutes.
Please follow the instructions for
operating the independent ventila-
tion that start on page 111.<
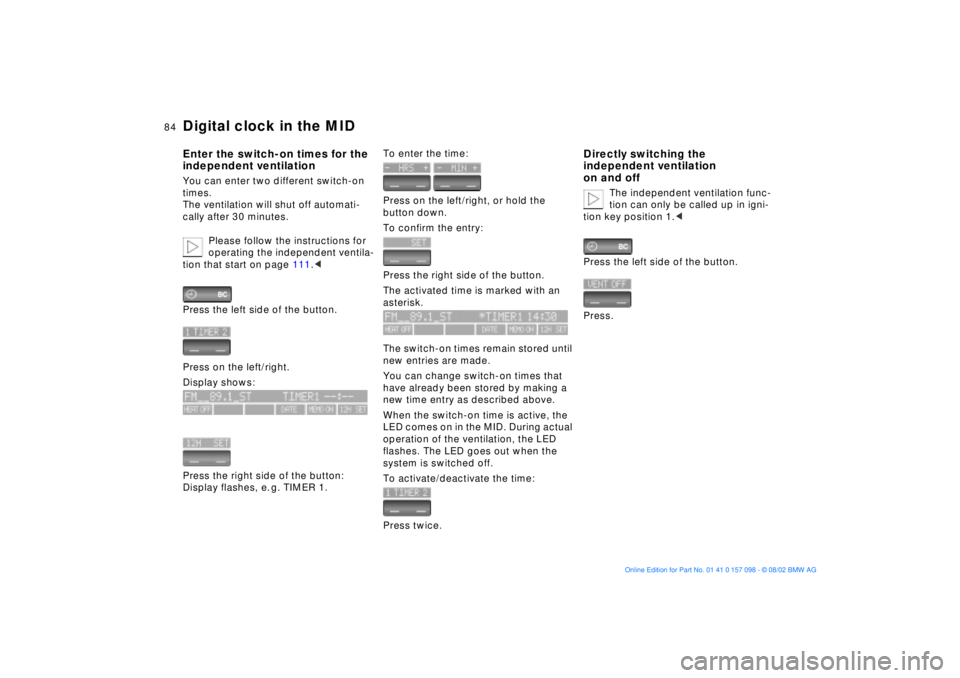
Press the left side of the button.
Press on the left/right.
Display shows:
Press the right side of the button:
Display flashes, e. g. TIMER 1.
To enter the time:
Press on the left/right, or hold the
button down.
To confirm the entry:
Press the right side of the button.
The activated time is marked with an
asterisk.
The switch-on times remain stored until
new entries are made.
You can change switch-on times that
have already been stored by making a
new time entry as described above.
When the switch-on time is active, the
LED comes on in the MID. During actual
operation of the ventilation, the LED
flashes. The LED goes out when the
system is switched off.
To activate/deactivate the time:
Press twice.
Directly switching the
independent ventilation
on and off
The independent ventilation func-
tion can only be called up in igni-
tion key position 1.<
Press the left side of the button.
Press.
Page 94 of 183

94n
Self-leveling suspension
*
2-axle self-leveling suspension
*
The warning lamp for the self-
leveling suspension comes on,
or the message Ð SELFLEVEL
SUSP.INACT Ð appears in the Check
Control: there is a malfunction in the
self-leveling suspension.
Stop and inspect the vehicle. If it is
riding significantly lower in the rear than
in the front, or if it is sitting at an incline
Ð left rear compared to right rear - con-
sult the nearest BMW Sports Activity
Vehicle center. Drive with appropriate
caution in the meantime. The vehicle
has reduced ground clearance or
driving comfort is noticeably reduced.
Even if the attitude of the vehicle is
normal, you should consult the nearest
BMW Sports Activity Vehicle center if
the warning lamp indicates a system
malfunction.
The conceptYour vehicle is equipped with 2-axle
self-leveling suspension acting on both
the front and rear suspension. This
system combines automatic self-lev-
eling, which compensates for variations
in front-to-rear load-distribution pat-
terns, with a selection feature allowing
drivers to choose from among several
ride-height options.
You may choose from among the fol-
lowing ride heights:
>Standard
The standard setting is intended for
most operating conditions, including
trailer towing
>Off-Road
Higher ride height for increased
ground clearance
>Access
Lowers vehicle for more convenient
cargo handling or easier passenger
ingress and exitsChanges in ride height are initiated
either manually, using the control
button, refer to page 95, or automati-
cally in response to specific speeds.
When the ride height is selected manu-
ally, the driver has the additional option
of revising the ride-height selection by
entering a new command during the
adjustment process.
When the vehicle is stationary, the
system executes ride-height changes in
both directions (up and down) when-
ever the doors are closed. The tailgate/
liftgate may be open. The system raises
the vehicle only when the engine is run-
ning.
The system's automatic self-leveling
feature automatically compensates for
variations in the vehicle's load.
Frequent changes in ride height
initiated at short intervals can
overheat the compressor, causing the
system to briefly suspend active opera-
tion.<
Page 99 of 183
99n
OverviewControlsMaintenanceRepairsDataIndex
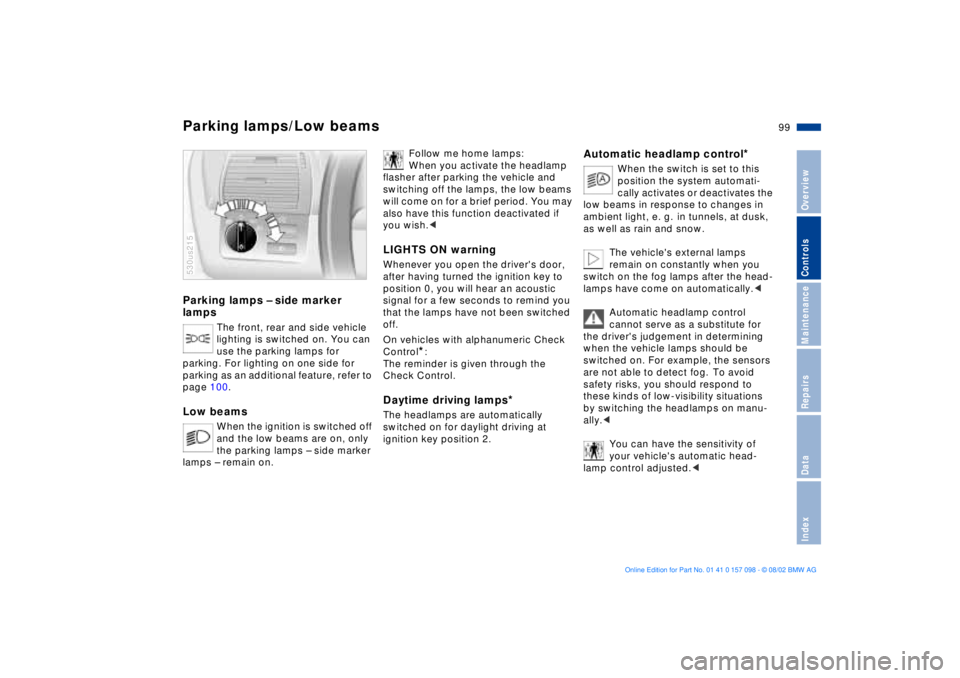
Parking lamps Ð side marker
lamps
The front, rear and side vehicle
lighting is switched on. You can
use the parking lamps for
parking. For lighting on one side for
parking as an additional feature, refer to
page 100.
Low beams
When the ignition is switched off
and the low beams are on, only
the parking lamps Ð side marker
lamps Ð remain on.
530us215
Follow me home lamps:
When you activate the headlamp
flasher after parking the vehicle and
switching off the lamps, the low beams
will come on for a brief period. You may
also have this function deactivated if
you wish.<
LIGHTS ON warningWhenever you open the driver's door,
after having turned the ignition key to
position 0, you will hear an acoustic
signal for a few seconds to remind you
that the lamps have not been switched
off.
On vehicles with alphanumeric Check
Control
*:
The reminder is given through the
Check Control.
Daytime driving lamps
*
The headlamps are automatically
switched on for daylight driving at
ignition key position 2.
Automatic headlamp control
*
When the switch is set to this
position the system automati-
cally activates or deactivates the
low beams in response to changes in
ambient light, e. g. in tunnels, at dusk,
as well as rain and snow.
The vehicle's external lamps
remain on constantly when you
switch on the fog lamps after the head-
lamps have come on automatically.<
Automatic headlamp control
cannot serve as a substitute for
the driver's judgement in determining
when the vehicle lamps should be
switched on. For example, the sensors
are not able to detect fog. To avoid
safety risks, you should respond to
these kinds of low-visibility situations
by switching the headlamps on manu-
ally.<
You can have the sensitivity of
your vehicle's automatic head-
lamp control adjusted.<
Parking lamps/Low beams
Page 138 of 183

138n
Winter tires Snow chains
*
Choosing the right tire BMW recommends winter tires Ð M+S
radial tires Ð for operation under
inclement winter driving conditions.
While so-called all-season tires with
M+S designation provide better winter
traction than summer tires with the load
ratings H, V, W, Y and ZR, they gener-
ally do not achieve the performance of
winter tires.
In the interests of safe tracking and
steering response, install radial tires
made by the same manufacturer and
with the same tread configuration on all
four wheels if you elect to mount winter
tires.
Do not exceed specified
maximum speeds
Never exceed the maximum speed
for which the tires are rated.
Unprofessional attempts by laymen to
service tires can lead to damage and
accidents.
Have this work performed by skilled
professionals only. Your BMW Sports
Activity Vehicle center will be glad to
assist you with both their expertise and
the proper equipment for your vehicle.<
Tire condition, tire pressureWinter tires display a perceptible loss in
their ability to cope with winter driving
conditions once the tread wears to
below 0.16 in/4 mm, and should thus
be replaced.
Comply with the specified tire inflation
pressures Ñ and be sure to have the
wheel and tire assemblies balanced
every time you change the tires.
Only certain snow chains have been
tested by BMW and classified and
approved as safe. Consult your BMW
Sports Activity Vehicle center for
details. The use of narrow-link BMW
snow chains is approved only in pairs
on the rear wheels and only with the
following tire sizes.
BMW X5 4.6is: 255/55 R18
All other models: 235/65 R 17.
Comply with all manufacturer's safety
precautions when mounting the chains.
Do not exceed a maximum speed of
30 mph/50 km/h.
Page 144 of 183

144n
Brake fluidBrake fluid level
If the indicator lamp for the
brake hydraulic system appears
or if the CHECK BRAKE FLUID
warning appears in the Check
Control: the brake fluid level is
too low.
Add brake fluidThe brake fluid reservoir is located
under the microfilter housing trim panel
on the driver's side of the vehicle. For
adding brake fluid or for determining
and correcting the cause of brake fluid
loss, consult your BMW Sports Activity
Vehicle center. Your BMW Sports
Activity Vehicle center is familiar with
the specifications for factory-approved
brake fluids Ð DOT 4.
Brake fluid loss may result in extended
brake pedal travel. For this situation,
refer to the notes on page 132.
Brake fluid is hygroscopic, that is,
it absorbs moisture from the air
over time.
In order to ensure the safety and reli-
ability of the brake system, have the
brake fluid changed every two years by
a BMW Sports Activity Vehicle center.
Refer also to the Service and Warranty
Information Booklet for US models or
the Warranty and Service Guide
Booklet for Canadian models.
Brake fluid is toxic and damages the
vehicle's paint. You should always store
it in its original container and in a loca-
tion which is out of reach of children.
Do not spill the fluid and do not fill the
brake fluid reservoir beyond the
MAX mark. The brake fluid could ignite
upon contact with hot engine parts and
cause serious burns.<
Comply with the applicable envi-
ronmental laws regulating the
disposal of brake fluid.<
Page 145 of 183
145n
OverviewControlsMaintenanceRepairsDataIndex
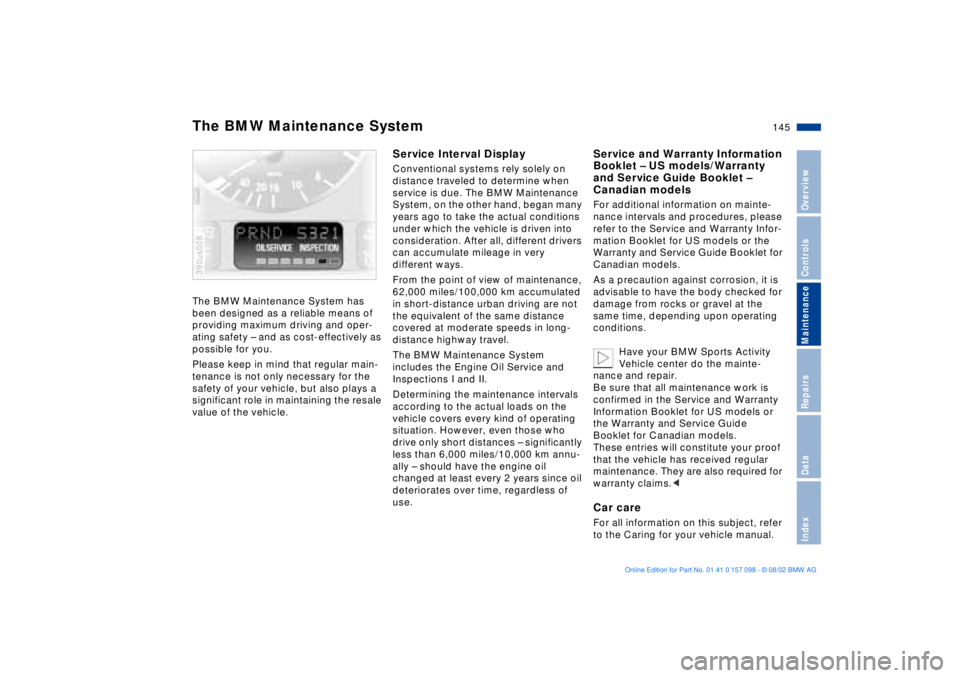
The BMW Maintenance System has
been designed as a reliable means of
providing maximum driving and oper-
ating safety Ð and as cost-effectively as
possible for you.
Please keep in mind that regular main-
tenance is not only necessary for the
safety of your vehicle, but also plays a
significant role in maintaining the resale
value of the vehicle. 390us008
Service Interval Display Conventional systems rely solely on
distance traveled to determine when
service is due. The BMW Maintenance
System, on the other hand, began many
years ago to take the actual conditions
under which the vehicle is driven into
consideration. After all, different drivers
can accumulate mileage in very
different ways.
From the point of view of maintenance,
62,000 miles/100,000 km accumulated
in short-distance urban driving are not
the equivalent of the same distance
covered at moderate speeds in long-
distance highway travel.
The BMW Maintenance System
includes the Engine Oil Service and
Inspections I and II.
Determining the maintenance intervals
according to the actual loads on the
vehicle covers every kind of operating
situation. However, even those who
drive only short distances Ð significantly
less than 6,000 miles/10,000 km annu-
ally Ð should have the engine oil
changed at least every 2 years since oil
deteriorates over time, regardless of
use.
Service and Warranty Information
Booklet Ð US models/Warranty
and Service Guide Booklet Ð
Canadian models For additional information on mainte-
nance intervals and procedures, please
refer to the Service and Warranty Infor-
mation Booklet for US models or the
Warranty and Service Guide Booklet for
Canadian models.
As a precaution against corrosion, it is
advisable to have the body checked for
damage from rocks or gravel at the
same time, depending upon operating
conditions.
Have your BMW Sports Activity
Vehicle center do the mainte-
nance and repair.
Be sure that all maintenance work is
confirmed in the Service and Warranty
Information Booklet for US models or
the Warranty and Service Guide
Booklet for Canadian models.
These entries will constitute your proof
that the vehicle has received regular
maintenance. They are also required for
warranty claims.
The BMW Maintenance System
Page 171 of 183

171n
OverviewControlsMaintenanceRepairsDataIndex
Capacities
Notes
Fuel tank
Reserve gal./liters
gal./litersapprox. 24.6/approx. 93
approx. 2.0/approx. 8 Ð
BMW X5 3.0i
approx. 2.5/approx. 10 Ð
BMW X5 4.4i, 4.6isFuel specification: page 26
Windshield washer system
with headlamp washer system quarts/liters approx. 8.2/approx. 7.8 For details: page 141
Cooling system including
heater circuit quarts/liters 11.1/10.5 Ð BMW X5 3.0i
13.7/13.0 Ð BMW X5 4.4i, 4.6isFor details: page 143
Engine oil and filter change quarts/liters 8.0/7.5 Ð BMW X5 3.0i
8.5/8.0 Ð BMW X5 4.4i, 4.6isBMW High Performance
Synthetic Oil
For details: page 142
Manual and automatic transmission,
transfer box and differential Ð Ð Lifetime fluid, no fluid
change required