tow BMW X5 4.4I 2004 E53 Owner's Manual
[x] Cancel search | Manufacturer: BMW, Model Year: 2004, Model line: X5 4.4I, Model: BMW X5 4.4I 2004 E53Pages: 200, PDF Size: 3.91 MB
Page 8 of 200
Contents
Operation, maintenance
Owner service procedures
Special operating instructions:
Break-in procedures136
Driving your X5137
General driving notes138
Safe braking139
Wheels and tires:
Tire inflation pressure140
Tire identification marks142
Wheel/tire condition143
Replacing wheels/tires144
Snow chains145
Under the hood:
Hood146
Engine compartment
essentials147
Washer fluid148
Engine oil148
Coolant150
Brake fluid151
Care and maintenance:
The BMW Maintenance
System152
Laws and regulations:
California laws153
OBD interface socket153
Replacement procedures:
Onboard tool kit158
Windshield wiper blades158
Lamps and bulbs159
Changing a tire163
Battery168
Fuses169
Assistance, giving and
receiving:
Receiving assistance170
Jump-starting171
Towing and tow-starting
vehicle173
Page 37 of 200
35n
OverviewControlsMaintenanceRepairsDataIndex
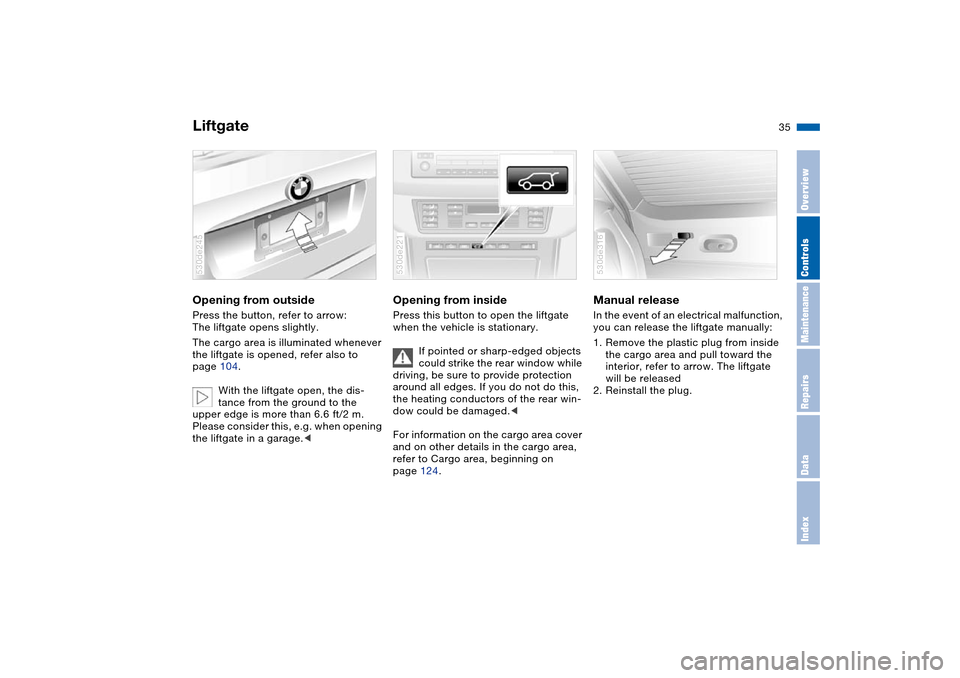
LiftgateOpening from outside Press the button, refer to arrow:
The liftgate opens slightly.
The cargo area is illuminated whenever
the liftgate is opened, refer also to
page 104.
With the liftgate open, the dis-
tance from the ground to the
upper edge is more than 6.6 ft/2 m.
Please consider this, e.g. when opening
the liftgate in a garage.<530de245
Opening from inside Press this button to open the liftgate
when the vehicle is stationary.
If pointed or sharp-edged objects
could strike the rear window while
driving, be sure to provide protection
around all edges. If you do not do this,
the heating conductors of the rear win-
dow could be damaged.<
For information on the cargo area cover
and on other details in the cargo area,
refer to Cargo area, beginning on
page 124.530de221
Manual release In the event of an electrical malfunction,
you can release the liftgate manually:
1. Remove the plastic plug from inside
the cargo area and pull toward the
interior, refer to arrow. The liftgate
will be released
2. Reinstall the plug. 530de316
Page 39 of 200
37n
OverviewControlsMaintenanceRepairsDataIndex
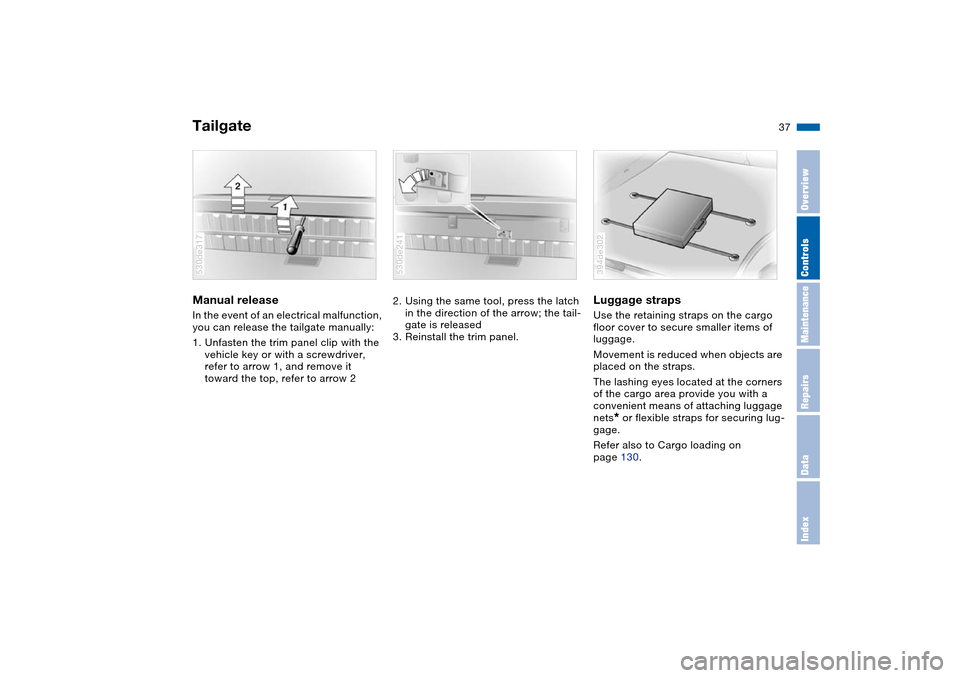
TailgateManual release In the event of an electrical malfunction,
you can release the tailgate manually:
1. Unfasten the trim panel clip with the
vehicle key or with a screwdriver,
refer to arrow 1, and remove it
toward the top, refer to arrow 2530de317
2. Using the same tool, press the latch
in the direction of the arrow; the tail-
gate is released
3. Reinstall the trim panel. 530de241
Luggage straps Use the retaining straps on the cargo
floor cover to secure smaller items of
luggage.
Movement is reduced when objects are
placed on the straps.
The lashing eyes located at the corners
of the cargo area provide you with a
convenient means of attaching luggage
nets
* or flexible straps for securing lug-
gage.
Refer also to Cargo loading on
page 130.
394de302
Page 40 of 200
38n
Alarm system The concept The vehicle alarm system responds:
>When a door, the hood, or the liftgate
is opened
>To movement in the vehicle interior:
interior motion sensor
>To variations in the vehicle tilt angle
such as occur during attempts to
steal the wheels or tow the vehicle
>To interruption of battery voltage.
The system responds to unauthorized
vehicle entry and attempted theft by
simultaneously activating the following:
>Sounding an acoustical alarm for
30 seconds
>The hazard warning flashers are acti-
vated for approx. five minutes
>The high beams flash on and off in
the same rhythm.
Arming and disarming alarm
system When you lock or unlock the vehicle,
either with the remote control or at the
door lock, the alarm system is armed or
disarmed at the same time.
You can have different acknowl-
edgment signals set to confirm
arming and disarming.<
The liftgate can also be opened with the
system armed using the button on the
remote control, refer to page 31. The
liftgate is locked again when closed.
Pressing the button longer triggers the
alarm: panic mode, refer to page 32.
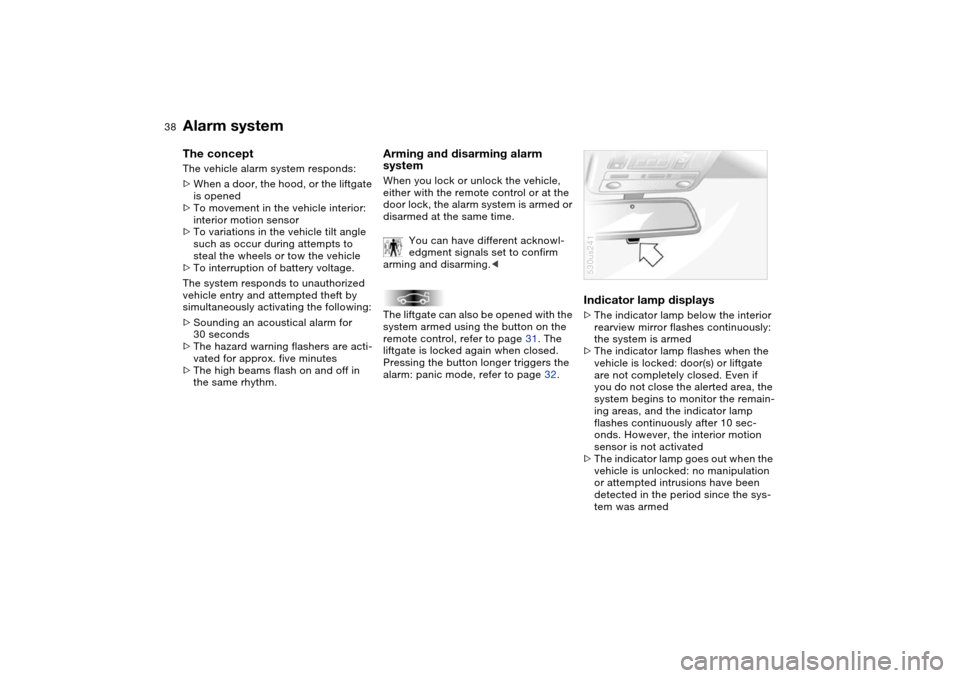
Indicator lamp displays >The indicator lamp below the interior
rearview mirror flashes continuously:
the system is armed
>The indicator lamp flashes when the
vehicle is locked: door(s) or liftgate
are not completely closed. Even if
you do not close the alerted area, the
system begins to monitor the remain-
ing areas, and the indicator lamp
flashes continuously after 10 sec-
onds. However, the interior motion
sensor is not activated
>The indicator lamp goes out when the
vehicle is unlocked: no manipulation
or attempted intrusions have been
detected in the period since the sys-
tem was armed530us241
Page 41 of 200
39n
OverviewControlsMaintenanceRepairsDataIndex
Alarm system Windows>The indicator lamp flashes for
10 seconds after the vehicle is
unlocked: an attempted entry has
been detected in the period since the
system was armed.
Following triggering of an alarm, the
indicator lamp will flash continuously. Tilt alarm sensor and
interior motion sensor Tilt alarm sensor:
The tilt of the vehicle is monitored. The
alarm system reacts, for example, if
someone attempts to steal the wheels
or tow the vehicle.
Interior motion sensor:
In order for the interior motion sensor to
function properly, the windows and
panorama glass roof ‹must be com-
pletely closed.
Avoiding unintentional alarms The tilt alarm sensor and interior motion
sensor may be switched off at the same
time. This prevents unintentional
alarms, e.g. in the following situations:
>In duplex garages
>When transporting on car-carrying
trains
>If animals are to remain in the vehicle.
Switching off the tilt alarm sensor and
interior motion sensor:
Press the button on the remote control
twice consecutively.
The indicator lamp lights up briefly and
then flashes continuously. The tilt alarm
sensor and the interior motion sensor
are switched off up to the next unlock-
ing and locking actions.
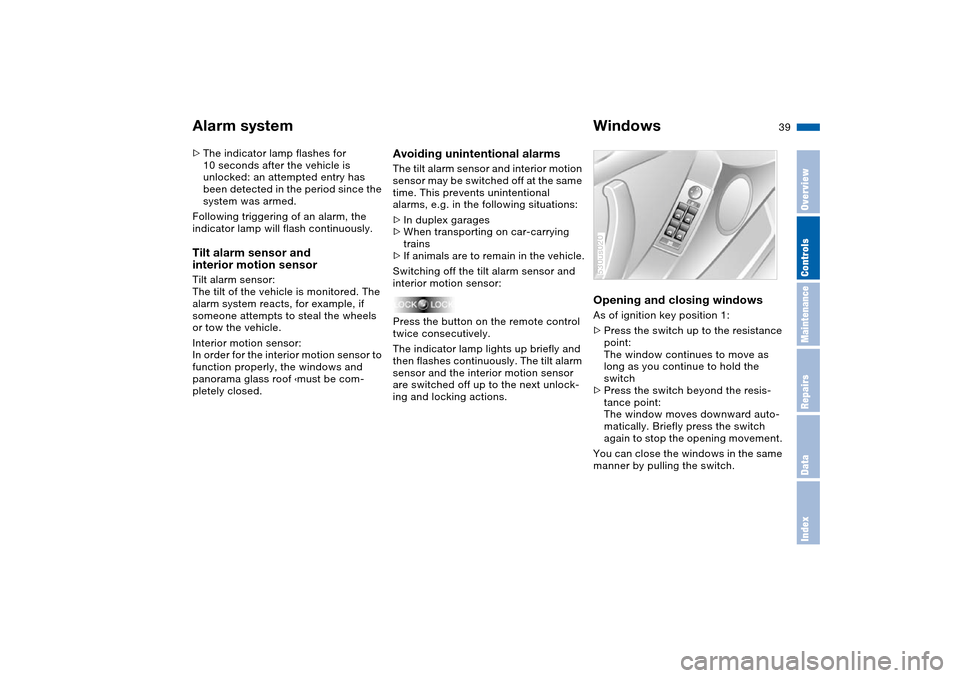
Opening and closing windows As of ignition key position 1:
>Press the switch up to the resistance
point:
The window continues to move as
long as you continue to hold the
switch
>Press the switch beyond the resis-
tance point:
The window moves downward auto-
matically. Briefly press the switch
again to stop the opening movement.
You can close the windows in the same
manner by pulling the switch.530us020
Page 46 of 200
44n
SeatsNote before adjusting
Never try to adjust your seat while
operating the vehicle. The seat
could respond with unexpected move-
ment, and the ensuing loss of vehicle
control could lead to an accident. On
the front passenger side as well, do not
tilt the backrest too far toward the rear
while driving. Failure to observe this
precaution can prevent the belt from
providing effective protection against
injury, as the passenger could slide
under the belt in an accident.<
Seat adjustment>Mechanical seat adjustment, refer to
following columns
>Power seat adjustment, refer to
page 46
>Head restraints, refer to page 47
>Power rear-seat backrest adjustment,
refer to page 48.
Page 64 of 200
62n
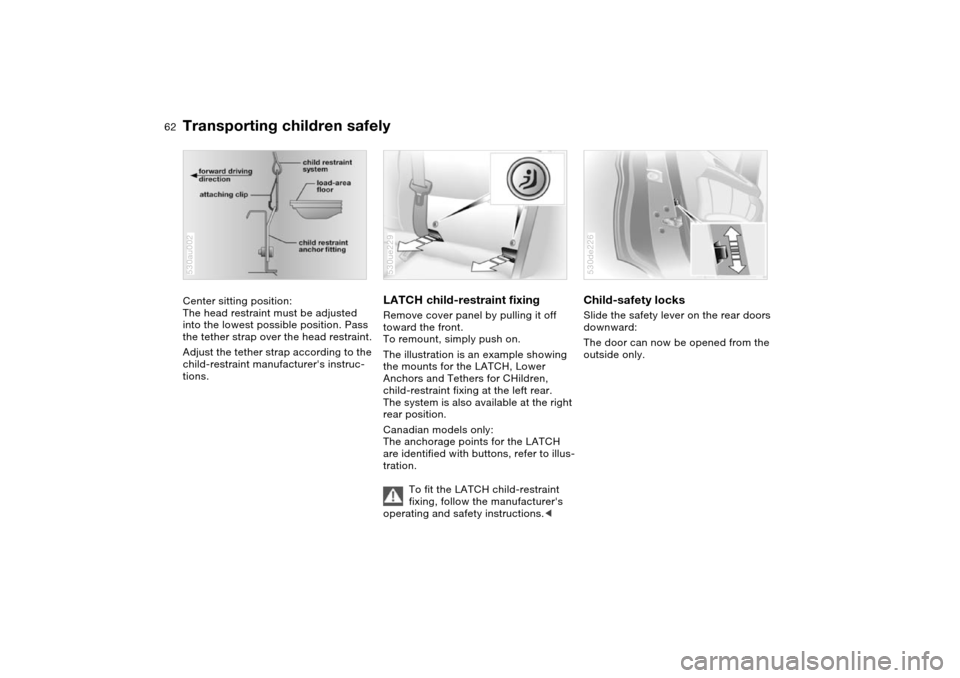
Transporting children safelyCenter sitting position:
The head restraint must be adjusted
into the lowest possible position. Pass
the tether strap over the head restraint.
Adjust the tether strap according to the
child-restraint manufacturer's instruc-
tions.530au002
LATCH child-restraint fixing Remove cover panel by pulling it off
toward the front.
To remount, simply push on.
The illustration is an example showing
the mounts for the LATCH, Lower
Anchors and Tethers for CHildren,
child-restraint fixing at the left rear.
The system is also available at the right
rear position.
Canadian models only:
The anchorage points for the LATCH
are identified with buttons, refer to illus-
tration.
To fit the LATCH child-restraint
fixing, follow the manufacturer's
operating and safety instructions.<530ue229
Child-safety locks Slide the safety lever on the rear doors
downward:
The door can now be opened from the
outside only. 530de226
Page 71 of 200
69n
OverviewControlsMaintenanceRepairsDataIndex
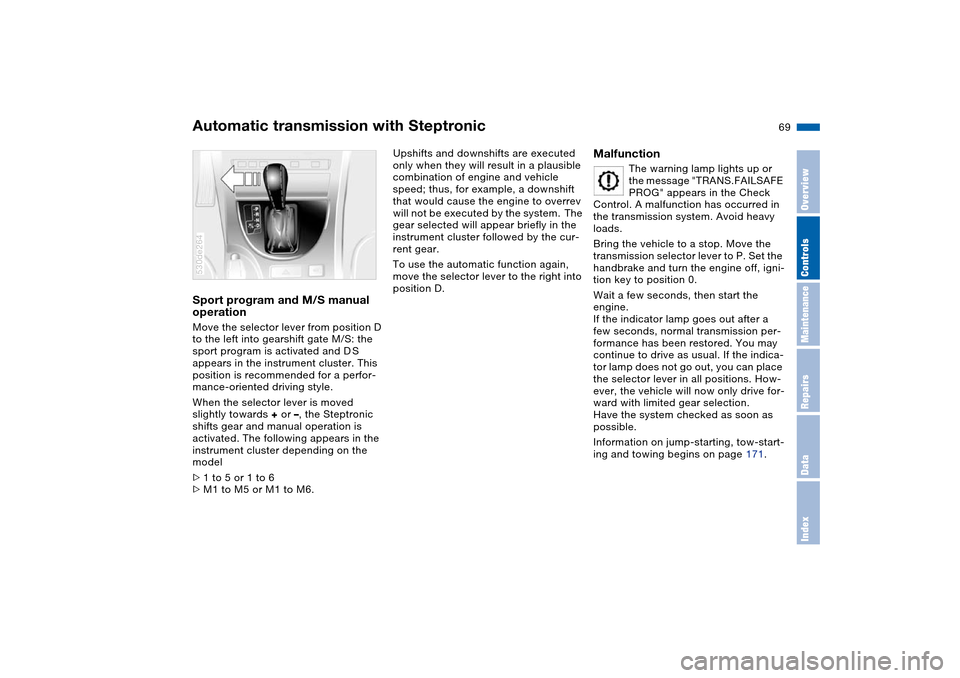
Automatic transmission with SteptronicSport program and M/S manual
operation Move the selector lever from position D
to the left into gearshift gate M/S: the
sport program is activated and D S
appears in the instrument cluster. This
position is recommended for a perfor-
mance-oriented driving style.
When the selector lever is moved
slightly towards + or –, the Steptronic
shifts gear and manual operation is
activated. The following appears in the
instrument cluster depending on the
model
>1 to 5 or 1 to 6
>M1 to M5 or M1 to M6. 530de264
Upshifts and downshifts are executed
only when they will result in a plausible
combination of engine and vehicle
speed; thus, for example, a downshift
that would cause the engine to overrev
will not be executed by the system. The
gear selected will appear briefly in the
instrument cluster followed by the cur-
rent gear.
To use the automatic function again,
move the selector lever to the right into
position D.
Malfunction
The warning lamp lights up or
the message "TRANS.FAILSAFE
PROG" appears in the Check
Control. A malfunction has occurred in
the transmission system. Avoid heavy
loads.
Bring the vehicle to a stop. Move the
transmission selector lever to P. Set the
handbrake and turn the engine off, igni-
tion key to position 0.
Wait a few seconds, then start the
engine.
If the indicator lamp goes out after a
few seconds, normal transmission per-
formance has been restored. You may
continue to drive as usual. If the indica-
tor lamp does not go out, you can place
the selector lever in all positions. How-
ever, the vehicle will now only drive for-
ward with limited gear selection.
Have the system checked as soon as
possible.
Information on jump-starting, tow-start-
ing and towing begins on page 171.
Page 95 of 200
93n
OverviewControlsMaintenanceRepairsDataIndex
PDC Park Distance Control
* Antilock Brake System
Signal tones The distance from an object is indicated
in front with a higher intermittent tone,
and at the rear with a lower intermittent
tone. As the distance between vehicle
and object decreases, the intervals
between the tones become shorter.
The signal tone becomes continuous
once the distance to the nearest object
falls to below roughly 1 ft/30 cm.
The warning signal is canceled after
approx. 3 seconds if you are moving
parallel to a wall.
If there is a malfunction of the system:
The indicator lamp flashes and a short
steady signal tone is sounded
>if you activate PDC with the button
>when you select reverse for the first
time after switching on the ignition
>if a malfunction occurs while the PDC
system is active.
Switch the system off and have the
cause of the malfunction corrected by
your BMW Sports Activity Vehicle cen-
ter. Even with PDC, final responsibility
for estimating the distance
between the vehicle and any obstruc-
tions always remains with the driver.
Even when sensors are involved, there
is a blind spot in which objects cannot
be detected. This applies especially in
those cases where the system
approaches the physical constraints of
ultrasonic measurement, as occurs with
tow bars and trailer couplings, and in
the vicinity of thin or wedge-shaped
objects. Low objects already displayed,
e.g. a curb, can also disappear from the
detection area of the sensors again
before a continuous tone sounds.
Loud sources of sound, inside and out-
side the vehicle, could drown out the
PDC signal tone.<
Keep the sensors clean and free of ice
or snow in order to ensure that they will
continue to operate effectively.
Do not apply high pressure spray to the
sensors for a prolonged period of time.
Keep the spray at least 4 in/10 cm away
from the sensors.
The concept The ABS Antilock Brake System keeps
the wheels from locking during braking,
thereby enhancing active driving safety.
The vehicle continues to be steerable
during hard braking.
ABS also includes EBV Electronic
brake-force distribution.
Safe braking, refer to page 139.EBV Electronic brake-force
distributionEBV controls the brake system's appli-
cation pressure at the rear wheels to
ensure stable deceleration.DBC Dynamic Brake ControlThe Dynamic Brake Control actively
supports the driver in dangerous brak-
ing situations. When you apply the
brake pedal rapidly, the system
increases the braking effect with low
pedal pressure so that the shortest
possible braking distance is achieved.
This system exploits all of the benefits
provided by ABS.
Do not reduce the pressure on the
brake pedal for the duration of the
brake application. DBC is deactivated
when you release the brake pedal.
Page 99 of 200
97n
OverviewControlsMaintenanceRepairsDataIndex
Self-leveling suspension
*
2-axle self-leveling suspension
*
The warning lamp for the self-
leveling suspension comes on,
or the message "SELFLEVEL
SUSP.INACT" appears in the Check
Control: there is a malfunction in the
self-leveling suspension.
Stop and inspect the vehicle. If the rear
of the vehicle is visibly lower than the
front, possibly accompanied by a tilt
noticeable when you compare the left
rear with the right rear, please respond
by immediately proceeding to the near-
est BMW Sports Activity Vehicle center.
Drive with appropriate caution in the
meantime. The vehicle has reduced
ground clearance and driving comfort
may be noticeably reduced.
Even when the position of the vehicle is
normal, have the system checked as
soon as possible when a malfunction is
indicated.
The concept Your vehicle is equipped with 2-axle
self-leveling suspension acting on both
the front and rear suspension. This sys-
tem combines automatic self-leveling,
which compensates for variations in
front-to-rear load-distribution patterns,
with a selection feature allowing drivers
to choose from among several ride-
height options.
You may choose from among the fol-
lowing ride heights:
>Normal
The standard setting is intended for
most operating conditions, including
trailer towing
>Off-Road
Increased level for more ground
clearance
>Access
Lowers vehicle for more convenient
cargo handling or easier passenger
entries and exits.
Changes in ride height are initiated
either manually, using the control but-
ton, refer to page 98, or automatically in
response to specific speeds. When the
ride height is selected manually, the
driver has the additional option of revis-
ing the ride-height selection by entering a new command during the adjustment
process.
When the vehicle is stationary, the sys-
tem executes ride-height changes in
both directions – up and down – when-
ever the doors are closed. The liftgate/
tailgate may be open. The system
raises the vehicle only when the engine
is running.
The system's automatic self-leveling
feature automatically compensates for
variations in the vehicle's load.
Frequent changes in ride height
initiated at short intervals can
overheat the compressor, causing the
system to briefly suspend active opera-
tion.<