sensor BMW X5 4.4I 2006 E53 Owner's Manual
[x] Cancel search | Manufacturer: BMW, Model Year: 2006, Model line: X5 4.4I, Model: BMW X5 4.4I 2006 E53Pages: 202, PDF Size: 4.13 MB
Page 5 of 202
5n
OverviewControlsMaintenanceRepairsDataIndex
Controls and features
Passenger safety systems:
Airbags55
Transporting children safely57
Vehicle Memory,
Key Memory61
Driving:
Ignition lock62
Starting engine62
Switching off engine63
Handbrake64
Manual transmission64
Automatic transmission with
Steptronic65
Turn signals/
headlamp flasher68
Washer/wiper system/
rain sensor69
Cruise control71
Everything under control:
Odometer, outside temperature
display73
Tachometer74
Energy control74
Engine oil temperature gauge75
Fuel gauge75
Coolant temperature gauge76
Service Interval Display76
Check Control77
Computer79
MID Multi-Information
Display81Digital clock in MID82
Computer in MID85
Technology for safety and
driving convenience:
PDC Park Distance Control 90
Antilock Brake System91
DSC Dynamic Stability
Control92
xDrive94
HDC Hill Descent Control94
Self-leveling suspension95
2-axle self-leveling
suspension96
Brake force display98
Flat Tire Monitor98
Lamps:
Parking lamps/low beams100
Adaptive Head Light101
High beams/roadside parking
lamps101
Front fog lamps102
Instrument lighting102
Interior lamps103
Controlling the climate for
pleasant driving:
Air conditioner104
Automatic climate control107
Roller sun blinds113
Parked car ventilation113Cabin convenience:
Integrated universal remote
control114
Telephone116
Interior rearview mirror with
digital compass117
Glove compartment119
Storage compartments119
Cup holders120
Ashtray, front121
Ashtray, rear121
Cigarette lighter, rear122
Loading and transporting:
Ski bag123
Cargo area
Folding rear backrests
down124
Roll-up cover125
Partition net125
Covers in cargo area127
Sockets128
Pull-out cargo floor128
Cargo loading130
Roof-mounted luggage rack132
Page 14 of 202
14n
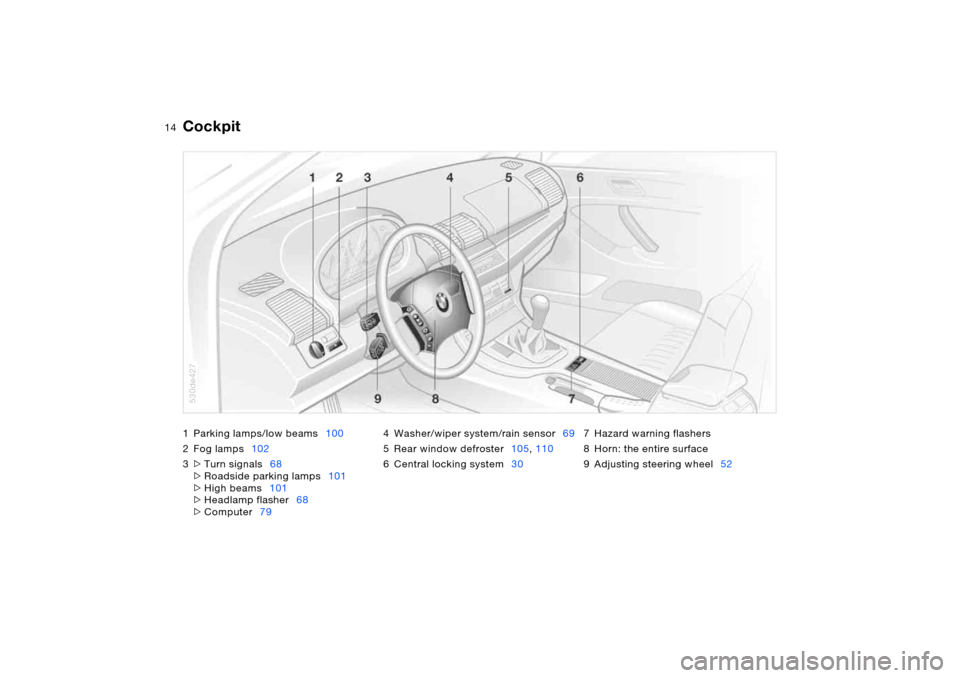
1 Parking lamps/low beams100
2Fog lamps102
3>Turn signals68
>Roadside parking lamps101
>High beams101
>Headlamp flasher68
>Computer794 Washer/wiper system/rain sensor69
5Rear window defroster105, 110
6 Central locking system307 Hazard warning flashers
8 Horn: the entire surface
9 Adjusting steering wheel52
Cockpit
530de427
Page 31 of 202
31n
OverviewControlsMaintenanceRepairsDataIndex
Opening and closing: from outsideUsing remote control When you engage/release the vehicle
locks, you also activate/deactivate the
anti-theft system, arm/disarm the alarm
system, and switch the interior lamps
on/off.
Protect the remote control against
unauthorized use by handing over
only the spare key, for example when
using hotel valet parking.<
You can find more detailed information
on the alarm system on page38.
Since passengers or animals
remaining in the vehicle might be
able to lock the doors from the inside,
take the vehicle's keys with you so that
the vehicle can be opened again from
the outside at any time.<
Unlocking vehiclePress the button.
Press the button once to unlock the
driver's door and the fuel filler door
only; press a second time to unlock all
remaining doors as well as the liftgate/
tailgate. Convenience opening modePress the button briefly and then hold
down.
The windows and the panorama glass
roof open. Locking and securing Press the button.
As a confirmation that the vehicle is
correctly locked, the hazard warning
flashers light up.
If you so desire, you can have this
function deactivated if your vehi-
cle is not equipped with an alarm sys-
tem.<
Switching on interior lamps If the vehicle is locked, press the but-
ton.
With this function, you can also search
for your vehicle, e.g. when parked in an
underground garage.Switching off tilt alarm sensor and
interior motion sensor
Press the button once again immedi-
ately after locking.
For more detailed information, refer to
page39. Opening liftgate Briefly press the button.
The liftgate will open slightly, regardless
of whether it was previously locked or
unlocked.
Page 38 of 202
38n
Alarm system The concept The vehicle alarm system responds:
>When a door, the hood or the liftgate
is opened
>To movement in the vehicle interior:
interior protection, refer to Tilt alarm
sensor and Interior motion sensor
>To variations in the vehicle tilt angle
such as occur during attempts to
steal the wheels or tow the vehicle
>To interruption of battery voltage.
The system responds to unauthorized
vehicle entry and attempted theft by
simultaneously activating the following:
>An acoustical alarm, which sounds
for 30 seconds
>The hazard warning flashers, which
flash for approx. five minutes
>The high beams, which flash on and
off in the same rhythm as the hazard
warning flashers.
Arming and disarming alarm
system When you lock or unlock the vehicle,
either with the remote control or at the
door lock, the alarm system is armed or
disarmed at the same time.
You can have different acknowl-
edgment signals set to confirm
arming and disarming.<
The liftgate can also be opened with the
system armed using the button on the
remote control, refer to page31. The
liftgate is locked again when closed.
Pressing the button longer triggers the
alarm: panic mode, refer to page32.
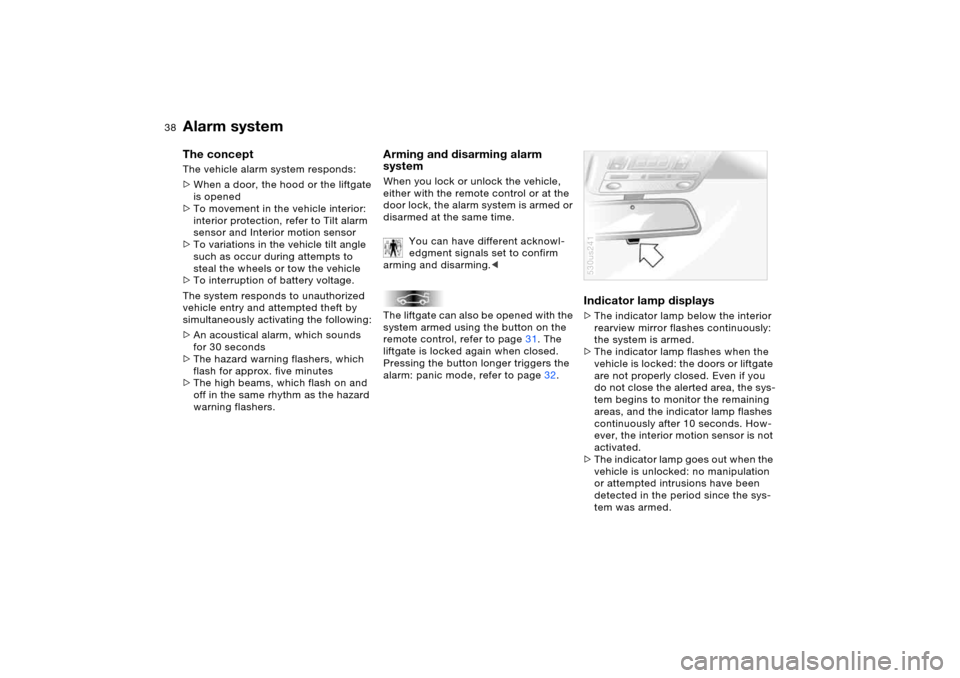
Indicator lamp displays >The indicator lamp below the interior
rearview mirror flashes continuously:
the system is armed.
>The indicator lamp flashes when the
vehicle is locked: the doors or liftgate
are not properly closed. Even if you
do not close the alerted area, the sys-
tem begins to monitor the remaining
areas, and the indicator lamp flashes
continuously after 10 seconds. How-
ever, the interior motion sensor is not
activated.
>The indicator lamp goes out when the
vehicle is unlocked: no manipulation
or attempted intrusions have been
detected in the period since the sys-
tem was armed.530us241
Page 39 of 202
39n
OverviewControlsMaintenanceRepairsDataIndex
Alarm system Windows>The indicator lamp flashes for 10 sec-
onds after the vehicle is unlocked: an
attempted entry has been detected in
the period since the system was
armed.
Following triggering of an alarm, the
indicator lamp will flash continuously.Tilt alarm sensorThe tilt of the vehicle is monitored. The
alarm system reacts, for example, if
someone attempts to steal the wheels
or tow the vehicle.Interior motion sensorIn order for the interior motion sensor to
function properly, the windows and
panorama glass roof must be com-
pletely closed.
Avoiding unintentional alarms The tilt alarm sensor and interior motion
s en sor m ay be swi tch e d off a t t h e sam e
time. This prevents unintentional
alarms, e.g. in the following situations:
>In duplex garages
>When transporting on car-carrying
trains
>If animals are to remain in the vehicle.
To switch off the tilt alarm sensor and
interior motion sensor:
Press the button on the remote control
twice consecutively.
The indicator lamp lights up briefly and
then flashes continuously. The tilt alarm
sensor and the interior motion sensor
are switched off until the next unlocking
and locking actions are executed.
To prevent injuries, exercise care
when closing the windows and
keep them in your field of vision until
they are shut.
Always take along the ignition key when
you leave the vehicle, as otherwise chil-
dren could, for example, operate the
windows and injure themselves.<
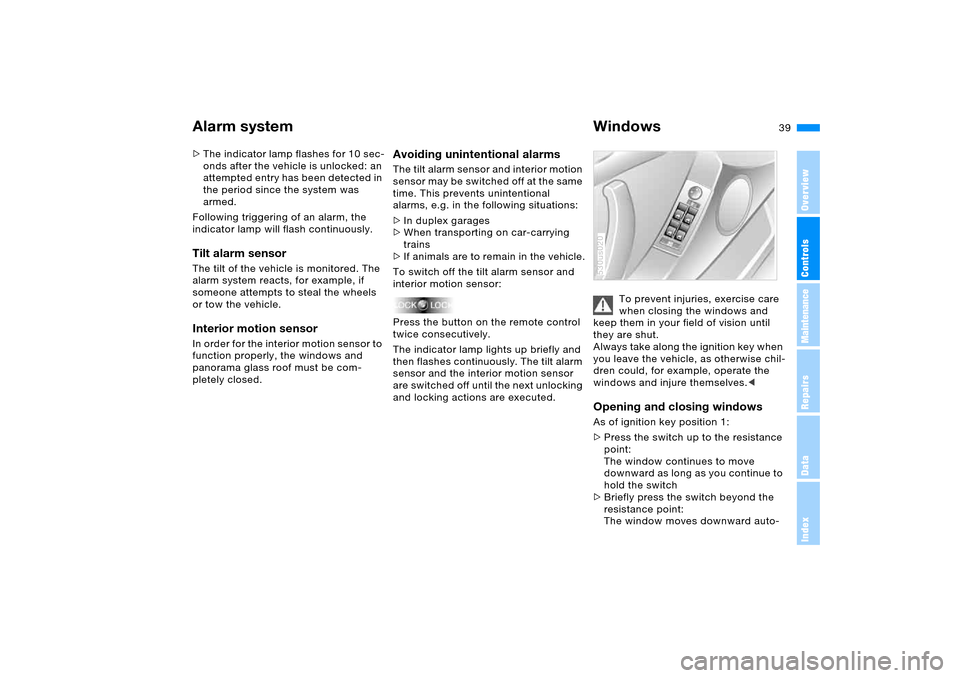
Opening and closing windows As of ignition key position 1:
>Press the switch up to the resistance
point:
The window continues to move
downward as long as you continue to
hold the switch
>Briefly press the switch beyond the
resistance point:
The window moves downward auto-530us020
Page 69 of 202
OverviewControlsMaintenanceRepairsDataIndex
69n
Washer/wiper system/rain sensor
*
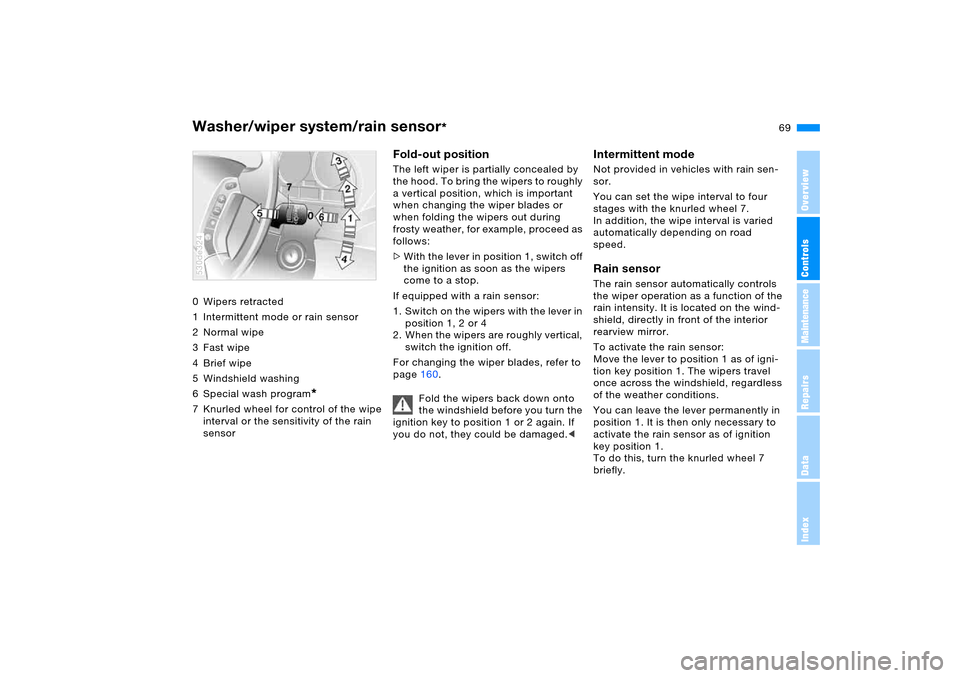
0 Wipers retracted
1 Intermittent mode or rain sensor
2Normal wipe
3Fast wipe
4Brief wipe
5 Windshield washing
6 Special wash program
*
7 Knurled wheel for control of the wipe
interval or the sensitivity of the rain
sensor530de324
Fold-out positionThe left wiper is partially concealed by
the hood. To bring the wipers to roughly
a vertical position, which is important
when changing the wiper blades or
when folding the wipers out during
frosty weather, for example, proceed as
follows:
>With the lever in position 1, switch off
the ignition as soon as the wipers
come to a stop.
If equipped with a rain sensor:
1. Switch on the wipers with the lever in
position 1, 2 or 4
2. When the wipers are roughly vertical,
switch the ignition off.
For changing the wiper blades, refer to
page160.
Fold the wipers back down onto
the windshield before you turn the
ignition key to position 1 or 2 again. If
you do not, they could be damaged.<
Intermittent mode Not provided in vehicles with rain sen-
sor.
You can set the wipe interval to four
stages with the knurled wheel 7.
In addition, the wipe interval is varied
automatically depending on road
speed. Rain sensor The rain sensor automatically controls
the wiper operation as a function of the
rain intensity. It is located on the wind-
shield, directly in front of the interior
rearview mirror.
To activate the rain sensor:
Move the lever to position 1 as of igni-
tion key position 1. The wipers travel
once across the windshield, regardless
of the weather conditions.
You can leave the lever permanently in
position 1. It is then only necessary to
activate the rain sensor as of ignition
key position 1.
To do this, turn the knurled wheel 7
briefly.
Page 70 of 202
70n
Washer/wiper system/rain sensor
*
To adjust the sensitivity of the rain
sensor:
Turn the knurled wheel 7.
To deactivate the rain sensor:
Move the lever to position 0.
Deactivate the rain sensor when
passing through an automatic car
wash. Failure to do so could result in
damage caused by undesired wiper
activation.< Normal wipe The system switches automatically to
intermittent mode when the vehicle is
stationary, not on vehicles with rain
sensor. Fast wipe The wipers operate at normal speed
when the vehicle is not moving, not on
vehicles with rain sensor. Windshield washing The system sprays washer fluid against
the windshield and activates the wipers
for a brief period.
Special wash program
*
As with 5; several additional wash
cycles are carried out and the head-
lamps are cleaned
*.
This program is recommended after you
have driven on extremely dirty roads.
Headlamp washing
*
>With the special wash program 6
>At appropriate intervals, the head-
lamps will also be cleaned upon actu-
ation of the windshield washer func-
tion 5 while the vehicle's headlamps
are switched on.
Do not use the washers if there
is any danger that the fluid will
freeze on the windshield. If you do so,
your vision could be obscured. Use
antifreeze to prevent this, refer to
page152.
Do not actuate washer systems when
the fluid reservoir is empty, otherwise,
the washer pump will be damaged.<
Windshield washer nozzles The windshield washer jets are heated
automatically when the ignition key is in
position 2.
Page 71 of 202
OverviewControlsMaintenanceRepairsDataIndex
71n
Washer/wiper system/rain sensor
*
Cruise control
*
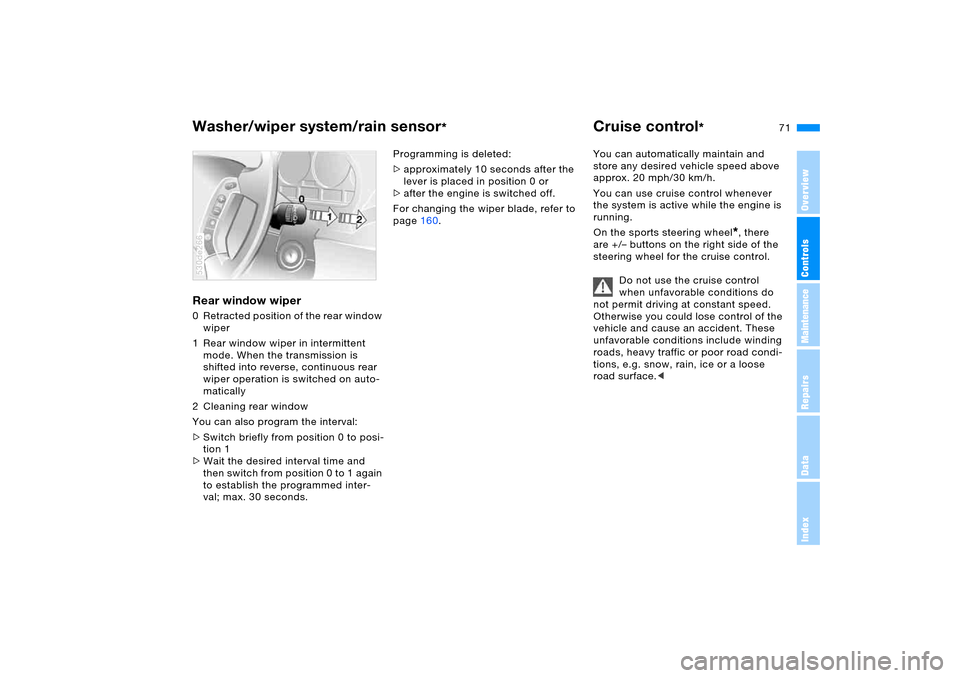
Rear window wiper 0 Retracted position of the rear window
wiper
1 Rear window wiper in intermittent
mode. When the transmission is
shifted into reverse, continuous rear
wiper operation is switched on auto-
matically
2 Cleaning rear window
You can also program the interval:
>Switch briefly from position 0 to posi-
tion 1
>Wait the desired interval time and
th en sw itc h fr om p osit ion 0 to 1 again
to establish the programmed inter-
val; max. 30 seconds. 530de266
Programming is deleted:
>approximately 10 seconds after the
lever is placed in position 0 or
>after the engine is switched off.
For changing the wiper blade, refer to
page160.You can automatically maintain and
store any desired vehicle speed above
approx. 20 mph/30 km/h.
You can use cruise control whenever
the system is active while the engine is
running.
On the sports steering wheel
*, there
are +/– buttons on the right side of the
steering wheel for the cruise control.
Do not use the cruise control
when unfavorable conditions do
not permit driving at constant speed.
Otherwise you could lose control of the
vehicle and cause an accident. These
unfavorable conditions include winding
roads, heavy traffic or poor road condi-
tions, e.g. snow, rain, ice or a loose
road surface.<
Page 90 of 202
90n
PDC Park Distance Control
*
The concept PDC provides extra safety and conve-
nience during parking maneuvers. Sig-
nal tones indicate the current distance
to an object behind or in front of your
vehicle. To do this, four ultrasonic sen-
sors in the front and rear bumpers each
measure the distance to the nearest
object. The detection range of the front
sensors and the two sensors located at
the ends of the rear bumper is approx.
2 ft/60 cm, while the rear center sen-
sors can detect objects up to a distance
of approx. 5 ft/1.50 m.
PDC is a parking aid that can
indicate objects when they are
approached slowly, as is usually the
case when parking. Avoid approaching
objects too quickly; otherwise the phys-
ical circumstances may cause the sys-
tem to issue the warning too late.<
Automatic operationWhen the engine is running or the igni-
tion is switched on, the PDC system
starts to operate automatically approx.
one second after you shift into reverse
or move the selector lever into the R
position. Wait this short period before
backing up.
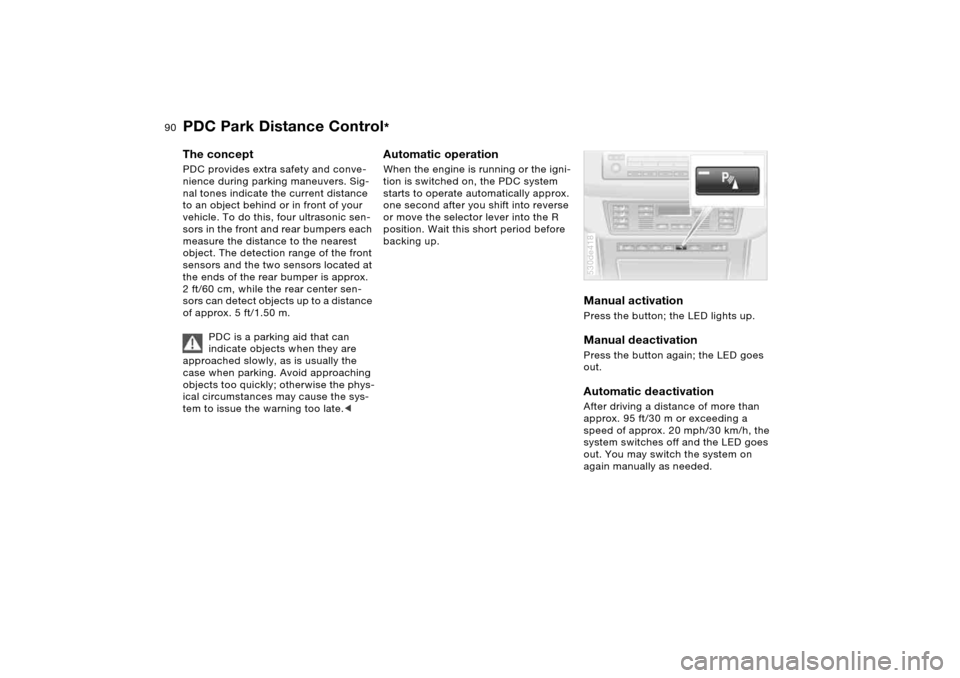
Manual activation Press the button; the LED lights up. Manual deactivation Press the button again; the LED goes
out.Automatic deactivationAfter driving a distance of more than
approx. 95 ft/30 m or exceeding a
speed of approx. 20 mph/30 km/h, the
system switches off and the LED goes
out. You may switch the system on
again manually as needed. 530de418
Page 91 of 202
91n
OverviewControlsMaintenanceRepairsDataIndex
PDC Park Distance Control
* Antilock Brake System
Signal tones The distance from an object is indicated
in front with a higher intermittent tone,
and at the rear with a lower intermittent
tone. As the distance between vehicle
and object decreases, the intervals
between the tones become shorter.
The signal tone becomes continuous
once the distance to the nearest object
falls to below roughly 1 ft/30 cm.
The warning signal is canceled after
approx. 3 seconds if you are moving
parallel to a wall. MalfunctionsThe LED flashes and a short steady sig-
nal tone is sounded
>if you activate PDC with the button
>when you select reverse for the first
time after switching on the ignition
>if a malfunction occurs while the PDC
system is active.
Switch the system off and have the
cause of the malfunction corrected by
your BMW Sports Activity Vehicle cen-
ter.
System limits
Even with PDC, final responsibility
for estimating the distance
between the vehicle and any obstruc-
tions always remains with the driver.
Even when sensors are involved, there
is a blind spot in which objects cannot
be detected. This applies especially in
those cases where the system
approaches the physical constraints of
ultrasonic measurement, as occurs with
tow bars and trailer couplings, and in
the vicinity of thin or wedge-shaped
objects. It is also possible that low
objects already displayed, such as curb
edges, may come into the blind spot of
the sensors before a continuous signal
sounds or that higher, protruding
objects, such as ledges, will not be
detected.
Loud sources of sound, inside and out-
side the vehicle, could drown out the
PDC signal tone.<
Keep the sensors clean and free
of ice or snow in order to ensure
that they will continue to operate effec-
tively.
When using high-pressure washers, do
not spray sensors for long periods and
keep the sprayer at least 4 in/10 cm
away from the sensors.<
The concept The ABS Antilock Brake System pre-
vents the wheel brakes from locking
during braking. Safe steering response
is maintained even during full braking.
This increases active safety.
The ABS is operational every time you
start the engine. Safe braking, refer to
page 140.EBV Electronic brake-force
distribution EBV controls the brake system's appli-
cation pressure at the rear wheels to
ensure stable deceleration.DBC Dynamic Brake Control When the brake pedal is depressed
rapidly, this system automatically gen-
erates a maximum boost of braking
force and thus aids in keeping braking
distances as short as possible during
full braking. This system exploits all of
the benefits provided by ABS.
Do not reduce the pressure on the
brake pedal for the duration of the
brake application. DBC is deactivated
when you release the brake pedal.