spare wheel BMW X5 4.4I 2006 E53 Owner's Manual
[x] Cancel search | Manufacturer: BMW, Model Year: 2006, Model line: X5 4.4I, Model: BMW X5 4.4I 2006 E53Pages: 202, PDF Size: 4.13 MB
Page 127 of 202
127n
OverviewControlsMaintenanceRepairsDataIndex
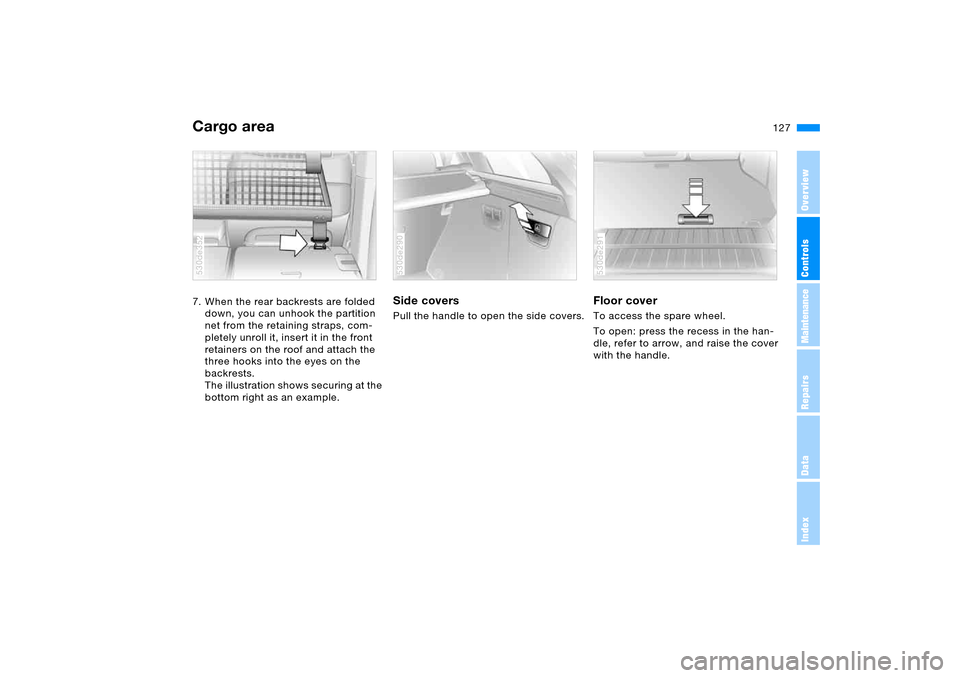
Cargo area 7. When the rear backrests are folded
down, you can unhook the partition
net from the retaining straps, com-
pletely unroll it, insert it in the front
retainers on the roof and attach the
three hooks into the eyes on the
backrests.
The illustration shows securing at the
bottom right as an example.530de352
Side covers Pull the handle to open the side covers.530de290
Floor cover To access the spare wheel.
To open: press the recess in the han-
dle, refer to arrow, and raise the cover
with the handle. 530de291
Page 129 of 202
129n
OverviewControlsMaintenanceRepairsDataIndex
Cargo areaWhen it is extended, you can load the
cargo floor:
>With up to 990 lbs./450 kg, distrib-
uted evenly across the entire surface
>With up to 330 lbs./150 kg on the
rear edge.
Do not overload the cargo floor
when it is extended. If you do so, it
could cause damage.
When sliding the cargo floor back in, do
not reach under the floor. Otherwise
there is a risk of injury.<
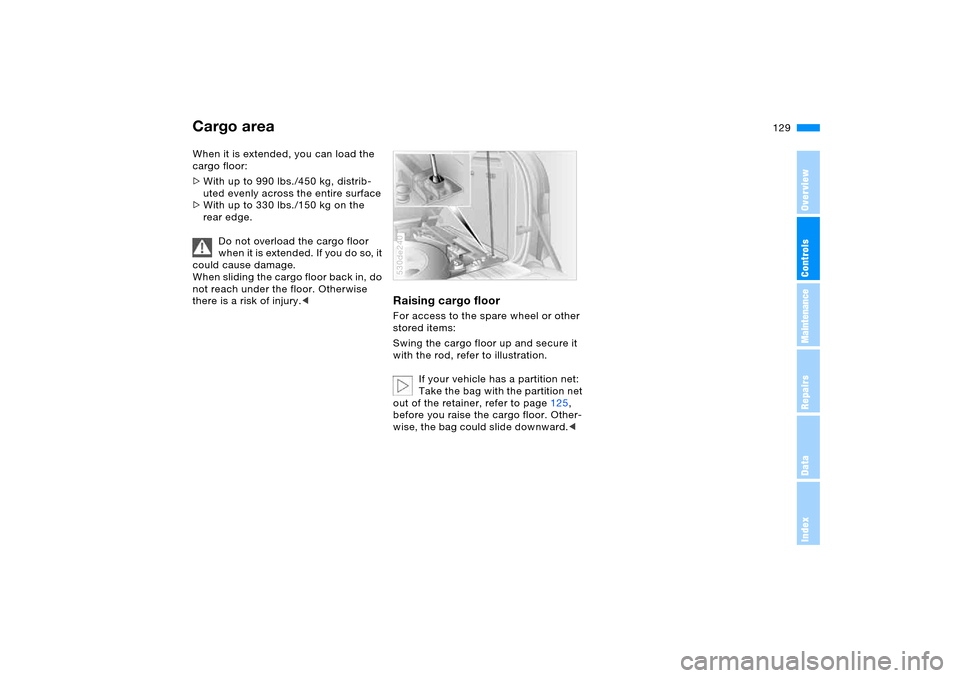
Raising cargo floor For access to the spare wheel or other
stored items:
Swing the cargo floor up and secure it
with the rod, refer to illustration.
If your vehicle has a partition net:
Take the bag with the partition net
out of the retainer, refer to page125,
before you raise the cargo floor. Other-
wise, the bag could slide downward.< 530de240
Page 141 of 202
141n
OverviewControlsMaintenanceRepairsDataIndex
Information for your safety The condition of the tires and the main-
tenance of the specified tire pressure
are crucial not only to the tire's service
life, but also to driving comfort and
most importantly, driving safety. Checking pressureOnly check tire inflation pressure when
the tires are cold. This means after a
maximum of 1.25 miles/2 km driving or
when the vehicle has been parked for at
least 2 hours. When tires are warm, the
tire inflation pressure increases.
Check the tire inflation pressure
regularly and correct it as needed,
even on the spare wheel: at least twice
a month and before starting long trips. If
you fail to observe this precaution, you
may be driving on tires with incorrect
tire pressures, a condition that can not
only compromise your vehicle's driving
stability, but also lead to tire damage
and the risk of an accident. Do not drive
with deflated, i.e. flat, tires. A flat tire
will seriously impairs your vehicle's
handling and braking response.
Attempts to drive on a flat tire can lead
to loss of control over the vehicle.<
After correcting the inflation pres-
sure(s), always reinitialize the Flat
Tire Monitor, refer to page99.<
Inflation pressures for factory-
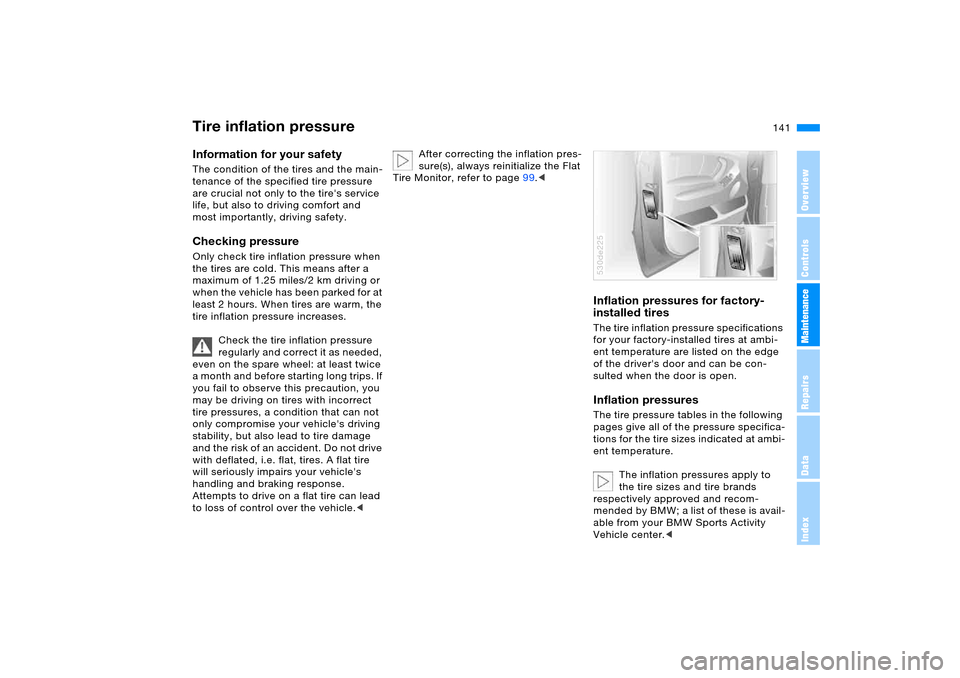
installed tiresThe tire inflation pressure specifications
for your factory-installed tires at ambi-
ent temperature are listed on the edge
of the driver's door and can be con-
sulted when the door is open.Inflation pressuresThe tire pressure tables in the following
pages give all of the pressure specifica-
tions for the tire sizes indicated at ambi-
ent temperature.
The inflation pressures apply to
the tire sizes and tire brands
respectively approved and recom-
mended by BMW; a list of these is avail-
able from your BMW Sports Activity
Vehicle center.<530de225
Tire inflation pressure
Page 145 of 202
145n
OverviewControlsMaintenanceRepairsDataIndex
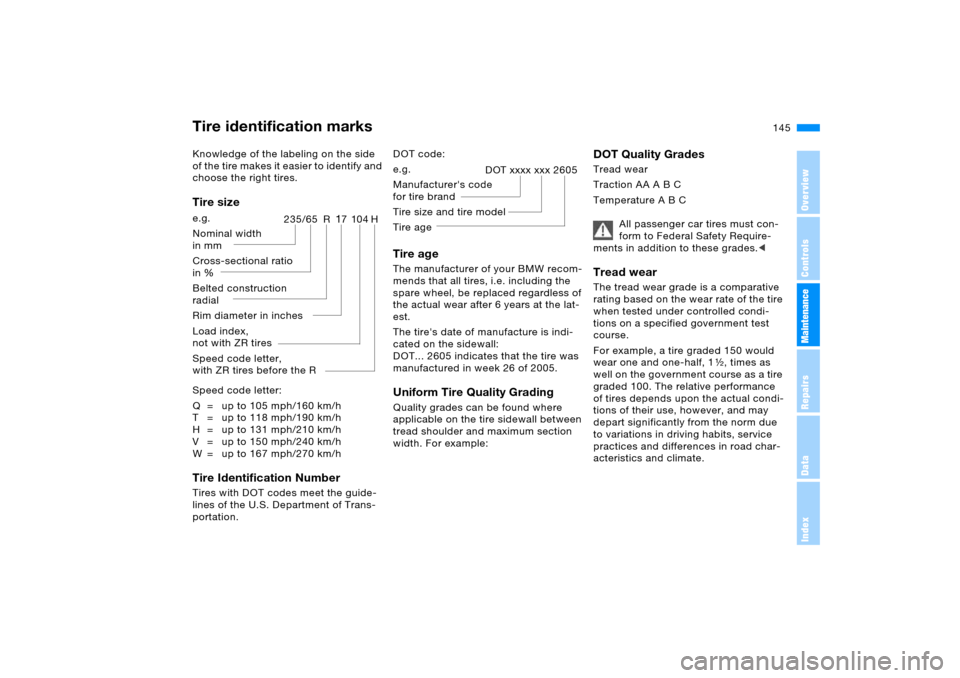
Tire identification marksKnowledge of the labeling on the side
of the tire makes it easier to identify and
choose the right tires.Tire sizeSpeed code letter:
Q = up to 105 mph/160 km/h
T = up to 118 mph/190 km/h
H = up to 131 mph/210 km/h
V = up to 150 mph/240 km/h
W = up to 167 mph/270 km/hTire Identification Number Tires with DOT codes meet the guide-
lines of the U.S. Department of Trans-
portation. e.g.
Nominal width
in mm
Cross-sectional ratio
in Ξ
Belted construction
radial
Rim diameter in inches
Load index,
not with ZR tires
Speed code letter,
with ZR tires before the R
235/65 R
17104H
DOT code: Tire age The manufacturer of your BMW recom-
mends that all tires, i.e. including the
spare wheel, be replaced regardless of
the actual wear after 6 years at the lat-
est.
The tire's date of manufacture is indi-
cated on the sidewall:
DOT... 2605 indicates that the tire was
manufactured in week 26 of 2005. Uniform Tire Quality Grading Quality grades can be found where
applicable on the tire sidewall between
tread shoulder and maximum section
width. For example: e.g.
Manufacturer's code
for tire brand
Tire size and tire model
Tire age
DOT xxxx xxx 2605
DOT Quality Grades Tread wear
Traction AA A B C
Temperature A B C
All passenger car tires must con-
form to Federal Safety Require-
ments in addition to these grades.< Tread wear The tread wear grade is a comparative
rating based on the wear rate of the tire
when tested under controlled condi-
tions on a specified government test
course.
For example, a tire graded 150 would
wear one and one-half, 1γ, times as
well on the government course as a tire
graded 100. The relative performance
of tires depends upon the actual condi-
tions of their use, however, and may
depart significantly from the norm due
to variations in driving habits, service
practices and differences in road char-
acteristics and climate.
Page 165 of 202
165n
OverviewControlsMaintenanceRepairsDataIndex
Lamps and bulbs Changing a wheel Light-emitting diodes LEDs Light-emitting diodes installed behind
translucent lenses serve as the light
source for many of the controls and dis-
plays in your vehicle. The concept
behind their operation is related to that
employed for lasers.
Do not remove the covers, and
never stare into the unfiltered light
several hours, as irritation of the retina
could result.<
Safety precautions to observe in
the event of a flat and during all
tire changes:
Park the vehicle as far as possible from
passing traffic. Park on a firm, flat, sur-
face. Switch on the hazard warning
flashers.
Turn the steering wheel to the straight-
ahead position, remove the key and
engage the steering lock. Shift into 1st
or reverse, selector lever in Park with
automatic transmission, and engage the
handbrake.
All passengers should be outside the
vehicle and well away from your imme-
diate working area, behind a guardrail,
for instance.
If a warning triangle or portable hazard
warning lamp is required, set it up on
the roadside at an appropriate distance
from the rear of the vehicle. Comply
with all safety guidelines and regula-
tions.
Change the wheel only on a level, firm
surface that is not slippery. The vehicle
or the jack could slip to the side if you
attempt to raise the vehicle on a soft
or slippery surface such as snow, ice,
tiles, etc.
Position the jack on a firm support sur-
face.
Do not place wooden blocks or similar
objects under the jack. If this is done,
the jack might not be able to reach its
full support capacity because of the
limited height. To avoid serious or fatal
injury: never lie under the vehicle, and
never start the engine while it is sup-
ported by the jack.<
Your BMW has either a compact wheel
for temporary use to ensure your mobil-
ity, or a spare wheel of the size 235/
65 R 17. Please observe the differences
in handling when removing the wheel
from the cargo area.
Page 166 of 202
166n
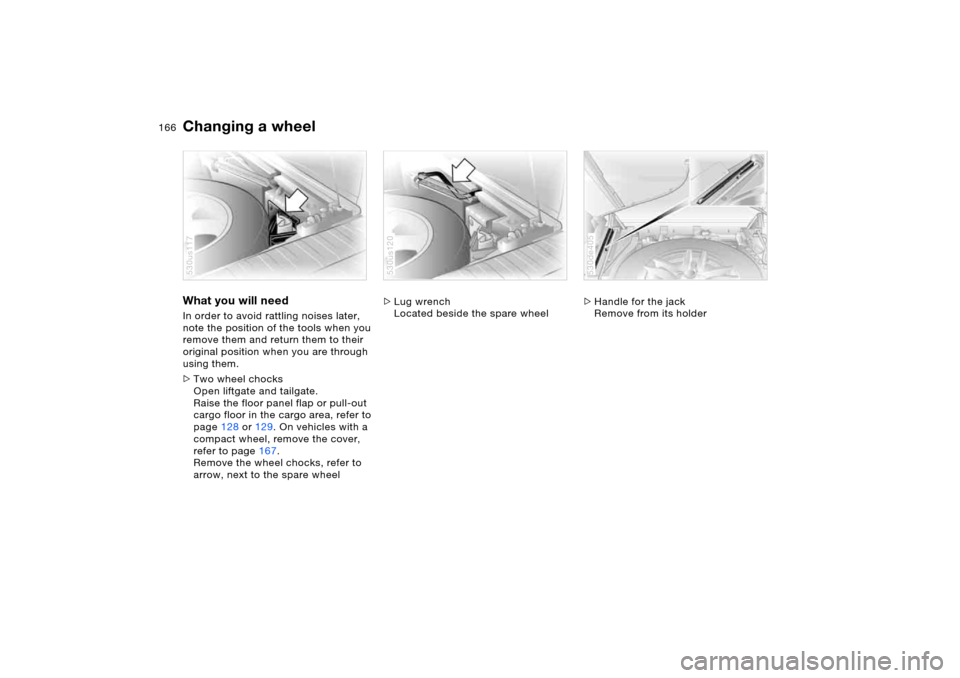
Changing a wheel What you will need In order to avoid rattling noises later,
note the position of the tools when you
remove them and return them to their
original position when you are through
using them.
>Two wheel chocks
Open liftgate and tailgate.
Raise the floor panel flap or pull-out
cargo floor in the cargo area, refer to
page128 or129. On vehicles with a
compact wheel, remove the cover,
refer to page167.
Remove the wheel chocks, refer to
arrow, next to the spare wheel 530us117
>Lug wrench
Located beside the spare wheel 530us120
>Handle for the jack
Remove from its holder530de405
Page 167 of 202
167n
OverviewControlsMaintenanceRepairsDataIndex
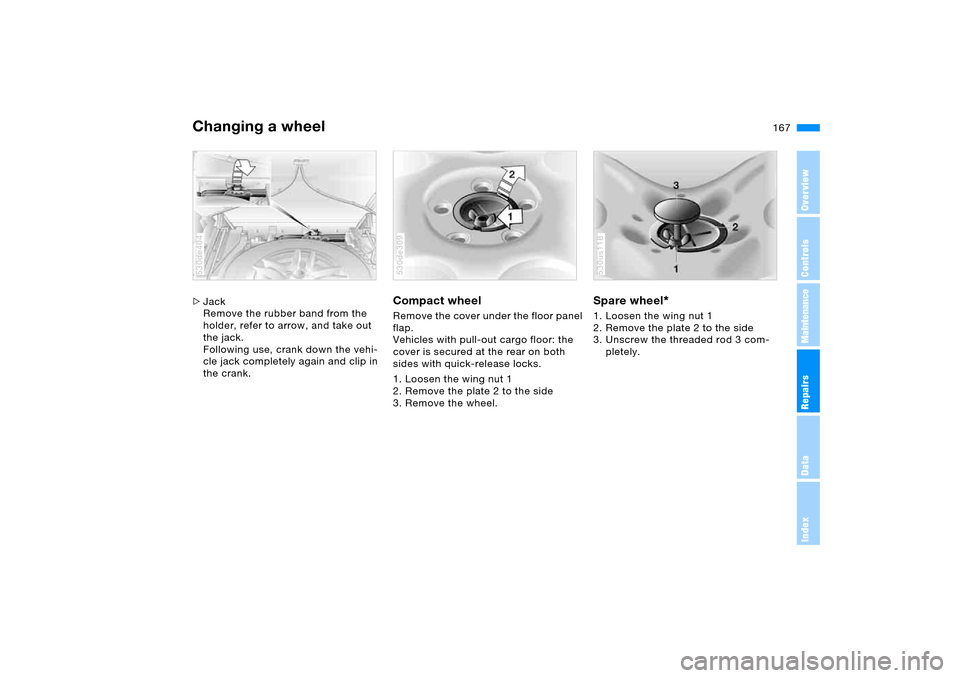
Changing a wheel >Jack
Remove the rubber band from the
holder, refer to arrow, and take out
the jack.
Following use, crank down the vehi-
cle jack completely again and clip in
the crank.530de404
Compact wheel Remove the cover under the floor panel
flap.
Vehicles with pull-out cargo floor: the
cover is secured at the rear on both
sides with quick-release locks.
1. Loosen the wing nut 1
2. Remove the plate 2 to the side
3. Remove the wheel.530de309
Spare wheel
*
1. Loosen the wing nut 1
2. Remove the plate 2 to the side
3. Unscrew the threaded rod 3 com-
pletely. 530us118
Page 168 of 202
168n
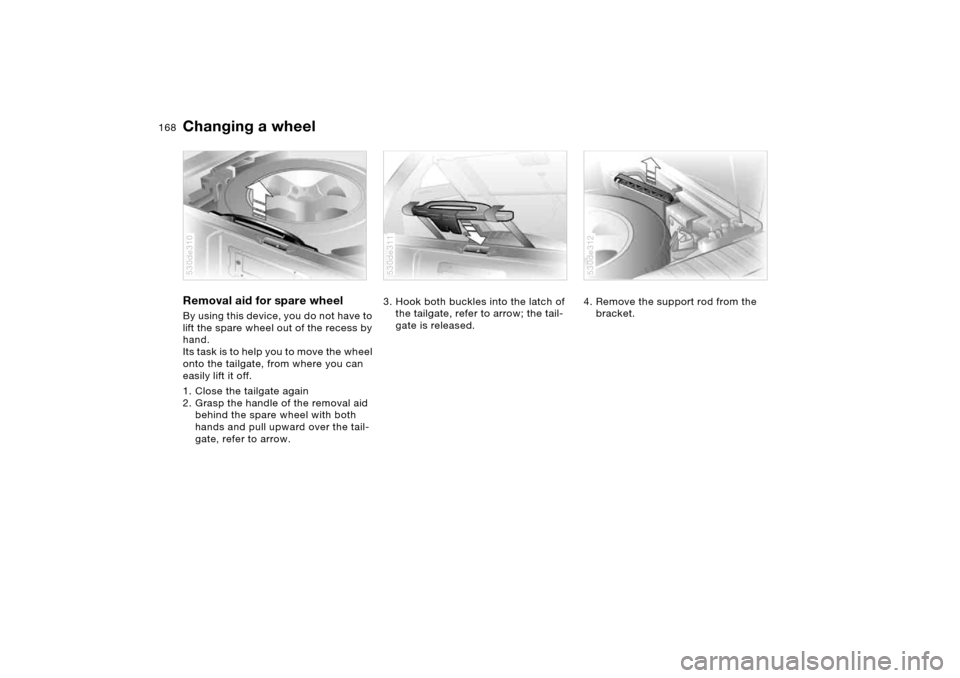
Changing a wheel Removal aid for spare wheel By using this device, you do not have to
lift the spare wheel out of the recess by
hand.
Its task is to help you to move the wheel
onto the tailgate, from where you can
easily lift it off.
1. Close the tailgate again
2. Grasp the handle of the removal aid
behind the spare wheel with both
hands and pull upward over the tail-
gate, refer to arrow. 530de310
3. Hook both buckles into the latch of
the tailgate, refer to arrow; the tail-
gate is released. 530de311
4. Remove the support rod from the
bracket. 530de312
Page 169 of 202
169n
OverviewControlsMaintenanceRepairsDataIndex
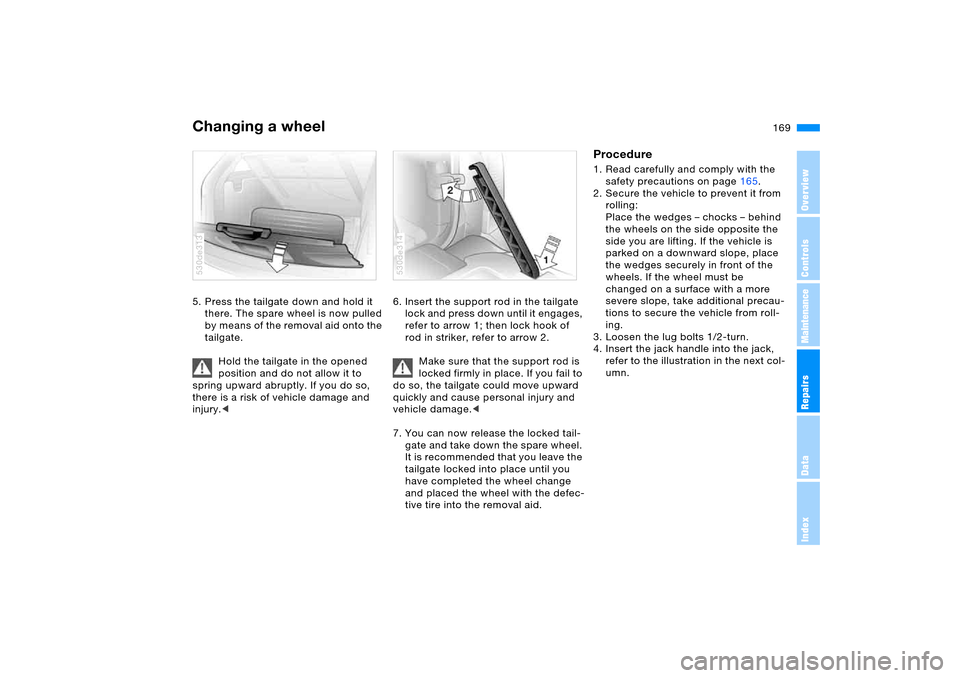
Changing a wheel 5. Press the tailgate down and hold it
there. The spare wheel is now pulled
by means of the removal aid onto the
tailgate.
Hold the tailgate in the opened
position and do not allow it to
spring upward abruptly. If you do so,
there is a risk of vehicle damage and
injury.<530de313
6. Insert the support rod in the tailgate
lock and press down until it engages,
refer to arrow 1; then lock hook of
rod in striker, refer to arrow 2.
Make sure that the support rod is
locked firmly in place. If you fail to
do so, the tailgate could move upward
quickly and cause personal injury and
vehicle damage.<
7. You can now release the locked tail-
gate and take down the spare wheel.
It is recommended that you leave the
tailgate locked into place until you
have completed the wheel change
and placed the wheel with the defec-
tive tire into the removal aid. 530de314
Procedure1. Read carefully and comply with the
safety precautions on page165.
2. Secure the vehicle to prevent it from
rolling:
Place the wedges – chocks – behind
the wheels on the side opposite the
side you are lifting. If the vehicle is
parked on a downward slope, place
the wedges securely in front of the
wheels. If the wheel must be
changed on a surface with a more
severe slope, take additional precau-
tions to secure the vehicle from roll-
ing.
3. Loosen the lug bolts 1/2-turn.
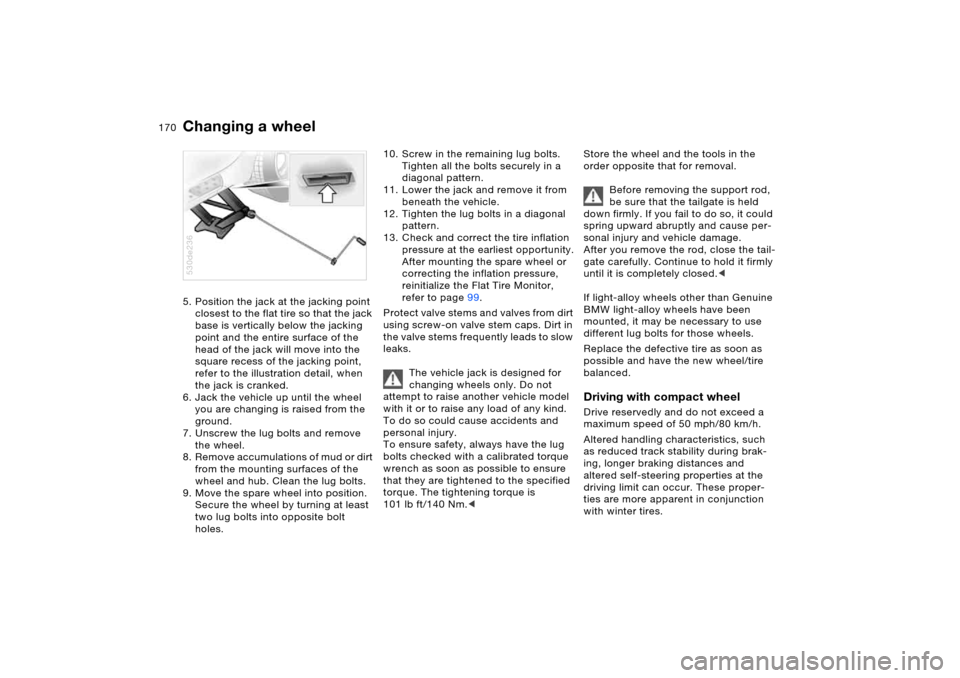
4. Insert the jack handle into the jack,
refer to the illustration in the next col-
umn.
Page 170 of 202
170n
Changing a wheel5. Position the jack at the jacking point
closest to the flat tire so that the jack
base is vertically below the jacking
point and the entire surface of the
head of the jack will move into the
square recess of the jacking point,
refer to the illustration detail, when
the jack is cranked.
6. Jack the vehicle up until the wheel
you are changing is raised from the
ground.
7. Unscrew the lug bolts and remove
the wheel.
8. Remove accumulations of mud or dirt
from the mounting surfaces of the
wheel and hub. Clean the lug bolts.
9. Move the spare wheel into position.
Secure the wheel by turning at least
two lug bolts into opposite bolt
holes. 530de236
10. Screw in the remaining lug bolts.
Tighten all the bolts securely in a
diagonal pattern.
11. Lower the jack and remove it from
beneath the vehicle.
12. Tighten the lug bolts in a diagonal
pattern.
13. Check and correct the tire inflation
pressure at the earliest opportunity.
After mounting the spare wheel or
correcting the inflation pressure,
reinitialize the Flat Tire Monitor,
refer to page99.
Protect valve stems and valves from dirt
using screw-on valve stem caps. Dirt in
the valve stems frequently leads to slow
leaks.
The vehicle jack is designed for
changing wheels only. Do not
attempt to raise another vehicle model
with it or to raise any load of any kind.
To do so could cause accidents and
personal injury.
To ensure safety, always have the lug
bolts checked with a calibrated torque
wrench as soon as possible to ensure
that they are tightened to the specified
torque. The tightening torque is
101 lb ft/140 Nm.<
Store the wheel and the tools in the
order opposite that for removal.
Before removing the support rod,
be sure that the tailgate is held
down firmly. If you fail to do so, it could
spring upward abruptly and cause per-
sonal injury and vehicle damage.
After you remove the rod, close the tail-
gate carefully. Continue to hold it firmly
until it is completely closed.<
If light-alloy wheels other than Genuine
BMW light-alloy wheels have been
mounted, it may be necessary to use
different lug bolts for those wheels.
Replace the defective tire as soon as
possible and have the new wheel/tire
balanced. Driving with compact wheelDrive reservedly and do not exceed a
maximum speed of 50 mph/80 km/h.
Altered handling characteristics, such
as reduced track stability during brak-
ing, longer braking distances and
altered self-steering properties at the
driving limit can occur. These proper-
ties are more apparent in conjunction
with winter tires.