Cluster BMW X5 4.8I 2007 E70 User Guide
[x] Cancel search | Manufacturer: BMW, Model Year: 2007, Model line: X5 4.8I, Model: BMW X5 4.8I 2007 E70Pages: 272, PDF Size: 9.03 MB
Page 68 of 272
Driving
66 the stored speed is reached and maintained
again.
Warning lamp
The warning lamp lights up when the
cruise control has automatically been
deactivated by braking with the park-
ing brake or by a control intervention by DSC.
A message appears on the Control Display.
Resuming stored speed
Briefly press the button, arrow4. The stored
speed is resumed and maintained.
In the following cases the stored speed value is
deleted and can no longer be resumed:
>in case of an intervention of the driving sta-
bility control systems
>when transmission position N is engaged
>when the ignition is switched off
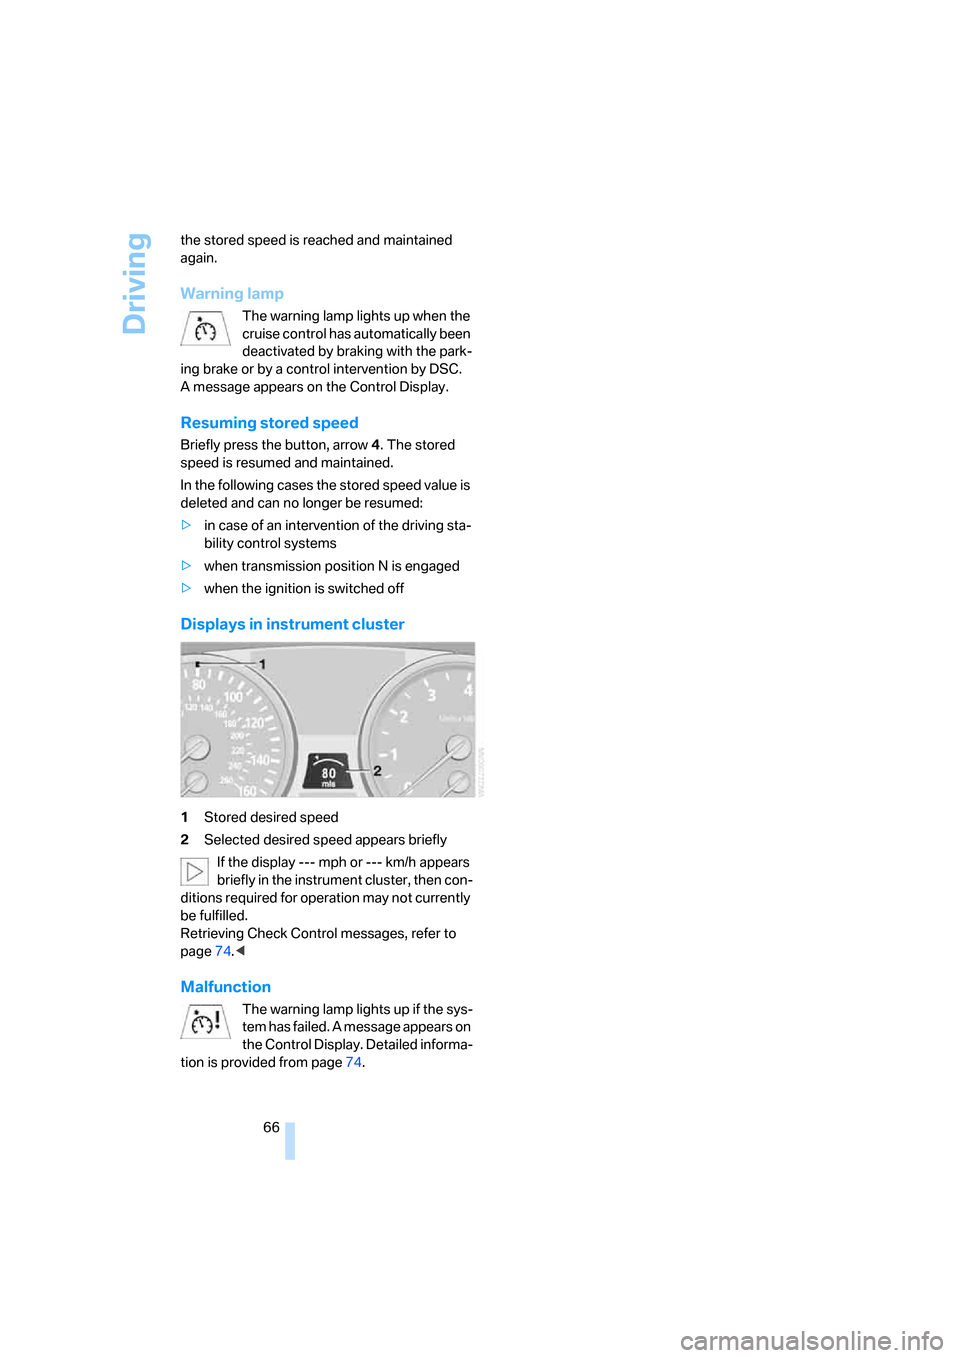
Displays in instrument cluster
1Stored desired speed
2Selected desired speed appears briefly
If the display --- mph or --- km/h appears
briefly in the instrument cluster, then con-
ditions required for operation may not currently
be fulfilled.
Retrieving Check Control messages, refer to
page74.<
Malfunction
The warning lamp lights up if the sys-
tem has failed. A message appears on
the Control Display. Detailed informa-
tion is provided from page74.
Page 69 of 272
Controls
67Reference
At a glance
Driving tips
Communications
Navigation
Entertainment
Mobility
Everything under control
Odometer, outside
temperature display, clock
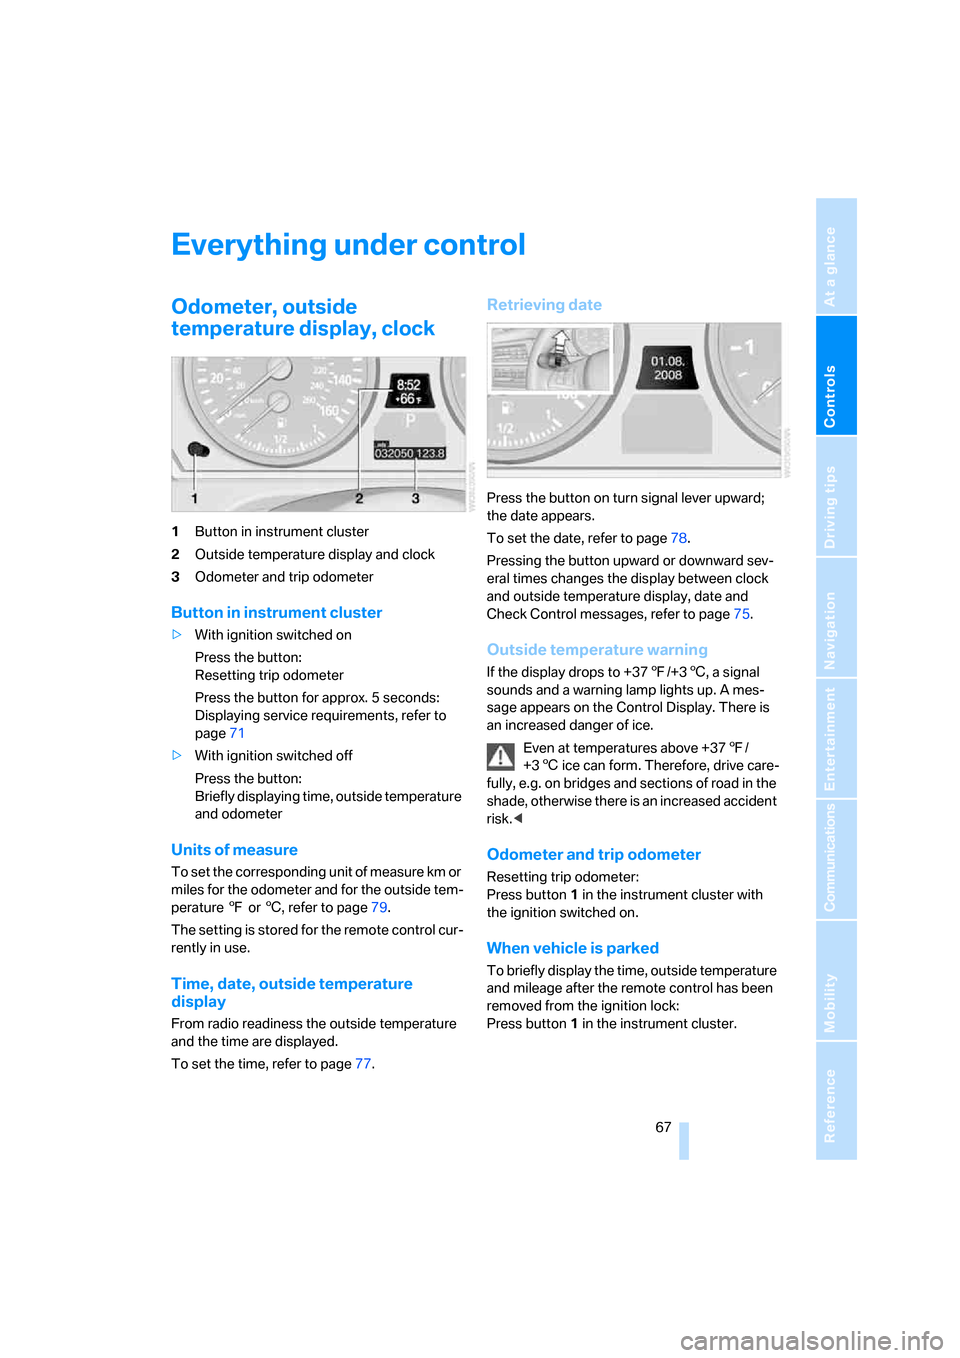
1Button in instrument cluster
2Outside temperature display and clock
3Odometer and trip odometer
Button in instrument cluster
>With ignition switched on
Press the button:
Resetting trip odometer
Press the button for approx. 5 seconds:
Displaying service requirements, refer to
page71
>With ignition switched off
Press the button:
Briefly displaying time, outside temperature
and odometer
Units of measure
To set the corresponding unit of measure km or
miles for the odometer and for the outside tem-
perature 7 or 6, refer to page79.
The setting is stored for the remote control cur-
rently in use.
Time, date, outside temperature
display
From radio readiness the outside temperature
and the time are displayed.
To set the time, refer to page77.
Retrieving date
Press the button on turn signal lever upward;
the date appears.
To set the date, refer to page78.
Pressing the button upward or downward sev-
eral times changes the display between clock
and outside temperature display, date and
Check Control messages, refer to page75.
Outside temperature warning
If the display drops to +377/+36, a signal
sounds and a warning lamp lights up. A mes-
sage appears on the Control Display. There is
an increased danger of ice.
Even at temperatures above +377/
+36 ice can form. Therefore, drive care-
fully, e.g. on bridges and sections of road in the
shade, otherwise there is an increased accident
risk.<
Odometer and trip odometer
Resetting trip odometer:
Press button 1 in the instrument cluster with
the ignition switched on.
When vehicle is parked
To briefly display the time, outside temperature
and mileage after the remote control has been
removed from the ignition lock:
Press button1 in the instrument cluster.
Page 71 of 272
Controls
69Reference
At a glance
Driving tips
Communications
Navigation
Entertainment
Mobility
Computer
Displays in instrument cluster
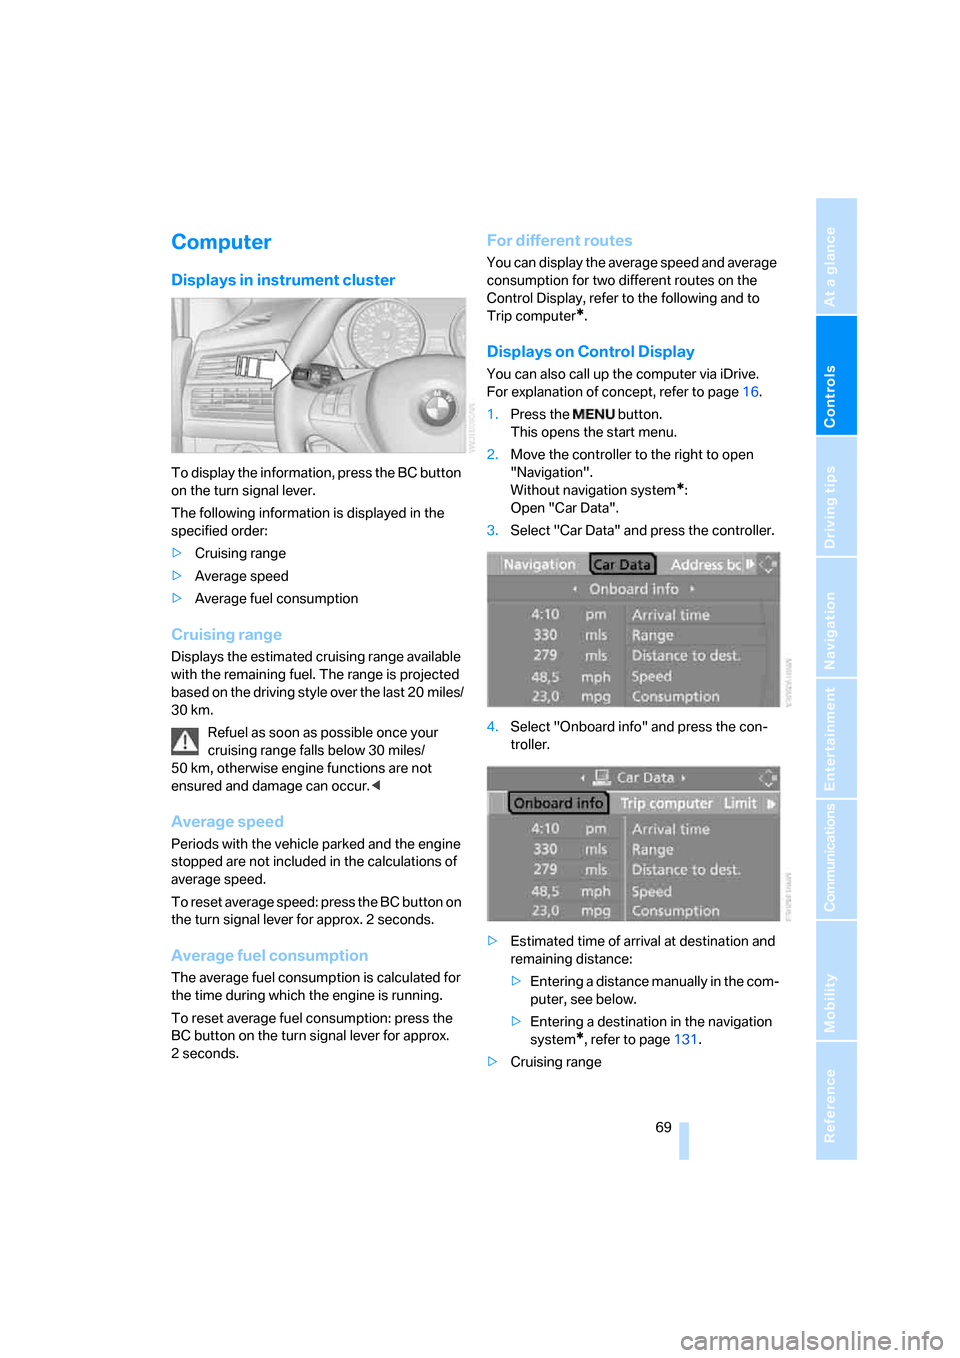
To display the information, press the BC button
on the turn signal lever.
The following information is displayed in the
specified order:
>Cruising range
>Average speed
>Average fuel consumption
Cruising range
Displays the estimated cruising range available
with the remaining fuel. The range is projected
based on the driving style over the last 20 miles/
30 km.
Refuel as soon as possible once your
cruising range falls below 30 miles/
50 km, otherwise engine functions are not
ensured and damage can occur.<
Average speed
Periods with the vehicle parked and the engine
stopped are not included in the calculations of
average speed.
To reset average speed: press the BC button on
the turn signal lever for approx. 2 seconds.
Average fuel consumption
The average fuel consumption is calculated for
the time during which the engine is running.
To reset average fuel consumption: press the
BC button on the turn signal lever for approx.
2seconds.
For different routes
You can display the average speed and average
consumption for two different routes on the
Control Display, refer to the following and to
Trip computer
*.
Displays on Control Display
You can also call up the computer via iDrive.
For explanation of concept, refer to page16.
1.Press the button.
This opens the start menu.
2.Move the controller to the right to open
"Navigation".
Without navigation system
*:
Open "Car Data".
3.Select "Car Data" and press the controller.
4.Select "Onboard info" and press the con-
troller.
>Estimated time of arrival at destination and
remaining distance:
>Entering a distance manually in the com-
puter, see below.
>Entering a destination in the navigation
system
*, refer to page131.
>Cruising range
Page 73 of 272
Controls
71Reference
At a glance
Driving tips
Communications
Navigation
Entertainment
Mobility
3.Press the controller.
Service requirements
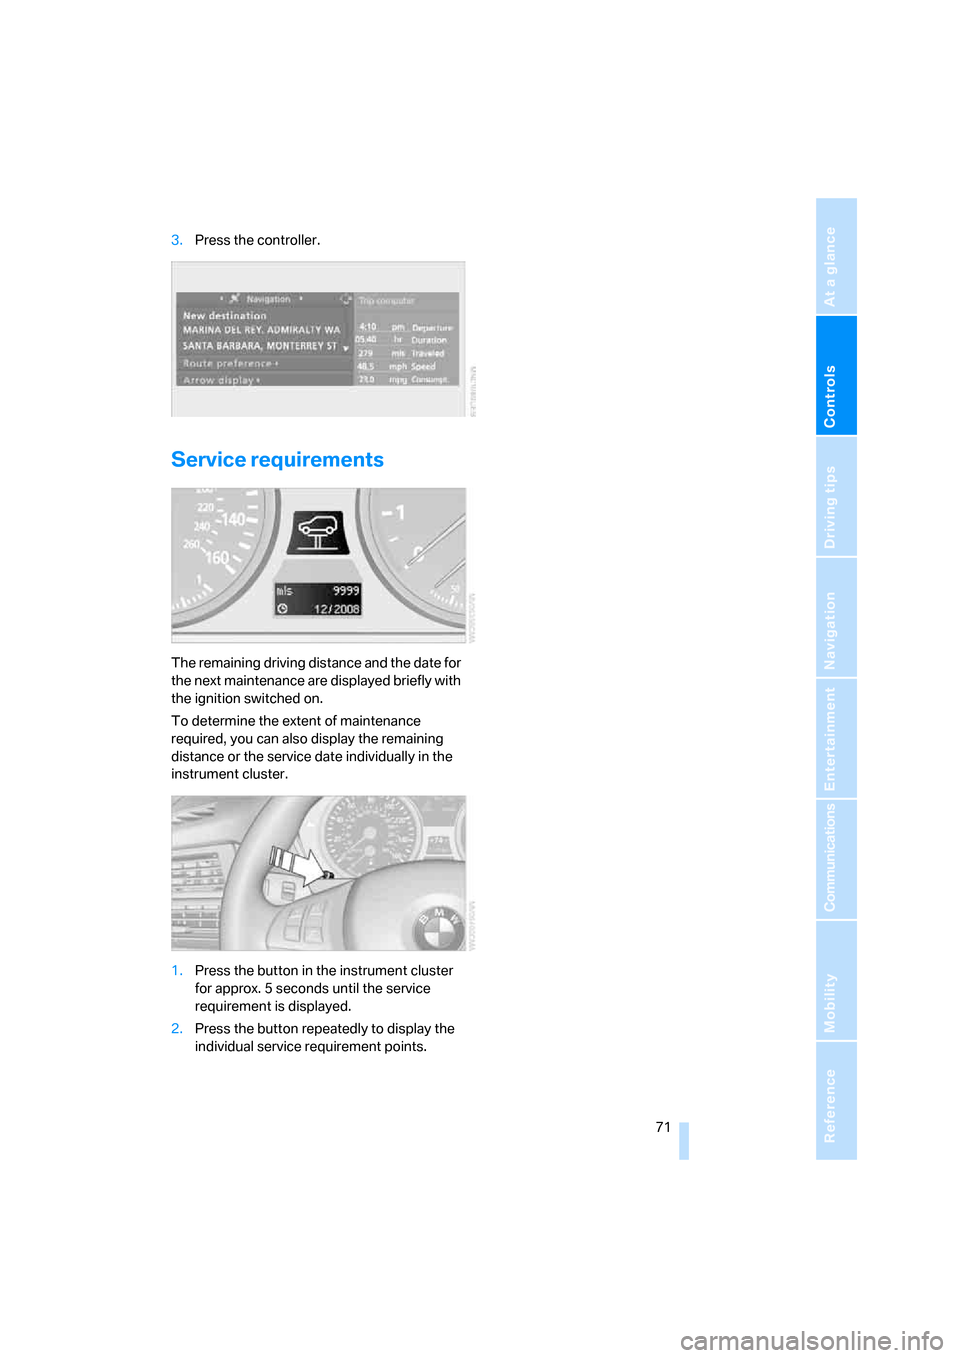
The remaining driving distance and the date for
the next maintenance are displayed briefly with
the ignition switched on.
To determine the extent of maintenance
required, you can also display the remaining
distance or the service date individually in the
instrument cluster.
1.Press the button in the instrument cluster
for approx. 5 seconds until the service
requirement is displayed.
2.Press the button repeatedly to display the
individual service requirement points.
Page 76 of 272
Everything under control
74
Check Control
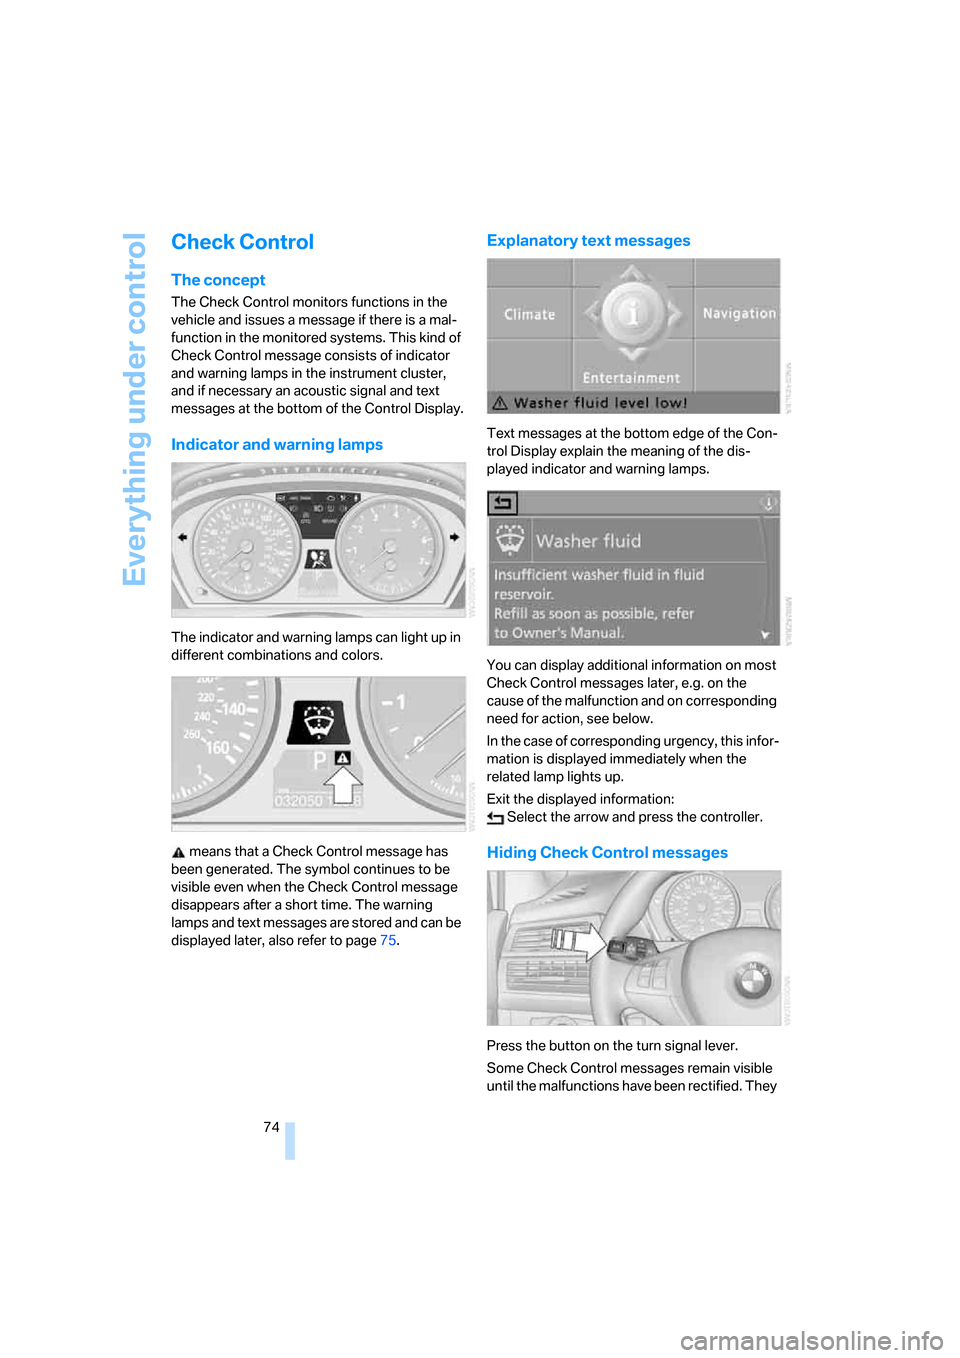
The concept
The Check Control monitors functions in the
vehicle and issues a message if there is a mal-
function in the monitored systems. This kind of
Check Control message consists of indicator
and warning lamps in the instrument cluster,
and if necessary an acoustic signal and text
messages at the bottom of the Control Display.
Indicator and warning lamps
The indicator and warning lamps can light up in
different combinations and colors.
means that a Check Control message has
been generated. The symbol continues to be
visible even when the Check Control message
disappears after a short time. The warning
lamps and text messages are stored and can be
displayed later, also refer to page75.
Explanatory text messages
Text messages at the bottom edge of the Con-
trol Display explain the meaning of the dis-
played indicator and warning lamps.
You can display additional information on most
Check Control messages later, e.g. on the
cause of the malfunction and on corresponding
need for action, see below.
In the case of corresponding urgency, this infor-
mation is displayed immediately when the
related lamp lights up.
Exit the displayed information:
Select the arrow and press the controller.
Hiding Check Control messages
Press the button on the turn signal lever.
Some Check Control messages remain visible
until the malfunctions have been rectified. They
Page 86 of 272
Technology for comfort, convenience and safety
84
Driving stability control
systems
Your BMW is equipped with an extended array
of systems designed to enhance and maintain
vehicle stability under extreme conditions.
ABS Antilock Brake System
ABS prevents locking of the wheels during
braking. Safe steering response is maintained
even during full braking. Active safety is thus
increased.
ABS is operational every time you start the
engine. Braking safely, refer to page123.
CBC Cornering Brake Control
When braking during curves or when braking
during a lane change, driving stability and steer-
ing response are improved further.
Electronic brake-force distribution
The system controls the brake pressure in the
rear wheels to ensure stable braking behavior.
DBC Dynamic Brake Control
When you apply the brakes rapidly, this system
automatically produces the maximum braking
force boost and thus helps to achieve the short-
est possible braking distance during full brak-
ing. This system exploits all of the benefits pro-
vided by ABS.
Do not reduce the pressure on the brake pedal
for the duration of the full braking.
DSC Dynamic Stability Control
DSC prevents traction loss in the driving wheels
when starting off and accelerating. DSC also
identifies unstable driving conditions, such as a
loss of traction at the rear of the vehicle or slid-
ing of the vehicle in its front wheels. In these
cases, DSC helps the vehicle maintain a safe
course within physical limits by reducing engine
output and through braking actions in the indi-
vidual wheels.The laws of physics cannot be repealed,
even with DSC. An appropriate driving
style remains the responsibility of the driver.
Therefore, do not reduce the additional safety
margin further by taking risks.<
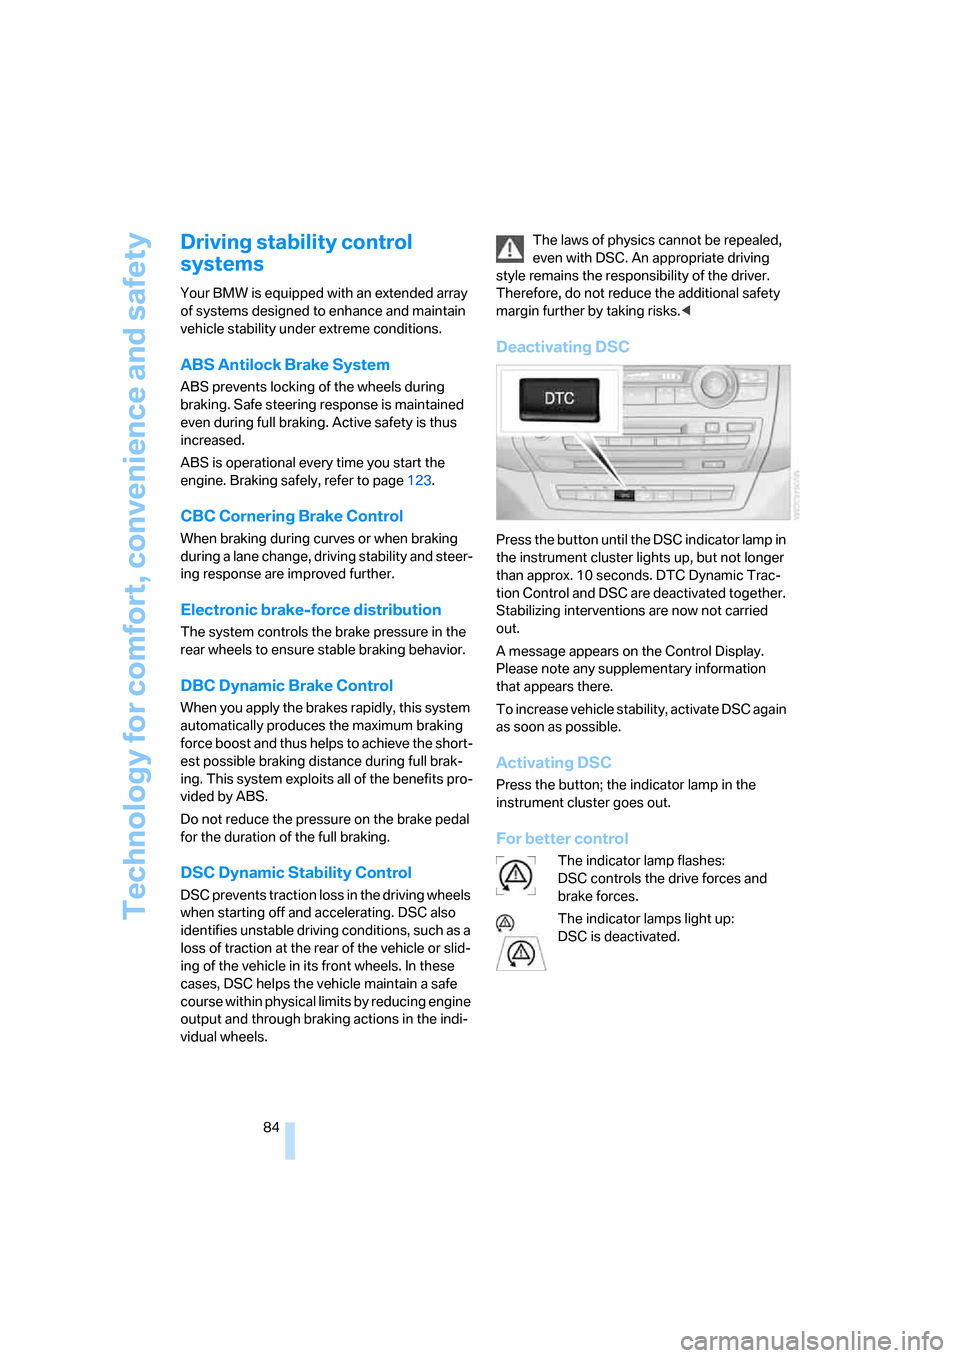
Deactivating DSC
Press the button until the DSC indicator lamp in
the instrument cluster lights up, but not longer
than approx. 10 seconds. DTC Dynamic Trac-
tion Control and DSC are deactivated together.
Stabilizing interventions are now not carried
out.
A message appears on the Control Display.
Please note any supplementary information
that appears there.
To increase vehicle stability, activate DSC again
as soon as possible.
Activating DSC
Press the button; the indicator lamp in the
instrument cluster goes out.
For better control
The indicator lamp flashes:
DSC controls the drive forces and
brake forces.
The indicator lamps light up:
DSC is deactivated.
Page 87 of 272
Controls
85Reference
At a glance
Driving tips
Communications
Navigation
Entertainment
Mobility
DTC Dynamic Traction Control
DTC is a version of DSC in which the drive out-
put is optimized for particular road conditions,
e.g. unplowed snow-covered roads. The sys-
tem assures the maximal drive output, but with
reduced driving stability. It is therefore neces-
sary to drive with appropriate caution.
You may find it useful to briefly activate DTC
under the following special circumstances:
>When driving in sand, on snowy inclines, in
slush or on unplowed, snow-covered road
surfaces
>When rocking a stuck vehicle free or start-
ing off in deep snow, sand or on loose
ground
>When driving with snow chains
*
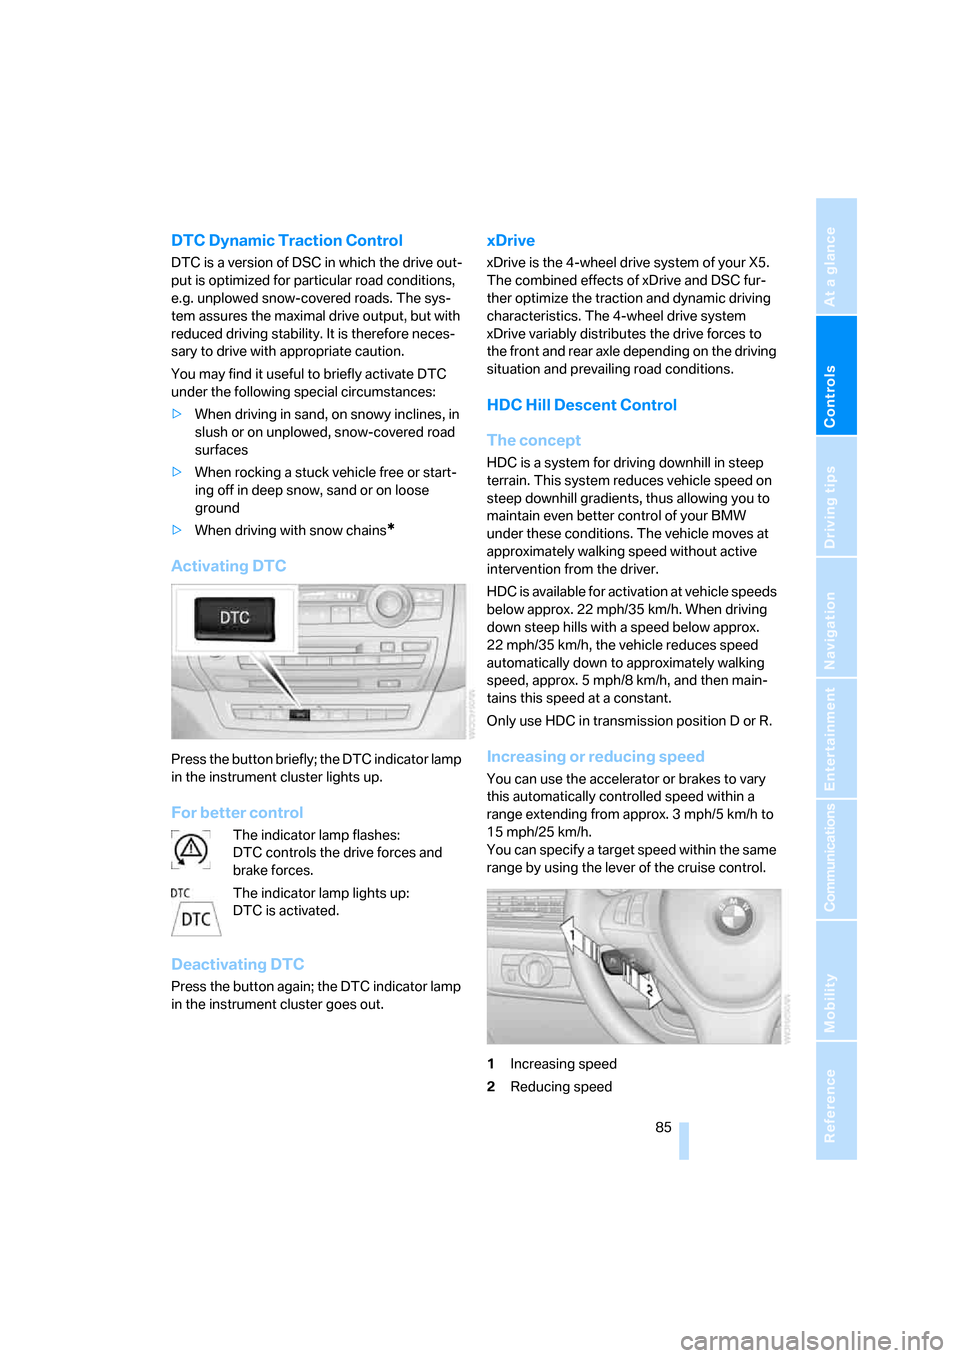
Activating DTC
Press the button briefly; the DTC indicator lamp
in the instrument cluster lights up.
For better control
The indicator lamp flashes:
DTC controls the drive forces and
brake forces.
The indicator lamp lights up:
DTC is activated.
Deactivating DTC
Press the button again; the DTC indicator lamp
in the instrument cluster goes out.
xDrive
xDrive is the 4-wheel drive system of your X5.
The combined effects of xDrive and DSC fur-
ther optimize the traction and dynamic driving
characteristics. The 4-wheel drive system
xDrive variably distributes the drive forces to
the front and rear axle depending on the driving
situation and prevailing road conditions.
HDC Hill Descent Control
The concept
HDC is a system for driving downhill in steep
terrain. This system reduces vehicle speed on
steep downhill gradients, thus allowing you to
maintain even better control of your BMW
under these conditions. The vehicle moves at
approximately walking speed without active
intervention from the driver.
HDC is available for activation at vehicle speeds
below approx. 22 mph/35 km/h. When driving
down steep hills with a speed below approx.
22 mph/35 km/h, the vehicle reduces speed
automatically down to approximately walking
speed, approx. 5 mph/8 km/h, and then main-
tains this speed at a constant.
Only use HDC in transmission position D or R.
Increasing or reducing speed
You can use the accelerator or brakes to vary
this automatically controlled speed within a
range extending from approx. 3 mph/5 km/h to
15 mph/25 km/h.
You can specify a target speed within the same
range by using the lever of the cruise control.
1Increasing speed
2Reducing speed
Page 88 of 272
Technology for comfort, convenience and safety
86
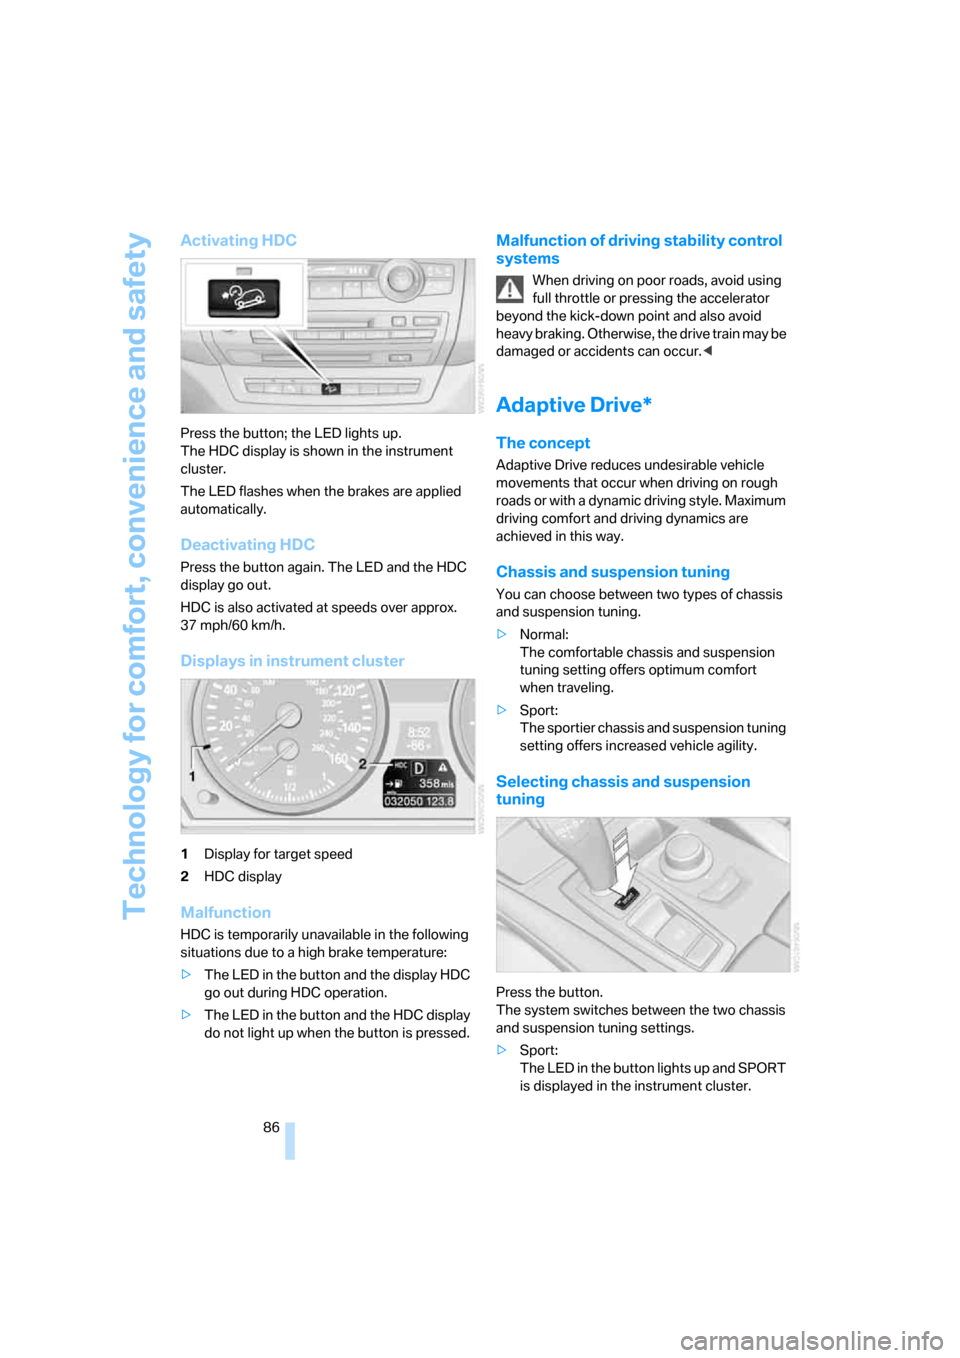
Activating HDC
Press the button; the LED lights up.
The HDC display is shown in the instrument
cluster.
The LED flashes when the brakes are applied
automatically.
Deactivating HDC
Press the button again. The LED and the HDC
display go out.
HDC is also activated at speeds over approx.
37 mph/60 km/h.
Displays in instrument cluster
1Display for target speed
2HDC display
Malfunction
HDC is temporarily unavailable in the following
situations due to a high brake temperature:
>The LED in the button and the display HDC
go out during HDC operation.
>The LED in the button and the HDC display
do not light up when the button is pressed.
Malfunction of driving stability control
systems
When driving on poor roads, avoid using
full throttle or pressing the accelerator
beyond the kick-down point and also avoid
heavy braking. Otherwise, the drive train may be
damaged or accidents can occur.<
Adaptive Drive*
The concept
Adaptive Drive reduces undesirable vehicle
movements that occur when driving on rough
roads or with a dynamic driving style. Maximum
driving comfort and driving dynamics are
achieved in this way.
Chassis and suspension tuning
You can choose between two types of chassis
and suspension tuning.
>Normal:
The comfortable chassis and suspension
tuning setting offers optimum comfort
when traveling.
>Sport:
The sportier chassis and suspension tuning
setting offers increased vehicle agility.
Selecting chassis and suspension
tuning
Press the button.
The system switches between the two chassis
and suspension tuning settings.
>Sport:
The LED in the button lights up and SPORT
is displayed in the instrument cluster.
Page 101 of 272
Controls
99Reference
At a glance
Driving tips
Communications
Navigation
Entertainment
Mobility
Activating Adaptive Head Light and
turning lamps
Turn the light switch to position 3, refer to
page97.
The Adaptive Head Light and the turning lamps
are active. The automatic headlamp control
is
switched on.
To avoid dazzling oncoming traffic, the Adap-
tive Head Light is not active when driving in
reverse and points toward the passenger side
when the vehicle is stopped. When driving in
reverse, only the turning lamps are active on
both sides.
Malfunction
The LED next to the symbol for automatic head-
lamp control flashes. Adaptive Head Light is
malfunctioning or has failed. Have the system
checked as soon as possible.
High beams/
roadside parking lamps
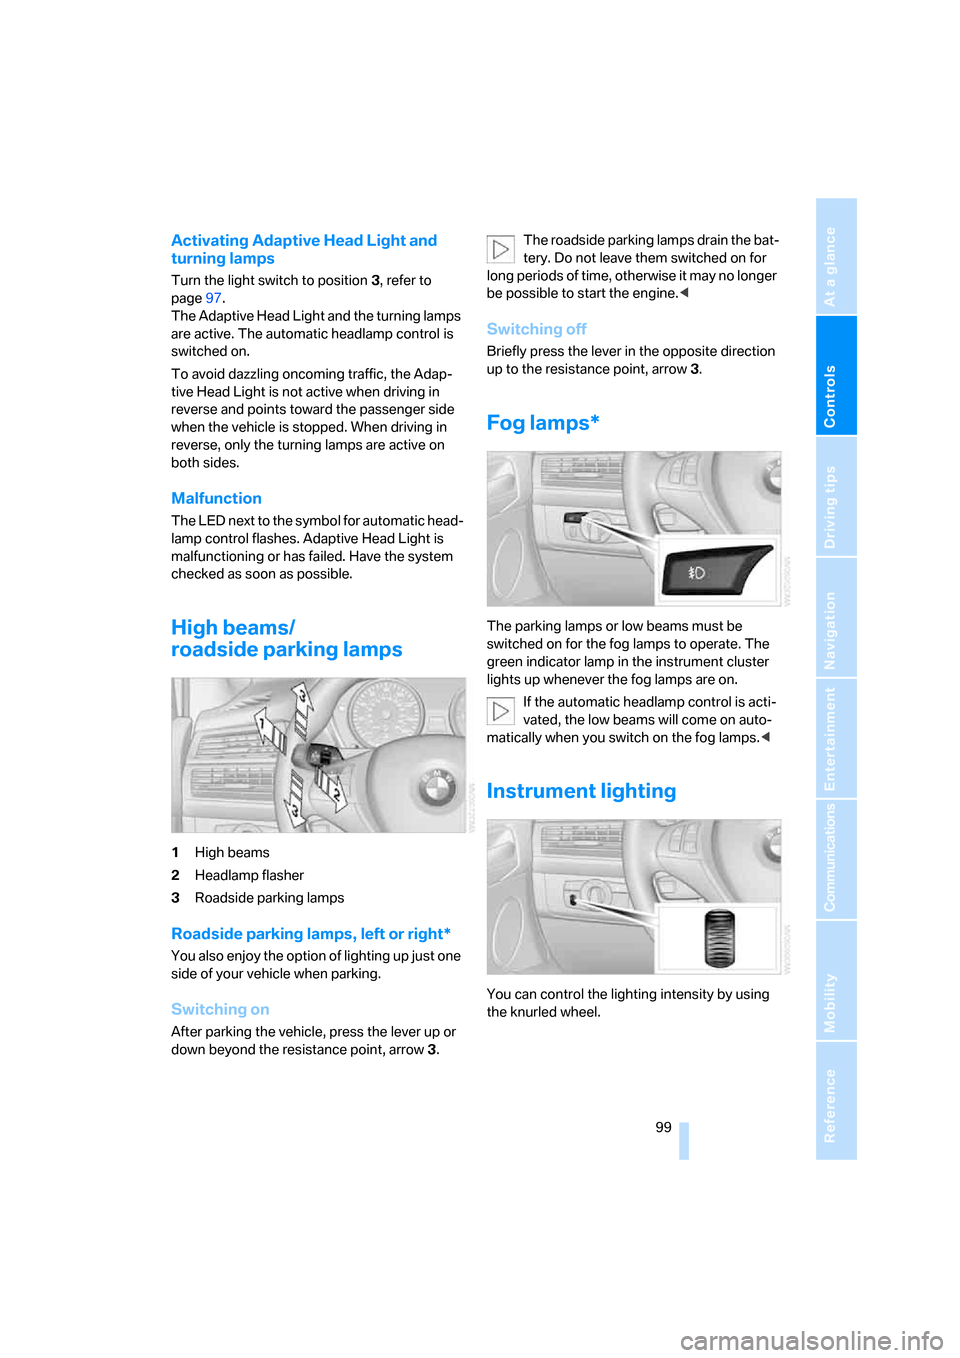
1High beams
2Headlamp flasher
3Roadside parking lamps
Roadside parking lamps, left or right*
You also enjoy the option of lighting up just one
side of your vehicle when parking.
Switching on
After parking the vehicle, press the lever up or
down beyond the resistance point, arrow 3.The roadside parking lamps drain the bat-
tery. Do not leave them switched on for
long periods of time, otherwise it may no longer
be possible to start the engine.<
Switching off
Briefly press the lever in the opposite direction
up to the resistance point, arrow 3.
Fog lamps*
The parking lamps or low beams must be
switched on for the fog lamps to operate. The
green indicator lamp in the instrument cluster
lights up whenever the fog lamps are on.
If the automatic headlamp control is acti-
vated, the low beams will come on auto-
matically when you switch on the fog lamps.<
Instrument lighting
You can control the lighting intensity by using
the knurled wheel.
Page 255 of 272
Reference 253
At a glance
Controls
Driving tips
Communications
Navigation
Entertainment
Mobility
"Categories" with satellite
radio163
CBC Cornering Brake
Control84
CBS Condition Based
Service226
"CD"155,165
CD, refer to Playing audio
tracks, DVD system in
rear178
CD/DVD player, DVD system
in rear173
CD changer165
– compressed audio files165
– controls154
– fast forward/reverse169
– random sequence168
– repeating a track168
– sampling tracks167
– selecting a CD166
– selecting a track166
– switching on/off154
– tone control155
– volume155
"CD" for DVD system in
rear174
CD player165
– compressed audio files165
– controls154
– fast forward/reverse169
– random sequence168
– repeating a track168
– sampling tracks167
– selecting a track166
– switching on/off154
– tone control155
– volume155
Cell phone, refer to Mobile
phone
Center armrest113
Center brake lamp231
Center console14
"Central locking"30
Central locking system29
– comfort access35
– from inside vehicle32Changes, technical
– refer to For your own
safety5
– refer to Parts and
accessories6
Changing language on
Control Display79
Changing tires220
Changing units of measure on
Control Display79
Changing wheels
232
CHECK button75
Check Control74
"Check Control
messages"75
Checking the air pressure,
refer to Tire inflation
pressure214
Children, transporting52
Child restraint fixing system
LATCH54
Child restraint systems52
Child-safety locks55
Child seats52
Chime, refer to Check
Control74
Chrome parts, care, refer to
Caring for your vehicle
brochure
Cigarette lighter115
Cleaning, refer to Caring for
your vehicle brochure
"Climate"47
Clock67
– 12h/24h mode78
– setting time77
Closing
– from inside32
– from outside30
Closing fuel filler cap212
Clothes hooks114
Cockpit10
Cold start, refer to Starting
engine56
"Color" for DVD system in
rear176Comfort access35
– observe in car wash36
– replacing battery37
Comfort area, refer to Around
the center console14
Comfort operation
– panorama glass
sunroof30,32
– panorama glass sunroof with
comfort access36
– windows30,32
– windows with comfort
access36
– with comfort access36
Comfort seat41
Comfort start, refer to Starting
engine56
"Communi-
cation"193,203,205
Compact Disc
– refer to CD changer165
– refer to CD player165
Compact wheel
– inflation pressure216
– wheel change232
Compartment for remote
control, refer to Ignition
lock56
Compartments, refer to
Storage compartments113
Compass, digital111
Computer69
– displays in instrument
cluster69
– displays on Control
Display69
– trip computer70
"Concierge"205
Condition Based Service
CBS226
"Confirmation"31
Connecting car vacuum
cleaner, refer to Connecting
electrical devices115
Connecting headphones173