start stop button BMW X5 4.8I 2007 E70 Owner's Manual
[x] Cancel search | Manufacturer: BMW, Model Year: 2007, Model line: X5 4.8I, Model: BMW X5 4.8I 2007 E70Pages: 272, PDF Size: 9.03 MB
Page 13 of 272
At a glance
11Reference
Controls
Driving tips
Communications
Navigation
Entertainment
Mobility
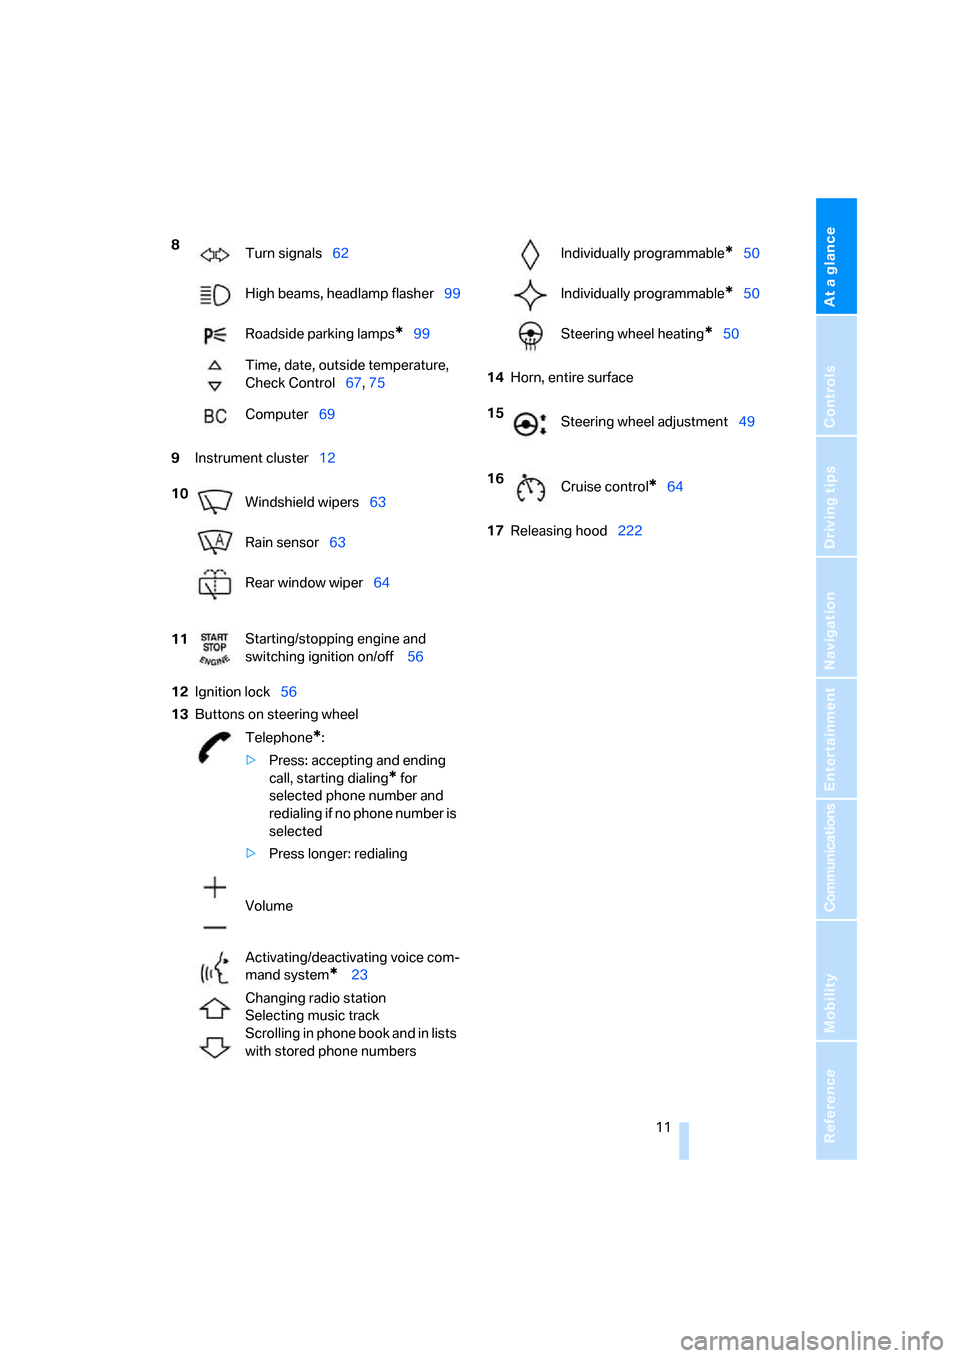
9Instrument cluster12
12Ignition lock56
13Buttons on steering wheel14Horn, entire surface
17Releasing hood222 8
Turn signals62
High beams, headlamp flasher99
Roadside parking lamps
*99
Time, date, outside temperature,
Check Control67, 75
Computer69
10
Windshield wipers63
Rain sensor63
Rear window wiper64
11Starting/stopping engine and
switching ignition on/off 56
Telephone
*:
>Press: accepting and ending
call, starting dialing
* for
selected phone number and
redialing if no phone number is
selected
>Press longer: redialing
Volume
Activating/deactivating voice com-
mand system
* 23
Changing radio station
Selecting music track
Scrolling in phone book and in lists
with stored phone numbers
Individually programmable*50
Individually programmable
*50
Steering wheel heating
*50
15
Steering wheel adjustment49
16
Cruise control
*64
Page 34 of 272
Opening and closing
32 2.Turning the key a second time unlocks the
remaining doors and the liftgate.
Comfort operation
You also operate the windows and the pan-
orama glass sunroof
* from the driver's door
lock.
Turn and hold the key in the positions for
unlocking or locking.
Watch during the closing process to be
sure that no one is injured. Releasing the
key stops the operation.<
Manual operation
In the event of an electrical malfunction, you can
turn a key all the way to the right or left in the
door lock to lock or unlock the driver's door.
Opening and closing: from
inside
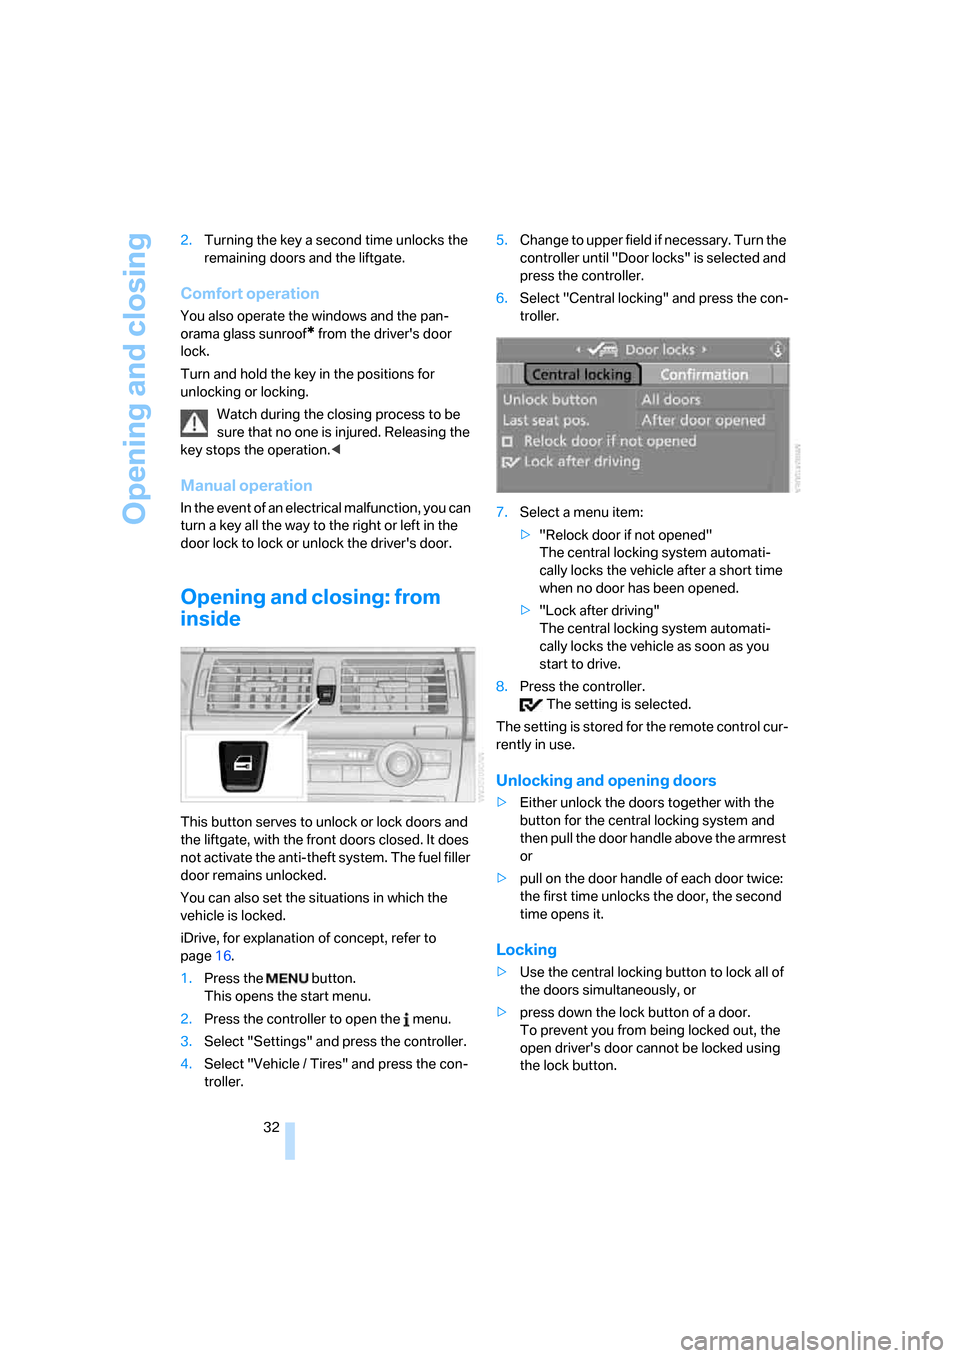
This button serves to unlock or lock doors and
the liftgate, with the front doors closed. It does
not activate the anti-theft system. The fuel filler
door remains unlocked.
You can also set the situations in which the
vehicle is locked.
iDrive, for explanation of concept, refer to
page16.
1.Press the button.
This opens the start menu.
2.Press the controller to open the menu.
3.Select "Settings" and press the controller.
4.Select "Vehicle / Tires" and press the con-
troller.5.Change to upper field if necessary. Turn the
controller until "Door locks" is selected and
press the controller.
6.Select "Central locking" and press the con-
troller.
7.Select a menu item:
>"Relock door if not opened"
The central locking system automati-
cally locks the vehicle after a short time
when no door has been opened.
>"Lock after driving"
The central locking system automati-
cally locks the vehicle as soon as you
start to drive.
8.Press the controller.
The setting is selected.
The setting is stored for the remote control cur-
rently in use.
Unlocking and opening doors
>Either unlock the doors together with the
button for the central locking system and
then pull the door handle above the armrest
or
>pull on the door handle of each door twice:
the first time unlocks the door, the second
time opens it.
Locking
>Use the central locking button to lock all of
the doors simultaneously, or
>press down the lock button of a door.
To prevent you from being locked out, the
open driver's door cannot be locked using
the lock button.
Page 38 of 272
Opening and closing
36 Please make sure that all electronic sys-
tems/consumers are switched off before
locking to save the battery.<
Comfort closing
Hold a finger or the back of a hand on the sur-
face, arrow2.
The windows and the panorama glass sunroof
*
are closed.
Watch during the closing process to be
sure that no one is injured. Removing the
hand from the door handle stops the closing
process immediately.<
Opening liftgate
Press the button on the liftgate.
This corresponds to pressing the button.
If a remote control accidentally left in the
cargo bay is detected in the locked vehi-
cle after closing the liftgate, the liftgate opens
again. The hazard warning flashers flash and a
signal
* sounds.<
Switching on radio readiness
By briefly pressing the Start/Stop button, you
switch on the radio readiness, refer to page56.
When doing so, do not depress the brake
pedal, otherwise the engine will start.<
Starting engine
You can start the engine or switch on the igni-
tion if a remote control is located in the interior
of the vehicle. It need not be inserted in the igni-
tion lock, refer to page56.
As long as no remote control is detected in the
vehicle, it is only possible to restart the engine
within approx. 10 seconds after it is switched off
if no door has been opened.
Switching off engine
>Remote control not in ignition lock:
After switching off the engine, the transmis-
sion is automatically switched into trans-
mission position P.>Remote control in ignition lock:
If transmission position N is engaged, the
transmission remains in this position after
the engine is switched off.
Before driving into a car wash
The vehicle can roll if you proceed according to
the following steps:
1.Insert remote control into ignition lock.
2.Depress brake pedal.
3.Engage transmission position N.
4.Release the parking brake.
5.Switch off the engine.
6.Leave the remote control in the ignition
lock.
Malfunction
The comfort access function may malfunction
due to local radio waves. Then open or close the
vehicle with the buttons on the remote control
or with a key. To start the engine following this,
insert the remote control in the ignition lock.
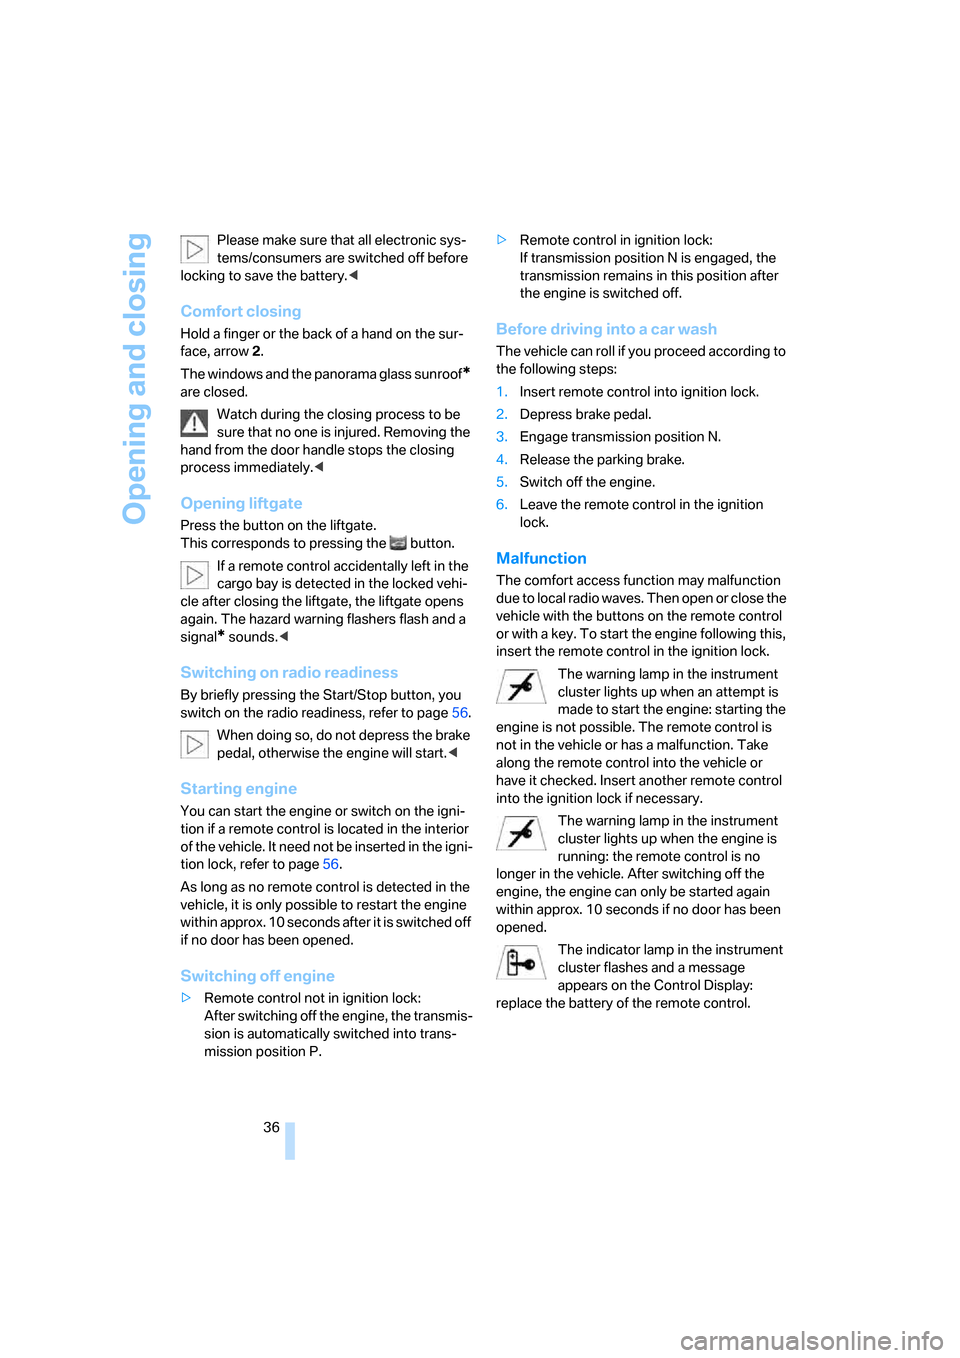
The warning lamp in the instrument
cluster lights up when an attempt is
made to start the engine: starting the
engine is not possible. The remote control is
not in the vehicle or has a malfunction. Take
along the remote control into the vehicle or
have it checked. Insert another remote control
into the ignition lock if necessary.
The warning lamp in the instrument
cluster lights up when the engine is
running: the remote control is no
longer in the vehicle. After switching off the
engine, the engine can only be started again
within approx. 10 seconds if no door has been
opened.
The indicator lamp in the instrument
cluster flashes and a message
appears on the Control Display:
replace the battery of the remote control.
Page 58 of 272
Driving
56
Driving
Ignition lock
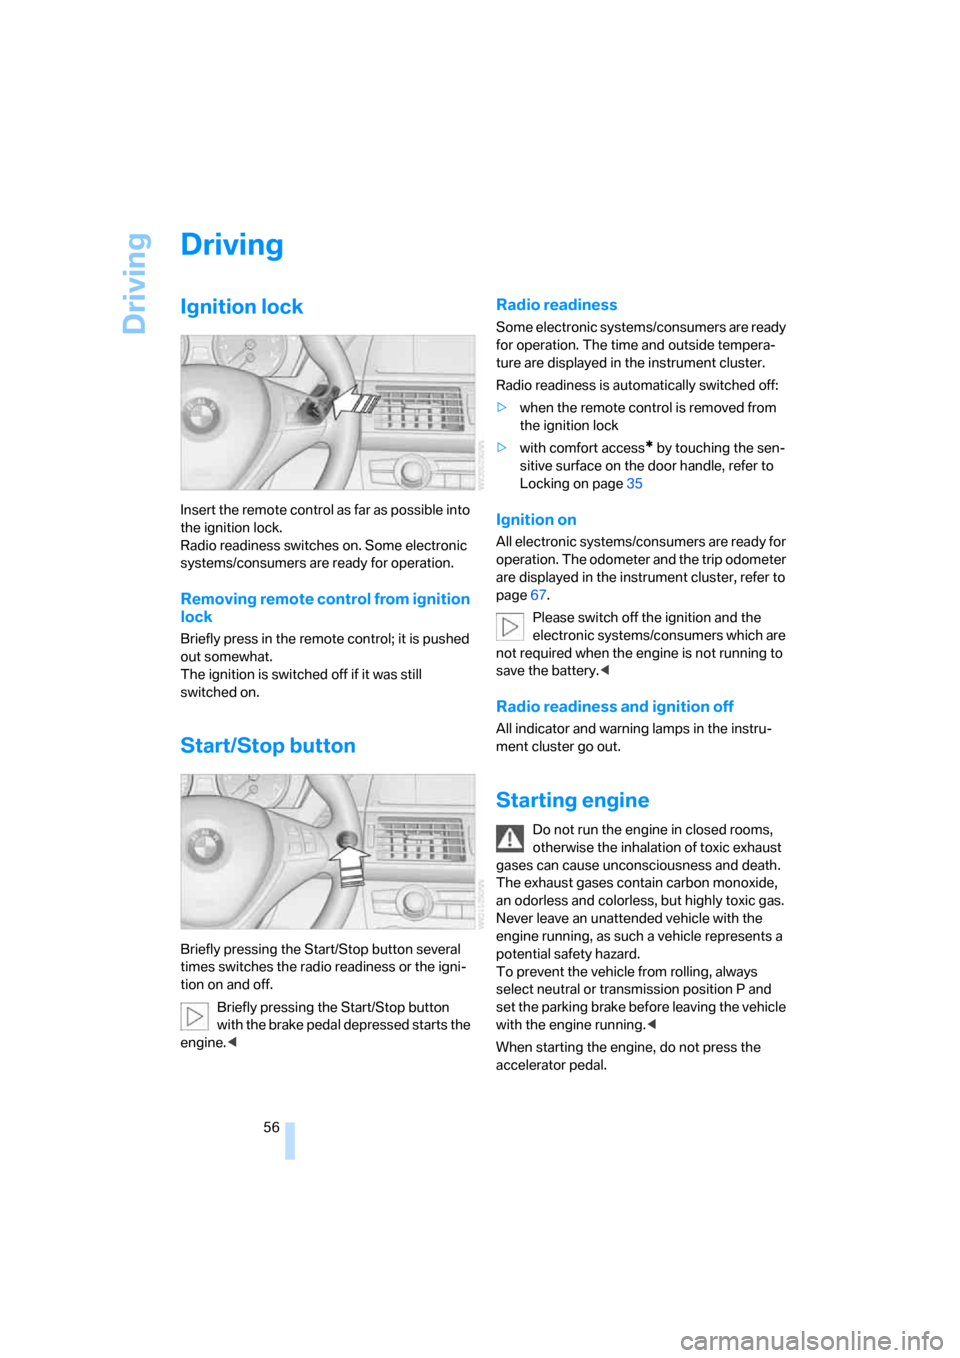
Insert the remote control as far as possible into
the ignition lock.
Radio readiness switches on. Some electronic
systems/consumers are ready for operation.
Removing remote control from ignition
lock
Briefly press in the remote control; it is pushed
out somewhat.
The ignition is switched off if it was still
switched on.
Start/Stop button
Briefly pressing the Start/Stop button several
times switches the radio readiness or the igni-
tion on and off.
Briefly pressing the Start/Stop button
with the brake pedal depressed starts the
engine.<
Radio readiness
Some electronic systems/consumers are ready
for operation. The time and outside tempera-
ture are displayed in the instrument cluster.
Radio readiness is automatically switched off:
>when the remote control is removed from
the ignition lock
>with comfort access
* by touching the sen-
sitive surface on the door handle, refer to
Locking on page35
Ignition on
All electronic systems/consumers are ready for
operation. The odometer and the trip odometer
are displayed in the instrument cluster, refer to
page67.
Please switch off the ignition and the
electronic systems/consumers which are
not required when the engine is not running to
save the battery.<
Radio readiness and ignition off
All indicator and warning lamps in the instru-
ment cluster go out.
Starting engine
Do not run the engine in closed rooms,
otherwise the inhalation of toxic exhaust
gases can cause unconsciousness and death.
The exhaust gases contain carbon monoxide,
an odorless and colorless, but highly toxic gas.
Never leave an unattended vehicle with the
engine running, as such a vehicle represents a
potential safety hazard.
To prevent the vehicle from rolling, always
select neutral or transmission position P and
set the parking brake before leaving the vehicle
with the engine running.<
When starting the engine, do not press the
accelerator pedal.
Page 59 of 272
Controls
57Reference
At a glance
Driving tips
Communications
Navigation
Entertainment
Mobility
Do not allow the engine to warm up by leaving it
running while the vehicle remains stationary.
Instead, drive off at a moderate engine speed.
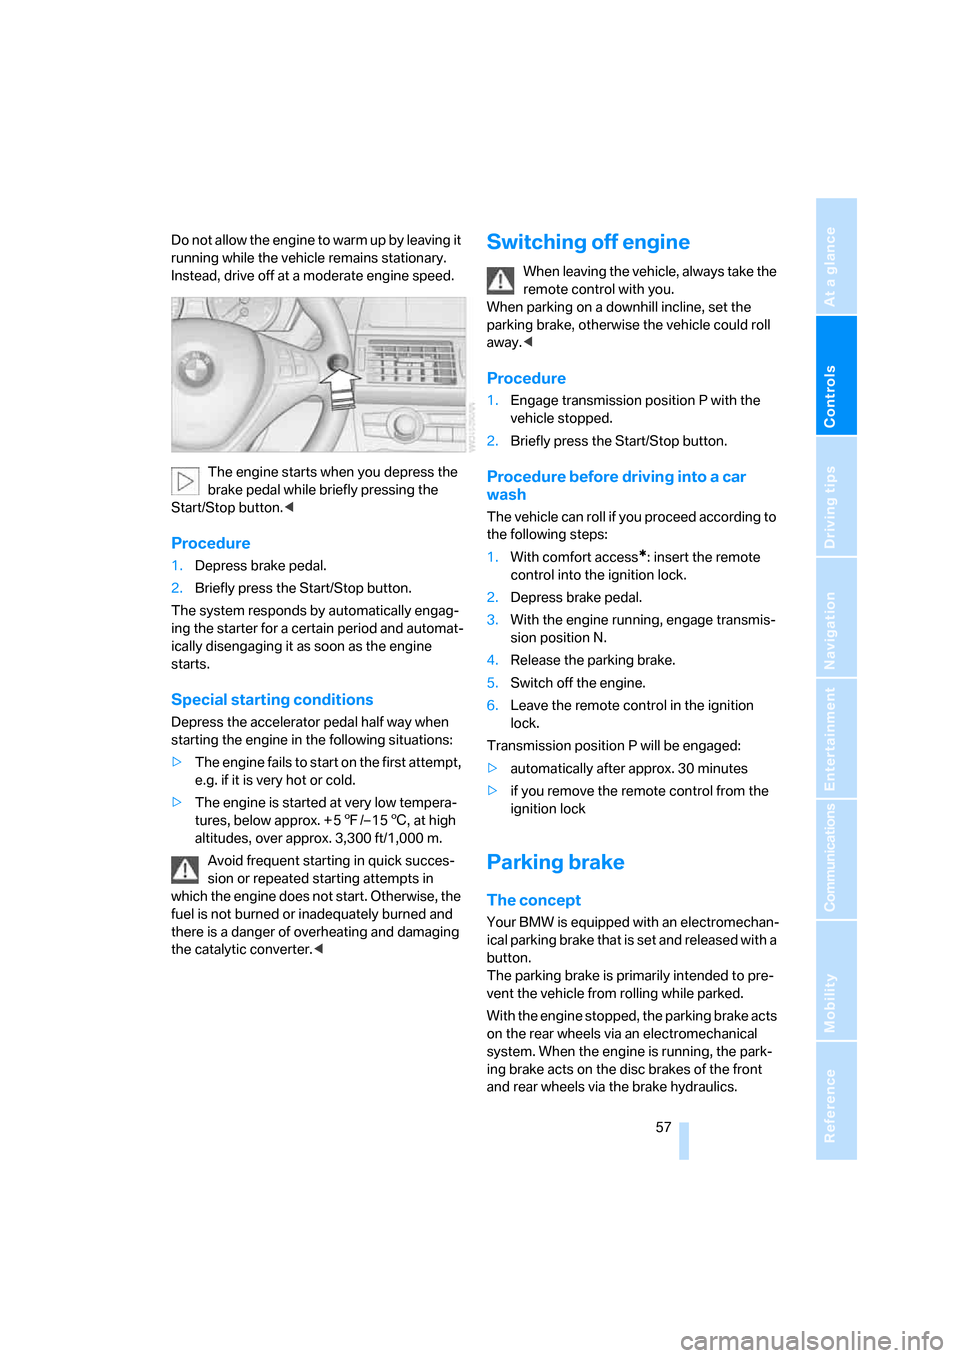
The engine starts when you depress the
brake pedal while briefly pressing the
Start/Stop button.<
Procedure
1.Depress brake pedal.
2.Briefly press the Start/Stop button.
The system responds by automatically engag-
ing the starter for a certain period and automat-
ically disengaging it as soon as the engine
starts.
Special starting conditions
Depress the accelerator pedal half way when
starting the engine in the following situations:
>The engine fails to start on the first attempt,
e.g. if it is very hot or cold.
>The engine is started at very low tempera-
tures, below approx. + 57/– 156, at high
altitudes, over approx. 3,300 ft/1,000 m.
Avoid frequent starting in quick succes-
sion or repeated starting attempts in
which the engine does not start. Otherwise, the
fuel is not burned or inadequately burned and
there is a danger of overheating and damaging
the catalytic converter.<
Switching off engine
When leaving the vehicle, always take the
remote control with you.
When parking on a downhill incline, set the
parking brake, otherwise the vehicle could roll
away.<
Procedure
1.Engage transmission position P with the
vehicle stopped.
2.Briefly press the Start/Stop button.
Procedure before driving into a car
wash
The vehicle can roll if you proceed according to
the following steps:
1.With comfort access
*: insert the remote
control into the ignition lock.
2.Depress brake pedal.
3.With the engine running, engage transmis-
sion position N.
4.Release the parking brake.
5.Switch off the engine.
6.Leave the remote control in the ignition
lock.
Transmission position P will be engaged:
>automatically after approx. 30 minutes
>if you remove the remote control from the
ignition lock
Parking brake
The concept
Your BMW is equipped with an electromechan-
ical parking brake that is set and released with a
button.
The parking brake is primarily intended to pre-
vent the vehicle from rolling while parked.
With the engine stopped, the parking brake acts
on the rear wheels via an electromechanical
system. When the engine is running, the park-
ing brake acts on the disc brakes of the front
and rear wheels via the brake hydraulics.
Page 71 of 272
Controls
69Reference
At a glance
Driving tips
Communications
Navigation
Entertainment
Mobility
Computer
Displays in instrument cluster
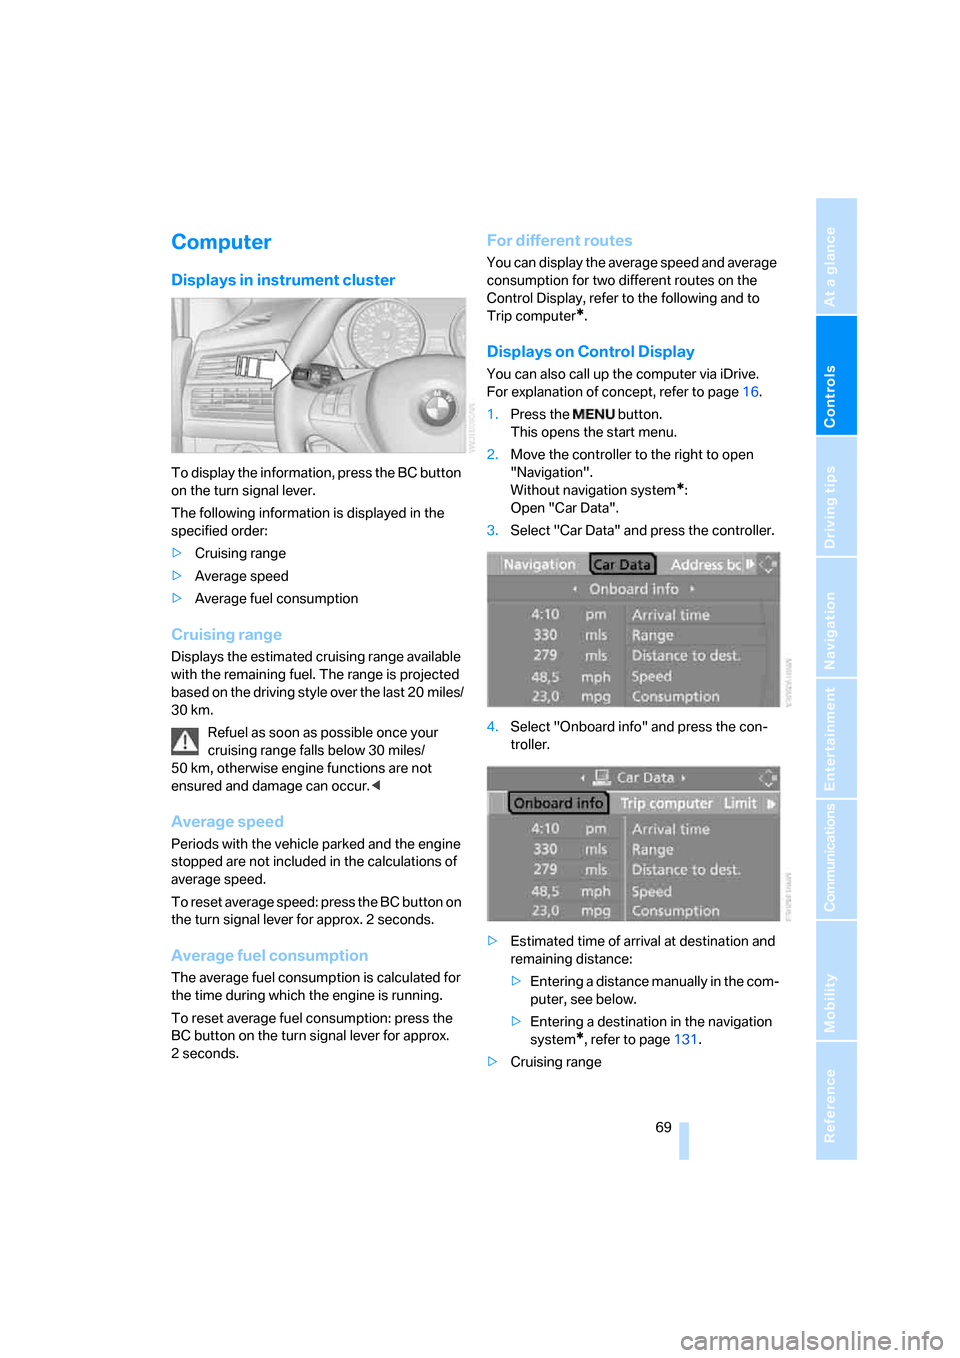
To display the information, press the BC button
on the turn signal lever.
The following information is displayed in the
specified order:
>Cruising range
>Average speed
>Average fuel consumption
Cruising range
Displays the estimated cruising range available
with the remaining fuel. The range is projected
based on the driving style over the last 20 miles/
30 km.
Refuel as soon as possible once your
cruising range falls below 30 miles/
50 km, otherwise engine functions are not
ensured and damage can occur.<
Average speed
Periods with the vehicle parked and the engine
stopped are not included in the calculations of
average speed.
To reset average speed: press the BC button on
the turn signal lever for approx. 2 seconds.
Average fuel consumption
The average fuel consumption is calculated for
the time during which the engine is running.
To reset average fuel consumption: press the
BC button on the turn signal lever for approx.
2seconds.
For different routes
You can display the average speed and average
consumption for two different routes on the
Control Display, refer to the following and to
Trip computer
*.
Displays on Control Display
You can also call up the computer via iDrive.
For explanation of concept, refer to page16.
1.Press the button.
This opens the start menu.
2.Move the controller to the right to open
"Navigation".
Without navigation system
*:
Open "Car Data".
3.Select "Car Data" and press the controller.
4.Select "Onboard info" and press the con-
troller.
>Estimated time of arrival at destination and
remaining distance:
>Entering a distance manually in the com-
puter, see below.
>Entering a destination in the navigation
system
*, refer to page131.
>Cruising range
Page 89 of 272
Controls
87Reference
At a glance
Driving tips
Communications
Navigation
Entertainment
Mobility
>Normal:
The LED in the button goes out.
The selection of the chassis and suspension
tuning setting is stored for the remote control
currently in use.
Self-leveling suspension*
Malfunction
The warning lamp for self-leveling
suspension lights up yellow and a
message is shown on the Control
Display. A malfunction has occurred in the self-
leveling suspension. Stop and check the vehi-
cle. If it is considerably lower at the rear than at
the front, and possibly also on one side – rear
left compared to rear right –, proceed to the
nearest BMW Sports Activity Vehicle Center or
a workshop that works according to BMW
repair procedures with correspondingly trained
personnel. Drive with appropriate caution in the
meantime. The vehicle has reduced ground
clearance and driving comfort may be notice-
ably reduced. Even if the orientation of the vehi-
cle is normal, when a malfunction is indicated
on the display, you should proceed to the near-
est BMW Sports Activity Vehicle Center or a
workshop that works according to BMW guide-
lines and uses appropriately trained personnel.
FTM Flat Tire Monitor*
The concept
The Flat Tire Monitor keeps track of the infla-
tion pressures in the tires as you drive. The sys-
tem provides an alert whenever the inflation
pressure drops significantly in relation to the
pressure in another tire.
In the event of a pressure loss, the rolling radius
and therefore the rotation speed of the wheels
change. This change is detected and is
reported as a flat tire.
Functional requirement
In order to assure the reliable reporting of a flat
tire, the system must be initialized for the cor-
rect tire inflation pressure.
The initialization must be repeated after
each time the tire inflation pressure is cor-
rected and after every tire or wheel change.<
System limits
The Flat Tire Monitor cannot indicate
sudden severe tire damage caused by
outside factors and does not detect a natural,
even pressure drop in all four tires.<
In the following situations, the system could be
delayed or malfunction:
>System has not been initialized
>Driving on snowy or slippery road surface
>Sporty driving style: slip in the drive wheels,
high lateral acceleration
>Driving with snow chains
*
When you are driving with the compact wheel*
the Flat Tire Monitor is unable to function.
Initializing system
The initialization finishes during driving,
which can be interrupted at any time.
When driving resumes, the initialization is con-
tinued automatically. Do not initialize the sys-
tem when driving with snow chains
* or with the
compact wheel
*.<
iDrive, for explanation of concept, refer to
page16.
1.Press the button.
This opens the start menu.
2.Press the controller to open the menu.
3.Select "Settings" and press the controller.
4.Select "Vehicle / Tires" and press the con-
troller.
Page 102 of 272
Lamps
100
Interior lamps
The interior lamps, footwell lamps, door entry
lighting
and courtesy lamps* are controlled
automatically.
With the courtesy lamps, LED lights are located
in the door handles to illuminate the exterior
area before the doors.
To protect the battery, all lamps in the
vehicle are switched off approx. 15 min-
utes after radio readiness is switched off, refer
to Start/Stop button on page56.<
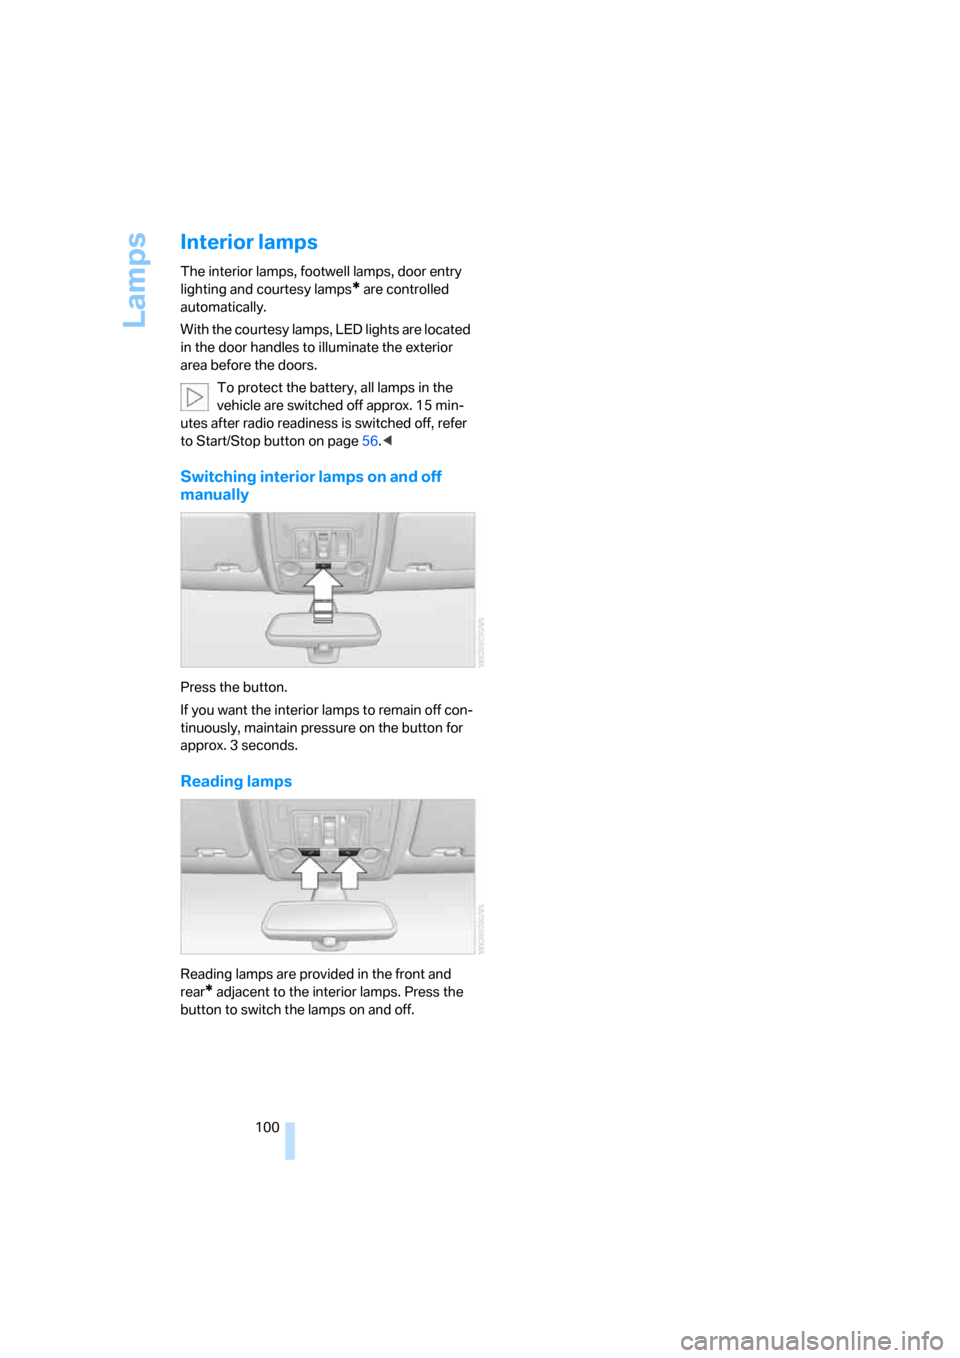
Switching interior lamps on and off
manually
Press the button.
If you want the interior lamps to remain off con-
tinuously, maintain pressure on the button for
approx. 3 seconds.
Reading lamps
Reading lamps are provided in the front and
rear
* adjacent to the interior lamps. Press the
button to switch the lamps on and off.
Page 107 of 272
Controls
105Reference
At a glance
Driving tips
Communications
Navigation
Entertainment
Mobility
AUC Automatic recirculated-air
control/recirculated-air mode
You can respond to pollutants or
unpleasant odors in the immediate
environment by suspending the
supply of outside air. The system
then recirculates the air currently within the
vehicle. During AUC operation, a sensor
detects pollutants in the outside air and con-
trols the shut-off automatically.
By pressing the button repeatedly, you can
request three operating modes:
>LED off: outside air flows in continuously.
>Left LED on, AUC mode: the system
detects pollutants in the outside air and
shuts off the supply as needed.
>Right LED on, recirculated-air mode: the
supply of outside air is permanently shut off.
If condensation starts to form on the
inside window surfaces during operation
in the recirculated-air mode, you should switch
it off while also increasing the air volume as
required.
The recirculated-air mode should not be used
over an extended period of time, as the air qual-
ity inside the vehicle deteriorates continu-
ously.<
Residual heat
The heat stored in the engine is
used to heat the passenger com-
partment, e.g. while stopped at a
school to pick up a child.
Switching on residual heat utilization
Pressing the right side switches on the residual
heat utilization when the following conditions
are met:
>up to 15 minutes after switching off the
engine
>with the engine at operating temperature
>with sufficient battery voltage
>at an outside temperature below 777/
256REST appears on the display of the automatic
climate control when the residual heat utiliza-
tion is switched on.
From radio readiness the interior temperature,
the air volume and the air distribution can be
set.
If the conditions for the residual heat utili-
zation are met, no display appears.<
Switching off residual heat utilization
You can select the lowest blower speed by
pressing and holding the left side. Pressing
again switches off the residual heat utilization.
REST disappears from the display of the auto-
matic climate control.
Switching off automatic climate control
You can select the lowest blower
speed by pressing and holding the
left side. Pressing again switches
off the automatic climate control. The air vol-
ume, the heater and the cooling function are all
switched off.
You can switch on the system again by pressing
any button of the automatic climate control.
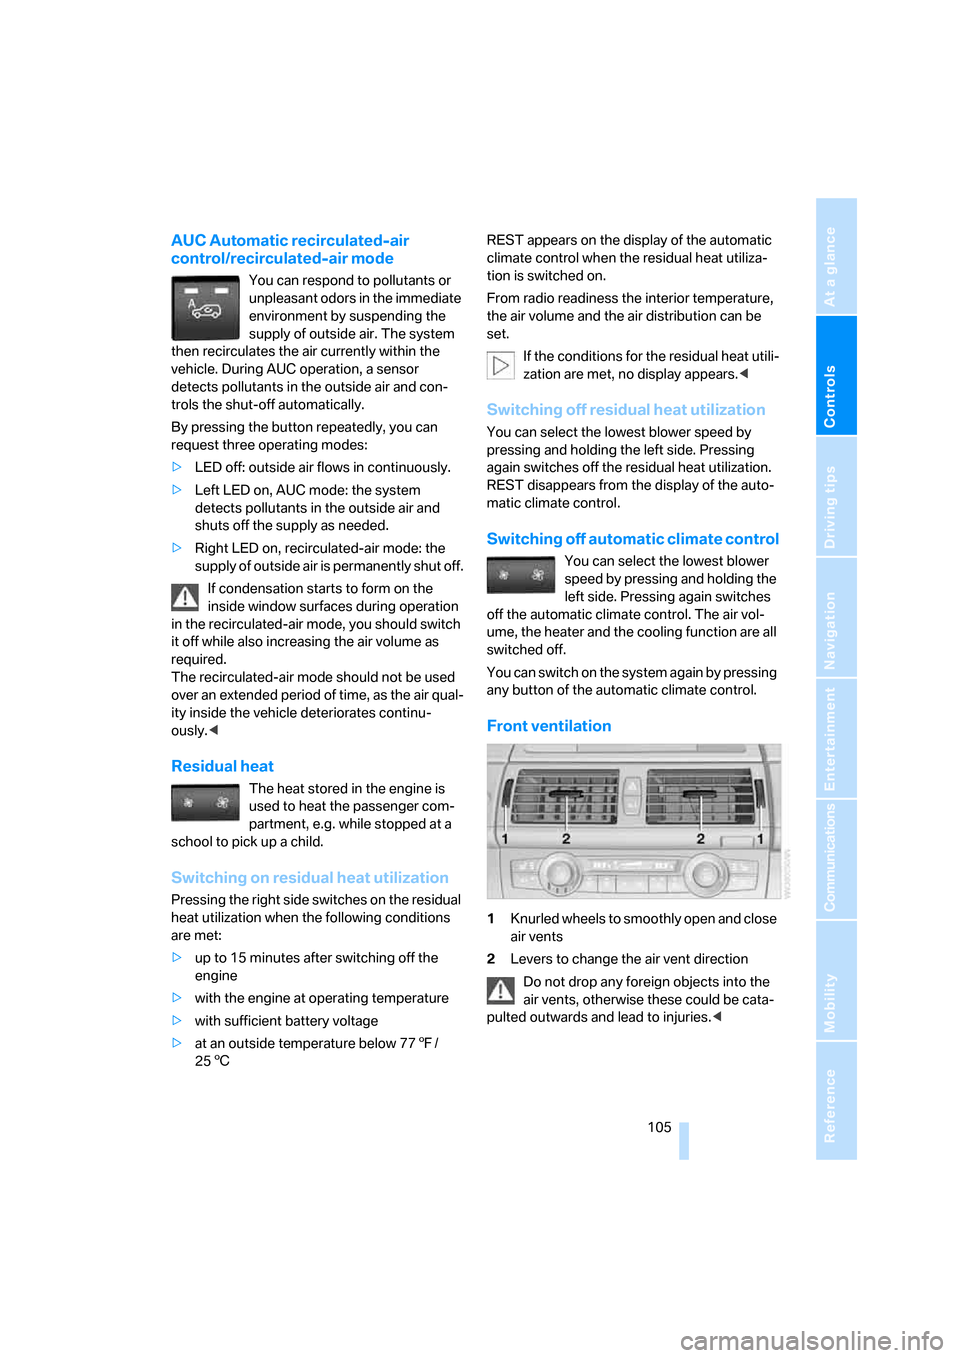
Front ventilation
1Knurled wheels to smoothly open and close
air vents
2Levers to change the air vent direction
Do not drop any foreign objects into the
air vents, otherwise these could be cata-
pulted outwards and lead to injuries.<
Page 175 of 272
Navigation
Entertainment
Driving tips
173Reference
At a glance
Controls
Communications
Mobility
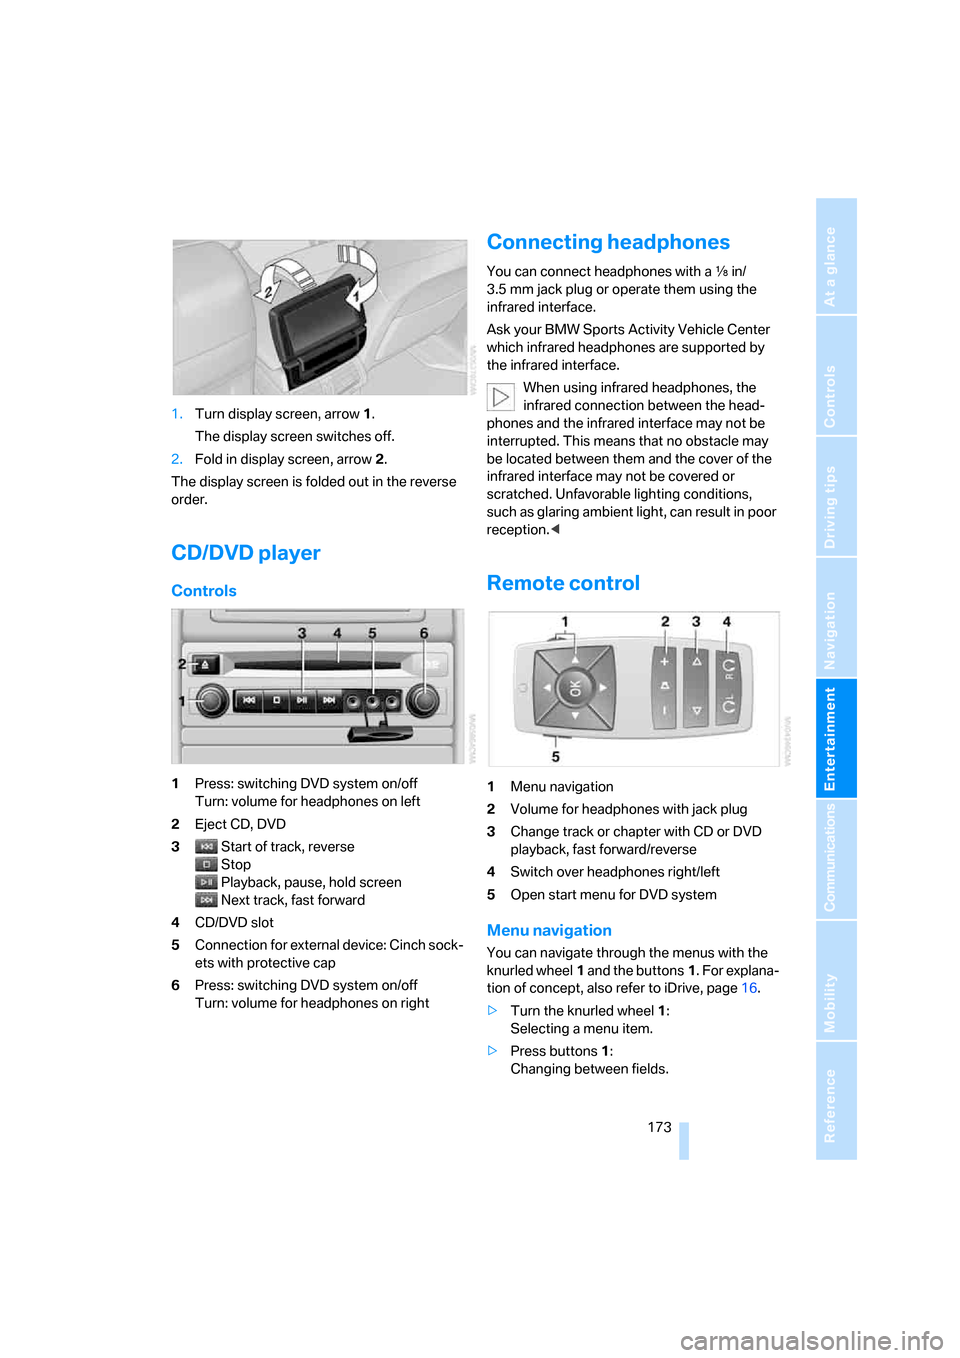
1.Turn display screen, arrow1.
The display screen switches off.
2.Fold in display screen, arrow2.
The display screen is folded out in the reverse
order.
CD/DVD player
Controls
1Press: switching DVD system on/off
Turn: volume for headphones on left
2Eject CD, DVD
3Start of track, reverse
Stop
Playback, pause, hold screen
Next track, fast forward
4CD/DVD slot
5Connection for external device: Cinch sock-
ets with protective cap
6Press: switching DVD system on/off
Turn: volume for headphones on right
Connecting headphones
You can connect headphones with a εin/
3.5 mm jack plug or operate them using the
infrared interface.
Ask your BMW Sports Activity Vehicle Center
which infrared headphones are supported by
the infrared interface.
When using infrared headphones, the
infrared connection between the head-
phones and the infrared interface may not be
interrupted. This means that no obstacle may
be located between them and the cover of the
infrared interface may not be covered or
scratched. Unfavorable lighting conditions,
such as glaring ambient light, can result in poor
reception.<
Remote control
1Menu navigation
2Volume for headphones with jack plug
3Change track or chapter with CD or DVD
playback, fast forward/reverse
4Switch over headphones right/left
5Open start menu for DVD system
Menu navigation
You can navigate through the menus with the
knurled wheel1 and the buttons1. For explana-
tion of concept, also refer to iDrive, page16.
>Turn the knurled wheel1:
Selecting a menu item.
>Press buttons1:
Changing between fields.