seat memory BMW X5 4.8IS 2004 E53 Owner's Manual
[x] Cancel search | Manufacturer: BMW, Model Year: 2004, Model line: X5 4.8IS, Model: BMW X5 4.8IS 2004 E53Pages: 200, PDF Size: 3.91 MB
Page 6 of 200
Contents
© 2004 Bayerische Motoren Werke
Aktiengesellschaft
Munich, Germany
Reprinting, including excerpts,
only with the written consent of
BMW AG, Munich.
Order No. 01 41 0 158 286
US English III/04
Printed in Germany
Printed on environmentally friendly paper,
bleached without chlorine, suitable for recycling.
Notes
Overview
Controls and features
About this Owner's Manual8
Symbols used8
Your individual vehicle8
Status at time of printing9
For your own safety9
Symbol on vehicle parts10
Service and Warranty10
Reporting safety defects10Cockpit14
Instrument cluster15
Indicator and warning lamps19
Buttons on steering wheel23
Warning triangle24
First-aid kit24
Refueling24
Fuel specifications26
Locks and security systems:
Keys30
Central locking system30
Opening and closing:
from outside31
Opening and closing:
from inside34
Liftgate35
Tailgate36
Alarm system38
Windows39
Panorama glass roof41
Adjustments:
Sitting safely43
Seats44
Mechanical seat adjustment45
Power seat adjustment46
Head restraints47
Power rear-seat backrest
adjustment48
Safety belts49
Seat, mirror and steering wheel
memory50
Heated seats52
Steering wheel52
Steering wheel heater53
Mirrors54
Contents
Page 52 of 200
50n
Seat, mirror and steering wheel memory
*
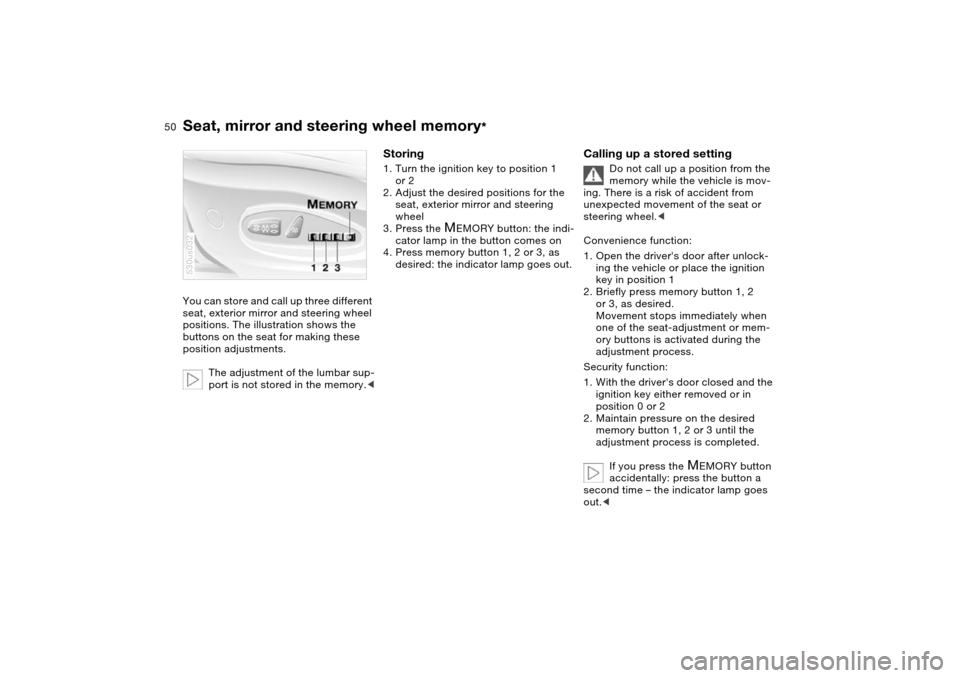
You can store and call up three different
seat, exterior mirror and steering wheel
positions. The illustration shows the
buttons on the seat for making these
position adjustments.
The adjustment of the lumbar sup-
port is not stored in the memory.<530us032
Storing 1. Turn the ignition key to position 1
or 2
2. Adjust the desired positions for the
seat, exterior mirror and steering
wheel
3. Press the
M
EMORY button: the indi-
cator lamp in the button comes on
4. Press memory button 1, 2 or 3, as
desired: the indicator lamp goes out.
Calling up a stored setting
Do not call up a position from the
memory while the vehicle is mov-
ing. There is a risk of accident from
unexpected movement of the seat or
steering wheel.<
Convenience function:
1. Open the driver's door after unlock-
ing the vehicle or place the ignition
key in position 1
2. Briefly press memory button 1, 2
or 3, as desired.
Movement stops immediately when
one of the seat-adjustment or mem-
ory buttons is activated during the
adjustment process.
Security function:
1. With the driver's door closed and the
ignition key either removed or in
position 0 or 2
2. Maintain pressure on the desired
memory button 1, 2 or 3 until the
adjustment process is completed.
If you press the
M
EMORY button
accidentally: press the button a
second time – the indicator lamp goes
out.<
Page 53 of 200
51n
OverviewControlsMaintenanceRepairsDataIndex
Seat, mirror and steering wheel memory
*
You can have your vehicle pro-
grammed to automatically dial in
your own individual adjustment settings
for the seat, mirrors and steering wheel
whenever you use your personal
remote control to unlock the vehicle.<
If you make use of this adjust-
ment, be sure that the footwell
behind the driver's seat is unobstructed
before unlocking the vehicle. If you fail
to do so, any persons or objects behind
the seat could be injured or damaged
by a rearward movement of the seat.<
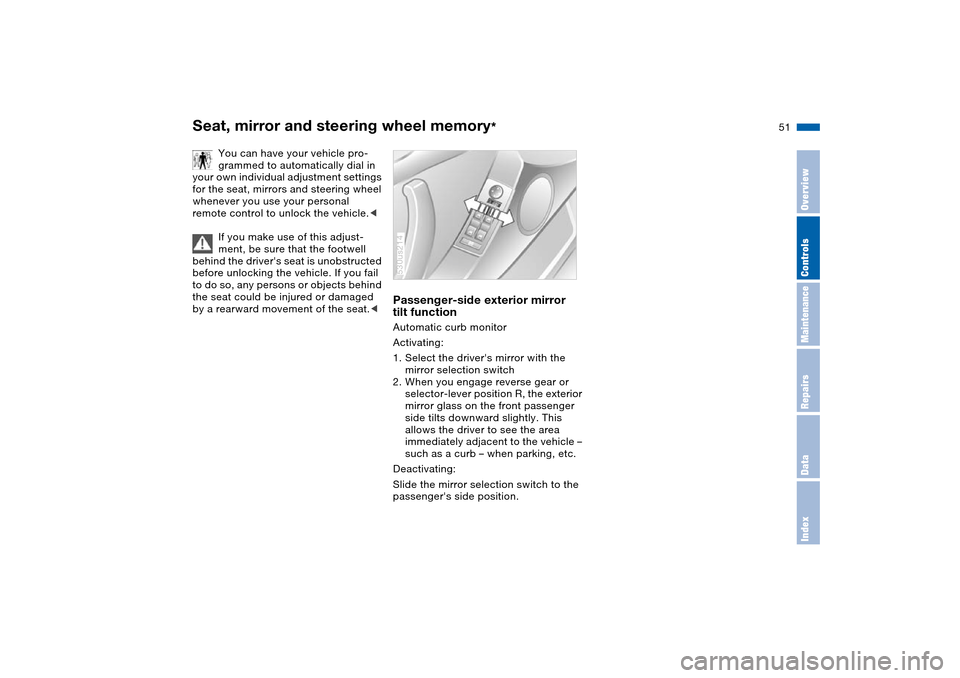
Passenger-side exterior mirror
tilt function Automatic curb monitor
Activating:
1. Select the driver's mirror with the
mirror selection switch
2. When you engage reverse gear or
selector-lever position R, the exterior
mirror glass on the front passenger
side tilts downward slightly. This
allows the driver to see the area
immediately adjacent to the vehicle –
such as a curb – when parking, etc.
Deactivating:
Slide the mirror selection switch to the
passenger's side position.530us214
Page 54 of 200
52n
Heated seats
*
Steering wheel
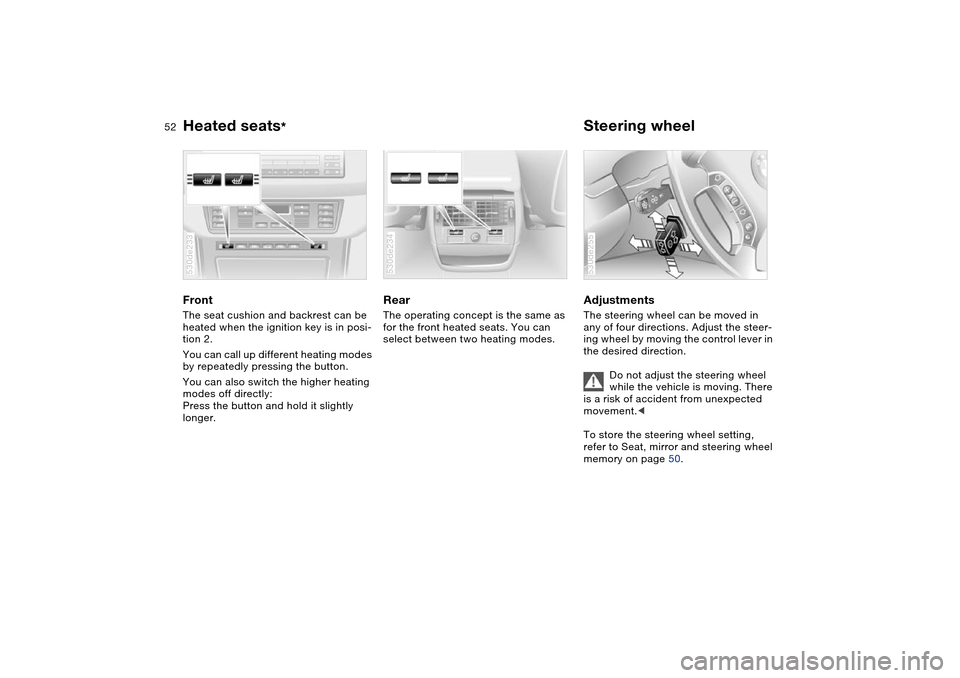
Front The seat cushion and backrest can be
heated when the ignition key is in posi-
tion 2.
You can call up different heating modes
by repeatedly pressing the button.
You can also switch the higher heating
modes off directly:
Press the button and hold it slightly
longer.530de233
Rear The operating concept is the same as
for the front heated seats. You can
select between two heating modes.530de234
Adjustments The steering wheel can be moved in
any of four directions. Adjust the steer-
ing wheel by moving the control lever in
the desired direction.
Do not adjust the steering wheel
while the vehicle is moving. There
is a risk of accident from unexpected
movement.<
To store the steering wheel setting,
refer to Seat, mirror and steering wheel
memory on page 50. 530de255
Page 55 of 200
53n
OverviewControlsMaintenanceRepairsDataIndex
Steering wheel Steering wheel heater
*
Automatic steering wheel
adjustmentonly in conjunction with seat, mirror and
steering wheel memory
In order to make it easier to get into and
out of the vehicle, the steering wheel
automatically moves into the top posi-
tion and returns to the driving or mem-
ory position.
This automatic feature is controlled by
the position of the ignition key and by
the driver's door.
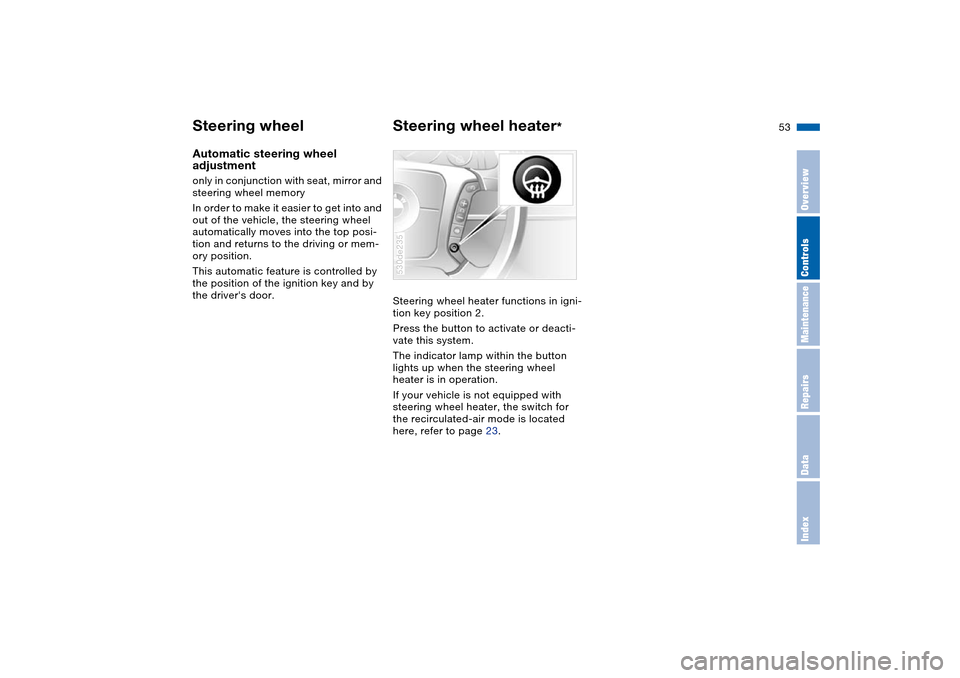
Steering wheel heater functions in igni-
tion key position 2.
Press the button to activate or deacti-
vate this system.
The indicator lamp within the button
lights up when the steering wheel
heater is in operation.
If your vehicle is not equipped with
steering wheel heater, the switch for
the recirculated-air mode is located
here, refer to page 23.
530de235
Page 65 of 200
63n
OverviewControlsMaintenanceRepairsDataIndex
Vehicle Memory, Key Memory How the system functions You have probably frequently wished
that you could configure individual
functions of your vehicle to reflect your
own personal requirements. In engi-
neering your vehicle, BMW has
included several user-defined func-
tions in the vehicle's design. Your
BMW Sports Activity Vehicle center can
make these settings for you.
There are vehicle and person-related
adjustments: Vehicle Memory and Key
Memory. You can configure up to four
different basic positions for four differ-
ent persons. The only requirement is
that each person uses his or her own
remote control key.
When your vehicle is unlocked with the
remote control, the vehicle recognizes
the individual user by means of a data
exchange with the key, and makes
adjustments accordingly.
In order for you to distinguish between
the master keys with remote control,
color-coded decals are supplied
together with the keys.
What the system can doYour BMW Sports Activity Vehicle cen-
ter can provide you with details on the
capabilities of the Vehicle Memory and
Key Memory systems.
You will see this symbol through-
out the Owner's Manual. It is to
remind you at appropriate places of the
settings that are available to you.<
Following configuration of the
memory functions, vehicle opera-
tion may differ from the description in
the Owner's Manual. Should you want
to sell your BMW some day, please
remember to have the memory func-
tions reset to the default state.<
Examples for Vehicle Memory:
>Various signals that can serve as
acknowledgment for locking and
unlocking the vehicle, refer to
pages 31, 33
>Deactivating/activating the pathway
lighting function, refer to page 102.
Examples for Key Memory:
>Automatic adjustment of the driver's
seat, exterior mirror and steering
wheel with settings stored in the
memory for the individual driver when
the vehicle is unlocked, refer to
page 51
>Calling up customized settings for
the automatic climate control when
unlocking the vehicle, refer to
page 111.
Page 171 of 200
169n
OverviewControlsMaintenanceRepairsDataIndex
Battery FusesPower failure Following a temporary power failure,
e.g. in the case of a flat battery, some
equipment is subject to restricted use
and must be reinitialized. Individual set-
tings are also lost and must be updated
again:
>Seat, mirror and steering wheel
memory
The position must be newly stored,
refer to page 50
>Time and date
Have to be updated, refer to page 84
>Activation time for independent venti-
lation
Must be updated again, refer to
page 86.
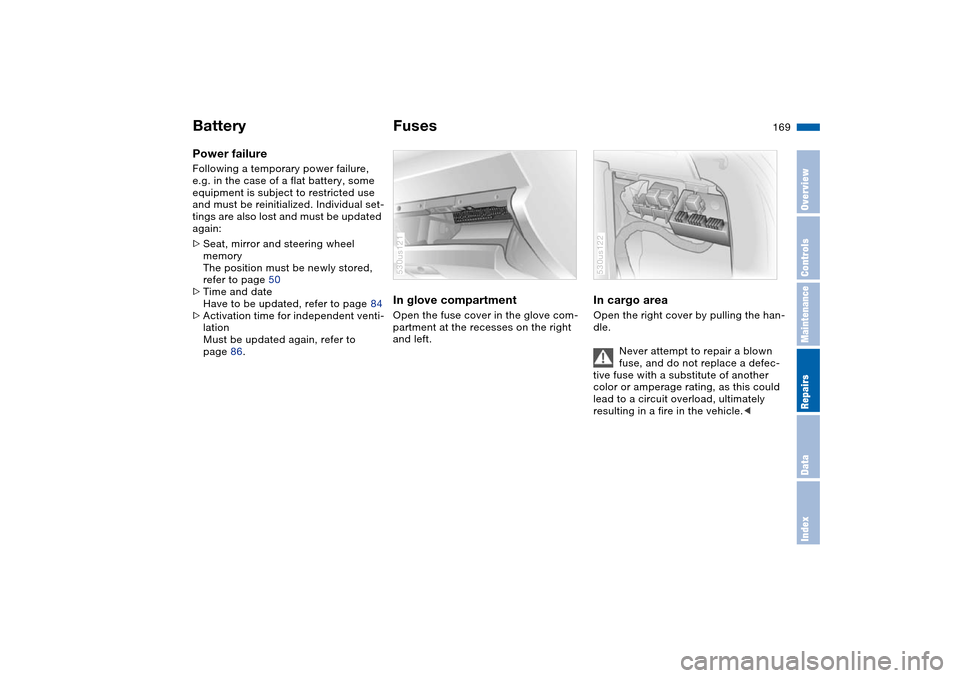
In glove compartment Open the fuse cover in the glove com-
partment at the recesses on the right
and left.530us121
In cargo area Open the right cover by pulling the han-
dle.
Never attempt to repair a blown
fuse, and do not replace a defec-
tive fuse with a substitute of another
color or amperage rating, as this could
lead to a circuit overload, ultimately
resulting in a fire in the vehicle.< 530us122
Page 191 of 200
Everything from A to Z
189n
OverviewControlsMaintenanceRepairsDataIndex
Gear display 67
Gearshift lever
automatic transmission
with Steptronic 67
manual transmission 66
General driving notes 138
Glove compartment 119
Grills, refer to
Ventilation 108, 113
Gross weight, refer to
Weights 180
Ground clearance 137
H
Hand lamp, refer to Rechar-
geable flashlight 119
Handbrake 66
indicator lamp 19, 21
Hands-free microphone,
refer to Portable
phone 118
Hands-free system 118
Having vehicle towed 173
Hazard warning flashers 14
HDC Hill Descent Control 96
Head airbags 57
Head restraints 47
Headlamp control,
automatic 102
Headlamp cover, care, refer
to Caring for your vehicle
brochureHeadlamp flasher 70
indicator lamp 22
Headlamp washer fluid
tank 148
capacity, refer to Filling
capacities 181
Headlamp washer system
cleaning headlamps 72
washer fluid 148
Headlamps
bulb replacement 159
care, refer to Caring for
your vehicle brochure
Heated mirrors 54
Heated rear window
air conditioner 107
automatic climate
control 112
Heated seats 52
Heated steering wheel 53
Heating
exterior mirror 54
rear window 107, 112
seats 52
steering wheel 53
Heating and
ventilation 106, 109
Heating while stopped 113
Heavy cargo 131
Height adjustment
seats 45, 46
steering wheel 52Height, refer to
Dimensions 179
High beams 103
bulb replacement 160
headlight flasher 70
indicator lamp 22
Hills 137, 139
Holder for cups 120
Horn 14
Hydroplaning 138, 143
I
Ice warning 75
Ignition 64
Ignition key 30
Ignition lock 64
Immobilizer function 90
Imprint 4
Independent ventilation 115
entering switch-on
times 86
switching on and off 86
switching on and off, also
refer to Owner's Manual
for Onboard Computer
Indicating
elements 15, 17, 18
Indicator and warning lamps,
overview 19Indicator/warning lamp
airbags 59
alarm system 38
coolant temperature 78
DSC 94
engine temperature 78
fasten safety belts 49
Flat Tire Monitor 101
front fog lamps 104
reserve 77
self-leveling
suspension 97
Individual air distribution 111
Individual settings, refer to
Vehicle Memory, Key
Memory 63
Inflation pressure
monitoring, refer to Flat
Tire Monitor 100
INSPECTION 78
Instrument cluster 15, 17, 18
Instrument illumination, refer
to Instrument lighting 104
Instrument lighting 104
Instrument panel lighting,
refer to Instrument
lighting 104
Instrument panel, refer to
Instrument
cluster 15, 17, 18
Integrated universal remote
control 116
Page 192 of 200
Everything from A to ZInterface socket for onboard
diagnosis 153
Interior lamps 104
remote control 31
Interior mirror
automatic dimming
feature 55
compass 55
Interior motion sensor 39
switching off 31, 39
Interior rearview mirror 54
Interlock, refer to Locking
steering 64
Intermittent operation,
wipers 71
J
Jumpering, refer to Jump-
starting 171
Jump-starting 171
K
Key Memory 63
Keys 30
Kickdown 68
L
Lamps and bulbs 159
Lamps, refer to Parking
lamps/low beams 102
Lashing eyes, refer to
Securing the load 131LATCH child-restraint
fixing 62
LEDs light-emitting
diodes 163
Length, refer to
Dimensions 179
License plate lamp, bulb
replacement 162
Liftgate 35
emergency operation,
refer to Unlocking
manually 35
opening, remote
control 31
Liftgate/tailgate
opening from inside 35
opening from outside 35
remote control 31
unlocking manually 35
Light switch 102
Light-alloy wheels, care,
refer to Caring for your
vehicle brochure
Light-emitting diodes
LEDs 163
Lighter 121, 122
Lighter socket 121
Lighting of instruments 104
Lights on warning 102
Limit 87
Load, refer to Cargo
loading 130Lock buttons, doors, refer to
Locking 34
Locking
from inside 34
from outside 31, 33
Locking and unlocking doors
from inside 34
from outside 31, 33
Locking, vehicle
from inside 34
from outside 31, 33
Low beams 102
automatic 102
bulb replacement 159
Lower back support, refer to
Lumbar support 46
Low-fuel warning light, refer
to Fuel gauge 77
Lug bolts 167
Lug wrench 164
Luggage compartment lid,
refer to Liftgate/tailgate 36
Luggage net 37
Luggage rack, refer to Roof-
mounted luggage rack 132
Luggage straps 37
Lumbar support 46
M
M+S tires, refer to Winter
tires 145
Maintenance system 152Maintenance, refer to
Service Interval Display 78
Manual operation
door lock 33
driver's door 33
fuel filler door 24
liftgate 35
panorama glass roof 42
tailgate 37
Manual transmission 66
Marking, tires 142
Master key 30
with remote control 30
Maximum cooling 112
Maximum roof weight 180
Maximum speed with winter
tires 145
Measurements, refer to
Dimensions 179
Mechanical key, refer to
Spare key 30
Mechanical seats 45
Memo 85
Memory, refer to
Seat, mirror and steering
wheel memory 50
Vehicle Memory, Key
Memory 63
Microfilter
air conditioner 108
automatic climate
control 114
Page 193 of 200
Everything from A to Z
191n
OverviewControlsMaintenanceRepairsDataIndex
Microphone for telephone,
refer to Telephone 118
Microphone, refer to
Telephone 118
MID Multi-Information
Display 83
Mirror
automatic curb monitor 51
mirror heating 54
mirror memory, refer to
Seat, mirror and steering
wheel memory 50
Mirror dimming feature 55
Mirrors 54
Multifunction switch
turn signals/headlamp
flasher 70
washer/wiper system 71
Multi-Information Display
MID 83
N
Navigation system, refer to
Owner's Manual for
Onboard Computer/Radio
and Navigation System
Neck support, refer to Head
restraints 47
Nozzles, refer to
Ventilation 108, 113O
OBD interface socket 153
Odometer 75
Oil
additives, refer to Adding
engine oil 149
consumption 148
dipstick 148
filling capacity 181
specified engine oil
grades 149
Oil change interval, refer to
Service and Warranty
Information Booklet, US
models or Warranty and
Service Guide Booklet,
Canadian models
Oil pressure, indicator/
warning lamp 19
OILSERVICE 78
Old batteries, refer to
Disposal 168
Onboard computer, refer to
separate Owner's Manual
Onboard tool kit 158
Opening and closing
from inside 34
using the door lock 33
using the remote
control 31
Output, refer to Engine
specifications 178Outside temperature
display 75
changing unit of
measure 75, 82
in computer 82
P
Panorama glass roof 41
automatic opening and
closing 41
closing in the event of an
electrical defect 42
comfort position 41
convenience operation 33
initializing 42
power failure 42
remote control 31
Park Distance Control
PDC 92
Parking aid, refer to PDC
Park Distance Control 92
Parking lamps 102
bulb replacement 160
Parking lamps/low
beams 102
Parking, vehicle 65
Parts and accessories, refer
to Your individual vehicle 8
Passenger-side mirror tilt
function 51
Pathway lighting 102PDC Park Distance
Control 92
Permissible axle load, refer
to Weights 180
Permissible gross weight,
refer to Weights 180
Plastic, refer to Caring for
your vehicle brochure
Pollen, refer to
Microfilter 108
Microfilter/activated-
charcoal filter 114
Power failure, battery 169
Power rear-seat
backrests 48
Power seat 46
Power windows 39
safety switch 40
Pressure monitoring,
tires 100
Flat Tire Monitor 100
Pressure, tires 140
Producing tire inflation
pressure 140
Programming settings, refer
to Vehicle Memory, Key
Memory 63
Protective function
panorama glass roof 42
Pull-out cargo floor 128