air condition BMW X5 4.8IS 2005 E53 Owner's Manual
[x] Cancel search | Manufacturer: BMW, Model Year: 2005, Model line: X5 4.8IS, Model: BMW X5 4.8IS 2005 E53Pages: 200, PDF Size: 3.55 MB
Page 5 of 200
5n
OverviewControlsMaintenanceRepairsDataIndex
Controls and features
Passenger safety systems:
Airbags57
Transporting children safely59
Vehicle Memory,
Key Memory63
Driving:
Ignition lock64
Starting engine64
Switching off engine65
Handbrake66
Manual transmission66
Automatic transmission with
Steptronic67
Turn signals/
headlamp flasher70
Washer/wiper system/
rain sensor71
Cruise control74
Everything under control:
Odometer, outside temperature
display76
Tachometer77
Energy control77
Engine oil thermometer78
Fuel gage78
Coolant temperature gage79
Service Interval Display79
Check Control80
Computer82
MID Multi-Information
Display84Digital clock in MID85
Computer in MID88
Technology for safety and
driving convenience:
PDC Park Distance Control 93
Antilock Brake System94
DSC Dynamic Stability
Control95
xDrive97
HDC Hill Descent Control97
Self-leveling suspension98
2-axle self-leveling
suspension99
Brake Force Display101
Flat Tire Monitor101
Lamps:
Parking lamps/low beams103
Adaptive Head Light104
High beams/roadside parking
lamps104
Front fog lamps105
Instrument lighting105
Interior lamps105
Controlling the climate for
pleasant driving:
Air conditioner107
Automatic climate control110
Roller sun blinds115
Independent ventilation116Cabin convenience:
Integrated universal remote
control117
Portable phone119
Glove compartment120
Storage compartments120
Cup holders121
Ashtray, front122
Ashtray, rear122
Cigarette lighter, rear123
Loading and transporting:
Ski bag124
Cargo area
Folding rear backrests
down126
Roll-up cover126
Partition net127
Flaps in cargo area128
Power outlets129
Pull-out floor in cargo
area130
Cargo loading131
Roof-mounted luggage rack133
Page 21 of 200
21n
OverviewControlsMaintenanceRepairsDataIndex
Indicator and warning lamps Red: an important reminder
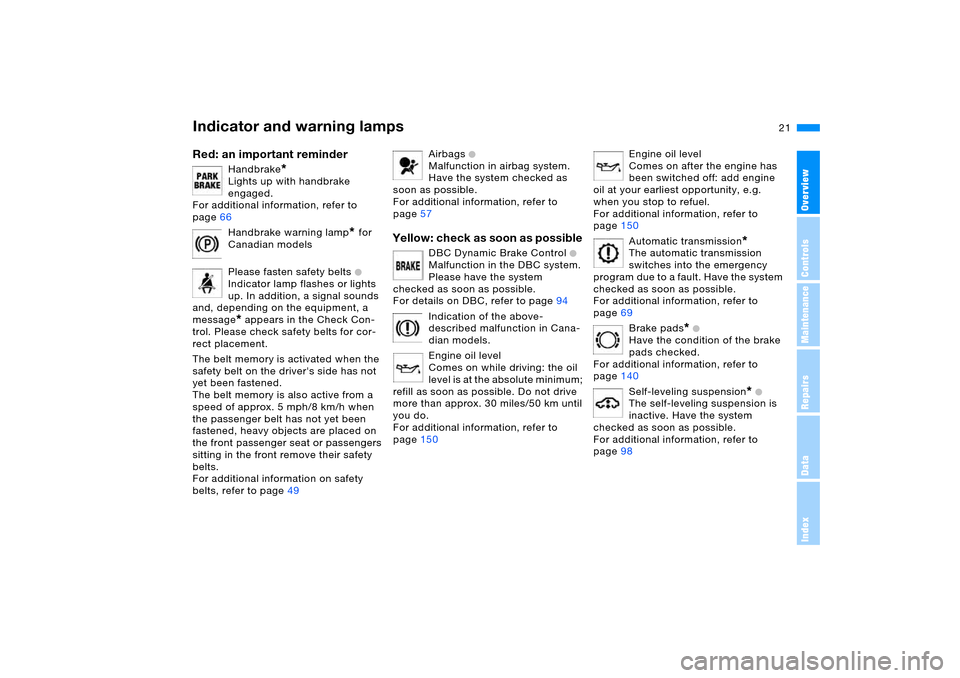
Handbrake
*
Lights up with handbrake
engaged.
For additional information, refer to
page66
Handbrake warning lamp
* for
Canadian models
Please fasten safety belts +
Indicator lamp flashes or lights
up. In addition, a signal sounds
and, depending on the equipment, a
message* appears in the Check Con-
trol. Please check safety belts for cor-
rect placement.
The belt memory is activated when the
safety belt on the driver's side has not
yet been fastened.
The belt memory is also active from a
speed of approx. 5 mph/8 km/h when
the passenger belt has not yet been
fastened, heavy objects are placed on
the front passenger seat or passengers
sitting in the front remove their safety
belts.
For additional information on safety
belts, refer to page49
Airbags
+
Malfunction in airbag system.
Have the system checked as
soon as possible.
For additional information, refer to
page57
Yellow: check as soon as possible
DBC Dynamic Brake Control
+
Malfunction in the DBC system.
Please have the system
checked as soon as possible.
For details on DBC, refer to page94
Indication of the above-
described malfunction in Cana-
dian models.
Engine oil level
Comes on while driving: the oil
level is at the absolute minimum;
refill as soon as possible. Do not drive
more than approx. 30 miles/50 km until
you do.
For additional information, refer to
page150
Engine oil level
Comes on after the engine has
been switched off: add engine
oil at your earliest opportunity, e.g.
when you stop to refuel.
For additional information, refer to
page150
Automatic transmission
*
The automatic transmission
switches into the emergency
program due to a fault. Have the system
checked as soon as possible.
For additional information, refer to
page69
Brake pads
* +
Have the condition of the brake
pads checked.
For additional information, refer to
page140
Self-leveling suspension
* +
The self-leveling suspension is
inactive. Have the system
checked as soon as possible.
For additional information, refer to
page98
Page 23 of 200
23n
OverviewControlsMaintenanceRepairsDataIndex
Buttons on steering wheel
*
The buttons integrated in the steering
wheel are provided so that you can
operate a number of accessories
quickly and without being distracted
from traffic conditions. You may oper-
ate:
>selected functions of the audio
sources
*
>the recirculated-air mode of the air
conditioner
* or the steering-wheel
heater
*
>the cruise control
>selected phone functions
* and
>the voice command system*.
In order to operate a system, the
corresponding system must be
switched on.<
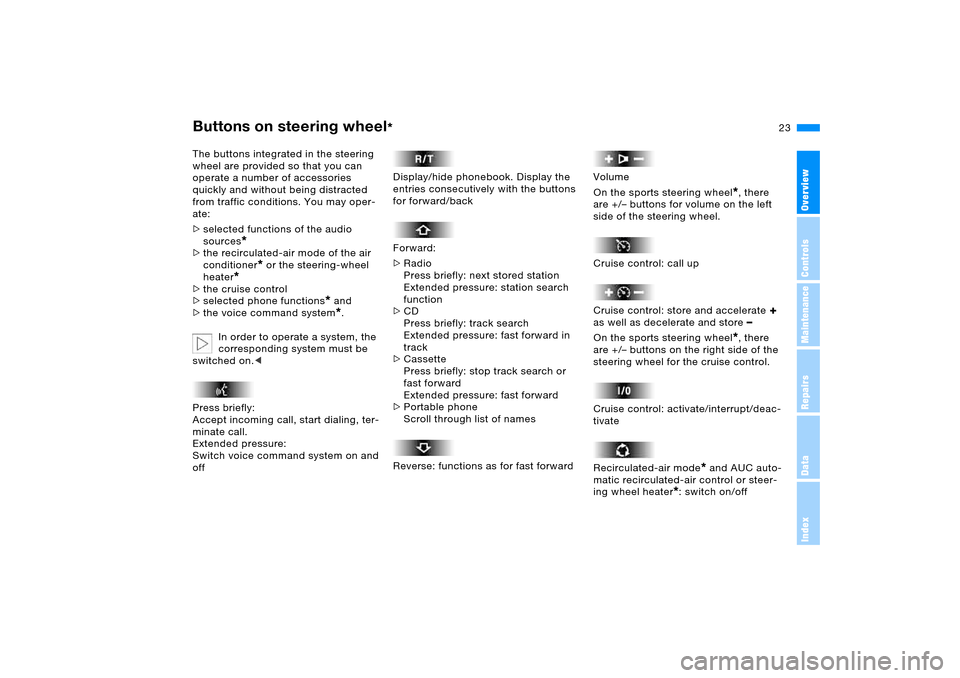
Press briefly:
Accept incoming call, start dialing, ter-
minate call.
Extended pressure:
Switch voice command system on and
off
Display/hide phonebook. Display the
entries consecutively with the buttons
for forward/back
Forward:
>Radio
Press briefly: next stored station
Extended pressure: station search
function
>CD
Press briefly: track search
Extended pressure: fast forward in
track
>Cassette
Press briefly: stop track search or
fast forward
Extended pressure: fast forward
>Portable phone
Scroll through list of names
Reverse: functions as for fast forward
Volume
On the sports steering wheel
*, there
are +/– buttons for volume on the left
side of the steering wheel.
Cruise control: call up
Cruise control: store and accelerate
+
as well as decelerate and store
–
On the sports steering wheel
*, there
are +/– buttons on the right side of the
steering wheel for the cruise control.
Cruise control: activate/interrupt/deac-
tivate
Recirculated-air mode
* and AUC auto-
matic recirculated-air control or steer-
ing wheel heater
*: switch on/off
Page 67 of 200
OverviewControlsMaintenanceRepairsDataIndex
67n
Manual transmission Automatic transmission with Steptronic
*
Reverse Select only when the vehicle is station-
ary. Press the gearshift lever to the left
to overcome the resistance.
As you do this, the backup lamps will
turn on automatically when the ignition
key is in position 2.
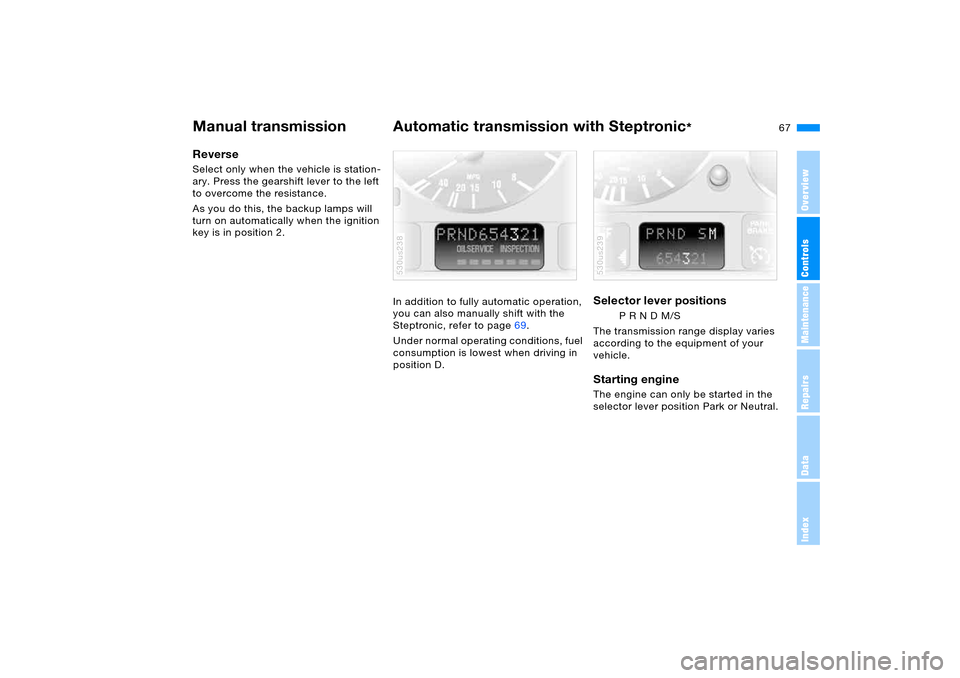
In addition to fully automatic operation,
you can also manually shift with the
Steptronic, refer to page69.
Under normal operating conditions, fuel
consumption is lowest when driving in
position D.
530us238
Selector lever positions
P R N D M/S
The transmission range display varies
according to the equipment of your
vehicle.
Starting engine The engine can only be started in the
selector lever position Park or Neutral. 530us239
Page 71 of 200
OverviewControlsMaintenanceRepairsDataIndex
71n
Washer/wiper system/rain sensor
*
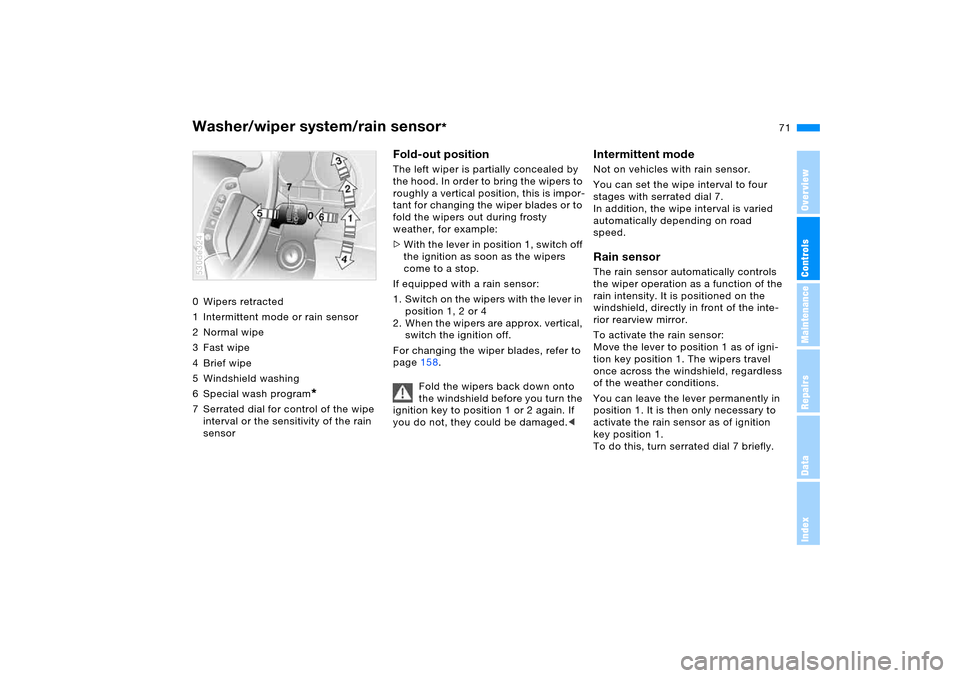
0 Wipers retracted
1 Intermittent mode or rain sensor
2Normal wipe
3Fast wipe
4Brief wipe
5 Windshield washing
6 Special wash program
*
7 Serrated dial for control of the wipe
interval or the sensitivity of the rain
sensor530de324
Fold-out positionThe left wiper is partially concealed by
the hood. In order to bring the wipers to
roughly a vertical position, this is impor-
tant for changing the wiper blades or to
fold the wipers out during frosty
weather, for example:
>With the lever in position 1, switch off
the ignition as soon as the wipers
come to a stop.
If equipped with a rain sensor:
1. Switch on the wipers with the lever in
position 1, 2 or 4
2. When the wipers are approx. vertical,
switch the ignition off.
For changing the wiper blades, refer to
page158.
Fold the wipers back down onto
the windshield before you turn the
ignition key to position 1 or 2 again. If
you do not, they could be damaged.<
Intermittent mode Not on vehicles with rain sensor.
You can set the wipe interval to four
stages with serrated dial 7.
In addition, the wipe interval is varied
automatically depending on road
speed. Rain sensor The rain sensor automatically controls
the wiper operation as a function of the
rain intensity. It is positioned on the
windshield, directly in front of the inte-
rior rearview mirror.
To activate the rain sensor:
Move the lever to position 1 as of igni-
tion key position 1. The wipers travel
once across the windshield, regardless
of the weather conditions.
You can leave the lever permanently in
position 1. It is then only necessary to
activate the rain sensor as of ignition
key position 1.
To do this, turn serrated dial 7 briefly.
Page 95 of 200
95n
OverviewControlsMaintenanceRepairsDataIndex
Antilock Brake System DSC Dynamic Stability Control MalfunctionPlease be absolutely sure to follow
instructions regarding possible combi-
nations of indicator lights on page 20.
The concept DSC prevents the drive wheels from
slipping when starting off and acceler-
ating. DSC also identifies unstable driv-
ing conditions, such as a loss of trac-
tion at the rear of the vehicle or sliding
of the vehicle in its front wheels. Under
these circumstances, DSC helps the
vehicle maintain a safe course within
the physical limits by reducing the
engine output and by applying the
brakes in the individual wheels.
The DSC is operational every time you
start the engine.
The laws of physics cannot be
repealed, even with DSC.
An appropriate driving style always
remains the responsibility of the driver.
So please do not further limit the addi-
tional safety margin by risky driving.<
Indicator lamp
The indicator lamp in the instru-
ment cluster goes out after the
engine is started.
The indicator lamp flashes:
DSC is active and governs drive and
braking force.
The indicator lamp stays lit:
DSC has been switched off using the
button and the stabilizing interventions
are no longer available.
Page 97 of 200
97n
OverviewControlsMaintenanceRepairsDataIndex
xDrive HDC Hill Descent Control xDrive is the 4-wheel drive system of
your X5. The combined effects of xDrive
and DSC further optimize the traction
and dynamic driving characteristics.
The 4-wheel drive system xDrive vari-
ably distributes the drive torque to the
front and rear axle depending on the
driving situation and prevailing road
conditions.MalfunctionPlease be sure to observe the informa-
tion on the DSC Dynamic Stability Con-
trol/xDrive warning lamp on page 22
and on the possible lamp combinations
that can light up on page 20.
The concept HDC is a system for driving downhill in
steep terrain. This system reduces vehi-
cle speed on steep downhill gradients,
thus allowing you to maintain even bet-
ter control of your BMW under these
conditions.
The vehicle moves at slightly more than
walking speed without active interven-
tion from the driver.
HDC is available for activation at vehi-
cle speeds below approx. 20 mph/
35 km/h. When driving down steep hills
with a speed below approx. 20 mph/
35 km/h, the vehicle reduces speed
automatically down to slightly more
than walking speed, approx. 5 mph/
8 km/h, and then maintains this speed
at a constant.
You can use the accelerator or brakes
to vary this automatically controlled
speed within a range extending from
approx. 3 mph/5 km/h to 15 mph/
25 km/h.
You can specify a target speed within
the same range by using the +/– but-
tons of the cruise control.
HDC is automatically deactivated once
vehicle speed again exceeds approx.
35 mph/60 km/h.
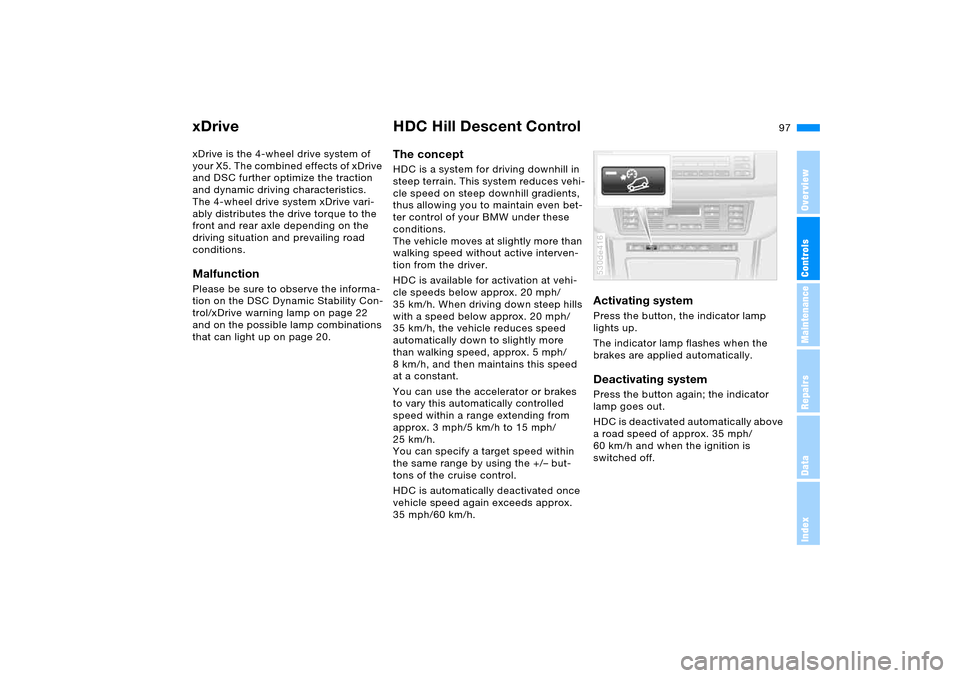
Activating system Press the button, the indicator lamp
lights up.
The indicator lamp flashes when the
brakes are applied automatically. Deactivating system Press the button again; the indicator
lamp goes out.
HDC is deactivated automatically above
a road speed of approx. 35 mph/
60 km/h and when the ignition is
switched off. 530de416
Page 99 of 200
99n
OverviewControlsMaintenanceRepairsDataIndex
2-axle self-leveling suspension
*
The concept Your vehicle is equipped with 2-axle
self-leveling suspension acting on both
the front and rear suspension. This sys-
tem combines automatic self-leveling,
which compensates for variations in
front-to-rear load-distribution patterns,
with a selection feature allowing drivers
to choose from among several ride-
height options.
You may choose from among the fol-
lowing ride heights:
>Normal
The standard setting is intended for
most operating conditions, including
trailer towing
>Off-Road
Increased level for more ground
clearance
>Access
Lowers vehicle for more convenient
cargo handling or easier passenger
entries and exits.
Changes in ride height are initiated
either manually, using the control but-
ton, refer to page 100, or automatically
in response to specific speeds. When
the ride height is selected manually, the
driver has the additional option of revis-
ing the ride-height selection by entering a new command during the adjustment
process.
When the vehicle is stationary, the sys-
tem executes ride-height changes in
both directions – up and down – when-
ever the doors are closed. The tailgate/
liftgate may be open. The system raises
the vehicle only when the engine is run-
ning.
The system's automatic self-leveling
feature automatically compensates for
variations in the vehicle's load.
Frequent changes in ride height
initiated at short intervals can
overheat the compressor, causing the
system to briefly suspend active opera-
tion.<
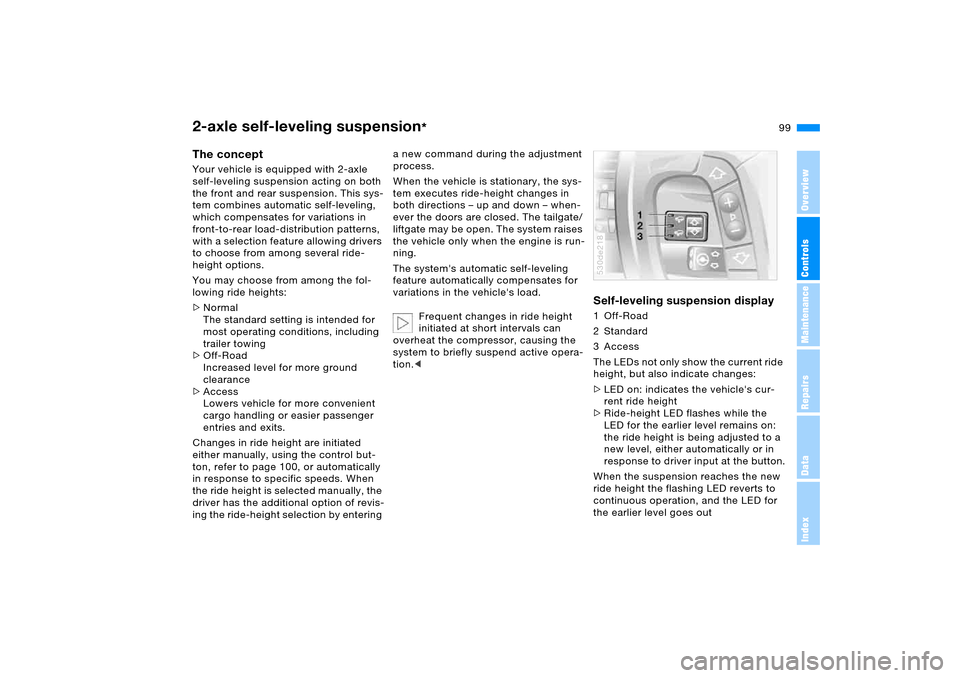
Self-leveling suspension display 1 Off-Road
2Standard
3 Access
The LEDs not only show the current ride
height, but also indicate changes:
>LED on: indicates the vehicle's cur-
rent ride height
>Ride-height LED flashes while the
LED for the earlier level remains on:
the ride height is being adjusted to a
new level, either automatically or in
response to driver input at the button.
When the suspension reaches the new
ride height the flashing LED reverts to
continuous operation, and the LED for
the earlier level goes out530de218
Page 103 of 200
103n
OverviewControlsMaintenanceRepairsDataIndex
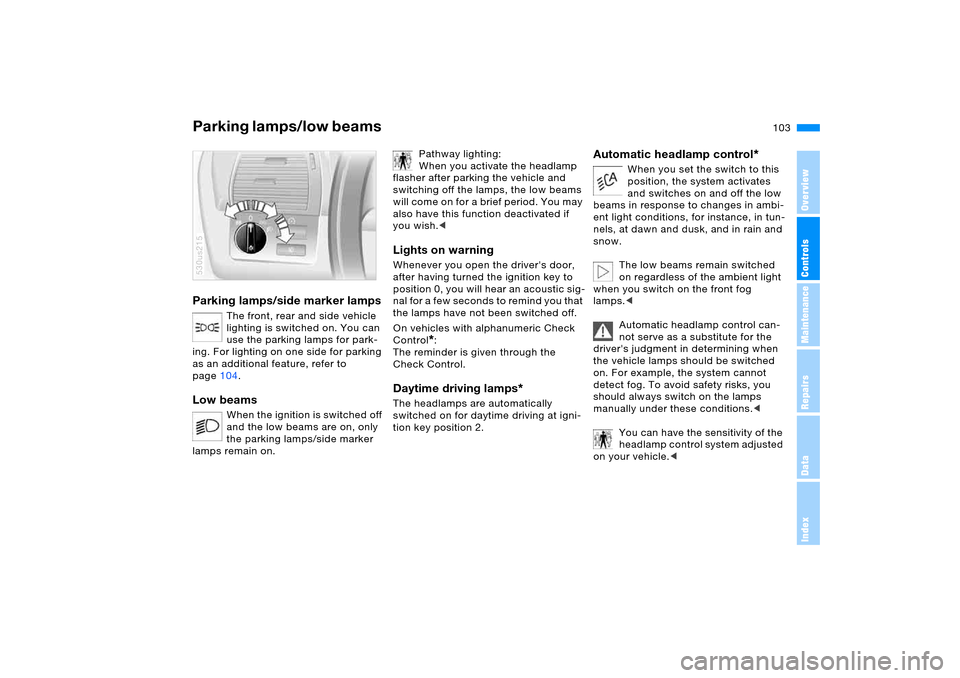
Parking lamps/side marker lamps
The front, rear and side vehicle
lighting is switched on. You can
use the parking lamps for park-
ing. For lighting on one side for parking
as an additional feature, refer to
page104.
Low beams
When the ignition is switched off
and the low beams are on, only
the parking lamps/side marker
lamps remain on.
530us215
Pathway lighting:
When you activate the headlamp
flasher after parking the vehicle and
switching off the lamps, the low beams
will come on for a brief period. You may
also have this function deactivated if
you wish.<
Lights on warning Whenever you open the driver's door,
after having turned the ignition key to
position 0, you will hear an acoustic sig-
nal for a few seconds to remind you that
the lamps have not been switched off.
On vehicles with alphanumeric Check
Control
*:
The reminder is given through the
Check Control.
Daytime driving lamps
*
The headlamps are automatically
switched on for daytime driving at igni-
tion key position 2.
Automatic headlamp control
*
When you set the switch to this
position, the system activates
and switches on and off the low
beams in response to changes in ambi-
ent light conditions, for instance, in tun-
nels, at dawn and dusk, and in rain and
snow.
The low beams remain switched
on regardless of the ambient light
when you switch on the front fog
lamps.<
Automatic headlamp control can-
not serve as a substitute for the
driver's judgment in determining when
the vehicle lamps should be switched
on. For example, the system cannot
detect fog. To avoid safety risks, you
should always switch on the lamps
manually under these conditions.<
You can have the sensitivity of the
headlamp control system adjusted
on your vehicle.<
Parking lamps/low beams
Page 107 of 200
107n
OverviewControlsMaintenanceRepairsDataIndex
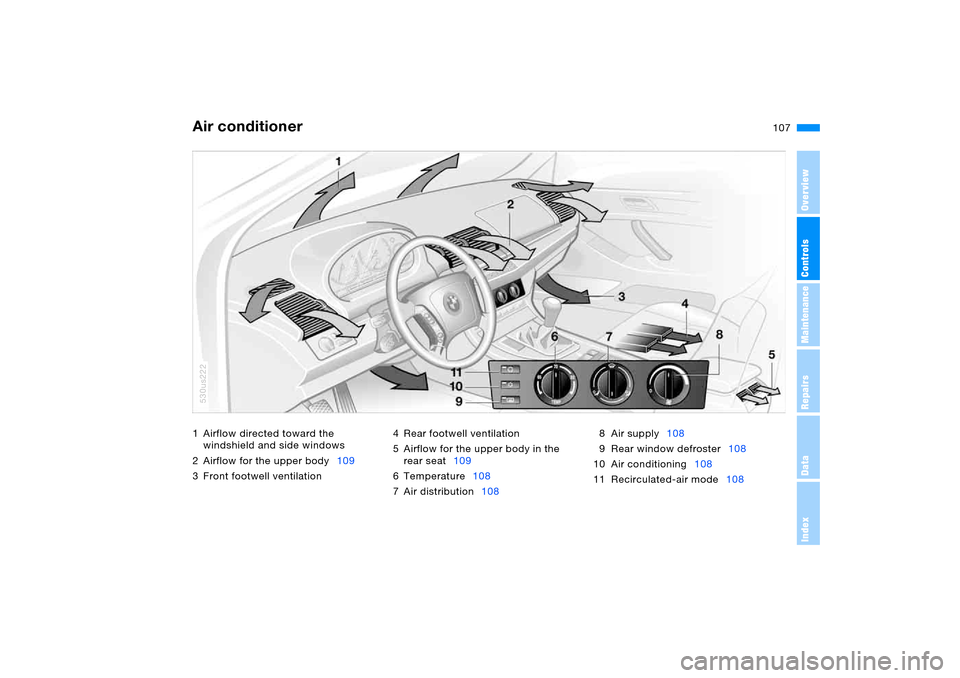
1 Airflow directed toward the
windshield and side windows
2 Airflow for the upper body109
3 Front footwell ventilation 4 Rear footwell ventilation
5 Airflow for the upper body in the
rear seat109
6Temperature108
7 Air distribution1088 Air supply108
9 Rear window defroster108
10 Air conditioning108
11 Recirculated-air mode108Air conditioner
530us222