ESP BMW X5 4.8IS 2006 E53 Owner's Guide
[x] Cancel search | Manufacturer: BMW, Model Year: 2006, Model line: X5 4.8IS, Model: BMW X5 4.8IS 2006 E53Pages: 202, PDF Size: 4.13 MB
Page 110 of 202
110n
Automatic climate control
*
Air conditioning
The air is cooled and
dehumidified and —
depending on the temperature setting —
warmed again. Depending on the
weather, the windshield may fog over
briefly when the engine is started. You
can reduce condensation forming on
the windows by switching on the air
conditioning.
During air conditioning, condensa-
tion forms, which then exits under
the vehicle. That traces of water on the
ground are therefore normal.<
Maximum cooling
Maximally cooled air is
obtained as quickly as possi-
ble from an outside temperature above
327/06 and with the engine running.
The automatic climate control changes
over to the lowest temperature and
switches into the recirculated-air mode.
The maximum air quantity only flows
out of the vents for the upper body.
Therefore, open these vents for maxi-
mum cooling.
AUC Automatic recirculated-air
control
You can respond to
unpleasant odors or pollut-
ants in the immediate environment by
shutting off the supply of outside air.
The system then recirculates the air
currently within the vehicle. In AUC
operating mode, a sensor detects pol-
lutants in the external air and controls
the shut-off automatically.
Press the button repeatedly to run
through the following control sequence
>LEDs off: outside air supply opera-
tional
>Left LED on, AUC mode: the system
detects pollutants in the outside air
and blocks the flow of air when nec-
essary. The system then recirculates
the air currently within the vehicle.
Depending on the air quality, the
automatic system then switches back
and forth between outside air supply
and recirculation of the air within the
vehicle
>Right LED on: the outside air supply
into the vehicle is shut off continu-
ously. The system then recirculates
the air currently within the vehicle.
You can also use the button on the
steering wheel to switch between Off
and recirculated-air mode or between
AUC and recirculated-air mode, refer to
page23.
If the windows fog over in the
recirculated-air mode, switch the
recirculated-air mode off and increase
the air supply as required.< Rear window defroster
When the rear window
defroster is activated, the
LED lights up. The rear window
defroster switches off automatically
after a while.
Residual heat
Press the button when the
motor is switched off, but
warm.
The heat stored in the engine is utilized
for heating the interior when the engine
has been switched off – while waiting at
a railroad crossing, for instance.
This function may be activated when
the outside temperature is below
approx. 597/156, the engine is at
operating temperature, and the battery
Page 115 of 202
115n
OverviewControlsMaintenanceRepairsDataIndex
Integrated universal remote control
*
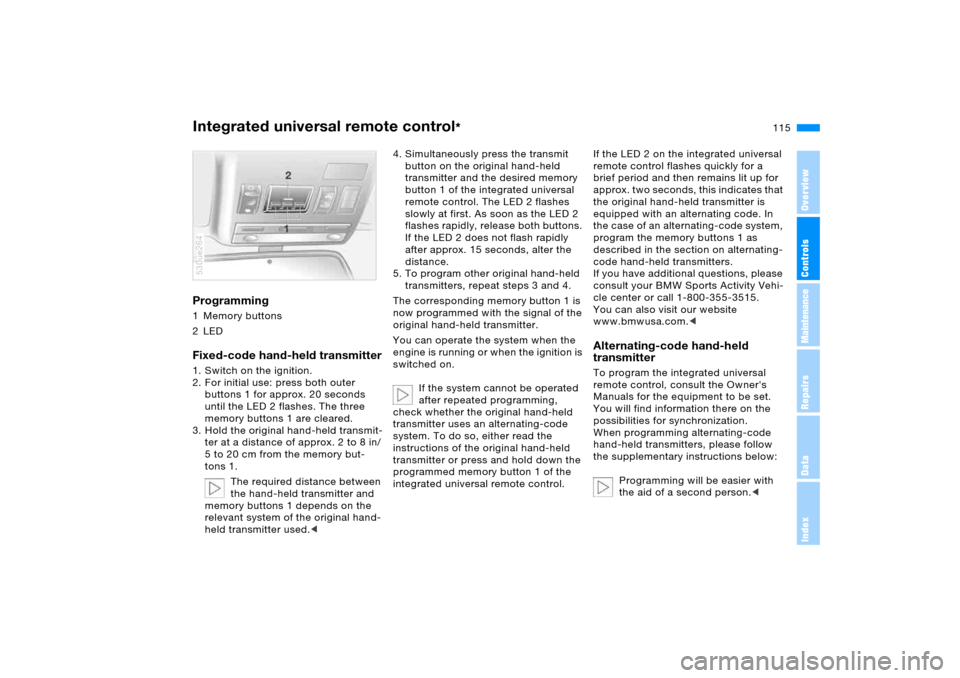
Programming 1Memory buttons
2LEDFixed-code hand-held transmitter1. Switch on the ignition.
2. For initial use: press both outer
buttons 1 for approx. 20 seconds
until the LED 2 flashes. The three
memory buttons 1 are cleared.
3. Hold the original hand-held transmit-
ter at a distance of approx. 2 to 8 in/
5 to 20 cm from the memory but-
tons 1.
The required distance between
the hand-held transmitter and
memory buttons 1 depends on the
relevant system of the original hand-
held transmitter used.<530ue264
4. Simultaneously press the transmit
button on the original hand-held
transmitter and the desired memory
button 1 of the integrated universal
remote control. The LED 2 flashes
slowly at first. As soon as the LED 2
flashes rapidly, release both buttons.
If the LED 2 does not flash rapidly
after approx. 15 seconds, alter the
distance.
5. To program other original hand-held
transmitters, repeat steps 3 and 4.
The corresponding memory button 1 is
now programmed with the signal of the
original hand-held transmitter.
You can operate the system when the
engine is running or when the ignition is
switched on.
If the system cannot be operated
after repeated programming,
check whether the original hand-held
transmitter uses an alternating-code
system. To do so, either read the
instructions of the original hand-held
transmitter or press and hold down the
programmed memory button 1 of the
integrated universal remote control.
If the LED 2 on the integrated universal
remote control flashes quickly for a
brief period and then remains lit up for
approx. two seconds, this indicates that
the original hand-held transmitter is
equipped with an alternating code. In
the case of an alternating-code system,
program the memory buttons 1 as
described in the section on alternating-
code hand-held transmitters.
If you have additional questions, please
consult your BMW Sports Activity Vehi-
cle center or call 1-800-355-3515.
You can also visit our website
www.bmwusa.com.
remote control, consult the Owner's
Manuals for the equipment to be set.
You will find information there on the
possibilities for synchronization.
When programming alternating-code
hand-held transmitters, please follow
the supplementary instructions below:
Programming will be easier with
the aid of a second person.<
Page 116 of 202
116n
Integrated universal remote control
*
Car phone
*
1. Park your vehicle within the range of
the remote-controlled device
2. Program the integrated universal
remote control as described at the
section on fixed-code hand-held
transmitters
3. Locate the button on the receiver of
the device you want to set up, e.g. on
the upper section of the motor
4. Press the button on the receiver of
the device you want to set up. After
step 4, you have approx. 30 seconds
for step 5
5. Press the programmed memory
button 1 on the integrated universal
remote control three times.
The corresponding memory button 1 is
now programmed with the signal of the
original hand-held transmitter.
If you have any additional ques-
tions, please contact your BMW
Sports Activity Vehicle center.<
Clearing memory buttonsIt is not possible to clear memory but-
tons 1 individually. To clear all three
memory buttons 1, proceed as follows:
Press both outer buttons 1 of the inte-
grated universal remote control for
approx. 20 seconds, maintaining pres-
sure until the LED 2 starts to flash.
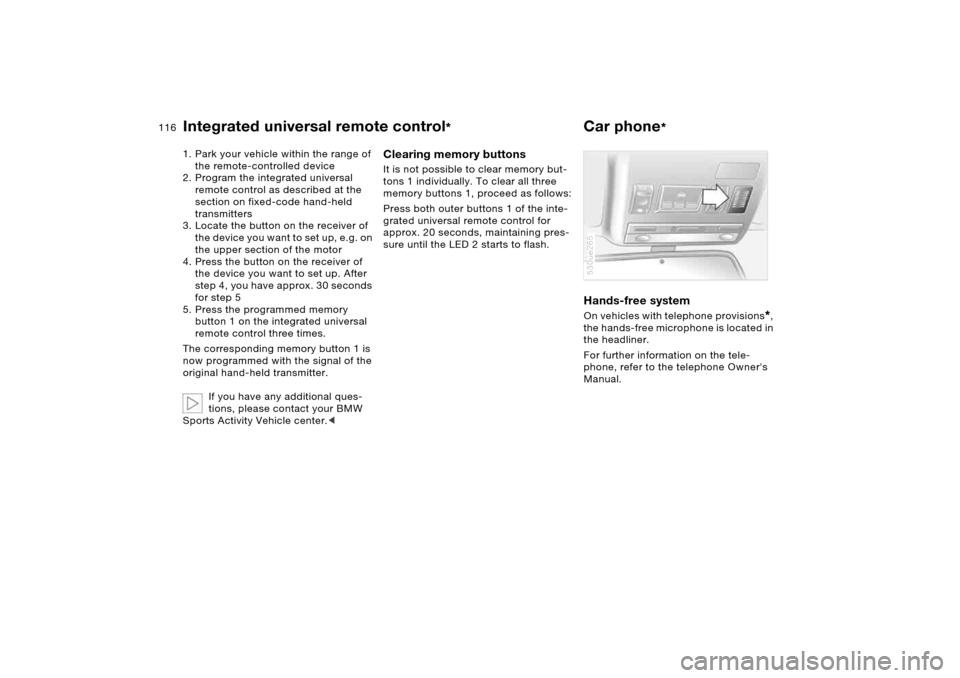
Hands-free system On vehicles with telephone provisions
*,
the hands-free microphone is located in
the headliner.
For further information on the tele-
phone, refer to the telephone Owner's
Manual.
530ue265
Page 117 of 202
117n
OverviewControlsMaintenanceRepairsDataIndex
Interior rearview mirror with digital compass
*
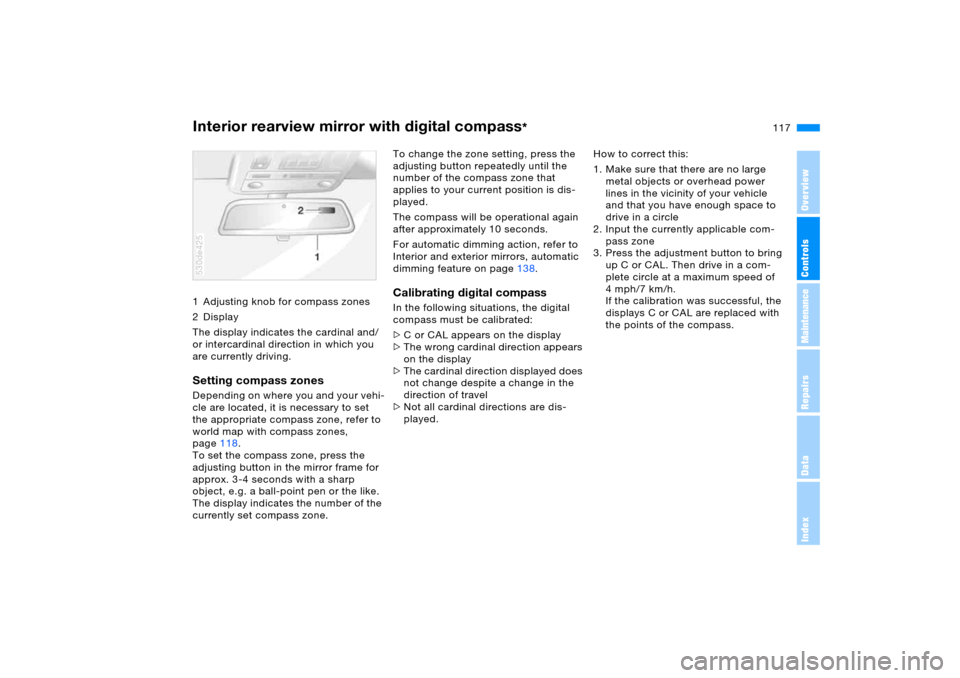
1 Adjusting knob for compass zones
2Display
The display indicates the cardinal and/
or intercardinal direction in which you
are currently driving.Setting compass zonesDepending on where you and your vehi-
cle are located, it is necessary to set
the appropriate compass zone, refer to
world map with compass zones,
page118.
To set the compass zone, press the
adjusting button in the mirror frame for
approx. 3-4 seconds with a sharp
object, e.g. a ball-point pen or the like.
The display indicates the number of the
currently set compass zone.530de425
To change the zone setting, press the
adjusting button repeatedly until the
number of the compass zone that
applies to your current position is dis-
played.
The compass will be operational again
after approximately 10 seconds.
For automatic dimming action, refer to
Interior and exterior mirrors, automatic
dimming feature on page138.Calibrating digital compassIn the following situations, the digital
compass must be calibrated:
>C or CAL appears on the display
>The wrong cardinal direction appears
on the display
>The cardinal direction displayed does
not change despite a change in the
direction of travel
>Not all cardinal directions are dis-
played.How to correct this:
1. Make sure that there are no large
metal objects or overhead power
lines in the vicinity of your vehicle
and that you have enough space to
drive in a circle
2. Input the currently applicable com-
pass zone
3. Press the adjustment button to bring
up C or CAL. Then drive in a com-
plete circle at a maximum speed of
4mph/7km/h.
If the calibration was successful, the
displays C or CAL are replaced with
the points of the compass.
Page 132 of 202
132n
Cargo loading Roof-mounted luggage rack
*
Always position and secure the
load as described above. If you do
not, it can endanger the passengers
during braking or evasive maneuvers.
Do not exceed the permissible gross
vehicle weight and the permissible axle
loads, refer to page182. If you do, the
operating safety of the vehicle is no
longer ensured and you are in violation
of the law.
You should never transport heavy or
hard objects unsecured in the passen-
ger compartment, as they could fly
around and pose a safety hazard to the
vehicle's occupants even during abrupt
braking or evasive maneuvers.<
A special rack system is available as an
option for your BMW. Please comply
with the precautions included with the
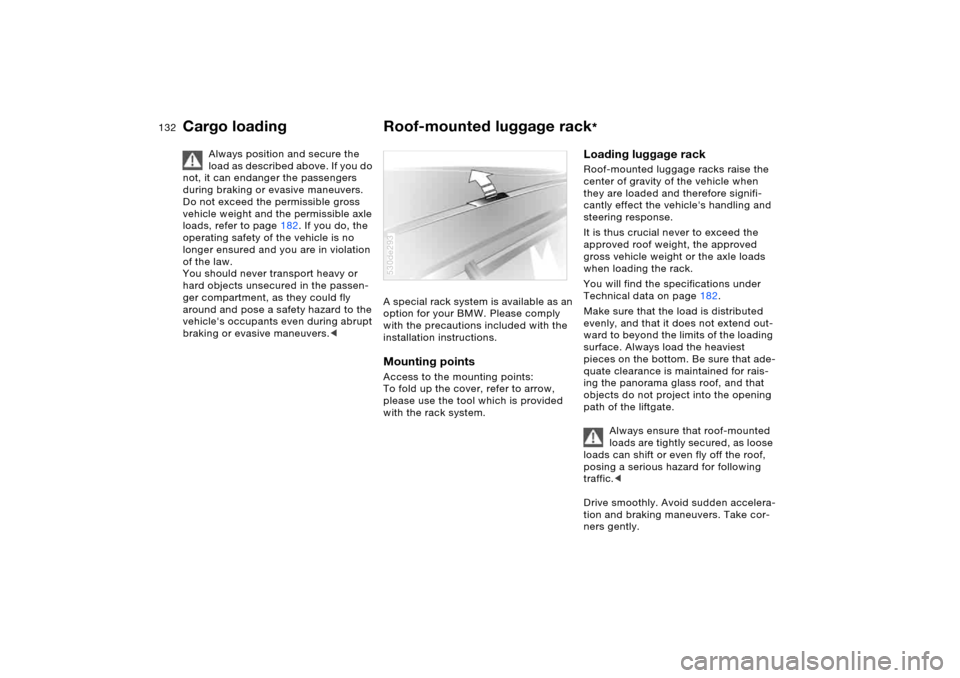
installation instructions.Mounting pointsAccess to the mounting points:
To fold up the cover, refer to arrow,
please use the tool which is provided
with the rack system.530de293
Loading luggage rackRoof-mounted luggage racks raise the
center of gravity of the vehicle when
they are loaded and therefore signifi-
cantly effect the vehicle's handling and
steering response.
It is thus crucial never to exceed the
approved roof weight, the approved
gross vehicle weight or the axle loads
when loading the rack.
You will find the specifications under
Technical data on page182.
Make sure that the load is distributed
evenly, and that it does not extend out-
ward to beyond the limits of the loading
surface. Always load the heaviest
pieces on the bottom. Be sure that ade-
quate clearance is maintained for rais-
ing the panorama glass roof, and that
objects do not project into the opening
path of the liftgate.
Always ensure that roof-mounted
loads are tightly secured, as loose
loads can shift or even fly off the roof,
posing a serious hazard for following
traffic.<
Drive smoothly. Avoid sudden accelera-
tion and braking maneuvers. Take cor-
ners gently.
Page 137 of 202
137n
OverviewControlsMaintenanceRepairsDataIndex
General driving notesClosing liftgate/tailgate
Operate the vehicle only when the
tailgate and liftgate are completely
closed. Otherwise, exhaust fumes
could enter into the passenger com-
partment.<
However, if special circumstances
should make it absolutely necessary to
operate the vehicle with the liftgate/tail-
gate open:
1. Close all windows and the panorama
glass roof
2. Increase the air supply for the air
conditioner or automatic climate
control to a high level, refer to
page105 or109.
Hot exhaust system
Extreme temperatures occur on
the exhaust system on any vehi-
cle. Do not remove the heat shields
installed adjacent to it, and never apply
undercoating to them. When driving,
standing at idle and while parking, take
care to avoid possible contact between
a hot exhaust system and any highly
flammable materials such as hay,
leaves, grass etc. Otherwise, there is a
danger of ignition and fire, with the risk
of serious injuries and damage.<
Mobile communications devices
in vehicle
BMW advises against using
mobile communications devices
such as mobile phones inside the vehi-
cle unless they are directly connected
to the external antenna. Otherwise, it is
impossible to prevent a mutual interfer-
ence of the vehicle electronics with the
mobile phone device. Also, there is no
guarantee that the radiation generated
by the transmission will be conveyed
out from the interior of the vehicle.<
When vehicle is parked Condensation forms in the air condi-
tioner system during operation and then
exits under the vehicle. Traces of water
on the ground are therefore normal.Brakes
Do not drive with your foot resting
on the brake pedal. Even light but
consistent pedal pressure can lead to
excessively high temperatures, brake
wear and possibly even brake failure.<
Road hazards
If road hazards, obstacles or curbs
are unavoidable, only drive over
them very slowly and carefully, other-
wise the wheels and suspension parts,
especially on vehicles fitted with low
profile tires, can be damaged.<
For more information on wheels and
tires, refer to page146.
Before driving into a car washFold in the exterior mirrors, refer to
page53, otherwise they could be dam-
aged due to the width of the vehicle.Hydroplaning
When driving on wet or slushy
roads, reduce road speed. If you
do not, a wedge of water can form
between tires and road surface. This
state can cause a partial or total loss
of contact with the road surface, of
braking control and of control over the
vehicle.<
Page 140 of 202
140n
Safe braking Emergency stops You brake most effectively when you
apply maximum pedal pressure in situa-
tions requiring it: emergency stops.
Since the vehicle maintains steering
responsiveness, you can nevertheless
avoid possible obstacles with a mini-
mum of steering effort.
Pulsation at the brake pedal combined
with sounds from the hydraulic circuits
indicates to the driver that ABS is in its
active mode.Brake fluid level If the brake fluid level is too low and
brake pedal travel has become longer,
there may be a malfunction in one of
the two brake system's hydraulic cir-
cuits.
Proceed to the nearest BMW
Sports Activity Vehicle center.
In so doing, increased pressure on the
brake pedal may be required, and slight
pulling to the side and longer braking
distances may result. Please remember
to adapt your driving style accord-
ingly.<
Disk brakes When the vehicle is driven only occa-
sionally, during extended periods when
the vehicle is not used at all, and in
operating conditions where brake appli-
cations are less frequent, there is an
increased tendency for corrosion to
form on rotors, while contaminants
accumulate on the brake pads. This
occurs because the minimal pressure
that the pads must exert to clean the
rotors during brake applications is not
reached.
If the brake rotors are corroded, they
will tend to respond to braking with a
pulsating effect that even extended
application will fail to cure.
When driving in wet conditions and in
heavy rain, it is advisable to apply light
pressure to the brake pedal from time
to time. Monitor traffic conditions to
ensure that this maneuver does not
endanger other road users. The heat
generated in this process helps dry the
pads and rotors to ensure that the brak-
ing force is then immediately available
when required.
Extended or steep mountain descents
should be driven in the gear in which
only minimal periodic brake application
is required. This avoids excessive strain on the brakes and possible impairment
of braking action.
Do not drive with the clutch pedal
depressed, at idle or with the
engine switched off, as otherwise there
will be no engine braking effect or
power assistance for braking and steer-
ing.
BMW recommends having brake
inspections performed at a BMW
Sports Activity Vehicle center only. If
you do not, parts of the 4-wheel drive
system could be damaged.
No floor mats, carpets or other objects
may lie in the area of pedal travel, as
otherwise pedal operation may be
impaired.<
Brake pads
For your own safety: use only
brake pads that BMW has
approved for your particular vehicle
model. BMW cannot evaluate non-
approved brake pads to determine if
they are suited for use, and therefore
cannot ensure the operating safety of
the vehicle if they are installed.<
Page 141 of 202
141n
OverviewControlsMaintenanceRepairsDataIndex
Information for your safety The condition of the tires and the main-
tenance of the specified tire pressure
are crucial not only to the tire's service
life, but also to driving comfort and
most importantly, driving safety. Checking pressureOnly check tire inflation pressure when
the tires are cold. This means after a
maximum of 1.25 miles/2 km driving or
when the vehicle has been parked for at
least 2 hours. When tires are warm, the
tire inflation pressure increases.
Check the tire inflation pressure
regularly and correct it as needed,
even on the spare wheel: at least twice
a month and before starting long trips. If
you fail to observe this precaution, you
may be driving on tires with incorrect
tire pressures, a condition that can not
only compromise your vehicle's driving
stability, but also lead to tire damage
and the risk of an accident. Do not drive
with deflated, i.e. flat, tires. A flat tire
will seriously impairs your vehicle's
handling and braking response.
Attempts to drive on a flat tire can lead
to loss of control over the vehicle.<
After correcting the inflation pres-
sure(s), always reinitialize the Flat
Tire Monitor, refer to page99.<
Inflation pressures for factory-
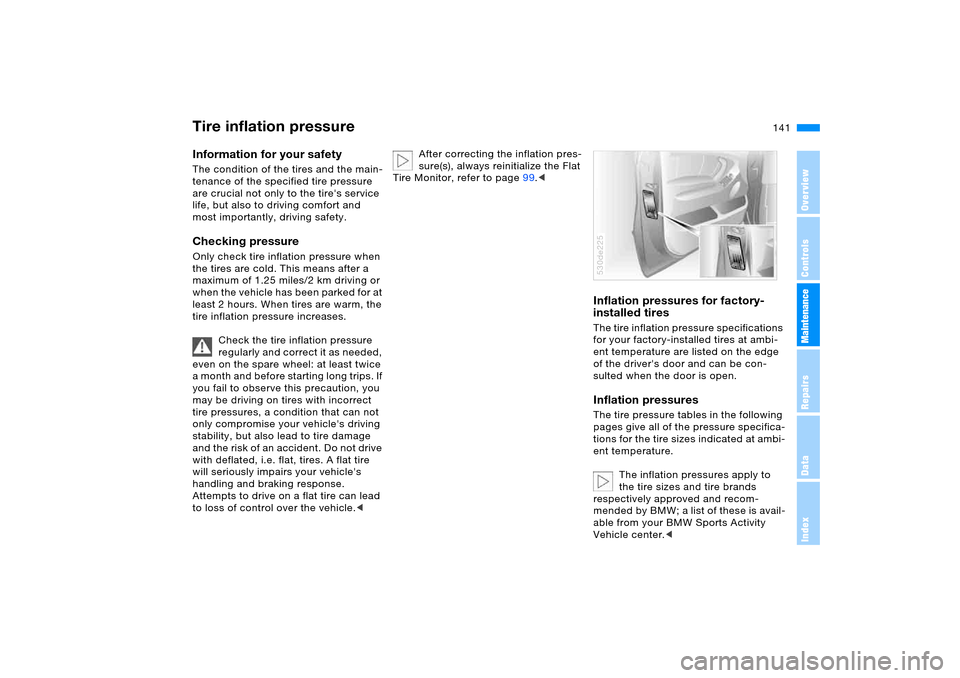
installed tiresThe tire inflation pressure specifications
for your factory-installed tires at ambi-
ent temperature are listed on the edge
of the driver's door and can be con-
sulted when the door is open.Inflation pressuresThe tire pressure tables in the following
pages give all of the pressure specifica-
tions for the tire sizes indicated at ambi-
ent temperature.
The inflation pressures apply to
the tire sizes and tire brands
respectively approved and recom-
mended by BMW; a list of these is avail-
able from your BMW Sports Activity
Vehicle center.<530de225
Tire inflation pressure
Page 142 of 202
142n
Tire inflation pressureFor correct identification of the right tire
inflation pressure for your tires, observe
the following:
>Tire sizes for your vehicle
>Load conditions
>Maximum allowable driving speed
Tire inflation pressures for driving up to
100mph or 160km/h:
For normal driving up to 100 mph or
160 km/h adjust pressures to the
respective tire inflation pressures listed
on the following page in the traveling
speeds column for normal driving at
spe eds up to a m axim um o f 10 0 m p h or
160 km/h to achieve optimum driving
comfort.
The permissible top speed for
these tire inflation pressures is
100mph or 160km/h. Do not exceed
this speed, as otherwise tire damage
and accidents may result.<
Tire inflation pressures for driving
above 100 mph or 160 km/h:
In order to drive at maximum
speeds in excess of 100 mph or
160 km/h, please observe, and, if nec-
essary, adjust tire pressures for speeds
exceeding 100 mph or 160 km/h from
the relevant table on the following
pages. Otherwise tire damage and acci-
dents could occur.<
Page 145 of 202
145n
OverviewControlsMaintenanceRepairsDataIndex
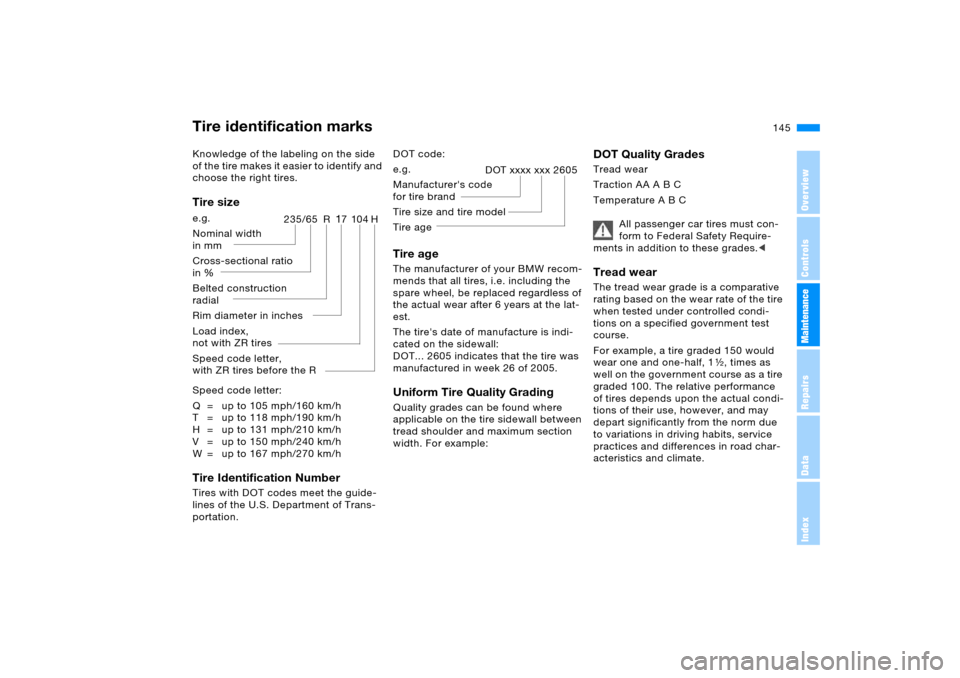
Tire identification marksKnowledge of the labeling on the side
of the tire makes it easier to identify and
choose the right tires.Tire sizeSpeed code letter:
Q = up to 105 mph/160 km/h
T = up to 118 mph/190 km/h
H = up to 131 mph/210 km/h
V = up to 150 mph/240 km/h
W = up to 167 mph/270 km/hTire Identification Number Tires with DOT codes meet the guide-
lines of the U.S. Department of Trans-
portation. e.g.
Nominal width
in mm
Cross-sectional ratio
in Ξ
Belted construction
radial
Rim diameter in inches
Load index,
not with ZR tires
Speed code letter,
with ZR tires before the R
235/65 R
17104H
DOT code: Tire age The manufacturer of your BMW recom-
mends that all tires, i.e. including the
spare wheel, be replaced regardless of
the actual wear after 6 years at the lat-
est.
The tire's date of manufacture is indi-
cated on the sidewall:
DOT... 2605 indicates that the tire was
manufactured in week 26 of 2005. Uniform Tire Quality Grading Quality grades can be found where
applicable on the tire sidewall between
tread shoulder and maximum section
width. For example: e.g.
Manufacturer's code
for tire brand
Tire size and tire model
Tire age
DOT xxxx xxx 2605
DOT Quality Grades Tread wear
Traction AA A B C
Temperature A B C
All passenger car tires must con-
form to Federal Safety Require-
ments in addition to these grades.< Tread wear The tread wear grade is a comparative
rating based on the wear rate of the tire
when tested under controlled condi-
tions on a specified government test
course.
For example, a tire graded 150 would
wear one and one-half, 1γ, times as
well on the government course as a tire
graded 100. The relative performance
of tires depends upon the actual condi-
tions of their use, however, and may
depart significantly from the norm due
to variations in driving habits, service
practices and differences in road char-
acteristics and climate.