BMW X5 XDRIVE 30I 2009 E70 Owner's Manual
Manufacturer: BMW, Model Year: 2009, Model line: X5 XDRIVE 30I, Model: BMW X5 XDRIVE 30I 2009 E70Pages: 317, PDF Size: 9.56 MB
Page 151 of 317
Navigation
Driving tips
149Reference
At a glance
Controls
Communications
Entertainment
Mobility
4.Turn the controller until "Language / Units"
is selected and press the controller.
5. Change to upper field if necessary. Turn the
controller until "Languages" is selected and
press the controller.
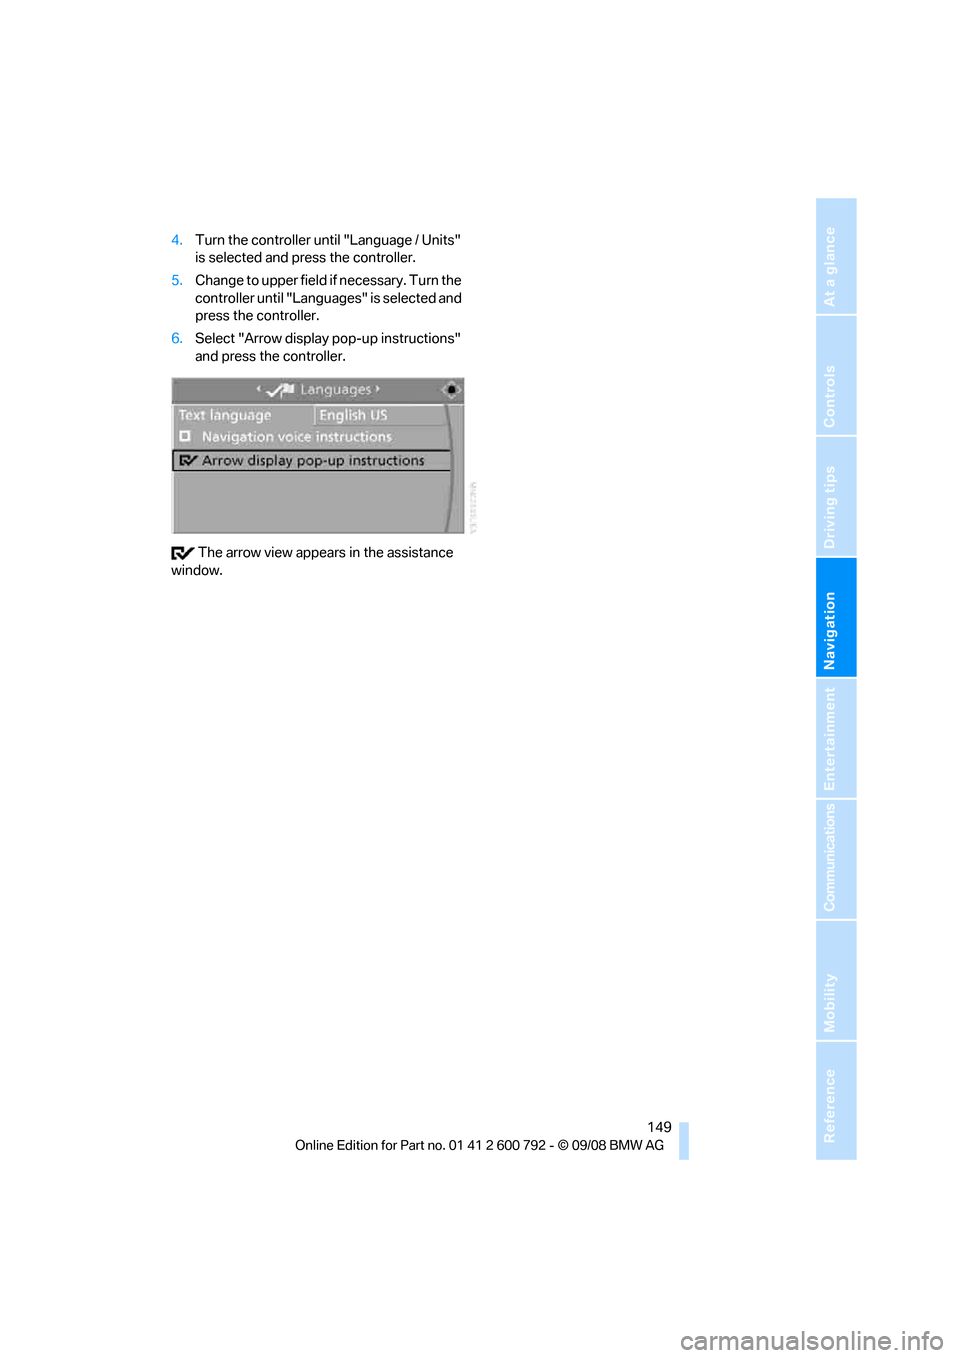
6. Select "Arrow display pop-up instructions"
and press the controller.
The arrow view appears in the assistance
window.
Page 152 of 317
Destination entry
150
Destination entry
In entering your destination you can select from
among the following options:
>Entering a destination manually, see below
> Entering destination via voice*, refer to
page 153
> Selecting destination using information,
refer to page 156
> Selecting destination from a list, refer to
Destination list, page 157
> Selecting destination from address book,
refer to page 158
> Selecting home addr ess, refer to page160
After selecting your de stination you can pro-
ceed to start the destin ation guidance, refer to
page 162.
You can also store a navigation destination on
the programmable memo ry buttons, refer to
page 21.
Enter data only with the vehicle station-
ary, and always give priority to the appli-
cable traffic regulations in the event of any con-
tradiction between traffic and road conditions
and the instructions issu ed by the navigation
system. If you do not ob serve this precaution,
you can endanger the vehicle occupants and
other road users.
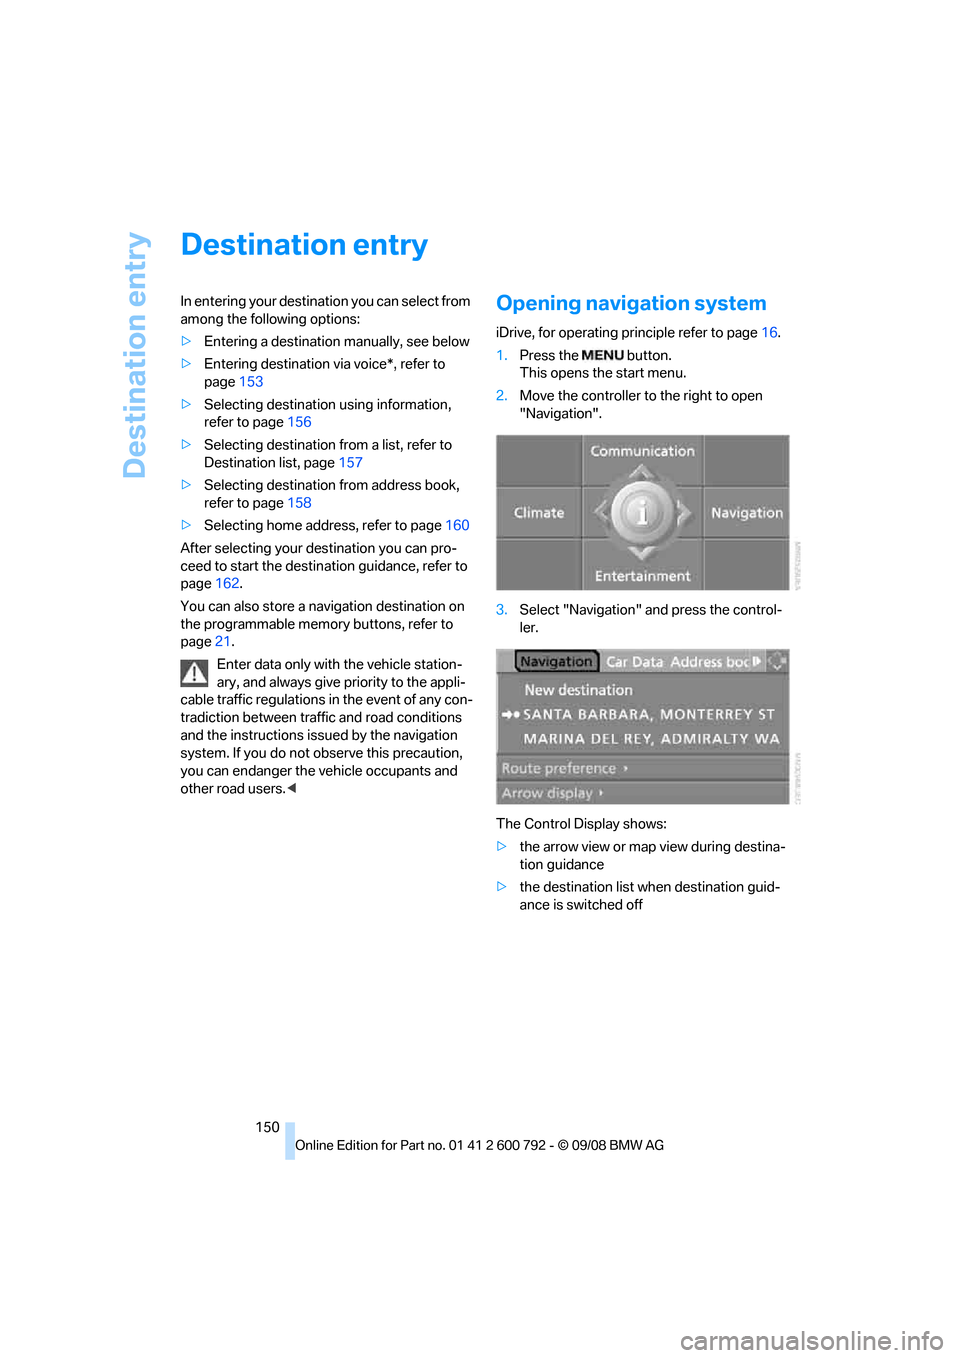
1. Press the button.
This opens the start menu.
2. Move the controller to the right to open
"Navigation".
3. Select "Navigation" and press the control-
ler.
The Control Display shows:
> the arrow view or map view during destina-
tion guidance
> the destination list when destination guid-
ance is switched off
Page 153 of 317
Navigation
Driving tips
151Reference
At a glance
Controls
Communications
Entertainment
Mobility
Entering a destination
manually
The system's word matching principle makes it
easier for you to enter the names of streets or
towns/cities, refer to page161. This allows you
to enter different spellin gs and completes your
entry automatically so that stored names can be
called up quickly.
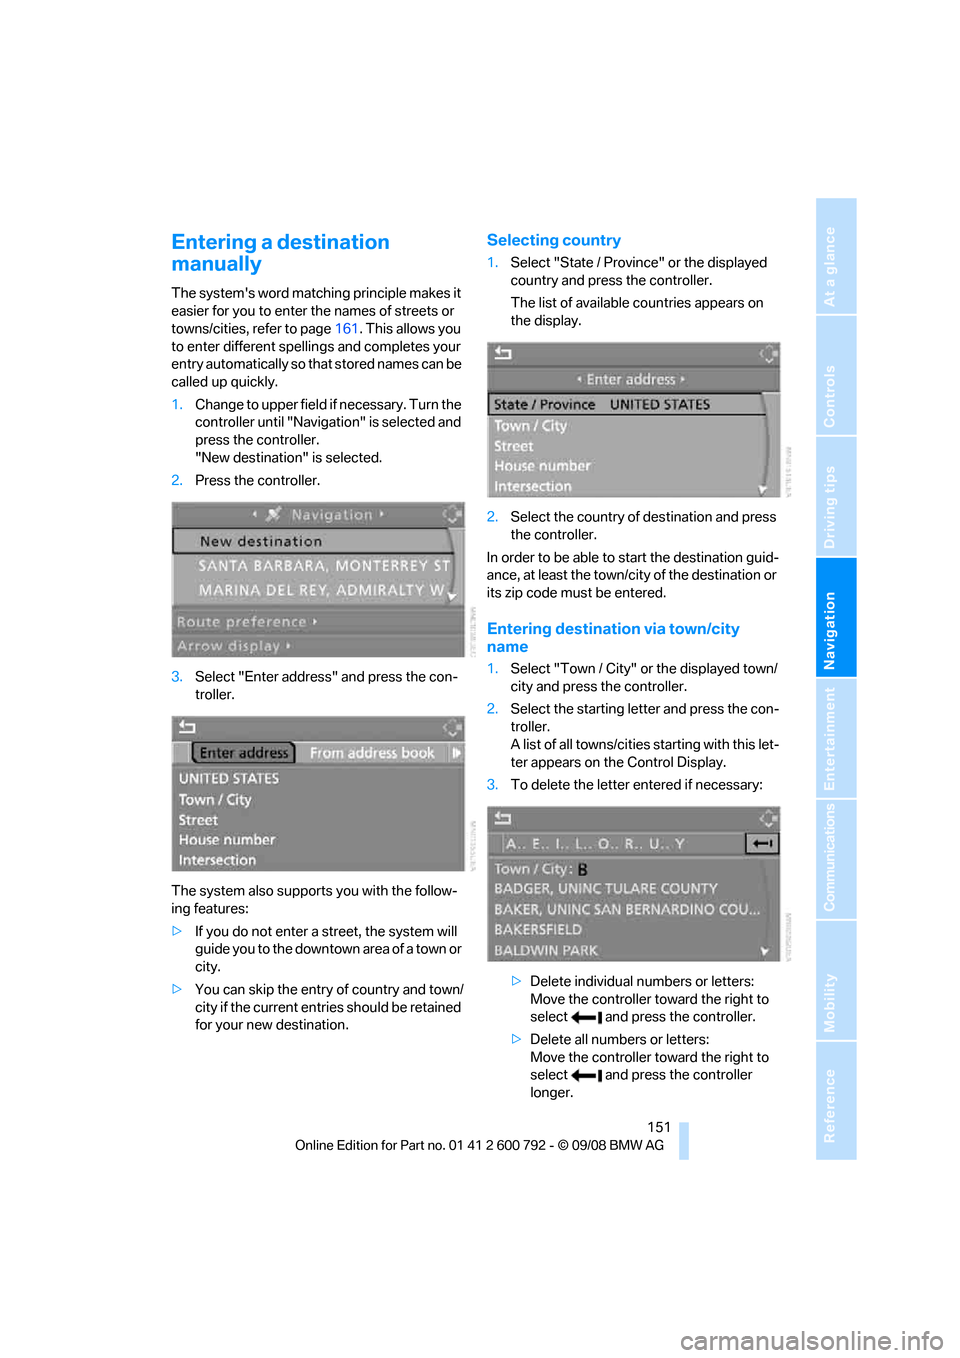
1. Change to upper field if necessary. Turn the
controller until "Navigation" is selected and
press the controller.
"New destination" is selected.
2. Press the controller.
3. Select "Enter address" and press the con-
troller.
The system also supports you with the follow-
ing features:
> If you do not enter a street, the system will
guide you to the downtown a r e a o f a t o w n o r
city.
> You can skip the entry of country and town/
city if the current entries should be retained
for your new destination.
Selecting country
1.Select "State / Province" or the displayed
country and press the controller.
The list of available countries appears on
the display.
2. Select the country of destination and press
the controller.
In order to be able to start the destination guid-
ance, at least the town/cit y of the destination or
its zip code must be entered.
Entering destination via town/city
name
1. Select "Town / City" or the displayed town/
city and press the controller.
2. Select the starting letter and press the con-
troller.
A list of all towns/cities starting with this let-
ter appears on the Control Display.
3. To delete the letter entered if necessary:
>Delete individual numbers or letters:
Move the controller to ward the right to
select and press the controller.
> Delete all numbers or letters:
Move the controller to ward the right to
select and press the controller
longer.
Page 154 of 317
Destination entry
152
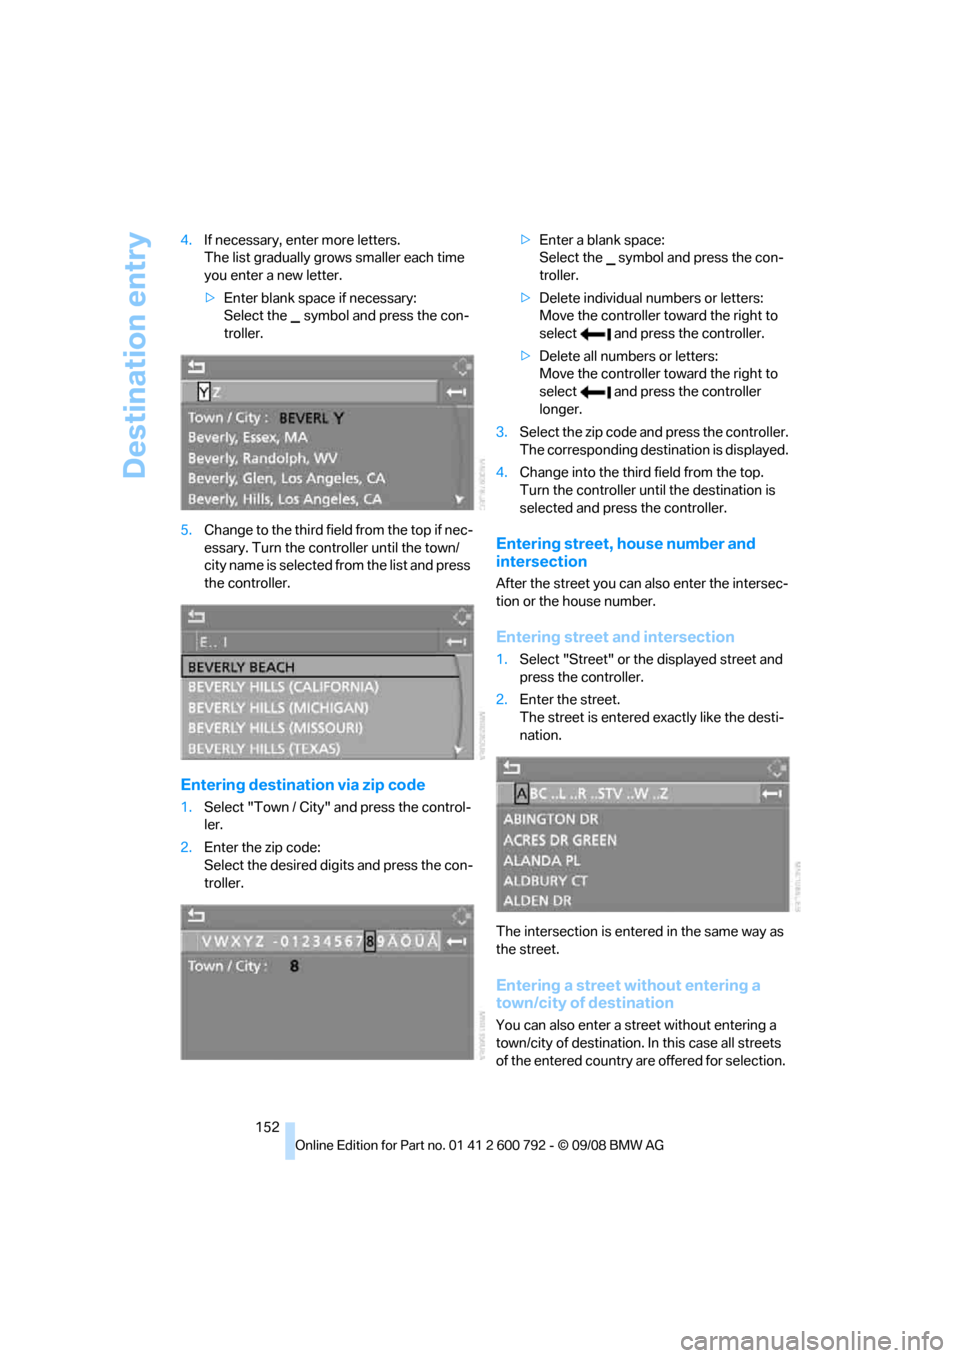
4.
If necessary, enter more letters.
The list gradually grow s smaller each time
you enter a new letter.
> Enter blank space if necessary:
Select the symbol and press the con-
troller.
5. Change to the third fiel d from the top if nec-
essary. Turn the cont roller until the town/
city name is selected from the list and press
the controller.
Entering destinat ion via zip code
1.Select "Town / City" and press the control-
ler.
2. Enter the zip code:
Select the desired digits and press the con-
troller. >
Enter a blank space:
Select the symbol and press the con-
troller.
> Delete individual numbers or letters:
Move the controller toward the right to
select and press the controller.
> Delete all numbers or letters:
Move the controller toward the right to
select and press the controller
longer.
3. Select the zip code and press the controller.
The corresponding dest ination is displayed.
4. Change into the third field from the top.
Turn the controller until the destination is
selected and press the controller.
Entering street, house number and
intersection
After the street you can also enter the intersec-
tion or the house number.
Entering street and intersection
1.Select "Street" or the displayed street and
press the controller.
2. Enter the street.
The street is entered exactly like the desti-
nation.
The intersection is entered in the same way as
the street.
Entering a street without entering a
town/city of destination
You can also enter a street without entering a
town/city of destination. In this case all streets
of the entered country are offered for selection.
Page 155 of 317
Navigation
Driving tips
153Reference
At a glance
Controls
Communications
Entertainment
Mobility
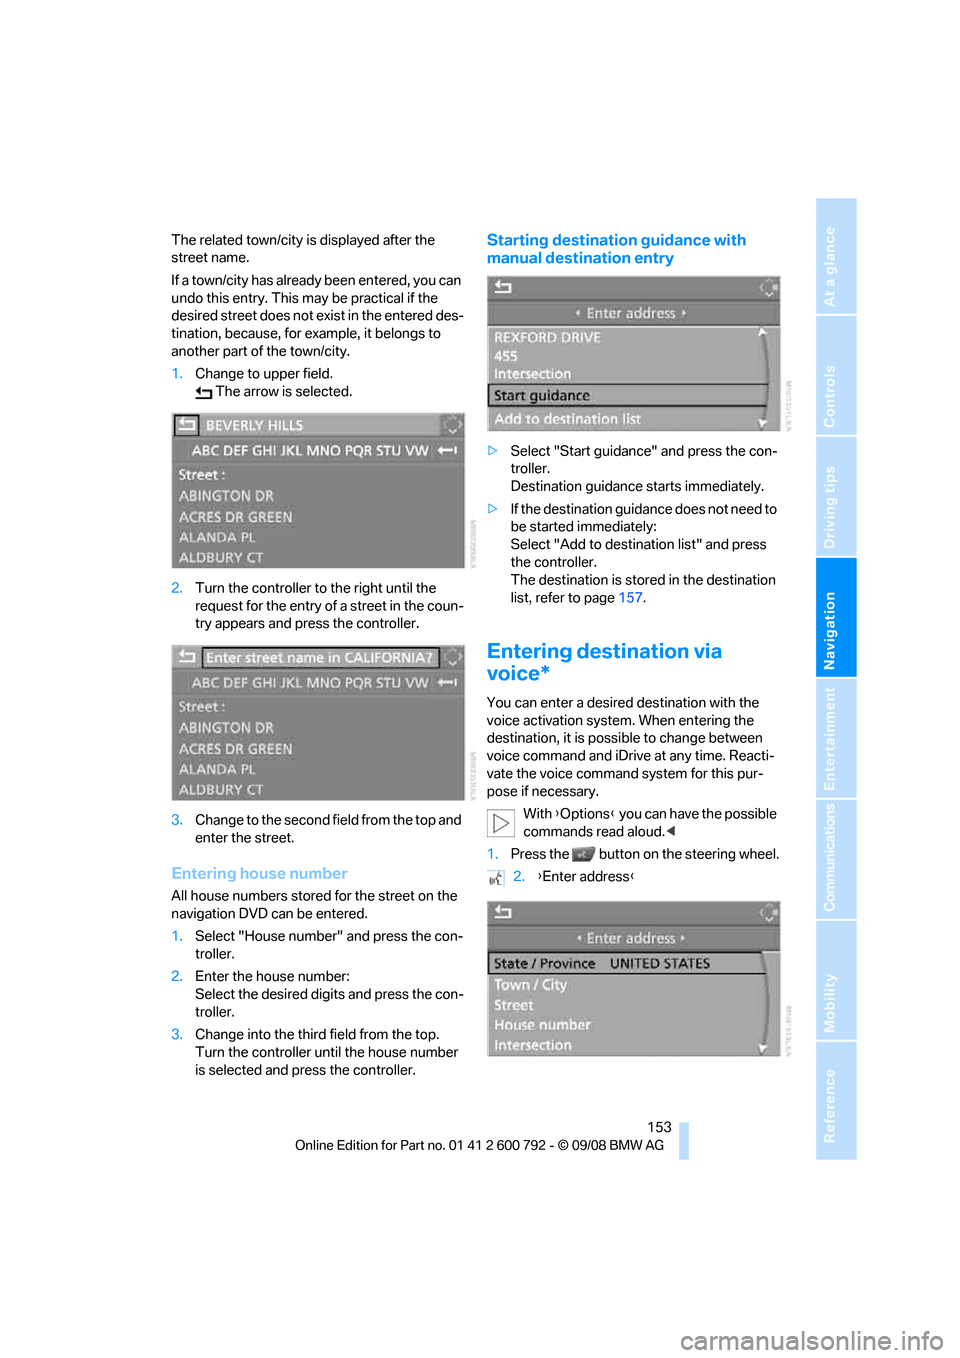
The related town/city is displayed after the
street name.
If a town/city has already been entered, you can
undo this entry. This may be practical if the
desired street does not exist in the entered des-
tination, because, for example, it belongs to
another part of the town/city.
1. Change to upper field.
The arrow is selected.
2. Turn the controller to the right until the
request for the entry of a street in the coun-
try appears and press the controller.
3. Change to the second field from the top and
enter the street.
Entering house number
All house numbers stored for the street on the
navigation DVD can be entered.
1.Select "House number" and press the con-
troller.
2. Enter the house number:
Select the desired digits and press the con-
troller.
3. Change into the third field from the top.
Turn the controller until the house number
is selected and press the controller.
Starting destination guidance with
manual destination entry
>Select "Start guidance" and press the con-
troller.
Destination guidance starts immediately.
> If the destination guidance does not need to
be started immediately:
Select "Add to destination list" and press
the controller.
The destination is stored in the destination
list, refer to page 157.
Entering destination via
voice*
You can enter a desired destination with the
voice activation system . When entering the
destination, it is possible to change between
voice command and iDrive at any time. Reacti-
vate the voice command system for this pur-
pose if necessary.
With {Options } you can have the possible
commands read aloud. <
1. Press the button on the steering wheel.
2.{Enter address }
Page 156 of 317
Destination entry
154
Selecting country
1.Wait for the system to ask for the country of
destination.
Say the name of the coun try of destination in
the language of the vo ice activation system.
Entering destination
The destination can be sp elled or entered as an
entire word.
Spelling destination
To enter the destination, spell it using the
orthography of the coun try of destination.
Pronounce the letters smoothly and at normal
volume, avoiding excessive emphasis and
pauses.
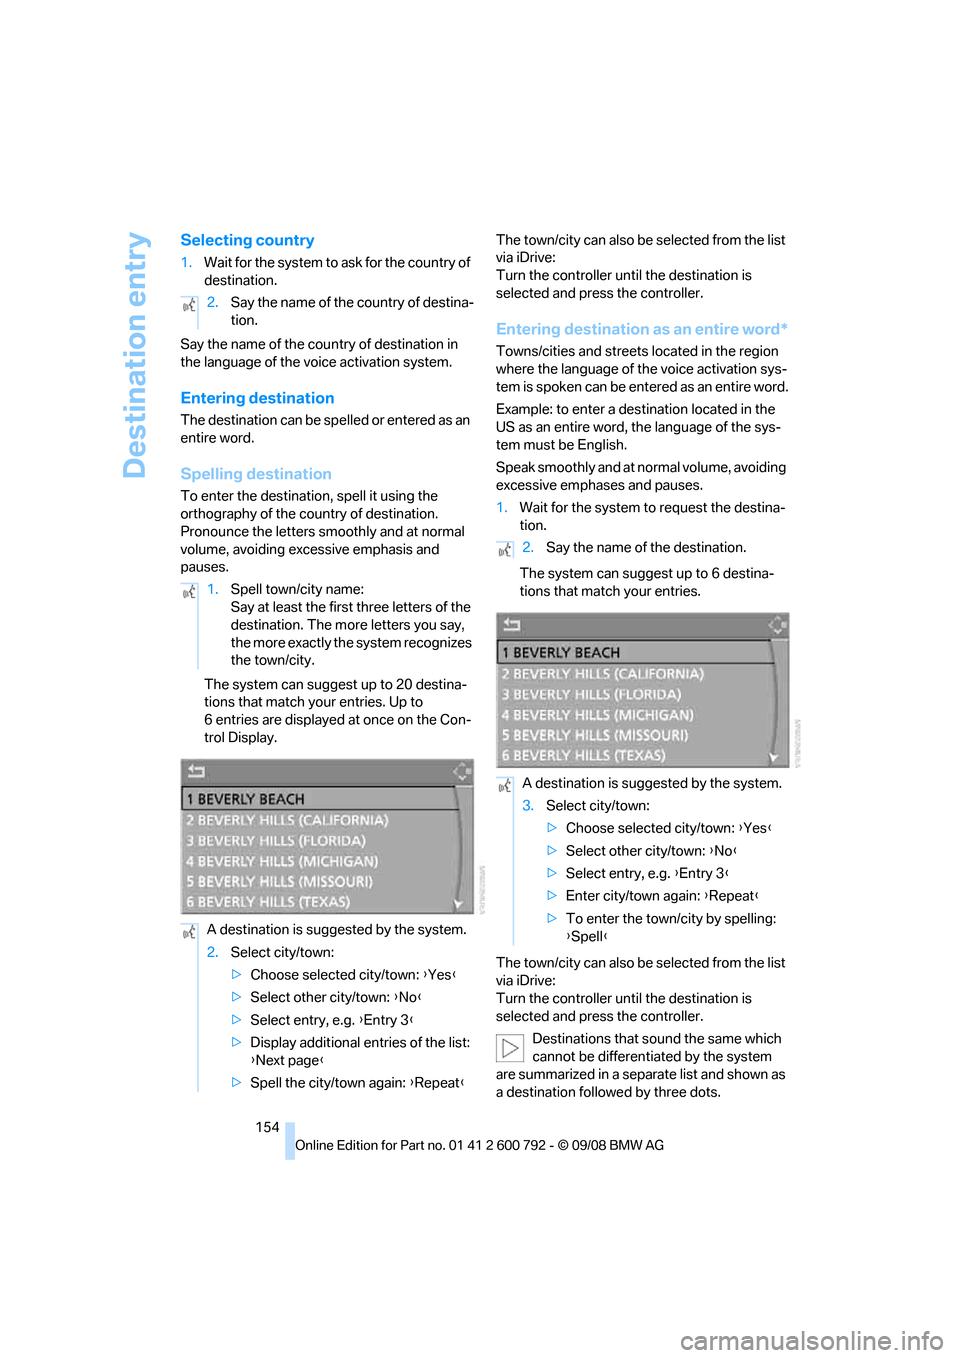
The system can suggest up to 20 destina-
tions that match your entries. Up to
6 entries are displayed at once on the Con-
trol Display. The town/city can also be
selected from the list
via iDrive:
Turn the controller until the destination is
selected and press the controller.
Entering destination as an entire word*
Towns/cities and streets located in the region
where the language of the voice activation sys-
tem is spoken can be entered as an entire word.
Example: to enter a destination located in the
US as an entire word, the language of the sys-
tem must be English.
Speak smoothly and at normal volume, avoiding
excessive emphases and pauses.
1. Wait for the system to request the destina-
tion.
The system can suggest up to 6 destina-
tions that match your entries.
The town/city can also be selected from the list
via iDrive:
Turn the controller until the destination is
selected and press the controller.
Destinations that sound the same which
cannot be differentia ted by the system
are summarized in a sepa rate list and shown as
a destination followe d by three dots.
2.
Say the name of the country of destina-
tion.
1. Spell town/city name:
Say at least the first three letters of the
destination. The more letters you say,
the more exactly the system recognizes
the town/city.
A destination is suggested by the system.
2. Select city/town:
>Choose selected city/town: { Yes}
> Select other city/town: {No }
> Select entry, e.g. {Entry 3 }
> Display additional entries of the list:
{Next page }
> Spell the city/town again: {Repeat }
2.Say the name of the destination.
A destination is suggested by the system.
3. Select city/town:
>Choose selected city/town: { Yes}
> Select other city/town: {No }
> Select entry, e.g. {Entry 3 }
> Enter city/town again: {Repeat }
> To enter the town/city by spelling:
{Spell }
Page 157 of 317
Navigation
Driving tips
155Reference
At a glance
Controls
Communications
Entertainment
Mobility
Select this entry with {Yes } if necessary. Then
select the desired city/town in this list. <
Entering street and house number
The street is entered in the same way as the
destination.
To enter the house number:
Up to 4-digit house numbers can be entered.
Say the house number as individual numbers.
Starting destination guidance
Destination guidance starts immediately.
Saving destination
The destination is added to the destination list
or can be stored in the address book.
Selecting destination via map
If you only know the location of the town/city or
street of the destination, then you can enter the
destination by using a map. You can use the
cursor to select the de stination on the map and
then apply it in the destination guidance.
1. Select "Navigation" and press the control-
ler.
"New destination" is selected.
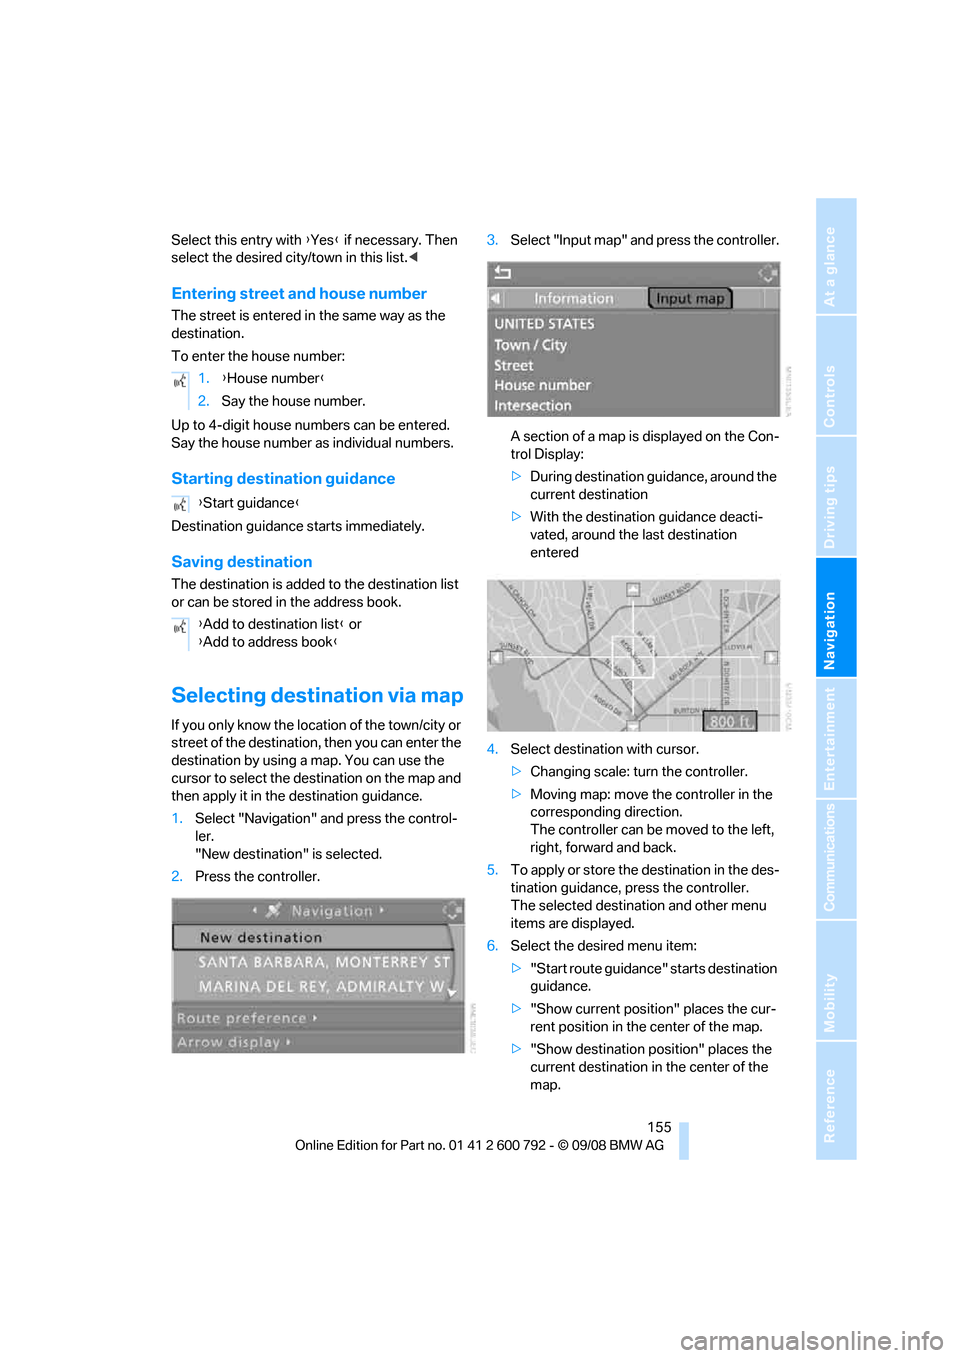
2. Press the controller. 3.
Select "Input map" and press the controller.
A section of a map is displayed on the Con-
trol Display:
> During destination guidance, around the
current destination
> With the destination guidance deacti-
vated, around the last destination
entered
4. Select destination with cursor.
>Changing scale: turn the controller.
> Moving map: move the controller in the
corresponding direction.
The controller can be moved to the left,
right, forward and back.
5. To apply or store the destination in the des-
tination guidance, press the controller.
The selected destinat ion and other menu
items are displayed.
6. Select the desired menu item:
>"Start route guidance" starts destination
guidance.
> "Show current position" places the cur-
rent position in the center of the map.
> "Show destination position" places the
current destination in the center of the
map.
1.
{House number }
2. Say the house number.
{ Start guidance }
{ Add to destination list } or
{ Add to address book }
Page 158 of 317
Destination entry
156
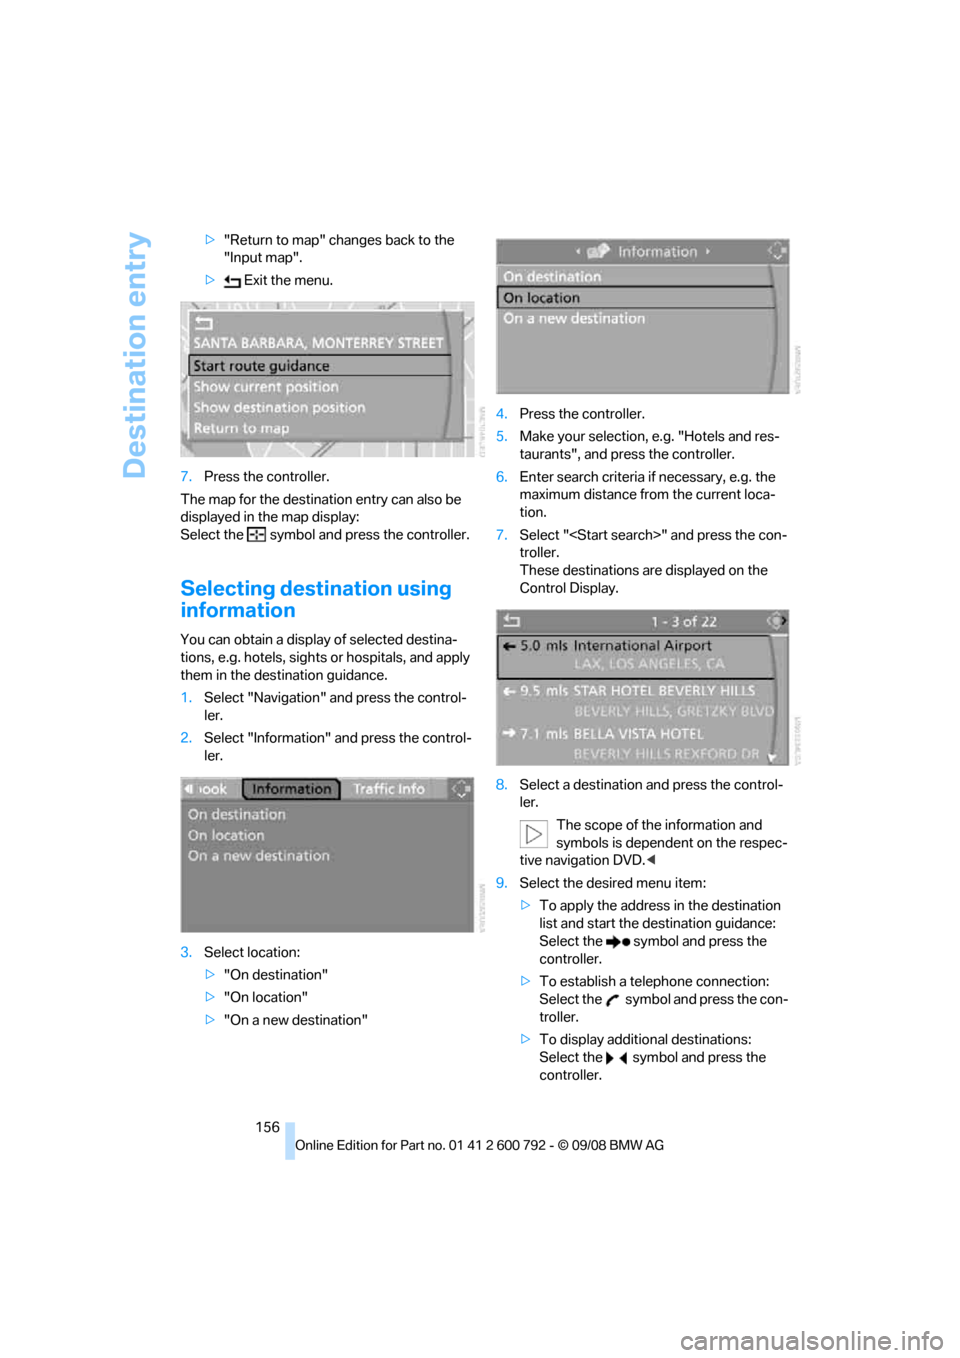
>
"Return to map" changes back to the
"Input map".
> Exit the menu.
7. Press the controller.
The map for the destination entry can also be
displayed in the map display:
Select the symbol and press the controller.
Selecting destination using
information
You can obtain a displa y of selected destina-
tions, e.g. hotels, sights or hospitals, and apply
them in the destination guidance.
1. Select "Navigation" and press the control-
ler.
2. Select "Information" and press the control-
ler.
3. Select location:
>"On destination"
> "On location"
> "On a new destination" 4.
Press the controller.
5. Make your selection, e.g. "Hotels and res-
taurants", and press the controller.
6. Enter search criteria if necessary, e.g. the
maximum distance from the current loca-
tion.
7. Select "
troller.
These destinations are displayed on the
Control Display.
8. Select a destination and press the control-
ler.
The scope of the information and
symbols is dependent on the respec-
tive navigation DVD. <
9. Select the desired menu item:
>To apply the address in the destination
list and start the destination guidance:
Select the symbol and press the
controller.
> To establish a telephone connection:
Select the symbol and press the con-
troller.
> To display additional destinations:
Select the symbol and press the
controller.
Page 159 of 317
Navigation
Driving tips
157Reference
At a glance
Controls
Communications
Entertainment
Mobility
>To start a new search:
Select the symbol and press the con-
troller.
To exit from the menu: Select the arrow and press the controller.
Symbols in map view
If, for example, you have selected the category
Hotels and have started the search, the hotels
are shown on the map as symbols.
To hide the symbols in the map view:
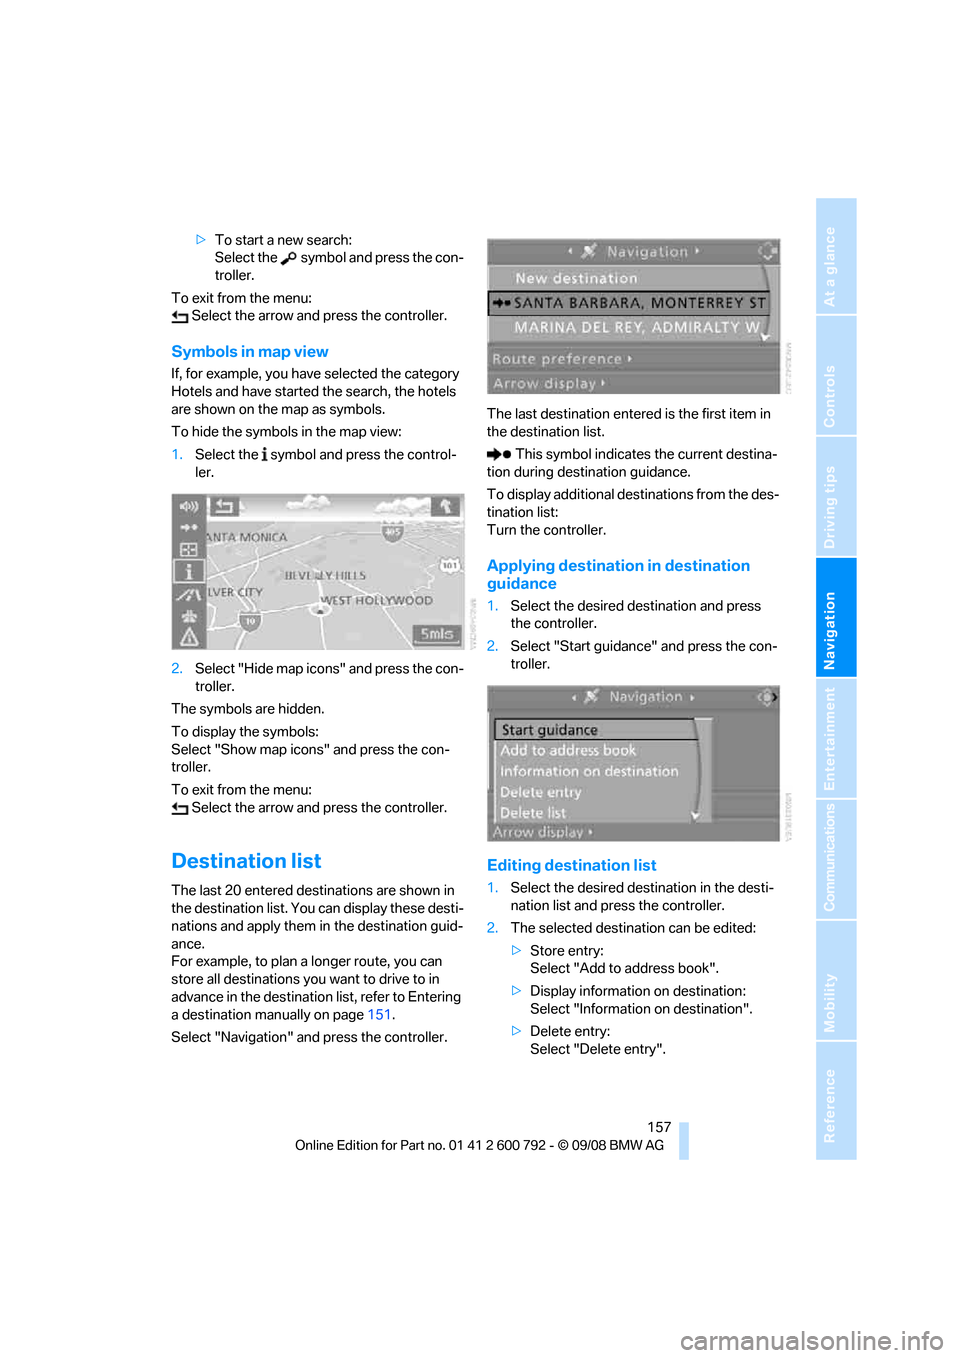
1. Select the symbol and press the control-
ler.
2. Select "Hide map icons" and press the con-
troller.
The symbols are hidden.
To display the symbols:
Select "Show map icons" and press the con-
troller.
To exit from the menu: Select the arrow and press the controller.
Destination list
The last 20 entered destinations are shown in
the destination list. You can display these desti-
nations and apply them in the destination guid-
ance.
For example, to plan a longer route, you can
store all destinations you want to drive to in
advance in the destination list, refer to Entering
a destination manually on page 151.
Select "Navigation" and press the controller. The last destination entered is the first item in
the destination list.
This symbol indicates the current destina-
tion during destination guidance.
To display additional de stinations from the des-
tination list:
Turn the controller.
Applying destination in destination
guidance
1. Select the desired destination and press
the controller.
2. Select "Start guidance" and press the con-
troller.
Editing destination list
1.Select the desired dest ination in the desti-
nation list and press the controller.
2. The selected destinat ion can be edited:
> Store entry:
Select "Add to address book".
> Display information on destination:
Select "Information on destination".
> Delete entry:
Select "Delete entry".
Page 160 of 317
Destination entry
158
>
Delete all entries:
Select "Delete list". The destination
guidance is switched off.
> Change entry:
Select "Edit". For operation, refer to
Entering destination via town/city name,
page 151.
3. Press the controller.
Address book
Opening address book
iDrive, for operating pr inciple refer to page16.
Select "Address book" and press the controller.
Storing destinations in address book
You can store approx. 100 destinations in the
address book.
1.Select "Address book" and press the con-
troller.
2. Select "New address" and press the con-
troller.
3. Select "Enter address" and press the con-
troller. 4.
Enter name and address, also refer to
Entering a destinat ion manually, page 151.
5. Select "Store in a ddress book" and press
the controller.
The entry is stored in the address book.
You can also store a destination from the desti-
nation list into the a ddress book, refer to
page 157.
Storing current position*
The current position can be applied in the
address book.
1.Select "Address book" and press the con-
troller.
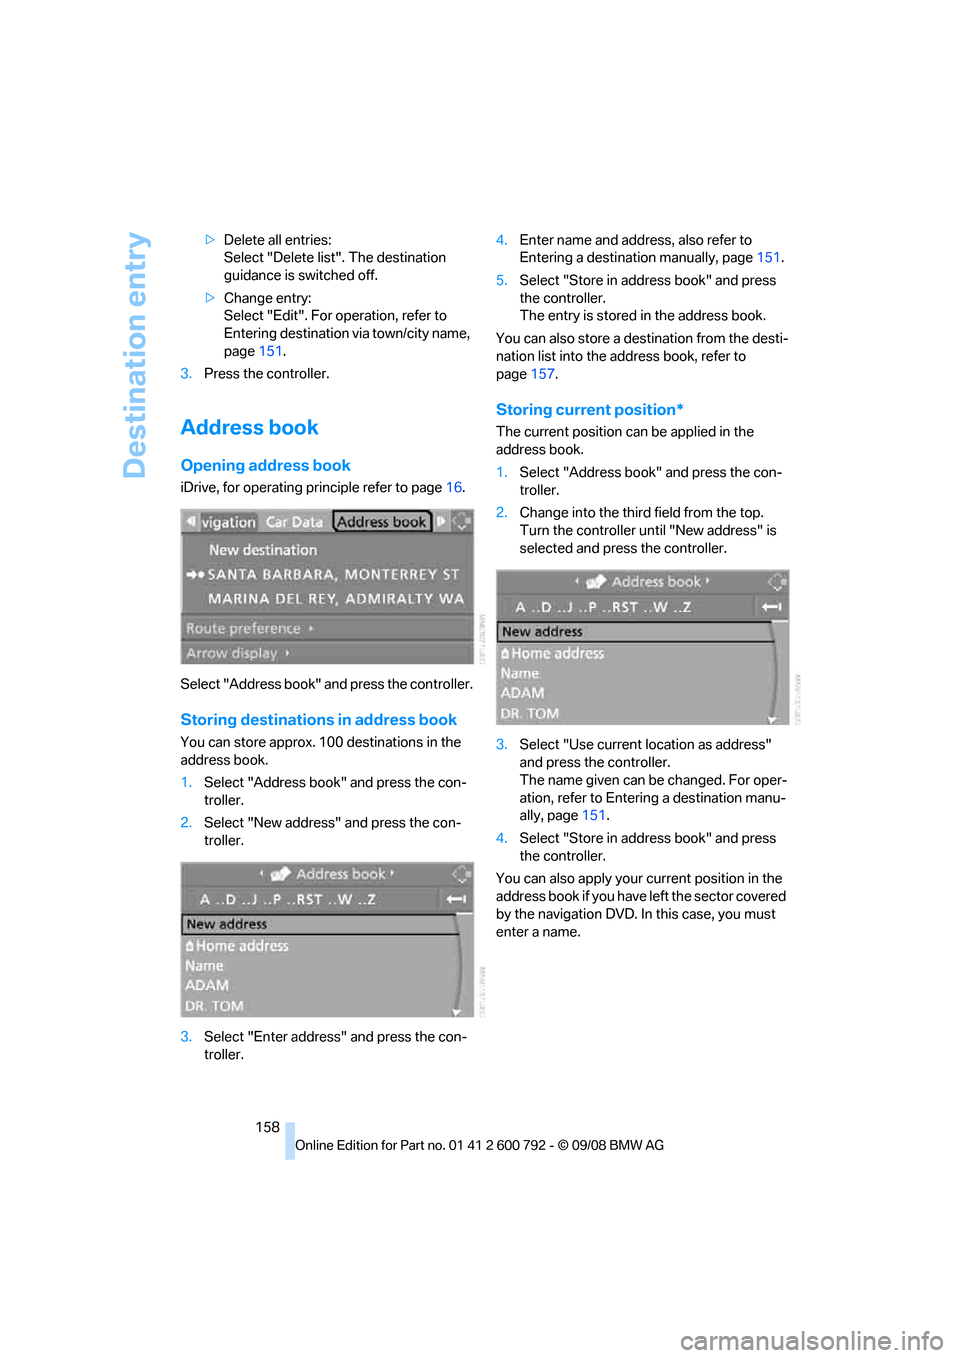
2. Change into the third field from the top.
Turn the controller until "New address" is
selected and press the controller.
3. Select "Use current location as address"
and press the controller.
The name given can be changed. For oper-
ation, refer to Entering a destination manu-
ally, page 151.
4. Select "Store in a ddress book" and press
the controller.
You can also apply your current position in the
address book if you have left the sector covered
by the navigation DVD. In this case, you must
enter a name.