ETC BMW X5 XDRIVE 30I 2009 E70 Owner's Manual
[x] Cancel search | Manufacturer: BMW, Model Year: 2009, Model line: X5 XDRIVE 30I, Model: BMW X5 XDRIVE 30I 2009 E70Pages: 317, PDF Size: 9.56 MB
Page 32 of 317
Opening and closing
30
Unlocking
Press the button.
This unlocks the vehicle.
Setting unlocking behavior
You can set whether the first press of the button
unlocks only the driver's door or the entire vehi-
cle.
iDrive, for operating pr inciple refer to page16.
1. Press the button.
This opens the start menu.
2. Press the controller to open the menu.
3. Select "Settings" and press the controller.
4. Select "Vehicle / Tire s" and press the con-
troller.
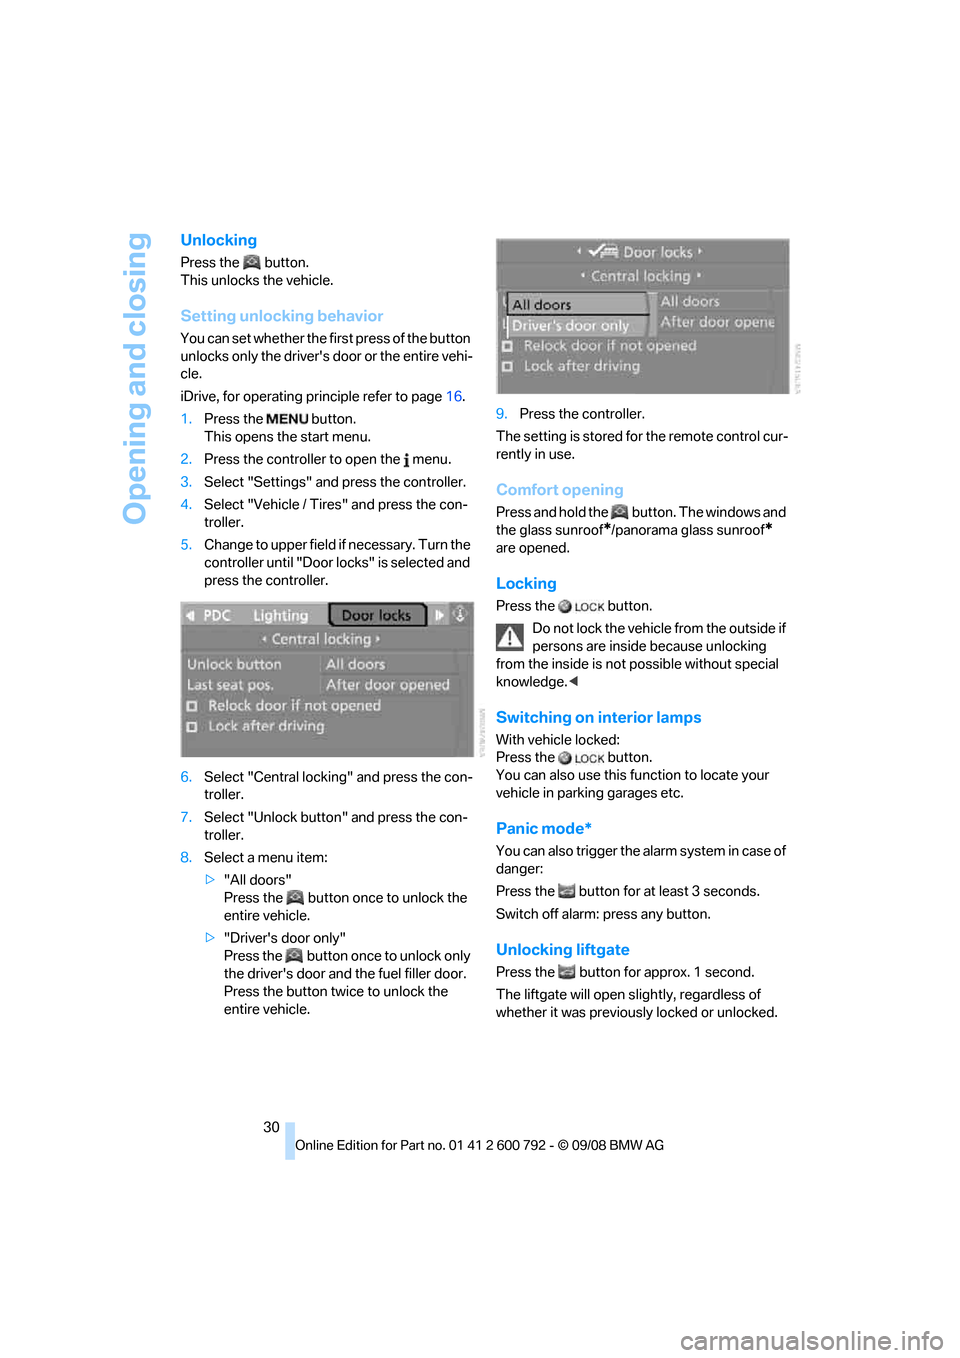
5. Change to upper field if necessary. Turn the
controller until "Door locks" is selected and
press the controller.
6. Select "Central locking" and press the con-
troller.
7. Select "Unlock button" and press the con-
troller.
8. Select a menu item:
>"All doors"
Press the button once to unlock the
entire vehicle.
> "Driver's door only"
Press the button once to unlock only
the driver's door and the fuel filler door.
Press the button twic e to unlock the
entire vehicle. 9.
Press the controller.
The setting is stored fo r the remote control cur-
rently in use.
Comfort opening
Press and hold the button. The windows and
the glass sunroof
*/panorama glass sunroof*
are opened.
Locking
Press the button.
Do not lock the vehicle from the outside if
persons are inside because unlocking
from the inside is not possible without special
knowledge. <
Switching on interior lamps
With vehicle locked:
Press the button.
You can also use this fu nction to locate your
vehicle in parking garages etc.
Panic mode*
You can also trigger the alarm system in case of
danger:
Press the button for at least 3 seconds.
Switch off alarm: press any button.
Unlocking liftgate
Press the button for approx. 1 second.
The liftgate will open s lightly, regardless of
whether it was previously locked or unlocked.
Page 60 of 317
Adjusting
58
Automatic heating
Below a certain outdoor temperature, both
exterior mirrors are automatically heated when
the motor is running or th e ignition is switched
on.
Tilting down passenger-side exterior
mirror – automatic curb monitor*
Activating
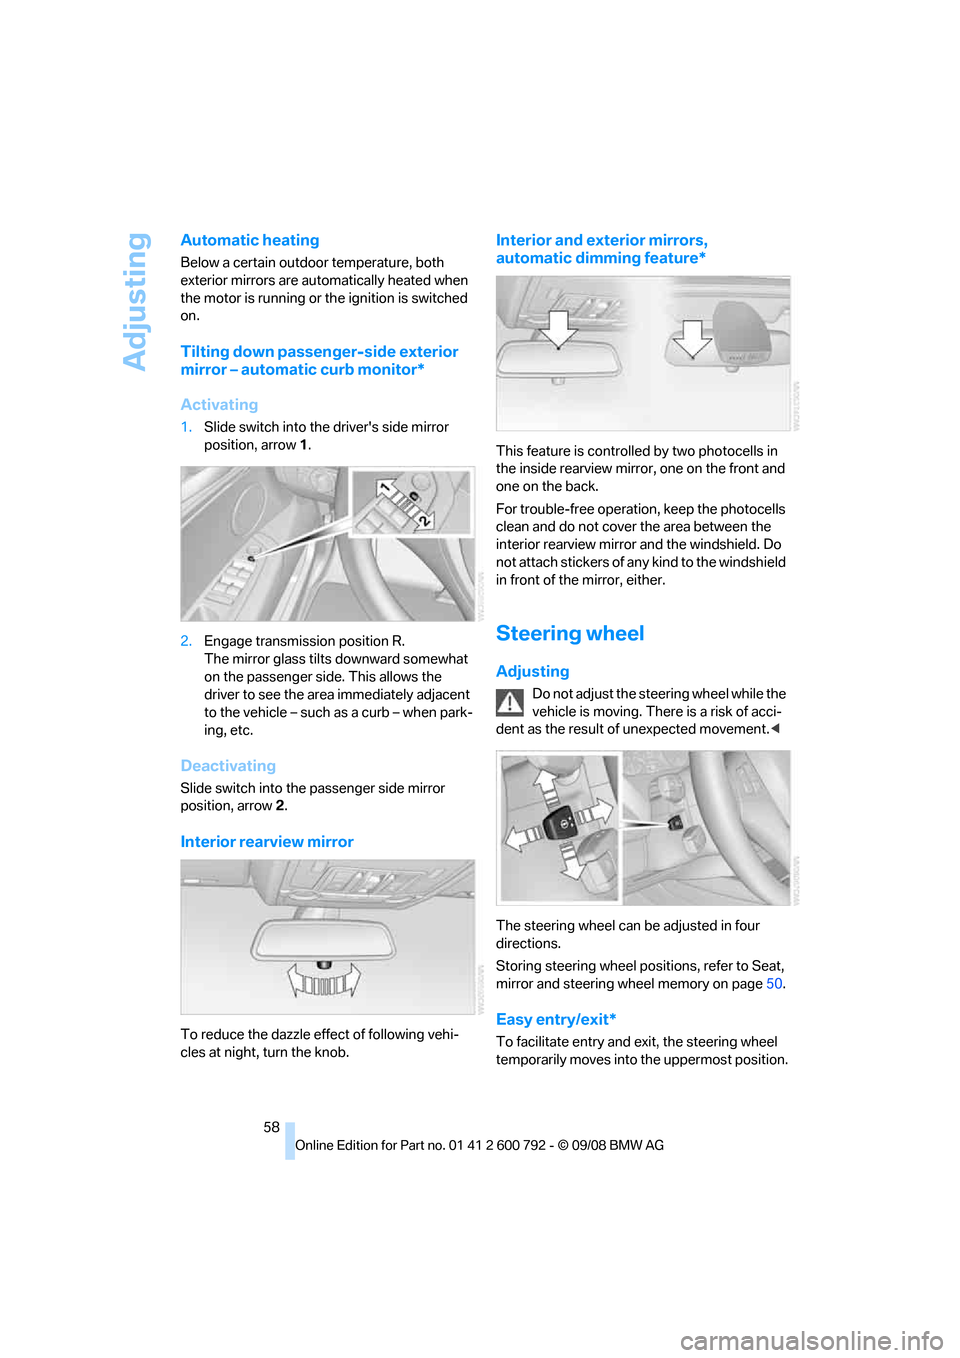
1. Slide switch into the driver's side mirror
position, arrow 1.
2. Engage transmission position R.
The mirror glass tilts downward somewhat
on the passenger side. This allows the
driver to see the area immediately adjacent
to the vehicle – such as a curb – when park-
ing, etc.
Deactivating
Slide switch into the passenger side mirror
position, arrow 2.
Interior rearview mirror
To reduce the dazzle e ffect of following vehi-
cles at night, turn the knob.
Interior and exte rior mirrors,
automatic dimming feature*
This feature is controlle d by two photocells in
the inside rearview mirro r, one on the front and
one on the back.
For trouble-free operation, keep the photocells
clean and do not cover the area between the
interior rearview mirror and the windshield. Do
not attach stickers of an y kind to the windshield
in front of the mirror, either.
Steering wheel
Adjusting
Do not adjust the steering wheel while the
vehicle is moving. There is a risk of acci-
dent as the result of unexpected movement. <
The steering wheel can be adjusted in four
directions.
Storing steering wheel positions, refer to Seat,
mirror and steering wheel memory on page 50.
Easy entry/exit*
To facilitate entry and exit, the steering wheel
temporarily moves into the uppermost position.
Page 93 of 317
Controls
91Reference
At a glance
Driving tips
Communications
Navigation
Entertainment
Mobility
Technology for comfort, convenience and
safety
PDC Park Distance Control*
The concept
The PDC assists you when you are parking.
Acoustic signals and an optical displays
alert
you to the approach of an object in front of
* or
behind your vehicle. To measure the distance,
there are four ultrasonic sensors in each
bumper. The range of these sensors is approx.
7 ft/2 m. But an acoustic warning only sounds at
approx. 24 in/60 cm for the sensors at the
front
* and at the two rear corners and at approx.
5 ft/1,50 m for the middle sensors at the rear.
PDC is a parking aid that can indicate
objects when they are approached
slowly, as is usually th e case when parking.
Avoid approaching an obje ct a t h i g h s p e e d , o t h -
erwise the physical circumstances would mean
that the system warning was too late. <
Automatic activation
Whenever the engine is running or the ignition
i s o n , e a c h t i m e y o u m o v e the selector lever into
position R, the PDC syst em is activated after
approx. 1 second.
Wait this short period before driving off.
Manual activation
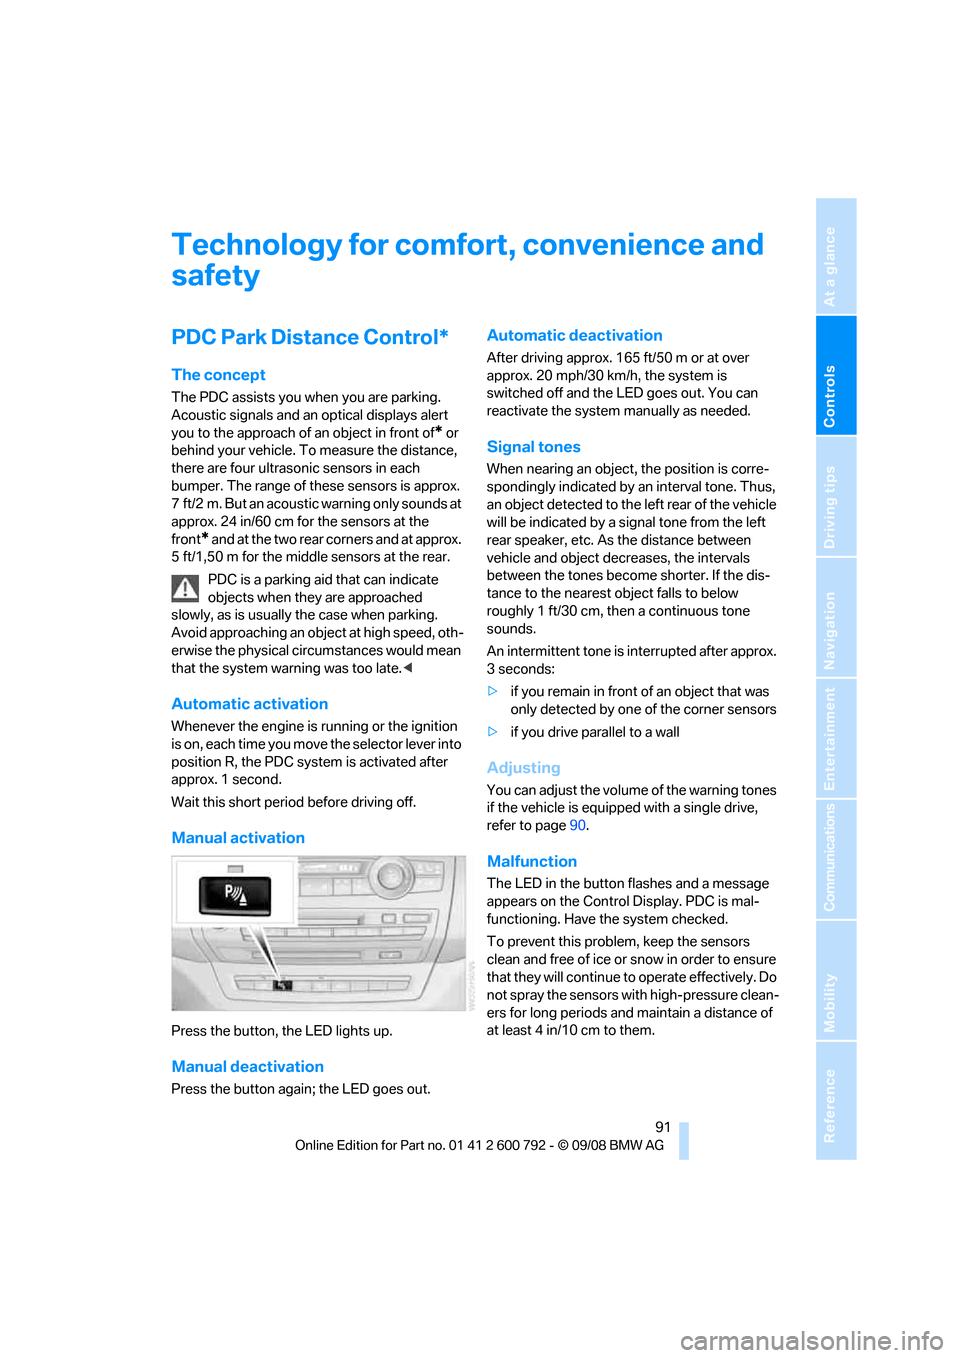
Press the button, the LED lights up.
Manual deactivation
Press the button again; the LED goes out.
Automatic deactivation
After driving approx. 165 ft/50 m or at over
approx. 20 mph/30 km/h, the system is
switched off and the LED goes out. You can
reactivate the system manually as needed.
Signal tones
When nearing an object, the position is corre-
spondingly indicated by an interval tone. Thus,
an object detected to the left rear of the vehicle
will be indicated by a sign al tone from the left
rear speaker, etc. As the distance between
vehicle and object decreases, the intervals
between the tones become shorter. If the dis-
tance to the nearest ob ject falls to below
roughly 1 ft/30 cm, then a continuous tone
sounds.
An intermittent tone is interrupted after approx.
3seconds:
> if you remain in front of an object that was
only detected by one of the corner sensors
> if you drive parallel to a wall
Adjusting
You can adjust the volume of the warning tones
if the vehicle is equipped with a single drive,
refer to page 90.
Malfunction
The LED in the button flashes and a message
appears on the Control Display. PDC is mal-
functioning. Have the system checked.
To prevent this problem, keep the sensors
clean and free of ice or snow in order to ensure
that they will continue to operate effectively. Do
not spray the sensors with high-pressure clean-
ers for long periods and maintain a distance of
at least 4 in/10 cm to them.
Page 94 of 317
Technology for comfort, convenience and safety
92
PDC with visual warning
You can also have the system show distances
to objects on the Control Display. Objects that
are farther away are already shown there before
a signal tone sounds.
The setting is stored for the remote control cur-
rently in use.
If the vehicle is equipped with a rear view cam-
era, refer to Displays on page 95.
iDrive, for operating pr inciple refer to page16.
1. Press the button.
This opens the start menu.
2. Press the controller to open the menu.
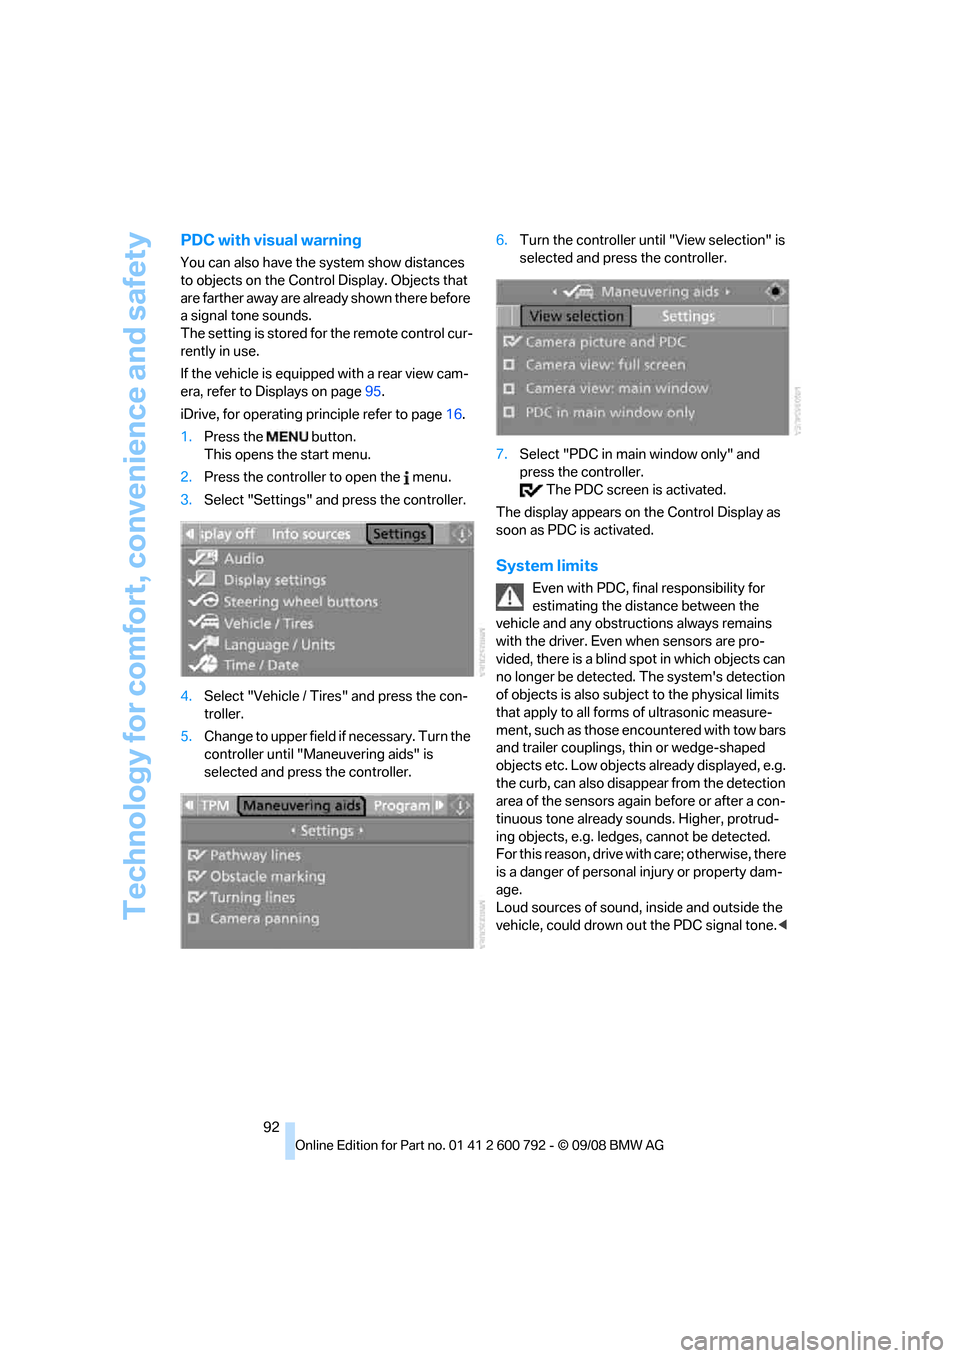
3. Select "Settings" and press the controller.
4. Select "Vehicle / Tire s" and press the con-
troller.
5. Change to upper field if necessary. Turn the
controller until "Maneuvering aids" is
selected and press the controller. 6.
Turn the controller until "View selection" is
selected and press the controller.
7. Select "PDC in main window only" and
press the controller.
The PDC screen is activated.
The display appears on the Control Display as
soon as PDC is activated.
System limits
Even with PDC, final responsibility for
estimating the distance between the
vehicle and any obstructions always remains
with the driver. Even when sensors are pro-
vided, there is a blind sp ot in which objects can
no longer be detected. The system's detection
of objects is also subjec t to the physical limits
that apply to all forms of ultrasonic measure-
ment, such as those encountered with tow bars
and trailer couplings, th in or wedge-shaped
objects etc. Low objects already displayed, e.g.
the curb, can also disappear from the detection
area of the sensors again before or after a con-
tinuous tone already sounds. Higher, protrud-
ing objects, e.g. ledg es, cannot be detected.
For this reason, drive with care; otherwise, there
is a danger of personal injury or property dam-
age.
Loud sources of sound, inside and outside the
vehicle, could drown ou t the PDC signal tone.<
Page 120 of 317
Climate
118
By pressing the button repeatedly, you can
request three operating modes:
>
LED off: outside air flows in continuously.
> Left LED on, AUC mode: the system
detects pollutants in the outside air and
shuts off the supply as needed.
> Right LED on, recirculated-air mode: the
supply of outside air is permanently shut off.
Should the windows fog up in the recircu-
lated-air mode, press the AUTO button or
switch off the recirc ulated-air mode and
increase the air volume if necessary.
The recirculated-air mode should not be used
without interruption over an extended period of
time, as the air quality inside the vehicle deteri-
orates continuously. <
Residual heat
The heat stored in the engine is used to heat the
passenger compartment, e.g. while stopped at
a school to pick up a child.
Switching on
Pressing the right side switches on
the residual heat utilization when
the following conditions are met:
> up to 15 minutes after switching off the
engine
> with the engine at operating temperature
> with sufficient battery voltage
> at an outside temperature below 77 7/
25 6
REST appears on the display of the automatic
climate control when the residual heat utiliza-
tion is switched on.
From radio readiness the interior temperature,
the air volume and the air distribution can be
set.
Switching off
You can select the lowe st blower speed by
pressing and holding th e left side. Pressing
again switches off the re sidual heat utilization.
REST disappears from the display of the auto-
matic climate control.
Switching automatic climate control on
and off
You can select the lowest blower
speed by pressing and holding the
left side. Pressing again switches
off the automatic climate control.
Y o u s w i t c h o n t h e s y s t e m a g a i n b y p r e s s i n g a n y
button of the automatic climate control.
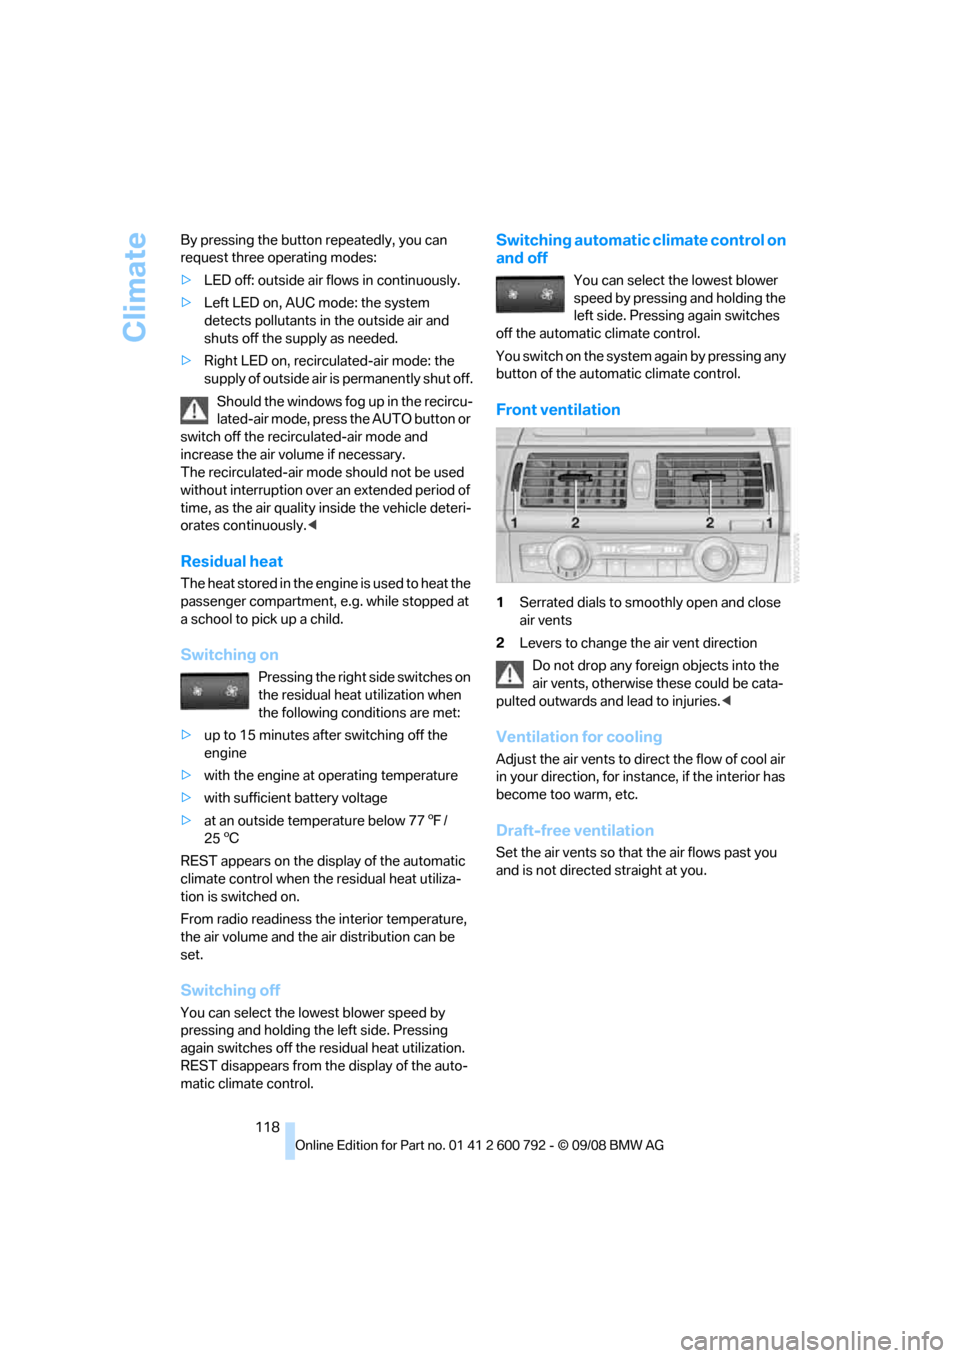
Front ventilation
1 Serrated dials to smoothly open and close
air vents
2 Levers to change th e air vent direction
Do not drop any foreign objects into the
air vents, otherwise these could be cata-
pulted outwards and lead to injuries. <
Ventilation for cooling
Adjust the air vents to direct the flow of cool air
in your direction, for instance, if the interior has
become too warm, etc.
Draft-free ventilation
Set the air vents so that the air flows past you
and is not directed straight at you.
Page 127 of 317
Controls
125Reference
At a glance
Driving tips
Communications
Navigation
Entertainment
Mobility
The display indicates the cardinal or intercardi-
nal direction in which you are currently driving.
Operating principle
You can run various functions by pressing the
adjustment button with a pointed object, e.g. a
ball-point pen etc. The following setting options
are displayed consecutively, depending on how
long the adjustment button is pressed:
> Press briefly: switch display on/off
> 3 to 6 seconds: set compass zone
> 6 to 9 seconds: calibrate compass
> 9 to 12 seconds: set left/right-hand drive
vehicle
> 12 to 15 seconds: set language
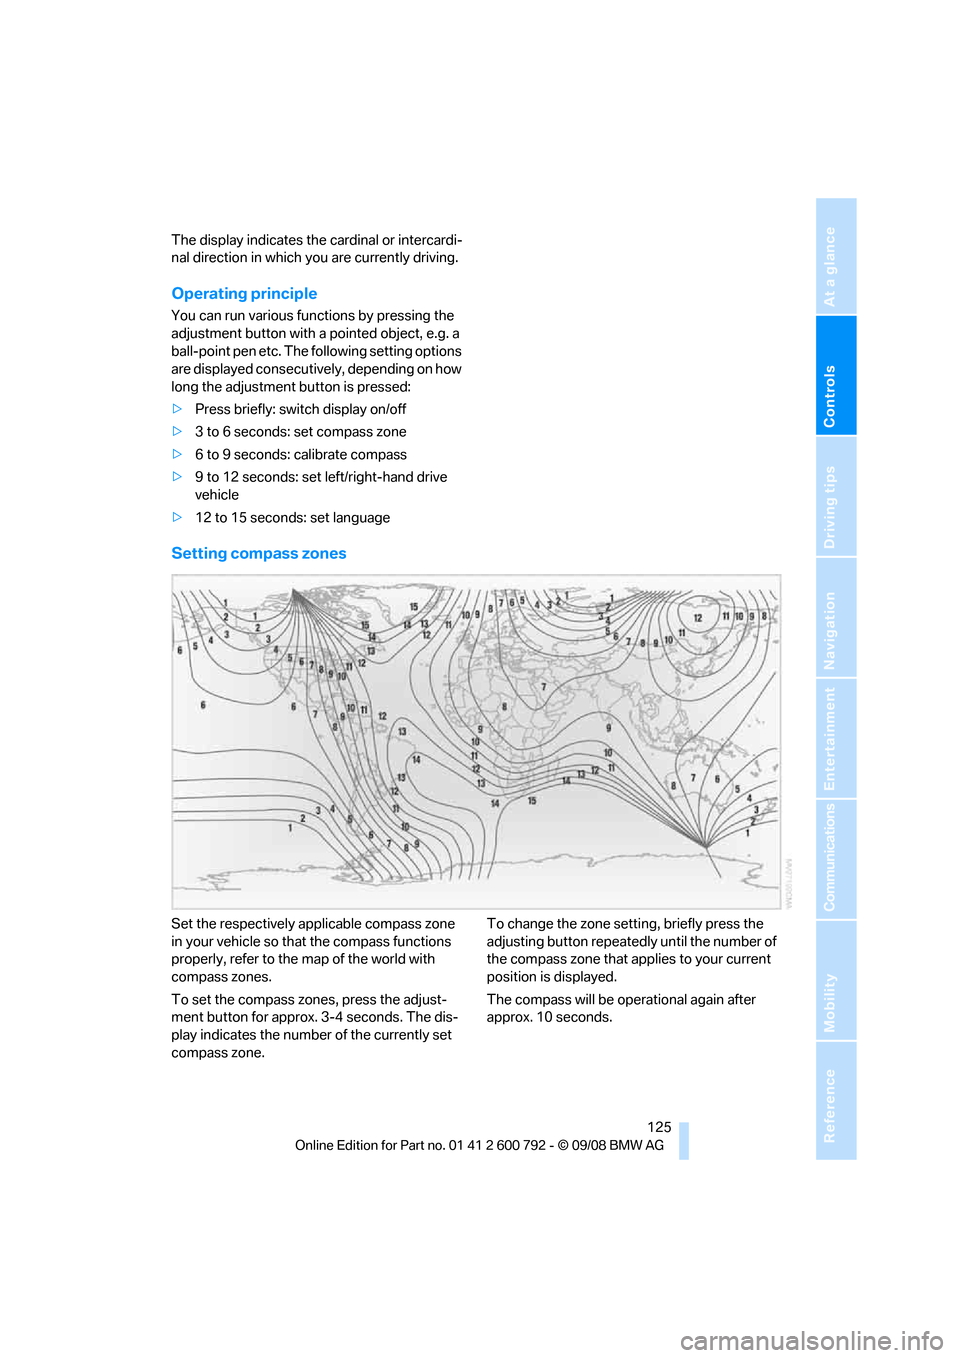
Setting compass zones
Set the respectively a pplicable compass zone
in your vehicle so that the compass functions
properly, refer to the map of the world with
compass zones.
To set the compass zones, press the adjust-
ment button for approx. 3-4 seconds. The dis-
play indicates the number of the currently set
compass zone. To change the zone setting, briefly press the
adjusting button repeatedly
until the number of
the compass zone that a pplies to your current
position is displayed.
The compass will be operational again after
approx. 10 seconds.
Page 131 of 317
Controls
129Reference
At a glance
Driving tips
Communications
Navigation
Entertainment
Mobility
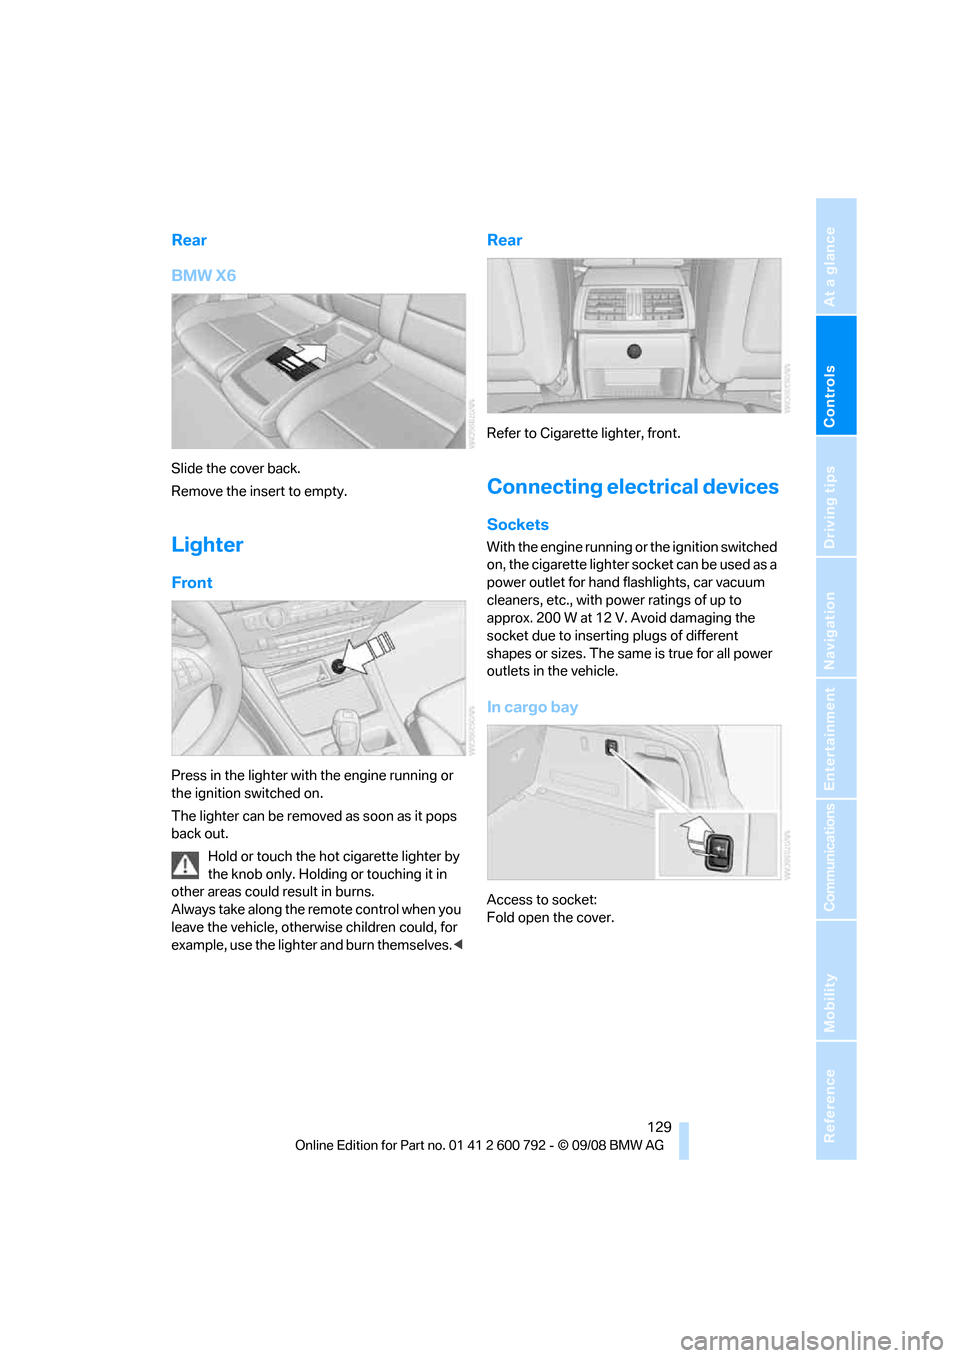
Rear
BMW X6
Slide the cover back.
Remove the insert to empty.
Lighter
Front
Press in the lighter with the engine running or
the ignition switched on.
The lighter can be removed as soon as it pops
back out.Hold or touch the hot cigarette lighter by
the knob only. Holding or touching it in
other areas could result in burns.
Always take along the remote control when you
leave the vehicle, otherw ise children could, for
example, use the lighter and burn themselves. <
Rear
Refer to Cigarette lighter, front.
Connecting electrical devices
Sockets
With the engine running or the ignition switched
on, the cigarette lighter socket can be used as a
power outlet for hand flashlights, car vacuum
cleaners, etc., with power ratings of up to
approx. 200 W at 12 V. Avoid damaging the
socket due to inserting plugs of different
shapes or sizes. The same is true for all power
outlets in the vehicle.
In cargo bay
Access to socket:
Fold open the cover.
Page 134 of 317
Practical interior accessories
132
Installing
When installing, proceed in the opposite order
of removal.
1.Set the cargo bay cove r into place on the
left and right sides.
2. Lift the back of the co ver slightly and slide
forward until it snaps into the two side
brackets.
Expanding cargo bay
The rear seat backrest is divided. You can fold
down both sides separate ly in order to expand
the cargo bay.
BMW X6: before folding the rear seat
backrest forward or using the ski bag,
remove beverage containers from the cup
holder and close the cup holder. <
Reach into the recess an d pull toward the front.
When you fold back the backrest, be sure
that the catch engages securely. The red
warning indicator disappears in the recess
when the catch is engaged. If it is not properly
engaged, transported cargo could enter the
passenger compartment during braking or eva-
sive maneuvers and endanger the vehicle occu-
pants. <
To ensure that the safety systems con-
tinue to provide optimized protection,
observe the safety belt information on
page 48.<
Storage compartments in
cargo bay
Depending on the vehicle's equipment, the fol-
lowing storage compartments are provided in
the cargo bay.
> Storage compartments behind the remov-
able side panels on the right and left side of
the cargo bay
* and under the floor panel
flap, storage compartment
* right side of
cargo bay.
> Storage tray
* under the floor panel flap,
capacity approx. 21 US gal/80 liter.
> Retaining straps
* on the left and right side
panel for securing small objects.
> Hooks
*, e.g. for hanging up shopping bags
or carrier bags on the left and right in the
cargo bay.
> Net
* on the left side pa nel of the cargo bay
for smaller objects.
> Lashing rail with lashing eyes
*. You can
secure heavy-duty cargo straps on the lash-
ing eyes.
They can be removed at the notches in the
rails. To move the lashing eyes, press the
button.
Read and comply with the information
enclosed with the heavy-duty cargo
straps. <
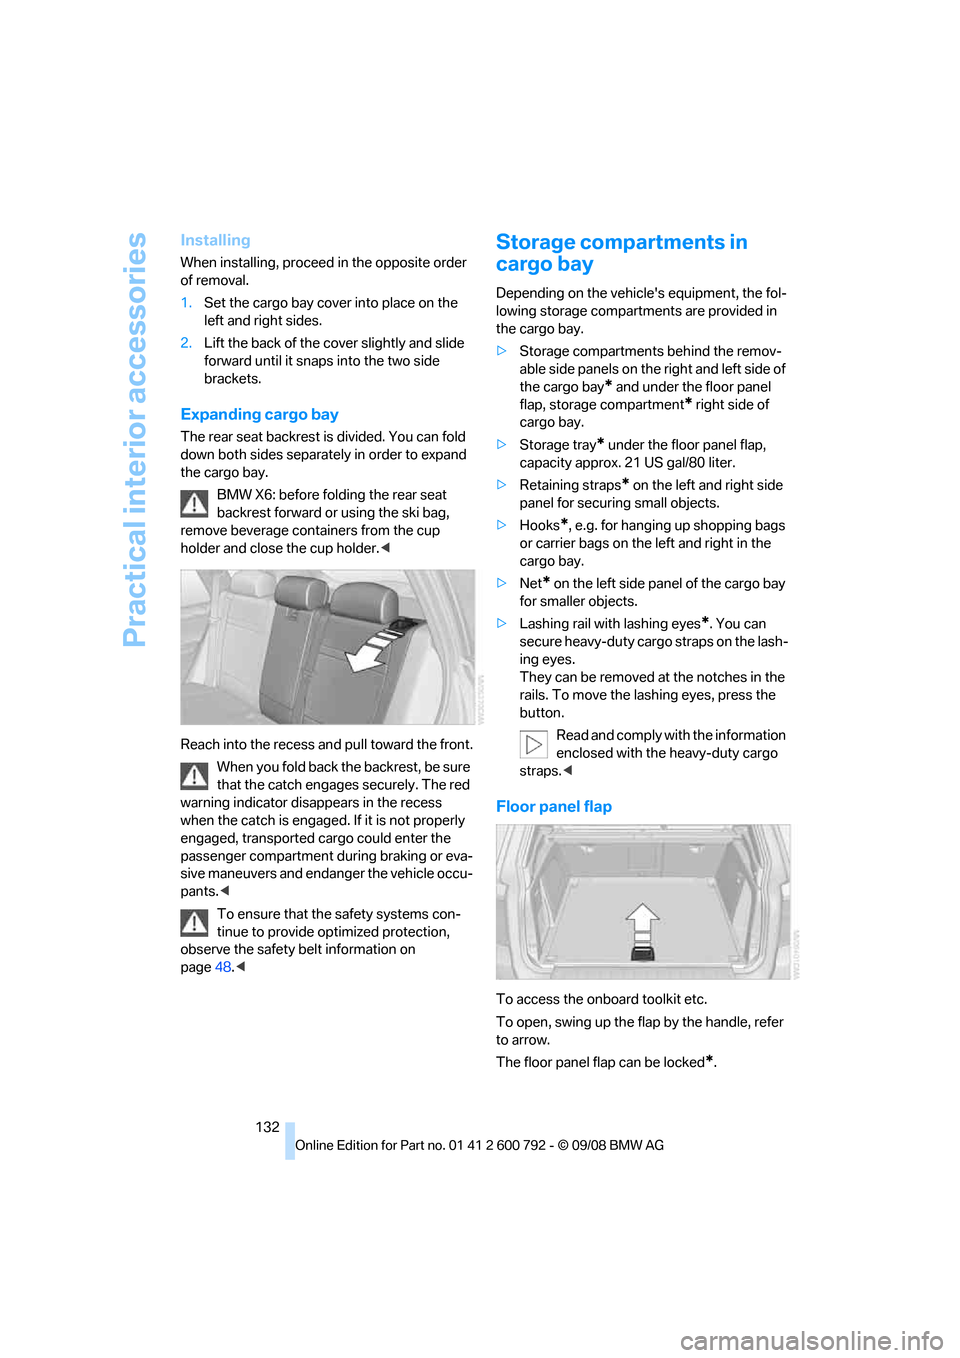
Floor panel flap
To access the onboard toolkit etc.
To open, swing up the flap by the handle, refer
to arrow.
The floor panel flap can be locked
*.
Page 141 of 317
Driving tips
139Reference
At a glance
Controls
Communications
Navigation
Entertainment
Mobility
speed. This is the fastest way for the cold
engine to reach its operating temperature.
Thinking ahead when driving
Avoid unnecessary acceleration and braking.
To do so, maintain the appropriate distance
from the vehicle in front of you. An anticipatory
and smooth driving style reduces fuel con-
sumption.
Avoiding high engine speeds
Driving at a low engine speed reduces fuel con-
sumption and minimizes wear.
Taking advantage of coasting
The flow of fuel is interrupted when coasting.
Switching off engine during longer
stops
Switch off the engine at longer stops such as
traffic signals, railroad cr ossings, or in traffic
jams. Even having the en gine switched off for
approx. 4 seconds results in fuel savings.
Switching off functions currently not
required
Functions such as air conditioning, seat heat-
ing, or rear window defrosting consume a lot of
energy and require additional fuel. Their influ-
ence is particularly pron ounced in city traffic
and stop & go operation. For this reason, it is a
good idea to switch th ese functions off when
they are not really needed.
Having maintenance carried out
Have the vehicle serviced regularly in order to
achieve the optimum economy and service life
of your vehicle. BMW recommends having the
maintenance performed by a BMW Sports
Activity Vehicle Center. Also pay attention to
the BMW maintenance system, refer to
page 263.
General driving notes
Closing liftgate
Operate the vehicle only when the liftgate
is completely closed. Otherwise, exhaust
fumes could enter into the passenger compart-
ment. <
If it is absolutely necessa ry to drive with the lift-
gate open:
1. Close all windows as well as the glass sun-
roof
*/panorama glass sunroof*.
2. Increase the air volume of the automatic cli-
mate control to a high level, refer to
page 116.
Hot exhaust system
As in all vehicles, extremely high temper-
atures are generated on the exhaust sys-
tem. Do not remove the heat shields installed
adjacent to it, and neve r apply undercoating to
them. When driving, stan ding at idle and while
parking take care to avoid possible contact
between the hot exhaust system and any highly
flammable materials such as hay, leaves, grass,
etc. Such contact could lead to a fire, and with it
the risk of serious property damage as well as
personal injury. Do not touch hot tailpipes, as
otherwise there is a danger of burns. <
Diesel particulate filter*
Soot particles are collected in the diesel partic-
ulate filter and are periodically cleared out
through high-temperature combustion. This
cleaning process lasts fo r several minutes. You
may sometimes notice it by the fact that the
engine temporarily runs a little less smoothly
and requires a somewhat higher engine speed
to achieve the usual powe r. You may also notice
additional sounds and small amounts of smoke
coming from the exhaust, even for a brief time
after switching off the engine.
Hydroplaning
When driving on wet or slushy roads,
reduce road speed. If you do not, a wedge
of water can form between tires and road sur-
face. This phenomenon is referred to as hydro-
Page 146 of 317
Things to remember when driving
144
Driving on poor roads
Your BMW is at home on all roads and surfaces.
It combines a 4-wheel drive system with the
advantages of a normal passenger car.Do not drive on unpaved terrain, as other-
wise the vehicle may be damaged. <
When you are driving on poor roads, there are a
few points which you shou ld strictly observe for
your own safety, for that of your passengers,
and for the safety of the vehicle:
> Familiarize yourself wi th the vehicle before
driving off and avoid taking risks at all costs.
> Adapt your driving spee d to the road condi-
tions. The steeper and rougher the road
surface is, the lower the speed should be.
> If you want to drive on very steep uphill or
downhill gradients, ma ke sure beforehand
that the engine oil and coolant levels are
near the MAX mark, refer to page 259.
BMW X5: you can operate your vehicle on
uphill and downhill gradients with a maxi-
mum slope of 50 %.
> On very steep downhill slopes, use Hill
Descent Control HDC, refer to page 98.
BMW X5: it is possible to start off on inclines
of up to 33 %. The permissible body roll is
50 %.
> While driving, watch carefully for obstacles
such as rocks or holes. Try to avoid these
obstacles whenev er possible.
> Make sure that the undercarriage does not
touch the ground, for example on crests and
bumpy roads. The ground clearance of the
vehicle is a maximum of approx. 8 in/20 cm.
Please note that the ground clearance can
vary depending on lo ading and the driving
conditions of the vehicle.
> Only drive through road surface water up to
a maximum water depth of
> BMW X5 20 in/50 cm
> BMW X6 17 in/45 cm
and only drive at walking speed; do not
remain stationary. >
After driving through water at low speed,
lightly press the brake pedal several times
to dry the brakes and to prevent the braking
effect from being reduced by wetness.
> Depending on the condition of the surface,
it may be practical to briefly activate DTC,
refer to DTC Dynamic Traction Control on
page 97.
> If the drive wheels spin on one side, depress
the accelerator pedal su fficiently so that the
driving stability control systems can distrib-
ute the drive forces to the individual wheels.
Please note the following points after driving on
poor roads to maintain the driving safety of your
BMW:
> Clean the coarsest dirt from the body.
> Clean mud, snow, ice etc. from the wheels
and tires and check the tires for damage.