buttons BMW X5 XDRIVE 30I 2010 E70 Owner's Manual
[x] Cancel search | Manufacturer: BMW, Model Year: 2010, Model line: X5 XDRIVE 30I, Model: BMW X5 XDRIVE 30I 2010 E70Pages: 300, PDF Size: 12.41 MB
Page 11 of 300
At a glance
This overview of buttons, switches and displays
is intended to familiarize you with your vehicle's
operating environment. The section will also
assist you in becoming acquainted with the
control concepts and options available
for operating the various systems.
At a glance
ba8_e70ag.book Seite 9 Freitag, 5. Juni 2009 11:42 11
Page 13 of 300
At a glance
11Reference
Controls
Driving tips
Communications
Navigation
Entertainment
Mobility
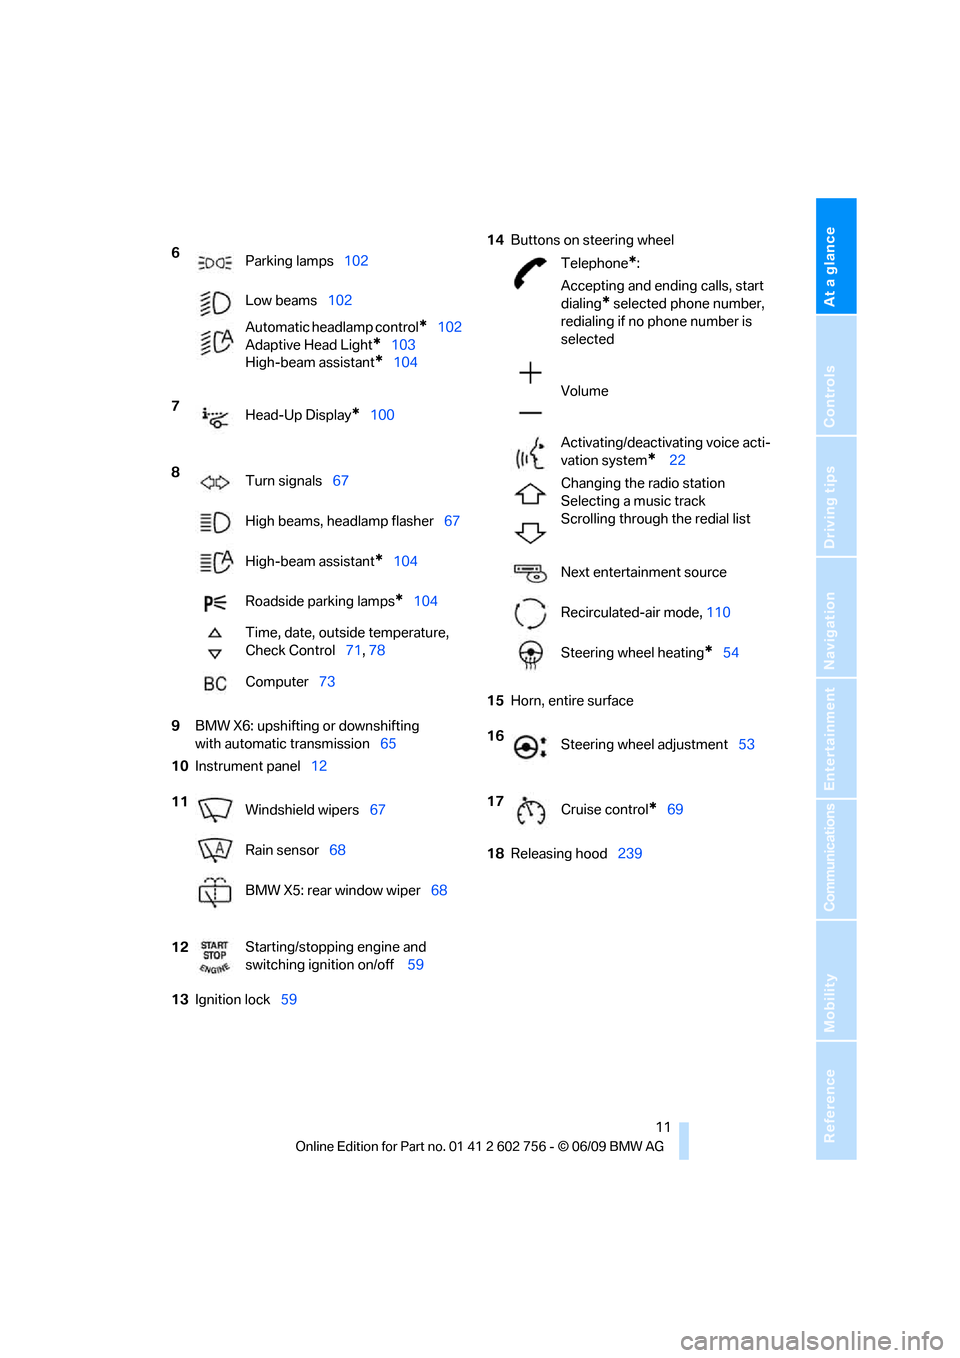
9BMW X6: upshifting or downshifting
with automatic transmission65
10Instrument panel12
13Ignition lock5914Buttons on steering wheel
15Horn, entire surface
18Releasing hood239 6
Parking lamps102
Low beams102
Automatic headlamp control
*102
Adaptive Head Light
*103
High-beam assistant
*104
7
Head-Up Display
*100
8
Turn signals67
High beams, headlamp flasher67
High-beam assistant
*104
Roadside parking lamps
*104
Time, date, outside temperature,
Check Control71, 78
Computer73
11
Windshield wipers67
Rain sensor68
BMW X5: rear window wiper68
12Starting/stopping engine and
switching ignition on/off 59
Telephone*:
Accepting and ending calls, start
dialing
* selected phone number,
redialing if no phone number is
selected
Volume
Activating/deactivating voice acti-
vation system
* 22
Changing the radio station
Selecting a music track
Scrolling through the redial list
Next entertainment source
Recirculated-air mode, 110
Steering wheel heating
*54
16
Steering wheel adjustment53
17
Cruise control
*69
ba8_e70ag.book Seite 11 Freitag, 5. Juni 2009 11:42 11
Page 17 of 300
At a glance
15Reference
Controls
Driving tips
Communications
Navigation
Entertainment
Mobility
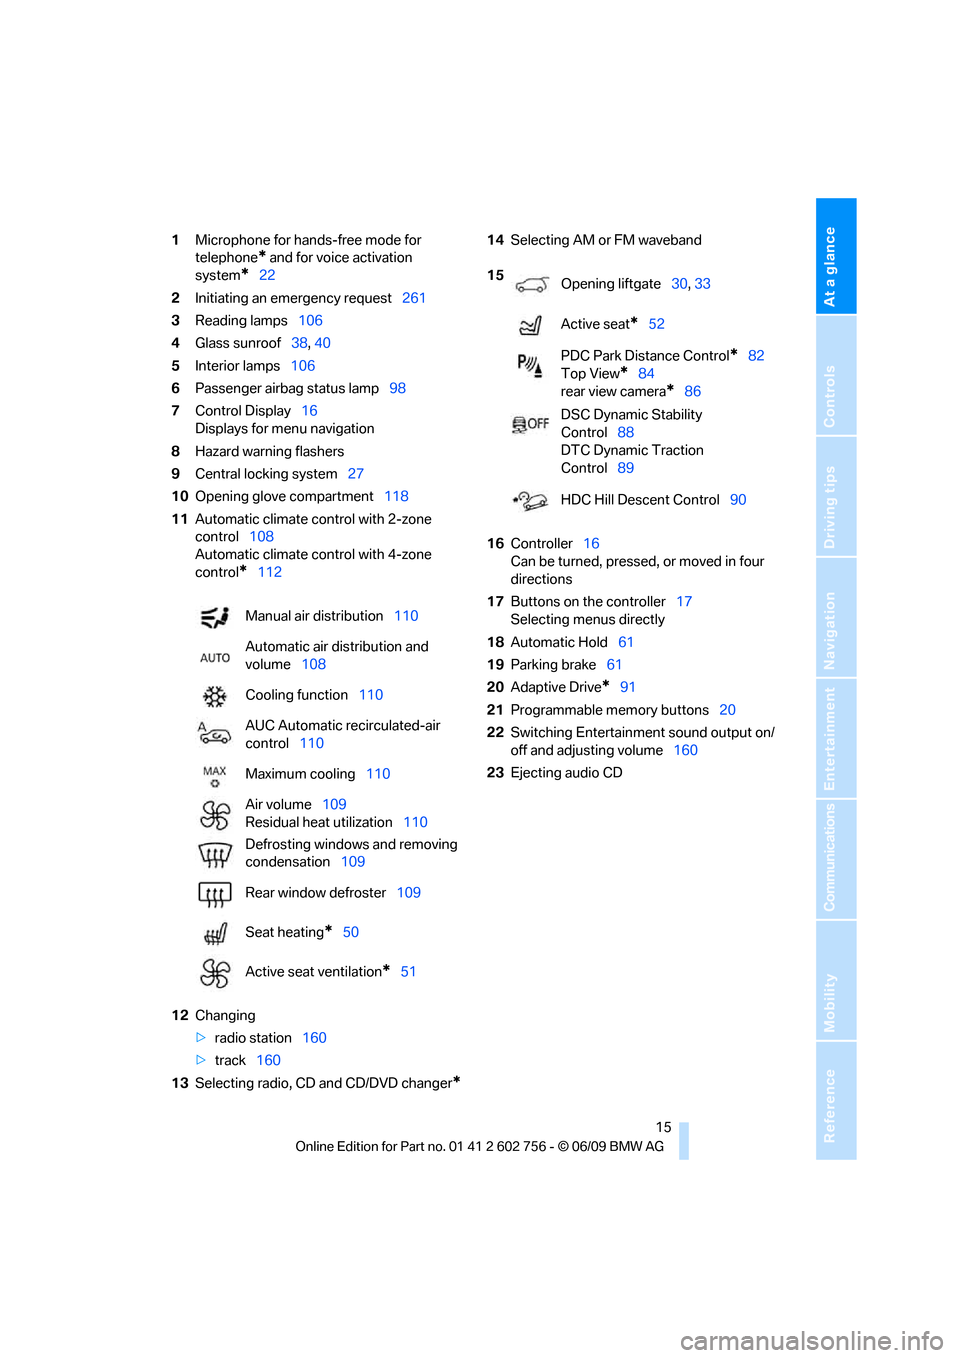
1Microphone for hands-free mode for
telephone
* and for voice activation
system
*22
2Initiating
an emergency request261
3Reading lamps106
4Glass sunroof38, 40
5Interior lamps106
6Passenger airbag status lamp98
7Control Display16
Displays for menu navigation
8Hazard warning flashers
9Central locking system27
10Opening glove compartment118
11Automatic climate control with 2-zone
control108
Automatic climate control with 4-zone
control
*112
12Changing
>radio station160
>track160
13Selecting radio, CD and CD/DVD changer
*
14Selecting AM or FM waveband
16Controller16
Can be turned, pressed, or moved in four
directions
17Buttons on the controller17
Selecting menus directly
18Automatic Hold61
19Parking brake61
20Adaptive Drive
*91
21Programmable memory buttons20
22Switching Entertainment sound output on/
off and adjusting volume160
23Ejecting audio CD Manual air distribution110
Automatic air distribution and
volume108
Cooling function110
AUC Automatic recirculated-air
control110
Maximum cooling110
Air volume109
Residual heat utilization110
Defrosting windows and removing
condensation109
Rear window defroster109
Seat heating
*50
Active seat ventilation
*51
15
Opening liftgate30, 33
Active seat
*52
PDC Park Distance Control
*82
Top View
*84
rear view camera
*86
DSC Dynamic Stability
Control88
DTC Dynamic Traction
Control89
HDC Hill Descent Control90
ba8_e70ag.book Seite 15 Freitag, 5. Juni 2009 11:42 11
Page 18 of 300
iDrive
16
iDrive
iDrive combines the functions of a large number
of switches. This allows these functions to be
operated from a central position. The following
section provides an introduction to basic menu navigation. The control of the individual func-
tions is described in connection with the rele-
vant equipment.
Controls
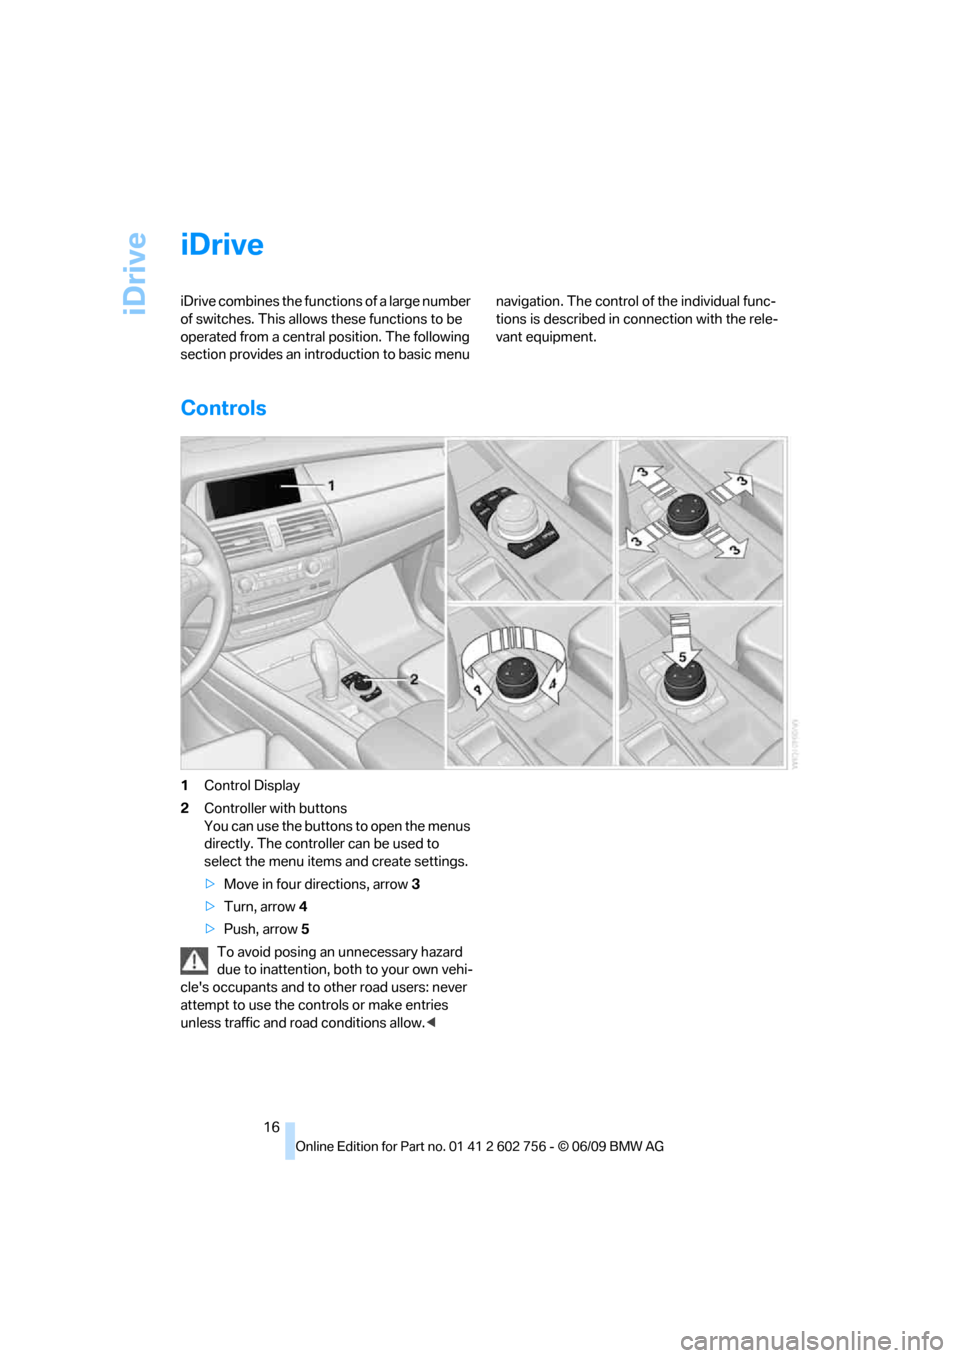
1Control Display
2Controller with buttons
You can use the buttons to open the menus
directly. The controller can be used to
select the menu items and create settings.
>Move in four directions, arrow 3
>Turn, arrow 4
>Push, arrow 5
To avoid posing an unnecessary hazard
due to inattention, both to your own vehi-
cle's occupants and to other road users: never
attempt to use the controls or make entries
unless traffic and road conditions allow.<
ba8_e70ag.book Seite 16 Freitag, 5. Juni 2009 11:42 11
Page 19 of 300
At a glance
17Reference
Controls
Driving tips
Communications
Navigation
Entertainment
Mobility
Buttons on the controller
Operating principle
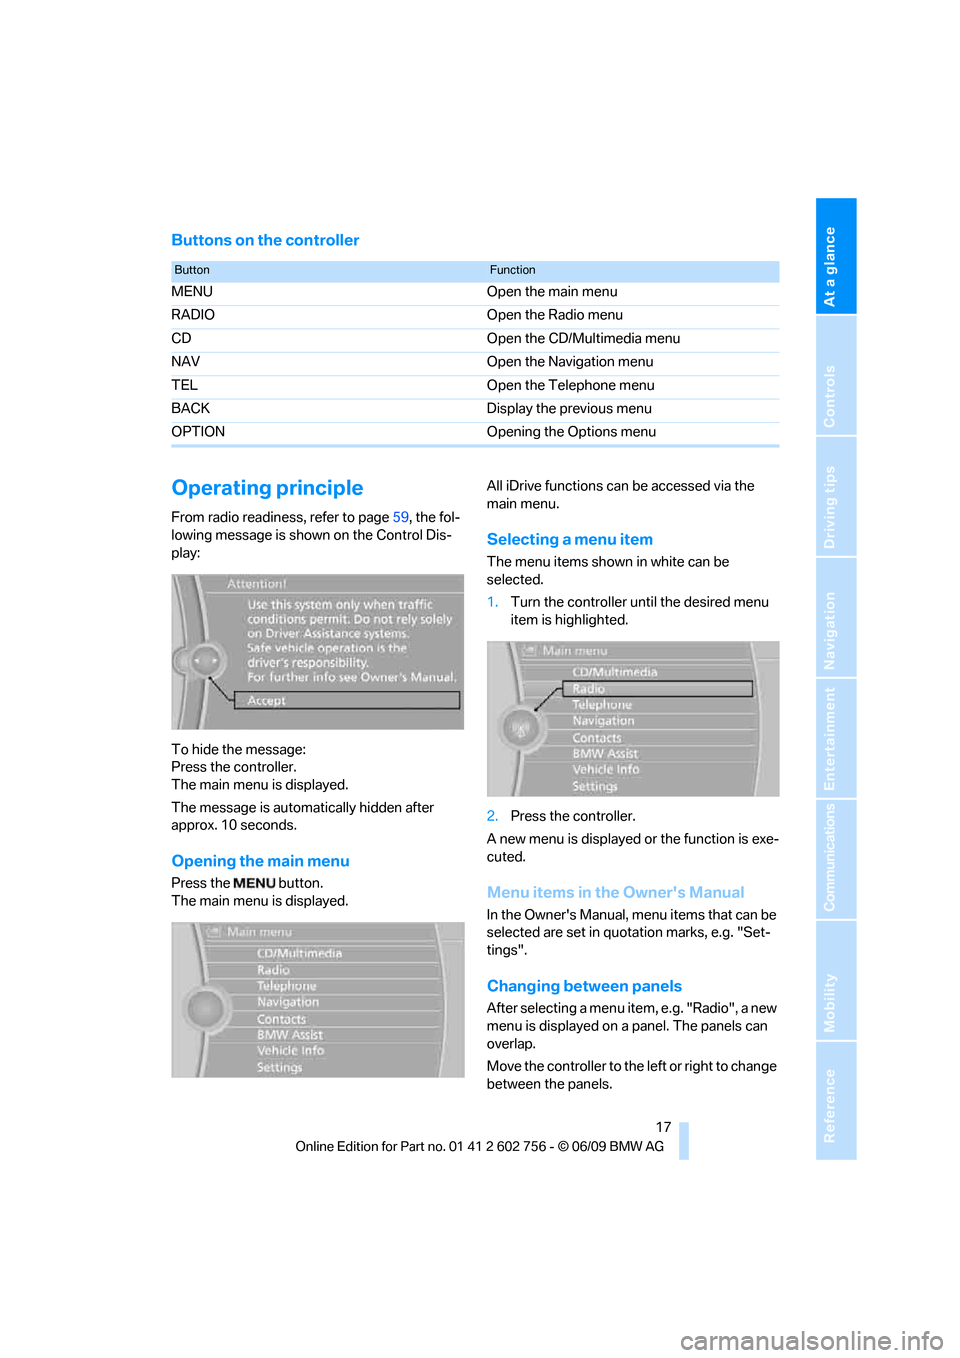
From radio readiness, refer to page59, the fol-
lowing message is shown on the Control Dis-
play:
To hide the message:
Press the controller.
The main menu is displayed.
The message is automatically hidden after
approx. 10 seconds.
Opening the main menu
Press the button.
The main menu is displayed.All iDrive functions can be accessed via the
main menu.
Selecting a menu item
The menu items shown in white can be
selected.
1.Turn the controller until the desired menu
item is highlighted.
2.Press the controller.
A new menu is displayed or the function is exe-
cuted.
Menu items in the Owner's Manual
In the Owner's Manual, menu items that can be
selected are set in quotation marks, e.g. "Set-
tings".
Changing between panels
After selecting a menu item, e.g. "Radio", a new
menu is displayed on a panel. The panels can
overlap.
Move the controller to the left or right to change
between the panels.
ButtonFunction
MENU Open the main menu
RADIO Open the Radio menu
CD Open the CD/Multimedia menu
NAV Open the Navigation menu
TEL Open the Telephone menu
BACK Display the previous menu
OPTION Opening the Options menu
ba8_e70ag.book Seite 17 Freitag, 5. Juni 2009 11:42 11
Page 22 of 300
iDrive
20
Programmable memory
buttons
Certain iDrive functions can be stored on the
programmable memory buttons and called up
directly, e.g. radio stations, navigation destina-
tions, phone numbers and entry points into the
menu.
Storing functions
1.Highlight the function via the iDrive.
2.Press the desired button ... for
longer than two seconds.
Sample use of programmable memory
buttons
Switch the voice instructions for the navigation
on/off.
1."Navigation"
2."Map"
3.Select the symbol using the controller.
4.Press the desired button ... for
longer than two seconds.
Running function
Press button ... .
The function is run immediately. This means,
for example, that the number is dialed when a
phone number is selected.
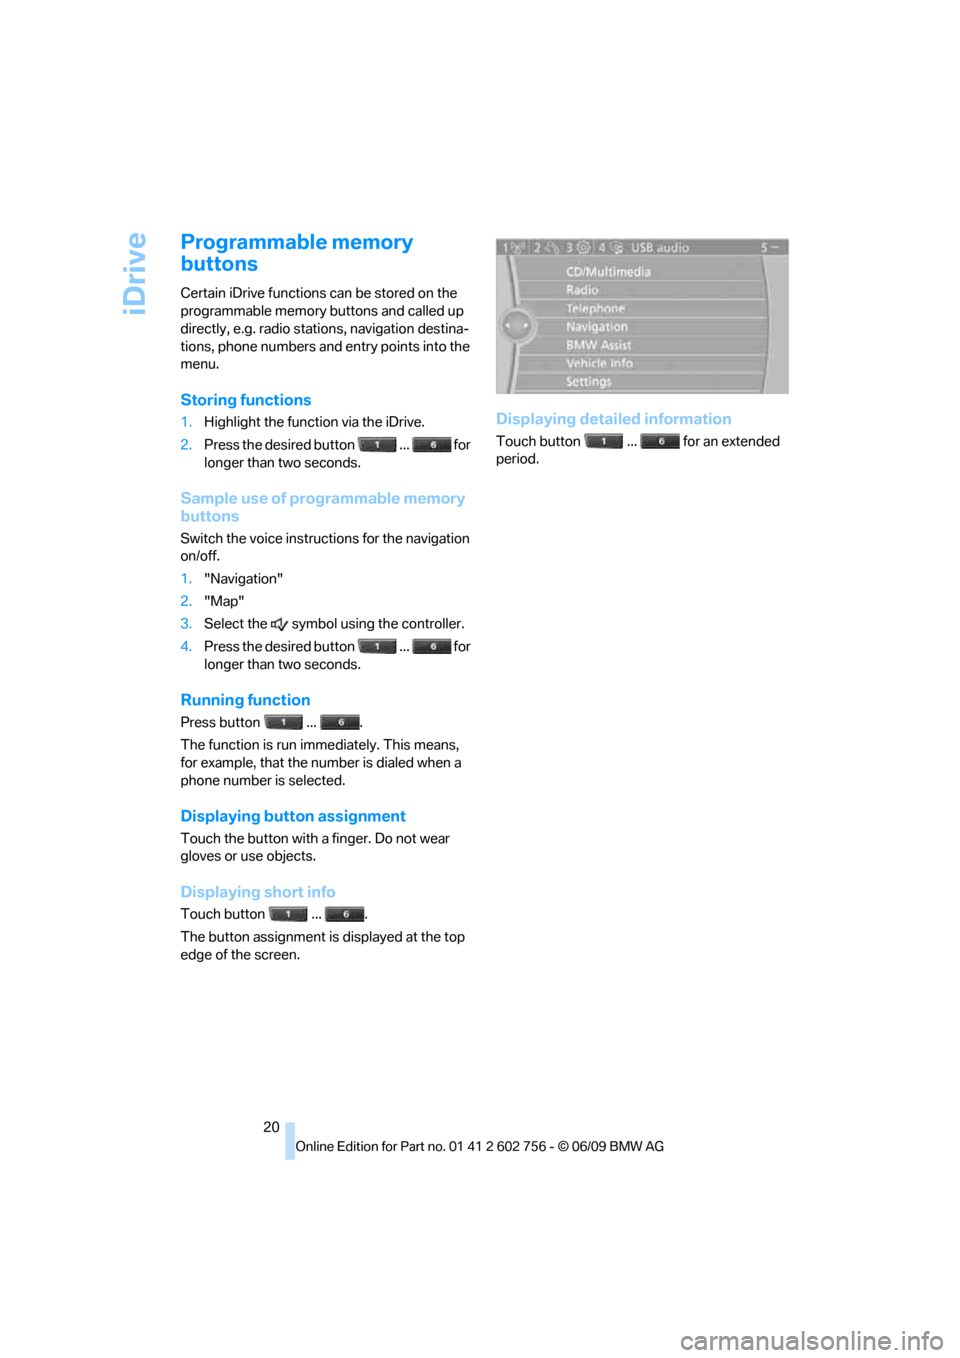
Displaying button assignment
Touch the button with a finger. Do not wear
gloves or use objects.
Displaying short info
Touch button ... .
The button assignment is displayed at the top
edge of the screen.
Displaying detailed information
Touch button ... for an extended
period.
ba8_e70ag.book Seite 20 Freitag, 5. Juni 2009 11:42 11
Page 29 of 300
Controls
27Reference
At a glance
Driving tips
Communications
Navigation
Entertainment
Mobility
>12h/24h clock format, refer to page80
>Date format, refer to page80
>Lighting settings:
>Triple turn signal activation, refer to
page67
>Welcome lamps, refer to page102
>Pathway lighting, refer to page103
>Daytime driving lamps
*, refer to
page103
>High-beam assistant
*, refer to page104
>PDC Park Distance Control
*: optical warn-
ing, refer to page83
>Top View
*: optical warning, refer to
page85
>Rear view camera
*:
>Selecting functions, refer to page86
>Type of display, refer to page87
>Head-Up Display
*: selection, brightness
and position of display, refer to page100
>Automatic climate control: AUTO program
and intensity, cooling function, and auto-
matic recirculated-air control/recirculated-
air mode, temperature, air distribution, ven-
tilation temperature, starting on page108
>Programmable memory buttons: selecting
stored functions, refer to page20
>Positions of driver's seat, outside mirrors,
and steering wheel
*, refer to page45
>Adaptive Drive
*: selected chassis and sus-
pension tuning, refer to page91
>Audio sources: volume and tone settings,
refer to page160
>Radio:
>Display of stored stations, refer to
page165
>Switching RDS Radio Data System on/
off
*, refer to page164
>Phone: volume setting, refer to
pages205,210
Central locking system
The concept
The central locking system functions when the
driver's door is closed.
The system simultaneously engages and
releases the locks on the following:
>Doors
>liftgate
>Fuel filler door
Operating from outside
>using the remote control
>using the door lock
>with comfort access
* using the door han-
dles
The interior lamps and the courtesy lamps
* are
also switched on and off with the remote con-
trol. The alarm system
is armed/disarmed at the
same time.
You can find more detailed information on the
alarm system
on page34.
Operating from inside
Using the button for central locking, refer to
page30. The fuel filler door is not locked.
In an accident of sufficient severity, the central
locking system automatically unlocks the vehi-
cle. In addition, the hazard warning flashers and
interior lamps come on.
Opening and closing:
Using remote control
Persons or animals in a parked vehicle
could lock the doors from the inside.
Always take along the remote control when
leaving the vehicle so that the vehicle can then
be opened from the outside.<
Unlocking
Press the button.
This unlocks the vehicle.
ba8_e70ag.book Seite 27 Freitag, 5. Juni 2009 11:42 11
Page 38 of 300
Opening and closing
36 >The engine can only be started if the vehicle
detects that the remote control is located in
the vehicle.
Comparison with ordinary remote
control
You can control the functions mentioned previ-
ously with the comfort access or by pressing
the buttons on the remote control. Therefore,
please familiarize yourself with the information
on opening and closing beginning on page26
beforehand.
The special features when using comfort
access are described in the following.
Should a short delay occur when opening
or closing the windows or the glass sun-
roof
*/panorama glass sunroof*, the system
checks whether a remote control is located in
the vehicle. Please repeat opening or closing if
necessary.<
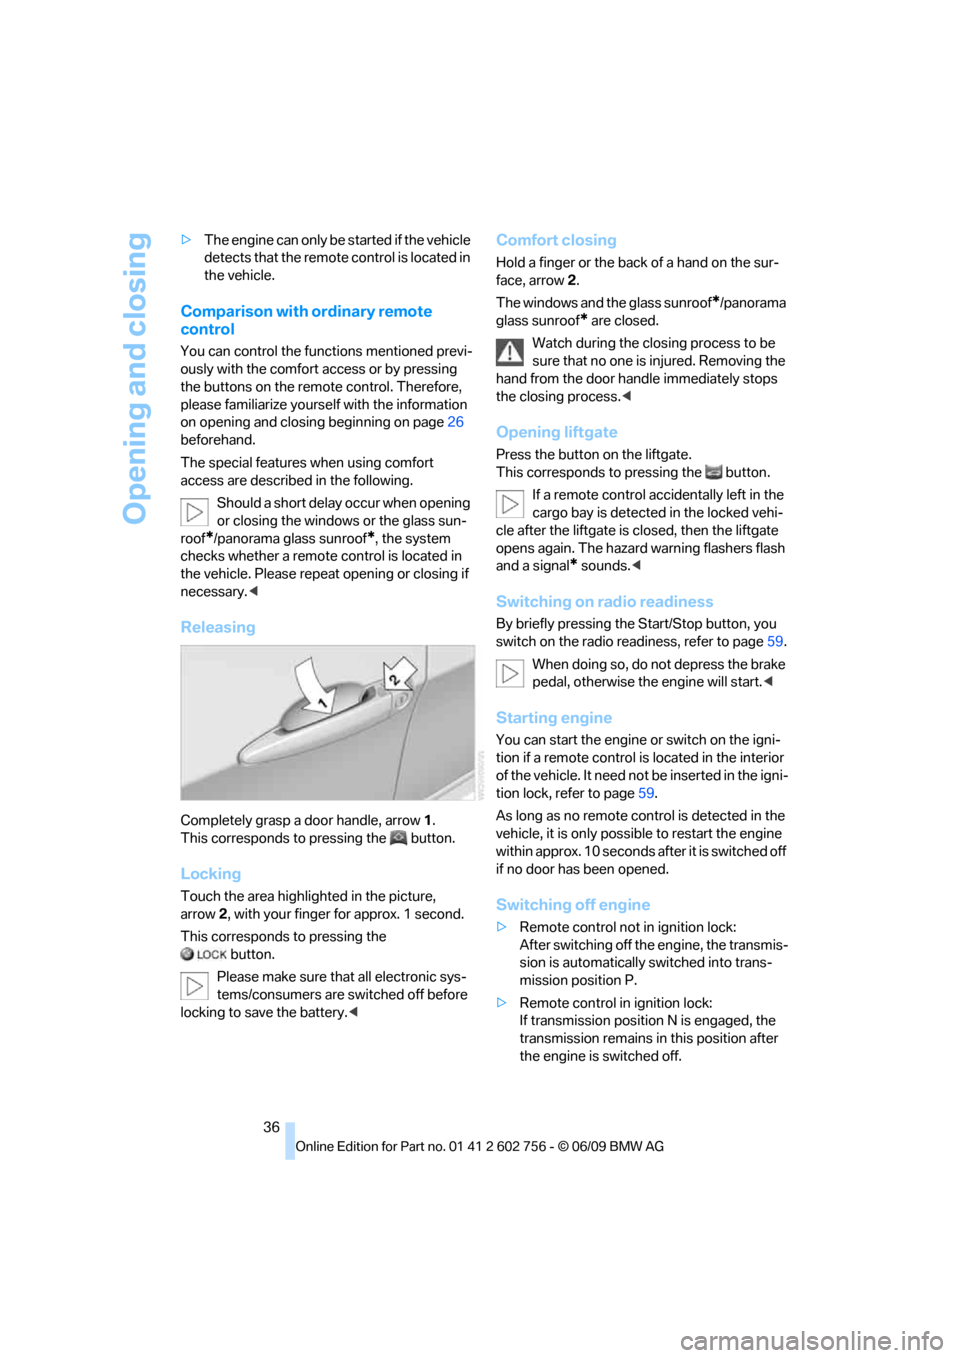
Releasing
Completely grasp a door handle, arrow1.
This corresponds to pressing the button.
Locking
Touch the area highlighted in the picture,
arrow2, with your finger for approx. 1 second.
This corresponds to pressing the
button.
Please make sure that all electronic sys-
tems/consumers are switched off before
locking to save the battery.<
Comfort closing
Hold a finger or the back of a hand on the sur-
face, arrow2.
The windows and the glass sunroof
*/panorama
glass sunroof
* are closed.
Watch during the closing process to be
sure that no one is injured. Removing the
hand from the door handle immediately stops
the closing process.<
Opening liftgate
Press the button on the liftgate.
This corresponds to pressing the button.
If a remote control accidentally left in the
cargo bay is detected in the locked vehi-
cle after the liftgate is closed, then the liftgate
opens again. The hazard warning flashers flash
and a signal
* sounds.<
Switching on radio readiness
By briefly pressing the Start/Stop button, you
switch on the radio readiness, refer to page59.
When doing so, do not depress the brake
pedal, otherwise the engine will start.<
Starting engine
You can start the engine or switch on the igni-
tion if a remote control is located in the interior
of the vehicle. It need not be inserted in the igni-
tion lock, refer to page59.
As long as no remote control is detected in the
vehicle, it is only possible to restart the engine
within approx. 10 seconds after it is switched off
if no door has been opened.
Switching off engine
>Remote control not in ignition lock:
After switching off the engine, the transmis-
sion is automatically switched into trans-
mission position P.
>Remote control in ignition lock:
If transmission position N is engaged, the
transmission remains in this position after
the engine is switched off.
ba8_e70ag.book Seite 36 Freitag, 5. Juni 2009 11:42 11
Page 39 of 300
Controls
37Reference
At a glance
Driving tips
Communications
Navigation
Entertainment
Mobility
Before driving into a car wash
The vehicle can roll if you proceed according to
the following steps:
1.Insert remote control into ignition lock.
2.Depress brake pedal.
3.Engage transmission position N.
4.Release the parking brake.
5.Switch off the engine.
6.Leave the remote control in the ignition
lock.
Malfunction
The comfort access function may malfunction
due to local radio waves. Then open or close the
vehicle with the buttons on the remote control
or with a key. To start the engine following this,
insert the remote control in the ignition lock.
The warning lamp in the instrument
panel lights up when an attempt is
made to start the engine: starting the
engine is not possible. The remote control is
not in the vehicle or has a malfunction. Take
along the remote control into the vehicle or
have it checked. Insert another remote control
into the ignition lock if necessary.
The warning lamp in the instrument
panel lights up when the engine is
running: the remote control is no
longer in the vehicle. After switching off the
engine, the engine can only be started again
within approx. 10 seconds if no door has been
opened.
The indicator lamp in the instrument
panel lights up and a message
appears on the Control Display:
replace the battery of the remote control.
Replacing battery
The remote control for comfort access contains
a battery which must be replaced if necessary.
1.Remove integrated key from remote con-
trol, refer to page26.
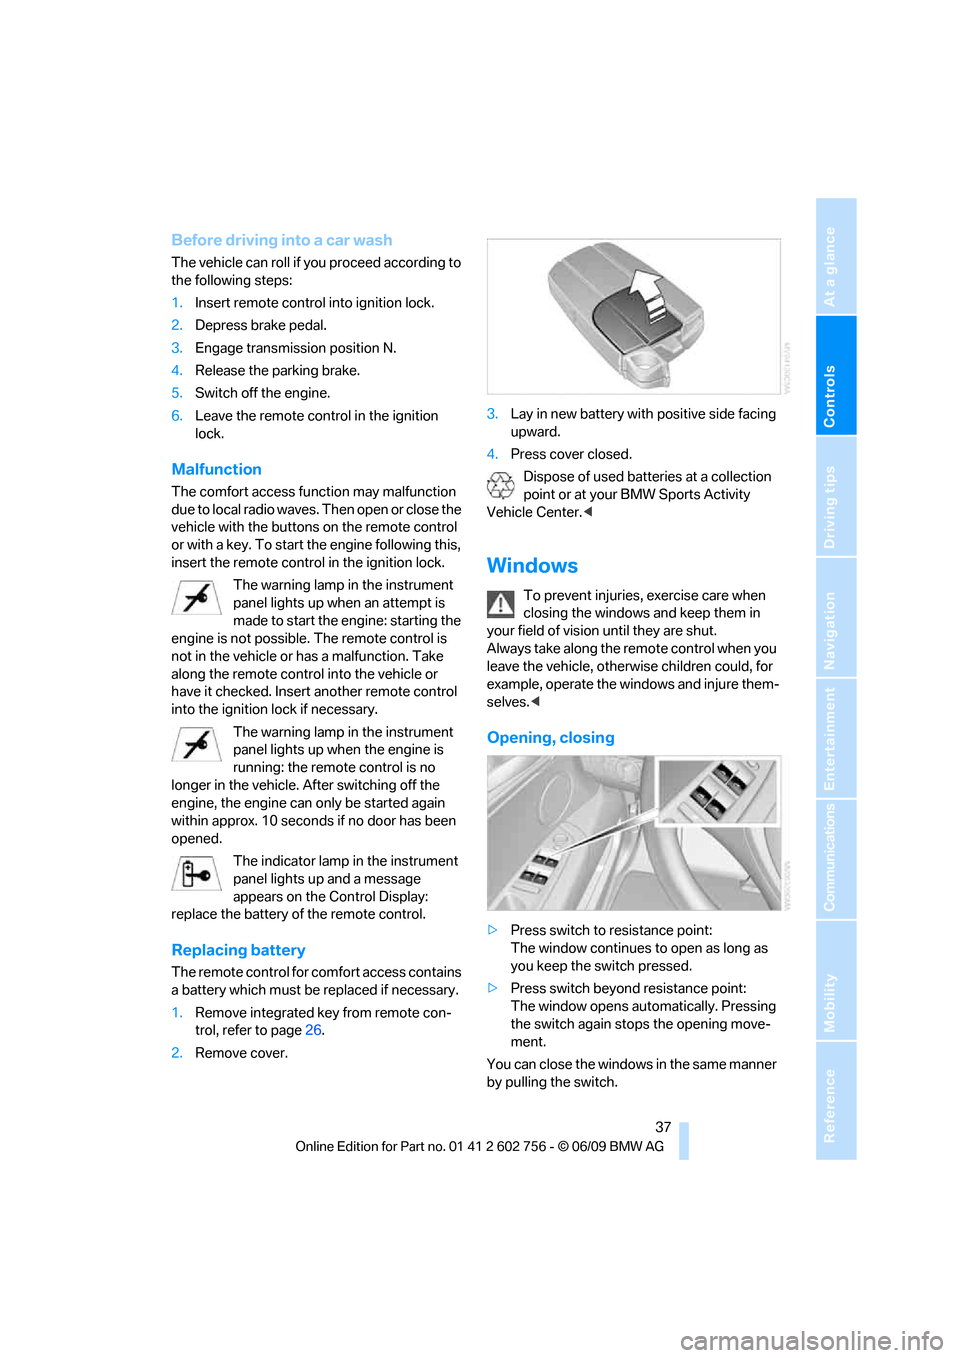
2.Remove cover.3.Lay in new battery with positive side facing
upward.
4.Press cover closed.
Dispose of used batteries at a collection
point or at your BMW Sports Activity
Vehicle Center.<
Windows
To prevent injuries, exercise care when
closing the windows and keep them in
your field of vision until they are shut.
Always take along the remote control when you
leave the vehicle, otherwise children could, for
example, operate the windows and injure them-
selves.<
Opening, closing
>Press switch to resistance point:
The window continues to open as long as
you keep the switch pressed.
>Press switch beyond resistance point:
The window opens automatically. Pressing
the switch again stops the opening move-
ment.
You can close the windows in the same manner
by pulling the switch.
ba8_e70ag.book Seite 37 Freitag, 5. Juni 2009 11:42 11
Page 48 of 300
Adjusting
46 3.Press the button:
The LED in the button lights up.
4.Press the desired memory button1 or2:
the LED goes out.
The positions of the driver's seat, the exte-
rior mirrors, and steering wheel are stored
for the remote control currently in use.
Activating
Do not activate the memory function
while the vehicle is moving. There is a risk
of accident from unexpected movement of the
seat or steering wheel.<
Comfort mode
1.After unlocking, open the driver's door or
switch on radio readiness, refer to page59.
2.Briefly press the desired memory button1
or 2.
The adjusting procedure is canceled if you
briefly press a seat-adjusting switch or one of
the memory buttons.
Safety feature
1.Close the driver's door and switch the igni-
tion on or off, refer to page59.
2.Press the desired memory button1 or2
and maintain pressure until the adjustment
process has been completed.
If the button was pressed inadvertently:
press the button again; the LED goes out.
Activating with the remote control
The driver's seat position last set is stored for
the remote control currently in use.
You can select whether or not the seat is reset
to that position automatically.
When using this feature, always make
sure that the footwell behind the driver's
seat is empty and unobstructed. Failure to do
so could cause injury to persons or damage to
objects behind the seat as a result of a rearward
movement of the seat.
the memory buttons.
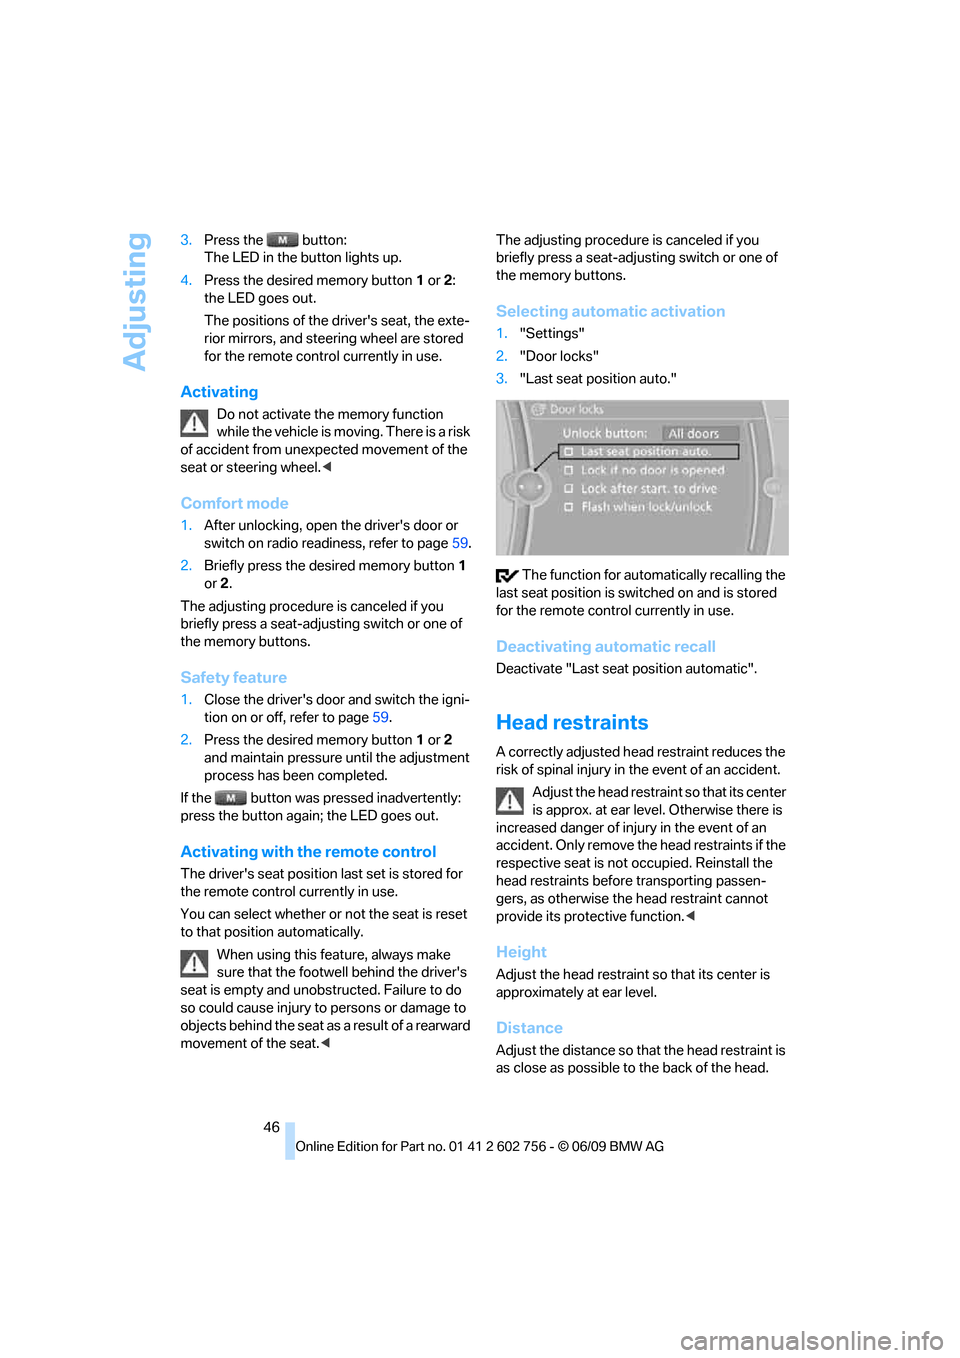
Selecting automatic activation
1."Settings"
2."Door locks"
3."Last seat position auto."
The function for automatically recalling the
last seat position is switched on and is stored
for the remote control currently in use.
Deactivating automatic recall
Deactivate "Last seat position automatic".
Head restraints
A correctly adjusted head restraint reduces the
risk of spinal injury in the event of an accident.
Adjust the head restraint so that its center
is approx. at ear level. Otherwise there is
increased danger of injury in the event of an
accident. Only remove the head restraints if the
respective seat is not occupied. Reinstall the
head restraints before transporting passen-
gers, as otherwise the head restraint cannot
provide its protective function.<
Height
Adjust the head restraint so that its center is
approximately at ear level.
Distance
Adjust the distance so that the head restraint is
as close as possible to the back of the head.
ba8_e70ag.book Seite 46 Freitag, 5. Juni 2009 11:42 11