Control Unit Cas BMW X5 XDRIVE 35D 2009 E70 Owner's Manual
[x] Cancel search | Manufacturer: BMW, Model Year: 2009, Model line: X5 XDRIVE 35D, Model: BMW X5 XDRIVE 35D 2009 E70Pages: 317, PDF Size: 9.56 MB
Page 33 of 317
Controls
31Reference
At a glance
Driving tips
Communications
Navigation
Entertainment
Mobility
During opening, the liftgate pivots back
and up. Ensure that adequate clearance is
available before opening.
To prevent accidentally locking yourself out,
never lay the remo te control in the cargo bay.
A previously locked liftgate is also locked again
after closing. <
If pointed or sharp- edged objects could
strike the rear window while driving, be
sure to provide protecti on around all edges.
Failure to do so could re sult in damage to the
heating conductors of the rear window.<
Setting confirmation signals
You can activate or deac tivate the confirmation
signals.
1. Press the button.
This opens the start menu.
2. Press the controller to open the menu.
3. Select "Settings" and press the controller.
4. Select "Vehicle / Tire s" and press the con-
troller.
5. Change to upper field if necessary. Turn the
controller until "Door locks" is selected and
press the controller.
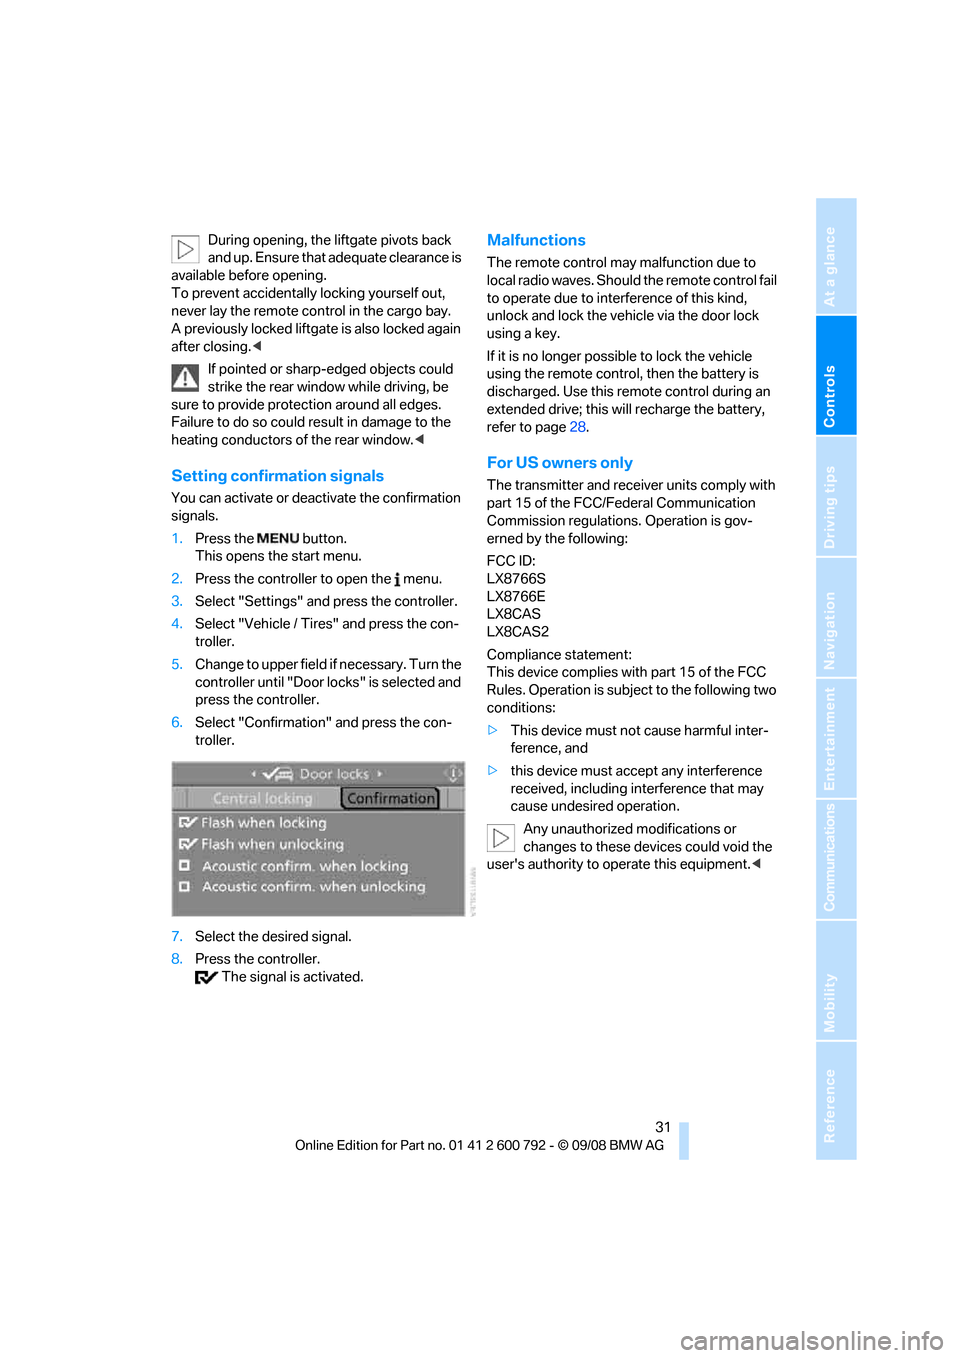
6. Select "Confirmation" and press the con-
troller.
7. Select the desired signal.
8. Press the controller.
The signal is activated.
Malfunctions
The remote control may malfunction due to
local radio waves. Should the remote control fail
to operate due to interference of this kind,
unlock and lock the vehicle via the door lock
using a key.
If it is no longer possible to lock the vehicle
using the remote control, then the battery is
discharged. Use this remote control during an
extended drive; this w ill recharge the battery,
refer to page 28.
For US owners only
The transmitter and receiver units comply with
part 15 of the FCC/Federal Communication
Commission regulations. Operation is gov-
erned by the following:
FCC ID:
LX8766S
LX8766E
LX8CAS
LX8CAS2
Compliance statement:
This device complies with part 15 of the FCC
Rules. Operation is subject to the following two
conditions:
> This device must not cause harmful inter-
ference, and
> this device must accept any interference
received, including in terference that may
cause undesired operation.
Any unauthorized modifications or
changes to these devices could void the
user's authority to operate this equipment. <
Page 91 of 317
Controls
89Reference
At a glance
Driving tips
Communications
Navigation
Entertainment
Mobility
Setting time format
1.Select "Time format" and press the control-
ler.
2. Select the desired format and press the
controller.
The setting is stored for the remote control cur-
rently in use.
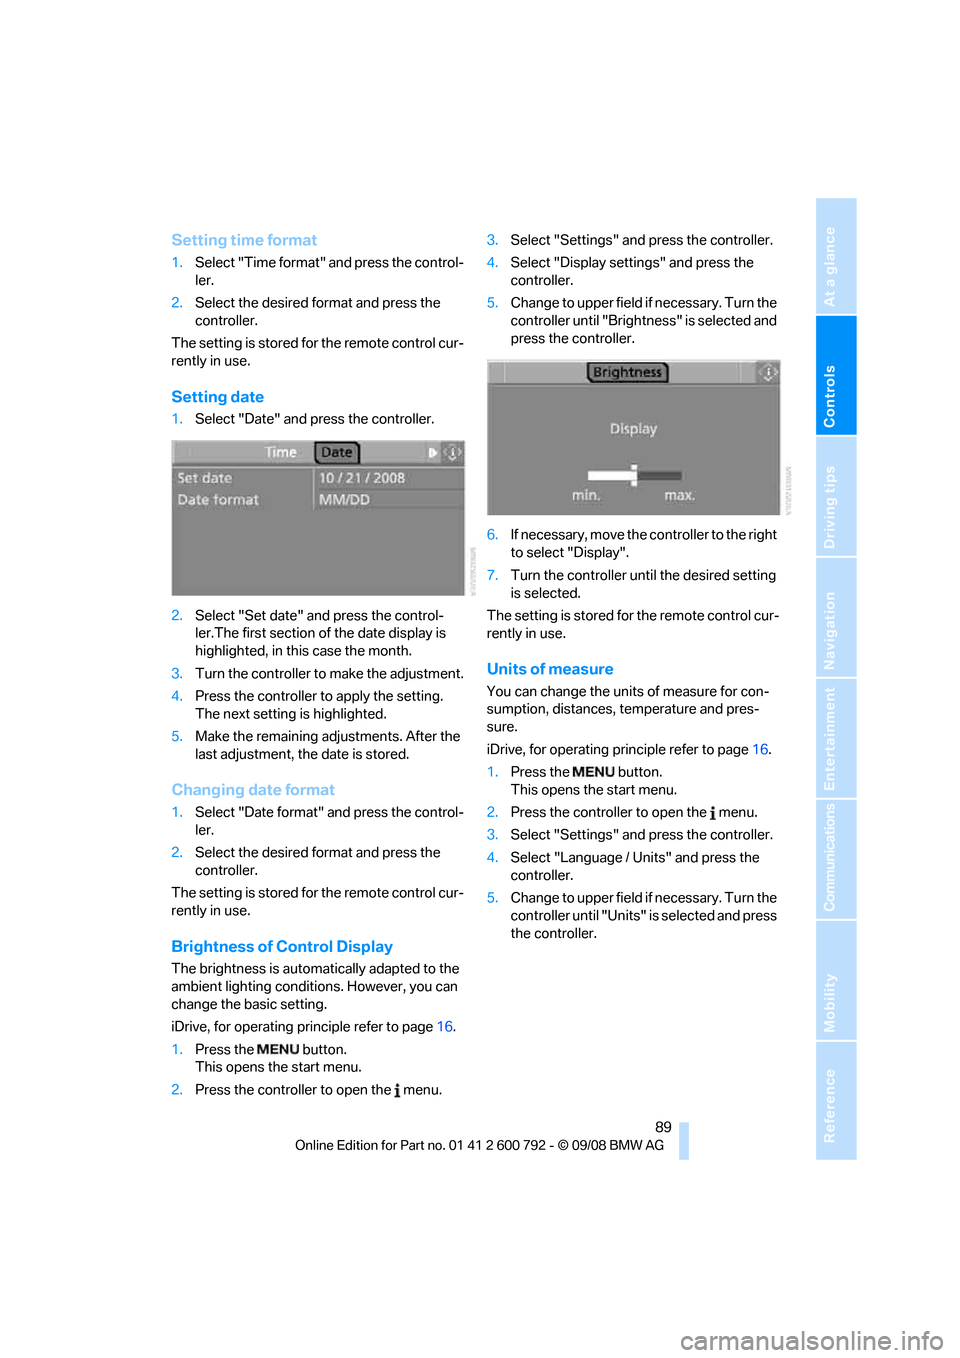
Setting date
1. Select "Date" and press the controller.
2. Select "Set date" and press the control-
ler.The first section of the date display is
highlighted, in this case the month.
3. Turn the controller to make the adjustment.
4. Press the controller to apply the setting.
The next setting is highlighted.
5. Make the remaining ad justments. After the
last adjustment, the date is stored.
Changing date format
1. Select "Date format" and press the control-
ler.
2. Select the desired format and press the
controller.
The setting is stored for the remote control cur-
rently in use.
Brightness of Control Display
The brightness is automatically adapted to the
ambient lighting conditions. However, you can
change the basic setting.
iDrive, for operating principle refer to page 16.
1. Press the button.
This opens the start menu.
2. Press the controller to open the menu. 3.
Select "Settings" and press the controller.
4. Select "Display settings" and press the
controller.
5. Change to upper field if necessary. Turn the
controller until "Brightn ess" is selected and
press the controller.
6. If necessary, move the controller to the right
to select "Display".
7. Turn the controller until the desired setting
is selected.
The setting is stored for the remote control cur-
rently in use.
Units of measure
You can change the units of measure for con-
sumption, distances, temperature and pres-
sure.
iDrive, for operating pr inciple refer to page16.
1. Press the button.
This opens the start menu.
2. Press the controller to open the menu.
3. Select "Settings" and press the controller.
4. Select "Language / Units" and press the
controller.
5. Change to upper field if necessary. Turn the
controller until "Units" is selected and press
the controller.
Page 103 of 317
Controls
101Reference
At a glance
Driving tips
Communications
Navigation
Entertainment
Mobility
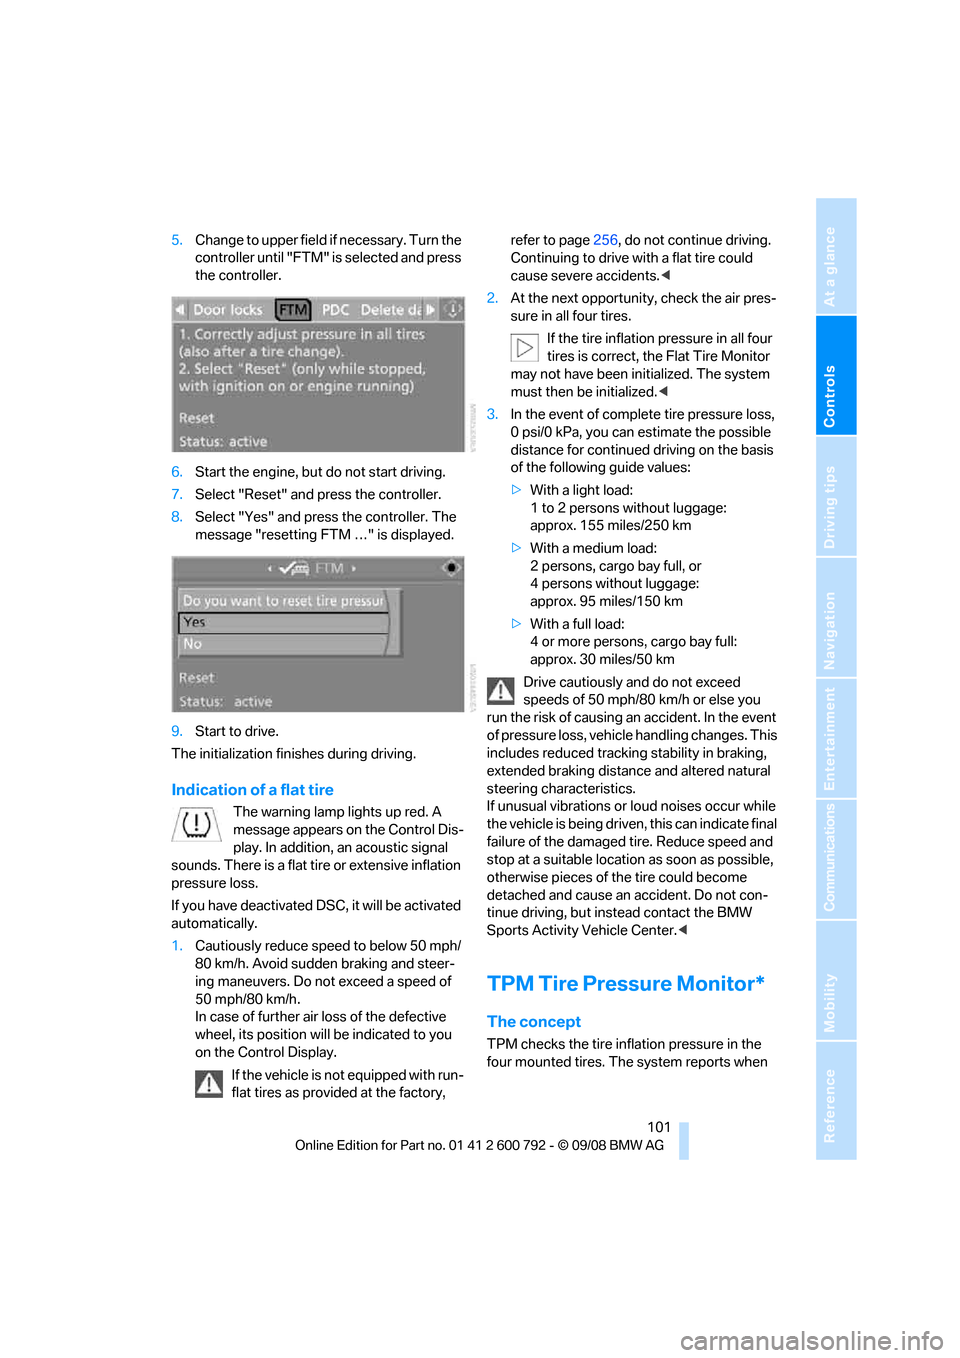
5.Change to upper field if necessary. Turn the
controller until "FTM" is selected and press
the controller.
6. Start the engine, but do not start driving.
7. Select "Reset" and press the controller.
8. Select "Yes" and press the controller. The
message "resetting FTM …" is displayed.
9. Start to drive.
The initialization finishes during driving.
Indication of a flat tire
The warning lamp lights up red. A
message appears on the Control Dis-
play. In addition, an acoustic signal
sounds. There is a flat tire or extensive inflation
pressure loss.
If you have deactivated DS C, it will be activated
automatically.
1. Cautiously reduce speed to below 50 mph/
80 km/h. Avoid sudden braking and steer-
ing maneuvers. Do not exceed a speed of
50 mph/80 km/h.
In case of further air loss of the defective
wheel, its position will be indicated to you
on the Control Display.
If the vehicle is not equipped with run-
flat tires as provided at the factory, refer to page
256, do not continue driving.
Continuing to drive with a flat tire could
cause severe accidents. <
2. At the next opportunity, check the air pres-
sure in all four tires.
If the tire inflation pressure in all four
tires is correct, the Flat Tire Monitor
may not have been initialized. The system
must then be initialized. <
3. In the event of complete tire pressure loss,
0 psi/0 kPa, you can estimate the possible
distance for continued driving on the basis
of the following guide values:
> With a light load:
1 to 2 persons without luggage:
approx. 155 miles/250 km
> With a medium load:
2 persons, cargo bay full, or
4 persons without luggage:
approx. 95 miles/150 km
> With a full load:
4 or more persons, cargo bay full:
approx. 30 miles/50 km
Drive cautiously and do not exceed
speeds of 50 mph/80 km/h or else you
run the risk of causing an accident. In the event
of pressure loss, vehicl e handling changes. This
includes reduced tracking stability in braking,
extended braking distance and altered natural
steering characteristics.
If unusual vibrations or loud noises occur while
the vehicle is being driven , this can indicate final
failure of the damaged tire. Reduce speed and
stop at a suitable location as soon as possible,
otherwise pieces of the tire could become
detached and cause an accident. Do not con-
tinue driving, but instead contact the BMW
Sports Activity Vehicle Center. <
TPM Tire Pressure Monitor*
The concept
TPM checks the tire inflation pressure in the
four mounted tires. The system reports when
Page 126 of 317
Practical interior accessories
124
The corresponding memory button
1 is now
programmed with the signal of the original
hand-held transmitter.
You can operate the device when the engine is
running or when the igni tion is switched on.
If the device cannot be used after
repeated programming, check whether
the original hand-held transmitter uses an alter-
nating-code system. To do so, either read the
instructions for the original hand-held transmit-
ter or hold down the programmed memory but-
ton 1 of the integrated universal remote control.
If the LED 2 on the integrated universal remote
control flashes rapidly for a short time and then
remains lit for approx. 2 seconds, this indicates
that the original hand-h eld transmitter uses an
alternating-code system. In the case of an alter-
nating-code system, program the memory but-
tons 1 as described at Alternating-code hand-
held transmitters. <
Alternating-code hand-held
transmitters
To program the integrated universal remote
control, consult the operating instructions for
the equipment to be set. You will find informa-
tion there on the possibilities for synchroniza-
tion.
When programming hand-held transmitters
that employ an alternating code, observe the
following supplementary instructions:
Programming will be easi er with the aid of
a second person. <
1. Park your vehicle within the range of the
remote-controlled device.
2. Program the integrated universal remote
control as described above in the section
Fixed-code hand-held transmitters.
3. Locate the button on the receiver of the
device to be set, e.g. on the drive unit.
4. Press the button on the receiver of the
device to be set. Af ter step 4, you have
approx. 30 seconds for step 5.
5. Press the programmed memory button 1
of the integrated universal remote control
three times. The corresponding memory button
1 is now
programmed with the signal of the original
hand-held transmitter.
Should you have questions, please con-
tact your BMW Sports Activity Vehicle
Center. <
Deleting all stored programs
Press the left and right-hand memory button 1
for approx. 20 seconds until the LED 2 flashes
quickly:
All stored programs are deleted.
Reassigning individual programs
1. Hold the original hand-held transmitter at
a distance of approx. 4 in/10 cm to 12 in/
30 cm from the memory buttons 1.
The required distance between the
hand-held transmitter and the mem-
ory buttons 1 depends on the relevant sys-
tem of the original hand-held transmitter
used. <
2. Press the desired memory button 1 of the
integrated universal remote control.
3. When the LED 2 flashes slowly after approx.
20 seconds, press the transmit button of
the original hand-held transmitter. Release
both buttons as soon as the LED 2 flashes
rapidly. If the LED 2 does not flash rapidly
after approx. 15 seconds, alter the distance
and repeat the step.
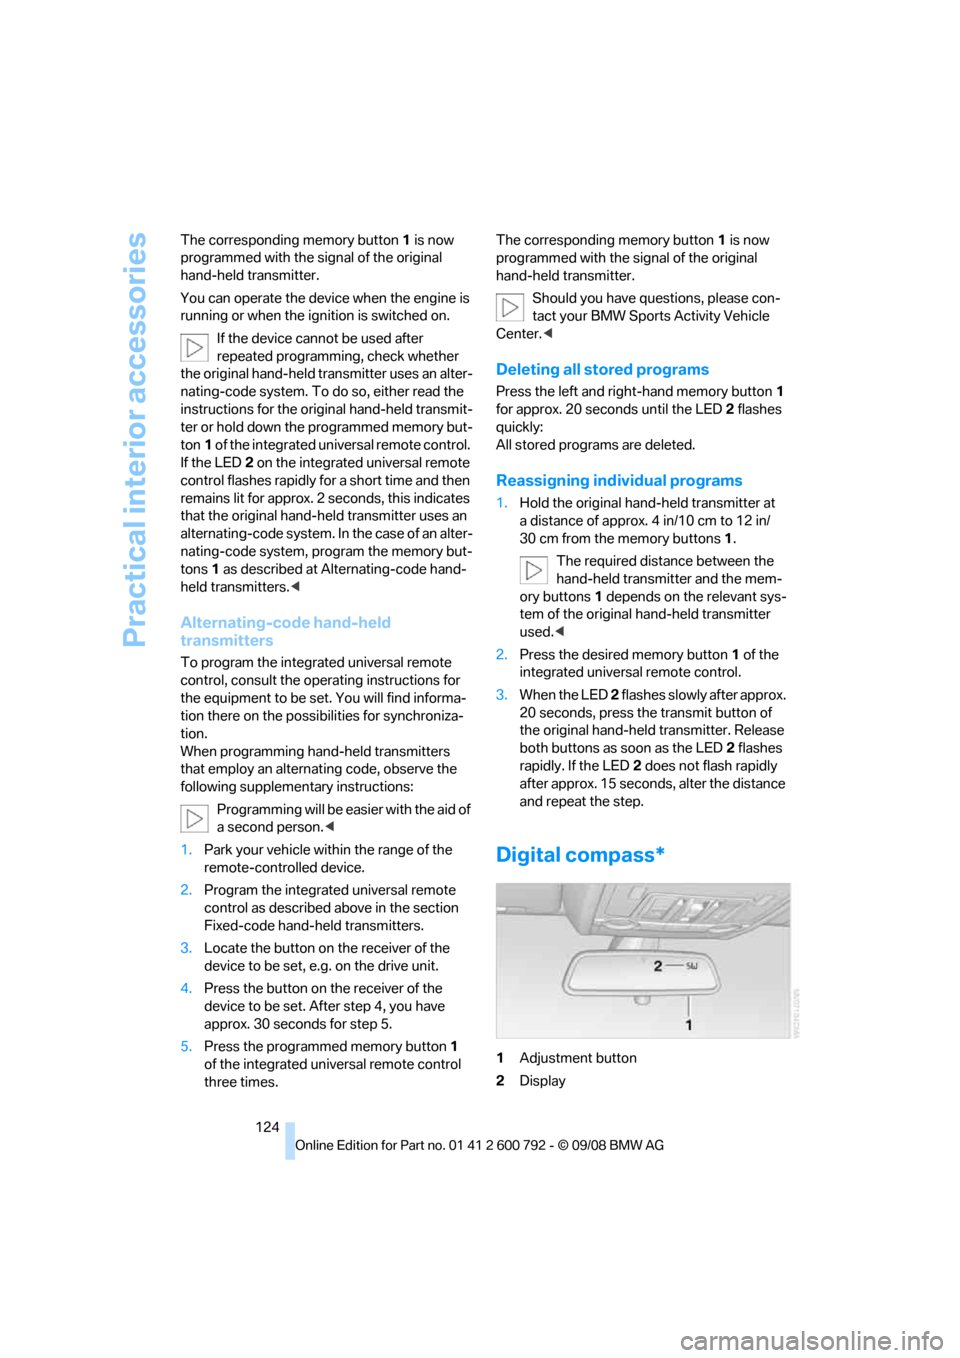
Digital compass*
1 Adjustment button
2 Display
Page 196 of 317
DVD changer
194
Removing all DVDs from DVD changer
1.Hold down the button.
The DVDs are pushed partially out of the
DVD changer in sequence.
2. Remove the DVDs individually.
Malfunctions
If all of the LEDs on the DVD changer flash rap-
idly, then a malfunction is occurring. In this
case, proceed as follows.
1. Press the button or button.
The DVD last inserted is ejected.
2. Remove the DVD.
The DVD changer tests the DVD compartments
and the rapid flashing of the LEDs stops. The
DVD changer is once more operational.
DVD country codes
Your DVD player only plays DVDs with the cod-
ing of your home regi on, e.g. Europe = 2. The
country codes supported by your DVD are con-
tained in the information on your DVD. It is not
possible to change this coding. An overview of
the six coding zones:
DVDs with the code 0 can be played back
on all units. <
Playing DVDs
Depending on the equipment in your vehicle,
you have the option of playing back both the
audio track and video track of DVDs or only their
audio track.
>Vehicles with two drives: audio and video
playback
> Vehicles with a single drive: audio playback,
refer to page 197
Audio and video playback
For your own safety, the picture only appears on
the Control Display at sp eeds of up to about
2 mph/3 km/h. For certain national-market ver-
sions, the picture does not appear on the Con-
trol Display unless the ve hicle is stationary and
the transmission is in Park.
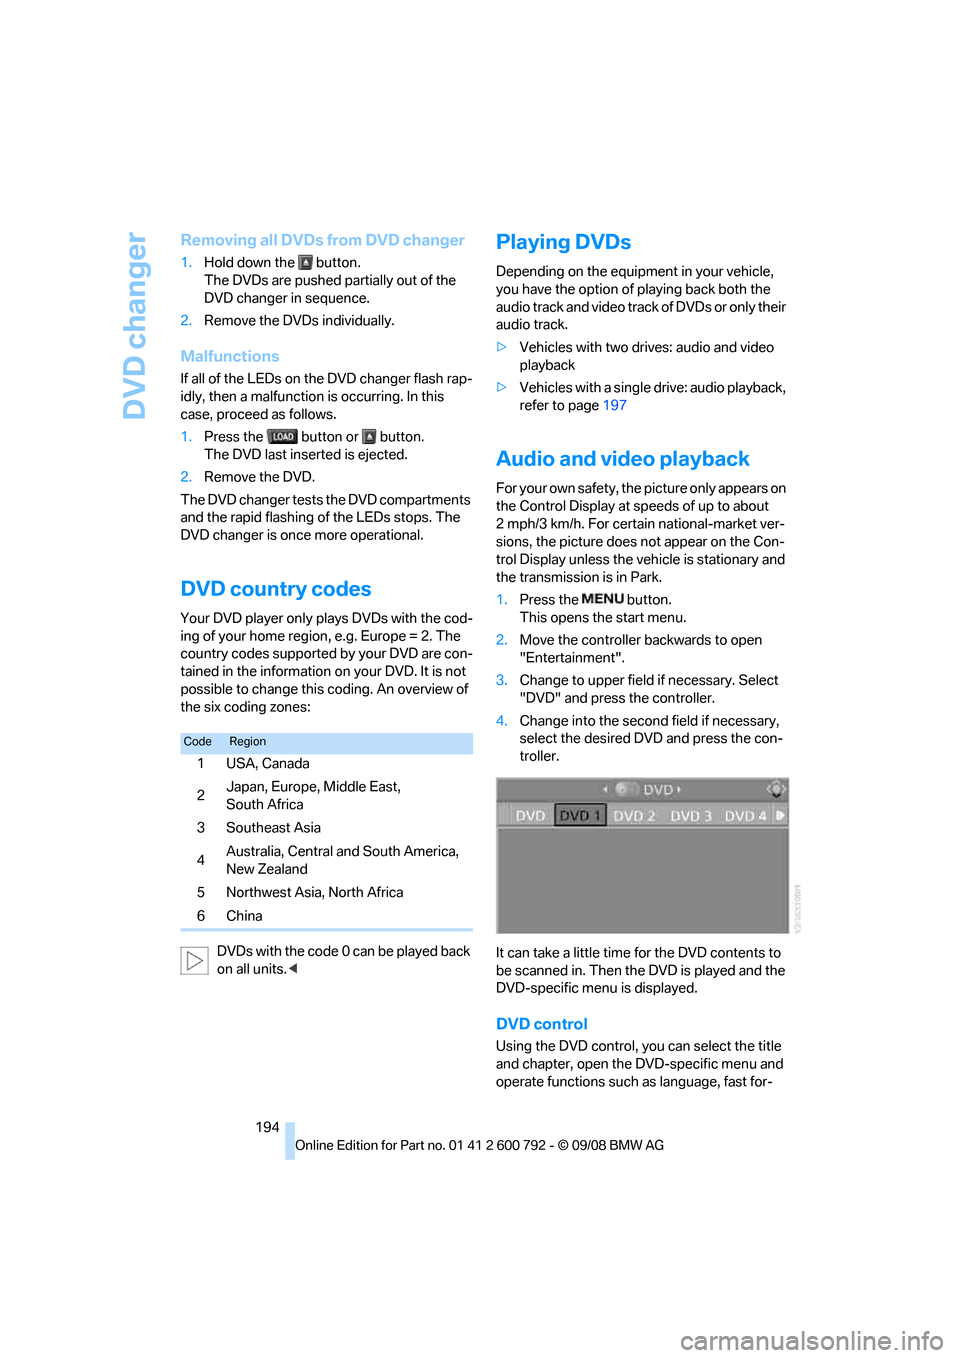
1. Press the button.
This opens the start menu.
2. Move the controller backwards to open
"Entertainment".
3. Change to upper field if necessary. Select
"DVD" and press the controller.
4. Change into the second field if necessary,
select the desired DVD and press the con-
troller.
It can take a little time for the DVD contents to
be scanned in. Then the DVD is played and the
DVD-specific menu is displayed.
DVD control
Using the DVD control, yo u can select the title
and chapter, open the DVD-specific menu and
operate functions such as language, fast for-
CodeRegion
1USA, Canada
2Japan, Europe, Middle East,
South Africa
3Southeast Asia
4 Australia, Central and South America,
New Zealand
5 Northwest Asia, North Africa
6China
Page 258 of 317
Wheels and tires
256
Run-flat tires
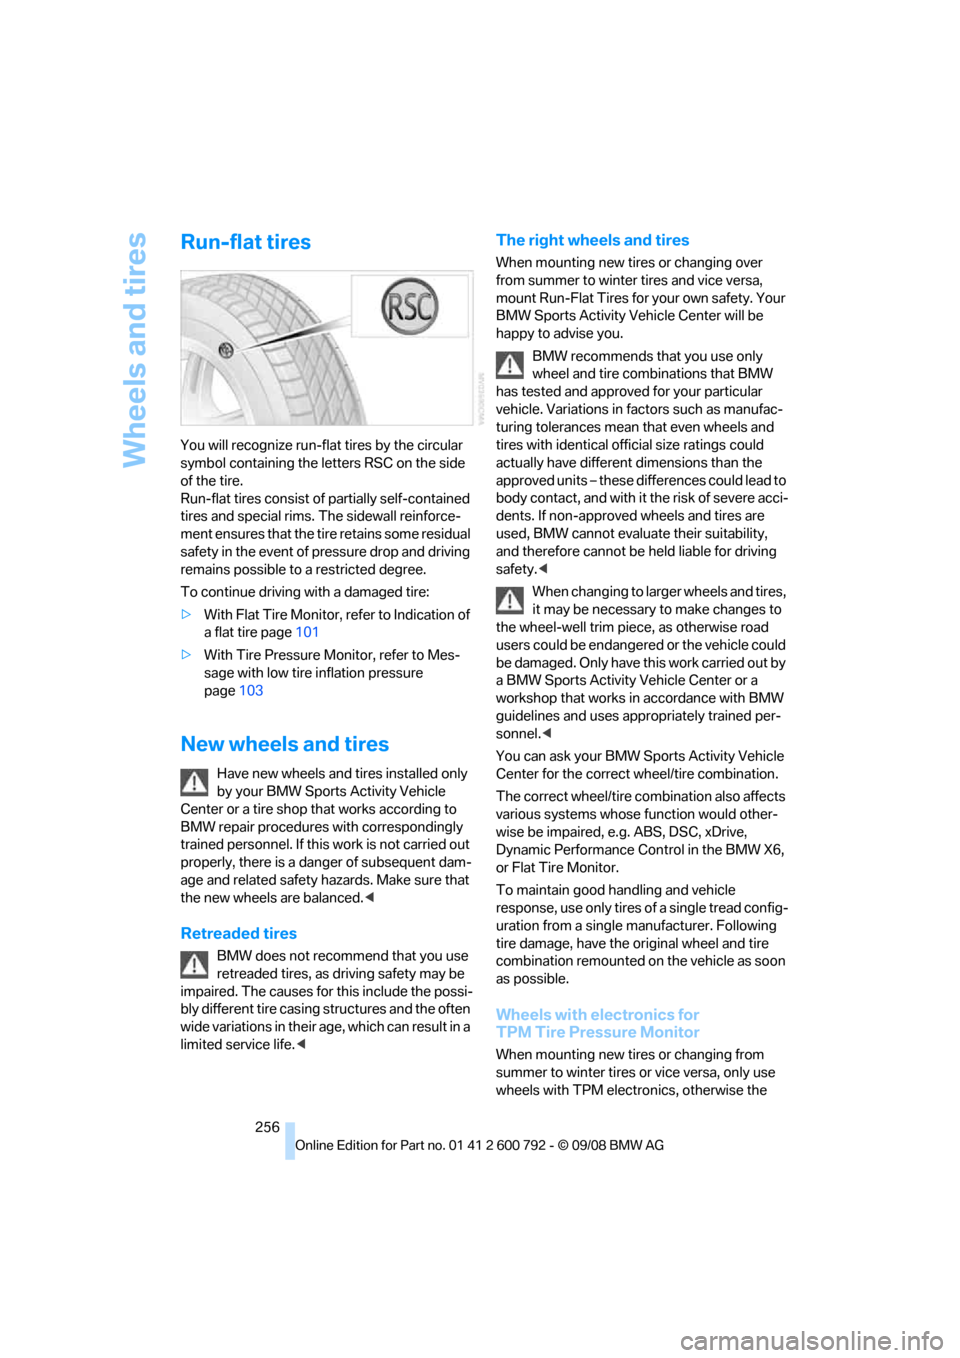
You will recognize run-flat tires by the circular
symbol containing the letters RSC on the side
of the tire.
Run-flat tires consist of partially self-contained
tires and special rims. The sidewall reinforce-
ment ensures that the tire retains some residual
safety in the event of pr essure drop and driving
remains possible to a restricted degree.
To continue driving with a damaged tire:
> With Flat Tire Monitor, refer to Indication of
a flat tire page 101
> With Tire Pressure Monitor, refer to Mes-
sage with low tire inflation pressure
page 103
New wheels and tires
Have new wheels and tires installed only
by your BMW Sports Activity Vehicle
Center or a tire shop that works according to
BMW repair procedures with correspondingly
trained personnel. If this work is not carried out
properly, there is a danger of subsequent dam-
age and related safety ha zards. Make sure that
the new wheels are balanced. <
Retreaded tires
BMW does not recommend that you use
retreaded tires, as driving safety may be
impaired. The causes for this include the possi-
bly different tire casing structures and the often
wide variations in their age, which can result in a
limited service life. <
The right wheels and tires
When mounting new tires or changing over
from summer to winter tires and vice versa,
mount Run-Flat Tires for your own safety. Your
BMW Sports Activity Vehicle Center will be
happy to advise you.
BMW recommends that you use only
wheel and tire combinations that BMW
has tested and approved for your particular
vehicle. Variations in factors such as manufac-
turing tolerances mean that even wheels and
tires with identical offi cial size ratings could
actually have different dimensions than the
approved units – these differences could lead to
body contact, and with it the risk of severe acci-
dents. If non-approved wheels and tires are
used, BMW cannot evaluate their suitability,
and therefore cannot be held liable for driving
safety. <
When changing to larger wheels and tires,
it may be necessary to make changes to
the wheel-well trim piec e, as otherwise road
users could be endangered or the vehicle could
be damaged. Only have th is work carried out by
a BMW Sports Activity Vehicle Center or a
workshop that works in accordance with BMW
guidelines and uses appropriately trained per-
sonnel. <
You can ask your BMW Sp orts Activity Vehicle
Center for the correct wheel/tire combination.
The correct wheel/tire combination also affects
various systems whose function would other-
wise be impaired, e.g. ABS, DSC, xDrive,
Dynamic Performance Control in the BMW X6,
or Flat Tire Monitor.
To maintain good handling and vehicle
response, use only tires of a single tread config-
uration from a single manufacturer. Following
tire damage, have the or iginal wheel and tire
combination remounted on the vehicle as soon
as possible.
Wheels with electronics for
TPM Tire Pressure Monitor
When mounting new tires or changing from
summer to winter tires or vice versa, only use
wheels with TPM electronics, otherwise the
Page 272 of 317
Replacing components
270
When performing care and maintenance on the
headlamps, please observe the information on
page
266.
For bulbs for which replacement is not
described and for checking and adjusting
headlamp aim, please contact your BMW
Sports Activity Vehicle Center. <
Light-emitting diodes LEDs
Light-emitting diodes installed behind translu-
cent lenses serve as the light source for many of
the controls and displays in your vehicle. These
light-emitting diodes, which operate using a
concept similar to that applied in conventional
lasers, are officially designated as Class 1 light-
emitting diodes.
Do not remove the covers, and never
stare into the unfilter ed light for several
hours, as irritation of the retina could result. <
BMW X5: changing lamps
Xenon light
These bulbs have a very long service life and
the probability of a failure is very low. If one of
these bulbs should nevertheless fail, it is possi-
ble to continue driving with great caution using
the fog lamps, provided traffic laws in your area
do not prohibit this.
Have work on the xenon light unit includ-
ing changing the bulb carried out only by
your BMW Sports Activity Vehicle Center or a
workshop that works according to BMW repair
procedures with correspondingly trained per-
sonnel. Due to the high voltage present in the
system, there is a danger of fatal injuries when
work is carried out improperly.<
Halogen bulbs:
Parking lamps and roadside parking
lamps, daytime driving lamps
35-Watt bulb, H8
The bulb is pressurized. Therefore, wear
safety glasses and protective gloves.
Otherwise there is a danger of injuries if the bulb is accidentally
damaged during replace-
ment. <
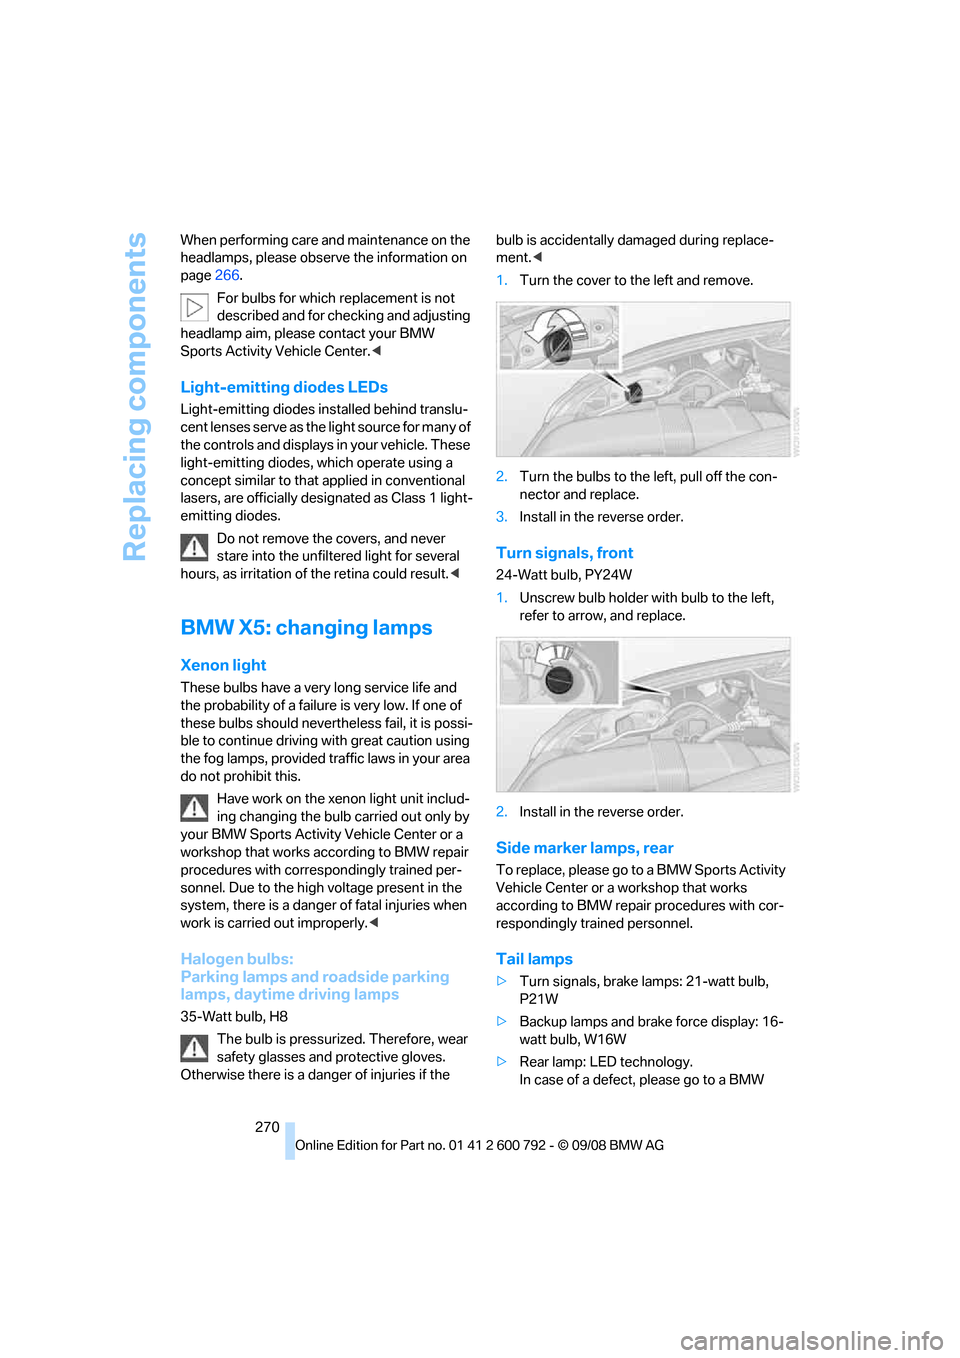
1. Turn the cover to the left and remove.
2. Turn the bulbs to the left, pull off the con-
nector and replace.
3. Install in the reverse order.
Turn signals, front
24-Watt bulb, PY24W
1.Unscrew bulb holder with bulb to the left,
refer to arrow, and replace.
2. Install in the reverse order.
Side marker lamps, rear
To replace, please go to a BMW Sports Activity
Vehicle Center or a workshop that works
according to BMW repair procedures with cor-
respondingly trained personnel.
Tail lamps
> Turn signals, brake lamps: 21-watt bulb,
P21W
> Backup lamps and brake force display: 16-
watt bulb, W16W
> Rear lamp: LE D technology.
In case of a defect, please go to a BMW
Page 275 of 317
Mobility
273Reference
At a glance
Controls
Driving tips
Communications
Navigation
Entertainment
the fog lamps, provided traffic laws in your area
do not prohibit this.
Have work on the xenon light unit includ-
ing changing the bulb carried out only by
your BMW Sports Activity Vehicle Center or a
workshop that works according to BMW repair
procedures with corres pondingly trained per-
sonnel. Due to the high voltage present in the
system, there is a danger of fatal injuries when
work is carried out improperly. <
Parking lamps and roadside parking
lamps, daytime driving lamps
35-Watt bulb, H8
The bulb is pressurized. Therefore, wear
safety glasses and protective gloves.
Otherwise there is a dang er of injuries if the
bulb is accidentally damaged during replace-
ment. <
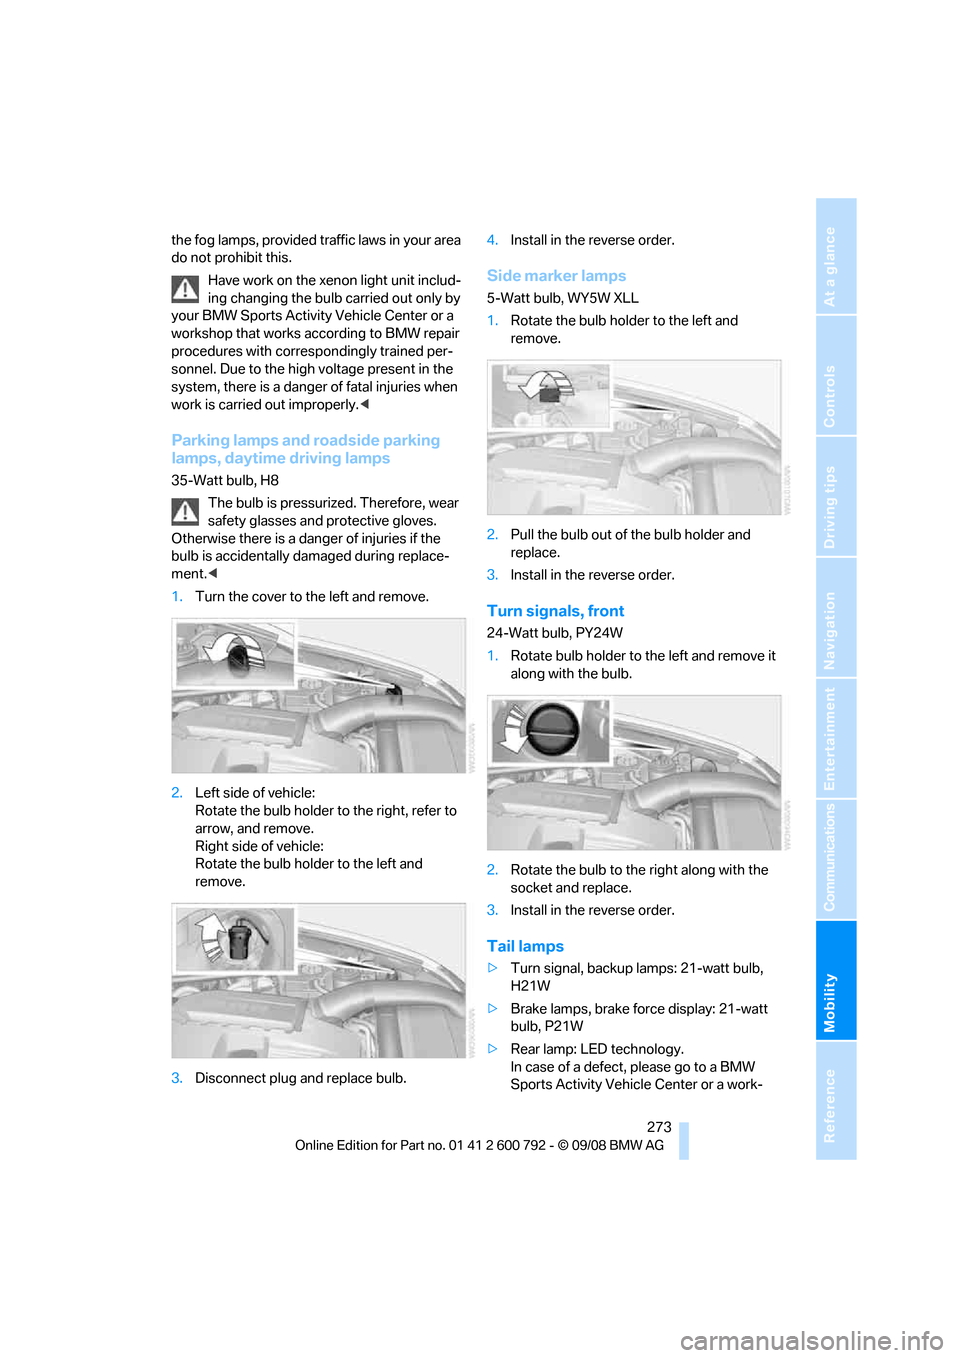
1. Turn the cover to th e left and remove.
2. Left side of vehicle:
Rotate the bulb holder to the right, refer to
arrow, and remove.
Right side of vehicle:
Rotate the bulb hold er to the left and
remove.
3. Disconnect plug and replace bulb. 4.
Install in the reverse order.
Side marker lamps
5-Watt bulb, WY5W XLL
1.Rotate the bulb hold er to the left and
remove.
2. Pull the bulb out of the bulb holder and
replace.
3. Install in the reverse order.
Turn signals, front
24-Watt bulb, PY24W
1.Rotate bulb holder to the left and remove it
along with the bulb.
2. Rotate the bulb to th e right along with the
socket and replace.
3. Install in the reverse order.
Tail lamps
>Turn signal, backup lamps: 21-watt bulb,
H21W
> Brake lamps, brake force display: 21-watt
bulb, P21W
> Rear lamp: LED technology.
In case of a defect, please go to a BMW
Sports Activity Vehicle Center or a work-
Page 309 of 317
Reference 307
At a glance
Controls
Driving tips
Communications
Navigation
Entertainment
Mobility
Neck support, refer to Head restraints 52
"New address" for navigation 158
"New destination" 151,155
New remote control 28
"New route" 166
New wheels and tires 256
"Next entertainment source" 59
Nozzles, refer to Windshield
washer nozzles 75
"NTSC color" for DVD system
in rear 216
Nylon rope, refer to Tow- starting and towing 281
O
OBD socket264
Octane ratings, refer to Fuel specifications 245
Odometer 78
Oil
– additives, refer to Approved
engine oils 262
– approved engine oils 262
– consumption, refer to
Checking engine oil
level 260
– level 260
– refilling, refer to Adding engine oil 261
Oil change interval, refer to
Service requirements 82
"On a new destination" for navigation 156
Onboard computer, refer to iDrive 16
Onboard toolkit 269
"On destination" 156
"On location" 156
Opening and closing
– comfort access 39
– from inside 32
– panorama glass sunroof 43
– using remote control 29
– using the door lock 32Operation by voice for mobile
phone 231
– adjusting volume 232
– canceling 231
– correcting phone
number 232
– dialing phone number 232
– placing a call 232
– redialing 233
– voice commands 231
– voice phone book 232
Operation on poor roads 144
"Options" 239,240
Orientation menu, refer to Start menu 17
Output, refer to Engine
data 286
Outside air, refer to AUC Automatic recirculated-air
control 117
Outside temperature display 78
– changing unit of measure 89
Outside temperature warning 78
"Overview" for DVD system in rear 213
P
Panic mode 30
Panorama glass sunroof 42
– moving manually 44
– power failure 44
– raising, opening, closing 43
Park Distance Control PDC 91
"Parked car operation" 121
"Parked car ventilation" 121
Parked-car ventilation 121
– activating activation
time 122
– preselecting activation times 122
– switching on and off directly 121
Parking, vehicle 66 Parking aid
– refer to PDC Park Distance
Control 91
– refer to Rear view camera 93
Parking assistant, refer to
PDC Park Distance
Control 91
Parking brake 67
– Automatic Hold 67
– indicator lamp 13
– releasing manually 67
– releasing manually in case of an electrical malfunction 69
– setting manually 67
Parking lamps 110
Parking with Automatic
Hold 68
Parts and accessories 6
"Passenger's seat climate" 56
Passenger-side exterior mirror, tilting down 58
Pathway lighting 111
"Pause" for DVD system in rear 210
Paying attention to speed 257
"PDC" 92
PDC Park Distance Control 91
Personal Profile 28
"Perspective" 164
Phone book 226
– creating and editing voice
phone book 232
Phone numbers
– deleting from phone
book 229
– dialing 227
– most recent numbers 229
– selecting in phone book 229
– Top 8 229
"Photo" for DVD-System in
rear 206,212
Pinch protection system
– glass sunroof, electric 45
– panorama glass
sunroof43
– power windows 42
Plasters, refer to First-aid
kit 279