light BMW X5 XDRIVE 35D 2010 E70 Owner's Guide
[x] Cancel search | Manufacturer: BMW, Model Year: 2010, Model line: X5 XDRIVE 35D, Model: BMW X5 XDRIVE 35D 2010 E70Pages: 300, PDF Size: 12.41 MB
Page 74 of 300
Everything under control
72
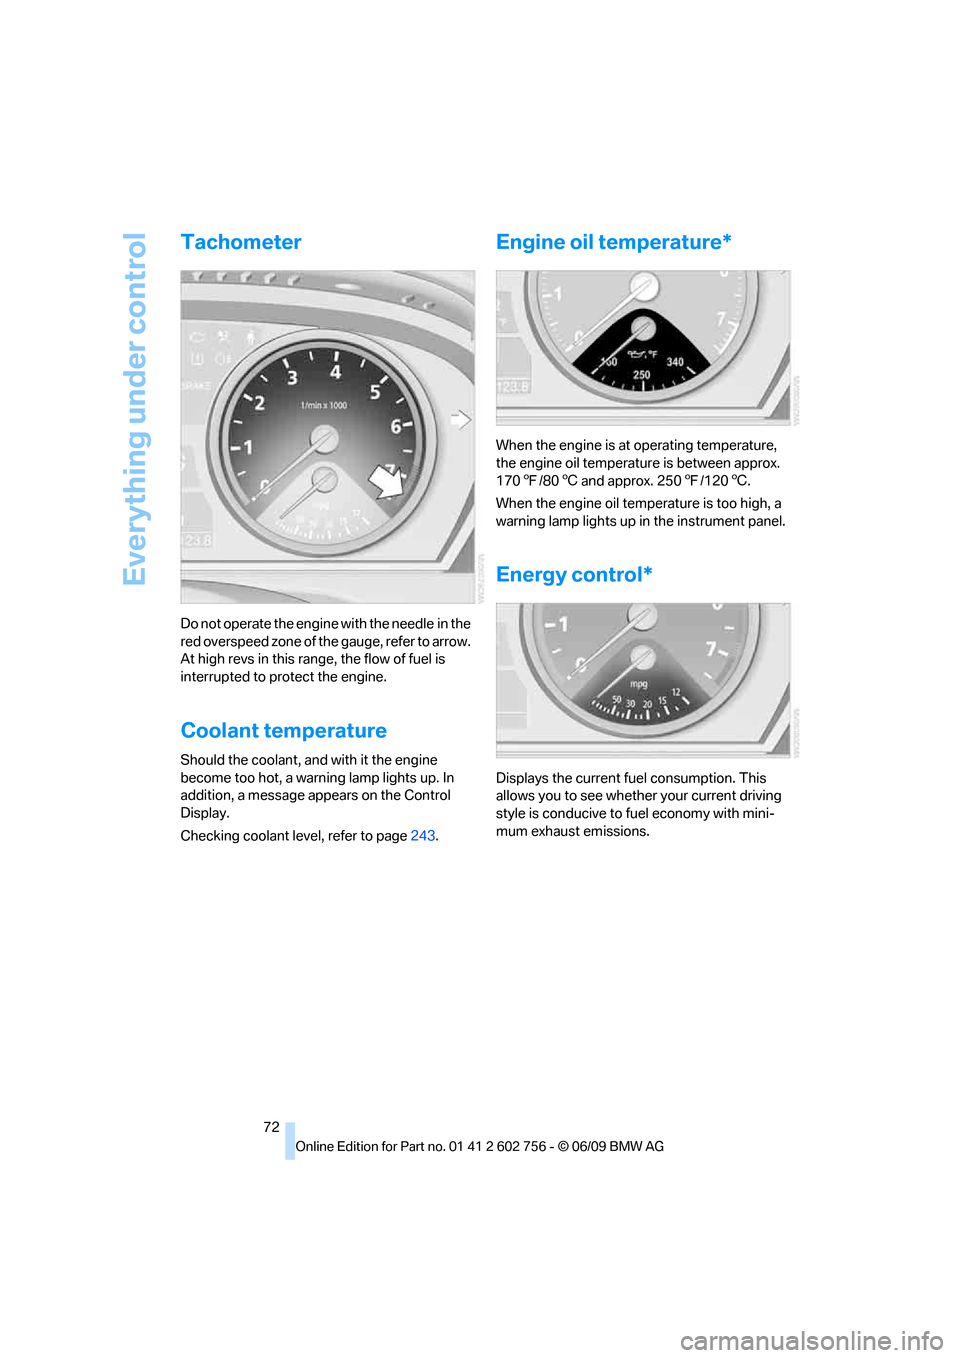
Tachometer
Do not operate the engine with the needle in the
red overspeed zone of the gauge, refer to arrow.
At high revs in this range, the flow of fuel is
interrupted to protect the engine.
Coolant temperature
Should the coolant, and with it the engine
become too hot, a warning lamp lights up. In
addition, a message appears on the Control
Display.
Checking coolant level, refer to page243.
Engine oil temperature*
When the engine is at operating temperature,
the engine oil temperature is between approx.
1707/806 and approx. 2507/1206.
When the engine oil temperature is too high, a
warning lamp lights up in the instrument panel.
Energy control*
Displays the current fuel consumption. This
allows you to see whether your current driving
style is conducive to fuel economy with mini-
mum exhaust emissions.
ba8_e70ag.book Seite 72 Freitag, 5. Juni 2009 11:42 11
Page 75 of 300
Controls
73Reference
At a glance
Driving tips
Communications
Navigation
Entertainment
Mobility
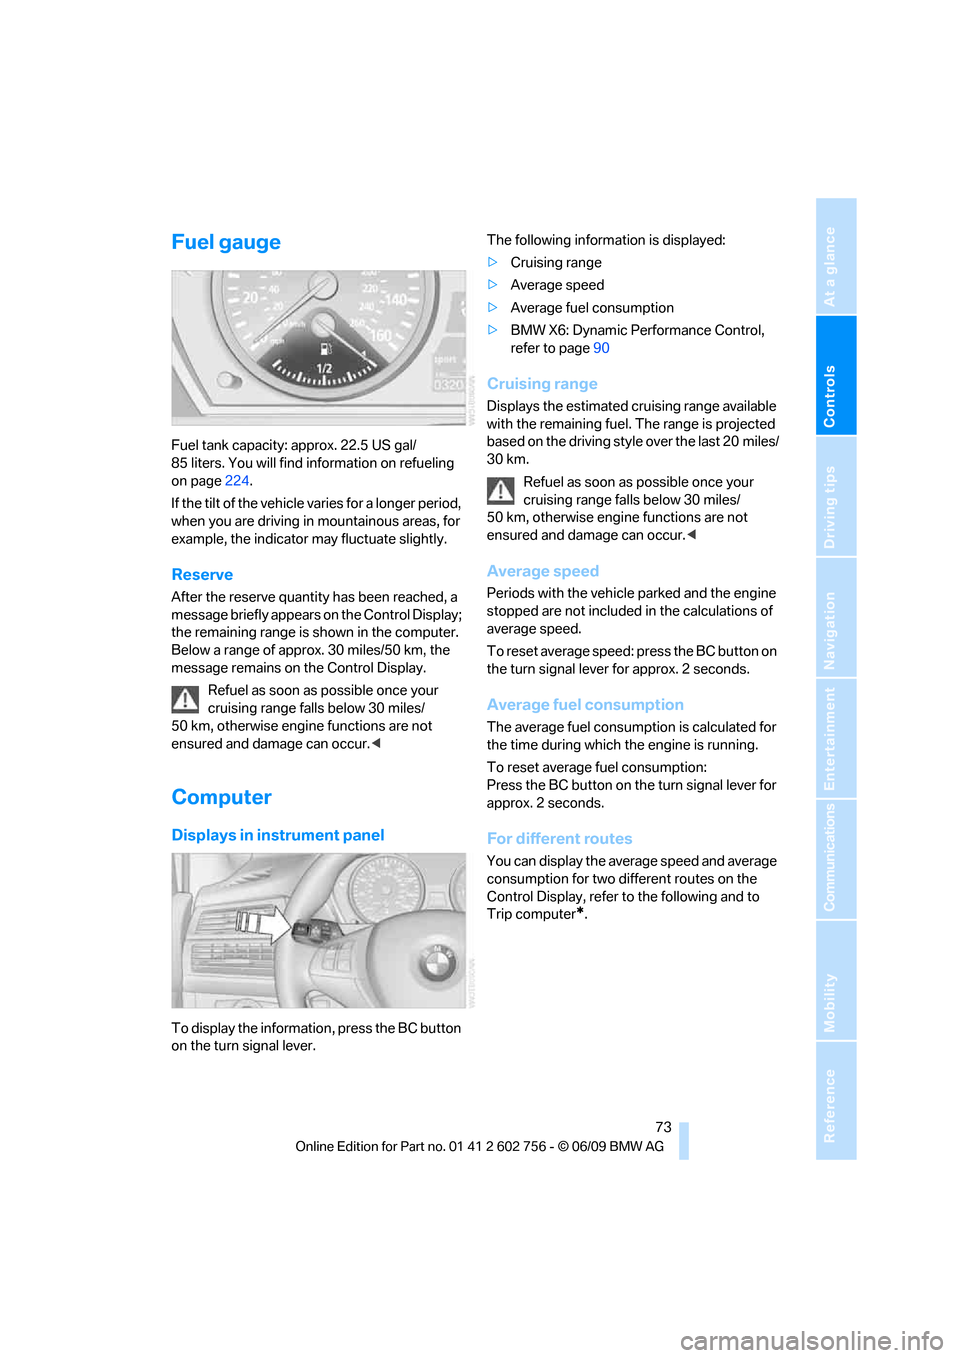
Fuel gauge
Fuel tank capacity: approx. 22.5 US gal/
85 liters. You will find information on refueling
on page224.
If the tilt of the vehicle varies for a longer period,
when you are driving in mountainous areas, for
example, the indicator may fluctuate slightly.
Reserve
After the reserve quantity has been reached, a
message briefly appears on the Control Display;
the remaining range is shown in the computer.
Below a range of approx. 30 miles/50 km, the
message remains on the Control Display.
Refuel as soon as possible once your
cruising range falls below 30 miles/
50 km, otherwise engine functions are not
ensured and damage can occur.<
Computer
Displays in instrument panel
To display the information, press the BC button
on the turn signal lever.The following information is displayed:
>Cruising range
>Average speed
>Average fuel consumption
>BMW X6: Dynamic Performance Control,
refer to page90
Cruising range
Displays the estimated cruising range available
with the remaining fuel. The range is projected
based on the driving style over the last 20 miles/
30 km.
Refuel as soon as possible once your
cruising range falls below 30 miles/
50 km, otherwise engine functions are not
ensured and damage can occur.<
Average speed
Periods with the vehicle parked and the engine
stopped are not included in the calculations of
average speed.
To reset average speed: press the BC button on
the turn signal lever for approx. 2 seconds.
Average fuel consumption
The average fuel consumption is calculated for
the time during which the engine is running.
To reset average fuel consumption:
Press the BC button on the turn signal lever for
approx. 2 seconds.
For different routes
You can display the average speed and average
consumption for two different routes on the
Control Display, refer to the following and to
Trip computer
*.
ba8_e70ag.book Seite 73 Freitag, 5. Juni 2009 11:42 11
Page 78 of 300
Everything under control
76
More information
Detailed information on service
requirements
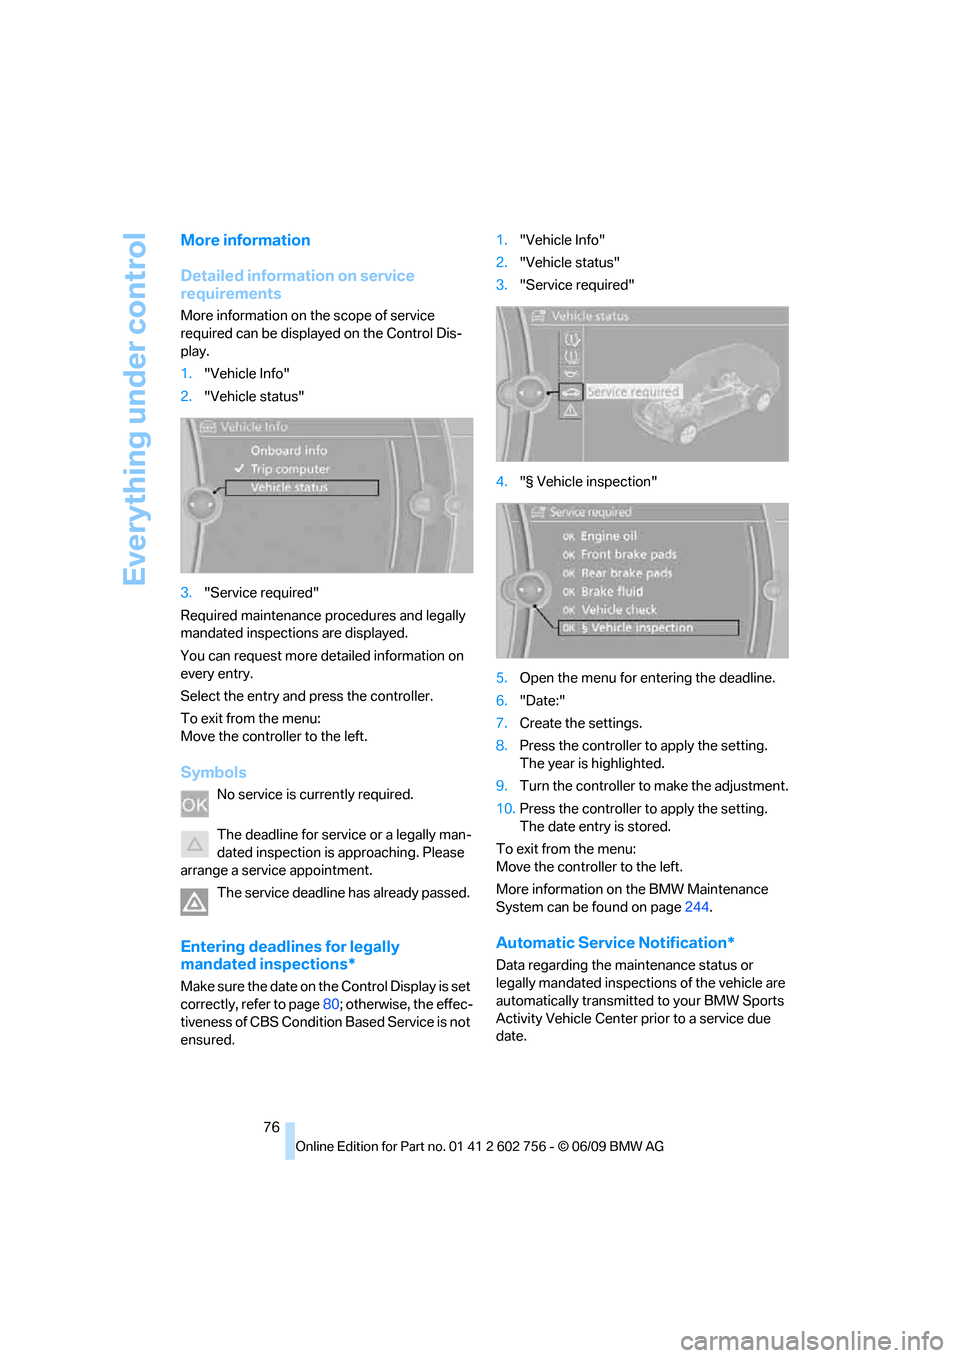
More information on the scope of service
required can be displayed on the Control Dis-
play.
1."Vehicle Info"
2."Vehicle status"
3."Service required"
Required maintenance procedures and legally
mandated inspections are displayed.
You can request more detailed information on
every entry.
Select the entry and press the controller.
To exit from the menu:
Move the controller to the left.
Symbols
No service is currently required.
The deadline for service or a legally man-
dated inspection is approaching. Please
arrange a service appointment.
The service deadline has already passed.
Entering deadlines for legally
mandated inspections*
Make sure the date on the Control Display is set
correctly, refer to page80; otherwise, the effec-
tiveness of CBS Condition Based Service is not
ensured.1."Vehicle Info"
2."Vehicle status"
3."Service required"
4."§ Vehicle inspection"
5.Open the menu for entering the deadline.
6."Date:"
7.Create the settings.
8.Press the controller to apply the setting.
The year is highlighted.
9.Turn the controller to make the adjustment.
10.Press the controller to apply the setting.
The date entry is stored.
To exit from the menu:
Move the controller to the left.
More information on the BMW Maintenance
System can be found on page244.
Automatic Service Notification*
Data regarding the maintenance status or
legally mandated inspections of the vehicle are
automatically transmitted to your BMW Sports
Activity Vehicle Center prior to a service due
date.
ba8_e70ag.book Seite 76 Freitag, 5. Juni 2009 11:42 11
Page 79 of 300
Controls
77Reference
At a glance
Driving tips
Communications
Navigation
Entertainment
Mobility
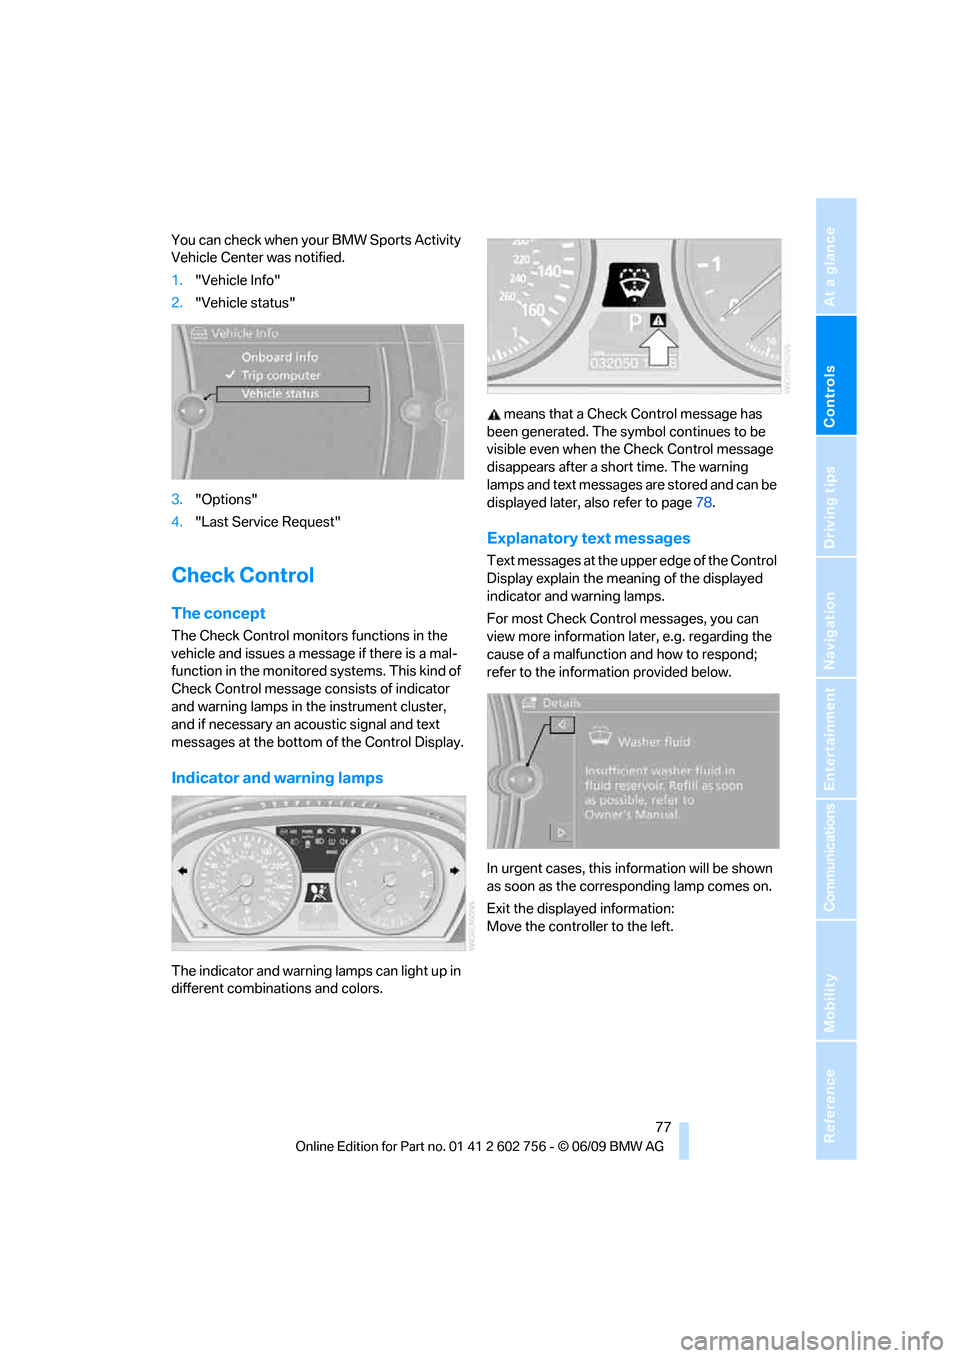
You can check when your BMW Sports Activity
Vehicle Center was notified.
1."Vehicle Info"
2."Vehicle status"
3."Options"
4."Last Service Request"
Check Control
The concept
The Check Control monitors functions in the
vehicle and issues a message if there is a mal-
function in the monitored systems. This kind of
Check Control message consists of indicator
and warning lamps in the instrument cluster,
and if necessary an acoustic signal and text
messages at the bottom of the Control Display.
Indicator and warning lamps
The indicator and warning lamps can light up in
different combinations and colors. means that a Check Control message has
been generated. The symbol continues to be
visible even when the Check Control message
disappears after a short time. The warning
lamps and text messages are stored and can be
displayed later, also refer to page78.
Explanatory text messages
Text messages at the upper edge of the Control
Display explain the meaning of the displayed
indicator and warning lamps.
For most Check Control messages, you can
view more information later, e.g. regarding the
cause of a malfunction and how to respond;
refer to the information provided below.
In urgent cases, this information will be shown
as soon as the corresponding lamp comes on.
Exit the displayed information:
Move the controller to the left.
ba8_e70ag.book Seite 77 Freitag, 5. Juni 2009 11:42 11
Page 82 of 300
Everything under control
80
Setting time format
1."Settings"
2."Time/Date"
3."Format:"
4.Select the desired format and press the
controller.
The time format is stored.
Setting date
The settings are stored for the remote control
currently in use.
1."Settings"
2."Time/Date"
3."Date:"
4.Turn the controller until the desired day is
displayed, and press the controller.
5.Create the necessary settings for the
month and year.
The date is stored.
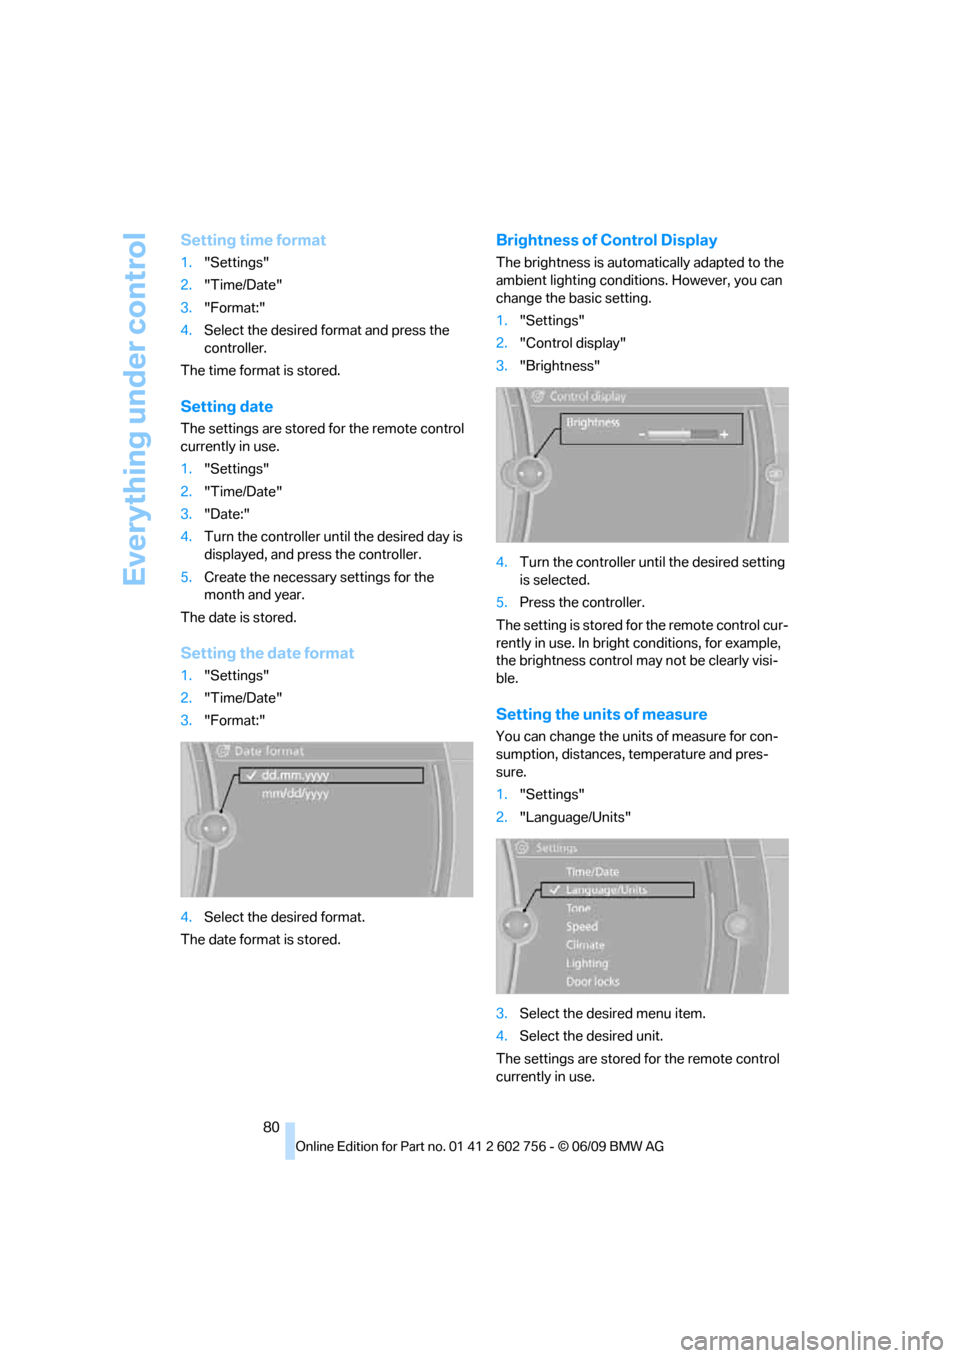
Setting the date format
1."Settings"
2."Time/Date"
3."Format:"
4.Select the desired format.
The date format is stored.
Brightness of Control Display
The brightness is automatically adapted to the
ambient lighting conditions. However, you can
change the basic setting.
1."Settings"
2."Control display"
3."Brightness"
4.Turn the controller until the desired setting
is selected.
5.Press the controller.
The setting is stored for the remote control cur-
rently in use. In bright conditions, for example,
the brightness control may not be clearly visi-
ble.
Setting the units of measure
You can change the units of measure for con-
sumption, distances, temperature and pres-
sure.
1."Settings"
2."Language/Units"
3.Select the desired menu item.
4.Select the desired unit.
The settings are stored for the remote control
currently in use.
ba8_e70ag.book Seite 80 Freitag, 5. Juni 2009 11:42 11
Page 85 of 300
Controls
83Reference
At a glance
Driving tips
Communications
Navigation
Entertainment
Mobility
Automatic deactivation
The system switches off and the LED goes out:
>after approx. 165 ft/50 m when driving for-
ward
>at speeds over approx. 25 mph/35 km/h
when driving forward
Switch the system back on as needed.
Switching on/off manually
Press the button.
>On: LED lights up
>Off: LED goes out
Signal tones
When nearing an object, the position is corre-
spondingly indicated by an interval tone. Thus,
an object detected to the left rear of the vehicle
will be indicated by a signal tone from the left
rear speaker, etc.
The shorter the distance to the object
becomes, the shorter the intervals become.
If the distance to the nearest object falls to
below roughly 1 ft/30 cm, then a continuous
tone sounds.
If objects are present both in front of and behind
the vehicle, then an alternating, continuous
tone sounds.
An intermittent tone is interrupted after approx.
3seconds:
>when the vehicle remains stationary in front
of an object that has only been detected by
one of the corner sensors
>when driving parallel to a wallThe signal tone is switched off:
>when the vehicle is more than approx.
4.0 in/10 cm away from an object
>when the selector lever is in the P position
Volume
You can adjust the volume of the signal tone,
refer to page81.
The setting is stored for the remote control cur-
rently in use.
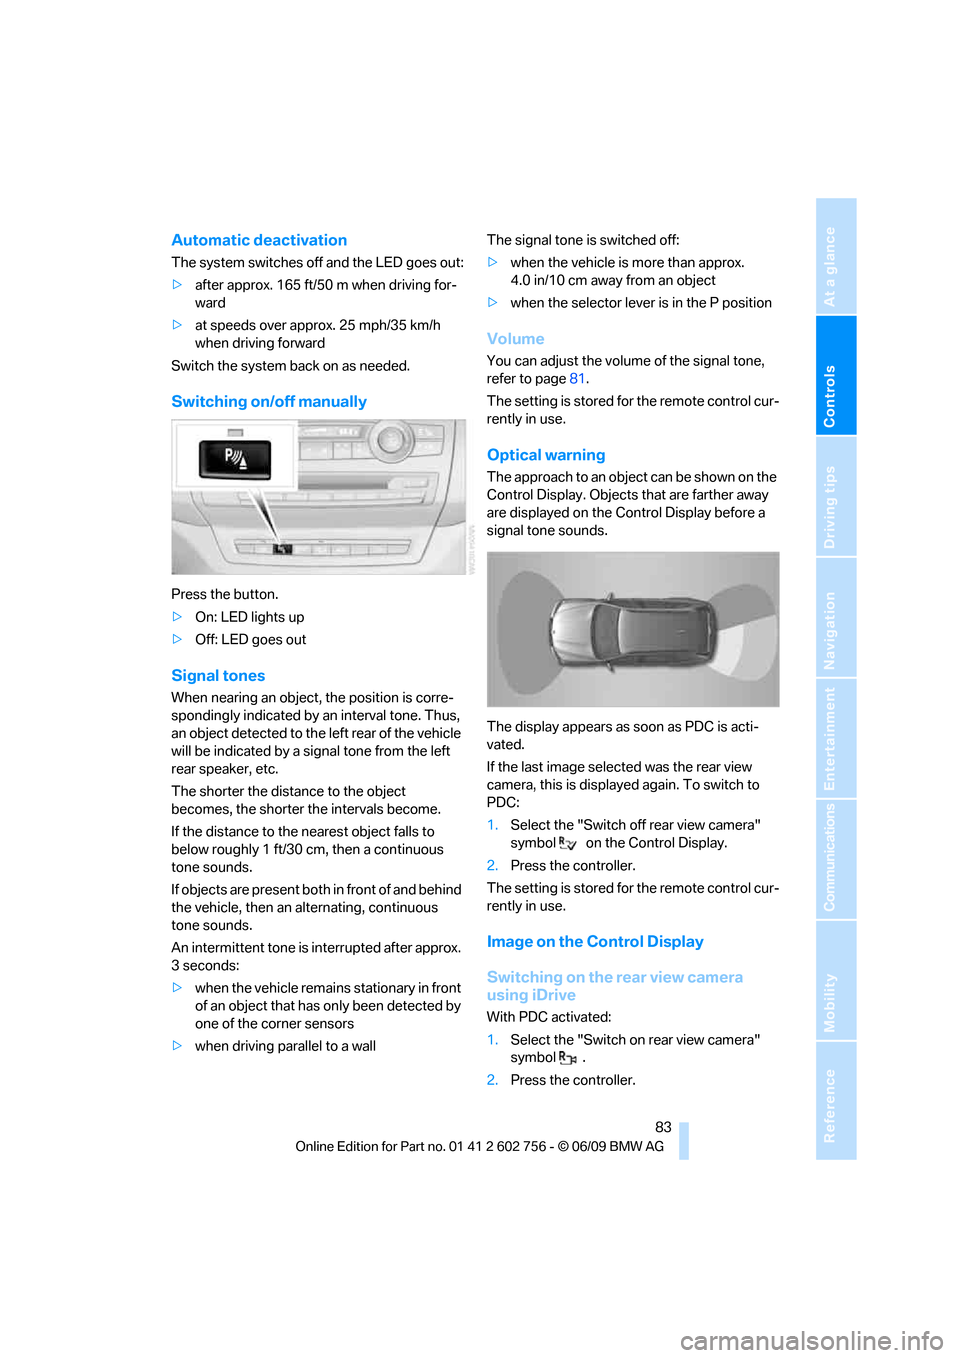
Optical warning
The approach to an object can be shown on the
Control Display. Objects that are farther away
are displayed on the Control Display before a
signal tone sounds.
The display appears as soon as PDC is acti-
vated.
If the last image selected was the rear view
camera, this is displayed again. To switch to
PDC:
1.Select the "Switch off rear view camera"
symbol on the Control Display.
2.Press the controller.
The setting is stored for the remote control cur-
rently in use.
Image on the Control Display
Switching on the rear view camera
using iDrive
With PDC activated:
1.Select the "Switch on rear view camera"
symbol .
2.Press the controller.
ba8_e70ag.book Seite 83 Freitag, 5. Juni 2009 11:42 11
Page 86 of 300
Technology for comfort, convenience and safety
84 The image of the rear view camera is displayed.
The setting is stored for the remote control cur-
rently in use.
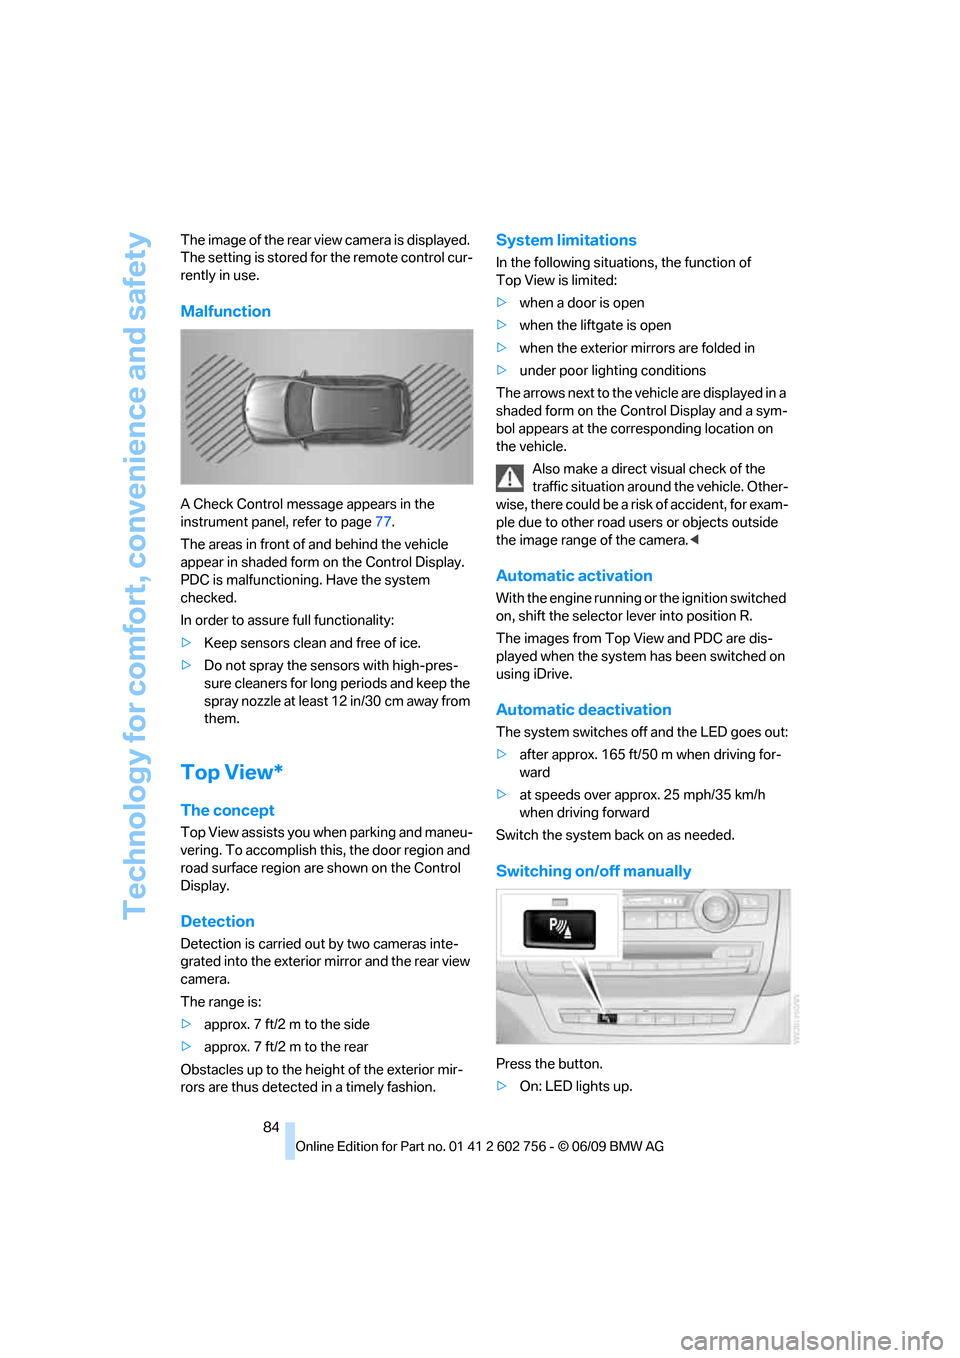
Malfunction
A Check Control message appears in the
instrument panel, refer to page77.
The areas in front of and behind the vehicle
appear in shaded form on the Control Display.
PDC is malfunctioning. Have the system
checked.
In order to assure full functionality:
>Keep sensors clean and free of ice.
>Do not spray the sensors with high-pres-
sure cleaners for long periods and keep the
spray nozzle at least 12 in/30 cm away from
them.
Top View*
The concept
Top View assists you when parking and maneu-
vering. To accomplish this, the door region and
road surface region are shown on the Control
Display.
Detection
Detection is carried out by two cameras inte-
grated into the exterior mirror and the rear view
camera.
The range is:
>approx. 7 ft/2 m to the side
>approx. 7 ft/2 m to the rear
Obstacles up to the height of the exterior mir-
rors are thus detected in a timely fashion.
System limitations
In the following situations, the function of
Top View is limited:
>when a door is open
>when the liftgate is open
>when the exterior mirrors are folded in
>under poor lighting conditions
The arrows next to the vehicle are displayed in a
shaded form on the Control Display and a sym-
bol appears at the corresponding location on
the vehicle.
Also make a direct visual check of the
traffic situation around the vehicle. Other-
wise, there could be a risk of accident, for exam-
ple due to other road users or objects outside
the image range of the camera.<
Automatic activation
With the engine running or the ignition switched
on, shift the selector lever into position R.
The images from Top View and PDC are dis-
played when the system has been switched on
using iDrive.
Automatic deactivation
The system switches off and the LED goes out:
>after approx. 165 ft/50 m when driving for-
ward
>at speeds over approx. 25 mph/35 km/h
when driving forward
Switch the system back on as needed.
Switching on/off manually
Press the button.
>On: LED lights up.
ba8_e70ag.book Seite 84 Freitag, 5. Juni 2009 11:42 11
Page 88 of 300
Technology for comfort, convenience and safety
86
Rear view camera*
The concept
The rear view camera assists you when parking
and maneuvering in reverse. To accomplish
this, the region behind your vehicle is shown on
the Control Display.
System limitations
Also make a direct visual check of the
traffic situation around the vehicle. Other-
wise, there could be a risk of accident, for exam-
ple due to other road users or objects outside
the image range of the rear view camera.<
The rear view camera is not able to detect
objects at greater heights or protruding
objects such as projections from walls.<
Automatic activation
With the engine running or the ignition switched
on, shift the selector lever into position R.
The image of the rear view camera is displayed
when the system has been switched on using
iDrive.
Automatic deactivation
The system switches off and the LED goes out:
>after approx. 33 ft/10 m when driving for-
ward
>at speeds over approx. 9 mph/15 km/h
when driving forward
Switch the system back on as needed.
Switching on/off manually
Press the button.
>On: LED lights up.>Off: LED goes out.
If PDC is displayed, switch on the rear view
camera using iDrive, refer to page83.
Assistance functions
Function requirements
>Rear view camera is switched on.
>Liftgate is completely closed.
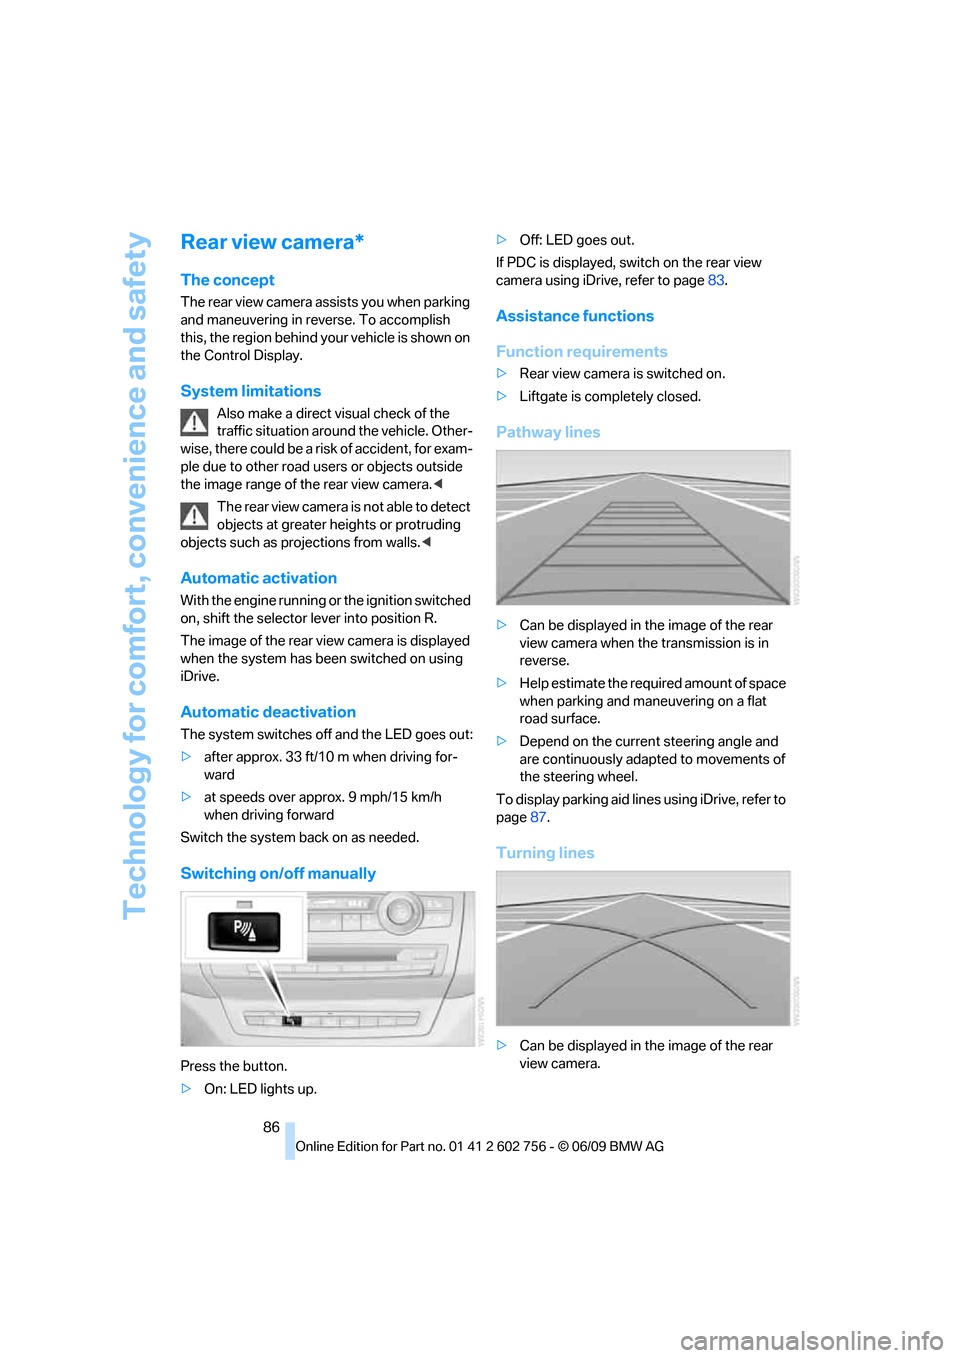
Pathway lines
>Can be displayed in the image of the rear
view camera when the transmission is in
reverse.
>Help estimate the required amount of space
when parking and maneuvering on a flat
road surface.
>Depend on the current steering angle and
are continuously adapted to movements of
the steering wheel.
To display parking aid lines using iDrive, refer to
page87.
Turning lines
>Can be displayed in the image of the rear
view camera.
ba8_e70ag.book Seite 86 Freitag, 5. Juni 2009 11:42 11
Page 90 of 300
Technology for comfort, convenience and safety
88
Contrast
With the rear view camera switched on:
1.Select the symbol.
2.Turn the controller until the desired setting
is displayed and then press the controller.
Camera
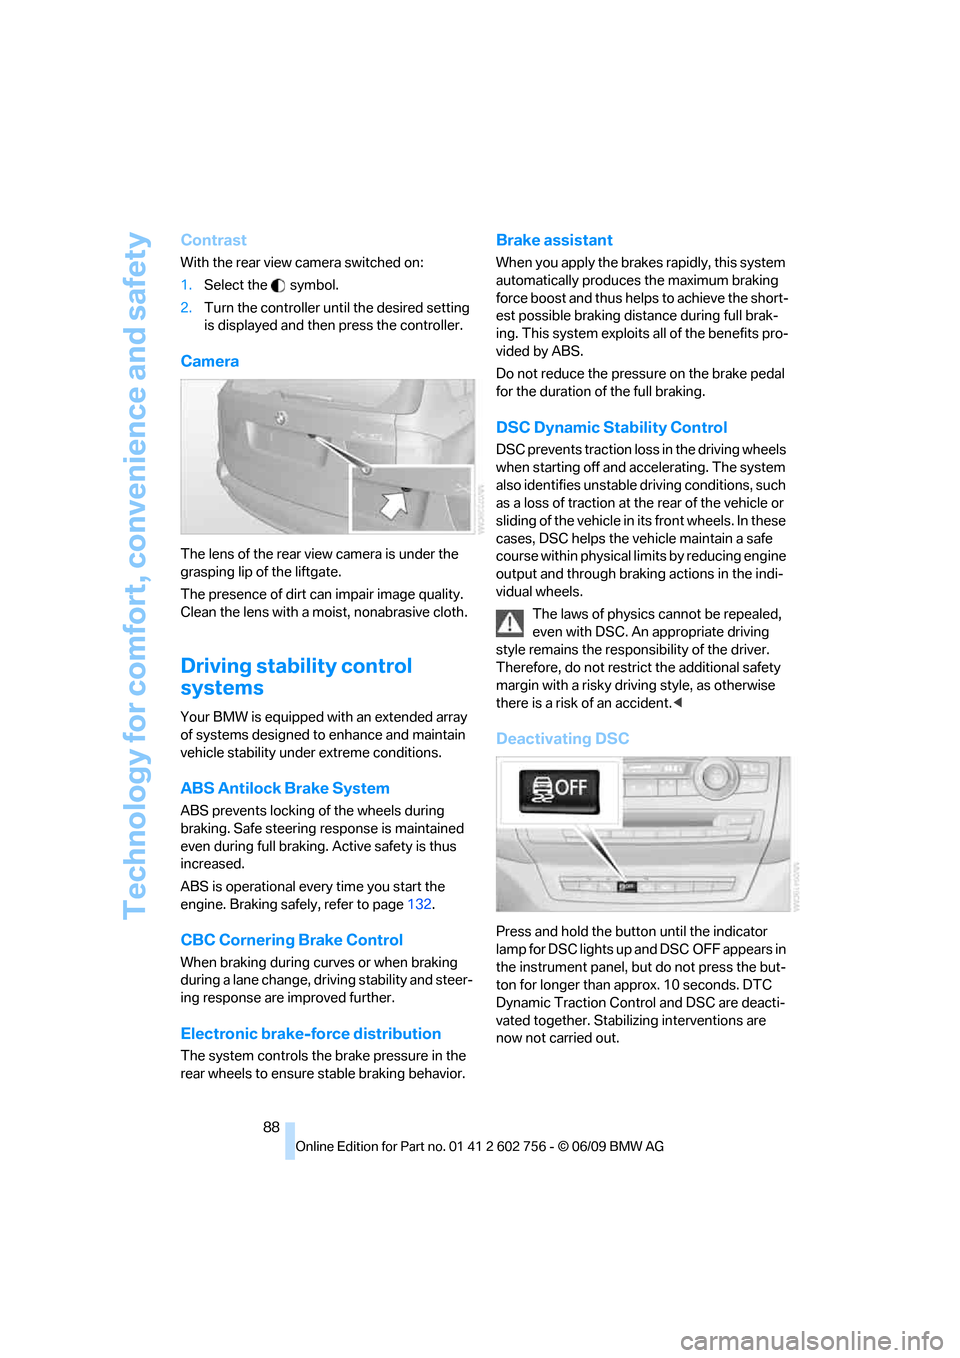
The lens of the rear view camera is under the
grasping lip of the liftgate.
The presence of dirt can impair image quality.
Clean the lens with a moist, nonabrasive cloth.
Driving stability control
systems
Your BMW is equipped with an extended array
of systems designed to enhance and maintain
vehicle stability under extreme conditions.
ABS Antilock Brake System
ABS prevents locking of the wheels during
braking. Safe steering response is maintained
even during full braking. Active safety is thus
increased.
ABS is operational every time you start the
engine. Braking safely, refer to page132.
CBC Cornering Brake Control
When braking during curves or when braking
during a lane change, driving stability and steer-
ing response are improved further.
Electronic brake-force distribution
The system controls the brake pressure in the
rear wheels to ensure stable braking behavior.
Brake assistant
When you apply the brakes rapidly, this system
automatically produces the maximum braking
force boost and thus helps to achieve the short-
est possible braking distance during full brak-
ing. This system exploits all of the benefits pro-
vided by ABS.
Do not reduce the pressure on the brake pedal
for the duration of the full braking.
DSC Dynamic Stability Control
DSC prevents traction loss in the driving wheels
when starting off and accelerating. The system
also identifies unstable driving conditions, such
as a loss of traction at the rear of the vehicle or
sliding of the vehicle in its front wheels. In these
cases, DSC helps the vehicle maintain a safe
course within physical limits by reducing engine
output and through braking actions in the indi-
vidual wheels.
The laws of physics cannot be repealed,
even with DSC. An appropriate driving
style remains the responsibility of the driver.
Therefore, do not restrict the additional safety
margin with a risky driving style, as otherwise
there is a risk of an accident.<
Deactivating DSC
Press and hold the button until the indicator
lamp for DSC lights up and DSC OFF appears in
the instrument panel, but do not press the but-
ton for longer than approx. 10 seconds. DTC
Dynamic Traction Control and DSC are deacti-
vated together. Stabilizing interventions are
now not carried out.
ba8_e70ag.book Seite 88 Freitag, 5. Juni 2009 11:42 11
Page 91 of 300
Controls
89Reference
At a glance
Driving tips
Communications
Navigation
Entertainment
Mobility
A message appears on the Control Display.
Please note any supplementary information
that appears there.
To increase vehicle stability, activate DSC again
as soon as possible.
Activating DSC
Press the button: the indicator lamp in the
instrument panel goes out.
For better control
The indicator lamp flashes:
DSC is controlling the drive forces and
brake forces.
The indicator lamp lights up:
DSC and DTC are malfunctioning.
DSC deactivated:
The indicator lamp lights up and
DSC OFF appears in the instrument
panel.
DSC and DTC deactivated.
DTC Dynamic Traction Control
DTC is a version of DSC in which the drive out-
put is optimized for particular road conditions,
e.g. unplowed snow-covered roads. The sys-
tem assures the maximal drive output, but with
reduced driving stability. It is therefore neces-
sary to drive with appropriate caution.
You may find it useful to briefly activate DTC
under the following special circumstances:
>When driving in sand, on snowy inclines, in
slush or on unplowed, snow-covered road
surfaces>When rocking a stuck vehicle free or start-
ing off in deep snow, sand or on loose
ground
>When driving with snow chains
*
Activating DTC
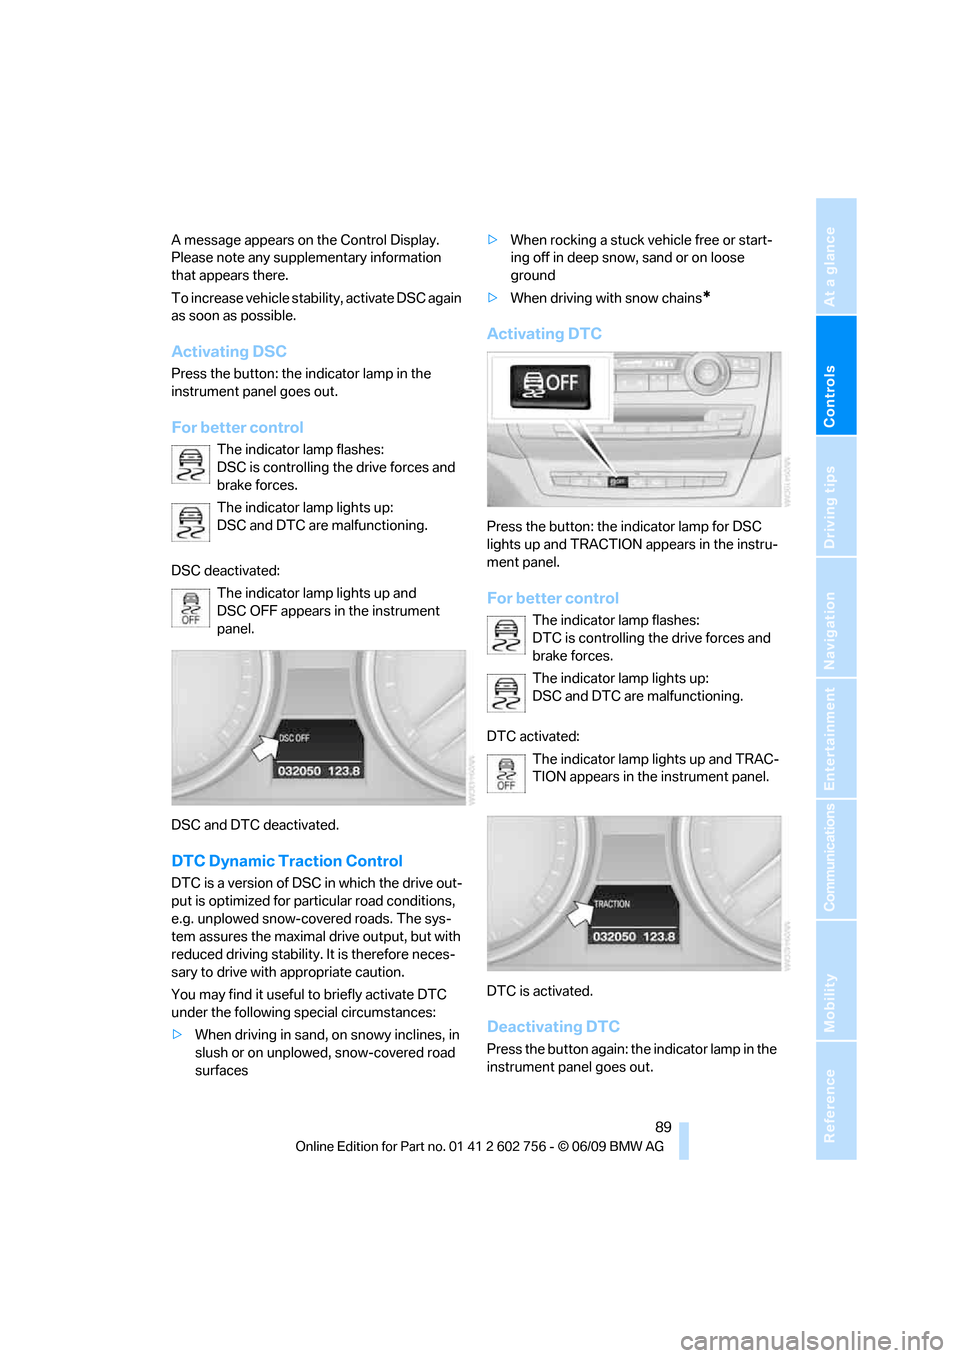
Press the button: the indicator lamp for DSC
lights up and TRACTION appears in the instru-
ment panel.
For better control
The indicator lamp flashes:
DTC is controlling the drive forces and
brake forces.
The indicator lamp lights up:
DSC and DTC are malfunctioning.
DTC activated:
The indicator lamp lights up and TRAC-
TION appears in the instrument panel.
DTC is activated.
Deactivating DTC
Press the button again: the indicator lamp in the
instrument panel goes out.
ba8_e70ag.book Seite 89 Freitag, 5. Juni 2009 11:42 11