reset BMW X5 XDRIVE 35I PREMIUM 2012 User Guide
[x] Cancel search | Manufacturer: BMW, Model Year: 2012, Model line: X5 XDRIVE 35I PREMIUM, Model: BMW X5 XDRIVE 35I PREMIUM 2012Pages: 317, PDF Size: 8.83 MB
Page 173 of 317
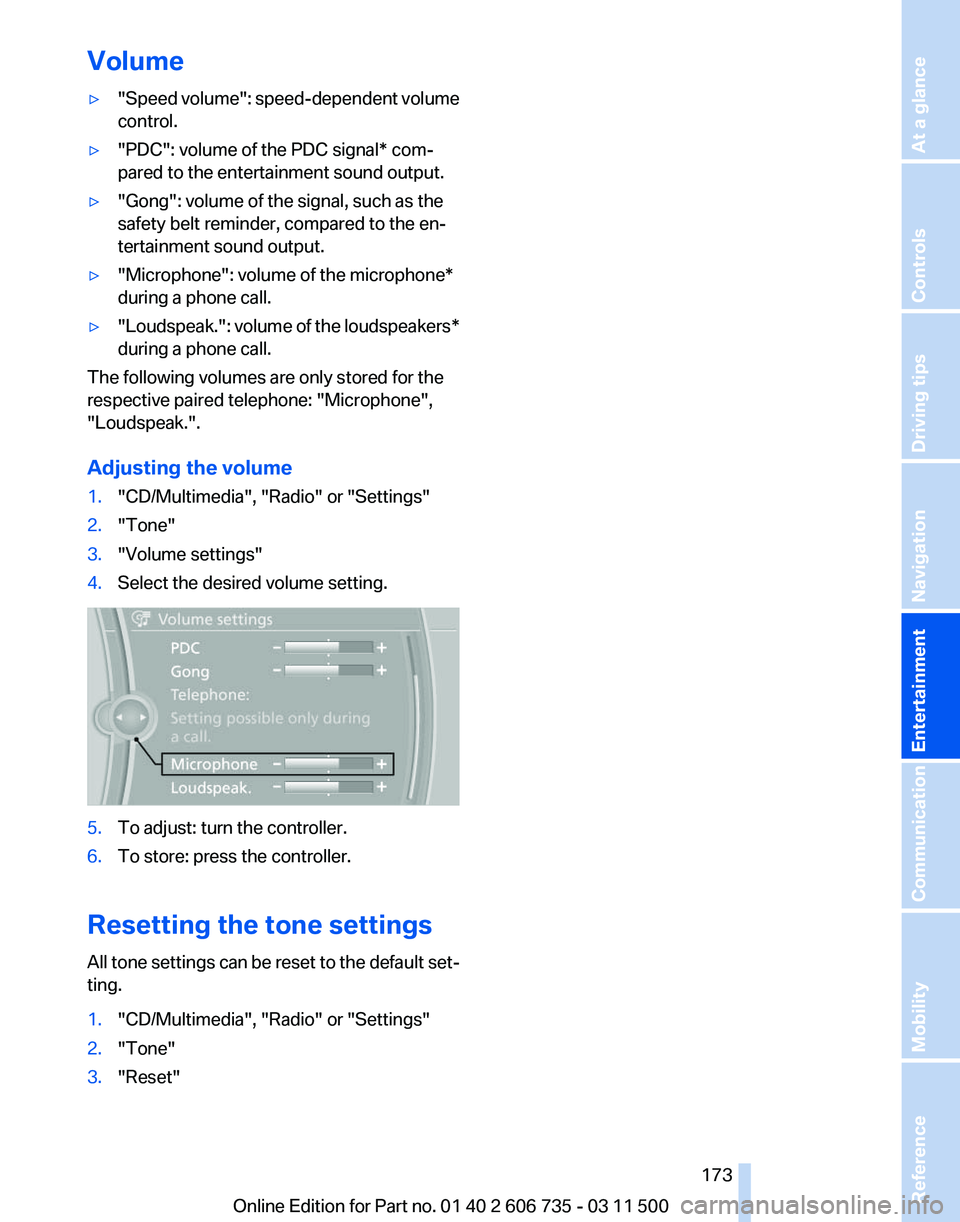
Volume
▷
"Speed volume": speed-dependent volume
control.
▷ "PDC": volume of the PDC signal* com‐
pared to the entertainment sound output.
▷ "Gong": volume of the signal, such as the
safety belt reminder, compared to the en‐
tertainment sound output.
▷ "Microphone": volume of the microphone*
during a phone call.
▷ "Loudspeak.":
volume of the loudspeakers*
during a phone call.
The following volumes are only stored for the
respective paired telephone:
"Microphone",
"Loudspeak.".
Adjusting the volume
1. "CD/Multimedia", "Radio" or "Settings"
2. "Tone"
3. "Volume settings"
4. Select the desired volume setting. 5.
To adjust: turn the controller.
6. To store: press the controller.
Resetting the tone settings
All
tone settings can be reset to the default set‐
ting.
1. "CD/Multimedia", "Radio" or "Settings"
2. "Tone"
3. "Reset"
Seite 173
173Online Edition for Part no. 01 40 2 606 735 - 03 11 500
Reference Mobility Communication
Entertainment Navigation Driving tips Controls At a glance
Page 180 of 317
Stored stations
General information
It is possible to store up to 40 stations.
Calling up a station
1.
"Radio"
2. "Presets"
3. Select the desired station.
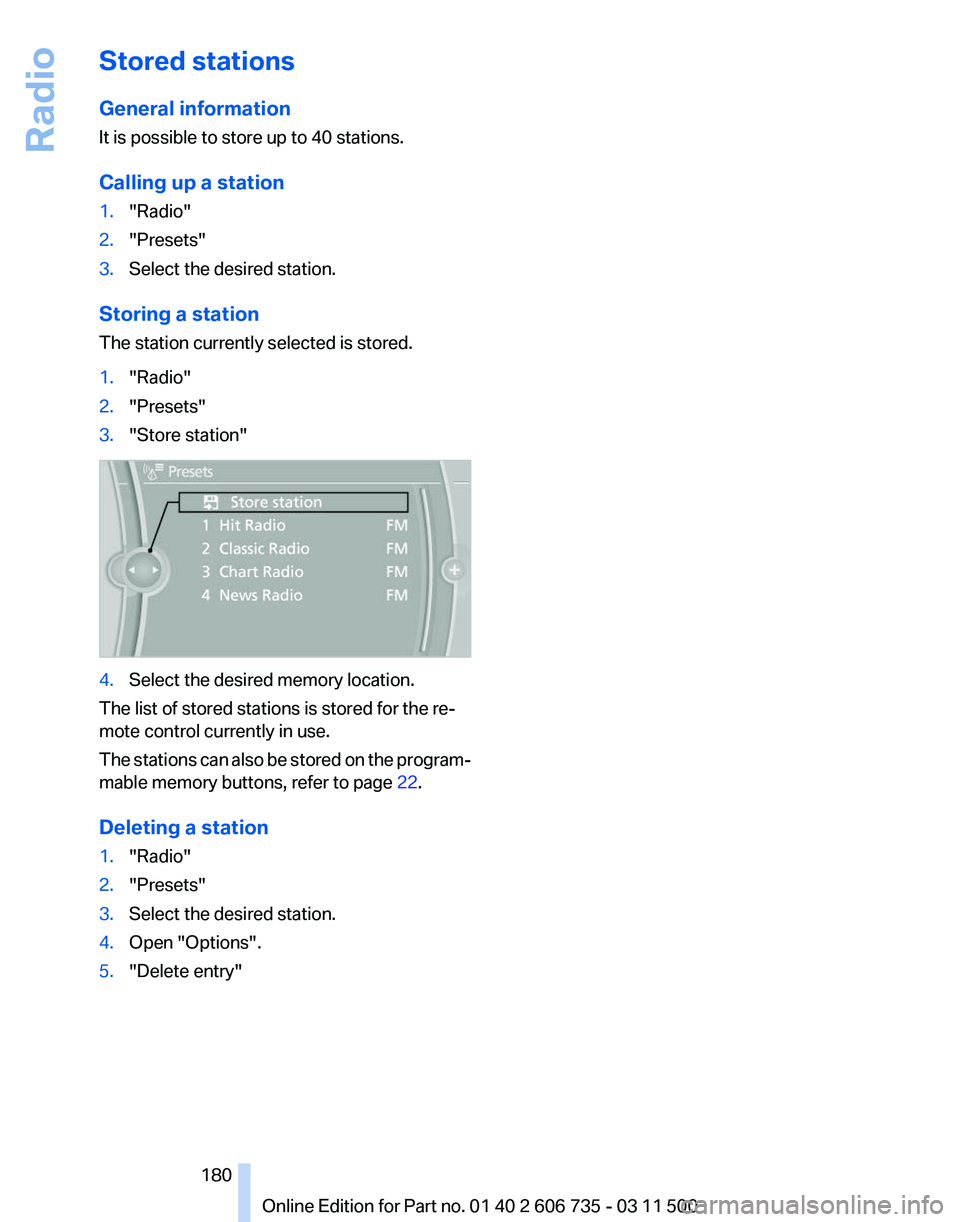
Storing a station
The station currently selected is stored.
1. "Radio"
2. "Presets"
3. "Store station" 4.
Select the desired memory location.
The list of stored stations is stored for the re‐
mote control currently in use.
The
stations can also be stored on the program‐
mable memory buttons, refer to page 22.
Deleting a station
1. "Radio"
2. "Presets"
3. Select the desired station.
4. Open "Options".
5. "Delete entry"
Seite 180
180 Online Edition for Part no. 01 40 2 606 735 - 03 11 500
Radio
Page 196 of 317
Notes
Do not expose the audio device to extreme en‐
vironmental conditions, such as very high tem‐
peratures; refer to the audio device operating
instructions.
Depending on the configuration of the audio
files, e.g., bit rates greater than 256 kbit/s, the
files may not play back correctly in each case.
Information on connection
▷
The connected audio device is supplied with
a
max. power of 500 mA if supported by the
device. Therefore, do not additionally con‐
nect the device to a socket in the vehicle;
otherwise, playback may be compromised.
▷ Do not use force when plugging the con‐
nector into the USB interface.
▷ Do not connect devices such as fans or
lamps to the USB audio interface.
▷ Do not connect USB hard drives.
▷ Do not use the USB audio interface to re‐
charge external devices.
Bluetooth audio*
At a glance
▷ Music files on external devices such as audio
devices or mobile phones can be played
back via Bluetooth.
Use of a mobile phone as an audio source,
refer to page 217.
▷ Bluetooth® is a registered trademark of
Bluetooth® SIG, Inc.
▷ The sound is output on the vehicle loud‐
speakers.
▷ The volume of the sound output is depend‐
ent on the device. If necessary, adjust the
volume on the device.
▷ Up to four external devices can be paired
with the vehicle.
Requirements
▷ The device is suitable. Details can be found
at www.bmw.com/bluetooth. ▷
The device is ready for operation.
▷ The ignition is switched on.
▷ Bluetooth is activated on the vehicle, refer to
page 217, and on the device.
▷ Bluetooth presettings must be made on the
device, such as for a connection without
confirmation or visibility; refer to the device
operating instructions.
▷ A number with at least four and a maximum
of
16 digits is defined as the Bluetooth pass‐
key. It is only required once for pairing.
Pairing and connecting Pairing a device
To
avoid becoming distracted and posing
an unnecessary hazard both to your own vehi‐
cle's occupants and to other road users, only
pair the device while the vehicle is stationary.◀
1. "CD/Multimedia"
2. "Bluetooth® (audio)"
3. If necessary, "Bluetooth® audio".
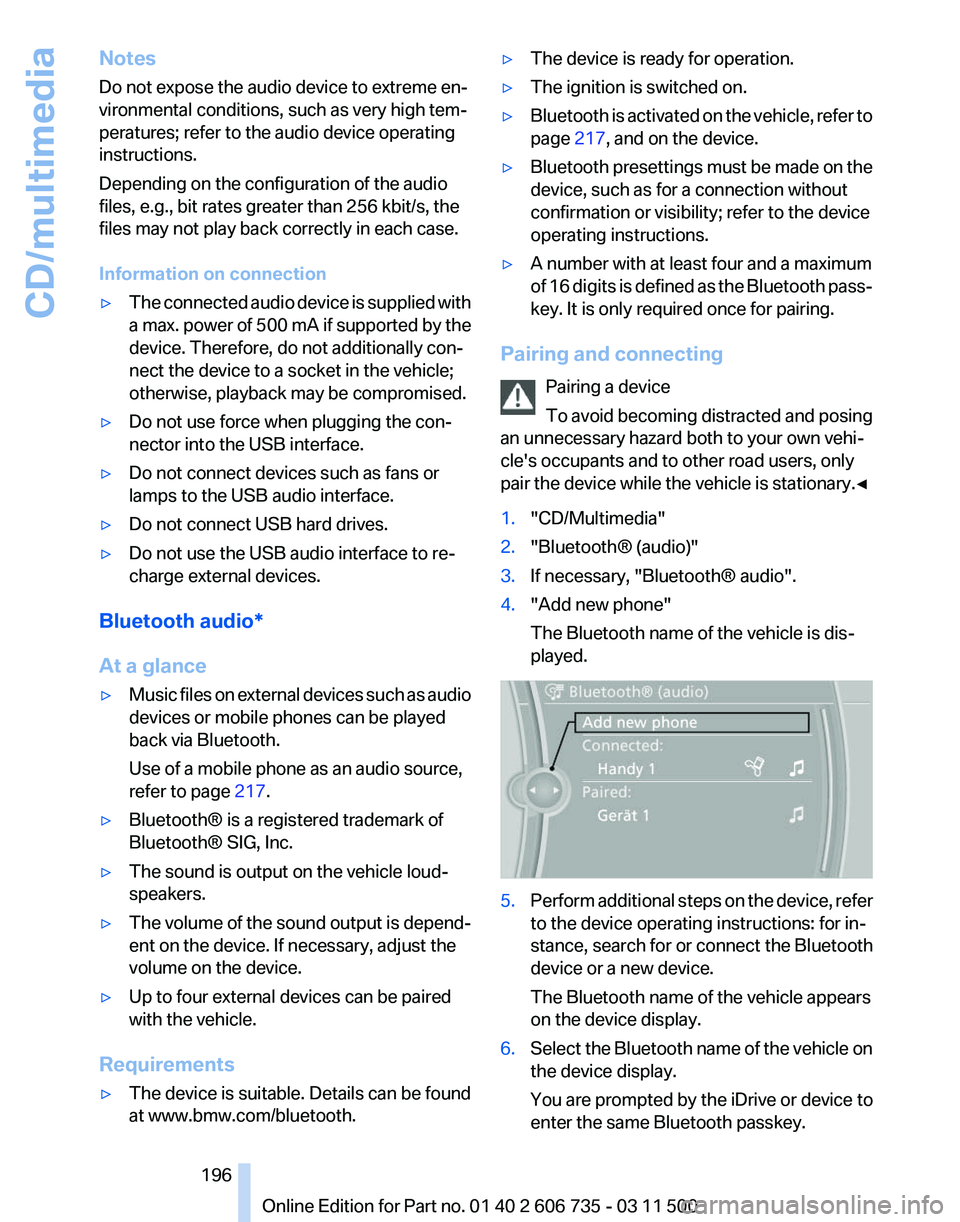
4. "Add new phone"
The Bluetooth name of the vehicle is dis‐
played. 5.
Perform additional steps on the device, refer
to the device operating instructions: for in‐
stance, search for or connect the Bluetooth
device or a new device.
The Bluetooth name of the vehicle appears
on the device display.
6. Select the Bluetooth name of the vehicle on
the device display.
You are prompted by the iDrive or device to
enter the same Bluetooth passkey. Seite 196
196 Online Edition for Part no. 01 40 2 606 735 - 03 11 500
CD/multimedia
Page 205 of 317
▷
"Tone":
▷"Treble / Bass" and "Balance": sepa‐
rately adjustable for the left and right
headphones and the infrared head‐
phones.
▷ "Reset": the settings are reset to the de‐
fault values.
▷ "DVD format":
▷"Standard"
▷ "Zoom": full-screen playback.
▷ "Language":
language of the DVD playback.
The language advances one setting each
time the menu item is selected.
▷ "Subtitles":
language of the subtitles or turn
off the subtitles.
▷ "Title": select individual tracks on the DVD.
▷ "Angle of view": camera angle.
Information or symbols that appear during
the
playback of a film generally point out dif‐
ferent camera angles. These are usually only
briefly available.
▷ "Menu": open the DVD-specific menu.
▷ "Return": exit the menu, or: Press the buttons on the remote con‐
trol.
Many DVDs offer dialogs and subtitles in various
languages
or scene descriptions for the hearing
impaired. These functions are stored on the
DVD.
With some DVDs, it is only possible to select
language, subtitles, camera angle, or title by us‐
ing the DVD-specific menu. Consult the infor‐
mation accompanying your DVD.
Opening the DVD-specific menu
Additional functions may be available on DVDs.
It is thus possible, for example, to select from
among several possible actions or to access in‐
formation about the film.
1. Press the button on the remote control
during playback.
2. Select "Menu".
3. Press the button. On some DVDs, you can use "Main menu"
and "Title" to access additional menus in
which you can select music scenes, for ex‐
ample.
To make a selection:
1. Select the symbol.
2. Press the button until the desired func‐
tion is selected.
3. Select the arrow.
4. Press the button.
To return to the start menu:
1. Select the arrow.
2. Press the button.
You can also select language, subtitles, camera
angle,
or title in the DVD-specific menu. Consult
the information accompanying your DVD.
Compressed video files
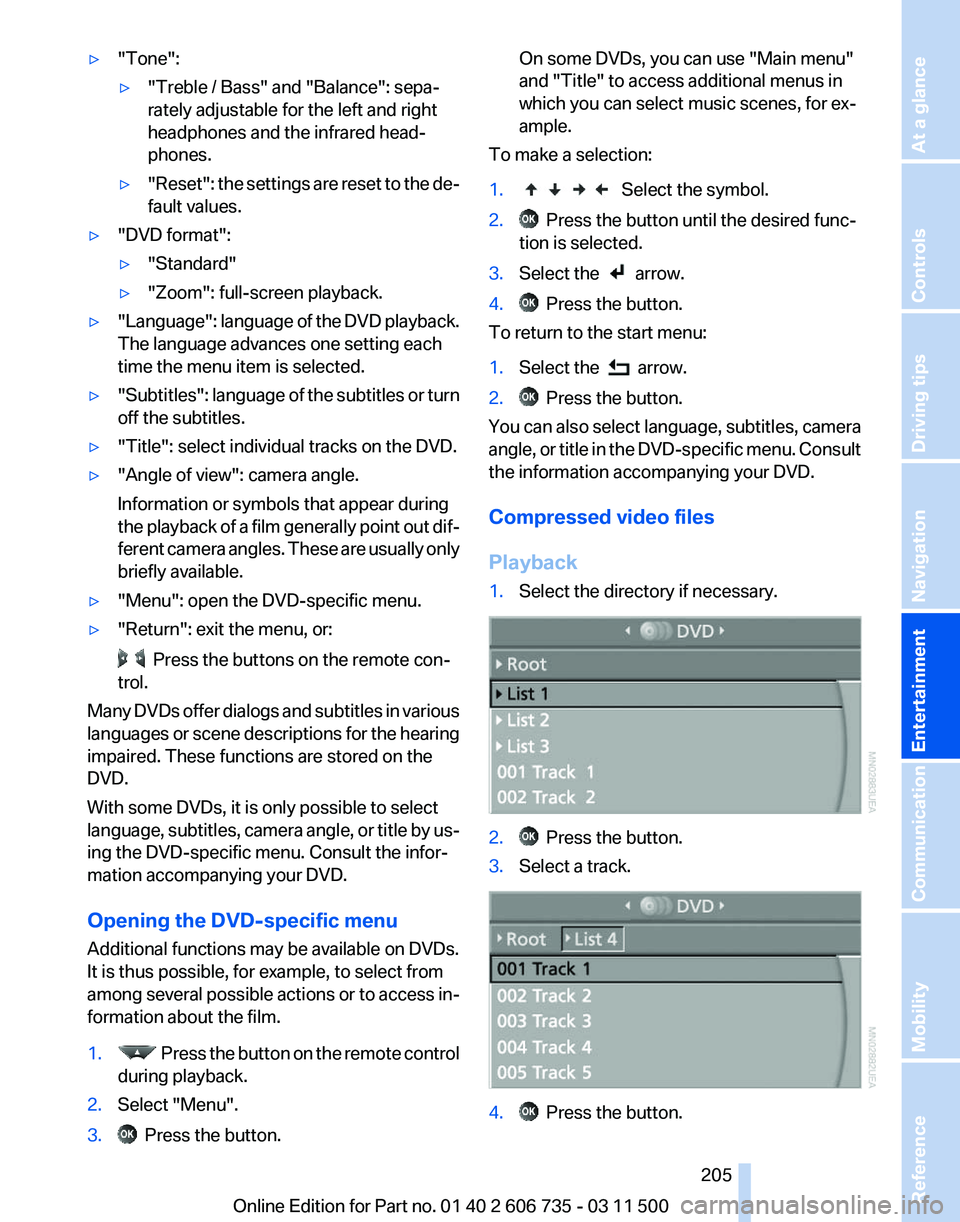
Playback
1. Select the directory if necessary. 2. Press the button.
3. Select a track. 4. Press the button.
Seite 205
205Online Edition for Part no. 01 40 2 606 735 - 03 11 500
Reference Mobility Communication
Entertainment Navigation Driving tips Controls At a glance
Page 207 of 317
Settings and playback functions for
audio CDs
1.
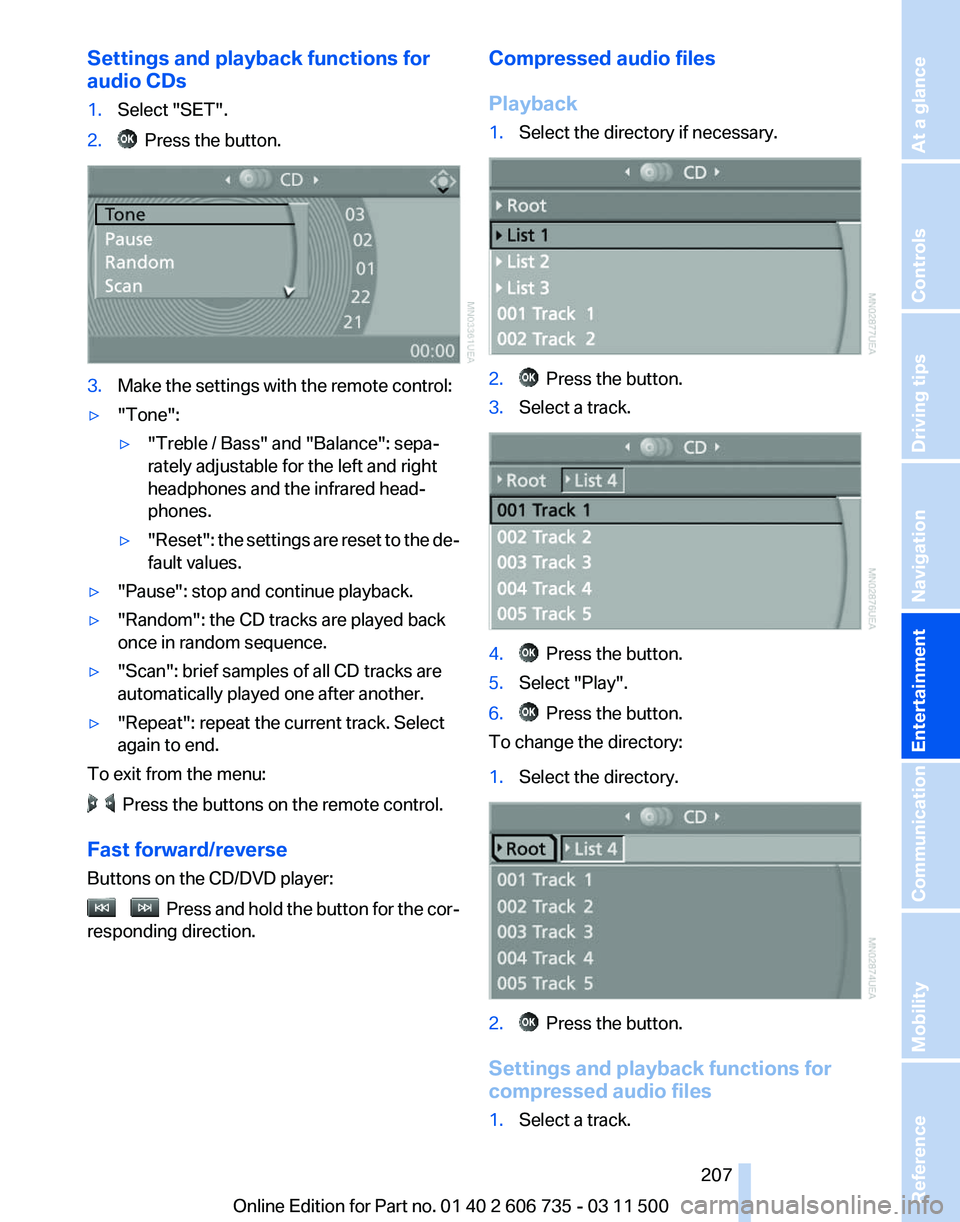
Select "SET".
2. Press the button.
3.
Make the settings with the remote control:
▷ "Tone":
▷"Treble / Bass" and "Balance": sepa‐
rately adjustable for the left and right
headphones and the infrared head‐
phones.
▷ "Reset": the settings are reset to the de‐
fault values.
▷ "Pause": stop and continue playback.
▷ "Random": the CD tracks are played back
once in random sequence.
▷ "Scan": brief samples of all CD tracks are
automatically played one after another.
▷ "Repeat": repeat the current track. Select
again to end.
To exit from the menu: Press the buttons on the remote control.
Fast forward/reverse
Buttons on the CD/DVD player: Press and hold the button for the cor‐
responding direction. Compressed audio files
Playback
1.
Select the directory if necessary. 2. Press the button.
3. Select a track. 4. Press the button.
5. Select "Play".
6. Press the button.
To change the directory:
1. Select the directory. 2. Press the button.
Settings and playback functions for
compressed audio files
1. Select a track.
Seite 207
207Online Edition for Part no. 01 40 2 606 735 - 03 11 500
Reference Mobility Communication
Entertainment Navigation Driving tips Controls At a glance
Page 208 of 317
2. Press the button.
3. Make the settings with the remote control:
▷ "Tone":
▷"Treble / Bass" and "Balance": sepa‐
rately adjustable for the left and right
headphones and the infrared head‐
phones.
▷ "Reset": the settings are reset to the de‐
fault values.
▷ "Pause": stop and continue playback.
▷ "Scan directory": briefly sample the tracks
in the current directory.
▷ "Scan all": briefly sample all tracks.
▷ "Random directory": play the tracks in the
current directory in a random sequence.
▷ "Random
all": play all tracks in a random se‐
quence.
▷ "Repeat track": repeat the selected track.
▷ "Repeat directory": repeat the tracks in the
current directory.
▷ "Details": display any stored information on
the current track.
To exit from the menu: Press the buttons on the remote control.
Displaying images from CD/
DVD
1. Push the CD/DVD into the drive with the la‐
beled side facing upward. The CD/DVD is
automatically pulled in.
2. Open the start menu with the remote con‐
trol.
3. Select "Photo".
4. Press the button.
Displaying overview
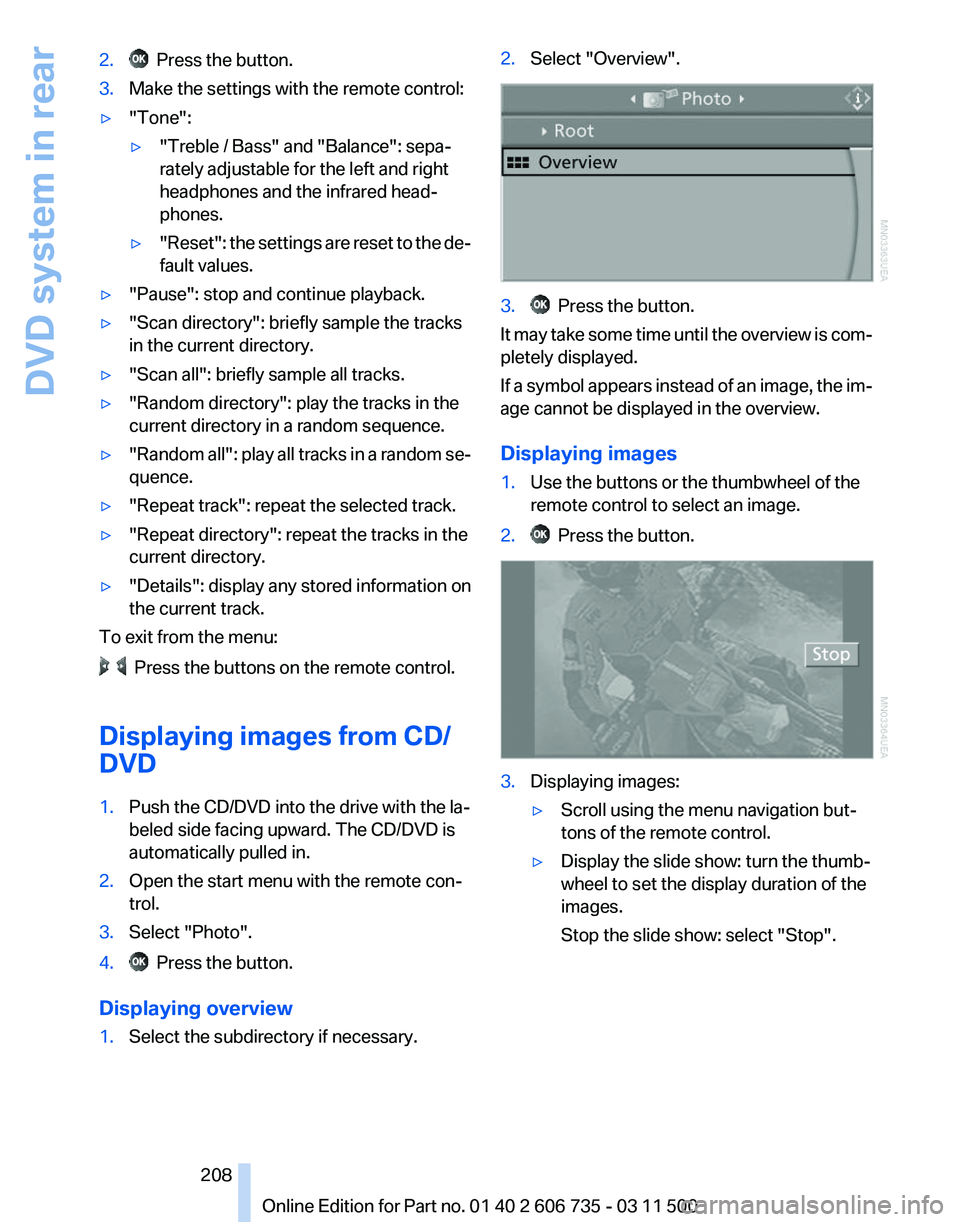
1. Select the subdirectory if necessary. 2.
Select "Overview". 3. Press the button.
It may take some time until the overview is com‐
pletely displayed.
If
a symbol appears instead of an image, the im‐
age cannot be displayed in the overview.
Displaying images
1. Use the buttons or the thumbwheel of the
remote control to select an image.
2. Press the button.
3.
Displaying images:
▷Scroll using the menu navigation but‐
tons of the remote control.
▷ Display the slide show: turn the thumb‐
wheel to set the display duration of the
images.
Stop the slide show: select "Stop".
Seite 208
208 Online Edition for Part no. 01 40 2 606 735 - 03 11 500
DVD system in rear
Page 211 of 317
External device
Connecting
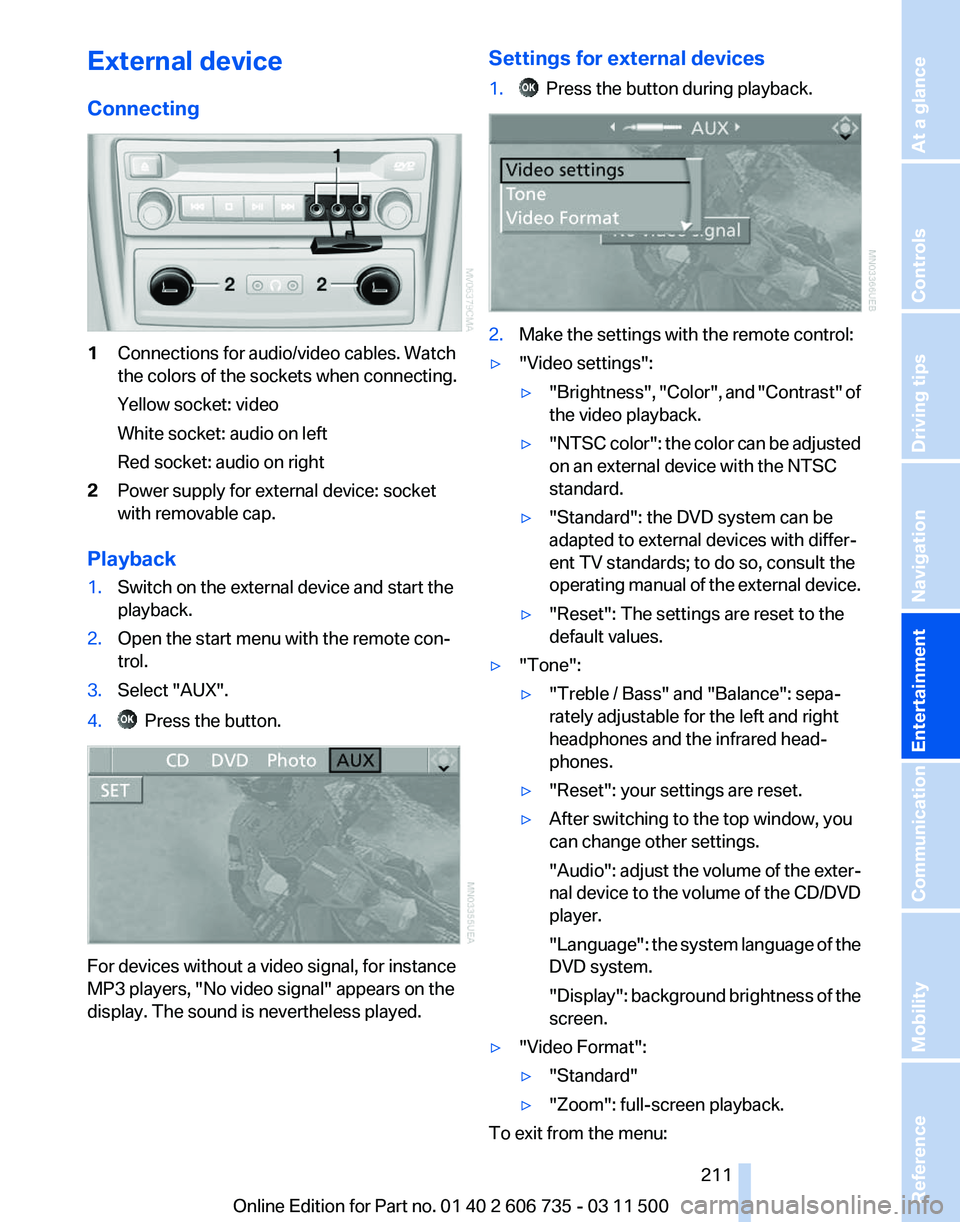
1
Connections for audio/video cables. Watch
the colors of the sockets when connecting.
Yellow socket: video
White socket: audio on left
Red socket: audio on right
2 Power supply for external device: socket
with removable cap.
Playback
1. Switch on the external device and start the
playback.
2. Open the start menu with the remote con‐
trol.
3. Select "AUX".
4. Press the button.
For devices without a video signal, for instance
MP3 players, "No video signal"
appears on the
display. The sound is nevertheless played. Settings for external devices
1. Press the button during playback.
2.
Make the settings with the remote control:
▷ "Video settings":
▷"Brightness", "Color",
and "Contrast" of
the video playback.
▷ "NTSC
color": the color can be adjusted
on an external device with the NTSC
standard.
▷ "Standard": the DVD system can be
adapted to external devices with differ‐
ent TV standards; to do so, consult the
operating
manual of the external device.
▷ "Reset": The settings are reset to the
default values.
▷ "Tone":
▷"Treble / Bass" and "Balance": sepa‐
rately adjustable for the left and right
headphones and the infrared head‐
phones.
▷ "Reset": your settings are reset.
▷ After switching to the top window, you
can change other settings.
"Audio":
adjust the volume of the exter‐
nal device to the volume of the CD/DVD
player.
"Language": the system language of the
DVD system.
"Display": background brightness of the
screen.
▷ "Video Format":
▷"Standard"
▷ "Zoom": full-screen playback.
To exit from the menu:
Seite 211
211Online Edition for Part no. 01 40 2 606 735 - 03 11 500
Reference Mobility Communication
Entertainment Navigation Driving tips Controls At a glance
Page 217 of 317
Requirements
▷
The mobile phone is suitable, refer to
page 216.
▷ The mobile phone is ready for operation.
▷ Bluetooth is activated in the vehicle and on
the mobile phone.
▷ Bluetooth presettings may need to be made
on the mobile phone, e.g., for a connection
without
confirmation or visibility, refer to the
mobile phone operating instructions.
▷ Deactivate Bluetooth audio if necessary.
▷ A number with at least four and a maximum
of 16 digits was defined as the Bluetooth
passkey. It is only required once for pairing.
▷ The ignition is switched on.
Activating/deactivating Bluetooth
Bluetooth
is not permitted everywhere. Comply
with all safety guidelines and regulations.
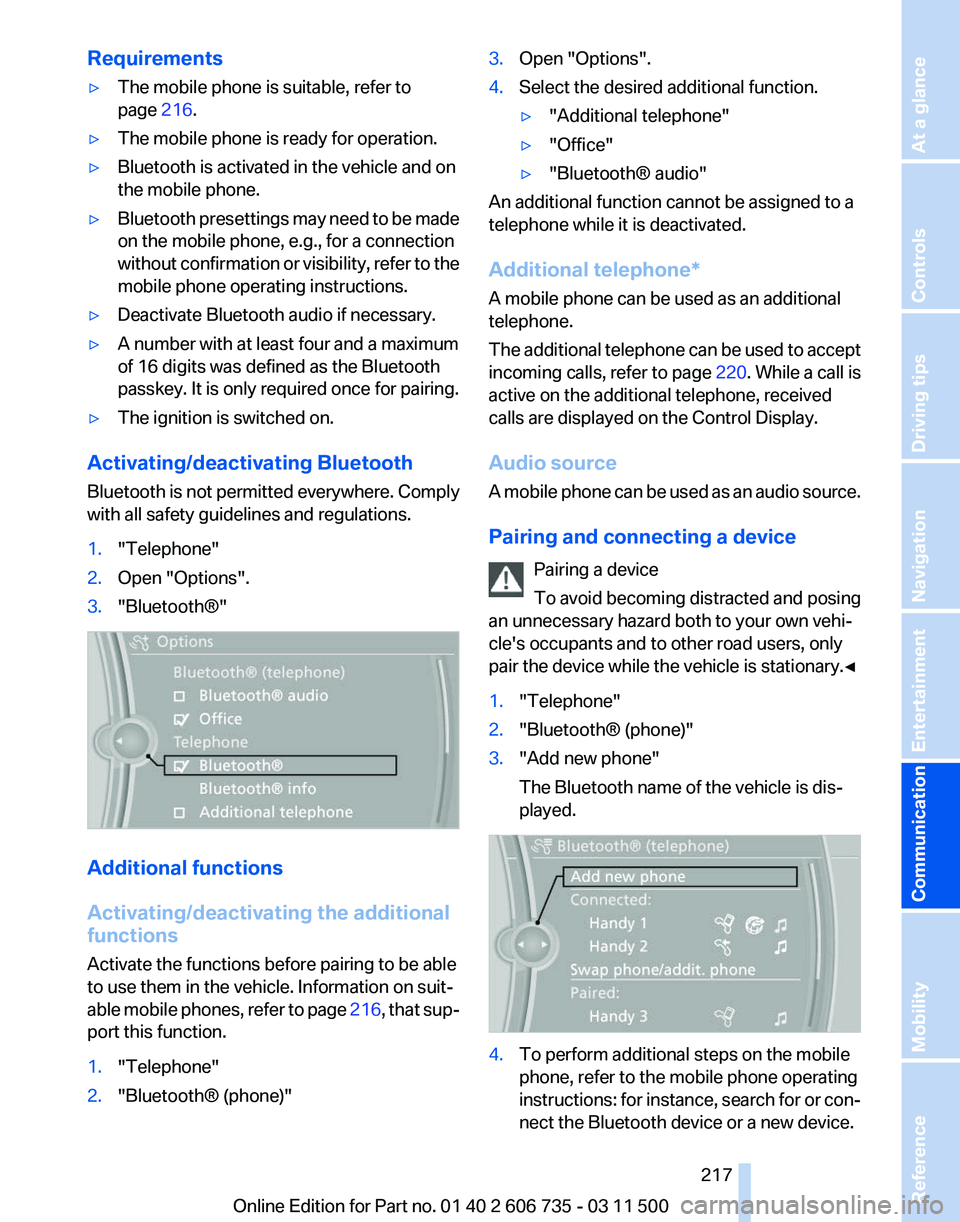
1. "Telephone"
2. Open "Options".
3. "Bluetooth®" Additional functions
Activating/deactivating the additional
functions
Activate the functions before pairing to be able
to use them in the vehicle. Information on suit‐
able
mobile phones, refer to page 216, that sup‐
port this function.
1. "Telephone"
2. "Bluetooth® (phone)" 3.
Open "Options".
4. Select the desired additional function.
▷"Additional telephone"
▷ "Office"
▷ "Bluetooth® audio"
An additional function cannot be assigned to a
telephone while it is deactivated.
Additional telephone
*
A mobile phone can be used as an additional
telephone.
The additional telephone can be used to accept
incoming calls, refer to page 220. While a call is
active on the additional telephone, received
calls are displayed on the Control Display.
Audio source
A mobile phone can be used as an audio source.
Pairing and connecting a device
Pairing a device
To avoid becoming distracted and posing
an unnecessary hazard both to your own vehi‐
cle's occupants and to other road users, only
pair the device while the vehicle is stationary.◀
1. "Telephone"
2. "Bluetooth® (phone)"
3. "Add new phone"
The Bluetooth name of the vehicle is dis‐
played. 4.
To perform additional steps on the mobile
phone, refer to the mobile phone operating
instructions:
for instance, search for or con‐
nect the Bluetooth device or a new device. Seite 217
217Online Edition for Part no. 01 40 2 606 735 - 03 11 500
Reference Mobility
Communication Entertainment Navigation Driving tips Controls At a glance
Page 225 of 317
Saving an entry
1.
›Save name‹
2. Say the name. Do not exceed the speaking
duration of approx. 2 seconds.
3. Say the phone number after being prompted
to do so by the system.
4. ›Save‹
Deleting an entry
1. ›Delete name‹
2. Say the name after being prompted to do so.
3. Confirm the query with ›Yes‹.
Deleting all entries
1. ›Delete phone book‹
The dialog for deleting the phone book is
opened.
2. Confirm the query with ›Yes‹.
3. Confirm the query again with ›Yes‹.
Reading and selecting entries
1. ›Read phone book‹
The dialog for reading the phone book is
opened.
2. Say ›Dial number‹ when the desired entry is
read.
Selecting an entry
1. ›Dial name‹
2. Say the name after being prompted to do so.
3. Confirm the query with ›Yes‹.
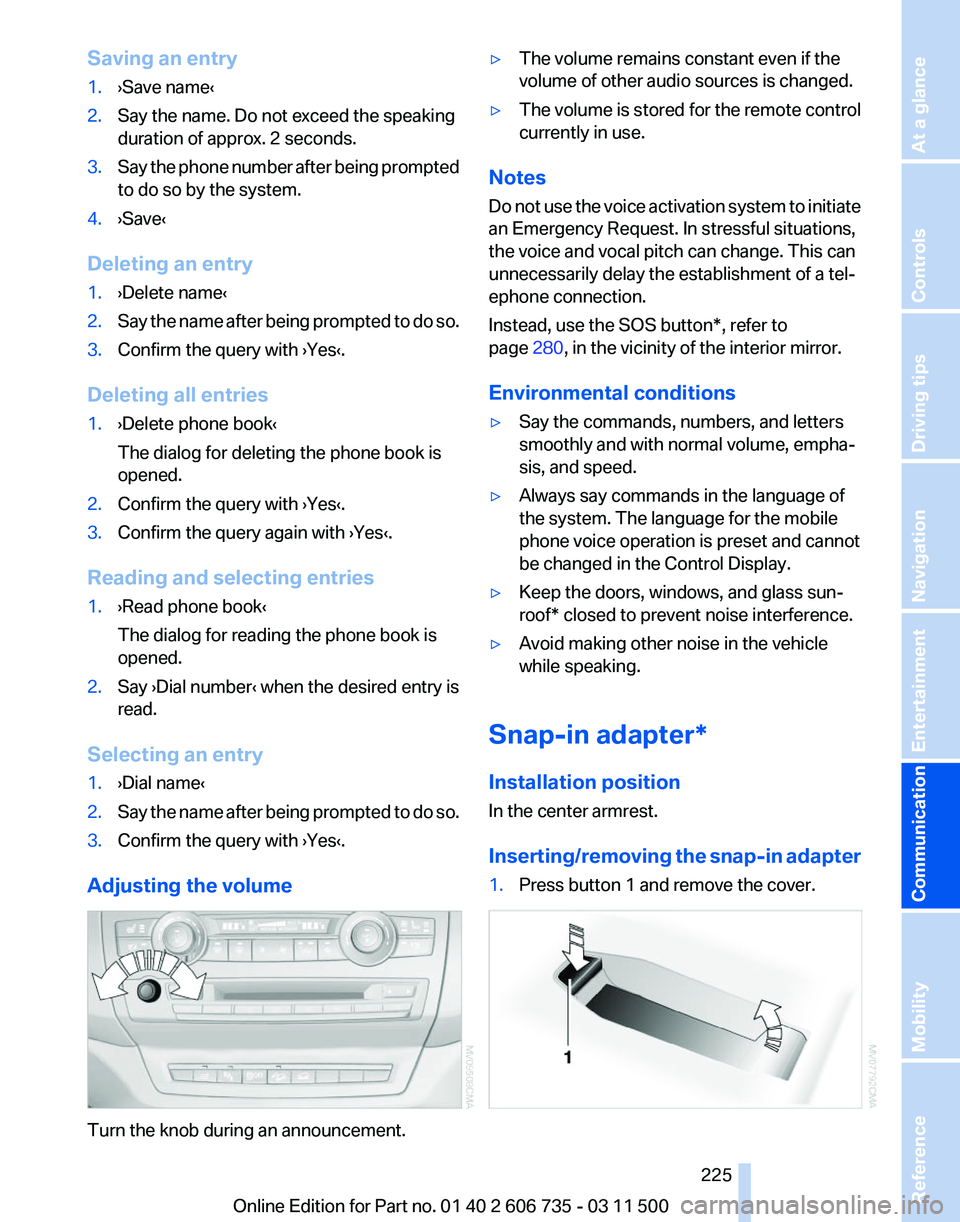
Adjusting the volume Turn the knob during an announcement. ▷
The volume remains constant even if the
volume of other audio sources is changed.
▷ The volume is stored for the remote control
currently in use.
Notes
Do not use the voice activation system to initiate
an Emergency Request. In stressful situations,
the voice and vocal pitch can change. This can
unnecessarily delay the establishment of a tel‐
ephone connection.
Instead, use the SOS button*, refer to
page 280, in the vicinity of the interior mirror.
Environmental conditions
▷ Say the commands, numbers, and letters
smoothly and with normal volume, empha‐
sis, and speed.
▷ Always say commands in the language of
the system. The language for the mobile
phone voice operation is preset and cannot
be changed in the Control Display.
▷ Keep the doors, windows, and glass sun‐
roof* closed to prevent noise interference.
▷ Avoid making other noise in the vehicle
while speaking.
Snap-in adapter*
Installation position
In the center armrest.
Inserting/removing
the snap-in adapter
1. Press button 1 and remove the cover. Seite 225
225Online Edition for Part no. 01 40 2 606 735 - 03 11 500
Reference Mobility
Communication Entertainment Navigation Driving tips Controls At a glance
Page 252 of 317
Wheels and tires
Tire inflation pressure
Safety information
It is not merely the tires' service life, but also
driving comfort and, to a great extent, driving
safety that depend on the condition of the tires
and the maintenance of the specified tire pres‐
sure.
Checking the pressure
Only check the tire inflation pressure when the
tires are cold. This means after a maximum of
1.25
miles/2 km driving or when the vehicle has
been parked for at least 2 hours. When the tires
are warm, the tire inflation pressure is higher.
Check the tire inflation pressure regularly
Check the tire inflation pressure regularly
and correct it if necessary, even in the compact
wheel*: usually twice monthly or before embark‐
ing on a long trip. If you fail to observe this pre‐
caution, you may be driving on tires with incor‐
rect tire pressures, a condition that may not only
compromise your vehicle's driving stability, but
also lead to tire damage and the risk of an acci‐
dent.
Do not drive with depressurized or flat tires, ex‐
cept for run-flat tires. A flat tire will seriously im‐
pair your vehicle's handling and braking re‐
sponse. Attempts to drive on a flat tire can lead
to a loss of control over the vehicle.◀
After adjusting the tire inflation pressure, reset
the Tire Pressure Monitor, refer to page 90, or
reinitialize the Flat Tire Monitor, refer to
page 88.
Pressure specifications
The tables below provide all the correct inflation
pressures for the specified tire sizes at ambient
temperature.
The inflation pressures apply to the tire sizes
approved and tire brands recommended by BMW; a list of these is available from your serv‐
ice center.
For
correct identification of the right tire inflation
pressures, observe the following:
▷ Tire sizes of your vehicle.
▷ Maximum allowable driving speed.
Tire inflation pressures for driving up to
100 mph or 160 km/h
For
normal driving up to 100 mph/160 km/h, ad‐
just pressures to the respective tire inflation
pressures listed on the following pages in the
column for traveling speeds up to 100 mph/
160 km/h to achieve optimum driving comfort.
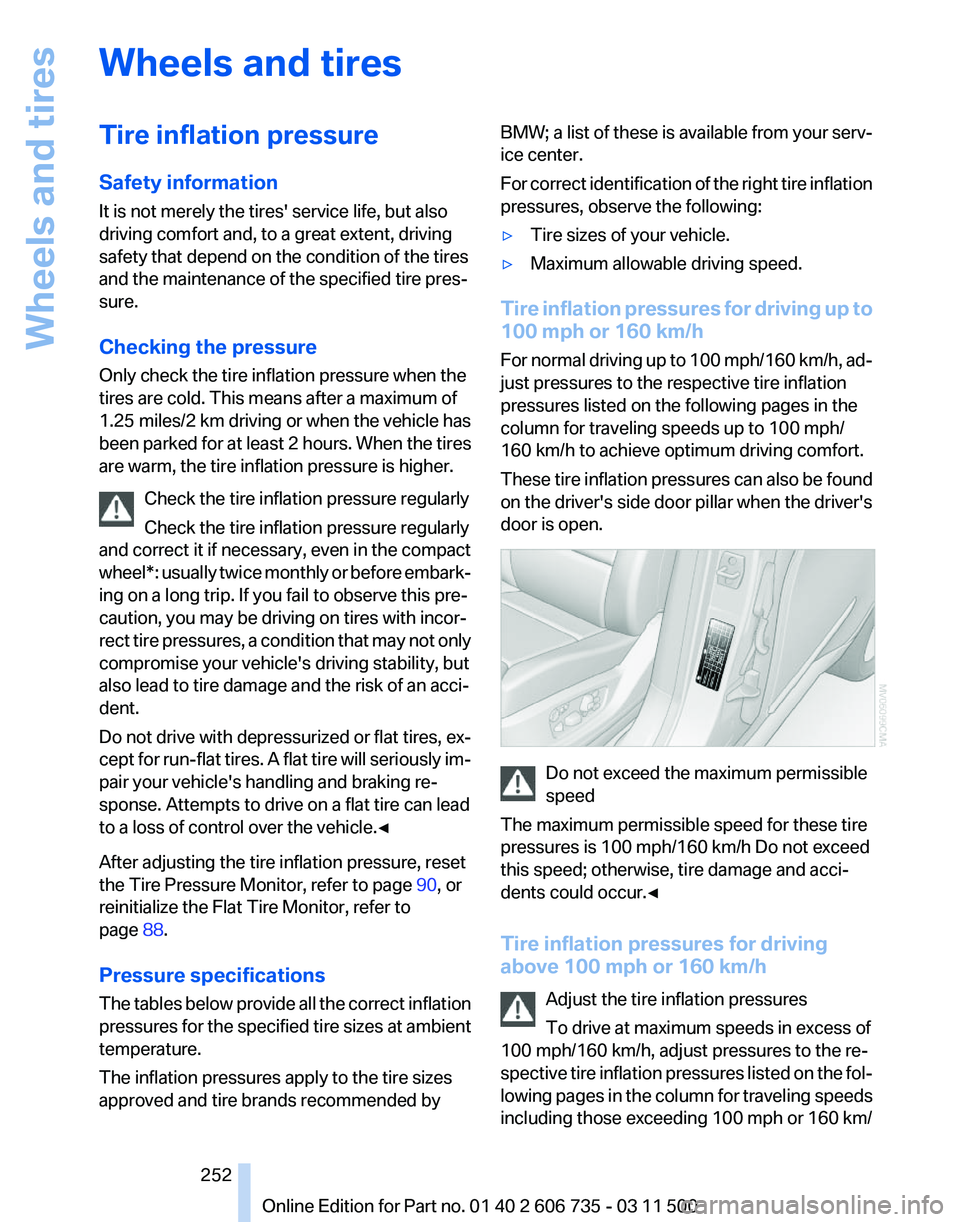
These tire inflation pressures can also be found
on the driver's side door pillar when the driver's
door is open. Do not exceed the maximum permissible
speed
The maximum permissible speed for these tire
pressures is 100 mph/160 km/h Do not exceed
this speed; otherwise, tire damage and acci‐
dents could occur.◀
Tire inflation pressures for driving
above 100 mph or 160 km/h
Adjust the tire inflation pressures
To drive at maximum speeds in excess of
100 mph/160 km/h, adjust pressures to the re‐
spective
tire inflation pressures listed on the fol‐
lowing pages in the column for traveling speeds
including those exceeding 100 mph or 160 km/ Seite 252
252 Online Edition for Part no. 01 40 2 606 735 - 03 11 500
Wheels and tires