belt BMW X5 XDRIVE 35I SPORT ACTIVITY 2013 Owners Manual
[x] Cancel search | Manufacturer: BMW, Model Year: 2013, Model line: X5 XDRIVE 35I SPORT ACTIVITY, Model: BMW X5 XDRIVE 35I SPORT ACTIVITY 2013Pages: 345, PDF Size: 9.45 MB
Page 49 of 345
AdjustingVehicle equipment
This chapter describes all series equipment as
well as country-specific and special equipment
offered for this model series.Therefore, it also
describes equipment that may not be found in
your vehicle, for instance due to the selected
special equipment or the country version. This
also applies to safety-related functions and
systems.
Sitting safely
The ideal seating position can make a vital
contribution to relaxed, fatigue-free driving.
The seating position plays an important role in
an accident in combination with:▷Safety belts, refer to page 54.▷Head restraints, refer to page 55.▷Airbags, refer to page 95.
Seats
Note before adjusting Do not adjust the seat while driving
Never attempt to adjust the driver's seat
while driving. The seat could respond with un‐
expected movement and the ensuing loss of
vehicle control could lead to an accident.◀
Do not incline the backrest too far to the
rear
Do not incline the backrest on the front pas‐
senger side too far to the rear during driving.
Otherwise, there is the danger of sliding under
the safety belt in an accident. This would elimi‐
nate the protection normally provided by the
belt.◀
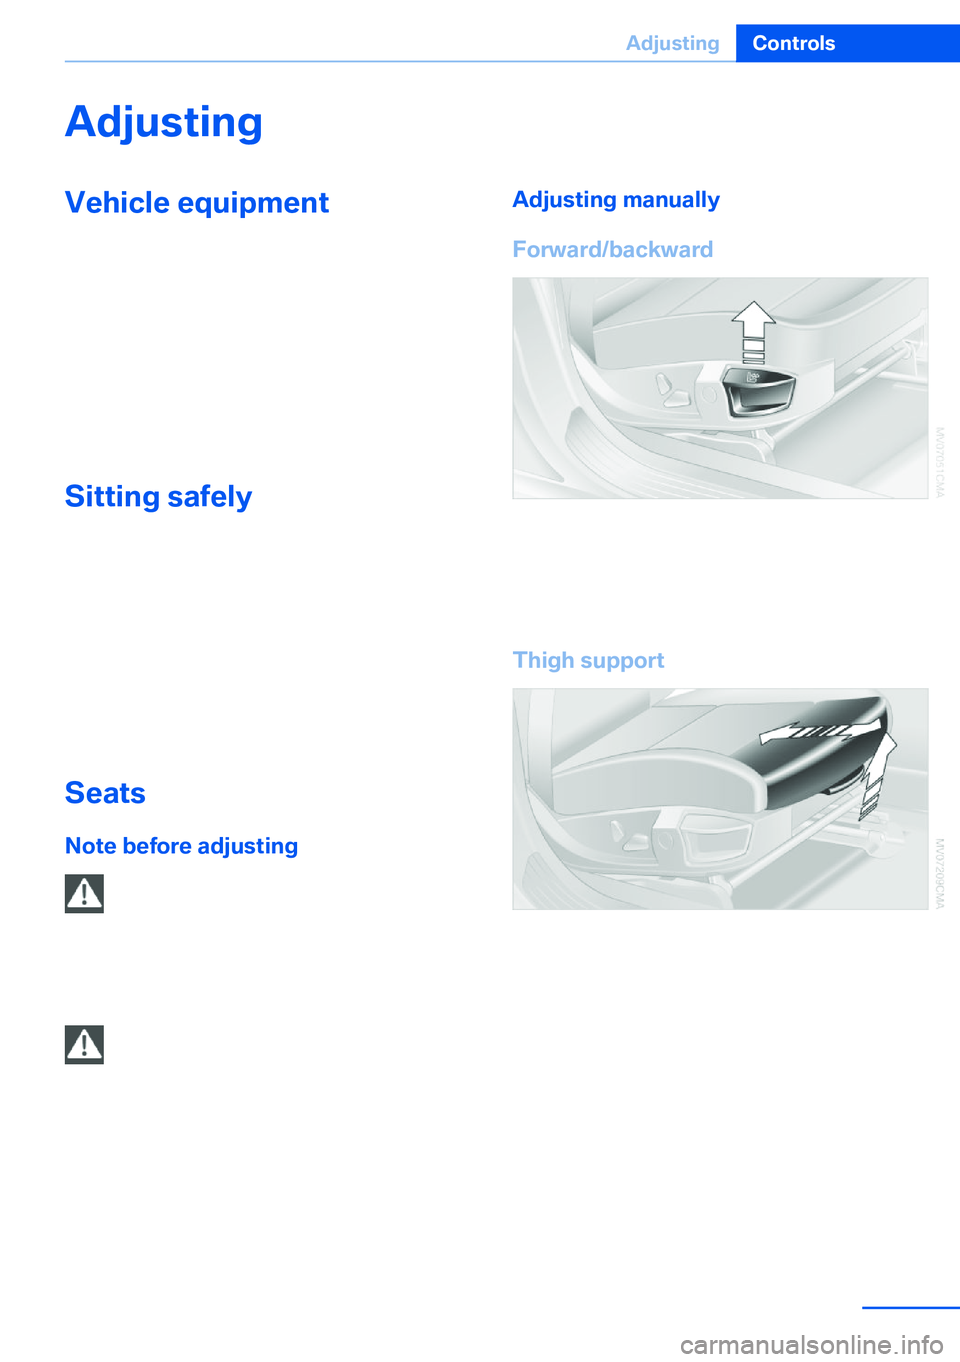
Adjusting manually
Forward/backward
Pull the lever and slide the seat into the de‐
sired position. After releasing the lever, move
the seat forward or back slightly to make sure it
engages properly.
Thigh support
Pull the lever and move the thigh support for‐
ward or back.
Seite 49AdjustingControls49
Online Edition for Part no. 01 40 2 918 395 - III/13
Page 51 of 345
▷Increase or decrease curvature:
Press front or rear section of switch.▷Shift curvature up or down:
Press upper or lower section of switch.
BMW X5: rear seats
2nd row seats If the row of seats is divided, each side can be
adjusted separately.
Do not adjust the seat while driving
Never adjust the 2nd row seats while the
vehicle is moving, as otherwise the passengers
on the 3rd row seats could be injured.
Make sure that the locking devices of the 2nd
row seats engage properly. Otherwise the re‐
straining effect of the safety belts during an ac‐
cident could be reduced.◀
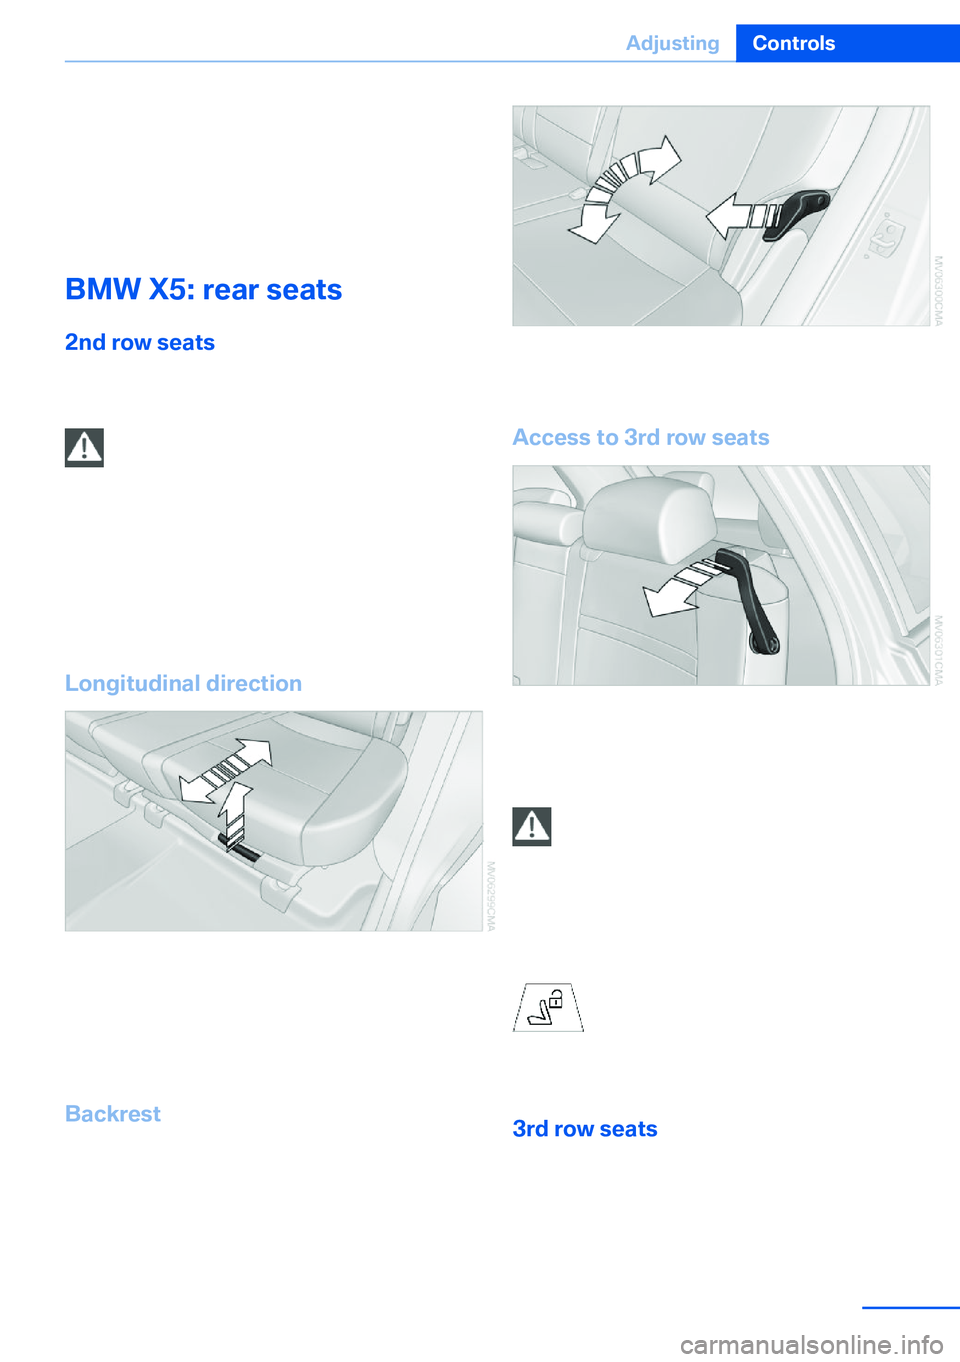
Longitudinal direction
1.Pull the lever and slide the seat into the de‐
sired position.2.Release the lever and move the seat
slightly forward or back so that it engages
properly.
Backrest
The backrests can be adjusted in four steps.
Pull the lever and apply weight to or remove
weight from the backrest as needed.
Access to 3rd row seats
Pull the lever and fold the seat forward.
The handle recess on the interior trim of the
door pillar makes climbing in easier.
Keep the footwell under the 2nd row
seats clear
When folding back the 2nd row seats, make
sure that the footwell under the 2nd row seats
is clear. Otherwise persons in the 3rd row
seats could be injured or objects damaged.◀
Warning lamp for the 2nd row seats:
lights up if the 2nd row seats are not
locked. A message also appears on
the Control Display.
3rd row seats
The 3rd row seats are divided and offer space
for two persons.
Seite 51AdjustingControls51
Online Edition for Part no. 01 40 2 918 395 - III/13
Page 54 of 345
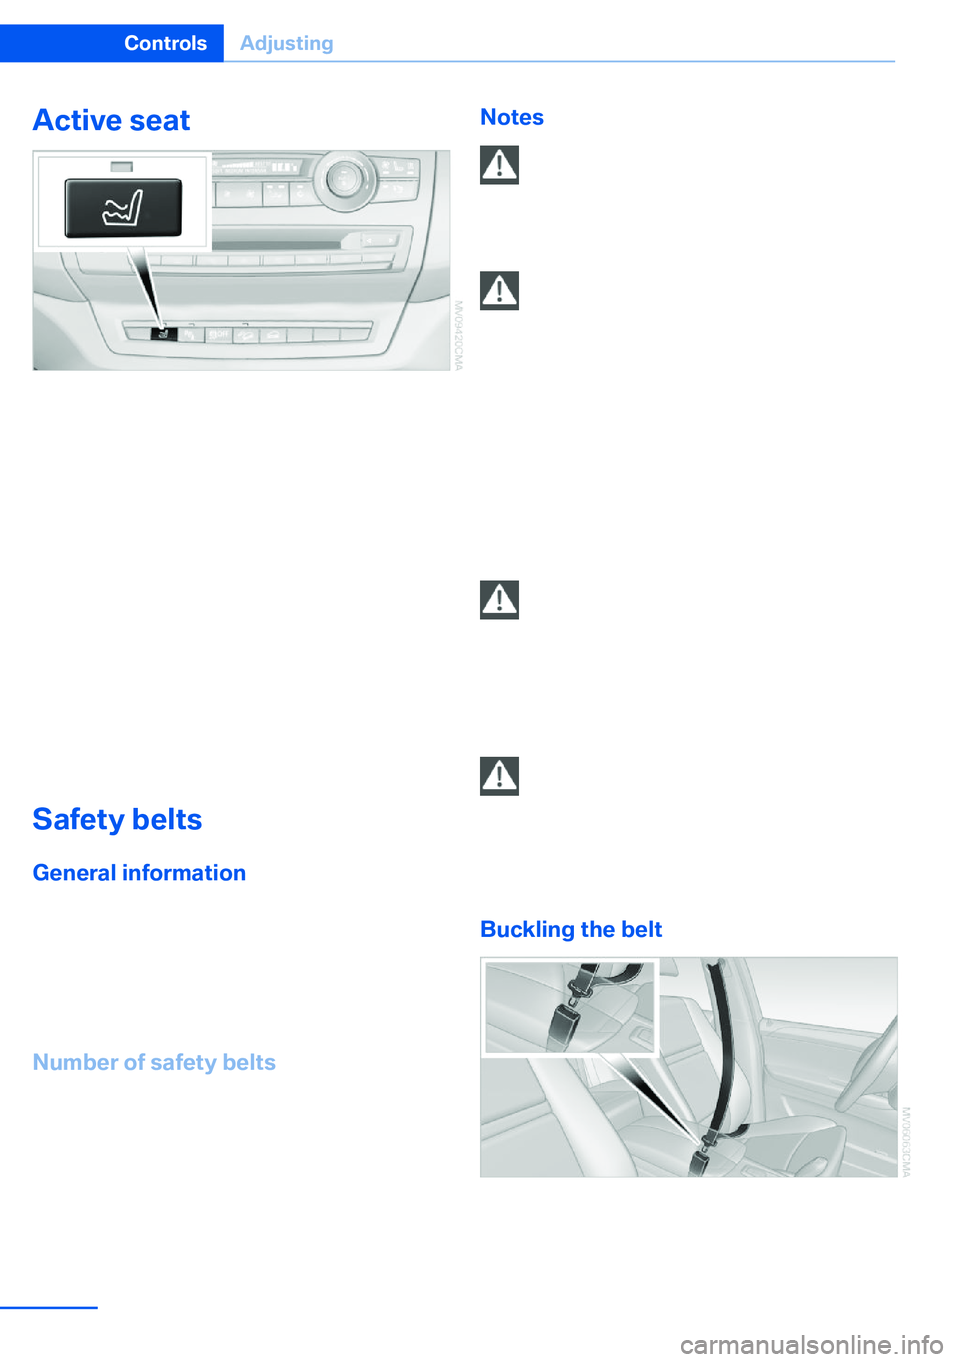
Active seat
The seat cushion is actively varied by alter‐
nately raising and lowering the right and left
half of the seat cushion. This reduces muscu‐
lar tension and fatigue to help prevent lower
back pain.
Press the button to switch on; the LED lights
up.
The action of the system is reduced and if
need be, switched off in order to reduce the
load on the battery. The LED remains lit.
When the active seat is switched off, it can
take up to 1 minute before the two halves of
the seat cushion have returned to their initial
position.
Safety belts
General information
Always make sure that safety belts are being
worn by all occupants before driving away.
Although airbags enhance safety by providing
added protection, they are not a substitute for
safety belts.
Number of safety belts
Your vehicle has been fitted with safety belts
for the safety of you and your passengers.
▷BMW X5: five or seven safety belts.▷BMW X6: four or five safety belts.Notes
One person per safety belt
Never allow more than one person to
wear a single safety belt. Never allow infants or
small children to ride on a passenger's lap.◀
Putting on the belt
Lay the belt, without twisting, snugly
across the lap and shoulders, as close to the
body as possible. Make sure that the belt lies
low around the hips in the lap area and does
not press on the abdomen. Otherwise, the belt
can slip over the hips in the lap area in a frontal
impact and injure the abdomen.
The safety belt must not lie across the neck,
rub on sharp edges, be routed over solid or
breakable objects, or be pinched.◀
Reduction of restraining effect
Avoid wearing clothing that prevents the
belt from fitting properly, and pull the shoulder
belt periodically to readjust the tension across
your lap; otherwise, the retention effect of the
safety belt may be reduced.◀
Using the middle safety belt
If the middle safety belt in the rear is
used, the larger section of the backrest must
be locked. Otherwise, the safety belt will not
have a restraining effect.◀
Buckling the belt
Make sure you hear the latch plate engage in
the belt buckle.
Seite 54ControlsAdjusting54
Online Edition for Part no. 01 40 2 918 395 - III/13
Page 62 of 345
On the front passenger seatAfter installing a child restraint fixing system
on the front passenger seat, ensure that the
front and side airbags on the front passenger
side are deactivated.
Deactivating the front passenger airbags
If a child restraint fixing system is used in
the front passenger seat, the front passenger
airbags must be deactivated; otherwise, there
is an increased risk of injury to the child when
the airbags are triggered, even with a child re‐
straint fixing system.◀
Seat position and height Before installing a child restraint fixing system,
move the front passenger seat as far back as
possible and adjust its height to the highest
position to obtain the best possible position for
the belt and to offer optimal protection in the
event of an accident.
Do not change the seat position and height af‐
ter this.
Backrest width Before mounting a child restraint fixing system
on the front passenger seat, open the backrest
width, refer to page 50, completely. Do not
change the backrest width after this.
Backrest width for the child seat
Before installing a child restraint fixing
system in the front passenger seat, the back‐
rest width must be opened completely. Do not
change the adjustment after this; otherwise,
the stability of the child seat will be reduced.◀Child seat security
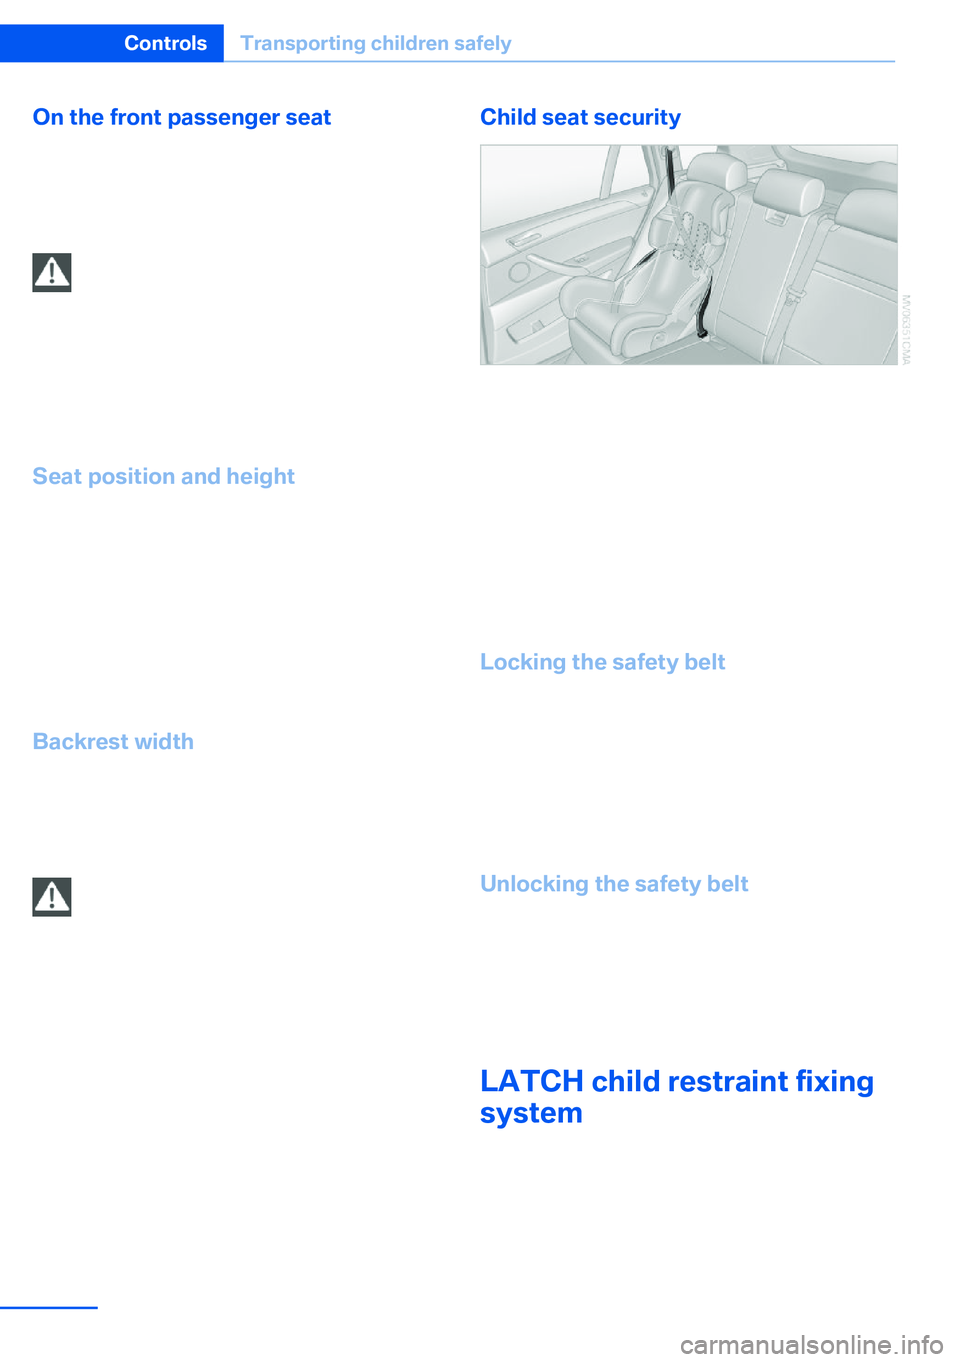
The rear safety belts
▷BMW X5: all safety belts of the 2nd and 3rd
row seats▷BMW X6: all safety belts of the 2nd row
seats
And the safety belt for the front passenger can
be locked to prevent extension in order to per‐
mit attachment of child restraint fixing sys‐
tems.
Locking the safety belt
1.Pull out the belt webbing completely.2.Secure the child restraint fixing system
with the belt.3.Allow the belt webbing to be pulled in and
pull it taut against the child restraint fixing
system. The safety belt is locked.
Unlocking the safety belt
1.Open the belt buckle.2.Remove the child restraint fixing system.3.Allow the belt webbing to be pulled in com‐
pletely.
LATCH child restraint fixing
system
LATCH: Lower Anchors and Tether for Chil‐
dren.
Seite 62ControlsTransporting children safely62
Online Edition for Part no. 01 40 2 918 395 - III/13
Page 70 of 345
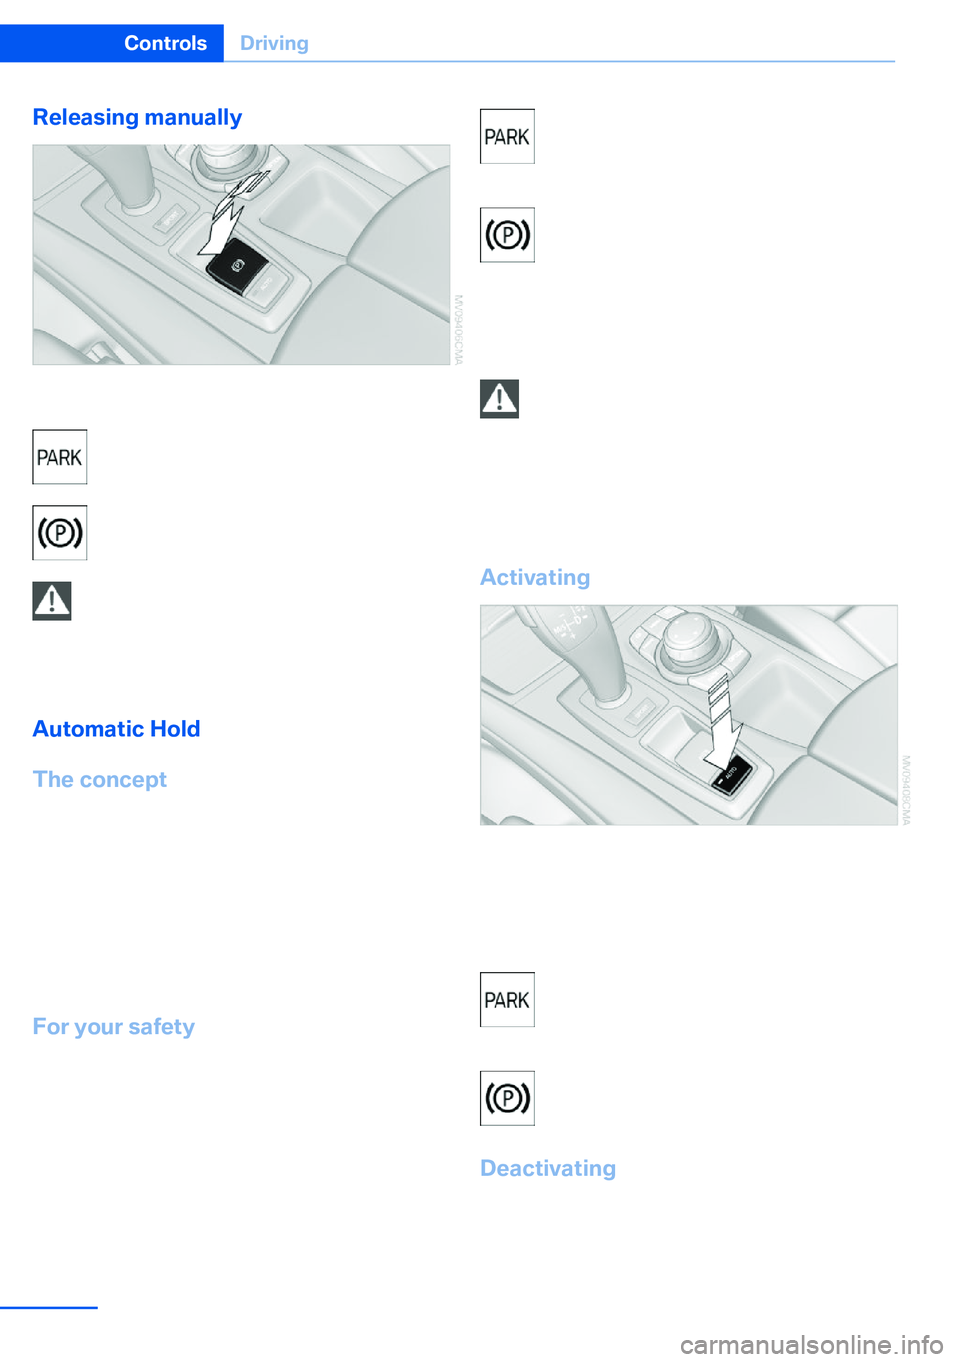
Releasing manually
Press the button with the brake depressed.The LED and indicator lamp go out.
Indicator lamp in Canadian models.
Take the remote control with you Take the remote control with you when
leaving the vehicle so that children, for exam‐
ple, cannot release the parking brake.◀
Automatic Hold
The concept This system assists the driver by automatically
setting and releasing the brake, such as when
moving in stop-and-go traffic.
The vehicle is automatically held in place when
it is stationary.
On inclines, the system prevents the vehicle
from rolling backward when driving away.
For your safety
Automatic Hold is deactivated automatically
and the parking brake is set when:
▷The engine is switched off.▷A door is opened and the driver's safety
belt is unbuckled.▷The vehicle is braked to a standstill with
the parking brake while driving.The indicator lamp switches from
green to red and the letters AUTO H go out.
Indicator lamp in Canadian models.
Before driving away:▷Release the parking brake manually.▷Reactivate Automatic Hold.
Leaving the vehicle with the engine run‐
ning
Before leaving the vehicle with the engine run‐
ning, engage position P of the automatic trans‐
mission and ensure that the parking brake is
set. Otherwise, the vehicle may begin to roll.◀
Activating
Press the button. The LED in the button lights
up and the indication AUTO H appears in the
instrument panel.
Automatic Hold is activated.
If the vehicle is being held by Auto‐
matic Hold, the indicator light in the in‐
strument panel also lights up in green.
Indicator lamp in Canadian models.
Deactivating Press the button again, the LED in the button
and the indication AUTO H in the instrument
panel go out.
Seite 70ControlsDriving70
Online Edition for Part no. 01 40 2 918 395 - III/13
Page 76 of 345
P ParkThe drive wheels are blocked.
P is engaged automatically when the following
conditions are met:▷The driver's door is opened while the en‐
gine is running, the safety belt is not fas‐
tened and neither the brake pedal nor the
accelerator is activated.▷The engine is switched off unless N is en‐
gaged and the remote control is in the igni‐
tion lock.▷The remote control is removed from the ig‐
nition lock.
Before leaving the vehicle, ensure that the
transmission position P is engaged; otherwise,
the vehicle may begin to roll.
Engaging transmission position
▷Transmission position P can only be disen‐
gaged if the engine is running and the
brake pedal is pressed.▷With the vehicle stationary, press on the
brake pedal before shifting out of P or N;
otherwise, the shift command will not be
executed: shift lock.
Press on the brake pedal until you start
driving
To prevent the vehicle from creeping after you
select a driving position, maintain pressure on
the brake pedal until you are ready to start.◀
Engaging transmission positions D, R,
N
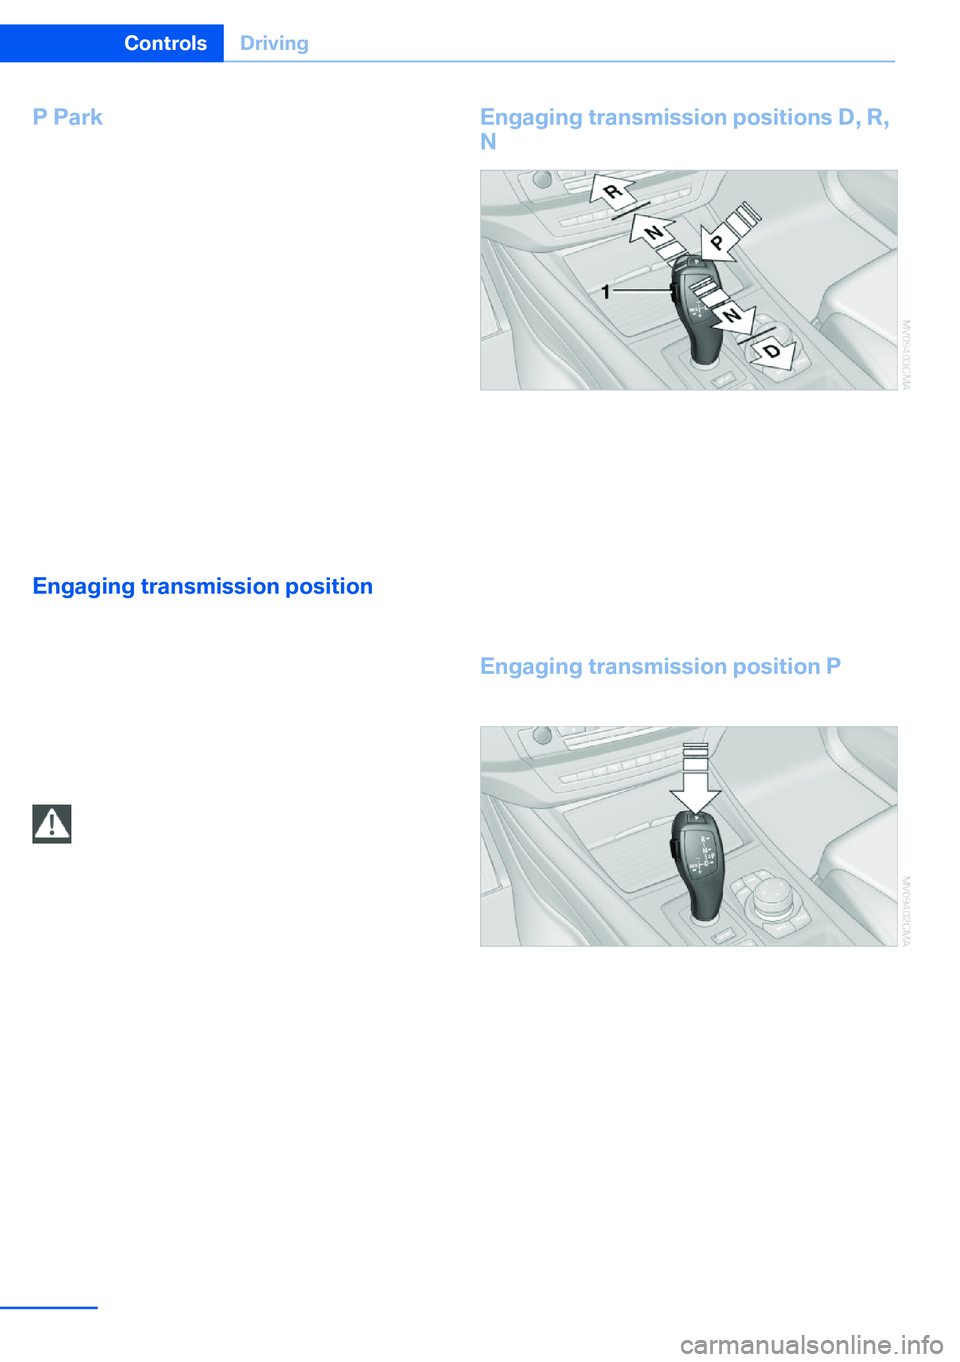
Briefly push the selector lever in the desired di‐
rection, beyond a resistance point if necessary.
When shifting out of P or into R, simultane‐
ously push the unlock button 1.
The engaged transmission position is dis‐
played on the selector lever.
After releasing the selector lever, it returns to
its center position.
Engaging transmission position P Select only when the vehicle is stationary.
Press button P.
Seite 76ControlsDriving76
Online Edition for Part no. 01 40 2 918 395 - III/13
Page 95 of 345
SafetyVehicle equipment
This chapter describes all series equipment as
well as country-specific and special equipment
offered for this model series.Therefore, it alsodescribes equipment that may not be found in
your vehicle, for instance due to the selected
special equipment or the country version. This
also applies to safety-related functions and
systems.
Airbags
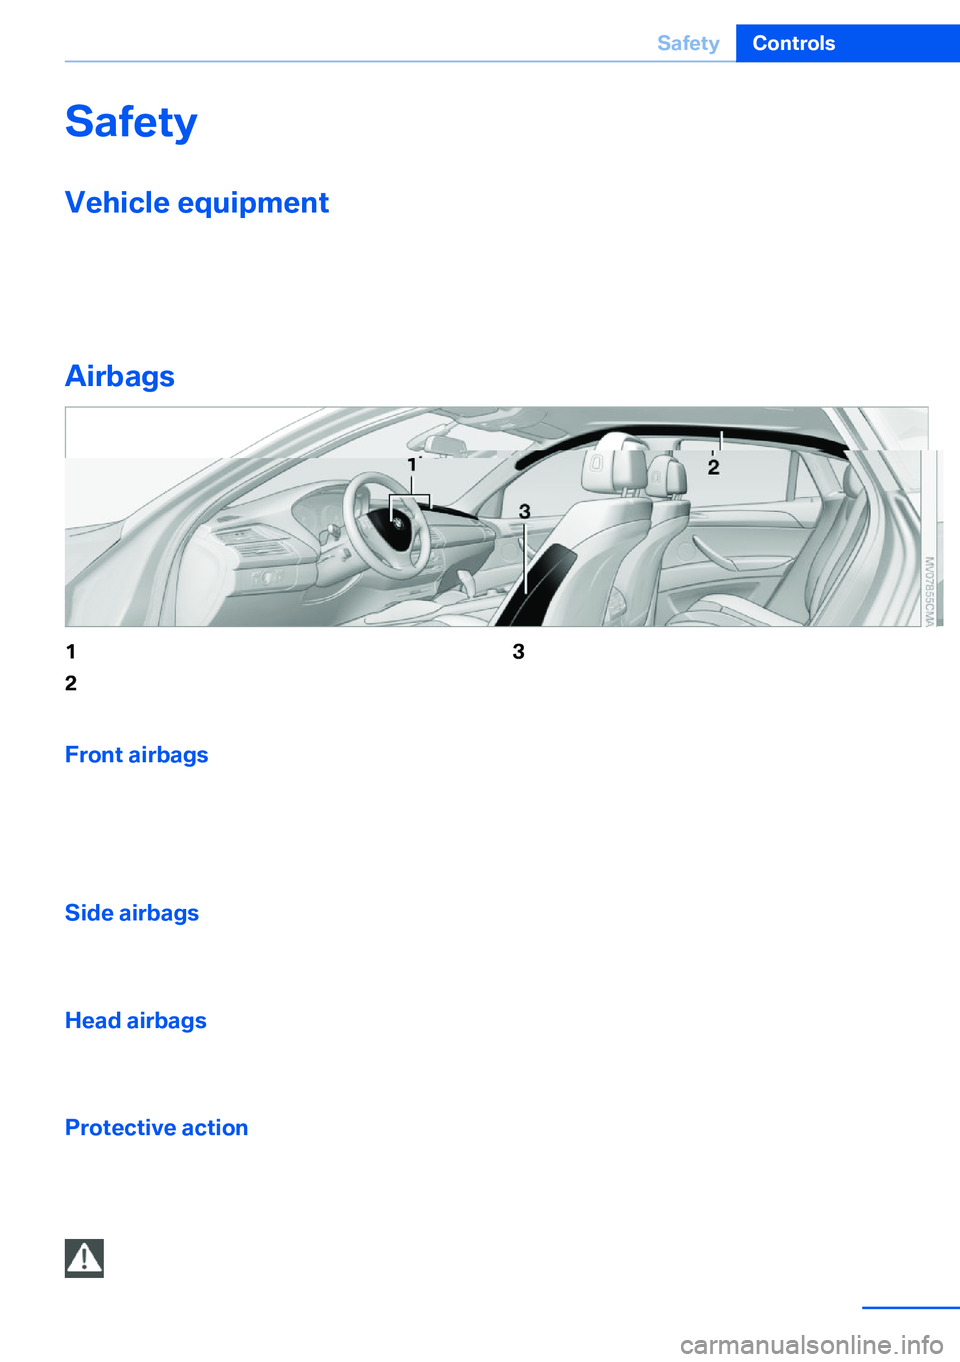
1Front airbags2Head airbags3Side airbagsFront airbags
Front airbags help protect the driver and front
passenger by responding to frontal impacts in
which safety belts alone cannot provide ade‐
quate restraint.
Side airbags
In a lateral impact, the side airbag supports the
side of the body in the chest and lap area.
Head airbags
In a lateral impact, the head airbag supports
the head.
Protective action
Airbags are not triggered in every impact situa‐
tion, e.g., in less severe accidents or rear-end
collisions.
Information on how to ensure the optimal
protective effect of the airbags▷Keep at a distance from the airbags.▷Always grasp the steering wheel on the
steering wheel rim, holding your hands at
the 3 o'clock and 9 o'clock positions, to
keep the danger of injury to your hands or
arms as low as possible if the airbag is trig‐
gered.▷There should be no people, animals, or ob‐
jects between an airbag and a person.▷Do not use the cover of the front airbag on
the front passenger side as a storage area.▷Keep the dashboard and window on the
front passenger side clear, i.e., do not
cover with adhesive labels or coverings,
and do not attach holders such as for navi‐
gation instruments and mobile phones.Seite 95SafetyControls95
Online Edition for Part no. 01 40 2 918 395 - III/13
Page 97 of 345
If it is not possible to activate the airbags, have
the person sit in the rear.
To make sure that occupation of the seat
cushion can be detected correctly:▷Do not attach seat covers, seat cushion
padding, ball mats or other items to the
passenger seat unless they are specifically
recommended by BMW.▷Do not place objects under the seat that
could press against the seat from below.
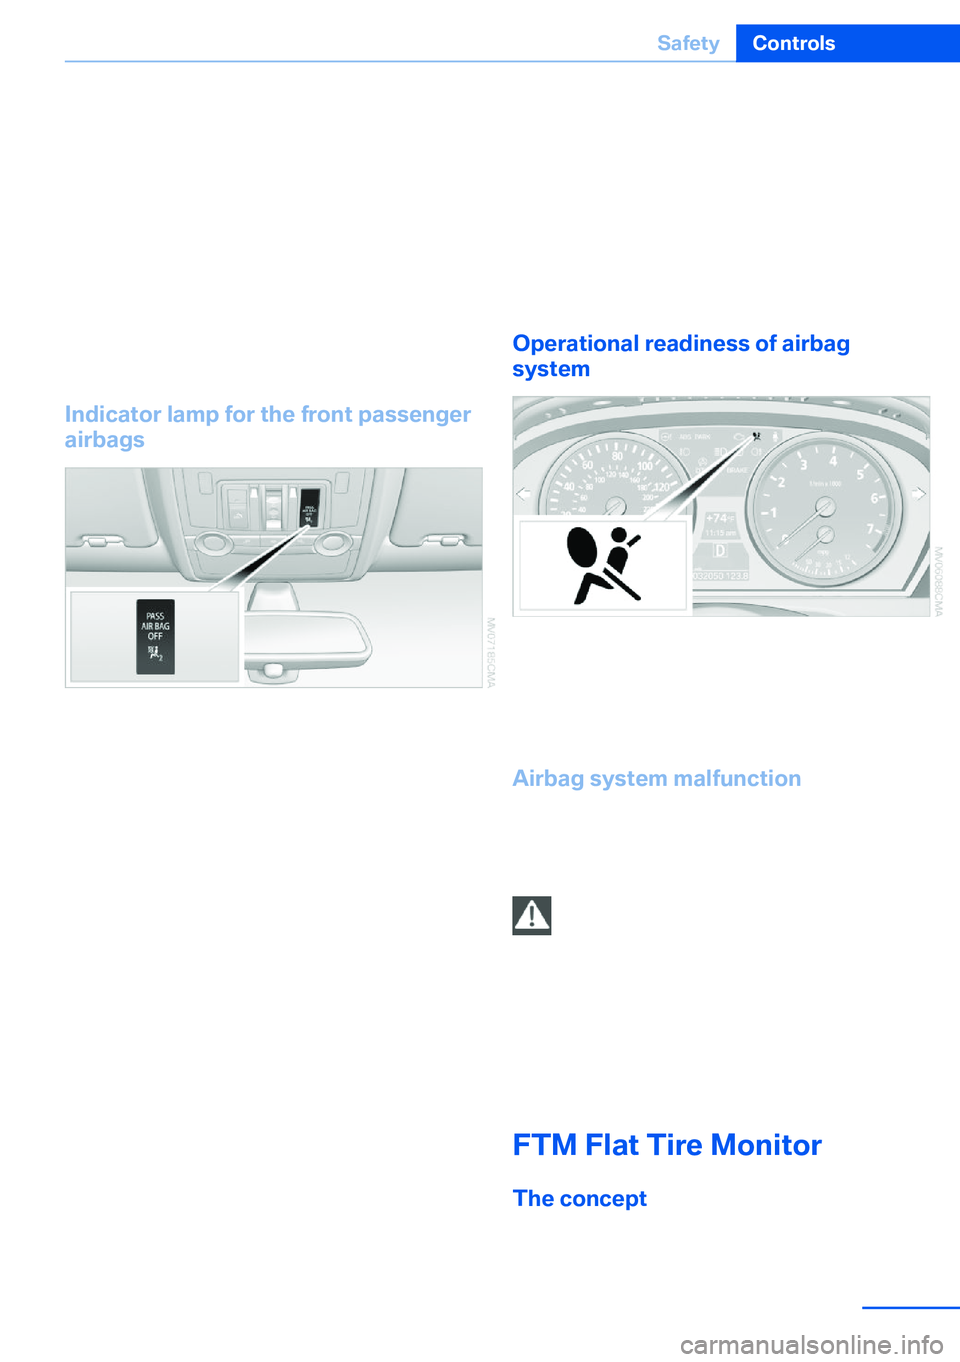
Indicator lamp for the front passenger
airbags
Depending on the vehicle's equipment, the ar‐
rangement of the switches and indicator lamps
may differ somewhat.
The indicator lamp for the front passenger air‐
bags indicates the operating state of the front
passenger airbags.
The lamp indicates whether the airbags are ac‐
tivated or deactivated.
▷The indicator lamp lights up when a child in
a child restraint fixing system intended for
the purpose is properly detected on the
seat. The airbags on the front passenger
side are not activated.▷The indicator lamp does not light up when,
for example, a correctly seated person of
sufficient size is detected on the seat. The
airbags on the front passenger side are ac‐
tivated.▷The indicator lamp does not light up when
the seat is empty. However, the airbags on
the front passenger side are not activated.Most child seats are detected by the system,
Especially the child seats required by NHTSA
at the time that the vehicle was manufactured.
After installing a child seat, make sure that the
indicator lamp for the front passenger airbags
lights up. This indicates that the child seat has
been detected and the front passenger airbags
are not activated.
Operational readiness of airbag
system
When the ignition is switched on,, refer to
page 68, the warning lamp comes on briefly to
indicate that the entire airbag system and the
belt tensioners are operational.
Airbag system malfunction
▷The warning lamp does not light up after
the ignition is switched on.▷Warning lamp remains permanently on.
Have the airbag system checked without
delay if there is a malfunction
In the event of a malfunction in the airbag sys‐
tem, have it checked without delay; otherwise,
there is the risk that the system will not func‐
tion as intended even if a sufficiently severe
accident occurs.◀
FTM Flat Tire Monitor The conceptThe system does not measure the actual infla‐
tion pressure in the tires.
Seite 97SafetyControls97
Online Edition for Part no. 01 40 2 918 395 - III/13
Page 114 of 345
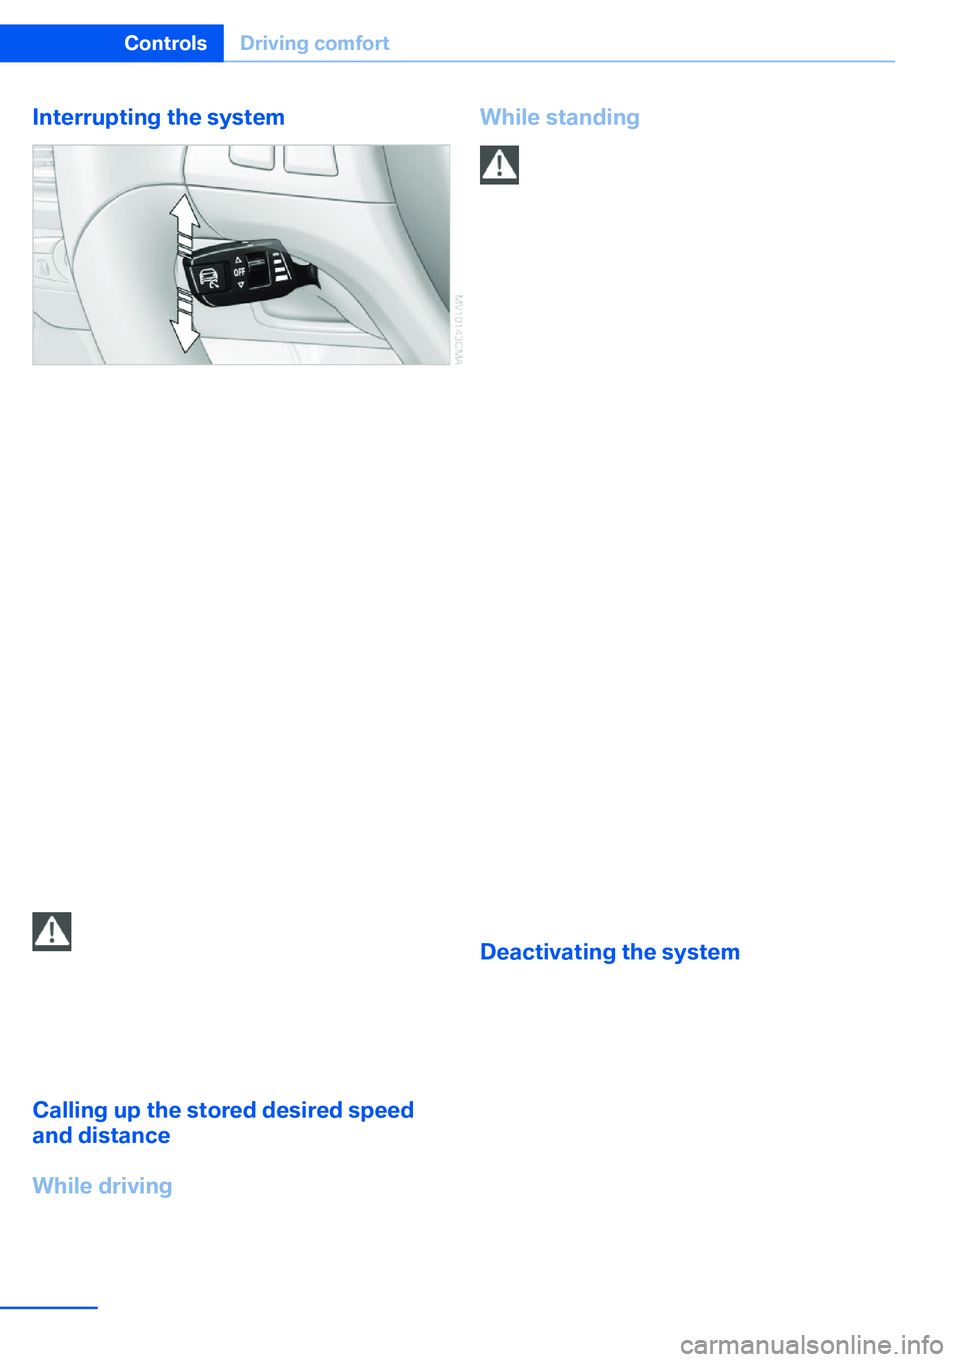
Interrupting the system
Press the lever up or down and additionally de‐
press the brake if the vehicle is stationary. The
mark in the speedometer changes color and
the distance indicator goes out.
In addition, the system is interrupted:
▷When the brakes are applied.▷When the transmission position D is disen‐
gaged.▷When DTC is activated or DSC is deacti‐
vated.▷When DSC is activated▷When the safety belt and the driver's door
are opened while the vehicle is stationary.▷When the system has not detected objects
for an extended period, e.g., on a road with
very little traffic without road edge line
markings.▷The radar sensor is dirty.
Active intervention if the system is inter‐
rupted
If the system is interrupted, actively intervene
by braking and, if necessary, with evasive ma‐
neuvers; otherwise, there is the danger of an
accident occurring.◀
Calling up the stored desired speed
and distance
While driving
Press button 4, refer to page 112. All of the
displays in the instrument panel lights up.
While standing
Before leaving the vehicle
Before leaving the vehicle with the en‐
gine running, engage position P of the auto‐
matic transmission and apply the parking
brake. Otherwise, the vehicle may begin to
roll.◀
If a vehicle detected ahead of you slows to a
halt and your vehicle is also brought to a halt
by the system:▷If the vehicle ahead of you drives away,
your vehicle accelerates automatically as
long as mark 1 for the desired speed in the
speedometer is green.▷If the vehicle ahead of you drives away
when mark 1 is orange, depress the accel‐
erator briefly or press button 4.Rolling bars
in the distance indicator 3 mean that the
vehicle ahead of you has driven away.
If you are standing behind a vehicle with your
brake pedal depressed and the system is de‐
activated or interrupted:
1.Select the desired speed using the lever,
arrow 1 or arrow 2, or press button 4 to re‐
trieve a stored speed.2.Release the brake pedal.3.When the vehicle ahead of you drives
away, press on the accelerator briefly or
press button 4.
Deactivating the system
▷When driving, press the lever up or down
twice.▷When stationary, do the same while de‐
pressing the brake pedal.▷Switch off the ignition.
The displays go out, and the stored desired
speed and distance are deleted.
Seite 114ControlsDriving comfort114
Online Edition for Part no. 01 40 2 918 395 - III/13
Page 146 of 345
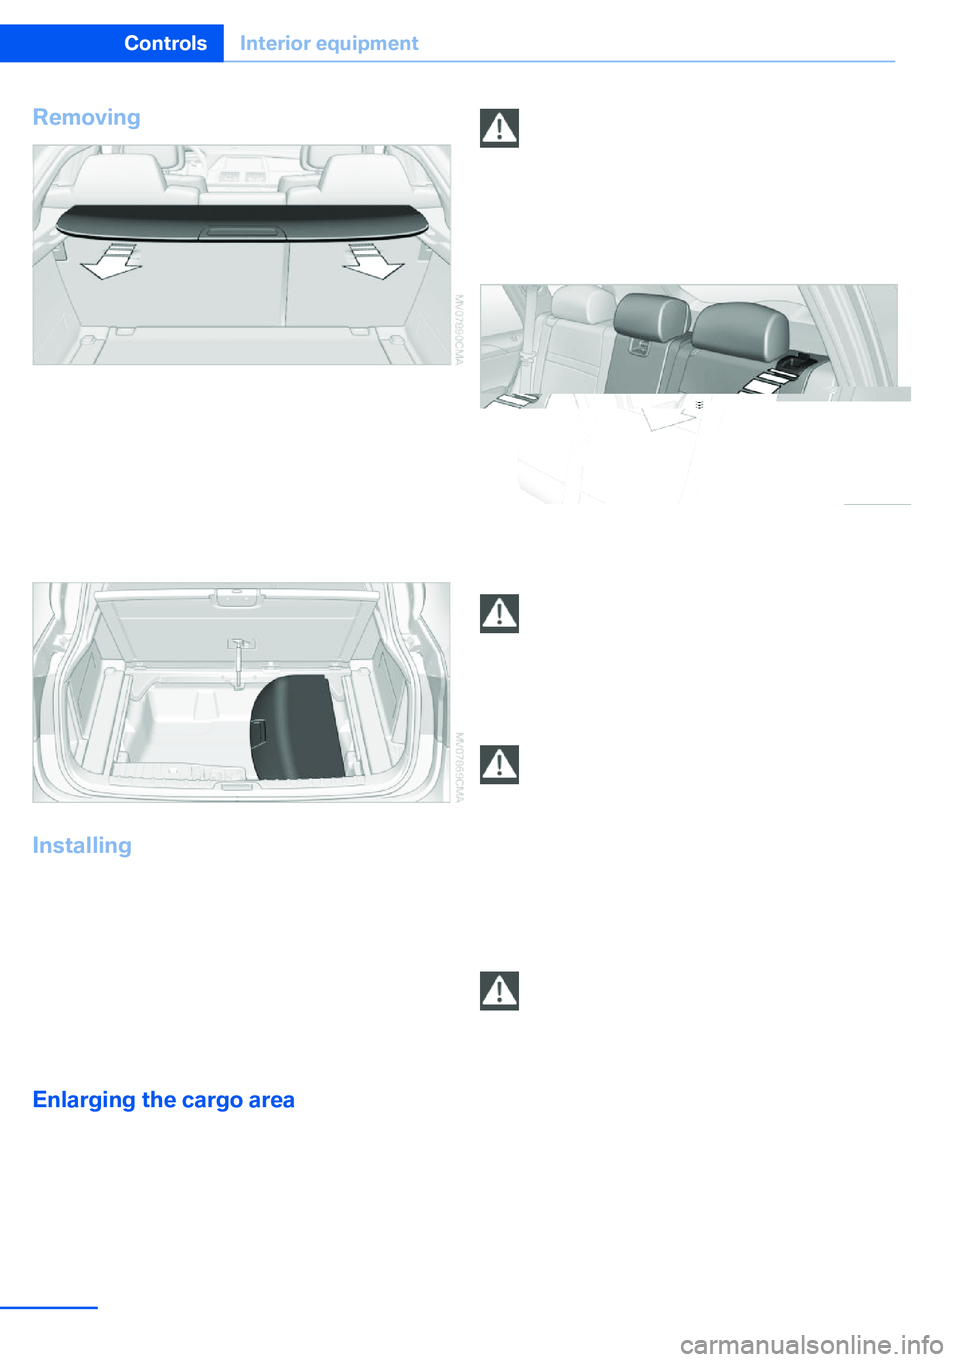
Removing1.Grasp retracted cargo cover underneath
the upper fold on both sides.2.Pull the cover back out of the side brack‐
ets.3.Depending on your vehicle's equipment
package, you can store the cover under the
floor panel in the cargo area.
Installing
When installing, proceed in the opposite order
of removal.
1.Set the cargo cover into place on the left
and right sides.2.Lift the back of the cover slightly and slide
forward until it snaps into the two side
brackets.
Enlarging the cargo area
The rear seat backrest is divided. You can fold
down both sides separately in order to expand
the cargo area.
BMW X6: before folding the rear seat
backrest forward
Before folding the rear seat backrest forward
or using the ski bag, remove beverage contain‐
ers from the cupholder and close the cu‐
pholder.◀
Reach into the recess and pull toward the
front.
Locking the backrest
Before letting passengers ride in the rear,
engage the seat backrests, locking them in
place. Otherwise, there is the danger of an ac‐
cident due to unexpected seat movement.◀
Ensure that the lock is securely engaged
When folding back the backrest, be sure
that it locks in place securely. The red warning
field in the control display disappears. If it is
not properly engaged, transported cargo could
enter the passenger compartment during brak‐
ing or evasive maneuvers and endanger the
vehicle occupants.◀
Observe the instructions concerning the
safety belt
Observe the instructions concerning the safety
belt, refer to page 54. Otherwise, personal pro‐
tection may be compromised.◀
Seite 146ControlsInterior equipment146
Online Edition for Part no. 01 40 2 918 395 - III/13