change wheel BMW X5M 2009 E70 Owner's Manual
[x] Cancel search | Manufacturer: BMW, Model Year: 2009, Model line: X5M, Model: BMW X5M 2009 E70Pages: 317, PDF Size: 9.56 MB
Page 5 of 317
Reference
At a glance
Controls
Driving tips
Communications
Navigation
Entertainment
Mobility
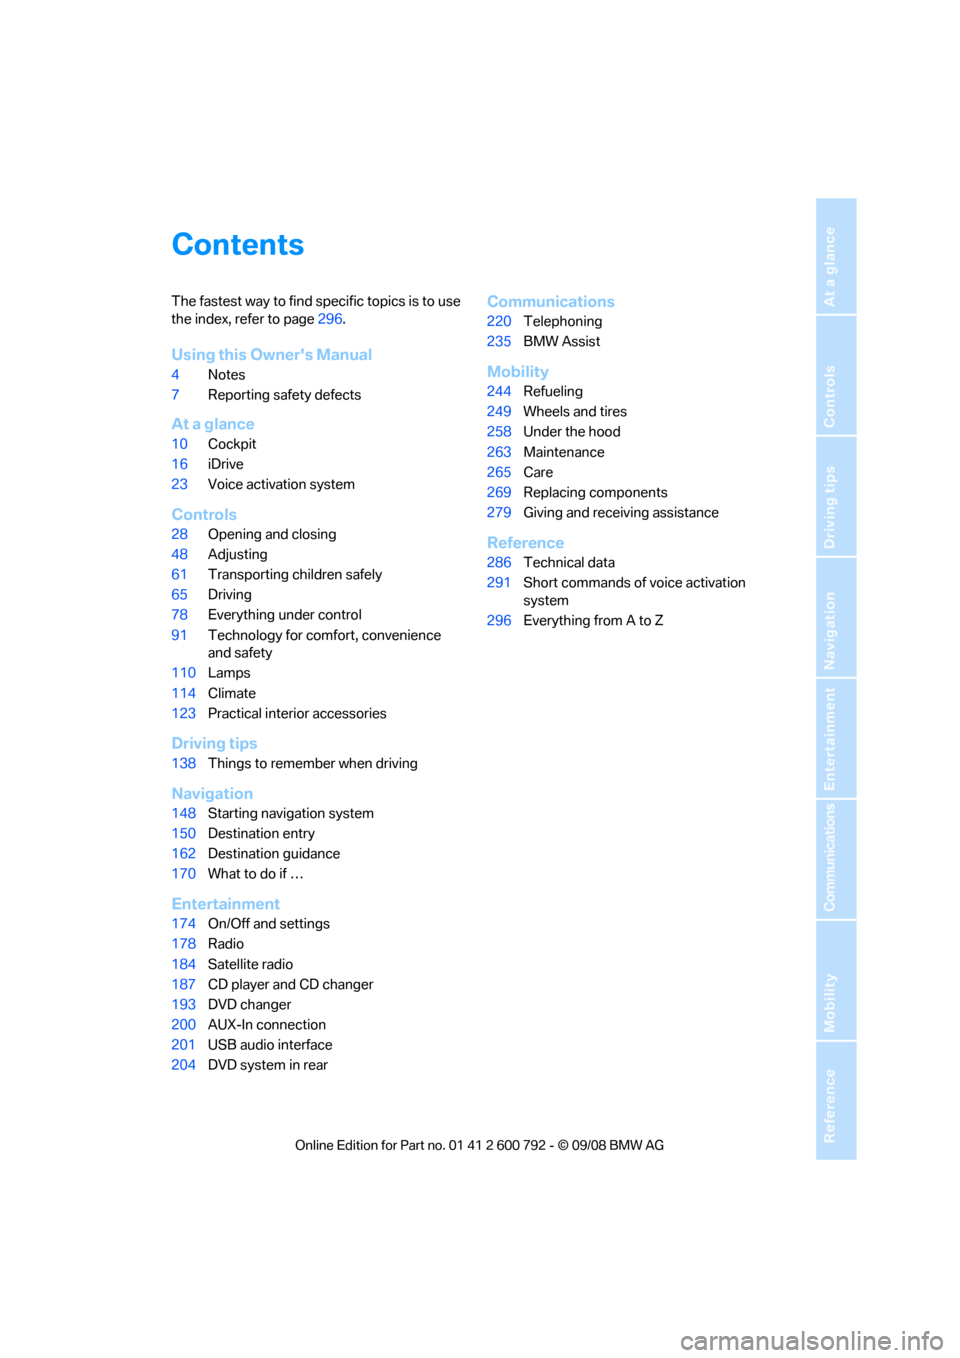
Contents
The fastest way to find specific topics is to use
the index, refer to page296.
Using this Owner's Manual
4 Notes
7 Reporting safety defects
At a glance
10Cockpit
16 iDrive
23 Voice activation system
Controls
28Opening and closing
48 Adjusting
61 Transporting children safely
65 Driving
78 Everything under control
91 Technology for comfort, convenience
and safety
110 Lamps
114 Climate
123 Practical interior accessories
Driving tips
138Things to remember when driving
Navigation
148Starting navigation system
150 Destination entry
162 Destination guidance
170 What to do if …
Entertainment
174On/Off and settings
178 Radio
184 Satellite radio
187 CD player and CD changer
193 DVD changer
200 AUX-In connection
201 USB audio interface
204 DVD system in rear
Communications
220Telephoning
235 BMW Assist
Mobility
244Refueling
249 Wheels and tires
258 Under the hood
263 Maintenance
265 Care
269 Replacing components
279 Giving and rece iving assistance
Reference
286Technical data
291 Short commands of voice activation
system
296 Everything from A to Z
Page 26 of 317
Voice activation system
24
Commands
Having possible commands read aloud
You can have the system read aloud the possi-
ble commands related to the selected menu
item on the Control Display.
To have the system list the possible com-
mands:
For example, if you have selected "CD", the
system will read aloud the possible commands
for operating the CD player and the CD
changer
*.
Opening help
Using alternative commands
There are often a number of commands to run a
function, e.g.:
Running functions directly with short
commands
With short commands you can carry out certain
functions directly, rega rdless of which menu
item is selected, refer to page 291.
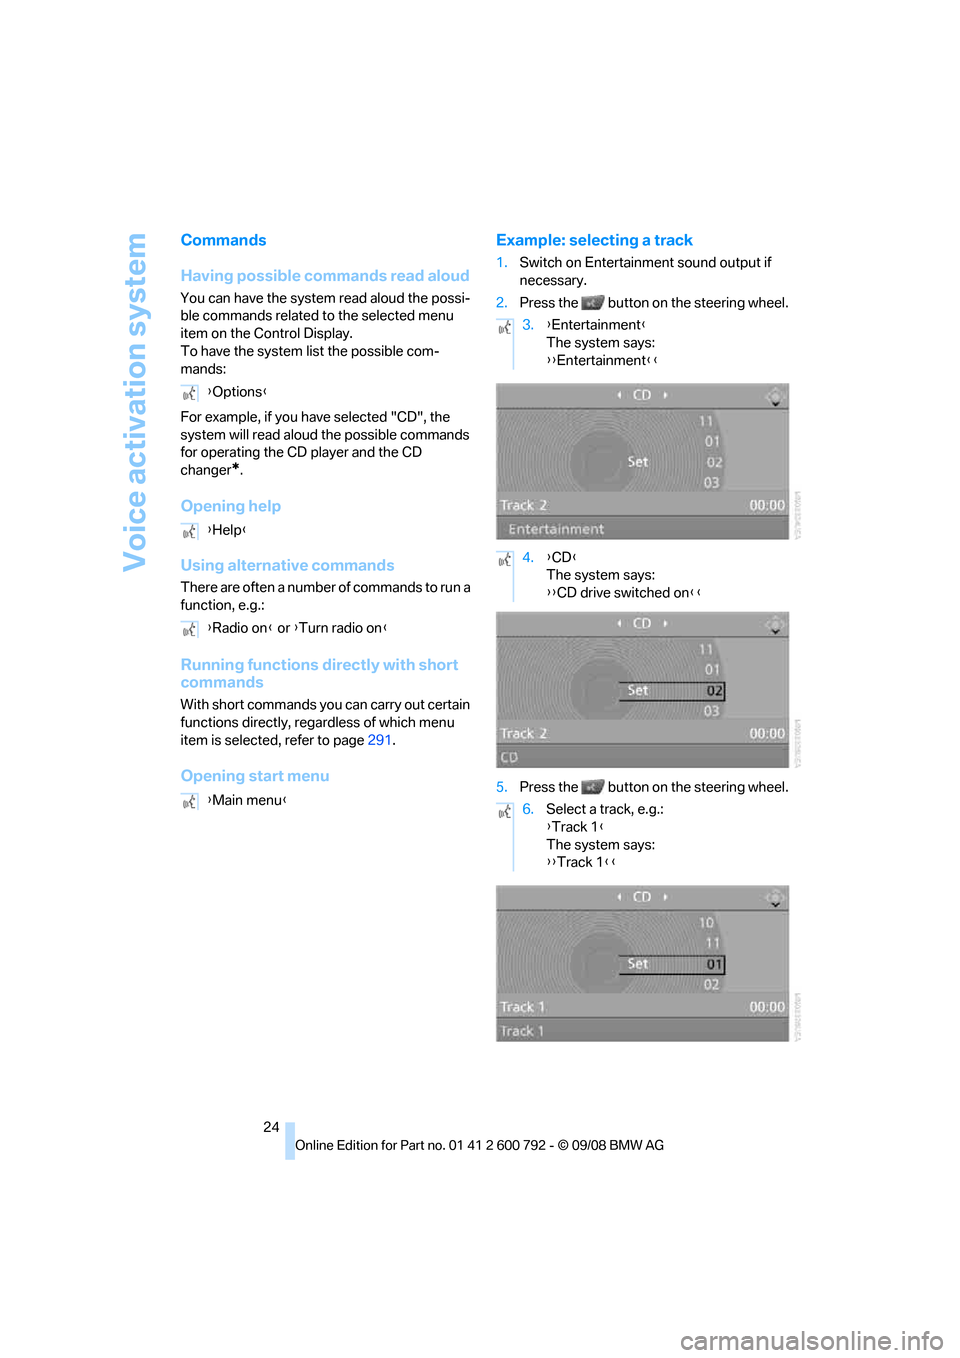
Opening start menu Example: selecting a track
1.
Switch on Entertainment sound output if
necessary.
2. Press the button on the steering wheel.
5. Press the button on the steering wheel.
{
Options }
{ Help }
{ Radio on } or {Turn radio on }
{ Main menu }
3.{Entertainment }
The system says:
{{ Entertainment }}
4. {CD }
The system says:
{{ CD drive switched on }}
6. Select a track, e.g.:
{Track 1 }
The system says:
{{ Track 1 }}
Page 40 of 317
Opening and closing
38
To stop the opening process:
>
Press the button on the outside of the lift-
gate.
> Press and hold the bu tton on the remote
control.
> Press the button on the inside of the lift-
gate.
> Press the button on the center console
again.
The opening process is interrupted if you
set the vehicle in motion. <
Closing liftgate
Make sure that the closing path of the lift-
gate is clear, otherwise injuries may
result. <
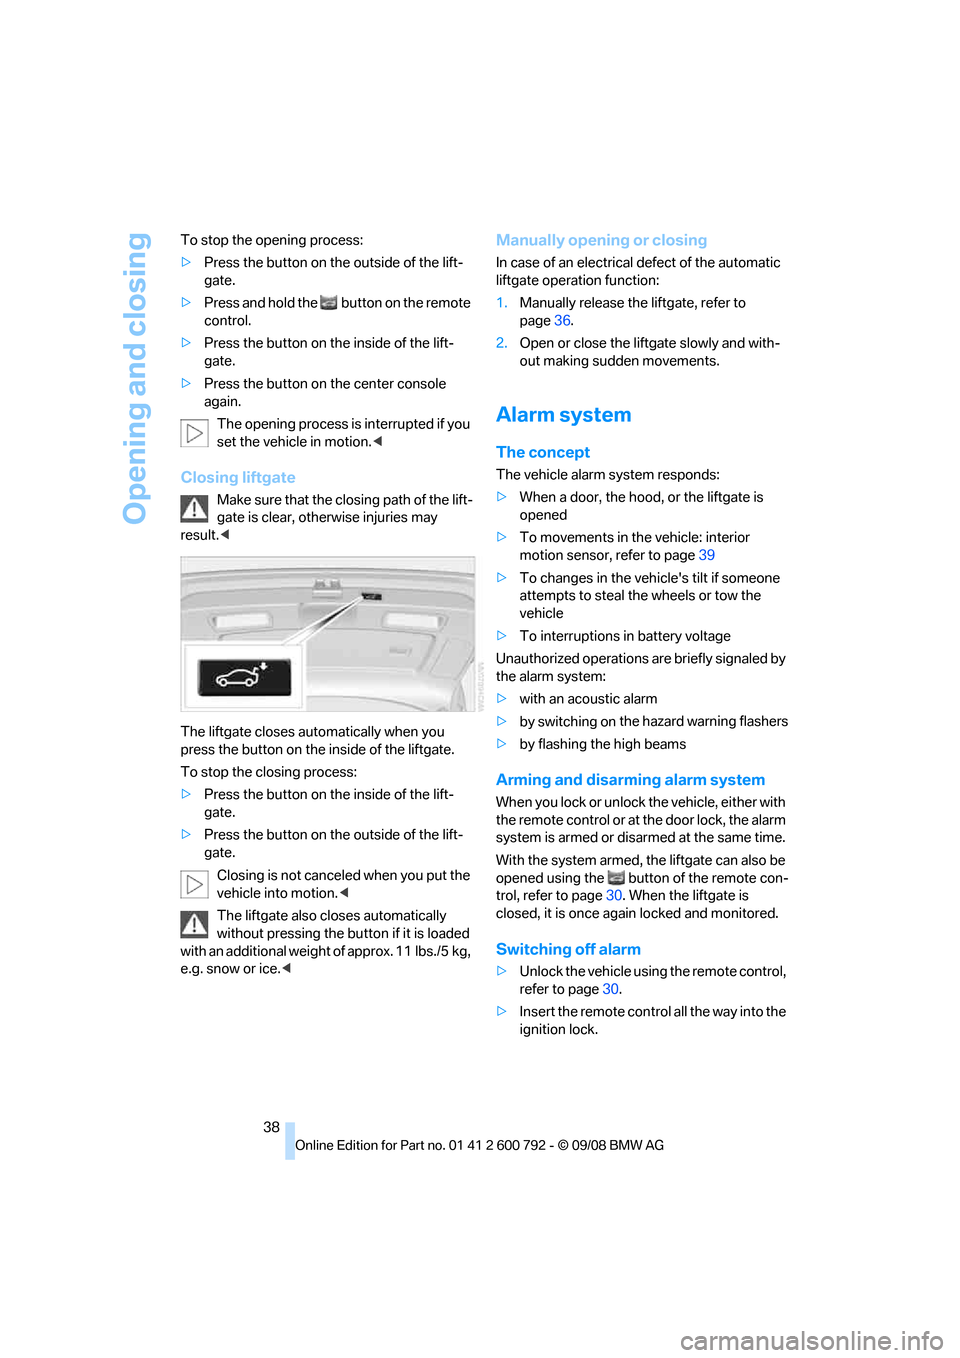
The liftgate closes automatically when you
press the button on the inside of the liftgate.
To stop the closing process:
> Press the button on the inside of the lift-
gate.
> Press the button on the outside of the lift-
gate.
Closing is not canceled when you put the
vehicle into motion. <
The liftgate also cl oses automatically
without pressing the bu tton if it is loaded
with an additional weight of approx. 11 lbs./5 kg,
e.g. snow or ice.<
Manually opening or closing
In case of an electrical defect of the automatic
liftgate operation function:
1. Manually rele ase the liftgate, refer to
page 36.
2. Open or close the liftgate slowly and with-
out making sudden movements.
Alarm system
The concept
The vehicle alarm system responds:
>When a door, the hood, or the liftgate is
opened
> To movements in the vehicle: interior
motion sensor, refer to page 39
> To changes in the vehicle's tilt if someone
attempts to steal th e wheels or tow the
vehicle
> To interruptions in battery voltage
Unauthorized operations are briefly signaled by
the alarm system:
> with an acoustic alarm
> by switching on
the hazard warning flashers
> by flashing the high beams
Arming and disarming alarm system
When you lock or unlock the vehicle, either with
the remote control or at the door lock, the alarm
system is armed or disarmed at the same time.
With the system armed, the liftgate can also be
opened using the button of the remote con-
trol, refer to page 30. When the liftgate is
closed, it is once again locked and monitored.
Switching off alarm
> Unlock the vehicle using the remote control,
refer to page 30.
> Insert the remote contro l all the way into the
ignition lock.
Page 52 of 317
Adjusting
50
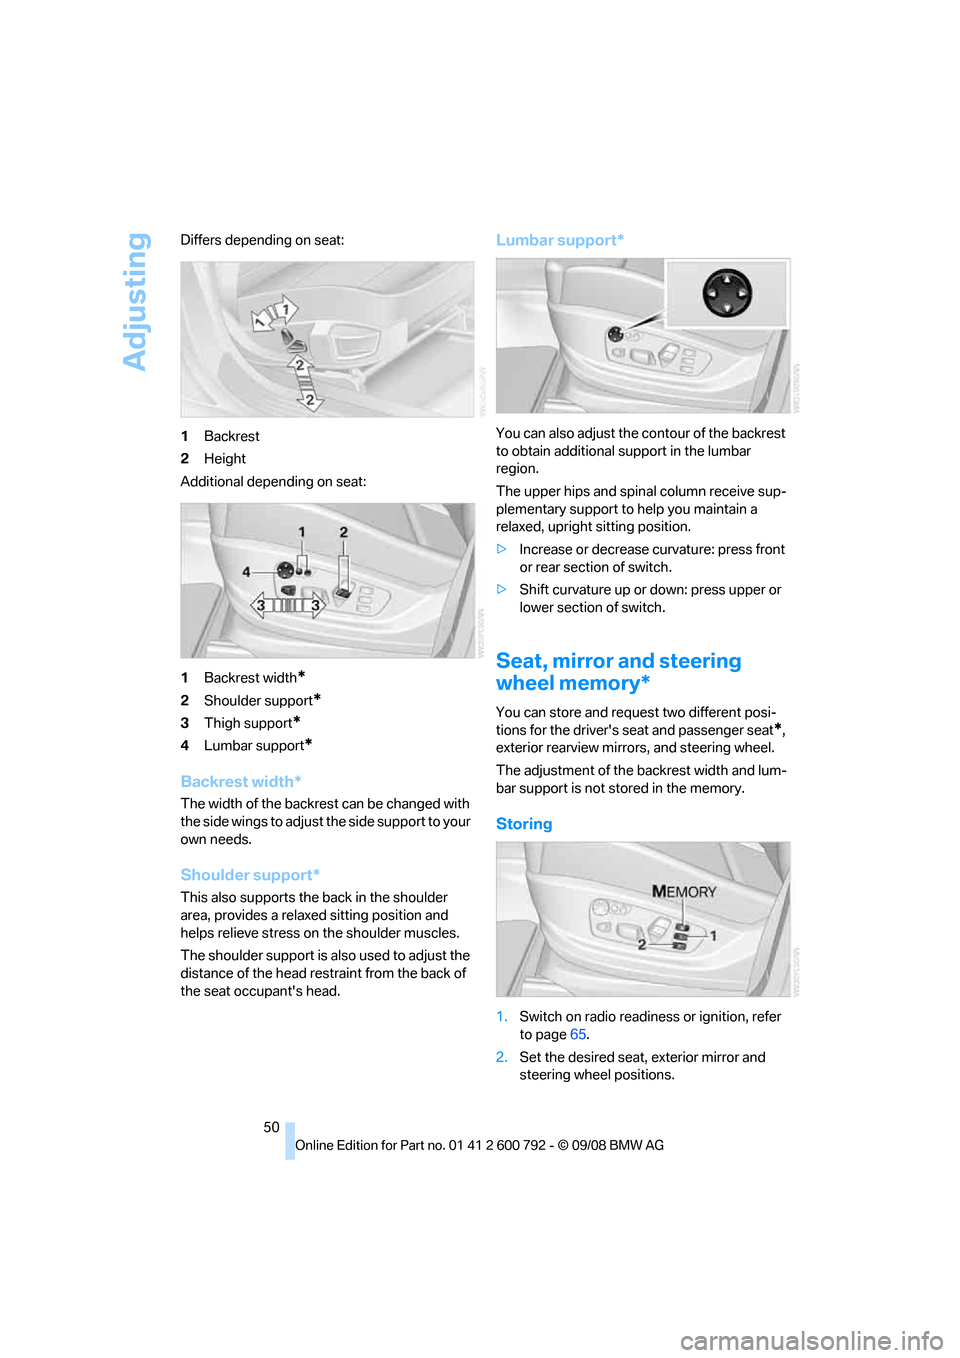
Differs depending on seat:
1
Backrest
2 Height
Additional depending on seat:
1 Backrest width
*
2Shoulder support*
3Thigh support*
4Lumbar support*
Backrest width*
The width of the backrest can be changed with
the side wings to adjust the side support to your
own needs.
Shoulder support*
This also supports the back in the shoulder
area, provides a relaxed sitting position and
helps relieve stress on the shoulder muscles.
The shoulder support is also used to adjust the
distance of the head restraint from the back of
the seat occupant's head.
Lumbar support*
You can also adjust the contour of the backrest
to obtain additional support in the lumbar
region.
The upper hips and spinal column receive sup-
plementary support to help you maintain a
relaxed, upright sitting position.
> Increase or decrease curvature: press front
or rear section of switch.
> Shift curvature up or down: press upper or
lower section of switch.
Seat, mirror and steering
wheel memory*
You can store and request two different posi-
tions for the driver's seat and passenger seat
*,
exterior rearview mirror s, and steering wheel.
The adjustment of the backrest width and lum-
bar support is not stored in the memory.
Storing
1. Switch on radio readiness or ignition, refer
to page 65.
2. Set the desired seat, exterior mirror and
steering wheel positions.
Page 53 of 317
Controls
51Reference
At a glance
Driving tips
Communications
Navigation
Entertainment
Mobility
3.Press the button:
The LED in the button lights up.
4. Press the desired memory button 1 or 2:
The LED goes out.
The positions of the driver's seat, the exte-
rior rearview mirrors, and steering wheel are
stored for the remote control currently in
use.
Calling up automatically
You can choose when the stored positions of
the driver's seat, exterior rearview mirrors, and
steering wheel are activated.
> Calling up when unlocking vehicle
> Calling up when opening driver's door
When using this feat ure, always make
sure that the footwell behind the driver's
seat is empty and unobstructed. Failure to do
so could cause injury to persons or damage to
objects behind the seat as a result of a rearward
movement of the seat. <
The system cancels the adjustment procedure
when you briefly press one of the seat adjust-
ment switches or one of the memory buttons.
Selecting calling up automatically
iDrive, for operating principle refer to page 16.
1. Open the start menu.
2. Press the controller to open the menu.
3. Select "Settings" and press the controller.
4. Select "Vehicle / Tire s" and press the con-
troller.
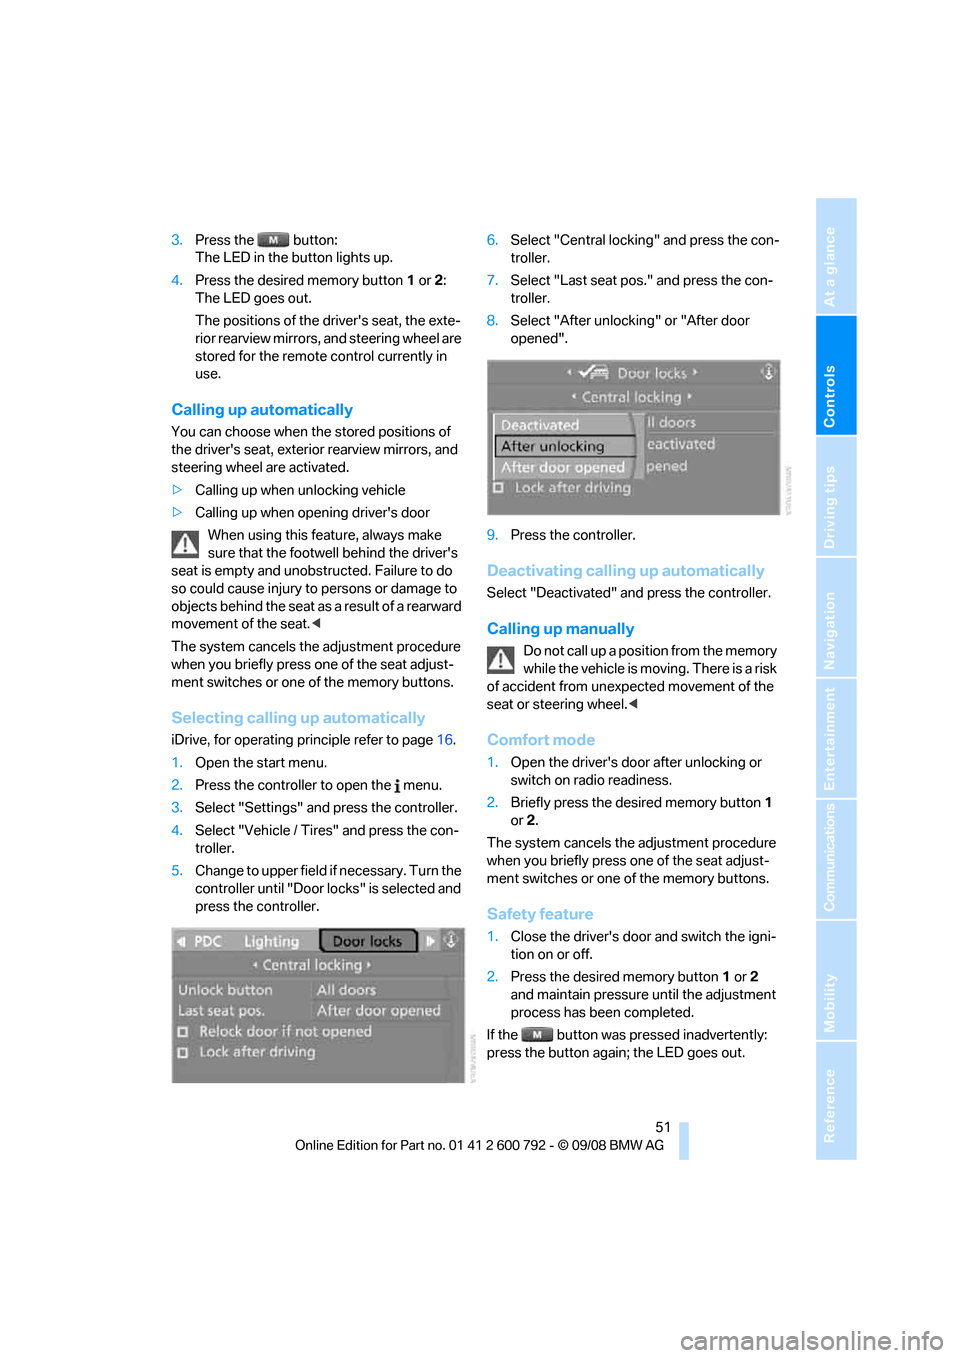
5. Change to upper field if necessary. Turn the
controller until "Door locks" is selected and
press the controller. 6.
Select "Central locking" and press the con-
troller.
7. Select "Last seat pos." and press the con-
troller.
8. Select "After unlock ing" or "After door
opened".
9. Press the controller.
Deactivating calling up automatically
Select "Deactivated" an d press the controller.
Calling up manually
Do not call up a position from the memory
while the vehicle is moving. There is a risk
of accident from unexpected movement of the
seat or steering wheel. <
Comfort mode
1.Open the driver's door after unlocking or
switch on radio readiness.
2. Briefly press the de sired memory button 1
or 2.
The system cancels the adjustment procedure
when you briefly press one of the seat adjust-
ment switches or one of the memory buttons.
Safety feature
1. Close the driver's door and switch the igni-
tion on or off.
2. Press the desired memory button 1 or 2
and maintain pressure until the adjustment
process has been completed.
If the button was pressed inadvertently:
press the button again; the LED goes out.
Page 61 of 317
Controls
59Reference
At a glance
Driving tips
Communications
Navigation
Entertainment
Mobility
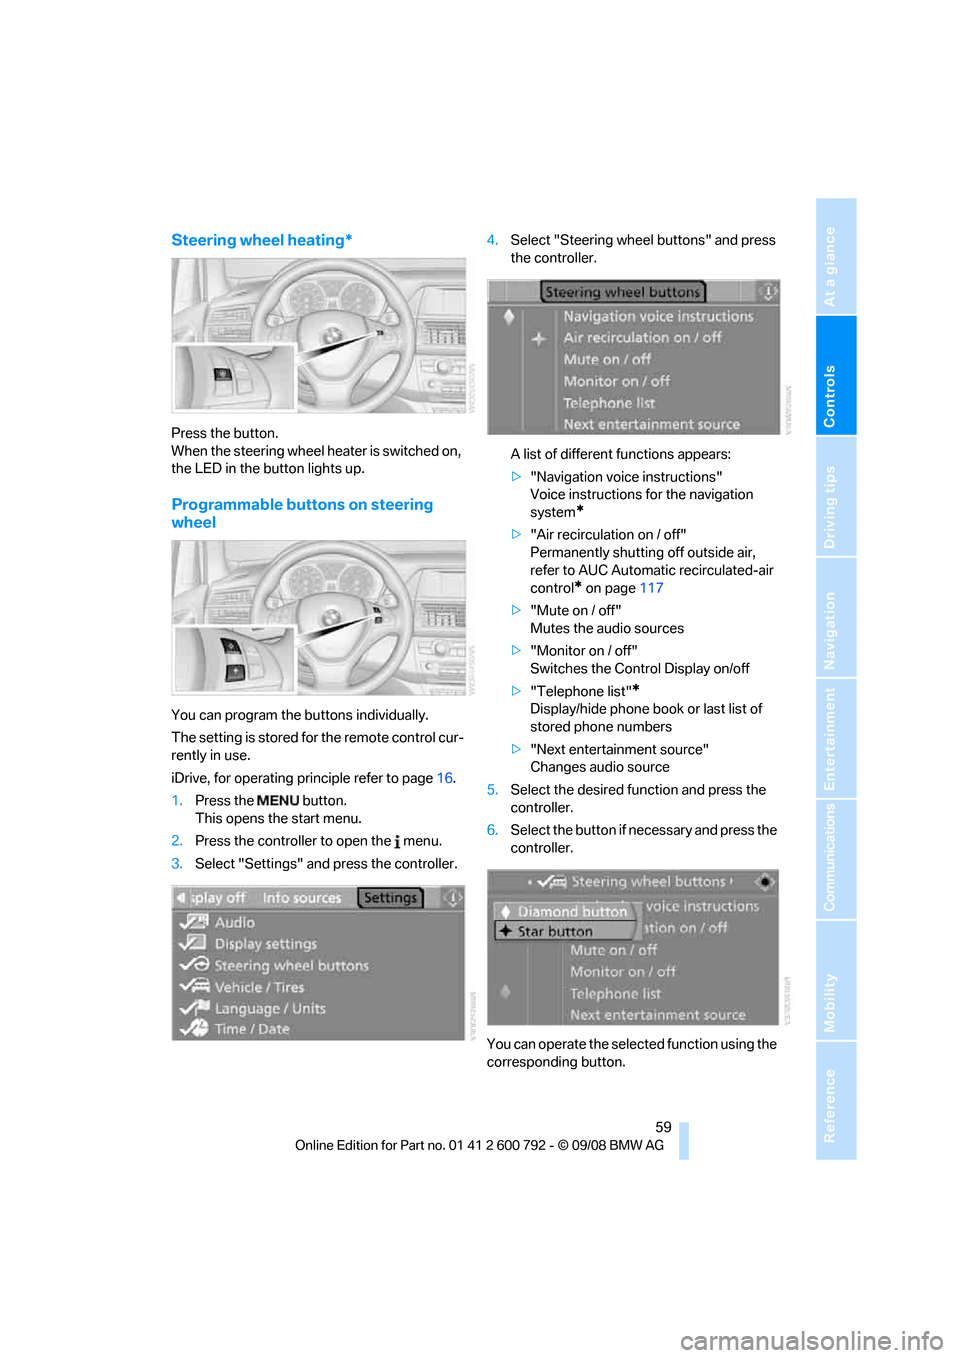
Steering wheel heating*
Press the button.
When the steering wheel heater is switched on,
the LED in the button lights up.
Programmable buttons on steering
wheel
You can program the buttons individually.
The setting is stored for the remote control cur-
rently in use.
iDrive, for operating principle refer to page16.
1. Press the button.
This opens the start menu.
2. Press the controller to open the menu.
3. Select "Settings" and press the controller. 4.
Select "Steering wheel buttons" and press
the controller.
A list of different functions appears:
>"Navigation voice instructions"
Voice instructions for the navigation
system
*
>"Air recirculation on / off"
Permanently shutting off outside air,
refer to AUC Automatic recirculated-air
control
* on page 117
> "Mute on / off"
Mutes the audio sources
> "Monitor on / off"
Switches the Control Display on/off
> "Telephone list"
*
Display/hide phone book or last list of
stored phone numbers
> "Next entertainment source"
Changes audio source
5. Select the desired function and press the
controller.
6. Select the button if ne cessary and press the
controller.
You can operate the selected function using the
corresponding button.
Page 71 of 317
Controls
69Reference
At a glance
Driving tips
Communications
Navigation
Entertainment
Mobility
>the vehicle is braked to a stop during driv-
ing.
In the instrument panel, the indicator
lamp changes from green to red and
the indication AUTO H goes out.
Indicator lamp on Canadian models.
Before you start to driv e, either release the
parking brake manually, refer to page 67, or
reactivate Automatic Hold, refer to page68.
Before leaving the vehi cle with the engine
running, shift the selector lever into posi-
tion P of the automatic transmission and make
sure that the parking brake is set. Otherwise,
the vehicle may begin to roll. <
Malfunction
If the parking brake fails or malfunctions, secure
the vehicle against rolling, e.g. with a wheel
chock, if you leave the vehicle.
Releasing parking brake manually
In the event of an electrical power loss or elec-
trical malfunction, you can release the parking
brake manually.
Before manually re leasing the parking
brake and each time you park the vehicle
without setting the park ing brake, make sure
that the automatic transmission is in position P,
refer to page 71. Be sure to pay attention to the
information in the instrument panel.
In addition, secure the vehicle against rolling,
e.g. with a wheel chock. Otherwise there is a
danger that the vehicle could roll if parked on a
steep slope. <
If it becomes necessary to also release the
transmission lock of the automatic transmission
manually, follow this sequence:
1. If necessary, start by releasing the parking
brake manually.
2. Then release the auto matic transmission's
transmission lock manually, refer to
page 72.
Jump starting and towing , refer to information
starting on page 280.
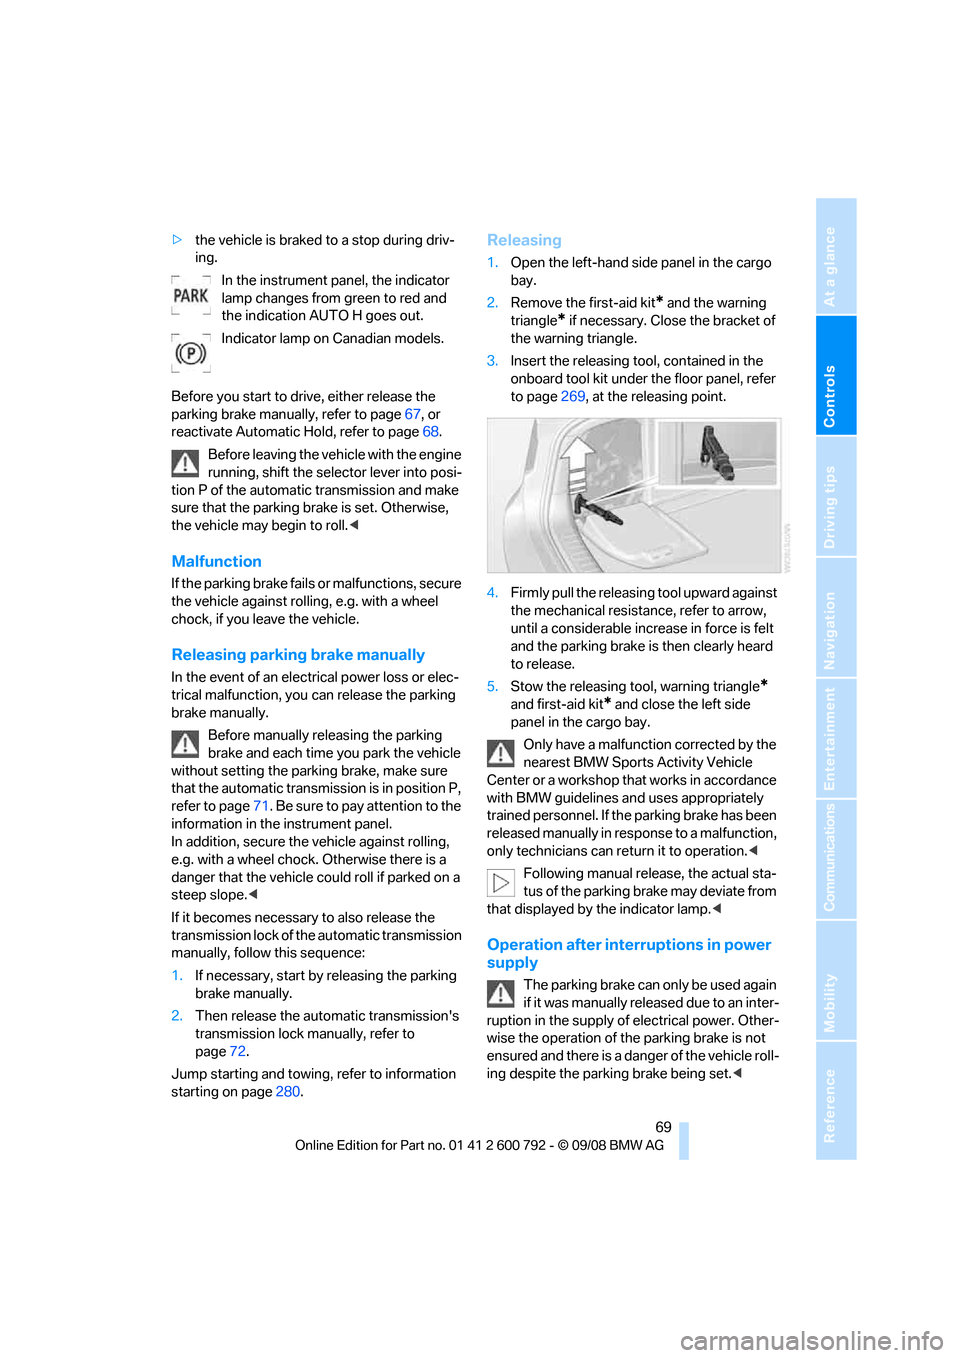
Releasing
1.Open the left-hand side panel in the cargo
bay.
2. Remove the first-aid kit
* and the warning
triangle
* if necessary. Close the bracket of
the warning triangle.
3. Insert the releasing tool, contained in the
onboard tool kit under the floor panel, refer
to page 269, at the releasing point.
4. Firmly pull the releasing tool upward against
the mechanical resistance, refer to arrow,
until a considerable incr ease in force is felt
and the parking brake is then clearly heard
to release.
5. Stow the releasing tool, warning triangle
*
and first-aid kit* and close the left side
panel in the cargo bay.
Only have a malfunction corrected by the
nearest BMW Sports Activity Vehicle
Center or a workshop that works in accordance
with BMW guidelines an d uses appropriately
trained personnel. If the parking brake has been
released manually in response to a malfunction,
only technicians can re turn it to operation.<
Following manual release, the actual sta-
tus of the parking brake may deviate from
that displayed by the indicator lamp. <
Operation after interruptions in power
supply
The parking brake can only be used again
if it was manually rele ased due to an inter-
ruption in the supply of electrical power. Other-
wise the operation of the parking brake is not
ensured and there is a danger of the vehicle roll-
ing despite the parking brake being set. <
Page 73 of 317
Controls
71Reference
At a glance
Driving tips
Communications
Navigation
Entertainment
Mobility
The transmission automatically shifts into
park if you release the driver's safety belt
and open the driver's door with the engine run-
ning while in re verse or drive.
The picture from the rear view camera
* and
PDC Park Distance Control
* on the Control
Display is hidden. <
R Reverse
Select only with the vehicle stationary.
An interlock prevents inadvertent gearshifts
into transmission position R. To deactivate the
interlock, press the release button 1.
P Park
Select only with the vehicle stationary. The rear
wheels are locked.
P is engaged automatically as soon as
you switch off the engine unless N is
engaged and on vehicles with comfort access
the remote control is inserted in the ignition
lock, refer to page 65.<
N Neutral
Can, for example, be engaged in automatic car
washes. The vehicle can roll.
N remains engaged even after the engine
is switched off whenever you leave the
remote control in the ignition lock. This function
is used, for example, in a car wash, refer to
page 66. After approx. 30 minutes P is auto-
matically engaged. <
D Drive, automatic position
Position for normal vehi cle operation. All for-
ward gears are available.
Under normal operating conditions, the fuel
consumption is lowest when driving in posi-
tion D.
Kick-down
The kick-down mode provides maximum accel-
eration.
Press the accelerato r pedal beyond the
increased resistance at full throttle.
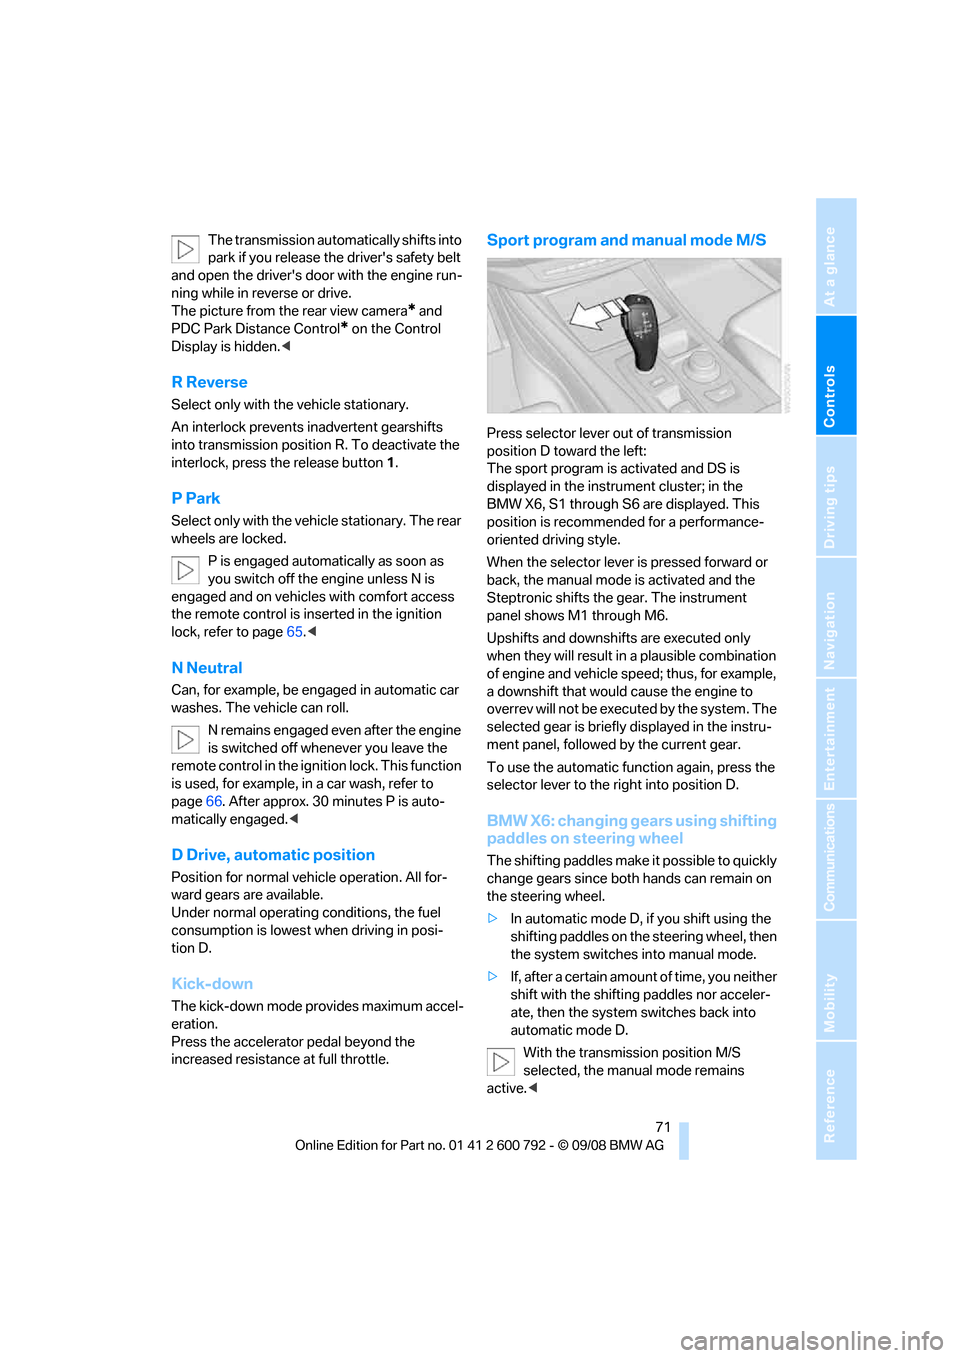
Sport program and manual mode M/S
Press selector lever out of transmission
position D toward the left:
The sport program is activated and DS is
displayed in the instru ment cluster; in the
BMW X6, S1 through S6 are displayed. This
position is recommend ed for a performance-
oriented driving style.
When the selector lever is pressed forward or
back, the manual mode is activated and the
Steptronic shifts the gear. The instrument
panel shows M1 through M6.
Upshifts and downshifts are executed only
when they will result in a plausible combination
of engine and vehicle speed; thus, for example,
a downshift that would cause the engine to
overrev will not be executed by the system. The
selected gear is briefly displayed in the instru-
ment panel, followed by the current gear.
To use the automatic func tion again, press the
selector lever to the right into position D.
BMW X6: changing gears using shifting
paddles on steering wheel
The shifting paddles make it possible to quickly
change gears since both hands can remain on
the steering wheel.
> In automatic mode D, if you shift using the
shifting paddles on the steering wheel, then
the system switches into manual mode.
> If, after a certain amount of time, you neither
shift with the shifting paddles nor acceler-
ate, then the system switches back into
automatic mode D.
With the transmission position M/S
selected, the manual mode remains
active.<
Page 96 of 317
Technology for comfort, convenience and safety
94
Parking using pathway and turning
circle lines
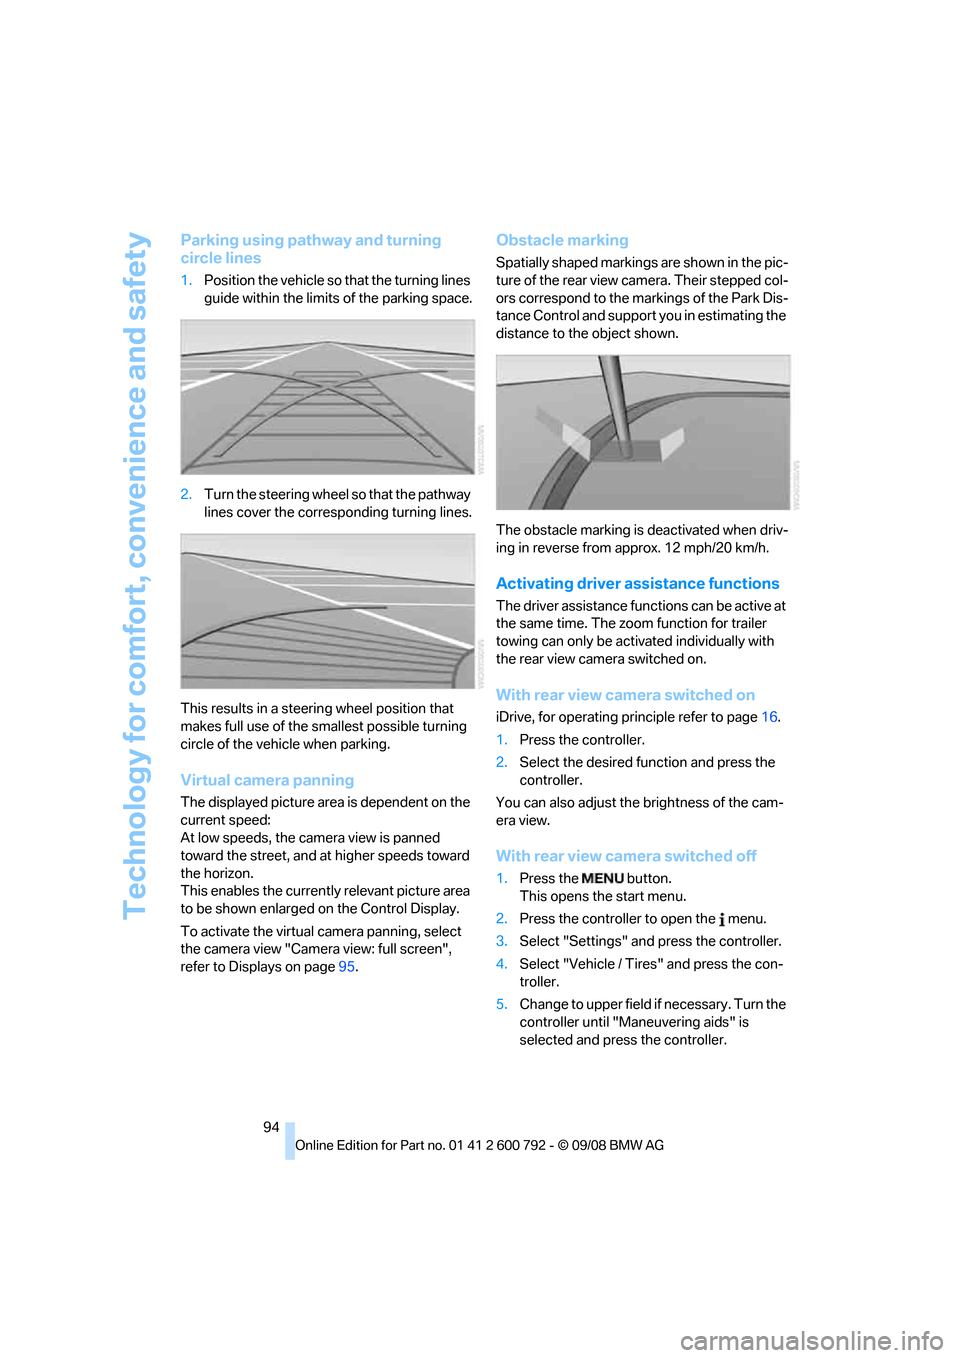
1.Position the vehicle so that the turning lines
guide within the limits of the parking space.
2. Turn the steering wheel so that the pathway
lines cover the corresp onding turning lines.
This results in a steerin g wheel position that
makes full use of the smallest possible turning
circle of the vehicle when parking.
Virtual camera panning
The displayed picture area is dependent on the
current speed:
At low speeds, the camera view is panned
toward the street, and at higher speeds toward
the horizon.
This enables the currentl y relevant picture area
to be shown enlarged on the Control Display.
To activate the virtual camera panning, select
the camera view "Camera view: full screen",
refer to Displays on page 95.
Obstacle marking
Spatially shaped markings are shown in the pic-
ture of the rear view camera. Their stepped col-
ors correspond to the markings of the Park Dis-
tance Control and support you in estimating the
distance to the object shown.
The obstacle marking is deactivated when driv-
ing in reverse from approx. 12 mph/20 km/h.
Activating driver a ssistance functions
The driver assistance functions can be active at
the same time. The zoom function for trailer
towing can only be acti vated individually with
the rear view camera switched on.
With rear view camera switched on
iDrive, for operating pr inciple refer to page16.
1. Press the controller.
2. Select the desired fu nction and press the
controller.
You can also adjust the brightness of the cam-
era view.
With rear view ca mera switched off
1.Press the button.
This opens the start menu.
2. Press the controller to open the menu.
3. Select "Settings" an d press the controller.
4. Select "Vehicle / Tire s" and press the con-
troller.
5. Change to upper field if necessary. Turn the
controller until "Maneuvering aids" is
selected and press the controller.
Page 98 of 317
Technology for comfort, convenience and safety
96
Cleaning rear view camera
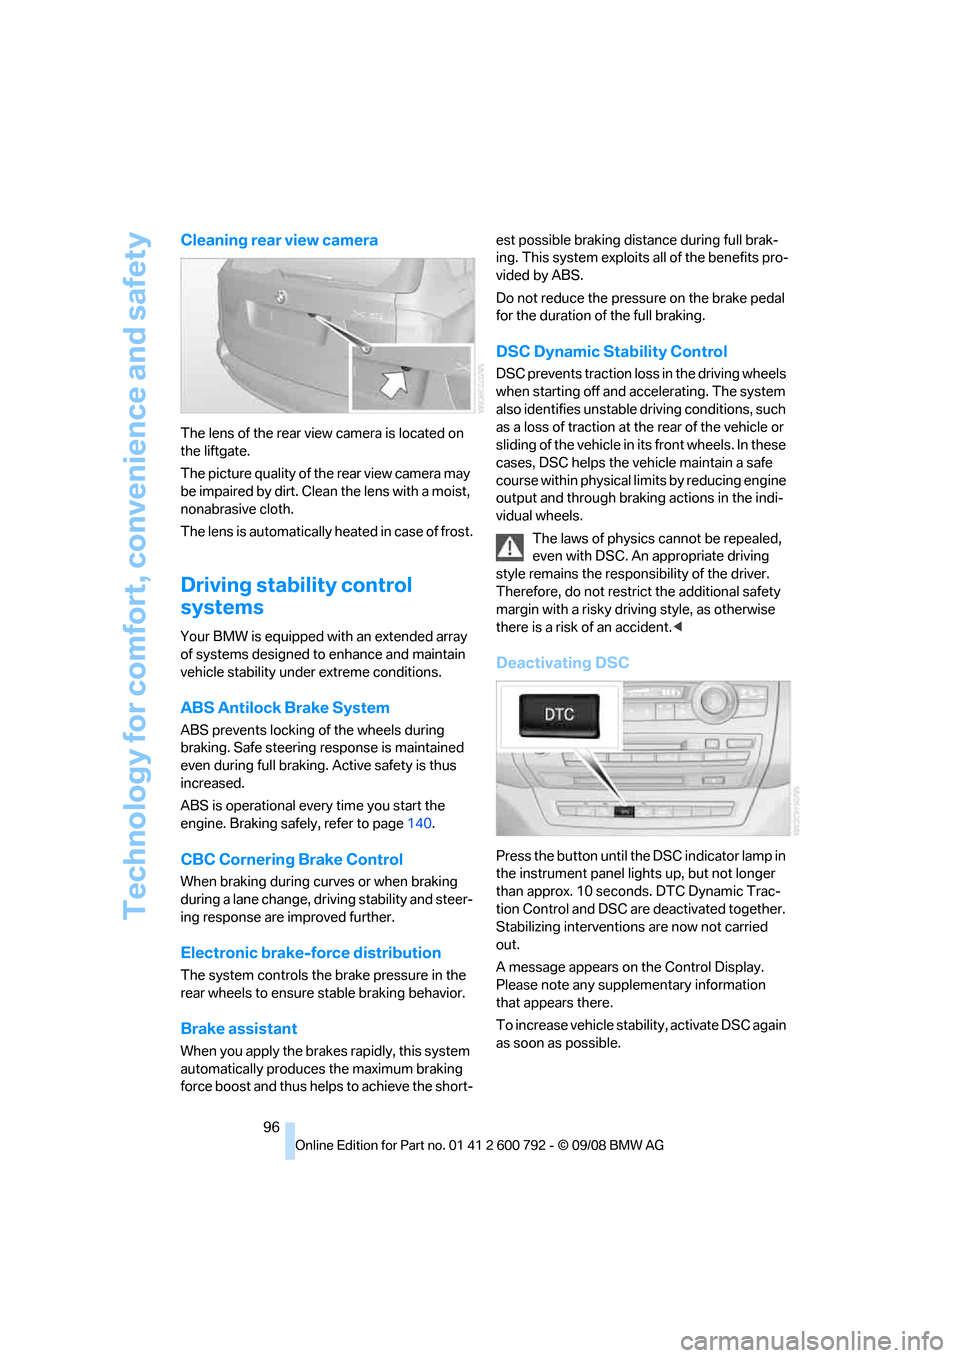
The lens of the rear view camera is located on
the liftgate.
The picture quality of the rear view camera may
be impaired by dirt. Clean the lens with a moist,
nonabrasive cloth.
The lens is automatically heated in case of frost.
Driving stability control
systems
Your BMW is equipped wi th an extended array
of systems designed to enhance and maintain
vehicle stability under extreme conditions.
ABS Antilock Brake System
ABS prevents locking of the wheels during
braking. Safe steering response is maintained
even during full braking. Active safety is thus
increased.
ABS is operational every time you start the
engine. Braking safely, refer to page 140.
CBC Cornering Brake Control
When braking during curves or when braking
during a lane change, dr iving stability and steer-
ing response are improved further.
Electronic brake-force distribution
The system controls the brake pressure in the
rear wheels to ensure st able braking behavior.
Brake assistant
When you apply the brakes rapidly, this system
automatically produces the maximum braking
force boost and thus helps to achieve the short- est possible braking distance during full brak-
ing. This system exploits all of the benefits pro-
vided by ABS.
Do not reduce th
e pressure on the brake pedal
for the duration of the full braking.
DSC Dynamic Stability Control
DSC prevents traction lo ss in the driving wheels
when starting off and accelerating. The system
also identifies unstable driving conditions, such
as a loss of traction at the rear of the vehicle or
sliding of the vehicle in its front wheels. In these
cases, DSC helps the vehicle maintain a safe
course within physical lim its by reducing engine
output and through braking actions in the indi-
vidual wheels.
The laws of physics cannot be repealed,
even with DSC. An appropriate driving
style remains the responsibility of the driver.
Therefore, do not restrict the additional safety
margin with a risky driving style, as otherwise
there is a risk of an accident. <
Deactivating DSC
Press the button until the DSC indicator lamp in
the instrument panel lights up, but not longer
than approx. 10 seconds. DTC Dynamic Trac-
tion Control and DSC ar e deactivated together.
Stabilizing intervention s are now not carried
out.
A message appears on the Control Display.
Please note any supplementary information
that appears there.
To increase vehicle stability, activate DSC again
as soon as possible.