ESP BMW X5M 2009 E70 Owner's Manual
[x] Cancel search | Manufacturer: BMW, Model Year: 2009, Model line: X5M, Model: BMW X5M 2009 E70Pages: 317, PDF Size: 9.56 MB
Page 7 of 317
5Reference
At a glance
Controls
Driving tips
Communications
Navigation
Entertainment
Mobility
The individual vehicle
When purchasing your BMW, you have decided
in favor of a model with individualized equip-
ment and features. This Owner's Manual
describes the entire array of options and equip-
ment available with a specific BMW model.
Please bear in mind th at the manual may con-
tain information on accessories and equipment
that you have not specifie d for your own vehicle.
Sections describing options and special equip-
ment are marked by asterisks
* to assist you in
identifying possible differences between the
descriptions in this ma nual and your own vehi-
cle's equipment.
If equipment in your BM W is not described in
this Owner's Manual, plea se refer to the accom-
panying Supplementary Owner's Manuals.
Editorial notice
BMW pursues a policy of continuous, ongoing
development that is conc eived to ensure that
our vehicles continue to embody the highest
quality and safety stan dards combined with
advanced, state-of-the-art technology. For this
reason, it is possible that the features described
in this Owner's Manual could differ from those
on your vehicle.
For your own safety
Maintenance and repairs
Advanced technology, e.g. the use of
modern materials and high-performance
electronics, requires sp ecially adapted mainte-
nance and repair methods. Therefore, have cor-
responding work on your BMW performed only
by your BMW Sports Activity Vehicle Center or
a workshop that works according to BMW
repair procedures with correspondingly trained
personnel. If this work is not carried out prop-
erly, there is a danger of subsequent damage
and related safety hazards. <
Page 15 of 317
At a glance
13Reference
Controls
Driving tips
Communications
Navigation
Entertainment
Mobility
Indicator and warning lamps
The concept
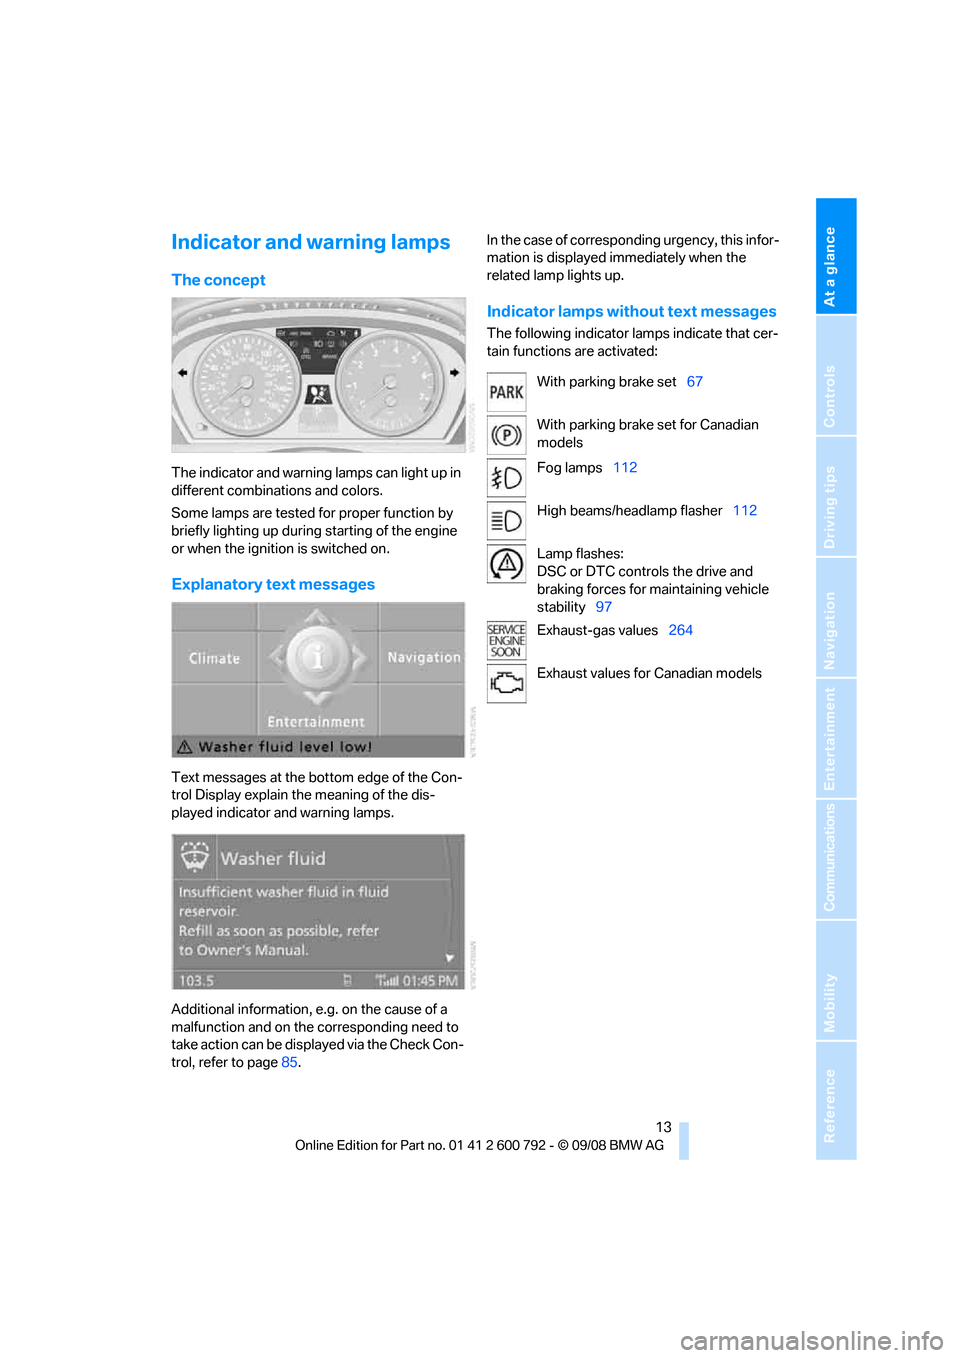
The indicator and warning lamps can light up in
different combinations and colors.
Some lamps are tested for proper function by
briefly lighting up during starting of the engine
or when the ignition is switched on.
Explanatory text messages
Text messages at the bottom edge of the Con-
trol Display explain the meaning of the dis-
played indicator and warning lamps.
Additional information, e.g. on the cause of a
malfunction and on the corresponding need to
take action can be disp layed via the Check Con-
trol, refer to page 85. In the case of corresponding urgency, this infor-
mation is displayed immediately when the
related lamp lights up.
Indicator lamps without text messages
The following indicator la
mps indicate that cer-
tain functions are activated:
With parking brake set 67
With parking brake set for Canadian
models
Fog lamps 112
High beams/headlamp flasher 112
Lamp flashes:
DSC or DTC controls the drive and
braking forces for maintaining vehicle
stability 97
Exhaust-gas values 264
Exhaust values fo r Canadian models
Page 20 of 317
iDrive
18
Opening menu items of start menu
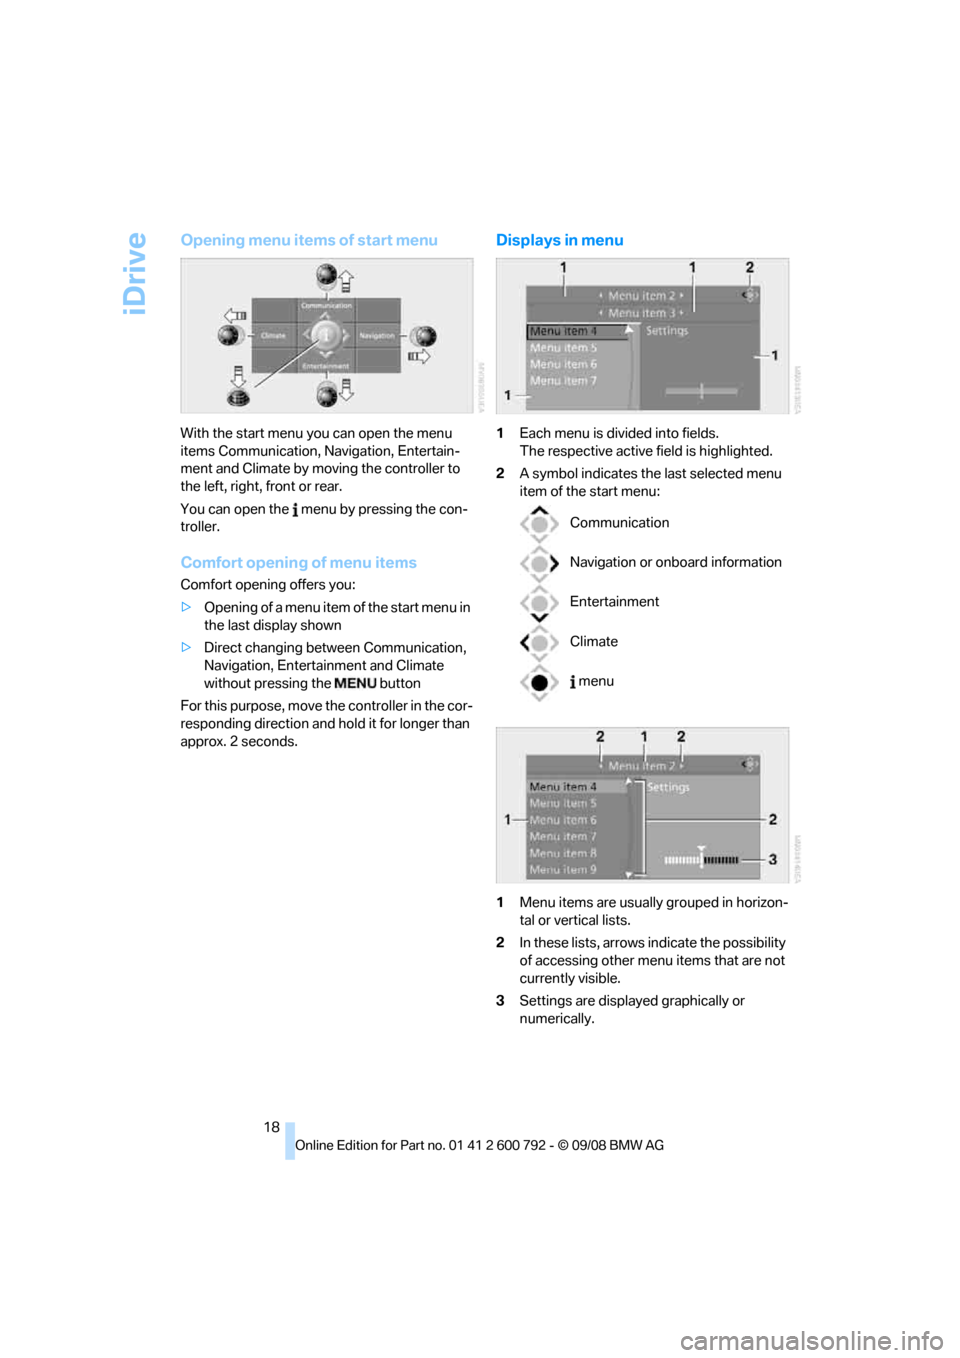
With the start menu you can open the menu
items Communication, Navigation, Entertain-
ment and Climate by moving the controller to
the left, right, front or rear.
You can open the menu by pressing the con-
troller.
Comfort opening of menu items
Comfort opening offers you:
> Opening of a menu item of the start menu in
the last display shown
> Direct changing between Communication,
Navigation, Entertainment and Climate
without pressing the button
For this purpose, move the controller in the cor-
responding direction and hold it for longer than
approx. 2 seconds.
Displays in menu
1 Each menu is divided into fields.
The respective active field is highlighted.
2 A symbol indicates the last selected menu
item of the start menu:
1 Menu items are usually grouped in horizon-
tal or vertical lists.
2 In these lists, arrows indicate the possibility
of accessing other menu items that are not
currently visible.
3 Settings are displayed graphically or
numerically.
Communication
Navigation or onboard information
Entertainment
Climate
menu
Page 25 of 317
At a glance
23Reference
Controls
Driving tips
Communications
Navigation
Entertainment
Mobility
Voice activation system
The concept
The voice activation system allows you to con-
trol operation of various vehicle systems with-
out ever removing your hands from the steering
wheel.
Individual menu items on the Control Display
can be spoken as commands. This frees you of
having to use the controller.
The voice activation system transforms your
oral commands into control signals for the
selected systems and provides support in the
form of instructions or questions.
The voice activation system uses a special
microphone located in th e area of the interior
rearview mirror, refer to page 14.
Precondition
Via iDrive, set the langua ge that applies for the
voice activation system in order to enable iden-
tification of the spoken commands. To set the
language of iDrive, refer to page 90.
Symbols in Owner's Manual
Voice commands
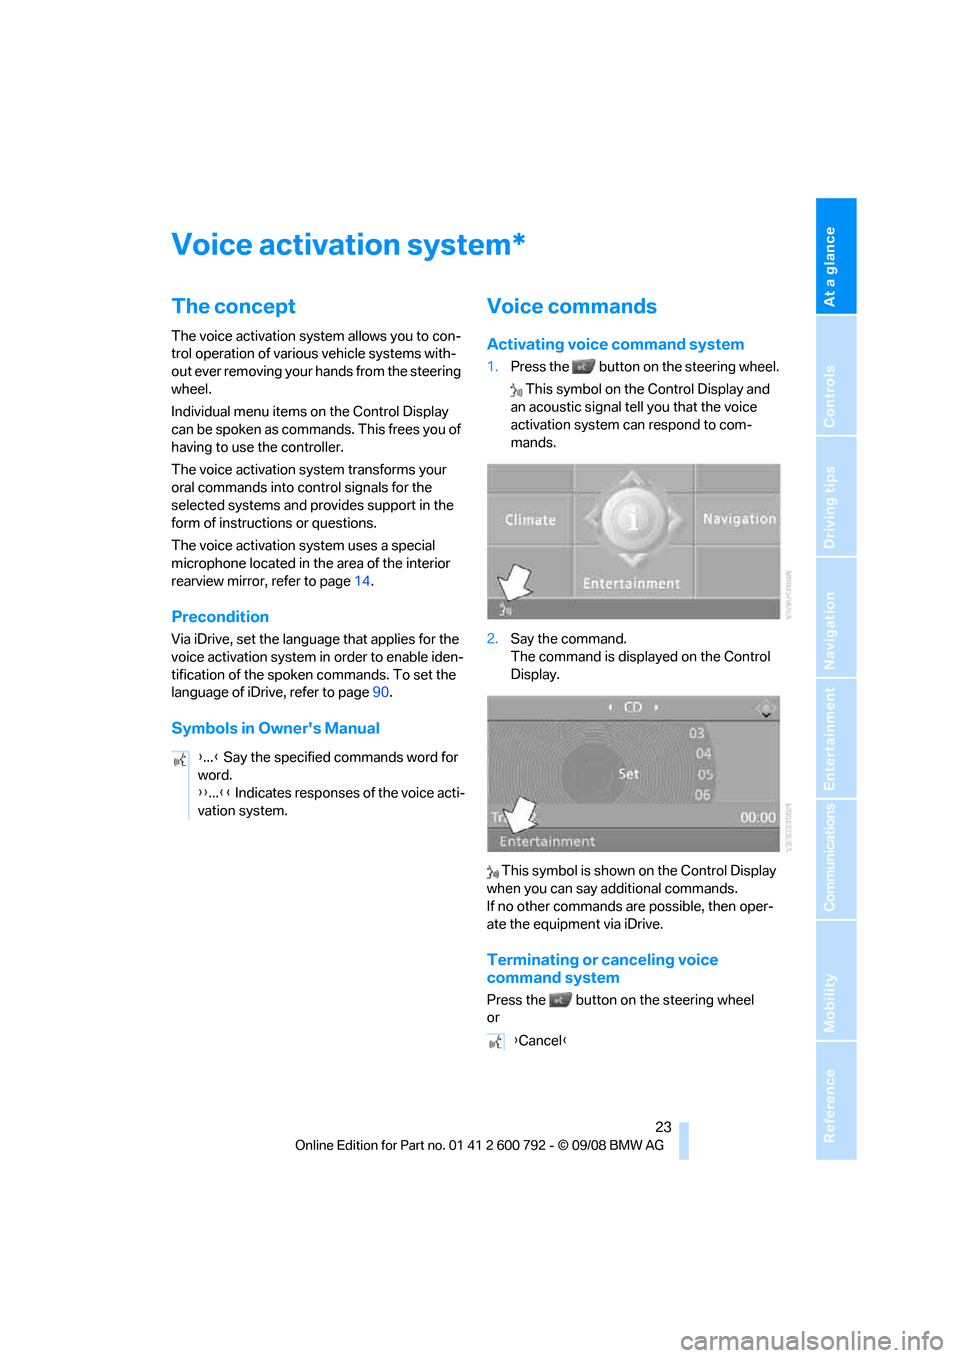
Activating voice command system
1.Press the button on the steering wheel.
This symbol on the Control Display and
an acoustic signal tell you that the voice
activation system can respond to com-
mands.
2. Say the command.
The command is displayed on the Control
Display.
This symbol is shown on the Control Display
when you can say a dditional commands.
If no other commands are possible, then oper-
ate the equipment via iDrive.
Terminating or canceling voice
command system
Press the button on the steering wheel
or
*
{ ...} Say the specified commands word for
word.
{{ ...}} Indicates responses of the voice acti-
vation system.
{ Cancel }
Page 30 of 317
Opening and closing
28
Opening and closing
Keys/remote control
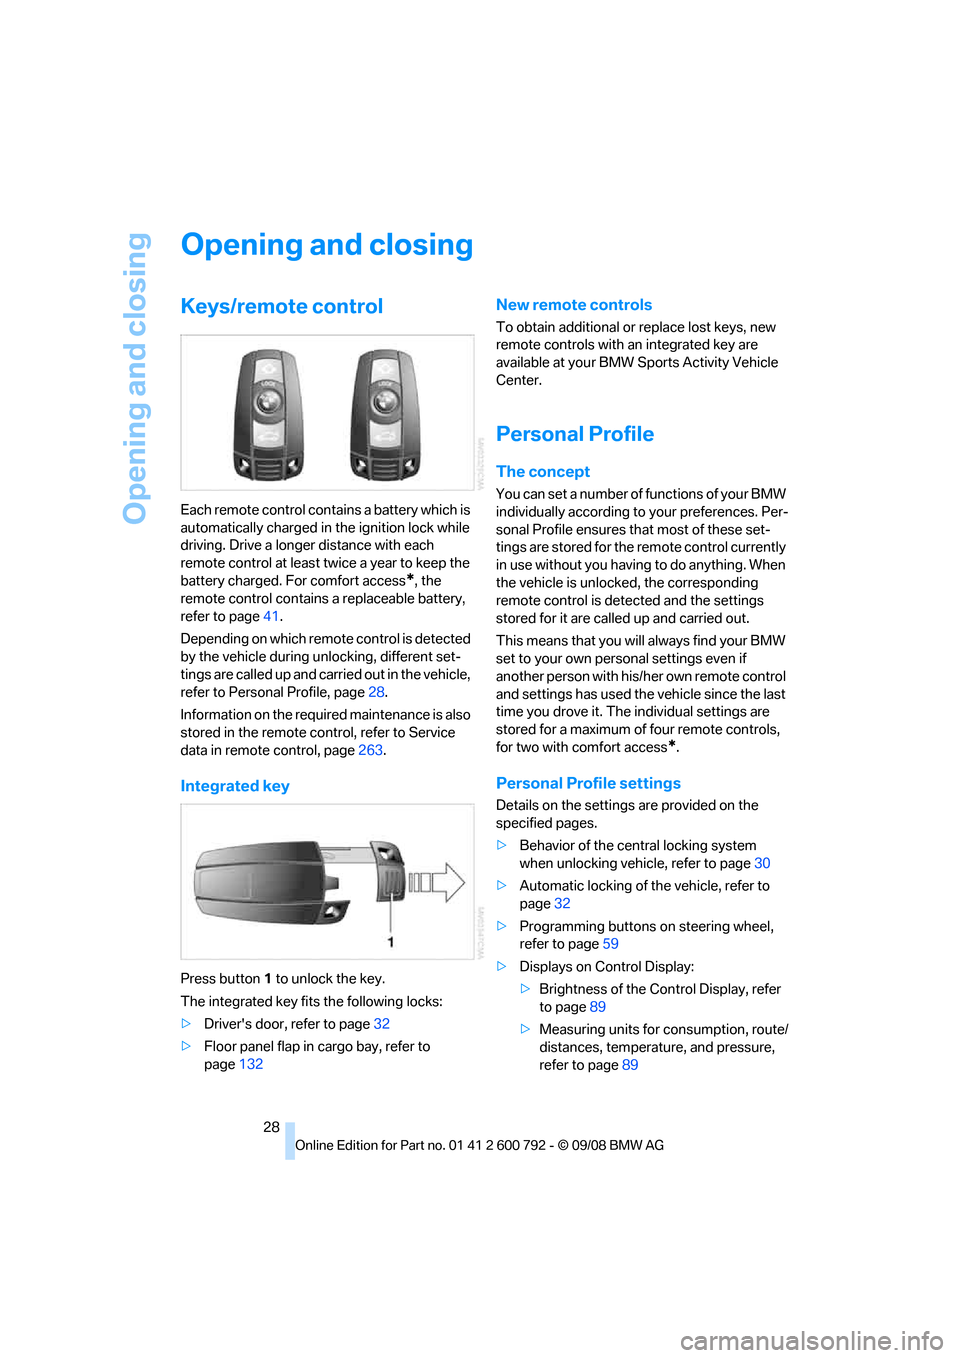
Each remote control contains a battery which is
automatically charged in the ignition lock while
driving. Drive a longer distance with each
remote control at least tw ice a year to keep the
battery charged. For comfort access
*, the
remote control contains a replaceable battery,
refer to page 41.
Depending on which remote control is detected
by the vehicle during unlocking, different set-
tings are called up and carr ied out in the vehicle,
refer to Personal Profile, page 28.
Information on the requir ed maintenance is also
stored in the remote co ntrol, refer to Service
data in remote control, page 263.
Integrated key
Press button 1 to unlock the key.
The integrated key fits the following locks:
> Driver's door, refer to page 32
> Floor panel flap in cargo bay, refer to
page 132
New remote controls
To obtain additional or replace lost keys, new
remote controls with an integrated key are
available at your BMW Sp orts Activity Vehicle
Center.
Personal Profile
The concept
You can set a number of functions of your BMW
individually according to your preferences. Per-
sonal Profile ensures that most of these set-
tings are stored for the remote control currently
in use without you having to do anything. When
the vehicle is unlocked, the corresponding
remote control is dete cted and the settings
stored for it are called up and carried out.
This means that you will always find your BMW
set to your own personal settings even if
another person with his/ her own remote control
and settings has used the vehicle since the last
time you drove it. The individual settings are
stored for a maximum of four remote controls,
for two with comfort access
*.
Personal Profile settings
Details on the settings are provided on the
specified pages.
> Behavior of the central locking system
when unlocking vehicle, refer to page 30
> Automatic locking of the vehicle, refer to
page 32
> Programming buttons
on steering wheel,
refer to page 59
> Displays on Control Display:
>Brightness of the Control Display, refer
to page 89
> Measuring units for consumption, route/
distances, temperature, and pressure,
refer to page 89
Page 40 of 317
Opening and closing
38
To stop the opening process:
>
Press the button on the outside of the lift-
gate.
> Press and hold the bu tton on the remote
control.
> Press the button on the inside of the lift-
gate.
> Press the button on the center console
again.
The opening process is interrupted if you
set the vehicle in motion. <
Closing liftgate
Make sure that the closing path of the lift-
gate is clear, otherwise injuries may
result. <
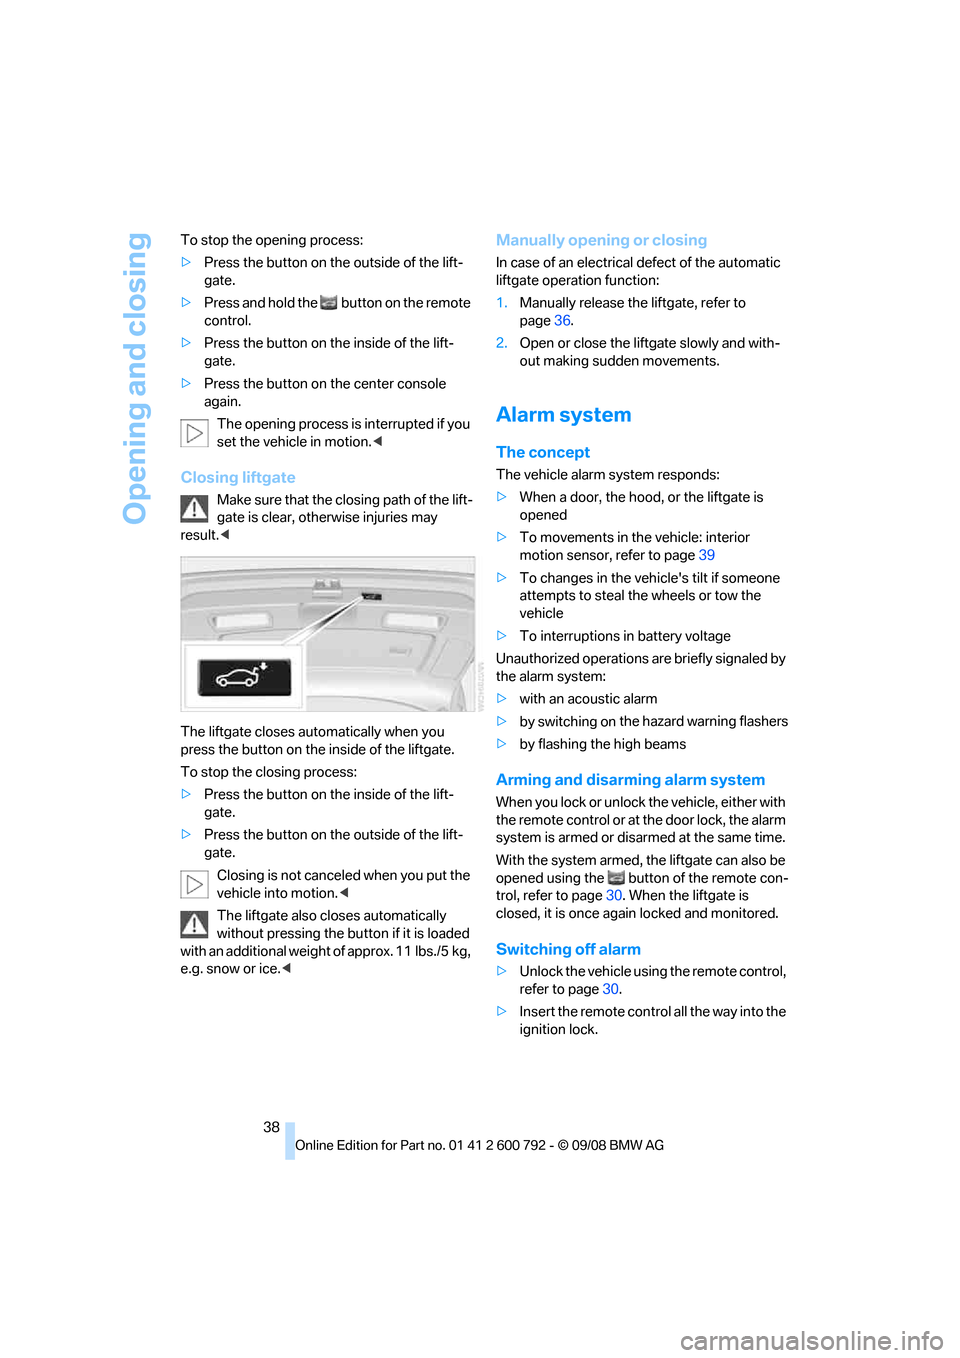
The liftgate closes automatically when you
press the button on the inside of the liftgate.
To stop the closing process:
> Press the button on the inside of the lift-
gate.
> Press the button on the outside of the lift-
gate.
Closing is not canceled when you put the
vehicle into motion. <
The liftgate also cl oses automatically
without pressing the bu tton if it is loaded
with an additional weight of approx. 11 lbs./5 kg,
e.g. snow or ice.<
Manually opening or closing
In case of an electrical defect of the automatic
liftgate operation function:
1. Manually rele ase the liftgate, refer to
page 36.
2. Open or close the liftgate slowly and with-
out making sudden movements.
Alarm system
The concept
The vehicle alarm system responds:
>When a door, the hood, or the liftgate is
opened
> To movements in the vehicle: interior
motion sensor, refer to page 39
> To changes in the vehicle's tilt if someone
attempts to steal th e wheels or tow the
vehicle
> To interruptions in battery voltage
Unauthorized operations are briefly signaled by
the alarm system:
> with an acoustic alarm
> by switching on
the hazard warning flashers
> by flashing the high beams
Arming and disarming alarm system
When you lock or unlock the vehicle, either with
the remote control or at the door lock, the alarm
system is armed or disarmed at the same time.
With the system armed, the liftgate can also be
opened using the button of the remote con-
trol, refer to page 30. When the liftgate is
closed, it is once again locked and monitored.
Switching off alarm
> Unlock the vehicle using the remote control,
refer to page 30.
> Insert the remote contro l all the way into the
ignition lock.
Page 42 of 317
Opening and closing
40
>
The engine can only be started if the vehicle
detects that the remote control is located in
the vehicle.
Comparison with ordinary remote
control
You can control the functions mentioned previ-
ously with the comfort access or by pressing
the buttons on the remote control. Therefore,
please familiarize yourself with the information
on opening and closing beginning on page 28
beforehand.
The special features when using comfort
access are described in the following.
Should a short delay occur when opening
or closing the windows or the glass sun-
roof
*/panorama glass sunroof*, the system
checks whether a remote control is located in
the vehicle. Please repeat opening or closing if
necessary. <
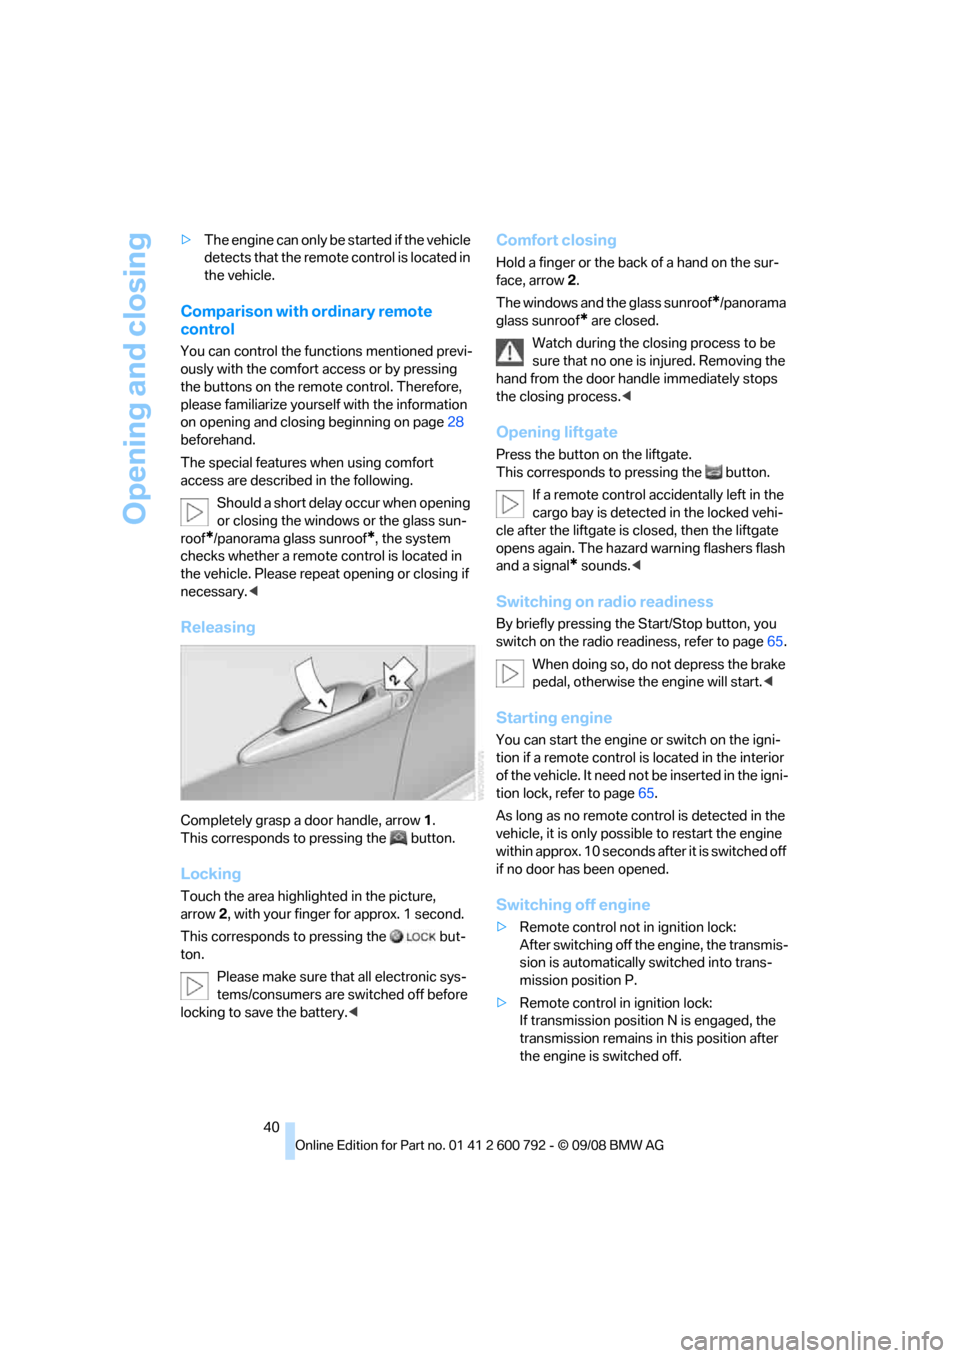
Releasing
Completely grasp a door handle, arrow 1.
This corresponds to pressing the button.
Locking
Touch the area highlighted in the picture,
arrow 2, with your finger for approx. 1 second.
This corresponds to pressing the but-
ton.
Please make sure that all electronic sys-
tems/consumers are sw itched off before
locking to save the battery. <
Comfort closing
Hold a finger or the back of a hand on the sur-
face, arrow2.
The windows and the glass sunroof
*/panorama
glass sunroof
* are closed.
Watch during the closing process to be
sure that no one is injured. Removing the
hand from the door handle immediately stops
the closing process. <
Opening liftgate
Press the button on the liftgate.
This corresponds to pr essing the button.
If a remote control acci dentally left in the
cargo bay is detected in the locked vehi-
cle after the liftgate is closed, then the liftgate
opens again. The hazard warning flashers flash
and a signal
* sounds. <
Switching on radio readiness
By briefly pressing the Start/Stop button, you
switch on the radio readiness, refer to page 65.
When doing so, do not depress the brake
pedal, otherwise the engine will start.<
Starting engine
You can start the engine or switch on the igni-
tion if a remote control is located in the interior
of the vehicle. It need not be inserted in the igni-
tion lock, refer to page 65.
As long as no remote co ntrol is detected in the
vehicle, it is only possible to restart the engine
within approx. 10 seconds after it is switched off
if no door has been opened.
Switching off engine
> Remote control not in ignition lock:
After switching off the engine, the transmis-
sion is automatically switched into trans-
mission position P.
> Remote control in ignition lock:
If transmission position N is engaged, the
transmission remains in this position after
the engine is switched off.
Page 44 of 317
Opening and closing
42
Separate switches for the rear windows are
located in the rear.
For information on using convenience opera-
tion at the door lock or
with the remote control,
refer to page 30 or32.
For information on comfort closing with comfort
access, refer to page 40.
After switching off ignition
You can still operate the windows with the
remote control remove d or the ignition
switched off for approx. 1 minute, as long as
neither of the front doors has been opened.
Pinch protection system
If the closing force rises beyond a predefined
threshold during closing, the system will stop
moving the window prior to lowering it again
slightly.
Despite the pinch protection system,
inspect the window's travel path prior to
closing it, as the safety system might fail to
detect certain kinds of obstructions, such as
thin objects, and the window would continue
closing.
Do not install any accesso ries in the range of
movement of the windows, otherwise the pinch
protection system will be impaired. <
Closing without pinch protection
system
In case of danger from outside or if, for example,
ice on the window prevents normal closing, pro-
ceed as follows:
1.Pull the switch beyond the resistance point
and hold. The pinch protection system is
limited and the window opens slightly if the
closing force exceeds a certain value.
2. Pull the switch beyond the resistance point
and hold again within approx. 4 seconds.
The window closes without the pinch pro-
tection system.
Safety switch
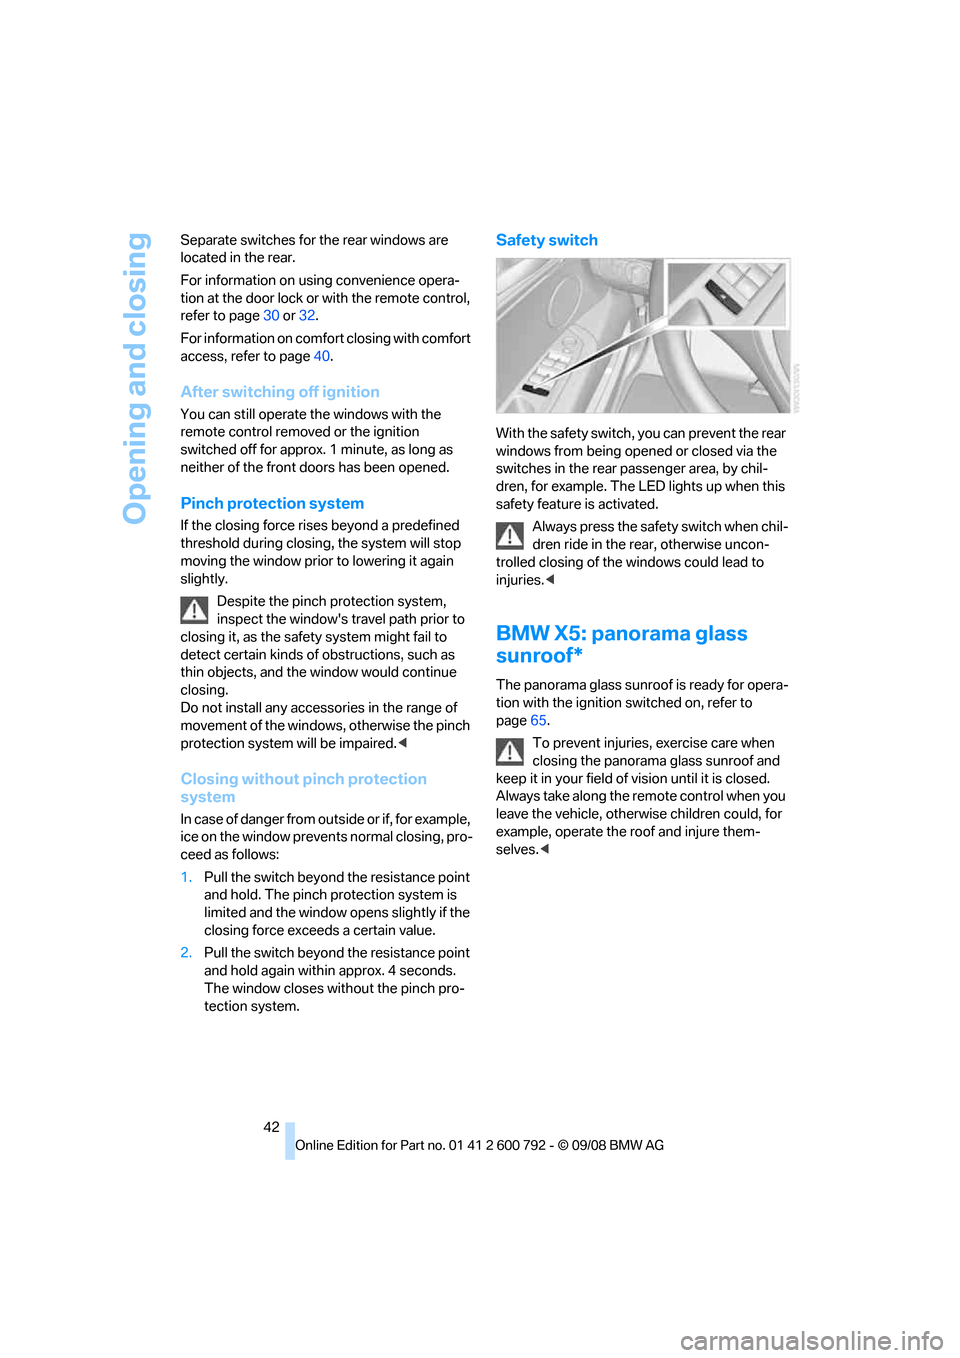
With the safety switch, you can prevent the rear
windows from being opened or closed via the
switches in the rear passenger area, by chil-
dren, for example. The LED lights up when this
safety feature is activated.
Always press the safety switch when chil-
dren ride in the re ar, otherwise uncon-
trolled closing of the windows could lead to
injuries. <
BMW X5: panorama glass
sunroof*
The panorama glass sunr oof is ready for opera-
tion with the ignition switched on, refer to
page 65.
To prevent injuries, exercise care when
closing the panorama glass sunroof and
keep it in your field of vision until it is closed.
Always take along the re mote control when you
leave the vehicle, otherwise children could, for
example, operate the roof and injure them-
selves. <
Page 45 of 317
Controls
43Reference
At a glance
Driving tips
Communications
Navigation
Entertainment
Mobility
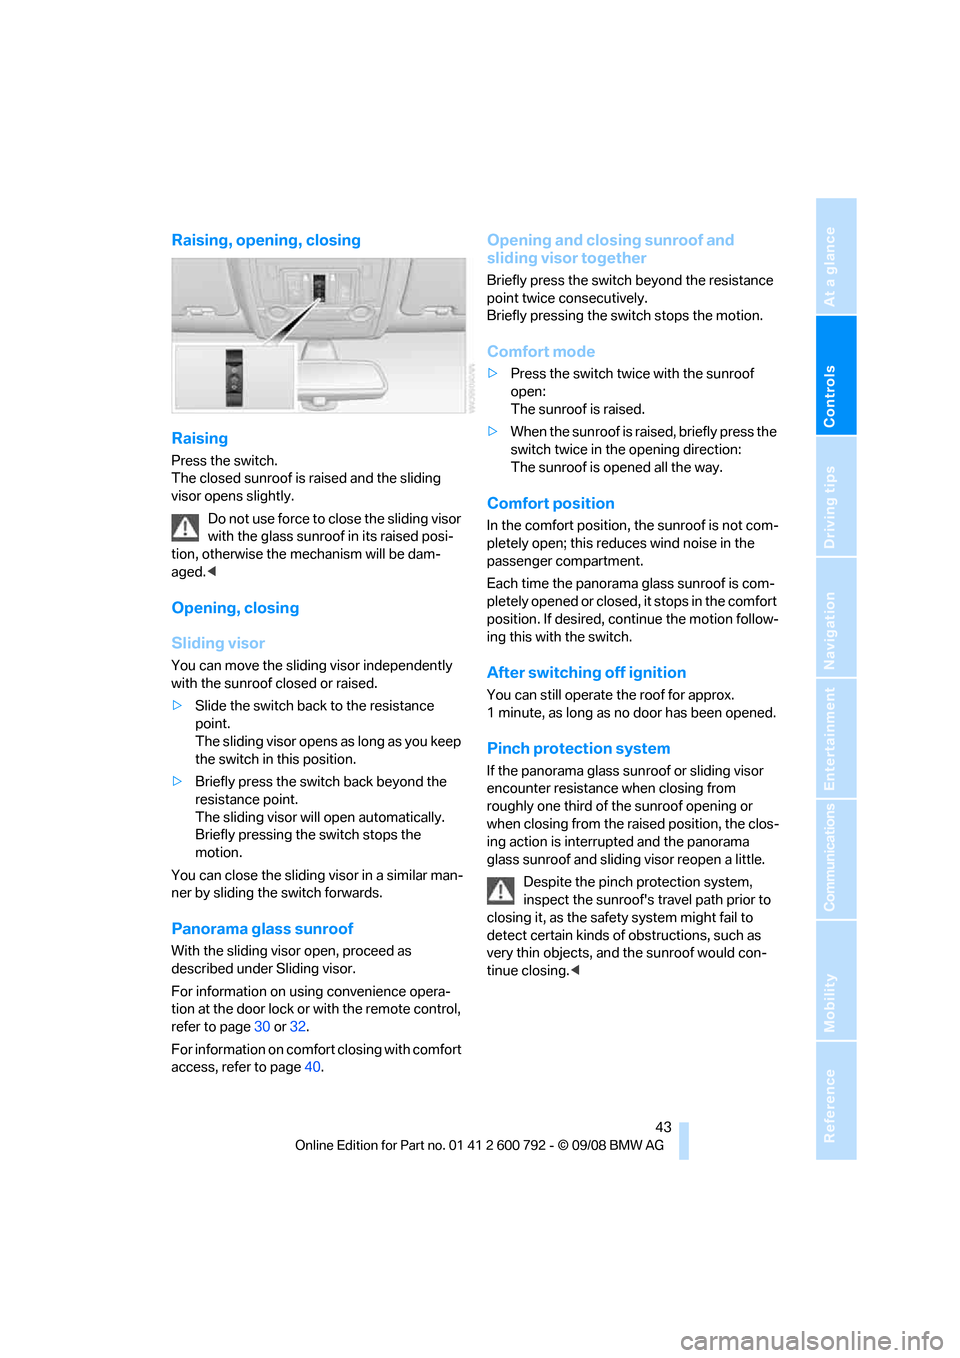
Raising, opening, closing
Raising
Press the switch.
The closed sunroof is raised and the sliding
visor opens slightly.Do not use force to close the sliding visor
with the glass sunroof in its raised posi-
tion, otherwise the mechanism will be dam-
aged. <
Opening, closing
Sliding visor
You can move the sliding visor independently
with the sunroof closed or raised.
>Slide the switch back to the resistance
point.
The sliding visor opens as long as you keep
the switch in this position.
> Briefly press the switch back beyond the
resistance point.
The sliding visor will open automatically.
Briefly pressing the switch stops the
motion.
You can close the sliding visor in a similar man-
ner by sliding the switch forwards.
Panorama glass sunroof
With the sliding visor open, proceed as
described under Sliding visor.
For information on using convenience opera-
tion at the door lock or with the remote control,
refer to page 30 or32.
For information on comfort closing with comfort
access, refer to page 40.
Opening and closing sunroof and
sliding visor together
Briefly press the switch beyond the resistance
point twice consecutively.
Briefly pressing the switch stops the motion.
Comfort mode
>Press the switch twice with the sunroof
open:
The sunroof is raised.
> When the sunroof is raised, briefly press the
switch twice in the opening direction:
The sunroof is opened all the way.
Comfort position
In the comfort position, the sunroof is not com-
pletely open; this reduces wind noise in the
passenger compartment.
Each time the panorama glass sunroof is com-
pletely opened or closed, it stops in the comfort
position. If desired, co ntinue the motion follow-
ing this with the switch.
After switching off ignition
You can still operate the roof for approx.
1 minute, as long as no door has been opened.
Pinch protection system
If the panorama glass su nroof or sliding visor
encounter resistance when closing from
roughly one third of the sunroof opening or
when closing from the raised position, the clos-
ing action is interrupted and the panorama
glass sunroof and slidin g visor reopen a little.
Despite the pinch protection system,
inspect the sunroof's tr avel path prior to
closing it, as the safety system might fail to
detect certain kinds of obstructions, such as
very thin objects, an d the sunroof would con-
tinue closing. <
Page 46 of 317
Opening and closing
44
Closing without pinch protection
system
In case of danger from outside, slide the switch
forward beyond the resistance point and hold.
The roof closes without the pinch protection
system.
Following interruptions in electrical
power supply
After a power loss, the sunroof may only
respond to the raise co mmand. Then have the
system initialized. BM W recommends having
this work carried out by your BMW Sports
Activity Vehicle Center.
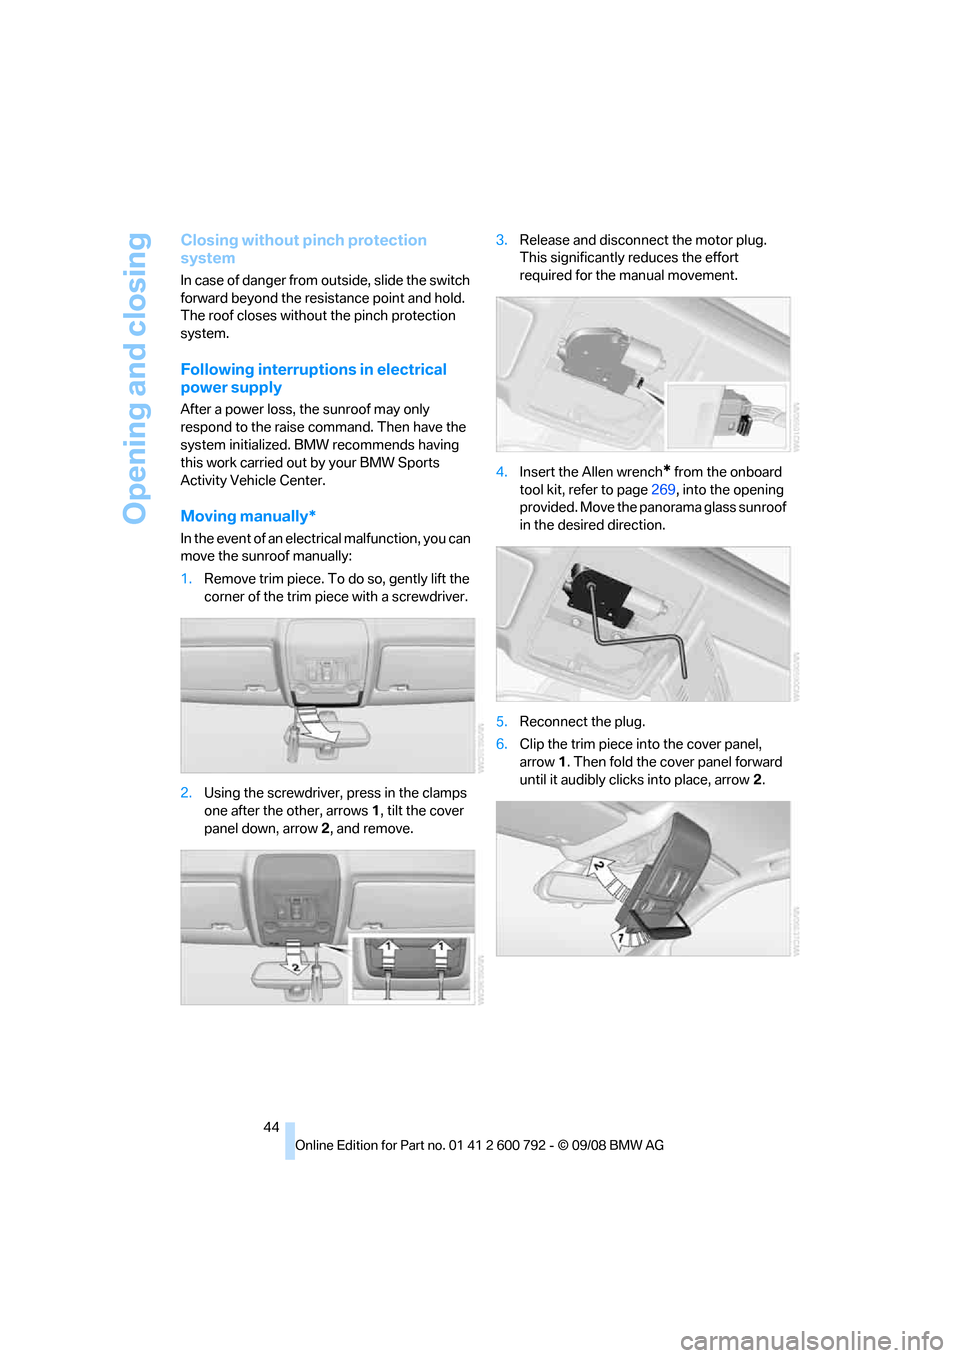
Moving manually*
In the event of an electrical malfunction, you can
move the sunroof manually:
1. Remove trim piece. To do so, gently lift the
corner of the trim piece with a screwdriver.
2. Using the screwdriver, press in the clamps
one after the other, arrows 1, tilt the cover
panel down, arrow 2, and remove. 3.
Release and disconnect the motor plug.
This significantly reduces the effort
required for the manual movement.
4. Insert the Allen wrench
* from the onboard
tool kit, refer to page 269, into the opening
provided. Move the pa norama glass sunroof
in the desired direction.
5. Reconnect the plug.
6. Clip the trim piece into the cover panel,
arrow 1. Then fold the co ver panel forward
until it audibly clicks into place, arrow 2.