stop start BMW X5M 2014 F85 User Guide
[x] Cancel search | Manufacturer: BMW, Model Year: 2014, Model line: X5M, Model: BMW X5M 2014 F85Pages: 251, PDF Size: 7.35 MB
Page 83 of 251
▷D/S: reel between drive mode and sequen‐
tial mode.
Engaging a selector lever position
Press on the brake pedal and pull or push the
selector lever in the corresponding direction.
As soon as the selector lever is released, it re‐
verts to the center position. In position R, the
selector lever locks.
The engaged selector lever position is dis‐
played in the instrument cluster and on the se‐
lector lever.
If a selector lever position is engaged, the vehi‐
cle may start rolling, after the brake is released,
e.g. on downhill slopes. Thus, drive off immedi‐
ately after releasing the brake.
Use the Slow Speed Assistant for maneuver‐
ing and during stop-and-go traffic.
Low Speed Assistant
The Low Speed Assistant gives assistance at
very low speeds. The vehicle moves at walking
speed.
This can also be used for rocking the vehicle in
the snow. To do this, reel between reverse
gear and forward gear without stepping on the
brakes in the process.
Activating
1.Engage a driving position.2.Briefly tap the accelerator pedal.
The vehicle rolls at minimum speed.
This is possible in 1st and 2nd gear and in re‐
verse gear.
Deactivating
Apply the brakes until the vehicle comes to a
stop.
Flashing display on the selector lever The actually engaged transmission position
can deviate from the selector lever position in
some situations. The display in the selector
lever flashes.
Observe the display in the instrument cluster,
refer to page 80, in these cases.
D Drive mode
In Drive mode, all forward gears are automati‐
cally changed.
Kickdown: for maximum acceleration, e. g. when passing. To do this, depress the acceler‐
ator pedal past the resistance point.
Switch to Sequential mode: shift using the
shift paddles or the selector lever, or push the
selector lever in the D/S direction.
S Sequential mode
Use the shift paddles or the selector lever to
upshift or downshift without letting off the gas.▷Maximum speed: once maximum engine
speed is attained, upshifting is not auto‐
matically performed in sequential mode. In
addition, the kickdown is deactivated.▷Shortly before falling below a gear-de‐
pendent minimum speed, the transmission
is automatically downshifted.▷Upshifting or downshifting is done only if
the rpm and vehicle speed are appropriate.
For example, there is no downshifting if the
engine speed is too high.▷Kickdown: the lowest possible gear is se‐
lected by simultaneously operating the
kickdown and the left shift paddle or selec‐
tor lever.▷It is also possible to start out in 2nd gear,
e. g. on icy roads.
Switch to Drive mode: push selector lever in
D/S direction.
R is Reverse
Select only when the vehicle is stationary.
It is also possible to rock the vehicle up to
6 mph/10 km/h. To do this, reel between for‐
Seite 79DrivingControls79
Online Edition for Part no. 01 40 2 956 993 - X/14
Page 85 of 251
In Sequential modeChoice of three driving programs:▷1: comfortable shifting operations.▷2: sporty, fast shifting operations.▷3: maximum shifting speed, Launch Con‐
trol, refer to page 82.
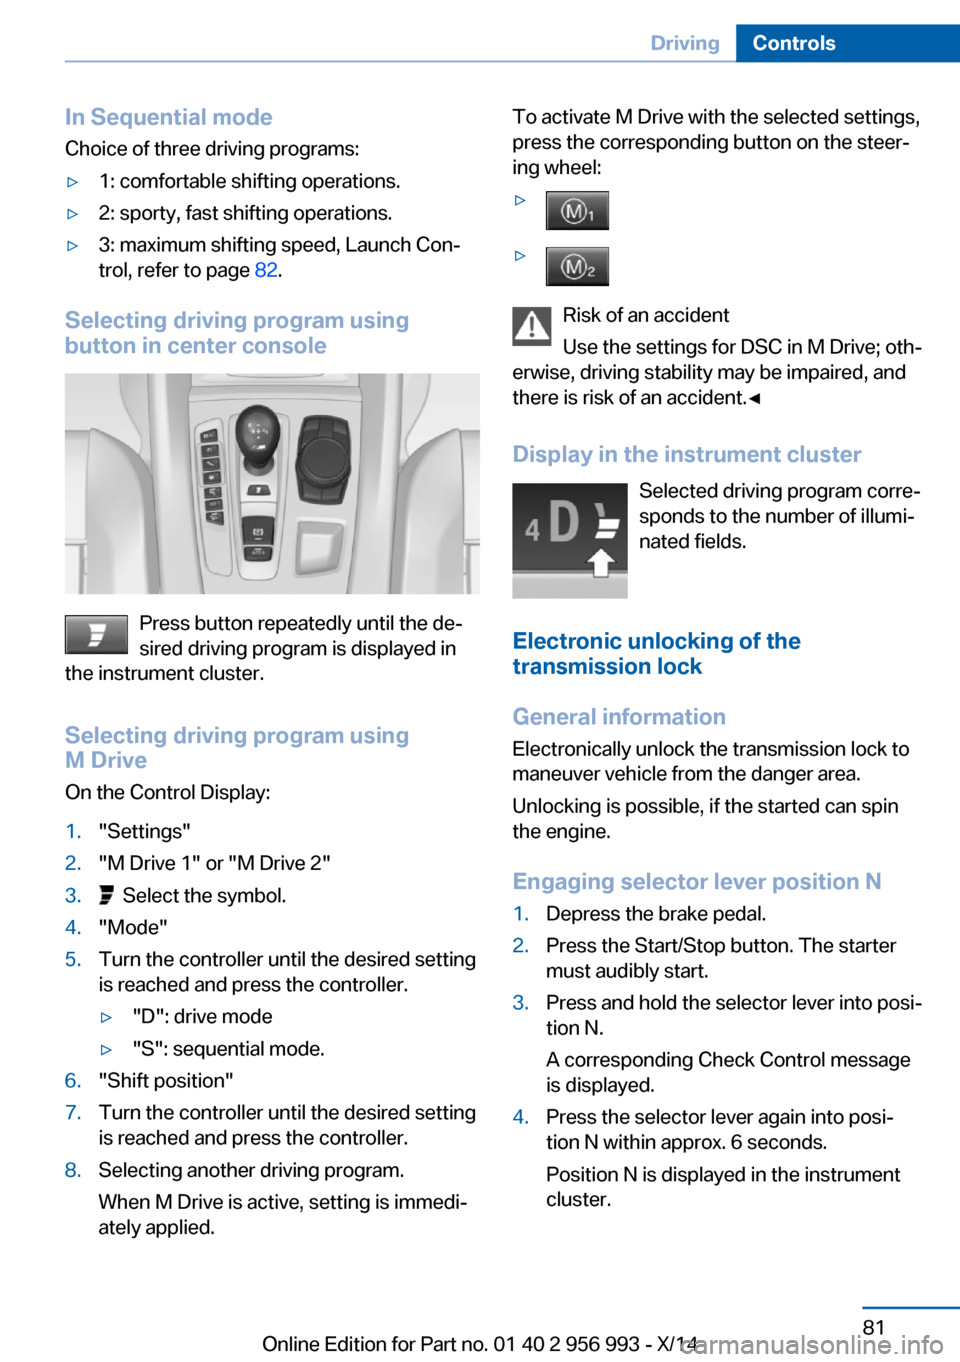
Selecting driving program using
button in center console
Press button repeatedly until the de‐
sired driving program is displayed in
the instrument cluster.
Selecting driving program using
M Drive
On the Control Display:
1."Settings"2."M Drive 1" or "M Drive 2"3. Select the symbol.4."Mode"5.Turn the controller until the desired setting
is reached and press the controller.▷"D": drive mode▷"S": sequential mode.6."Shift position"7.Turn the controller until the desired setting
is reached and press the controller.8.Selecting another driving program.
When M Drive is active, setting is immedi‐
ately applied.To activate M Drive with the selected settings,
press the corresponding button on the steer‐
ing wheel:▷▷
Risk of an accident
Use the settings for DSC in M Drive; oth‐
erwise, driving stability may be impaired, and
there is risk of an accident.◀
Display in the instrument cluster Selected driving program corre‐
sponds to the number of illumi‐
nated fields.
Electronic unlocking of the
transmission lock
General information
Electronically unlock the transmission lock to
maneuver vehicle from the danger area.
Unlocking is possible, if the started can spin
the engine.
Engaging selector lever position N
1.Depress the brake pedal.2.Press the Start/Stop button. The starter
must audibly start.3.Press and hold the selector lever into posi‐
tion N.
A corresponding Check Control message
is displayed.4.Press the selector lever again into posi‐
tion N within approx. 6 seconds.
Position N is displayed in the instrument
cluster.Seite 81DrivingControls81
Online Edition for Part no. 01 40 2 956 993 - X/14
Page 86 of 251
5.Release brake, as soon as the starter
stops.6.Maneuver the vehicle from the danger area
and secure it against moving on its own.
Launch Control
The concept Launch Control enables optimum accelerationon surfaces with good traction.
Hints Component wear
Do not use Launch Control too often;
otherwise, this may result in premature wear of
components due to the high stress placed on
the vehicle.◀
Do not use Launch Control during the break-in,
refer to page 177, period.
Requirements Launch Control is available when the engine is
warmed up, that is, after uninterrupted driving
of at least 6 miles/10 km.
To start with Launch Control do not steer the
steering wheel.
Activate Launch Control
1.Deactivate Dynamic Stability Control, refer
to page 131, or activate M Dynamic mode,
refer to page 130.2.Select Sequential mode with gear 1 and
driving program 3.3.With the engine running, firmly apply the
brake with the left foot.4.Depress the accelerator pedal far enough
that a flag symbol is displayed in the instru‐
ment cluster.
Keep accelerator pedal in this position.
The starting engine speed adjusts.5.Within 3 seconds, release the brake. The
vehicle accelerates.Upshifting occurs automatically as long as
the flag symbol is displayed and the accel‐
erator pedal is not released.
Launch Control is available again only after the
transmission is cooled down to a certain de‐
gree.
M Driving Dynamics Control
The concept
The M Driving Dynamics Control affects the
response of the vehicle to accelerator pedal
movements.
ProgramsResponse behavior options:
▷"Efficient": efficient, comfortable. Minimal
fuel consumption.
Ideal e. g. in city traffic or on snow.▷"Sport": sporty, dynamic.▷"Sport Plus": spontaneous, direct. Maxi‐
mum dynamics.
Selecting a channel
Via M Drive On the Control Display:
1."Settings"2."M Drive 1" or "M Drive 2"3. Select the symbol.4.Select the desired channel.
When M Drive is active, setting is immedi‐
ately applied.
To activate M Drive with the selected settings,
press the corresponding button on the steer‐
ing wheel:
▷▷Seite 82ControlsDriving82
Online Edition for Part no. 01 40 2 956 993 - X/14
Page 88 of 251
DisplaysVehicle features and optionsThis chapter describes all standard, country-
specific and optional features offered with the
series. It also describes features that are notnecessarily available in your car, e. g., due to
the selected options or country versions. This
also applies to safety-related functions and
systems.
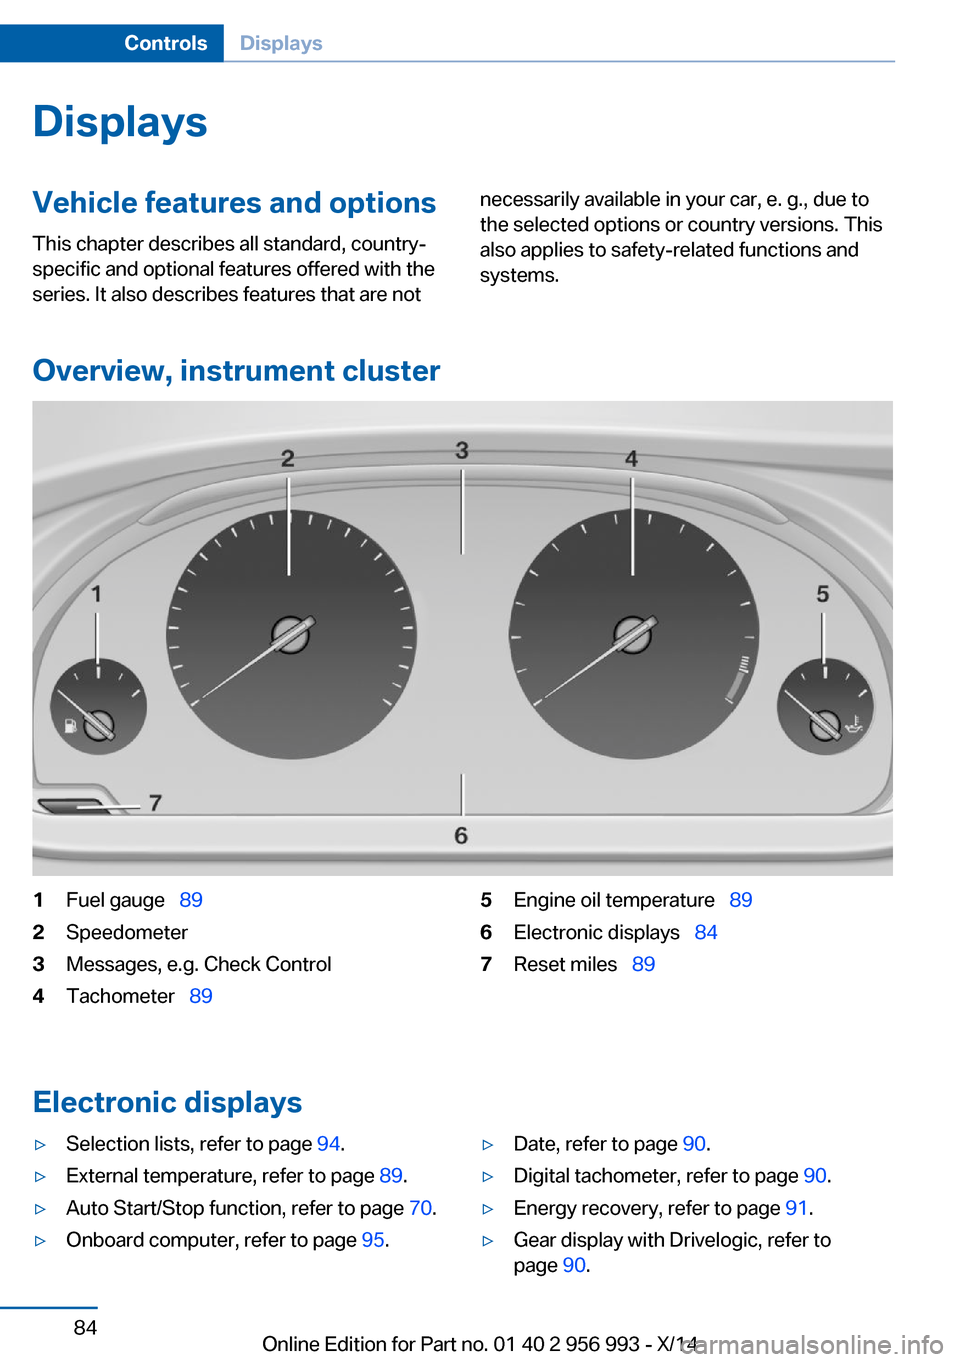
Overview, instrument cluster
1Fuel gauge 892Speedometer3Messages, e.g. Check Control4Tachometer 895Engine oil temperature 896Electronic displays 847Reset miles 89
Electronic displays
▷Selection lists, refer to page 94.▷External temperature, refer to page 89.▷Auto Start/Stop function, refer to page 70.▷Onboard computer, refer to page 95.▷Date, refer to page 90.▷Digital tachometer, refer to page 90.▷Energy recovery, refer to page 91.▷Gear display with Drivelogic, refer to
page 90.Seite 84ControlsDisplays84
Online Edition for Part no. 01 40 2 956 993 - X/14
Page 95 of 251
tem, the range up to the destination is dis‐
played.
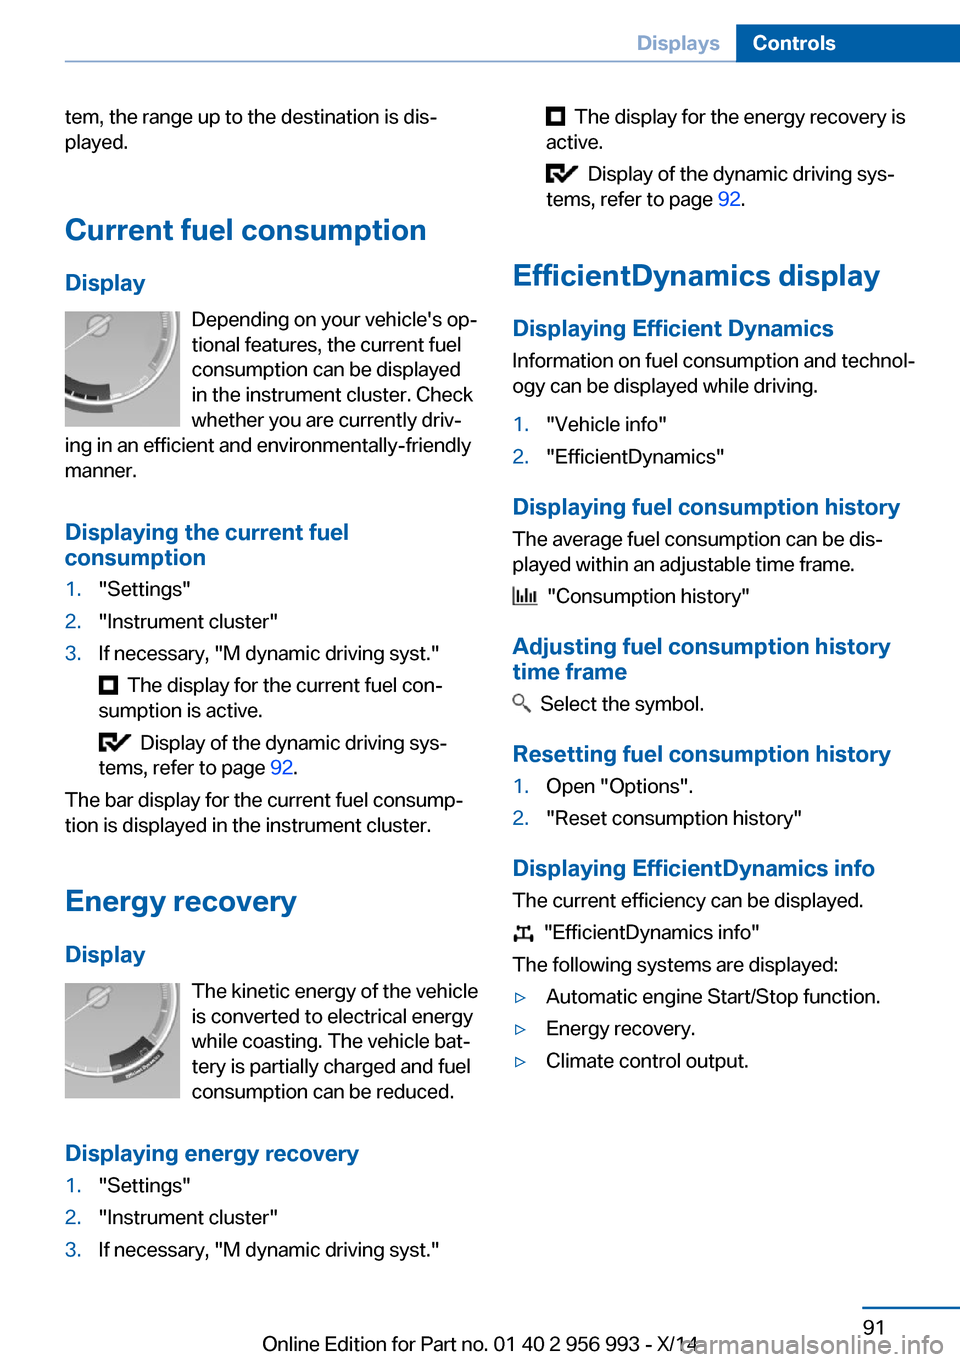
Current fuel consumption Display Depending on your vehicle's op‐
tional features, the current fuel
consumption can be displayed
in the instrument cluster. Check
whether you are currently driv‐
ing in an efficient and environmentally-friendly
manner.
Displaying the current fuel
consumption1."Settings"2."Instrument cluster"3.If necessary, "M dynamic driving syst."
The display for the current fuel con‐
sumption is active.
Display of the dynamic driving sys‐
tems, refer to page 92.
The bar display for the current fuel consump‐
tion is displayed in the instrument cluster.
Energy recovery
Display The kinetic energy of the vehicle
is converted to electrical energy
while coasting. The vehicle bat‐
tery is partially charged and fuel
consumption can be reduced.
Displaying energy recovery
1."Settings"2."Instrument cluster"3.If necessary, "M dynamic driving syst." The display for the energy recovery is
active.
Display of the dynamic driving sys‐
tems, refer to page 92.
EfficientDynamics display
Displaying Efficient Dynamics
Information on fuel consumption and technol‐ ogy can be displayed while driving.
1."Vehicle info"2."EfficientDynamics"
Displaying fuel consumption history
The average fuel consumption can be dis‐
played within an adjustable time frame.
"Consumption history"
Adjusting fuel consumption history time frame
Select the symbol.
Resetting fuel consumption history
1.Open "Options".2."Reset consumption history"
Displaying EfficientDynamics info
The current efficiency can be displayed.
"EfficientDynamics info"
The following systems are displayed:
▷Automatic engine Start/Stop function.▷Energy recovery.▷Climate control output.Seite 91DisplaysControls91
Online Edition for Part no. 01 40 2 956 993 - X/14
Page 100 of 251
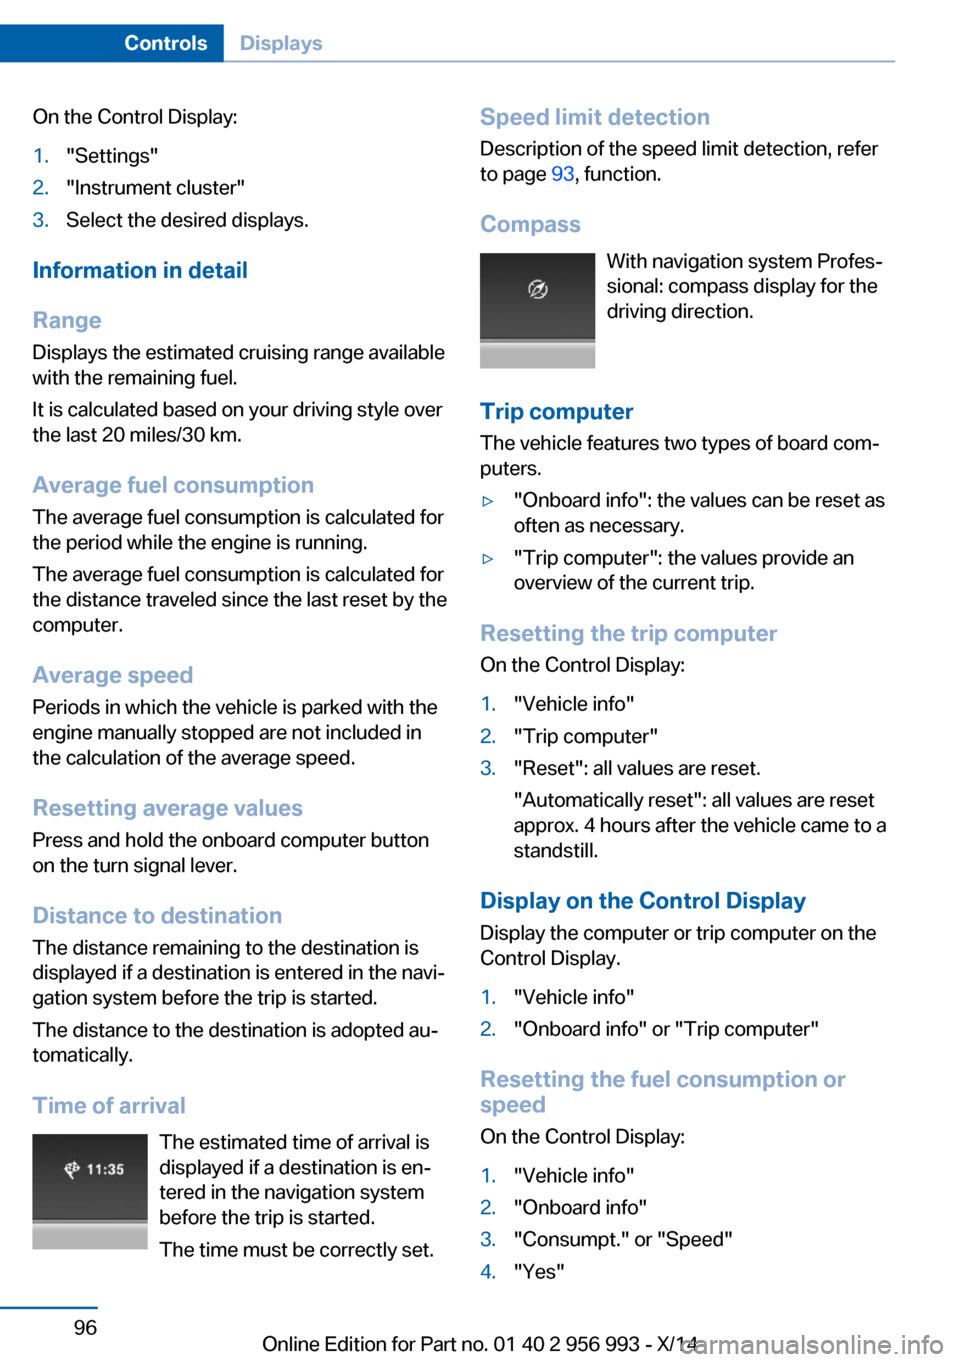
On the Control Display:1."Settings"2."Instrument cluster"3.Select the desired displays.
Information in detail
Range
Displays the estimated cruising range available
with the remaining fuel.
It is calculated based on your driving style over
the last 20 miles/30 km.
Average fuel consumption
The average fuel consumption is calculated for
the period while the engine is running.
The average fuel consumption is calculated for
the distance traveled since the last reset by the
computer.
Average speed
Periods in which the vehicle is parked with the
engine manually stopped are not included in
the calculation of the average speed.
Resetting average values Press and hold the onboard computer button
on the turn signal lever.
Distance to destination
The distance remaining to the destination is
displayed if a destination is entered in the navi‐
gation system before the trip is started.
The distance to the destination is adopted au‐
tomatically.
Time of arrival The estimated time of arrival is
displayed if a destination is en‐
tered in the navigation system
before the trip is started.
The time must be correctly set.
Speed limit detection
Description of the speed limit detection, refer
to page 93, function.
Compass With navigation system Profes‐sional: compass display for the
driving direction.
Trip computer The vehicle features two types of board com‐
puters.▷"Onboard info": the values can be reset as
often as necessary.▷"Trip computer": the values provide an
overview of the current trip.
Resetting the trip computer
On the Control Display:
1."Vehicle info"2."Trip computer"3."Reset": all values are reset.
"Automatically reset": all values are reset
approx. 4 hours after the vehicle came to a
standstill.
Display on the Control Display
Display the computer or trip computer on the
Control Display.
1."Vehicle info"2."Onboard info" or "Trip computer"
Resetting the fuel consumption or
speed
On the Control Display:
1."Vehicle info"2."Onboard info"3."Consumpt." or "Speed"4."Yes"Seite 96ControlsDisplays96
Online Edition for Part no. 01 40 2 956 993 - X/14
Page 114 of 251
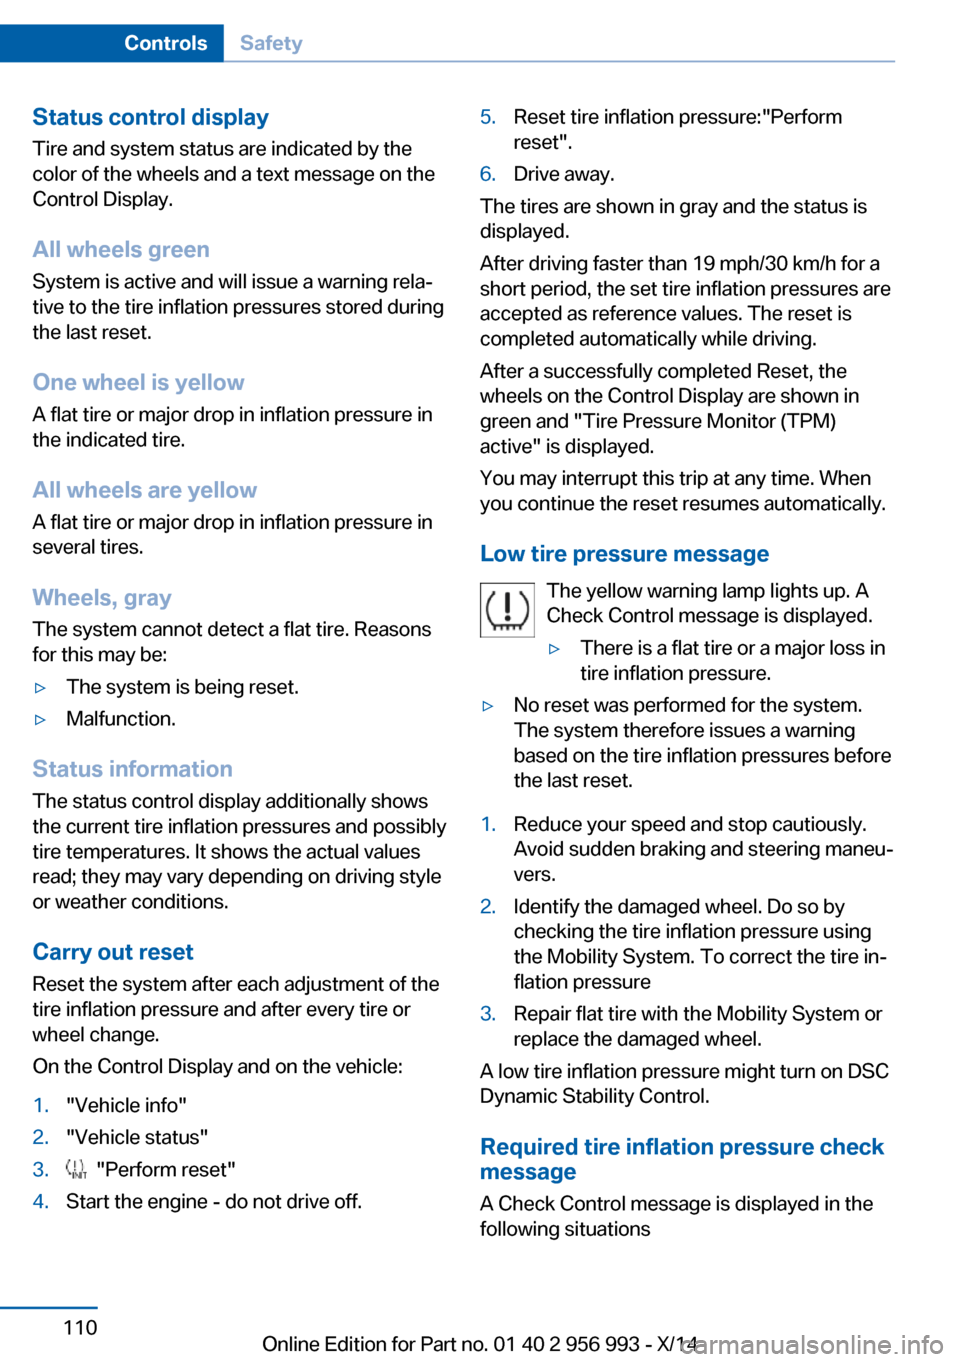
Status control displayTire and system status are indicated by the
color of the wheels and a text message on the
Control Display.
All wheels green System is active and will issue a warning rela‐
tive to the tire inflation pressures stored during
the last reset.
One wheel is yellow A flat tire or major drop in inflation pressure in
the indicated tire.
All wheels are yellow A flat tire or major drop in inflation pressure in
several tires.
Wheels, gray The system cannot detect a flat tire. Reasons
for this may be:▷The system is being reset.▷Malfunction.
Status information
The status control display additionally shows
the current tire inflation pressures and possibly
tire temperatures. It shows the actual values
read; they may vary depending on driving style or weather conditions.
Carry out reset
Reset the system after each adjustment of the
tire inflation pressure and after every tire or
wheel change.
On the Control Display and on the vehicle:
1."Vehicle info"2."Vehicle status"3. "Perform reset"4.Start the engine - do not drive off.5.Reset tire inflation pressure:"Perform
reset".6.Drive away.
The tires are shown in gray and the status is
displayed.
After driving faster than 19 mph/30 km/h for a
short period, the set tire inflation pressures are
accepted as reference values. The reset is
completed automatically while driving.
After a successfully completed Reset, the
wheels on the Control Display are shown in
green and "Tire Pressure Monitor (TPM)
active" is displayed.
You may interrupt this trip at any time. When
you continue the reset resumes automatically.
Low tire pressure message The yellow warning lamp lights up. A
Check Control message is displayed.
▷There is a flat tire or a major loss in
tire inflation pressure.▷No reset was performed for the system.
The system therefore issues a warning
based on the tire inflation pressures before
the last reset.1.Reduce your speed and stop cautiously.
Avoid sudden braking and steering maneu‐
vers.2.Identify the damaged wheel. Do so by
checking the tire inflation pressure using
the Mobility System. To correct the tire in‐
flation pressure3.Repair flat tire with the Mobility System or
replace the damaged wheel.
A low tire inflation pressure might turn on DSC
Dynamic Stability Control.
Required tire inflation pressure check
message
A Check Control message is displayed in the
following situations
Seite 110ControlsSafety110
Online Edition for Part no. 01 40 2 956 993 - X/14
Page 115 of 251
▷The system has detected a wheel change,
but no reset was done.▷Inflation was not carried out according to
specifications.▷The tire inflation pressure has fallen below
the level of the last confirmation.
In this case:
▷Check the tire pressure and correct as
needed.▷Carry out a reset of the system after a tire
change.
System limits
The system does not function properly if a re‐
set has not been carried out, e.g., a flat tire is
reported though tire inflation pressures are
correct.
The tire inflation pressure depends on the
tire's temperature. Driving or exposure to the
sun will increase the tire's temperature, thus
increasing the tire inflation pressure. The tire
inflation pressure is reduced when the tire
temperature falls again. These circumstances
may cause a warning when temperatures fall
very sharply.
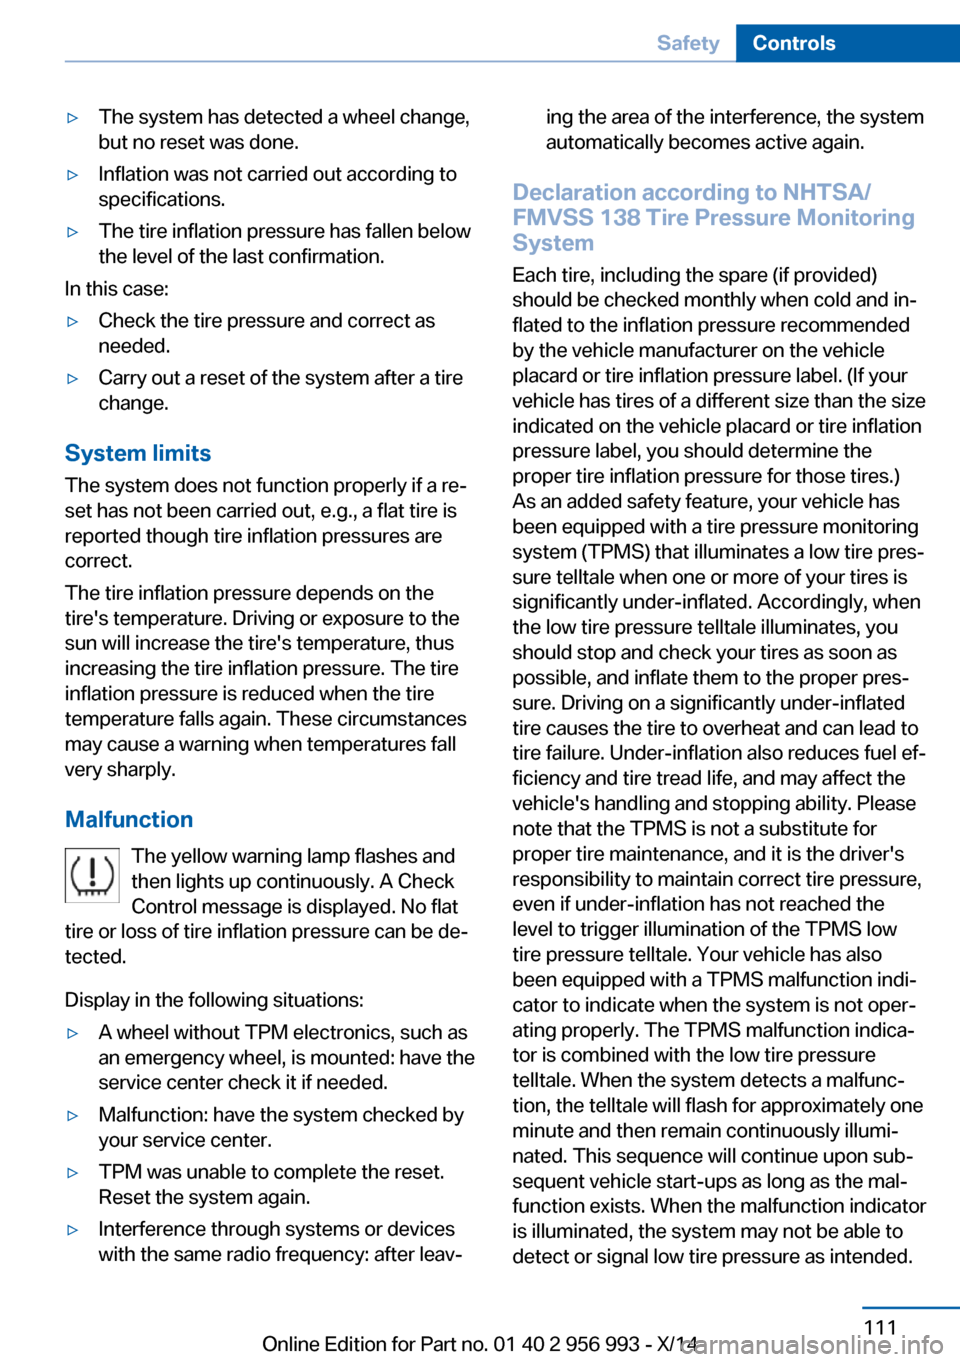
Malfunction The yellow warning lamp flashes and
then lights up continuously. A Check
Control message is displayed. No flat
tire or loss of tire inflation pressure can be de‐
tected.
Display in the following situations:
▷A wheel without TPM electronics, such as
an emergency wheel, is mounted: have the
service center check it if needed.▷Malfunction: have the system checked by
your service center.▷TPM was unable to complete the reset.
Reset the system again.▷Interference through systems or devices
with the same radio frequency: after leav‐ing the area of the interference, the system
automatically becomes active again.
Declaration according to NHTSA/
FMVSS 138 Tire Pressure Monitoring
System
Each tire, including the spare (if provided)
should be checked monthly when cold and in‐
flated to the inflation pressure recommended
by the vehicle manufacturer on the vehicle
placard or tire inflation pressure label. (If your
vehicle has tires of a different size than the size
indicated on the vehicle placard or tire inflation
pressure label, you should determine the
proper tire inflation pressure for those tires.)
As an added safety feature, your vehicle has
been equipped with a tire pressure monitoring
system (TPMS) that illuminates a low tire pres‐
sure telltale when one or more of your tires is
significantly under-inflated. Accordingly, when
the low tire pressure telltale illuminates, you
should stop and check your tires as soon as
possible, and inflate them to the proper pres‐
sure. Driving on a significantly under-inflated
tire causes the tire to overheat and can lead to
tire failure. Under-inflation also reduces fuel ef‐
ficiency and tire tread life, and may affect the
vehicle's handling and stopping ability. Please
note that the TPMS is not a substitute for
proper tire maintenance, and it is the driver's
responsibility to maintain correct tire pressure,
even if under-inflation has not reached the
level to trigger illumination of the TPMS low
tire pressure telltale. Your vehicle has also
been equipped with a TPMS malfunction indi‐
cator to indicate when the system is not oper‐
ating properly. The TPMS malfunction indica‐
tor is combined with the low tire pressure
telltale. When the system detects a malfunc‐
tion, the telltale will flash for approximately one
minute and then remain continuously illumi‐
nated. This sequence will continue upon sub‐
sequent vehicle start-ups as long as the mal‐
function exists. When the malfunction indicator
is illuminated, the system may not be able to
detect or signal low tire pressure as intended.
Seite 111SafetyControls111
Online Edition for Part no. 01 40 2 956 993 - X/14
Page 116 of 251
TPMS malfunctions may occur for a variety of
reasons, including the installation of replace‐
ment or alternate tires or wheels on the vehicle
that prevent the TPMS from functioning prop‐
erly. Always check the TPMS malfunction tell‐
tale after replacing one or more tires or wheels
on your vehicle to ensure that the replacement
or alternate tires and wheels allow the TPMS
to continue to function properly.
FTM Flat Tire Monitor The conceptThe system detects tire inflation pressure losson the basis of rotation speed differences be‐
tween the individual wheels while driving.
In the event of a tire inflation pressure loss, the
diameter and therefore the rotational speed of
the corresponding wheel changes. This will be
detected and reported as a flat tire.
The system does not measure the actual infla‐
tion pressure in the tires.
Functional requirements
The system must have been initialized when
the tire inflation pressure was correct; other‐
wise, reliable flagging of a flat tire is not as‐
sured. Initialize the system after each correc‐ tion of the tire inflation pressure and after
every tire or wheel change.
Status display
The current status of the Flat Tire Monitor can
be displayed on the Control Display, e.g.,
whether or not the FTM is active.
On the Control Display:1."Vehicle info"2."Vehicle status"3. "Flat Tire Monitor (FTM)"
The status is displayed.
Initialization
When initializing the once set inflation tire
pressures serve as reference values in order to
detect a flat tire. Initialization is started by con‐
firming the tire inflation pressures.
Do not initialize the system when driving with
snow chains.
On the Control Display:1."Vehicle info"2."Vehicle status"3. "Perform reset"4.Start the engine - do not drive off.5.Start the initialization with "Perform reset".6.Drive away.
The initialization is completed while driving,
which can be interrupted at any time.
The initialization automatically continues when
driving resumes.
Indication of a flat tire The yellow warning lamp lights up. A
Check Control message is displayed.
There is a flat tire or a major loss in tire
inflation pressure.
1.Reduce your speed and stop cautiously.
Avoid sudden braking and steering maneu‐
vers.2.Identify the damaged wheel. Do so by
checking the tire inflation pressure using
the Mobility System. If the tire inflation
pressure in all tires is correct, the Flat Tire
Monitor may not have been initialized. In
this case, initialize the system.3.Repair flat tire with the Mobility System or
replace the damaged wheel.Seite 112ControlsSafety112
Online Edition for Part no. 01 40 2 956 993 - X/14
Page 120 of 251
Braking intervention
The warning prompts the driver himself/herself
to react. During a warning, the maximum brak‐
ing force is used. Premise for the brake boos‐
ter is sufficiently quick and hard stepping on
the brake pedal. The system can assist with
some braking intervention if there is risk of a
collision. At low speeds vehicles may thus
come to a complete stop.
The braking intervention is executed only if
DSC Dynamic Stability Control is switched on
and M Dynamic mode MDM is not activated.
The braking intervention can be interrupted by
stepping on the accelerator pedal or by ac‐
tively moving the steering wheel.
Object detection can be restricted. Limitations
of the detection range and functional restric‐
tions are to be considered.
Tow-starting and towing
For towing the vehicle turn, switch off the
Intelligent Safety systems; otherwise malfunc‐
tions of the individual braking systems might
lead to accidents.◀
System limits Be alert
Due to system limitations, warnings may
be not issued at all, or may be issued late or
improperly. Therefore, always be alert and
ready to intervene; otherwise, there is the risk
of an accident.◀
Detection range
The system's detection potential is limited.
Thus a warning might not be issued or be is‐
sued late.
E. g. the following situations may not be de‐
tected:▷Slow moving vehicles when you approach
them at high speed.▷Vehicles that suddenly swerve in front of
you, or sharply decelerating vehicles.▷Vehicles with an unusual rear appearance.▷Two-wheeled vehicles ahead of you.
Functional limitations
The system may not be fully functional in the
following situations:
▷In heavy fog, rain, sprayed water or snow‐
fall.▷In tight curves.▷If the driving stability control systems are
limited or deactivated, e.g., DSC OFF.▷If the field of view of the camera in the mir‐
ror is dirty or obscured.▷Up to 10 seconds after the start of the en‐
gine, via the Start/Stop knob.▷During calibration of the camera immedi‐
ately after vehicle shipment.▷If there is constant blinding effects be‐
cause of oncoming light, e.g., from the sun
low in the sky.
Warning sensitivity
The more sensitive the warning settings are,
the more warnings are displayed. However,
there may also be an excess of false warnings.
Pedestrian warning
Depending on how the vehicle is equipped, the
function warns of an imminent collision with
pedestrians during daytime or nighttime.
The function is subdivided into the following
systems:
▷During daytime: Pedestrian warning with
city braking function, refer to page 117▷At night: Night vision, refer to page 119Seite 116ControlsSafety116
Online Edition for Part no. 01 40 2 956 993 - X/14