open hood BMW X5M 2014 F85 Owner's Manual
[x] Cancel search | Manufacturer: BMW, Model Year: 2014, Model line: X5M, Model: BMW X5M 2014 F85Pages: 251, PDF Size: 7.35 MB
Page 50 of 251
▷"Acoustic sig. lock/unlock"▷"Flash when lock/unlock"
Automatic lockingThe settings are saved in the active profile, re‐fer to page 35.
1."Settings"2."Doors/key"3.Select the desired function:▷"Lock if no door is opened"
The vehicle locks automatically after a
short period of time if no door is
opened.▷"Lock after start driving"
The vehicle locks automatically after
you drive off.
Retrieving the seat, mirror, and
steering wheel settings
The driver's seat, exterior mirror, and steering
wheel position adjusted last will be stored for
the active profile.
When the vehicle is unlocked, these positions
are automatically retrieved if this function was
activated.
Pinch hazard when moving back the seat
If this function is used, first make sure
that the footwell behind the driver's seat is
empty. Otherwise, people might get injured or
objects damaged when the seat is moved
back.◀
The adjustment procedure is interrupted:
▷When a seat position reel is pressed.▷When a button of the seat, mirror, and
steering wheel memory is pressed briefly.
Activating the setting
1."Settings"2."Doors/key"3."Last seat position autom."Alarm system
The conceptWhen the vehicle is locked, the vehicle alarm
system responds to:▷Opening a door, the hood or the tailgate.▷Movements in the interior.▷Changes in the vehicle tilt, e. g., during at‐
tempts at stealing a wheel or when towing
the car.▷Disconnected battery voltage.
The alarm system briefly signals tampering:
▷By sounding an acoustic alarm.▷By switching on the hazard warning sys‐
tem.▷By flashing the daytime running lights.
Arming and disarming the alarm
system
When you unlock or lock the vehicle, either
with the remote control or via the Comfort Ac‐
cess, the alarm system is disarmed or armed at
the same time.
Door lock and armed alarm systemThe alarm system is triggered when the door is
opened, when the vehicle is unlocked via the
door lock.
Tailgate and armed alarm system
The tailgate can be opened even when the
alarm system is armed.
After the tailgate is closed, it is locked and
monitored again when the doors are locked.
The hazard warning system flashes once.
Panic mode You can trigger the alarm system if you find
yourself in a dangerous situation.
Press button on the remote control for
at least 3 seconds.
Seite 46ControlsOpening and closing46
Online Edition for Part no. 01 40 2 956 993 - X/14
Page 51 of 251
To reel off the alarm: press any button.
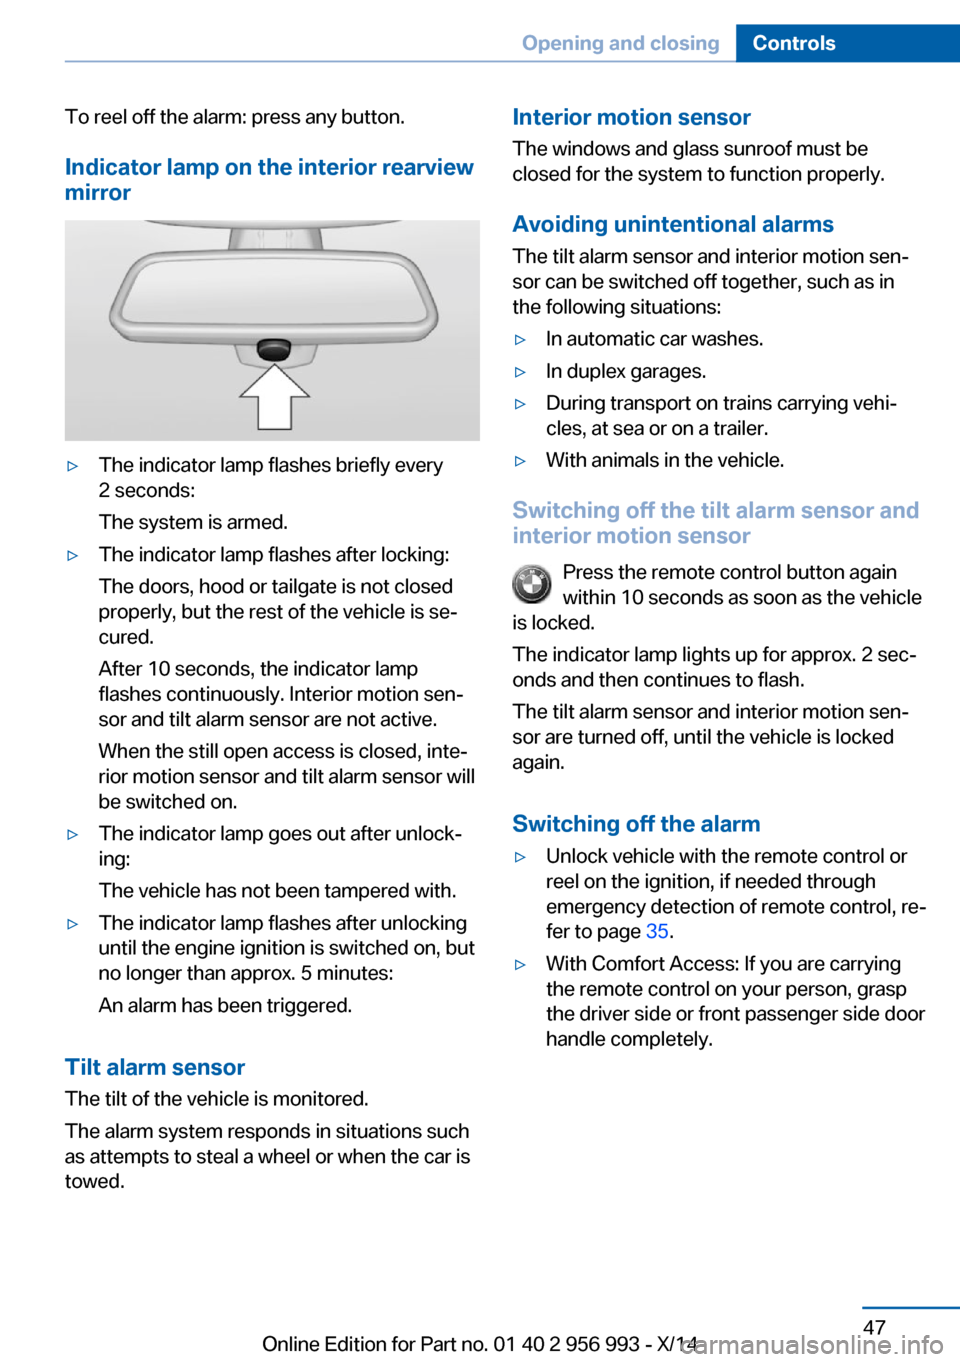
Indicator lamp on the interior rearview
mirror▷The indicator lamp flashes briefly every
2 seconds:
The system is armed.▷The indicator lamp flashes after locking:
The doors, hood or tailgate is not closed
properly, but the rest of the vehicle is se‐
cured.
After 10 seconds, the indicator lamp
flashes continuously. Interior motion sen‐
sor and tilt alarm sensor are not active.
When the still open access is closed, inte‐
rior motion sensor and tilt alarm sensor will
be switched on.▷The indicator lamp goes out after unlock‐
ing:
The vehicle has not been tampered with.▷The indicator lamp flashes after unlocking
until the engine ignition is switched on, but
no longer than approx. 5 minutes:
An alarm has been triggered.
Tilt alarm sensor The tilt of the vehicle is monitored.
The alarm system responds in situations such
as attempts to steal a wheel or when the car is
towed.
Interior motion sensor
The windows and glass sunroof must be
closed for the system to function properly.
Avoiding unintentional alarms
The tilt alarm sensor and interior motion sen‐
sor can be switched off together, such as in
the following situations:▷In automatic car washes.▷In duplex garages.▷During transport on trains carrying vehi‐
cles, at sea or on a trailer.▷With animals in the vehicle.
Switching off the tilt alarm sensor and
interior motion sensor
Press the remote control button again
within 10 seconds as soon as the vehicle
is locked.
The indicator lamp lights up for approx. 2 sec‐
onds and then continues to flash.
The tilt alarm sensor and interior motion sen‐
sor are turned off, until the vehicle is locked again.
Switching off the alarm
▷Unlock vehicle with the remote control or
reel on the ignition, if needed through
emergency detection of remote control, re‐
fer to page 35.▷With Comfort Access: If you are carrying
the remote control on your person, grasp
the driver side or front passenger side door
handle completely.Seite 47Opening and closingControls47
Online Edition for Part no. 01 40 2 956 993 - X/14
Page 74 of 251
Auto Start/Stop function
The concept The Auto Start/Stop function helps save fuel.
The system switches off the engine during a
stop, e.g., in traffic congestion or at traffic lights. The ignition remains switched on. The
engine starts again automatically for driving
off.
Semi-automatic mode After every start of the engine using the Start/
Stop button, the Auto Start/Stop function is in
the last selected state, refer to page 71.
When the Auto Start Stop function is active, it
is available when the vehicle is traveling faster
than about 3 mph, approx. 5 km/h.
Engine stop The engine is switched off automatically dur‐
ing a stop under the following conditions:▷The selector lever is in selector lever posi‐
tion D.▷The brake pedal remains pressed while the
vehicle is stationary or the vehicle is held
by Automatic Hold.▷The driver's safety belt is buckled or the
driver's door is closed.
The air flow from the air conditioner is reduced
when the engine is switched off.
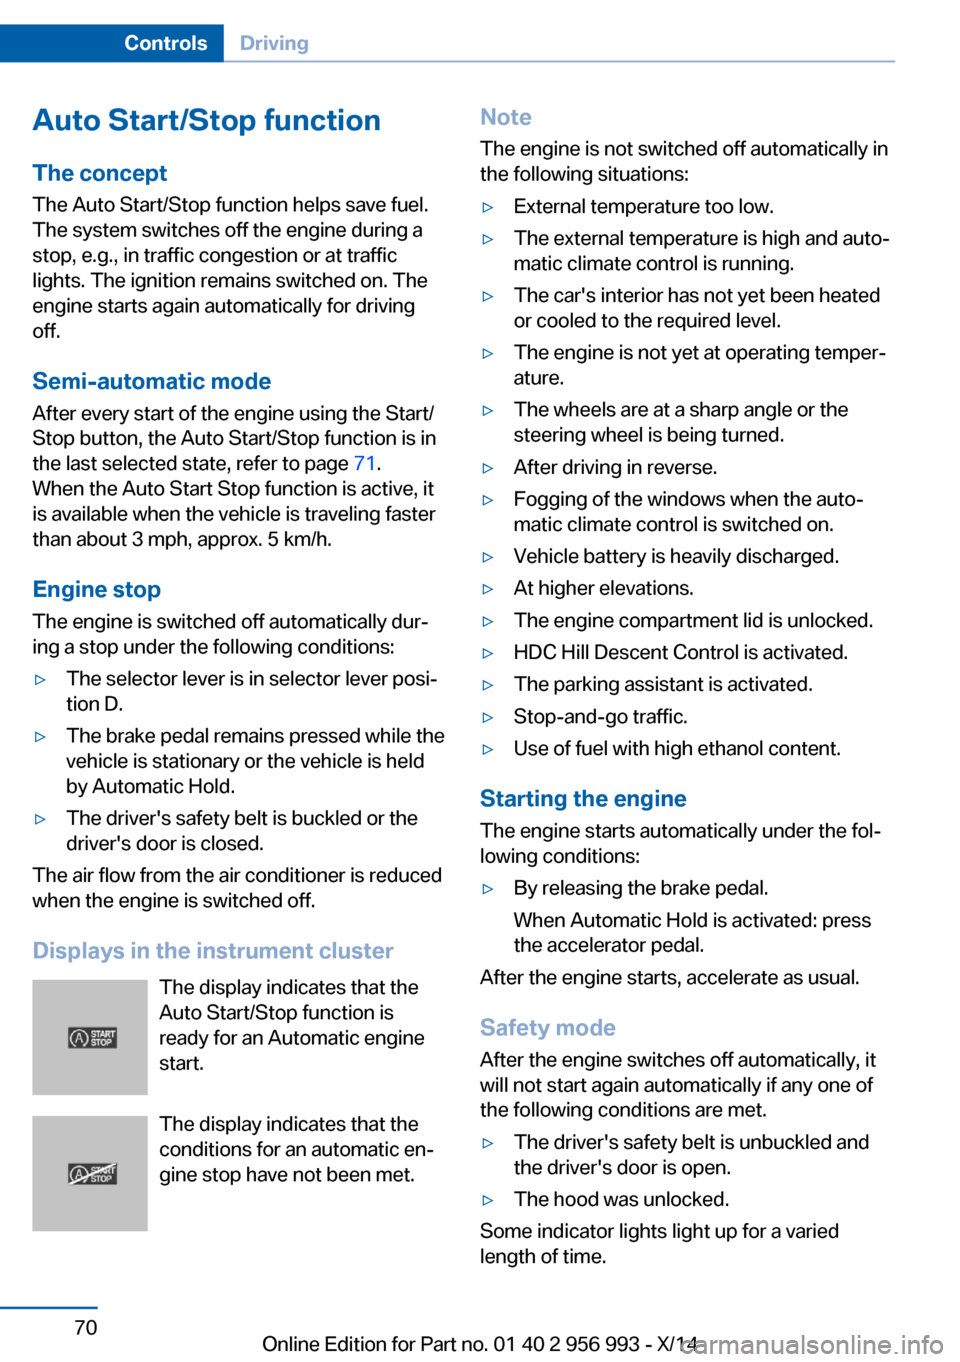
Displays in the instrument cluster The display indicates that the
Auto Start/Stop function is
ready for an Automatic engine
start.
The display indicates that the conditions for an automatic en‐
gine stop have not been met.
Note
The engine is not switched off automatically in
the following situations:▷External temperature too low.▷The external temperature is high and auto‐
matic climate control is running.▷The car's interior has not yet been heated
or cooled to the required level.▷The engine is not yet at operating temper‐
ature.▷The wheels are at a sharp angle or the
steering wheel is being turned.▷After driving in reverse.▷Fogging of the windows when the auto‐
matic climate control is switched on.▷Vehicle battery is heavily discharged.▷At higher elevations.▷The engine compartment lid is unlocked.▷HDC Hill Descent Control is activated.▷The parking assistant is activated.▷Stop-and-go traffic.▷Use of fuel with high ethanol content.
Starting the engine
The engine starts automatically under the fol‐
lowing conditions:
▷By releasing the brake pedal.
When Automatic Hold is activated: press
the accelerator pedal.
After the engine starts, accelerate as usual.
Safety mode
After the engine switches off automatically, it
will not start again automatically if any one of
the following conditions are met.
▷The driver's safety belt is unbuckled and
the driver's door is open.▷The hood was unlocked.
Some indicator lights light up for a varied
length of time.
Seite 70ControlsDriving70
Online Edition for Part no. 01 40 2 956 993 - X/14
Page 208 of 251
Engine compartmentVehicle features and optionsThis chapter describes all standard, country-
specific and optional features offered with the
series. It also describes features that are notnecessarily available in your car, e. g., due to
the selected options or country versions. This
also applies to safety-related functions and
systems.
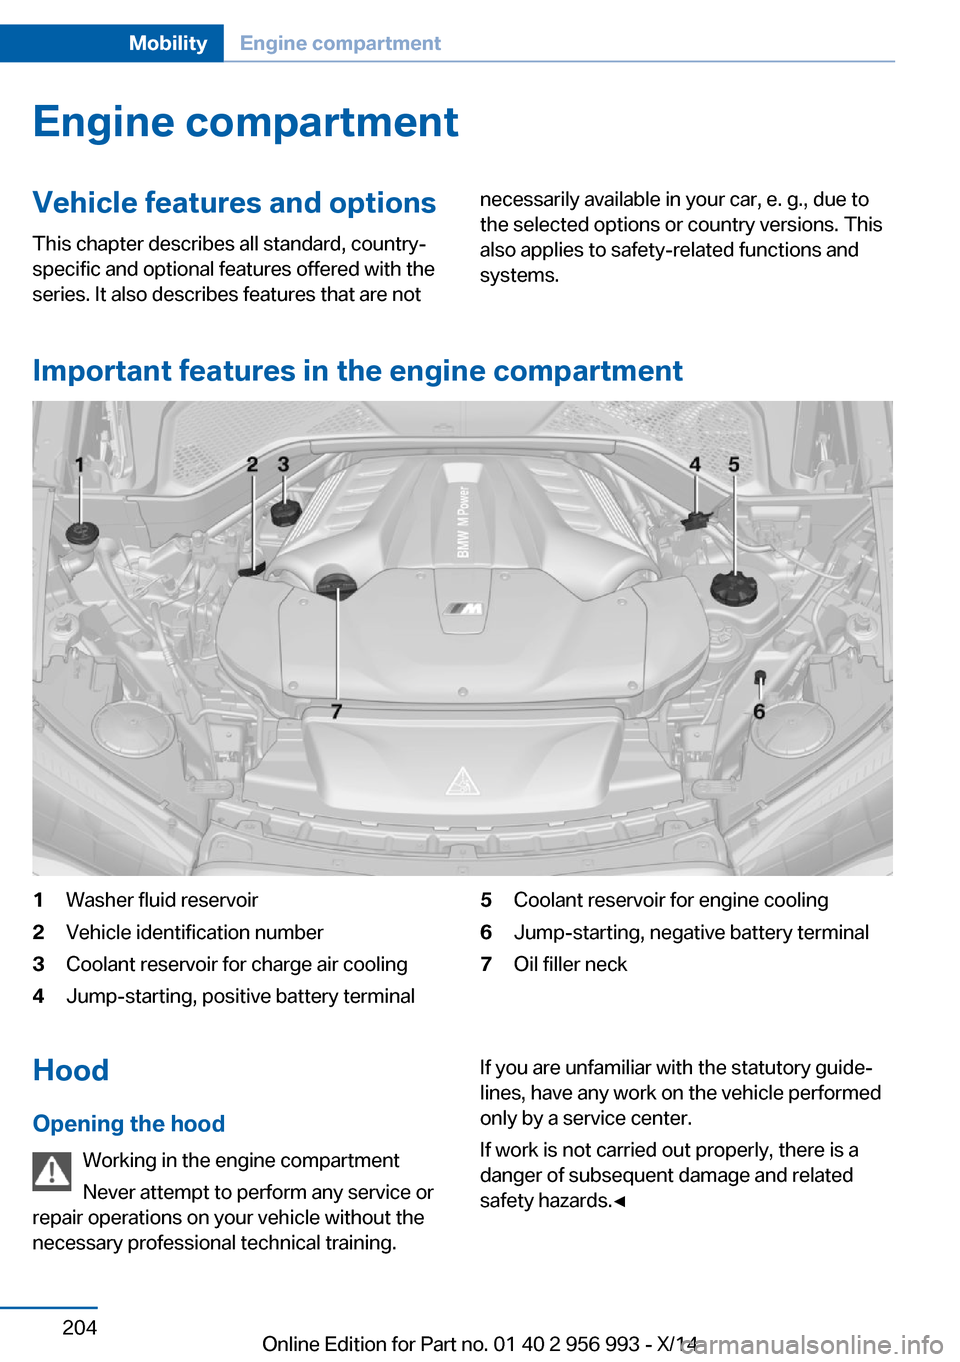
Important features in the engine compartment
1Washer fluid reservoir2Vehicle identification number3Coolant reservoir for charge air cooling4Jump-starting, positive battery terminal5Coolant reservoir for engine cooling6Jump-starting, negative battery terminal7Oil filler neckHood
Opening the hood Working in the engine compartment
Never attempt to perform any service or
repair operations on your vehicle without the necessary professional technical training.If you are unfamiliar with the statutory guide‐
lines, have any work on the vehicle performed
only by a service center.
If work is not carried out properly, there is a
danger of subsequent damage and related
safety hazards.◀Seite 204MobilityEngine compartment204
Online Edition for Part no. 01 40 2 956 993 - X/14
Page 209 of 251
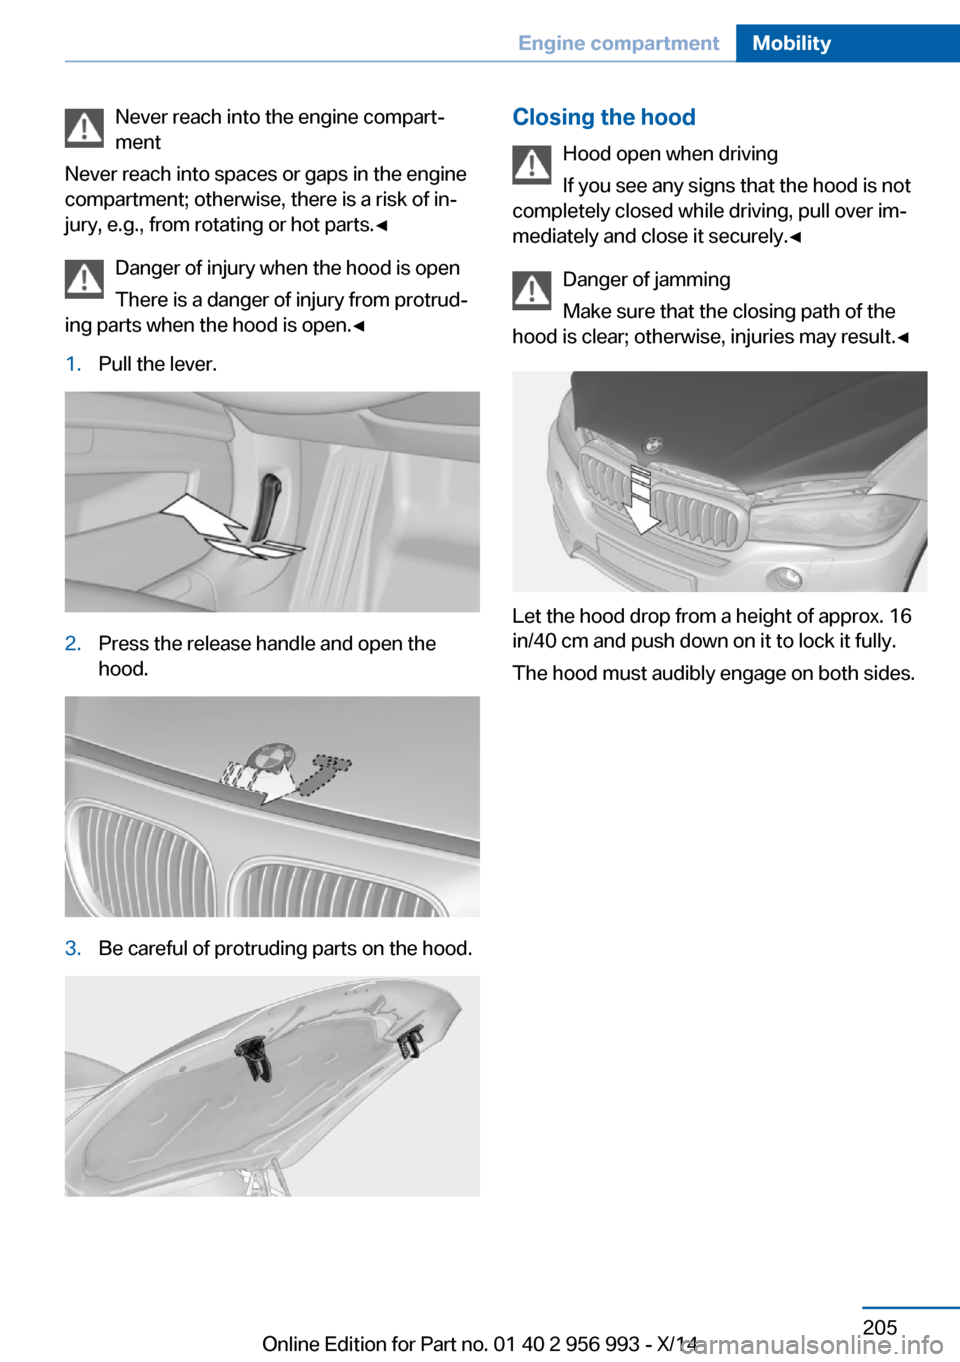
Never reach into the engine compart‐
ment
Never reach into spaces or gaps in the engine
compartment; otherwise, there is a risk of in‐
jury, e.g., from rotating or hot parts.◀
Danger of injury when the hood is open
There is a danger of injury from protrud‐
ing parts when the hood is open.◀1.Pull the lever.2.Press the release handle and open the
hood.3.Be careful of protruding parts on the hood.Closing the hood
Hood open when driving
If you see any signs that the hood is not
completely closed while driving, pull over im‐
mediately and close it securely.◀
Danger of jamming
Make sure that the closing path of the
hood is clear; otherwise, injuries may result.◀
Let the hood drop from a height of approx. 16
in/40 cm and push down on it to lock it fully.
The hood must audibly engage on both sides.
Seite 205Engine compartmentMobility205
Online Edition for Part no. 01 40 2 956 993 - X/14
Page 217 of 251
Replacing componentsVehicle features and optionsThis chapter describes all standard, country-
specific and optional features offered with the
series. It also describes features that are not
necessarily available in your car, e. g., due to
the selected options or country versions. This
also applies to safety-related functions and
systems.
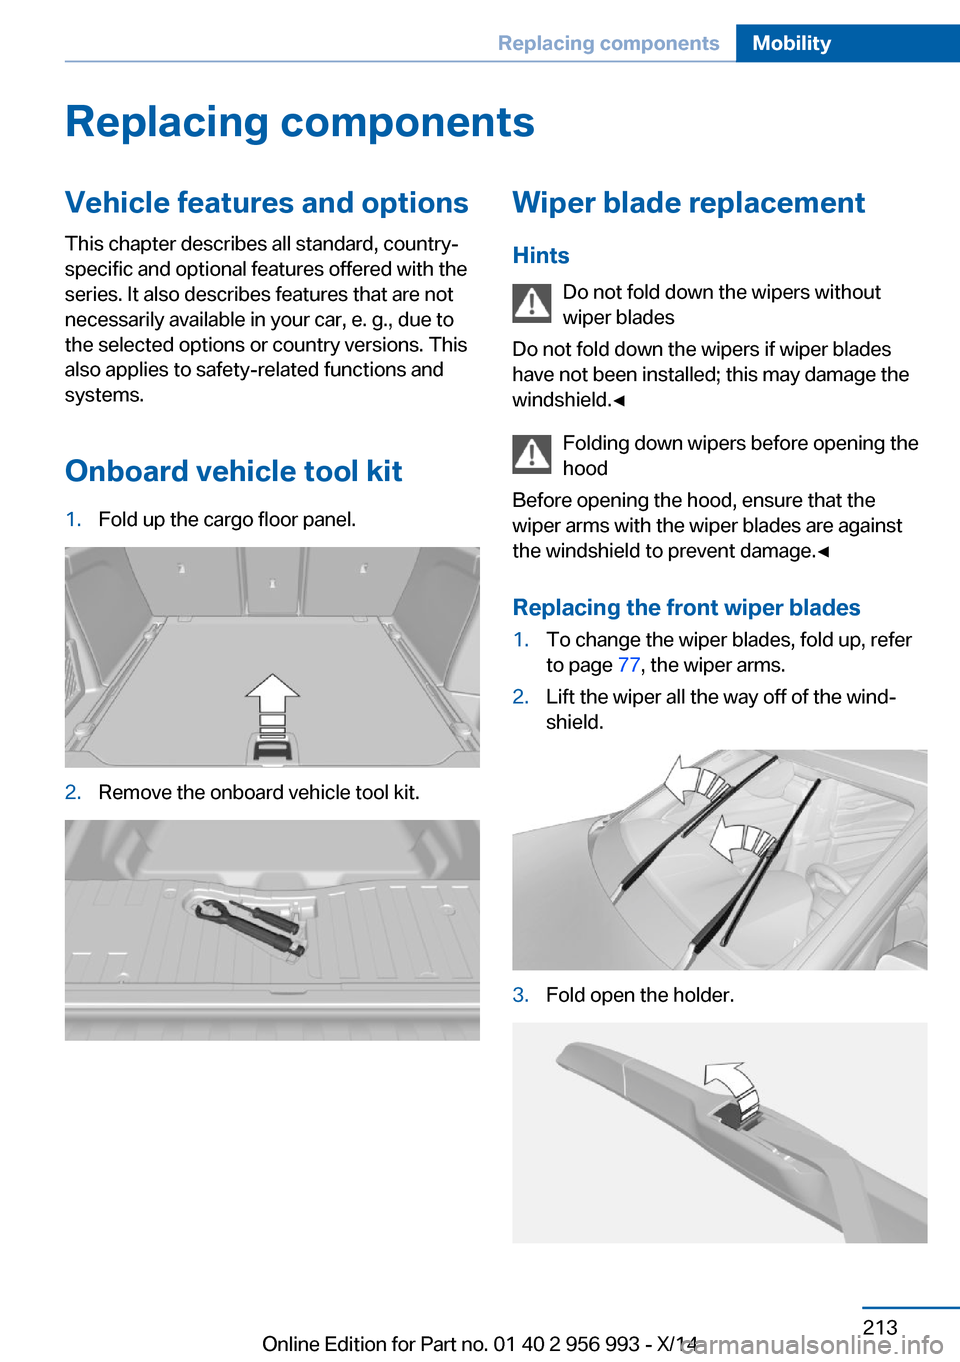
Onboard vehicle tool kit1.Fold up the cargo floor panel.2.Remove the onboard vehicle tool kit.Wiper blade replacementHints Do not fold down the wipers without
wiper blades
Do not fold down the wipers if wiper blades
have not been installed; this may damage the
windshield.◀
Folding down wipers before opening the
hood
Before opening the hood, ensure that the
wiper arms with the wiper blades are against
the windshield to prevent damage.◀
Replacing the front wiper blades1.To change the wiper blades, fold up, refer
to page 77, the wiper arms.2.Lift the wiper all the way off of the wind‐
shield.3.Fold open the holder.Seite 213Replacing componentsMobility213
Online Edition for Part no. 01 40 2 956 993 - X/14
Page 219 of 251
Do not remove the covers
Do not remove the covers, and never
stare into the unfiltered light for several hours;
otherwise, irritation of the retina could result.◀
Headlight glass
Condensation can form on the inside of the ex‐
ternal lights in cool or humid weather. When
driving with the light switched on, the conden‐
sation evaporates after a short time. The head‐
light glass does not need to be changed.
If the headlights do not dim despite driving
with the light switched on, increasing humidity
forms, e. g. water droplets in the light, have the service center check this.
Headlight setting The headlight adjustments can be affected by
changing lights and bulbs. Have the head‐
lights' settings checked and corrected by serv‐
ice after a replacement.
Front lights, bulb replacement
Xenon headlights
Hints
Because of the long life of these bulbs, the
likelihood of failure is very low. Switching the
lights on and off frequently shortens their life.
If a bulb fails, reel on the front fog lights and
continue the trip with great care. Comply with local regulations.
Do not perform work/bulb replacement
on xenon headlights
Have any work on the xenon lighting system,
including bulb replacement, performed only by
a service center. Due to the high voltage present in the system, there is a danger of fatal
injuries if work is carried out improperly.◀
For checking and adjusting headlamp aim,
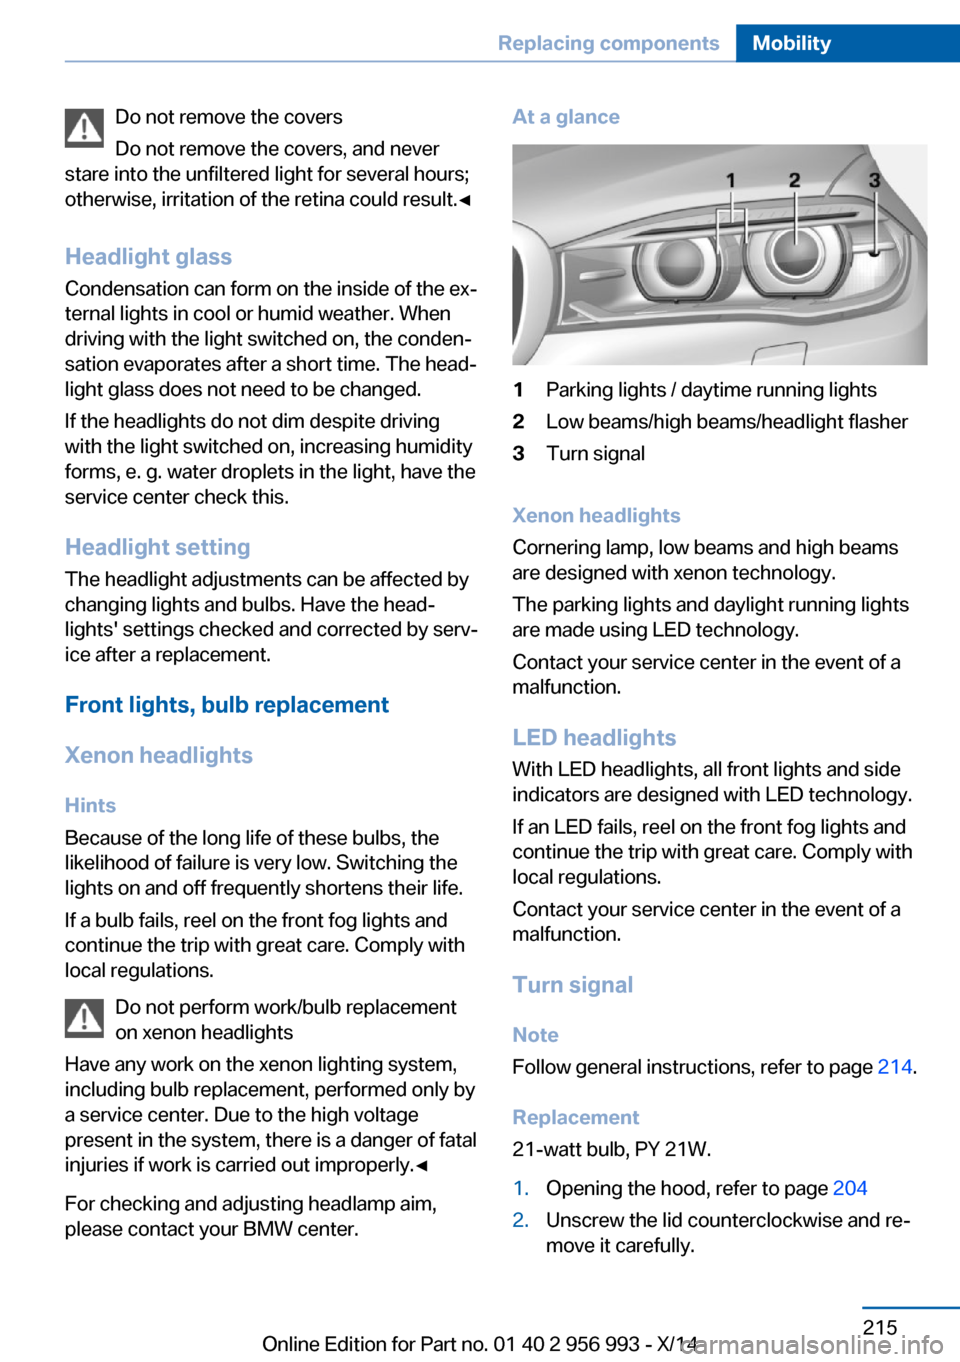
please contact your BMW center.At a glance1Parking lights / daytime running lights2Low beams/high beams/headlight flasher3Turn signal
Xenon headlights
Cornering lamp, low beams and high beams
are designed with xenon technology.
The parking lights and daylight running lights
are made using LED technology.
Contact your service center in the event of a
malfunction.
LED headlightsWith LED headlights, all front lights and side
indicators are designed with LED technology.
If an LED fails, reel on the front fog lights and continue the trip with great care. Comply withlocal regulations.
Contact your service center in the event of a
malfunction.
Turn signal Note
Follow general instructions, refer to page 214.
Replacement
21-watt bulb, PY 21W.
1.Opening the hood, refer to page 2042.Unscrew the lid counterclockwise and re‐
move it carefully.Seite 215Replacing componentsMobility215
Online Edition for Part no. 01 40 2 956 993 - X/14
Page 243 of 251
Equipment, interior 157
Error displays, see Check Control 85
ESP Electronic Stability Pro‐ gram, refer to DSC 130
Exchanging wheels/tires 199
Exhaust system 178
Exterior mirror, automatic dimming feature 60
Exterior mirrors 59
External start 222
External temperature dis‐ play 89
External temperature warn‐ ing 89
Eyes for securing cargo 182
F
Failure message, see Check Control 85
False alarm, refer to Uninten‐ tional alarm 47
Fan, refer to Air flow 151
Filler neck for engine oil 207
Fine wood, care 227
First aid kit 221
Fitting for towing, see tow fit‐ ting 224
Flat tire, changing wheels 216
Flat Tire Monitor FTM 112
Flat tire, repairing 200
Flat tire, Tire Pressure Moni‐ tor TPM 109
Flat tire, warning lamp 110, 112
Flooding 178
Floor carpet, care 228
Floor mats, care 228
Fold-out position, wiper 77
Foot brake 178
Front airbags 106
Front center armrest 169
Front cupholder 171 Front-end collision warning
with City Braking func‐
tion 114
Front fog lights 104
Front fog lights, bulb replace‐ ment 216
Front lights 215
front-seat passenger airbags, automatic deactivation 108
Front-seat passenger airbags, indicator lamp 108
Front seats 52
FTM Flat Tire Monitor 112
Fuel 192
Fuel consumption, current 91
Fuel consumption, refer to Average fuel consump‐
tion 96
Fuel filler flap 190
Fuel gauge 89
Fuel lid 190
Fuel quality 192
Fuel recommendation 192
Fuel, tank capacity 234
Fuse 219
G
Garage door opener, refer to Universal Integrated Remote
Control 157
Gasoline 192
Gear change 80
Gear shift indicator 93
General driving notes 177
Glare shield 159
Glasses compartment 170
Glass sunroof, powered 49
Glass sunroof, refer to Panor‐ amic glass sunroof 49
Glove compartment 168
Gross vehicle weight, ap‐ proved 233
Ground clearance 179 H
Handbrake, refer to Parking brake 72
Hand-held transmitter, alter‐ nating code 158
Hazard warning flashers 220
HDC Hill Descent Con‐ trol 132
Head airbags 106
Headlight control, auto‐ matic 102
Headlight courtesy delay fea‐ ture 101
Headlight flasher 75
Headlight glass 215
Headlights 215
Headlights, care 226
Headlight washer system 75
Head restraints 52
Head restraints, front 56
Head restraints, rear 57
Head-up Display 99
Head-up Display, care 228
Head-up display, M view 99
Head-up display, standard view 99
Heavy cargo, stowing 182
High-beam Assistant 103
High beams 75
High beams/low beams, refer to High-beam Assistant 103
Hill Descent Control HDC 132
Hills 179
Hill start assistant, refer to Drive-off assistant 129
Hints 6
Holder for beverages 171
Hood 204
Horn 14
Hot exhaust system 178
HUD Head-up Display 99
Hydroplaning 178 Seite 239Everything from A to ZReference239
Online Edition for Part no. 01 40 2 956 993 - X/14