height adjustment BMW X6 2008 Owners Manual
[x] Cancel search | Manufacturer: BMW, Model Year: 2008, Model line: X6, Model: BMW X6 2008Pages: 288, PDF Size: 8.08 MB
Page 36 of 288
Opening and closing
34 2.Push the catch 2 in the direction of the
arrow.
3.Open the liftgate and press the cover back
into place.
The liftgate is locked again as soon as it is
closed.
Closing
Make sure that the closing path of the lift-
gate is clear, otherwise injuries may
result.<
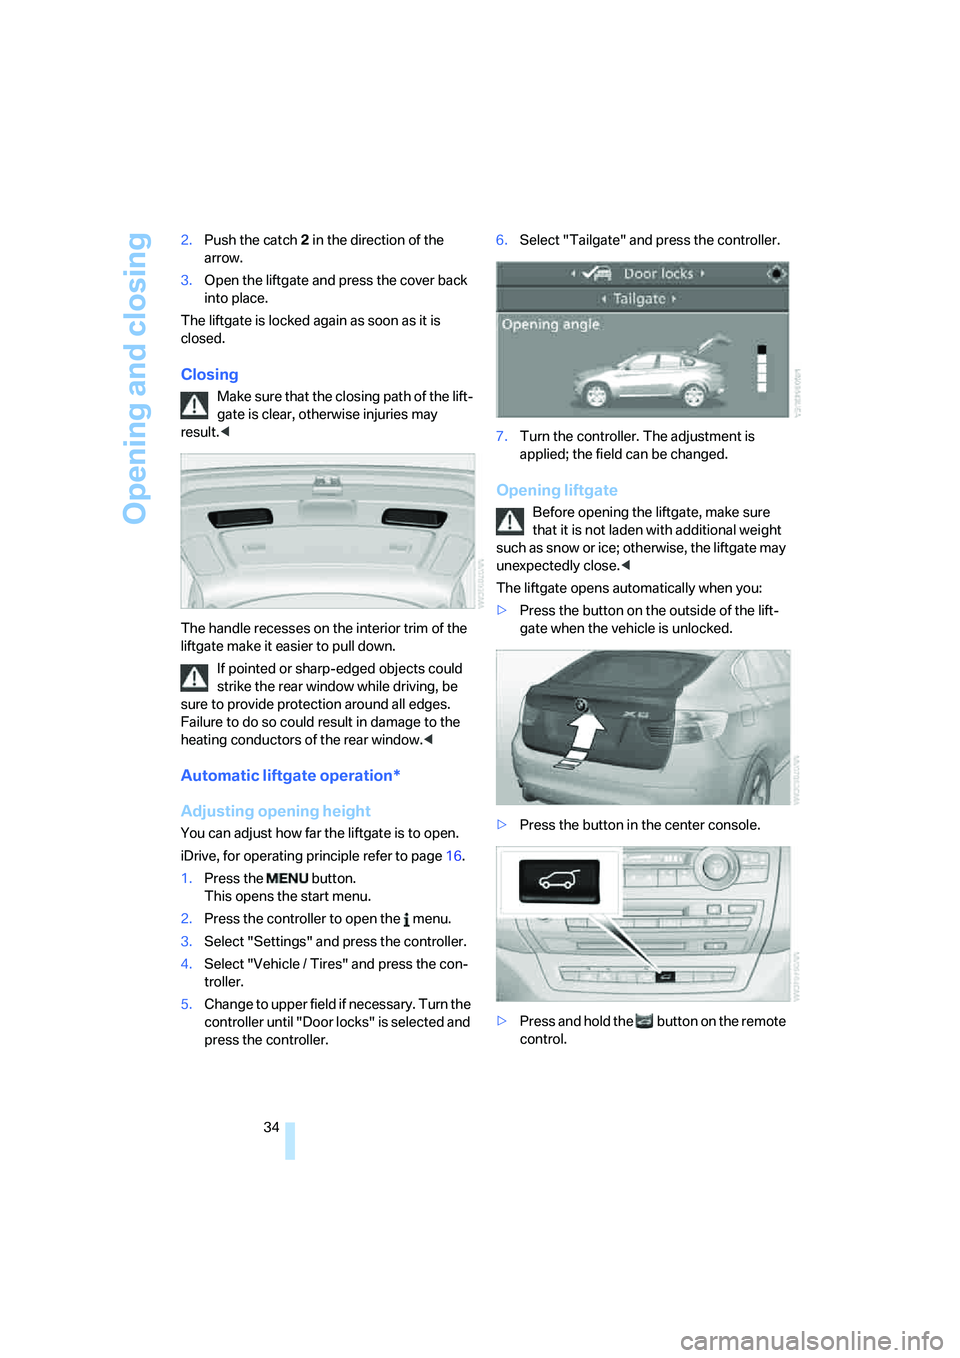
The handle recesses on the interior trim of the
liftgate make it easier to pull down.
If pointed or sharp-edged objects could
strike the rear window while driving, be
sure to provide protection around all edges.
Failure to do so could result in damage to the
heating conductors of the rear window.<
Automatic liftgate operation*
Adjusting opening height
You can adjust how far the liftgate is to open.
iDrive, for operating principle refer to page16.
1.Press the button.
This opens the start menu.
2.Press the controller to open the menu.
3.Select "Settings" and press the controller.
4.Select "Vehicle / Tires" and press the con-
troller.
5.Change to upper field if necessary. Turn the
controller until "Door locks" is selected and
press the controller.6.Select "Tailgate" and press the controller.
7.Turn the controller. The adjustment is
applied; the field can be changed.
Opening liftgate
Before opening the liftgate, make sure
that it is not laden with additional weight
such as snow or ice; otherwise, the liftgate may
unexpectedly close.<
The liftgate opens automatically when you:
>Press the button on the outside of the lift-
gate when the vehicle is unlocked.
>Press the button in the center console.
>Press and hold the button on the remote
control.
Page 45 of 288
Controls
43Reference
At a glance
Driving tips
Communications
Navigation
Entertainment
Mobility
Seats
Note before adjusting
Never attempt to adjust or calibrate your
seat while the vehicle is moving. The seat
could respond with unexpected movement, and
the ensuing loss of vehicle control could lead to
an accident.
Never adjust manually adjustable seats while
the vehicle is moving, as otherwise the restrain-
ing effect of these seats during accidents could
be reduced.
Also on the passenger side, do not incline the
backrest too far to the rear while the vehicle is
being driven, otherwise there is a danger in the
event of an accident of sliding under the safety
belt, eliminating the protection normally pro-
vided by the belt.<
Also observe the information on damage to
safety belts on page47 and on the height of the
head restraints on page46.
Adjusting manually*
To ensure that the safety systems con-
tinue to provide optimized protection,
please observe the adjustment instructions on
page42.<
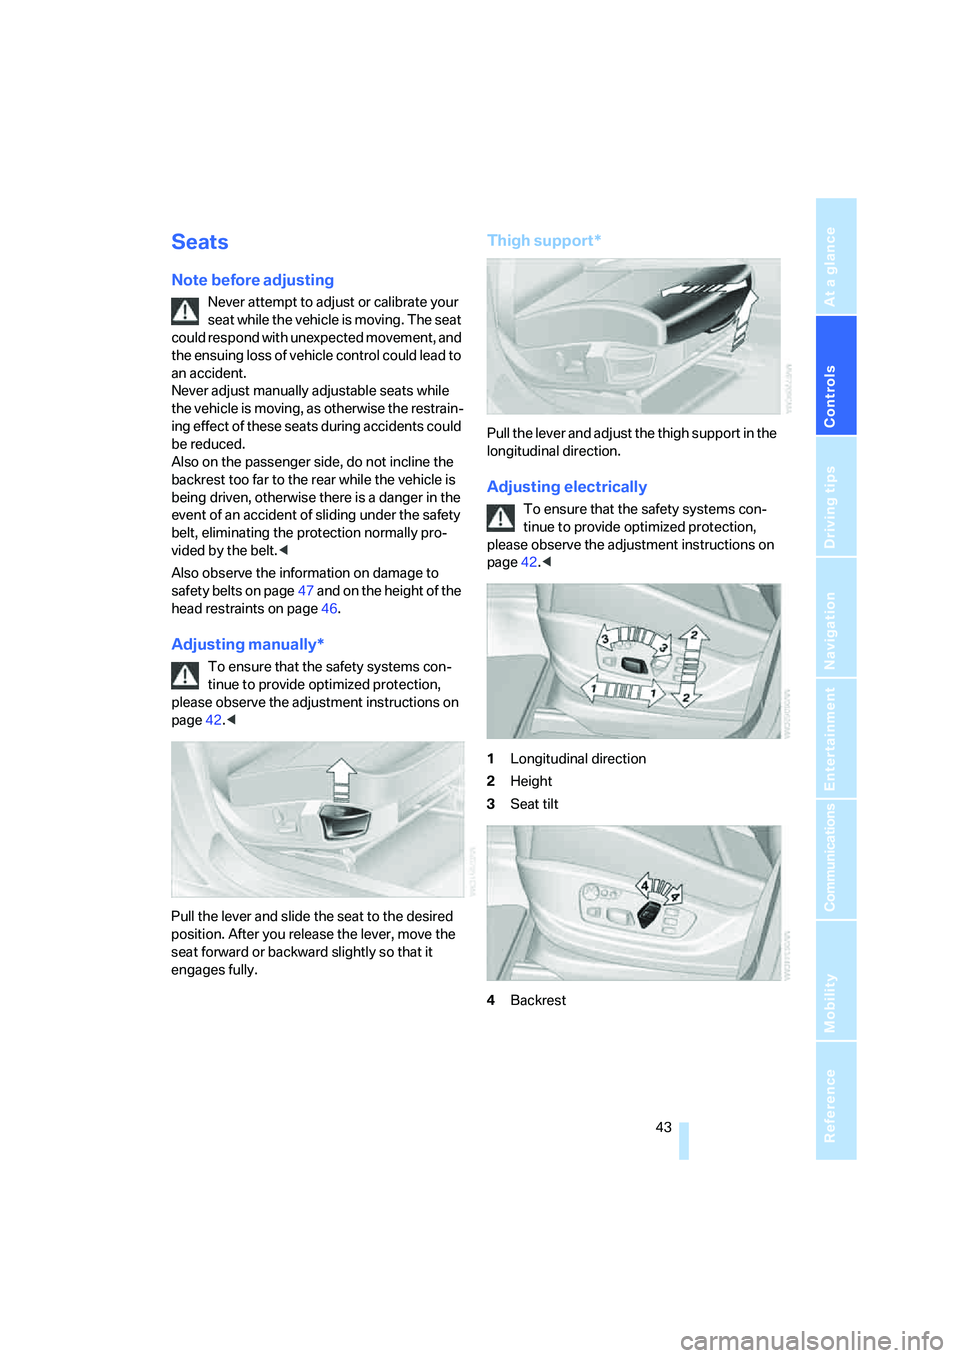
Pull the lever and slide the seat to the desired
position. After you release the lever, move the
seat forward or backward slightly so that it
engages fully.
Thigh support*
Pull the lever and adjust the thigh support in the
longitudinal direction.
Adjusting electrically
To ensure that the safety systems con-
tinue to provide optimized protection,
please observe the adjustment instructions on
page42.<
1Longitudinal direction
2Height
3Seat tilt
4Backrest
Page 46 of 288
Adjusting
44 Differs depending on seat:
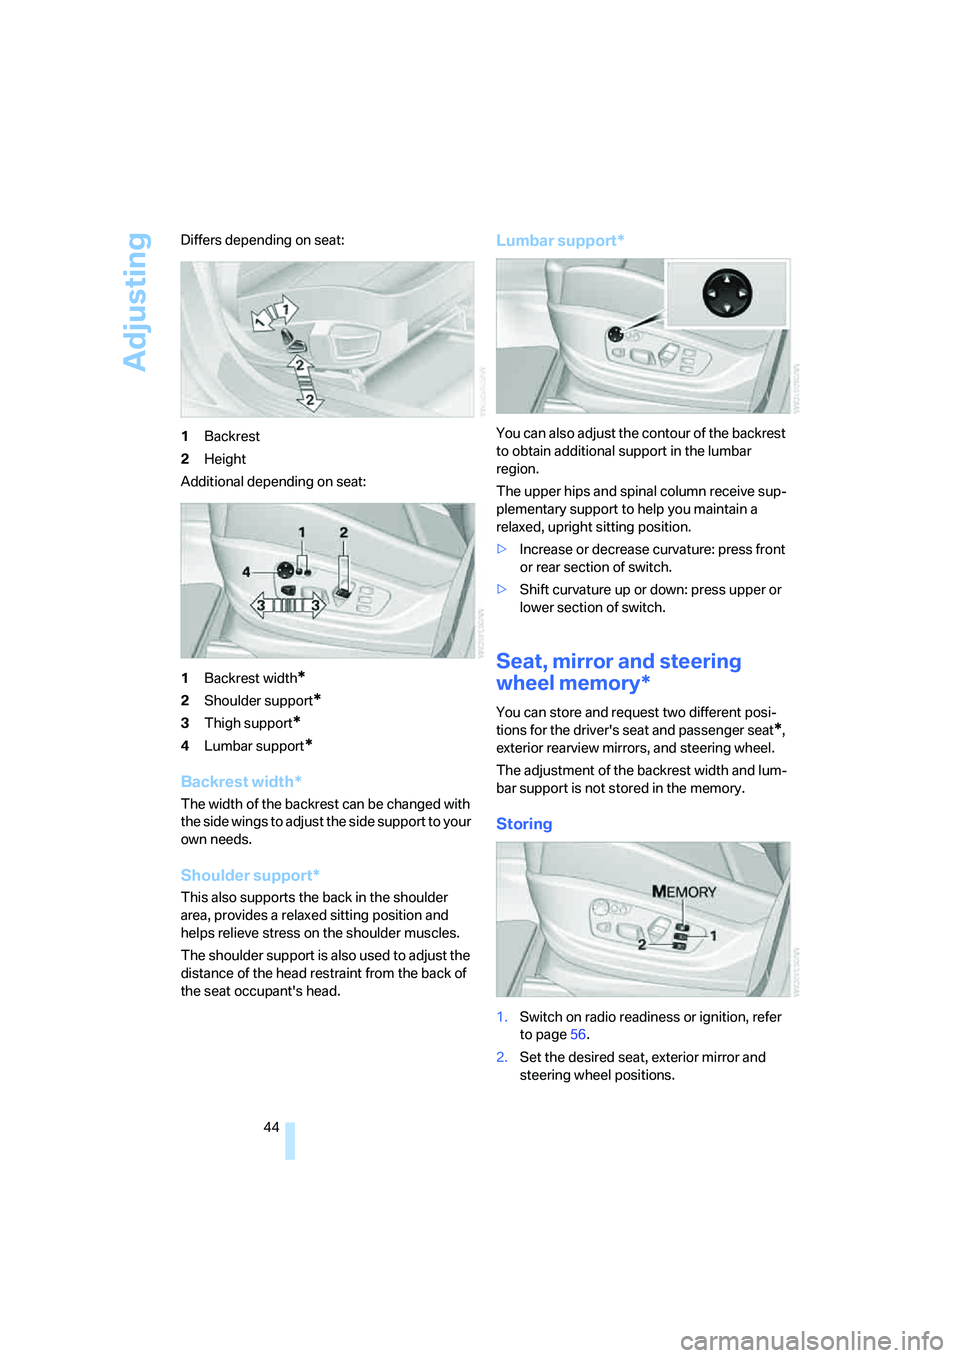
1Backrest
2Height
Additional depending on seat:
1Backrest width
*
2Shoulder support*
3Thigh support*
4Lumbar support*
Backrest width*
The width of the backrest can be changed with
the side wings to adjust the side support to your
own needs.
Shoulder support*
This also supports the back in the shoulder
area, provides a relaxed sitting position and
helps relieve stress on the shoulder muscles.
The shoulder support is also used to adjust the
distance of the head restraint from the back of
the seat occupant's head.
Lumbar support*
You can also adjust the contour of the backrest
to obtain additional support in the lumbar
region.
The upper hips and spinal column receive sup-
plementary support to help you maintain a
relaxed, upright sitting position.
>Increase or decrease curvature: press front
or rear section of switch.
>Shift curvature up or down: press upper or
lower section of switch.
Seat, mirror and steering
wheel memory*
You can store and request two different posi-
tions for the driver's seat and passenger seat
*,
exterior rearview mirrors, and steering wheel.
The adjustment of the backrest width and lum-
bar support is not stored in the memory.
Storing
1.Switch on radio readiness or ignition, refer
to page56.
2.Set the desired seat, exterior mirror and
steering wheel positions.
Page 48 of 288
Adjusting
46
Head restraints
A correctly adjusted head restraint reduces the
risk of spinal injury in the event of an accident.
Adjust the head restraint so that its center
is approx. at ear level. Otherwise there is
increased danger of injury in the event of an
accident. Only remove the head restraints if the
respective seat is not occupied. Reinstall the
head restraints before transporting passen-
gers, as otherwise the head restraint cannot
provide its protective function.<
Active front head restraints
In the event of a rear-end collision of sufficient
severity, the active head restraint reduces the
distance to the head.
Do not use seat covers or head restraint
covers that could impede the proper
functioning of the active head restraint. Other-
wise, there is no assurance that the active head
restraint will perform its protective function and
it is not possible to take advantage of its injury-
reducing potential in the event of a rear-end
collision.
Have the active head restraints reset after they
are triggered in a rear-end collision. Have this
work carried out only at a BMW Sports Activity
Vehicle Center or at a workshop that works
according to BMW repair procedures with cor-
respondingly trained personnel. Otherwise,
correct operation of this safety equipment is not
guaranteed.<
Removal and installation of the front head
restraints should be performed by a BMW
Sports Activity Vehicle Center.<
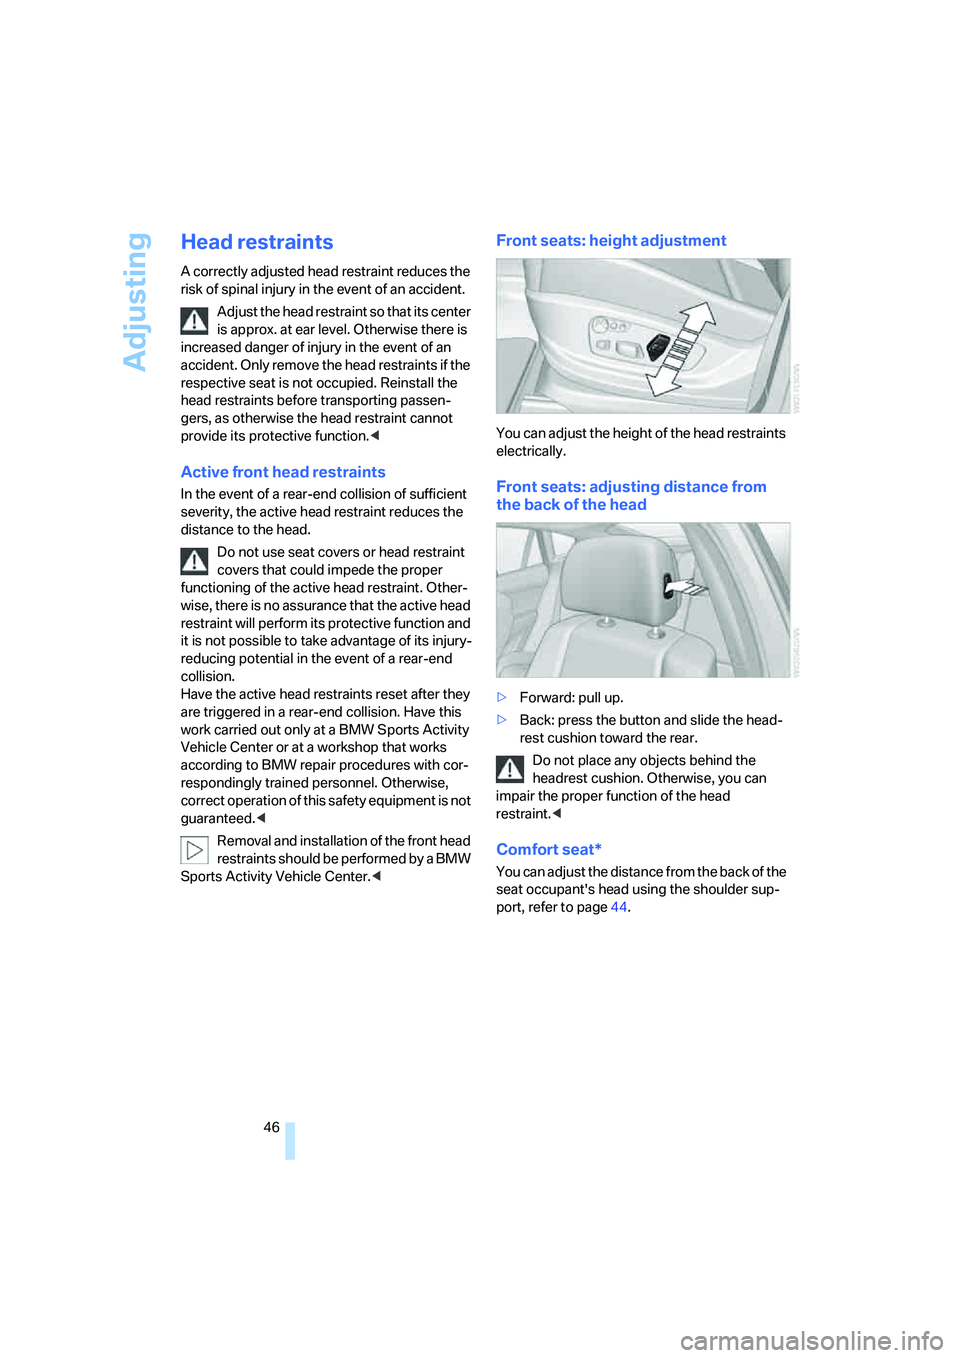
Front seats: height adjustment
You can adjust the height of the head restraints
electrically.
Front seats: adjusting distance from
the back of the head
>Forward: pull up.
>Back: press the button and slide the head-
rest cushion toward the rear.
Do not place any objects behind the
headrest cushion. Otherwise, you can
impair the proper function of the head
restraint.<
Comfort seat*
You can adjust the distance from the back of the
seat occupant's head using the shoulder sup-
port, refer to page44.
Page 55 of 288
Controls
53Reference
At a glance
Driving tips
Communications
Navigation
Entertainment
Mobility
Transporting children safely
The right place for children
Do not leave children unattended in the
vehicle, otherwise they could endanger
themselves and other persons, e.g. by opening
the doors.<
Children always in rear
Accident research shows that the safest place
for children is on the rear seat.
Children younger than 13 years of age or
less than 5 ft/150 cm tall should only be
transported in the rear, in child restraint sys-
tems that correspond to their age, weight and
height. Otherwise there is an increased danger
of injury in an accident.<
Children 13 years of age or older must wear a
safety belt as soon as a suitable child restraint
system can no longer be used due to their age,
weight and size.
Exception for front passenger seat
Should it be necessary to use a child
restraint system on the front passenger
seat, the front and side airbags on the passen-
ger side must be deactivated. Otherwise, there
is an increased risk of injury for the child if the
airbags are triggered, even with a child restraint
system.<
For more information on automatic deactivation
of the front passenger airbags, refer to page95.
Installing child restraint
systems
Follow the child restraint system manu-
facturer's instructions for selection,
installation, and use of child restraint systems.
Otherwise, the degree of protection may be
reduced.<
On front passenger seat
After mounting a child restraint system on
the front passenger seat, make sure that
the front and side airbags on the front passen-
ger side are deactivated; otherwise, there is an
increased risk of injury if the airbags are trig-
gered.<
Backrest width*
The backrest width adjustment of the
front passenger seat must be completely
open. After installing the child's seat, no mem-
ory position may be called up; otherwise, the
stability of the child's seat on the front passen-
ger seat is reduced.<
1.Open backrest width adjustment com-
pletely, refer to page44.
2.Install child's seat.
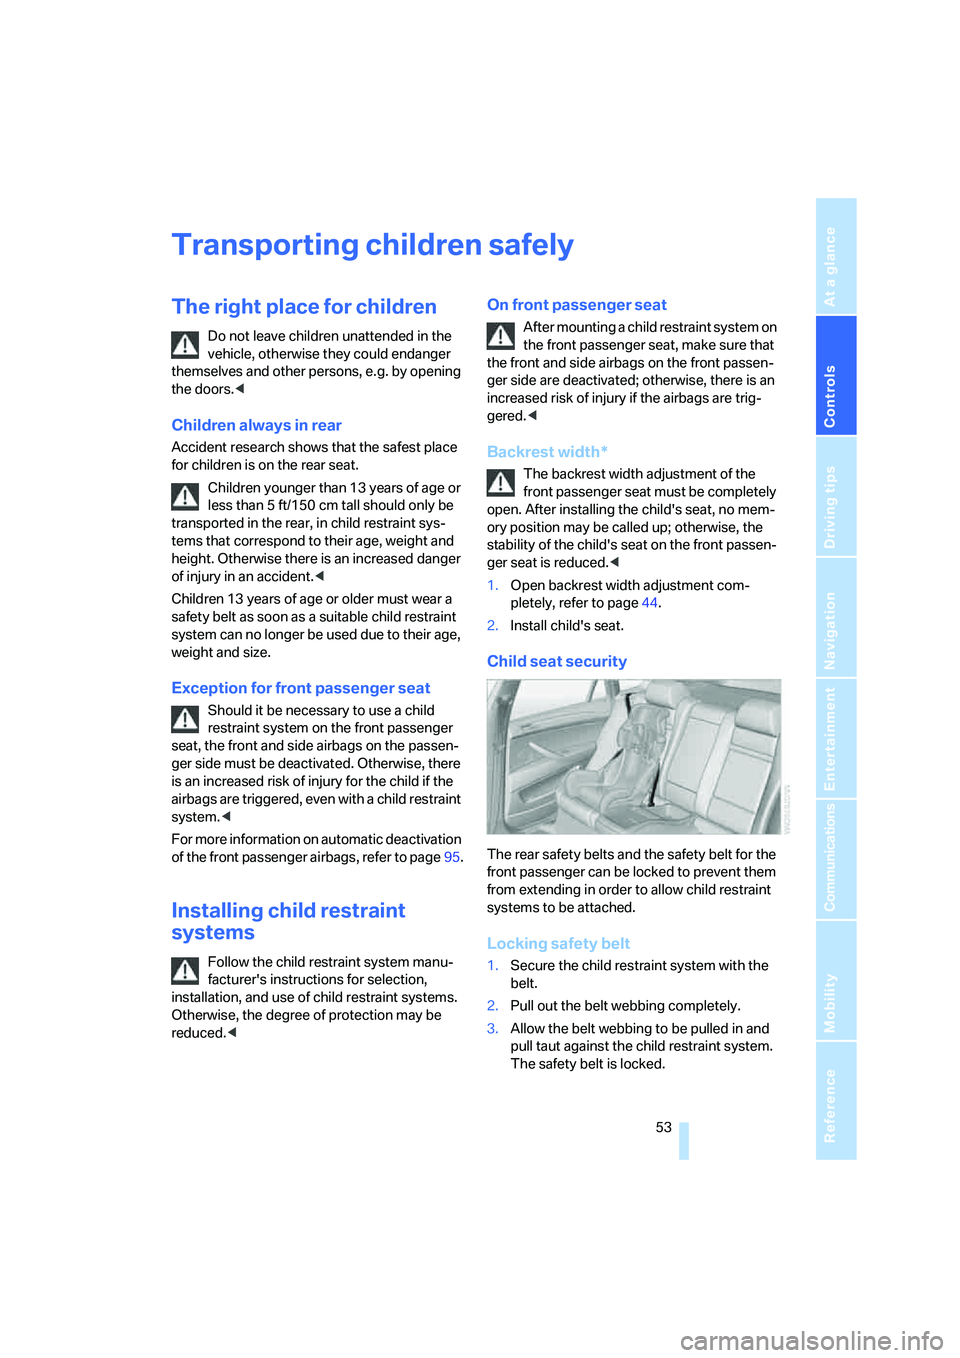
Child seat security
The rear safety belts and the safety belt for the
front passenger can be locked to prevent them
from extending in order to allow child restraint
systems to be attached.
Locking safety belt
1.Secure the child restraint system with the
belt.
2.Pull out the belt webbing completely.
3.Allow the belt webbing to be pulled in and
pull taut against the child restraint system.
The safety belt is locked.
Page 275 of 288
Reference 273
At a glance
Controls
Driving tips
Communications
Navigation
Entertainment
Mobility
Front seat adjustment43
FTM Flat Tire Monitor89
– false alarms90
– indicating a flat tire90
– initializing the system90
– malfunction94
– snow chains238
– system limits90
– warning lamp90
Fuel231
– capacity261
– display69
– high-quality brands231
– quality231
– saving126
– specifications231
Fuel clock, refer to Fuel
gauge69
Fuel consumption display
– computer, average fuel
consumption70
Fuel display, refer to Fuel
gauge69
Fuel filler door230
– closing230
– opening230
– releasing manually230
Fuses251
G
Garage door opener, refer to
Integrated universal remote
control112
Gasoline, refer to Required
fuel231
Gasoline display, refer to Fuel
gauge69
Gear changes, automatic
transmission with
Steptronic62
General driving
notes126,127Glass sunroof, electric39
– convenience operation from
outside32
– convenience operation with
comfort access37
– moving manually41
– opening, closing40
– power interruption40
– raising39
– remote control30
Glove compartment115
– lighting115
– opening manually115
GPS navigation, refer to
Navigation system134
Grills, refer to Ventilation107
Grills of the automatic climate
control103
Gross vehicle weight, refer to
Weights260
H
Handbrake, refer to Parking
brake57
– Automatic Hold58
Hands-free system, refer to
Microphone14
Hazard warning flashers15
HDC Hill Descent Control87
"HD radio"167
HD radio, refer to High
Definition Radio167
Head airbags95
Headlamp control,
automatic99
Headlamp flasher64
Headlamps99
– care, refer to Caring for your
vehicle brochure
– cleaning, refer to Washer/
wiper system64
– replacing bulbs245
Head Light, refer to Adaptive
Head Light101
Head restraints46
– sitting safely42
"Head-Up Display"97
Head-Up Display97Heated
– mirrors50
– rear window105
– seats48
– steering wheel51
Heating103
– exterior mirrors50
– interior103
– rear window105
– residual heat107
– seats48
– steering wheel51
Heating with engine switched
off, refer to Residual
heat107
Heavy cargo, refer to Securing
cargo130
Height, refer to
Dimensions259
Height adjustment
– seats43
– steering wheel51
High beams64,101
– headlamp flasher64
– indicator lamp13
High Definition Radio167
Highs, refer to Treble and
bass161
High water, refer to Driving
through water127
Highway, refer to Route
criteria146
Hill Descent Control HDC87
Hills128
Holder for cups117
Home address146
"Home address" for
navigation146
Homepage4
Hood239
Horn10
Hot exhaust system127
"Hour memo"79
"House number" for
destination entry139
Hydraulic brake assistant,
refer to Brake assistant86
Hydroplaning127