CD player BMW X6 2013 E71 User Guide
[x] Cancel search | Manufacturer: BMW, Model Year: 2013, Model line: X6, Model: BMW X6 2013 E71Pages: 345, PDF Size: 9.45 MB
Page 222 of 345
Menu navigation
You can use the thumbwheel and buttons 1 to
navigate through the menus.▷Turn the thumbwheel: select a menu item.▷Press the arrow buttons: change between
fields.▷ Press the button: activate the menu
item.
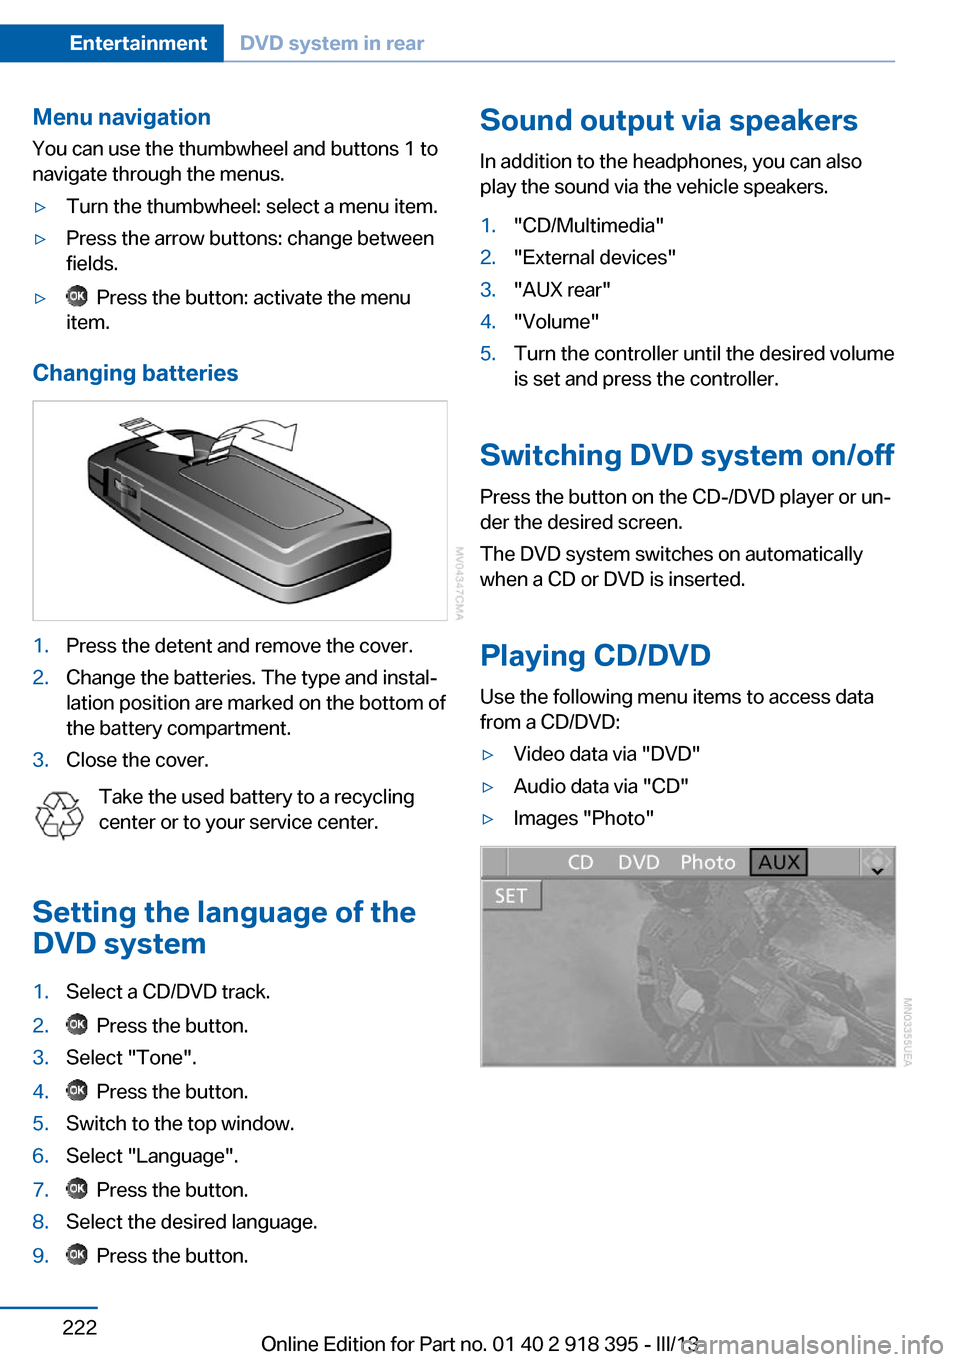
Changing batteries
1.Press the detent and remove the cover.2.Change the batteries. The type and instal‐
lation position are marked on the bottom of
the battery compartment.3.Close the cover.
Take the used battery to a recycling
center or to your service center.
Setting the language of the
DVD system
1.Select a CD/DVD track.2. Press the button.3.Select "Tone".4. Press the button.5.Switch to the top window.6.Select "Language".7. Press the button.8.Select the desired language.9. Press the button.Sound output via speakers
In addition to the headphones, you can also
play the sound via the vehicle speakers.1."CD/Multimedia"2."External devices"3."AUX rear"4."Volume"5.Turn the controller until the desired volume
is set and press the controller.
Switching DVD system on/off
Press the button on the CD-/DVD player or un‐
der the desired screen.
The DVD system switches on automatically
when a CD or DVD is inserted.
Playing CD/DVD
Use the following menu items to access data
from a CD/DVD:
▷Video data via "DVD"▷Audio data via "CD"▷Images "Photo"Seite 222EntertainmentDVD system in rear222
Online Edition for Part no. 01 40 2 918 395 - III/13
Page 223 of 345
Playing videos from CDs/
DVDs
Country codes of DVDs
Your DVD player only plays DVDs with the
coding of your home region, e.g., Europe=2.
The country codes supported by your DVD are
contained in the information on your DVD.
An overview of the coding zones:CodeRegion1USA, Canada2Japan, Europe, Middle East, South Af‐
rica3Southeast Asia4Australia, Central and South America,
New Zealand5Northwest Asia, North Africa6China
DVDs with the code 0 can be played on all de‐
vices.
Starting playback
1.Push the CD/DVD into the drive with the la‐
beled side facing upward. The CD/DVD is
automatically pulled in.▷Playback begins automatically after a
few seconds.▷Otherwise: select "DVD".2.If the DVD control or the DVD-specific
menu is displayed when a DVD is inserted,
use the remote control buttons for menu
navigation to select the desired option.
Or:
Press the button on the CD/DVD
player.
You can control the playback with the buttons
on the CD/DVD player or the DVD control.
Video CDs (VCDs) and Super Video CDs
(SVCDs) can only be played if they do not have
a DVD-specific menu.
Eject CD/DVD
Press the button on the CD/DVD player.
The DVD emerges slightly from the drive.
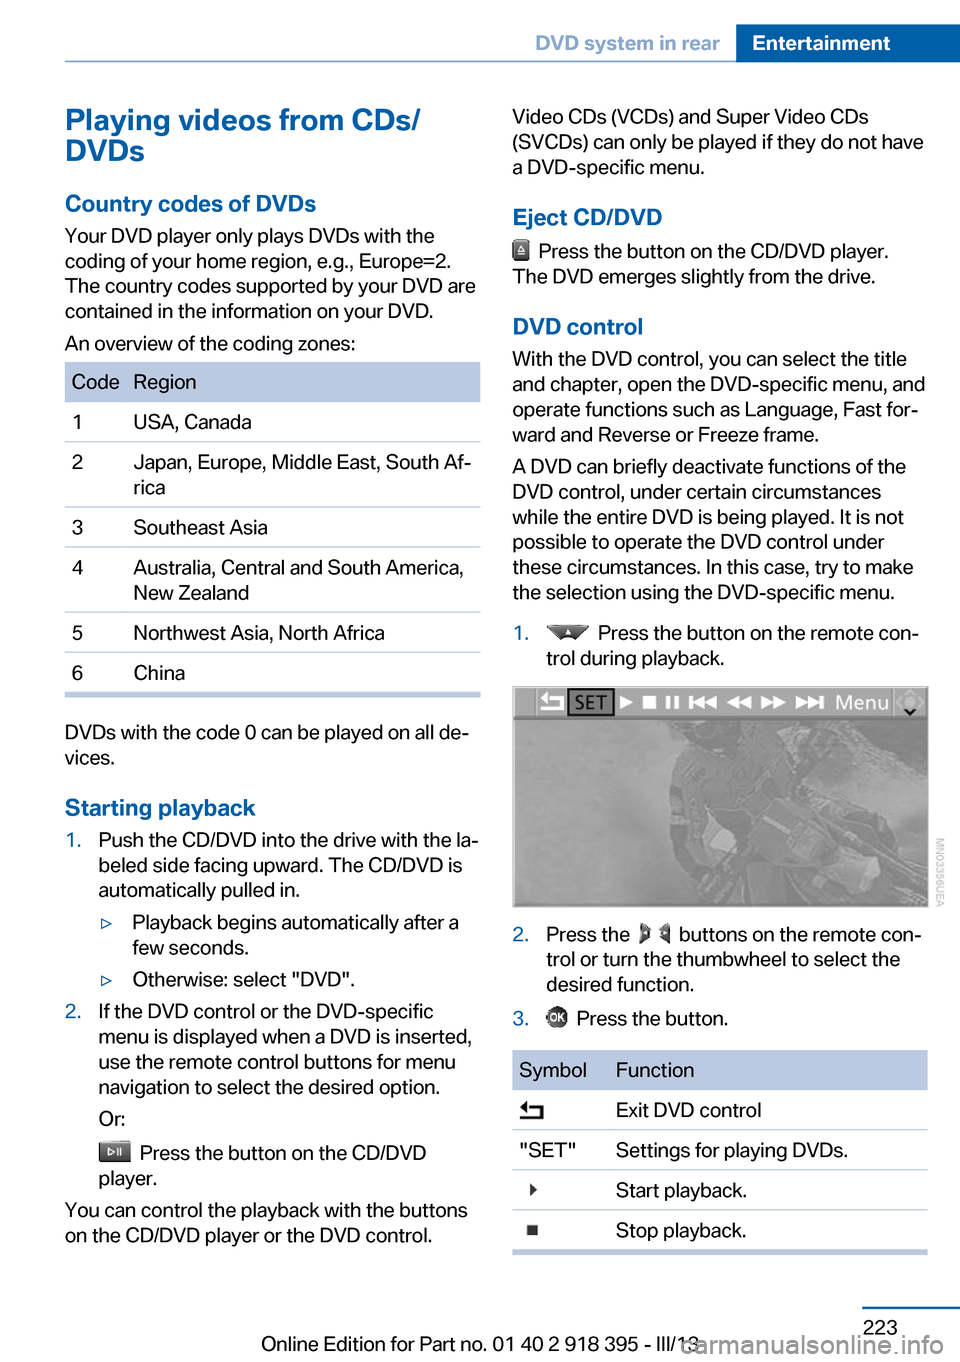
DVD control With the DVD control, you can select the title
and chapter, open the DVD-specific menu, and
operate functions such as Language, Fast for‐
ward and Reverse or Freeze frame.
A DVD can briefly deactivate functions of the
DVD control, under certain circumstances
while the entire DVD is being played. It is not
possible to operate the DVD control under
these circumstances. In this case, try to make
the selection using the DVD-specific menu.
1. Press the button on the remote con‐
trol during playback.2.Press the buttons on the remote con‐
trol or turn the thumbwheel to select the
desired function.3. Press the button.SymbolFunction Exit DVD control"SET"Settings for playing DVDs. Start playback. Stop playback.Seite 223DVD system in rearEntertainment223
Online Edition for Part no. 01 40 2 918 395 - III/13
Page 224 of 345
SymbolFunction Activate and deactivate freeze
frame. Skip a chapter. Fast forward/reverse."Menu"Open the DVD-specific menu.
The DVD control disappears again after a short
time if you have not selected a function.
Or:
Press the button on the remote control
to exit the DVD control.
Fast forward/reverse
Forward/reverse with DVD control
1. Press the button on the remote con‐
trol during playback.2. Select the symbol.3. Press the button.4. Press the button several times to in‐
crease the fast forward/reverse speed.
The DVD playback will be distorted.
To cancel fast forward/reverse:
1. Select the symbol.2. Press the button.
Or:
Press the button on the CD/DVD player.
The DVD will start play at the point selected.
Forward/reverse with remote control
Press and hold the button until you
reach the desired point.
Or:
1.During playback, turn the thumbwheel.
Fast forward/reverse is interrupted.2.Continue to turn the thumbwheel. The
speed is increased.3. Press the button on the CD/DVD
player. Fast forward/reverse is interrupted.
The DVD will start play at the point se‐
lected.
Skipping chapter
You can change to the next or previous chap‐
ter during playback.
1. Press the button on the remote con‐
trol during playback.2. Select the symbol.3. Press the button repeatedly, continuing
until you reach the desired chapter.
Or:
Press the button on the left or right on
the remote control repeatedly until you reach
the desired chapter.
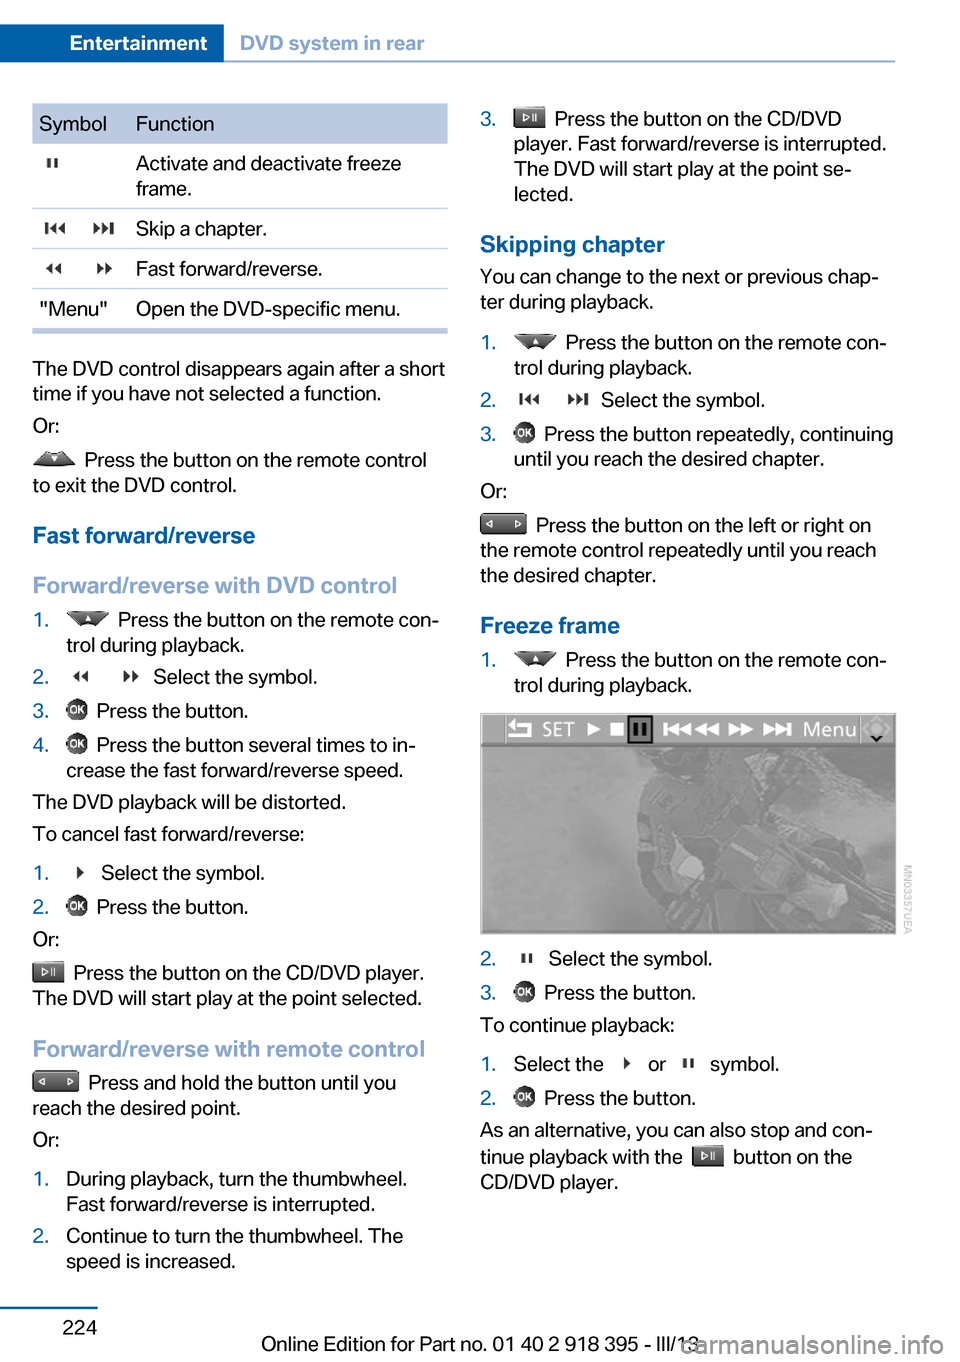
Freeze frame
1. Press the button on the remote con‐
trol during playback.2. Select the symbol.3. Press the button.
To continue playback:
1.Select the or symbol.2. Press the button.
As an alternative, you can also stop and con‐
tinue playback with the
button on the
CD/DVD player.
Seite 224EntertainmentDVD system in rear224
Online Edition for Part no. 01 40 2 918 395 - III/13
Page 227 of 345
3. Press the button.
As an alternative, you can also control the play‐
back with the buttons on the CD/DVD player.
To eject CD/DVD:
Press the button on the CD/DVD player.
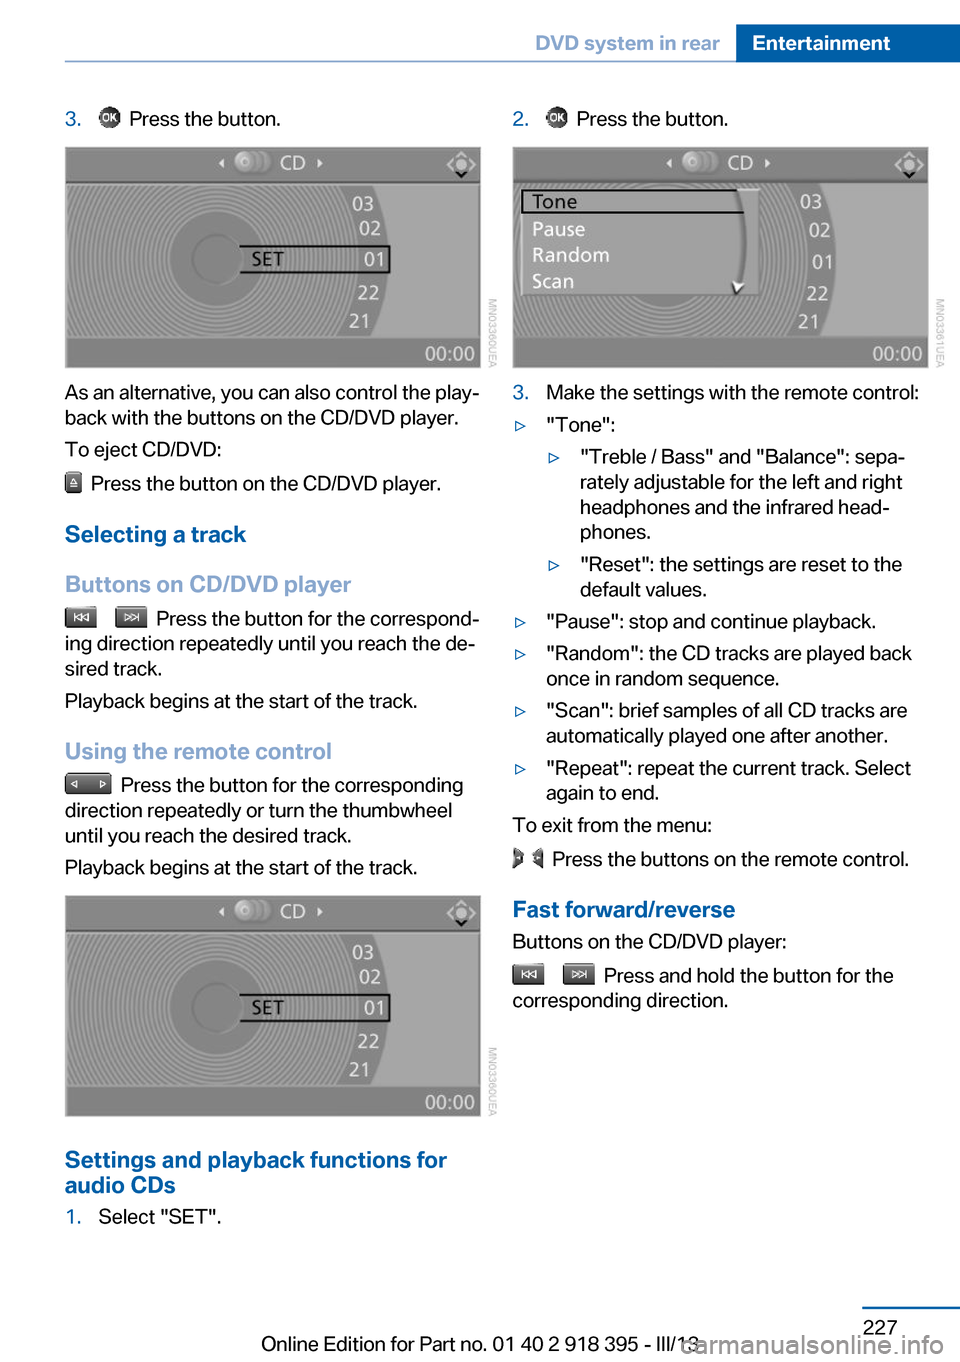
Selecting a track
Buttons on CD/DVD player
Press the button for the correspond‐
ing direction repeatedly until you reach the de‐
sired track.
Playback begins at the start of the track.
Using the remote control
Press the button for the corresponding
direction repeatedly or turn the thumbwheel
until you reach the desired track.
Playback begins at the start of the track.
Settings and playback functions for
audio CDs
1.Select "SET".2. Press the button.3.Make the settings with the remote control:▷"Tone":▷"Treble / Bass" and "Balance": sepa‐
rately adjustable for the left and right
headphones and the infrared head‐
phones.▷"Reset": the settings are reset to the
default values.▷"Pause": stop and continue playback.▷"Random": the CD tracks are played back
once in random sequence.▷"Scan": brief samples of all CD tracks are
automatically played one after another.▷"Repeat": repeat the current track. Select
again to end.
To exit from the menu:
Press the buttons on the remote control.
Fast forward/reverse Buttons on the CD/DVD player:
Press and hold the button for the
corresponding direction.
Seite 227DVD system in rearEntertainment227
Online Edition for Part no. 01 40 2 918 395 - III/13
Page 229 of 345
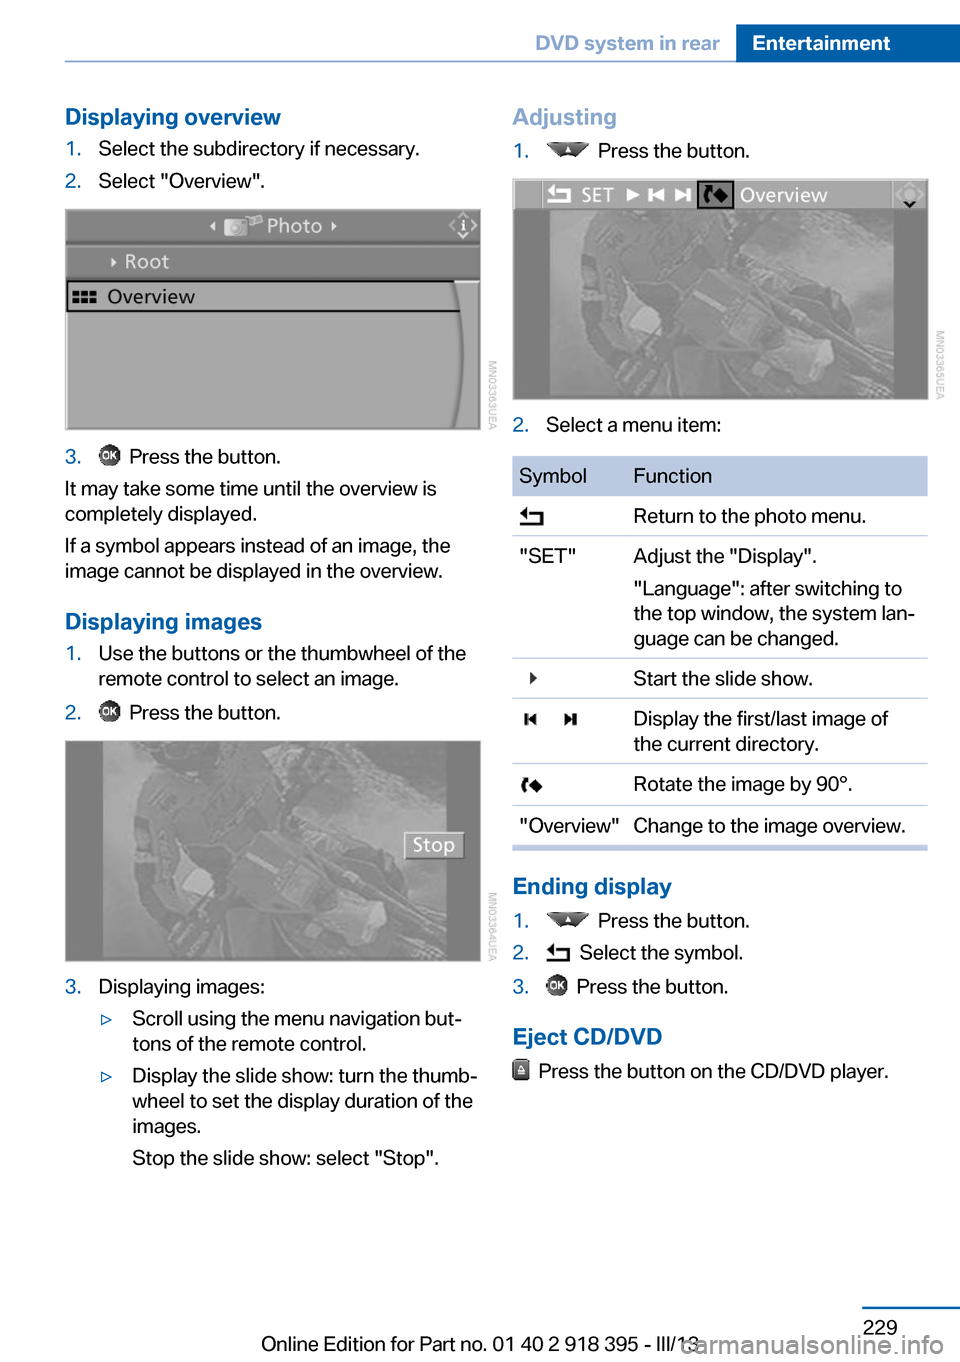
Displaying overview1.Select the subdirectory if necessary.2.Select "Overview".3. Press the button.
It may take some time until the overview is
completely displayed.
If a symbol appears instead of an image, the
image cannot be displayed in the overview.
Displaying images
1.Use the buttons or the thumbwheel of the
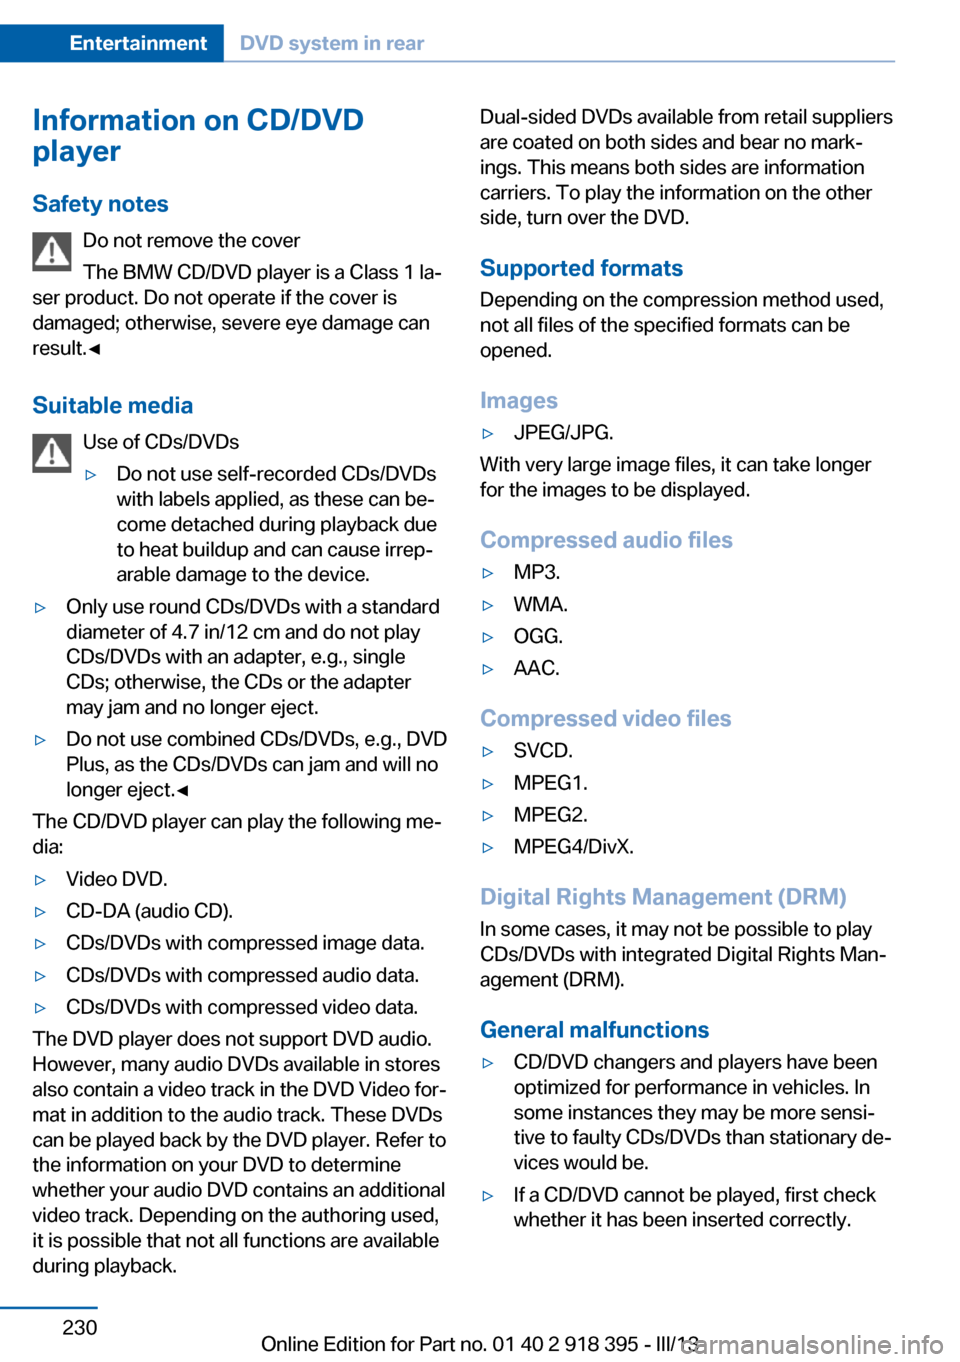
remote control to select an image.2. Press the button.3.Displaying images:▷Scroll using the menu navigation but‐
tons of the remote control.▷Display the slide show: turn the thumb‐
wheel to set the display duration of the
images.
Stop the slide show: select "Stop".Adjusting1. Press the button.2.Select a menu item:SymbolFunction Return to the photo menu."SET"Adjust the "Display".
"Language": after switching to
the top window, the system lan‐
guage can be changed. Start the slide show. Display the first/last image of
the current directory. Rotate the image by 90°."Overview"Change to the image overview.
Ending display
1. Press the button.2. Select the symbol.3. Press the button.
Eject CD/DVD
Press the button on the CD/DVD player.
Seite 229DVD system in rearEntertainment229
Online Edition for Part no. 01 40 2 918 395 - III/13
Page 230 of 345
Information on CD/DVD
player
Safety notes Do not remove the cover
The BMW CD/DVD player is a Class 1 la‐
ser product. Do not operate if the cover is
damaged; otherwise, severe eye damage can
result.◀
Suitable media Use of CDs/DVDs▷Do not use self-recorded CDs/DVDs
with labels applied, as these can be‐
come detached during playback due
to heat buildup and can cause irrep‐
arable damage to the device.▷Only use round CDs/DVDs with a standard
diameter of 4.7 in/12 cm and do not play
CDs/DVDs with an adapter, e.g., single
CDs; otherwise, the CDs or the adapter
may jam and no longer eject.▷Do not use combined CDs/DVDs, e.g., DVD
Plus, as the CDs/DVDs can jam and will no
longer eject.◀
The CD/DVD player can play the following me‐
dia:
▷Video DVD.▷CD-DA (audio CD).▷CDs/DVDs with compressed image data.▷CDs/DVDs with compressed audio data.▷CDs/DVDs with compressed video data.
The DVD player does not support DVD audio.
However, many audio DVDs available in stores
also contain a video track in the DVD Video for‐
mat in addition to the audio track. These DVDs
can be played back by the DVD player. Refer to
the information on your DVD to determine
whether your audio DVD contains an additional
video track. Depending on the authoring used,
it is possible that not all functions are available
during playback.
Dual-sided DVDs available from retail suppliers
are coated on both sides and bear no mark‐
ings. This means both sides are information
carriers. To play the information on the other
side, turn over the DVD.
Supported formats
Depending on the compression method used,
not all files of the specified formats can be
opened.
Images▷JPEG/JPG.
With very large image files, it can take longer
for the images to be displayed.
Compressed audio files
▷MP3.▷WMA.▷OGG.▷AAC.
Compressed video files
▷SVCD.▷MPEG1.▷MPEG2.▷MPEG4/DivX.
Digital Rights Management (DRM)
In some cases, it may not be possible to play
CDs/DVDs with integrated Digital Rights Man‐
agement (DRM).
General malfunctions
▷CD/DVD changers and players have been
optimized for performance in vehicles. In
some instances they may be more sensi‐
tive to faulty CDs/DVDs than stationary de‐
vices would be.▷If a CD/DVD cannot be played, first check
whether it has been inserted correctly.Seite 230EntertainmentDVD system in rear230
Online Edition for Part no. 01 40 2 918 395 - III/13
Page 231 of 345
Foreign bodies/liquids in the CD/DVD
slot
Make sure that no foreign objects or liquids get
into the CD/DVD slot; otherwise, the CD/DVD
player will be damaged.◀
Humidity High levels of humidity can lead to condensa‐
tion on the CD/DVD or the laser's scan lens,
and temporarily prevent playback.
Malfunctions involving individual CDs/DVDs
If malfunctions occur only with particular CDs/
DVDs, this can be due to one of the following
causes.
Copied or self-recorded CDs/DVDs▷Possible reasons for malfunctions with
home-recorded CDs/DVDs are inconsis‐
tent data creation or recording processes,
or poor quality or old age of the blank CD/
DVD.▷Only label CDs/DVDs on the upper side
with a pen intended for this purpose.
Damaged CDs/DVDs
▷Avoid fingerprints, dust, scratches and
moisture.▷Store CDs/DVDs in a sleeve.▷Do not subject CDs/DVDs to temperatures
over 122 ℉/50 ℃, high humidity or direct
sunlight.
CDs/DVDs with copy protection
CDs/DVDs are often provided with a copy pro‐
tection feature by the manufacturer. As a re‐
sult, some CDs/DVDs cannot be played, can
only be played to a limited degree, or cause the
system to switch off. In this case, wait a short
while and then switch the system back on
again. Then remove the CD/DVD from the
drive.
CDs/DVDs with compressed audio
files
If the language set for the CD/DVD player does
not match the language of the music track, the
music tracks may be displayed incorrectly.
External device
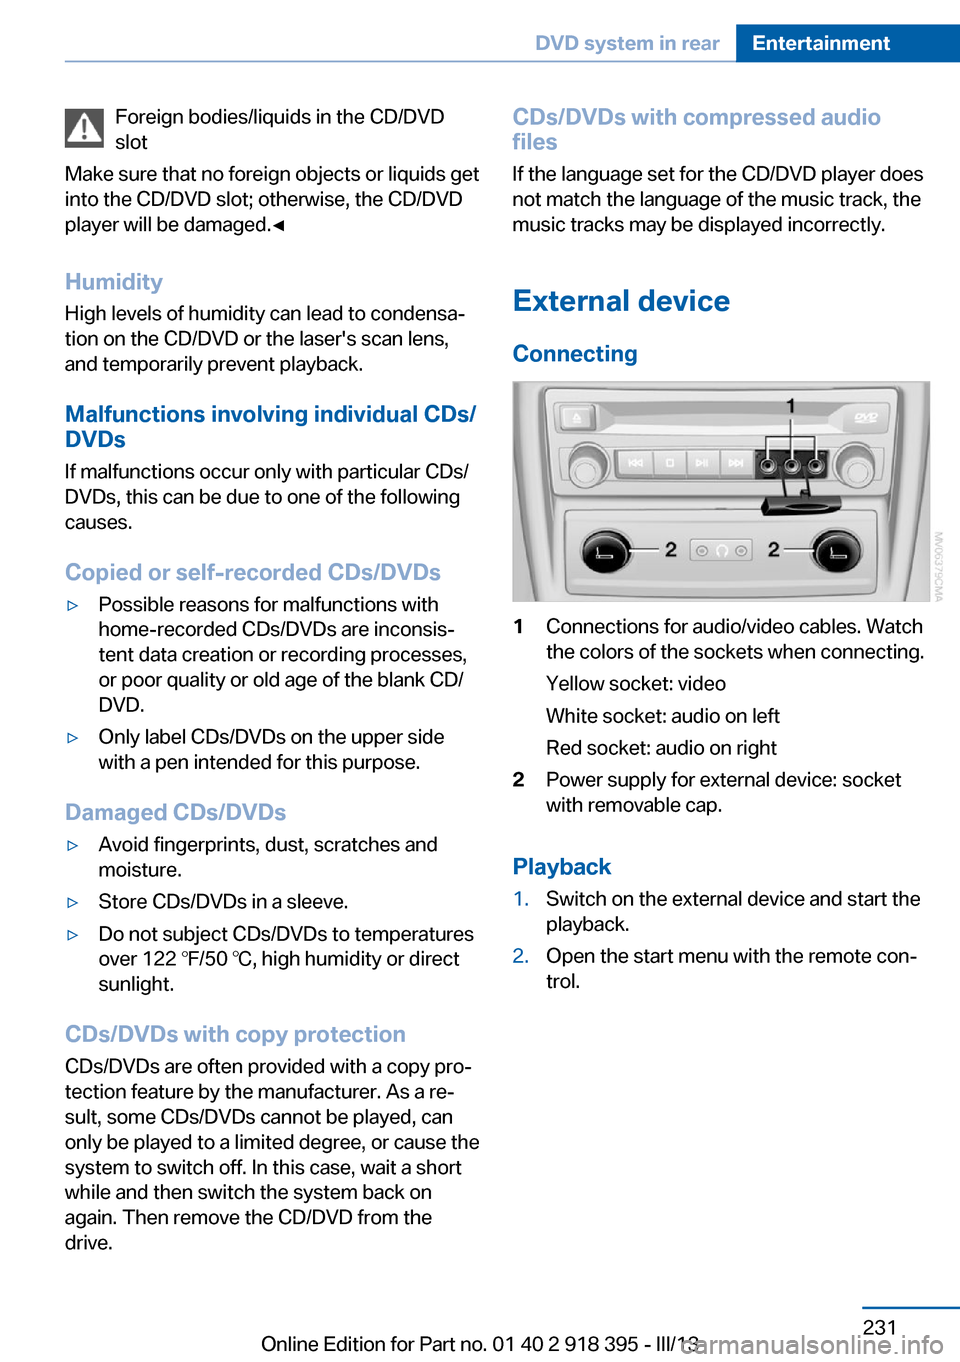
Connecting1Connections for audio/video cables. Watch
the colors of the sockets when connecting.
Yellow socket: video
White socket: audio on left
Red socket: audio on right2Power supply for external device: socket
with removable cap.
Playback
1.Switch on the external device and start the
playback.2.Open the start menu with the remote con‐
trol.Seite 231DVD system in rearEntertainment231
Online Edition for Part no. 01 40 2 918 395 - III/13
Page 232 of 345
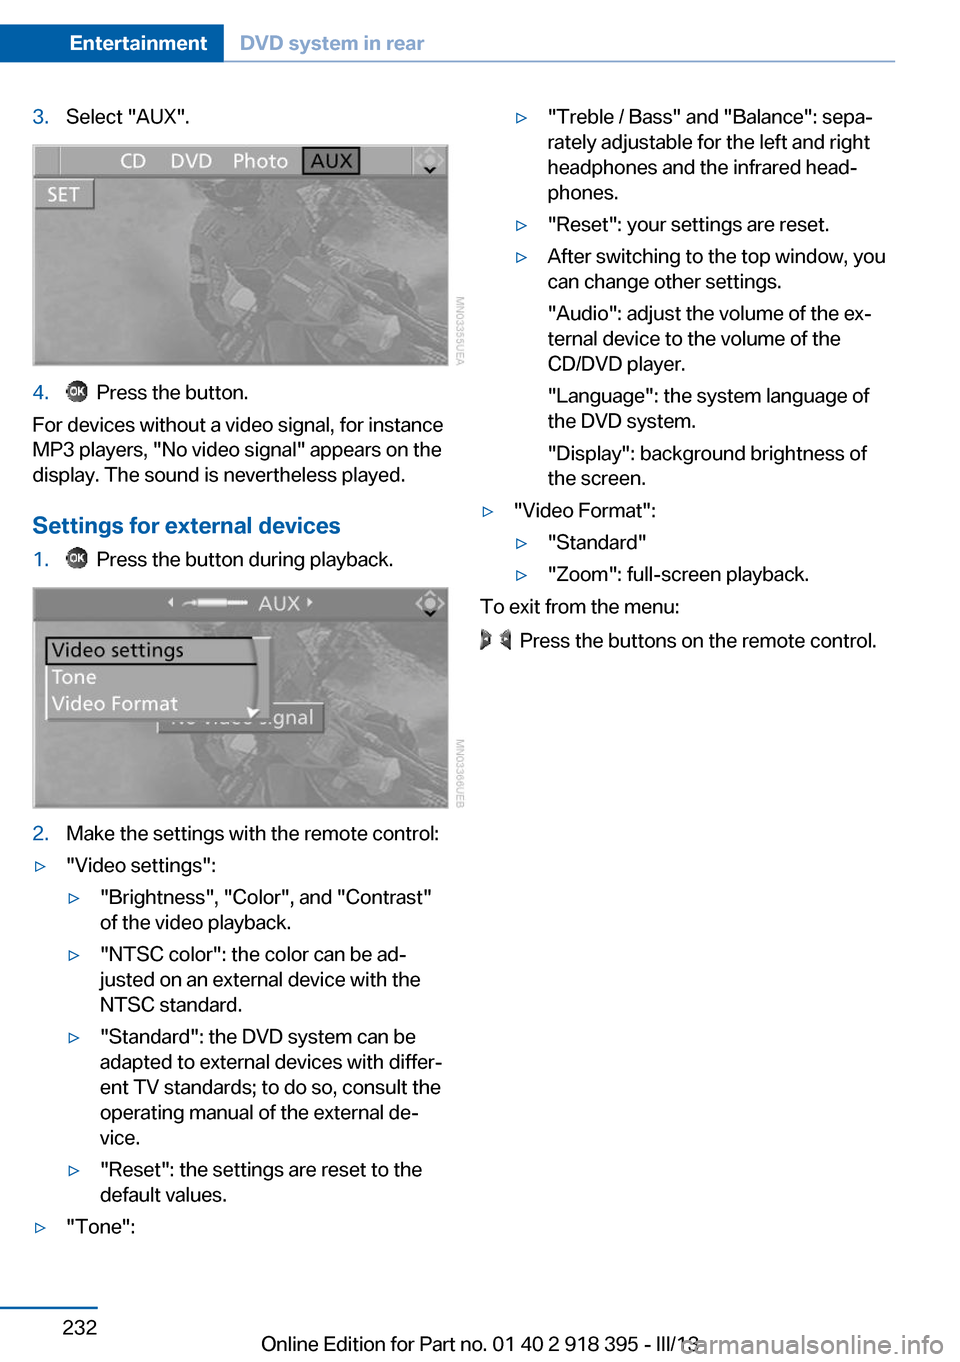
3.Select "AUX".4. Press the button.
For devices without a video signal, for instance
MP3 players, "No video signal" appears on the
display. The sound is nevertheless played.
Settings for external devices
1. Press the button during playback.2.Make the settings with the remote control:▷"Video settings":▷"Brightness", "Color", and "Contrast"
of the video playback.▷"NTSC color": the color can be ad‐
justed on an external device with the
NTSC standard.▷"Standard": the DVD system can be
adapted to external devices with differ‐
ent TV standards; to do so, consult the
operating manual of the external de‐
vice.▷"Reset": the settings are reset to the
default values.▷"Tone":▷"Treble / Bass" and "Balance": sepa‐
rately adjustable for the left and right
headphones and the infrared head‐
phones.▷"Reset": your settings are reset.▷After switching to the top window, you
can change other settings.
"Audio": adjust the volume of the ex‐
ternal device to the volume of the
CD/DVD player.
"Language": the system language of
the DVD system.
"Display": background brightness of
the screen.▷"Video Format":▷"Standard"▷"Zoom": full-screen playback.
To exit from the menu:
Press the buttons on the remote control.
Seite 232EntertainmentDVD system in rear232
Online Edition for Part no. 01 40 2 918 395 - III/13
Page 236 of 345
TelephoneVehicle equipmentThis chapter describes all series equipment as
well as country-specific and special equipment
offered for this model series.Therefore, it also
describes equipment that may not be found in
your vehicle, for instance due to the selected
special equipment or the country version. This
also applies to safety-related functions and
systems.
At a glance
The concept Mobile phones or other external devices such
as audio players can be connected to the vehi‐
cle via Bluetooth.
Bluetooth® is a registered trademark of Blue‐
tooth® SIG, Inc.
After these devices are paired once, they are
recognized automatically when the ignition is
switched on as soon as they are in the vehicle
and can then be operated via iDrive, the but‐
tons on the steering wheel, and via voice acti‐
vation.
Depending on their functionality, external devi‐
ces can be used via the vehicle as a telephone
or as an audio source. The telephone functions
are described in the following. Operating the
audio functions, refer to page 215.
Up to four external devices can be paired.
Certain functions may need to be enabled by
the mobile phone provider or service provider.
Using the mobile phone while driving
Make entries only when traffic and road
conditions allow. Do not hold the mobile phone
in your hand while you are driving; use the
hands-free system instead. If you do not ob‐
serve this precaution, you can endanger the
vehicle occupants and other road users.◀Snap-in adapter
The snap-in adapter is used to:▷Hold the mobile phone.▷Recharge the battery.▷Connect the mobile phone to an outside
antenna of the vehicle.
This provides for better network reception
and consistent sound quality.
Approved mobile phones
Details on which mobile phones and external
devices with a Bluetooth interface are sup‐
ported by the mobile phone preparation pack‐
age can be obtained at www.bmwusa.com/
bluetooth.
Displaying the vehicle identification
number and software part number
The vehicle identification number and software part number are needed to determine which
mobile phones are supported by the mobile
phone preparation package. The software ver‐
sion of the mobile phone may also be required.
1."Telephone"2.Open "Options".3."Bluetooth® info"4."Display system information"
These approved mobile phones with a certain
software version, support the vehicle functions
described below.
Malfunctions may occur with other mobile
phones or software versions.
Do not operate a mobile phone that is con‐
nected to the vehicle on the mobile phone key‐
pad, as this may lead to a malfunction.
A software update, refer to page 218, can be
performed if necessary.
Seite 236CommunicationTelephone236
Online Edition for Part no. 01 40 2 918 395 - III/13
Page 338 of 345
Manual air distribution 133
Manual mode, automatic transmission with Step‐
tronic 77
Manual operation– Door lock 34– Driver's door 34
Manual operation, fuel filler
flap 268
Manual operation of upper tailgate 36
Manual operation, Side View 127
Manual operation, Top View 125
Map, destination entry 175
Map display in black and white 184
Map in split screen 183
Map view 181
Marking on approved tires 286
Master key, refer to Remote control with integrated
key 30
Maximum cooling 133
Maximum speed, winter tires 286
Medical kit, refer to First aid kit 308
Memory, refer to Seat and mirror memory 57
Menus, operating, iDrive 18
Menus, refer to iDrive operat‐ ing concept 19
Message list, traffic bulle‐ tins 183
Messages 252
Microfilter 135
Minimum tread, tires 284
Mirror
– Mirror memory, refer to Seat
and mirror memory 57
Mirrors 58
Mirrors
– Automatic Curb Monitor 58
Mirrors, folding in and out 59
Mirrors, heating 59
Mirrors, interior mirror 59
Mobile communication devi‐ ces in the vehicle 157
Mobile phone, installation lo‐ cation, refer to Center arm‐
rest 148
Mobile phone, refer to Tele‐ phone 236
Modifications, technical, refer to Safety 6
Monitor, refer to Control Dis‐ play 19
Mounting of child restraint fix‐ ing systems 61
MP3 player 212
Multimedia 200
Music collection 207
Music search 208
Music, storing 207
N
Navigation 168
Navigation data 168
Navigation data, updat‐ ing 168
Navigation system– Destination entry by
voice 176
Neck restraints, refer to Head
restraints 55
Nets, refer to Storage com‐ partments 148
Neutral cleaner, care 314
New wheels and tires 285
Notes 6, 255
Nozzles of automatic climate control 130
Nozzles, refer to Ventila‐ tion 134
O OBD Onboard Diagnos‐ tics 294
OBD socket, refer to Socket
for OBD Onboard Diagno‐
sis 294
Octane number, refer to Fuel quality 270
Octane rating, refer to Gaso‐ line quality 270
Odometer 80
Office 249
Oil additives 291
Oil consumption 290
Oil level 290
Oil, refer to Engine oil 290
Oil types, alternative 291
Oil types, approved 291
Old batteries, disposal 305
Onboard Diagnostics OBD 294
Onboard monitor, refer to Control Display 19
Onboard vehicle tool kit 295
Opening and closing– Comfort Access 40– From the inside 35– From the outside 32– Using the door lock 34– Using the remote control 32
Opening height, adjust‐
ing 37, 38
Operating concept, iDrive 18
Outside-air mode, automatic climate control 133
Outside air, refer to Recircu‐ lated air mode 133
Overheating of engine, refer to Coolant temperature 80
P Paint, vehicle 313
Pairing, mobile phone 237
Panic mode 33
Seite 338ReferenceEverything from A to Z338
Online Edition for Part no. 01 40 2 918 395 - III/13