language BMW X6 2013 E71 User Guide
[x] Cancel search | Manufacturer: BMW, Model Year: 2013, Model line: X6, Model: BMW X6 2013 E71Pages: 345, PDF Size: 9.45 MB
Page 206 of 345
3.Select the desired DVD.4.Select the desired chapter.
Fast forward/reversePress and hold the button.
Selecting the language
The languages that are available depend on
the DVD.
1."CD/Multimedia"2."CD/DVD"3.Select the desired DVD.4.Open "Options".5."Audio/language"6.Select the desired language.
Notes
CD/DVD player and changer Do not remove the cover
BMW CD/DVD players and changers are
officially designated Class 1 laser products. Do
not operate if the cover is damaged; otherwise,
severe eye damage can result.◀
CDs and DVDs Use of CDs/DVDs
▷Do not use self-recorded CDs/DVDs
with labels applied, as these can be‐
come detached during playback due
to heat buildup and can cause irrep‐
arable damage to the device.▷Only use round CDs/DVDs with a standard
diameter of 4.7 in/12 cm and do not play
CDs/DVDs with an adapter, e.g., single
CDs; otherwise, the CDs or the adapter
may jam and no longer eject.▷Do not use combined CDs/DVDs, e.g., DVD
Plus, as the CDs/DVDs can jam and will no
longer eject.◀General malfunctions▷CD/DVD changers and players have been
optimized for performance in vehicles. In
some instances they may be more sensi‐
tive to faulty CDs/DVDs than stationary de‐
vices would be.▷If a CD/DVD cannot be played, first check
whether it has been inserted correctly.
Humidity
High levels of humidity can lead to condensa‐
tion on the CD/DVD or the laser's scan lens,
and temporarily prevent playback.
Malfunctions involving individual CDs/
DVDs
If malfunctions occur only with particular CDs/
DVDs, this can be due to one of the following
causes:
Self-recorded CDs/DVDs
▷Possible reasons for malfunctions with
self-recorded CDs/DVDs are inconsistent
data creation or recording processes, or
poor quality or old age of the blank CD/
DVD.▷Only label CDs/DVDs on the upper side
with a pen intended for this purpose.
Damage
▷Avoid fingerprints, dust, scratches and
moisture.▷Store CDs/DVDs in a sleeve.▷Do not subject CDs/DVDs to temperatures
over 122 ℉/50 ℃, high humidity or direct
sunlight.
CDs/DVDs with copy protection
CDs/DVDs are often provided with a copy pro‐
tection feature by the manufacturer. This can
mean that some CDs/DVDs cannot be played
or can only be played to a limited extent.
Seite 206EntertainmentCD/multimedia206
Online Edition for Part no. 01 40 2 918 395 - III/13
Page 222 of 345
Menu navigation
You can use the thumbwheel and buttons 1 to
navigate through the menus.▷Turn the thumbwheel: select a menu item.▷Press the arrow buttons: change between
fields.▷ Press the button: activate the menu
item.
Changing batteries
1.Press the detent and remove the cover.2.Change the batteries. The type and instal‐
lation position are marked on the bottom of
the battery compartment.3.Close the cover.
Take the used battery to a recycling
center or to your service center.
Setting the language of the
DVD system
1.Select a CD/DVD track.2. Press the button.3.Select "Tone".4. Press the button.5.Switch to the top window.6.Select "Language".7. Press the button.8.Select the desired language.9. Press the button.Sound output via speakers
In addition to the headphones, you can also
play the sound via the vehicle speakers.1."CD/Multimedia"2."External devices"3."AUX rear"4."Volume"5.Turn the controller until the desired volume
is set and press the controller.
Switching DVD system on/off
Press the button on the CD-/DVD player or un‐
der the desired screen.
The DVD system switches on automatically
when a CD or DVD is inserted.
Playing CD/DVD
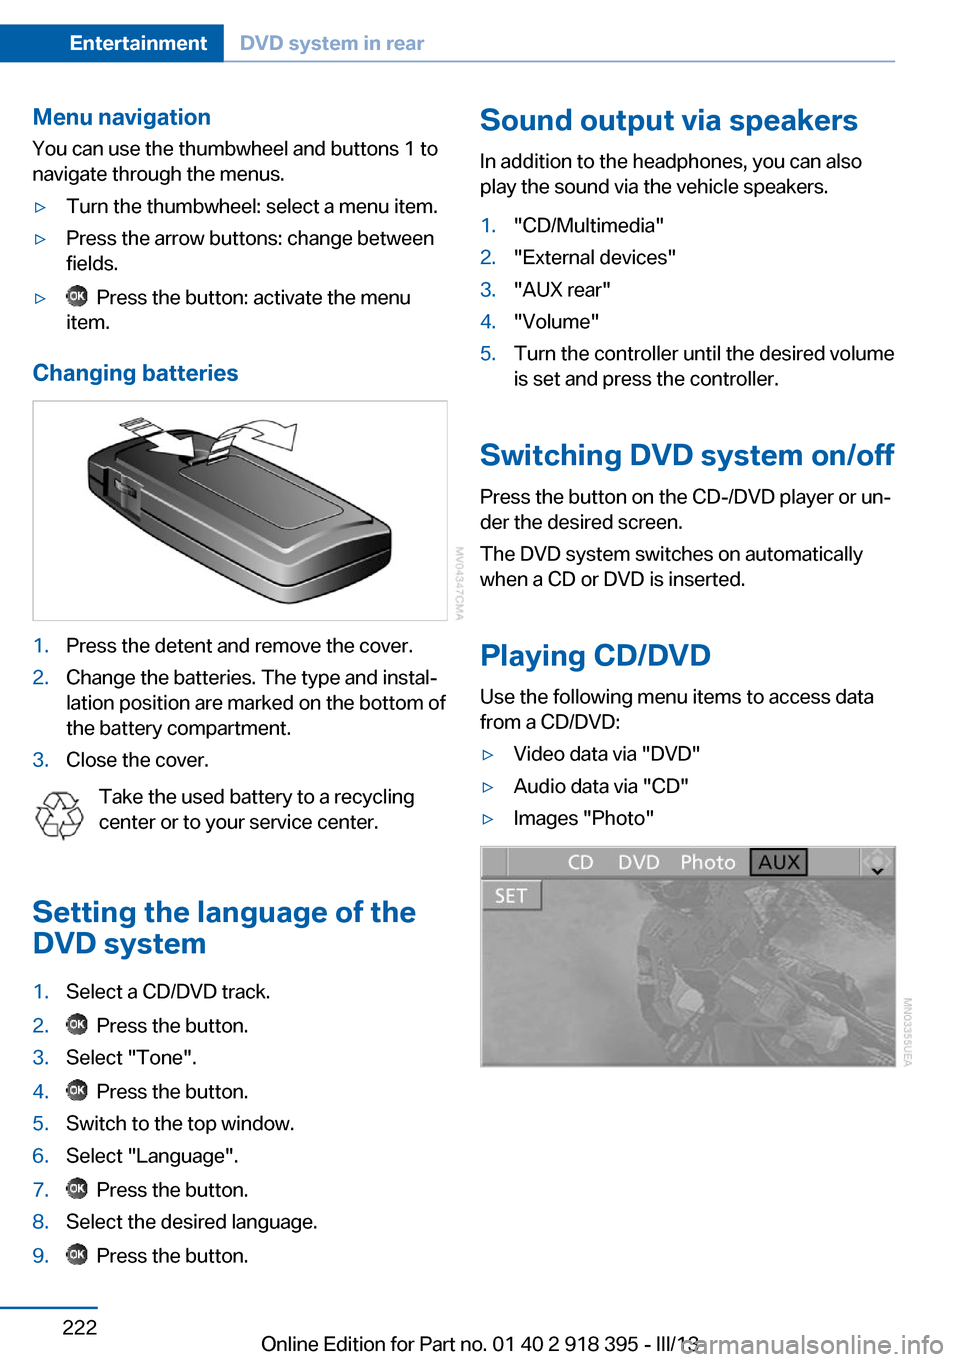
Use the following menu items to access data
from a CD/DVD:
▷Video data via "DVD"▷Audio data via "CD"▷Images "Photo"Seite 222EntertainmentDVD system in rear222
Online Edition for Part no. 01 40 2 918 395 - III/13
Page 223 of 345
Playing videos from CDs/
DVDs
Country codes of DVDs
Your DVD player only plays DVDs with the
coding of your home region, e.g., Europe=2.
The country codes supported by your DVD are
contained in the information on your DVD.
An overview of the coding zones:CodeRegion1USA, Canada2Japan, Europe, Middle East, South Af‐
rica3Southeast Asia4Australia, Central and South America,
New Zealand5Northwest Asia, North Africa6China
DVDs with the code 0 can be played on all de‐
vices.
Starting playback
1.Push the CD/DVD into the drive with the la‐
beled side facing upward. The CD/DVD is
automatically pulled in.▷Playback begins automatically after a
few seconds.▷Otherwise: select "DVD".2.If the DVD control or the DVD-specific
menu is displayed when a DVD is inserted,
use the remote control buttons for menu
navigation to select the desired option.
Or:
Press the button on the CD/DVD
player.
You can control the playback with the buttons
on the CD/DVD player or the DVD control.
Video CDs (VCDs) and Super Video CDs
(SVCDs) can only be played if they do not have
a DVD-specific menu.
Eject CD/DVD
Press the button on the CD/DVD player.
The DVD emerges slightly from the drive.
DVD control With the DVD control, you can select the title
and chapter, open the DVD-specific menu, and
operate functions such as Language, Fast for‐
ward and Reverse or Freeze frame.
A DVD can briefly deactivate functions of the
DVD control, under certain circumstances
while the entire DVD is being played. It is not
possible to operate the DVD control under
these circumstances. In this case, try to make
the selection using the DVD-specific menu.
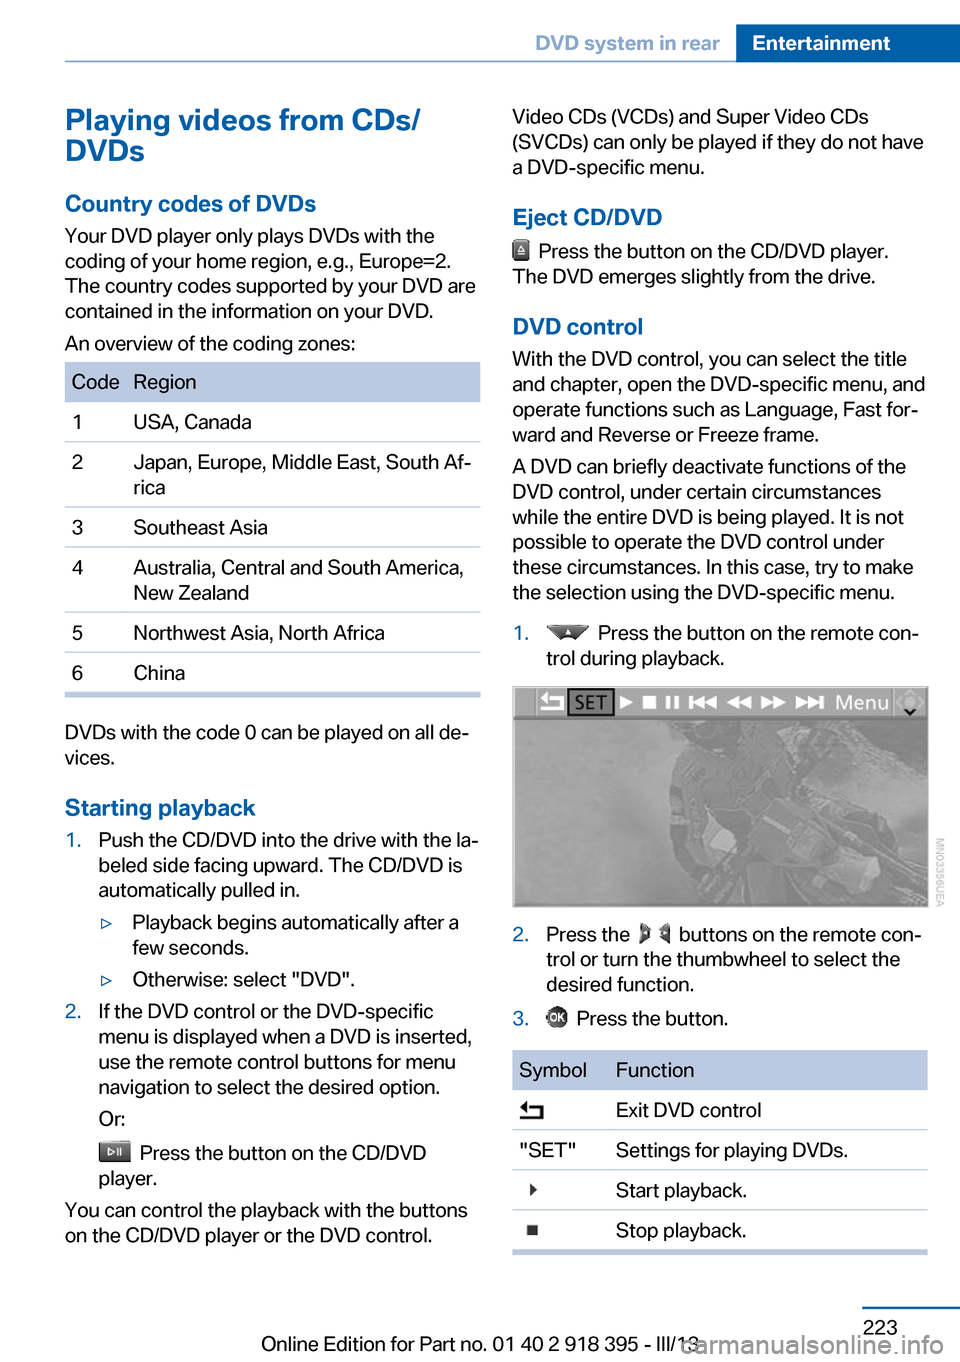
1. Press the button on the remote con‐
trol during playback.2.Press the buttons on the remote con‐
trol or turn the thumbwheel to select the
desired function.3. Press the button.SymbolFunction Exit DVD control"SET"Settings for playing DVDs. Start playback. Stop playback.Seite 223DVD system in rearEntertainment223
Online Edition for Part no. 01 40 2 918 395 - III/13
Page 225 of 345
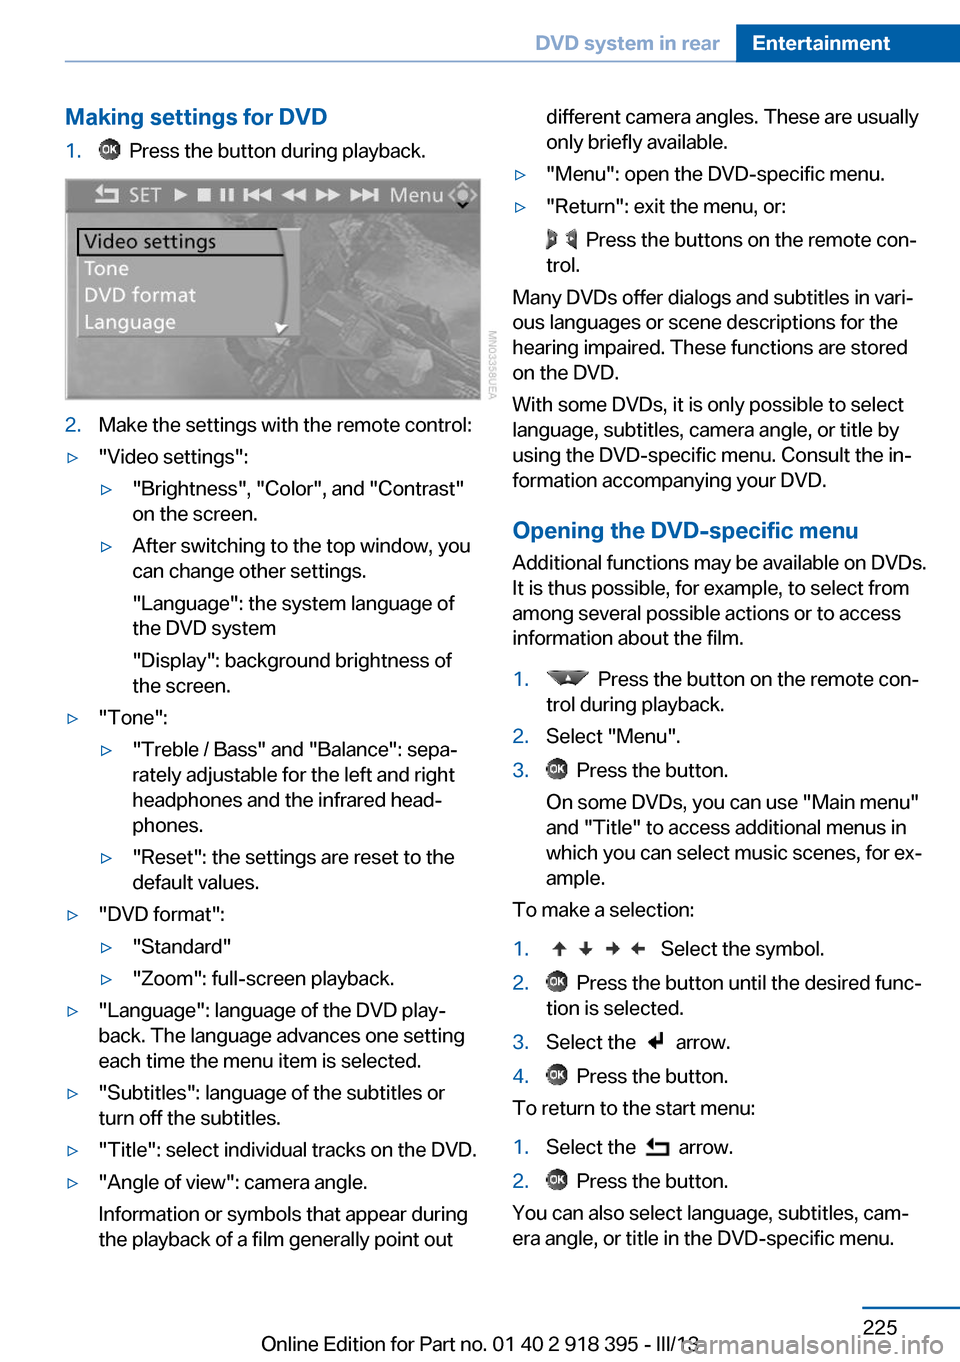
Making settings for DVD1. Press the button during playback.2.Make the settings with the remote control:▷"Video settings":▷"Brightness", "Color", and "Contrast"
on the screen.▷After switching to the top window, you
can change other settings.
"Language": the system language of
the DVD system
"Display": background brightness of
the screen.▷"Tone":▷"Treble / Bass" and "Balance": sepa‐
rately adjustable for the left and right
headphones and the infrared head‐
phones.▷"Reset": the settings are reset to the
default values.▷"DVD format":▷"Standard"▷"Zoom": full-screen playback.▷"Language": language of the DVD play‐
back. The language advances one setting
each time the menu item is selected.▷"Subtitles": language of the subtitles or
turn off the subtitles.▷"Title": select individual tracks on the DVD.▷"Angle of view": camera angle.
Information or symbols that appear during
the playback of a film generally point outdifferent camera angles. These are usually
only briefly available.▷"Menu": open the DVD-specific menu.▷"Return": exit the menu, or:
Press the buttons on the remote con‐
trol.
Many DVDs offer dialogs and subtitles in vari‐
ous languages or scene descriptions for the
hearing impaired. These functions are stored
on the DVD.
With some DVDs, it is only possible to select
language, subtitles, camera angle, or title by
using the DVD-specific menu. Consult the in‐
formation accompanying your DVD.
Opening the DVD-specific menu
Additional functions may be available on DVDs.
It is thus possible, for example, to select from
among several possible actions or to access
information about the film.
1. Press the button on the remote con‐
trol during playback.2.Select "Menu".3. Press the button.
On some DVDs, you can use "Main menu"
and "Title" to access additional menus in
which you can select music scenes, for ex‐
ample.
To make a selection:
1. Select the symbol.2. Press the button until the desired func‐
tion is selected.3.Select the arrow.4. Press the button.
To return to the start menu:
1.Select the arrow.2. Press the button.
You can also select language, subtitles, cam‐
era angle, or title in the DVD-specific menu.
Seite 225DVD system in rearEntertainment225
Online Edition for Part no. 01 40 2 918 395 - III/13
Page 229 of 345
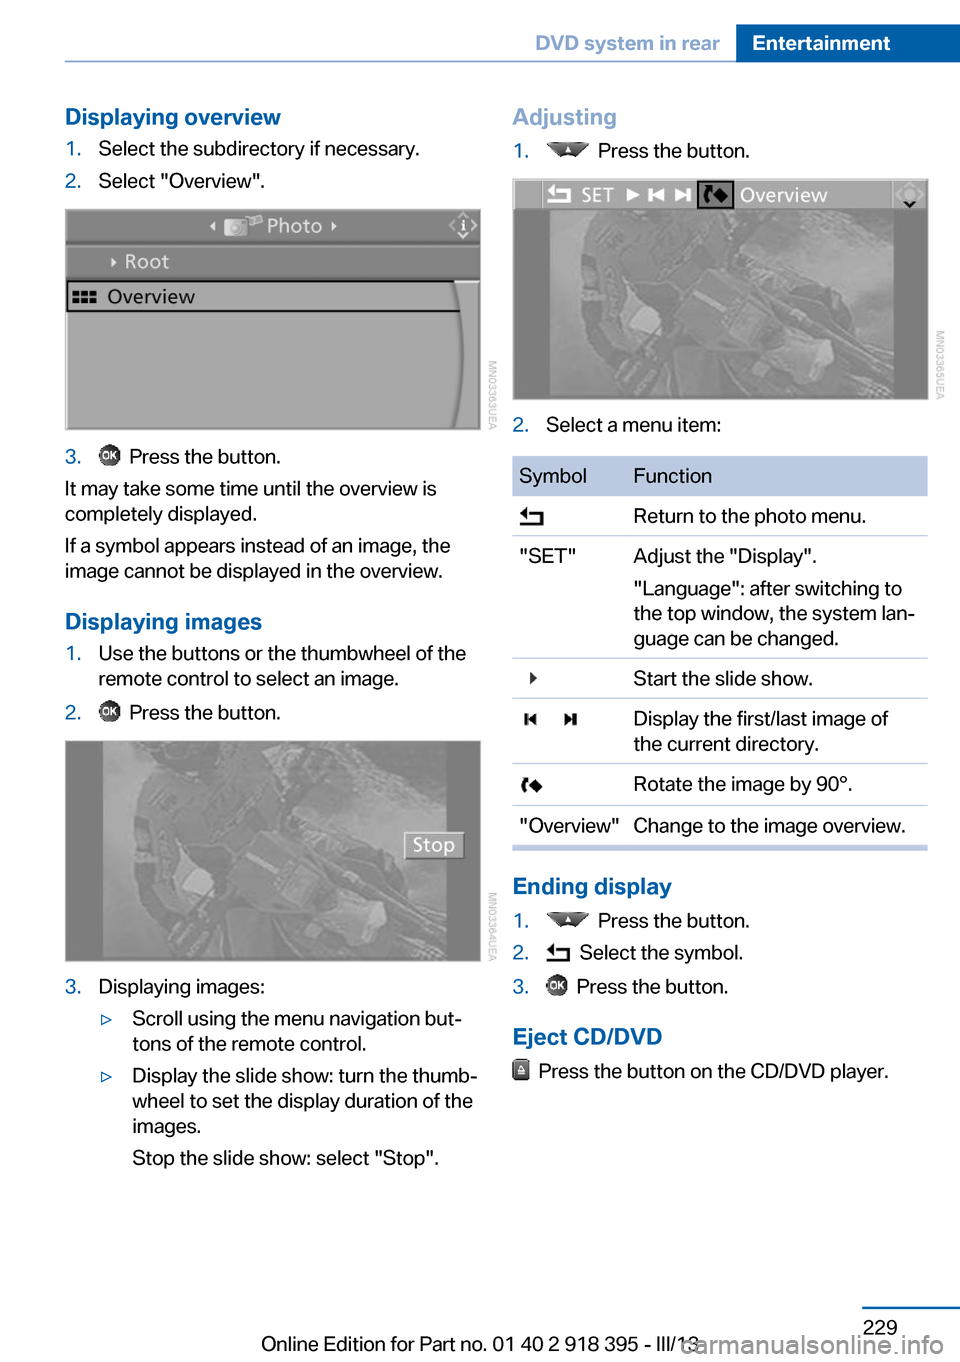
Displaying overview1.Select the subdirectory if necessary.2.Select "Overview".3. Press the button.
It may take some time until the overview is
completely displayed.
If a symbol appears instead of an image, the
image cannot be displayed in the overview.
Displaying images
1.Use the buttons or the thumbwheel of the
remote control to select an image.2. Press the button.3.Displaying images:▷Scroll using the menu navigation but‐
tons of the remote control.▷Display the slide show: turn the thumb‐
wheel to set the display duration of the
images.
Stop the slide show: select "Stop".Adjusting1. Press the button.2.Select a menu item:SymbolFunction Return to the photo menu."SET"Adjust the "Display".
"Language": after switching to
the top window, the system lan‐
guage can be changed. Start the slide show. Display the first/last image of
the current directory. Rotate the image by 90°."Overview"Change to the image overview.
Ending display
1. Press the button.2. Select the symbol.3. Press the button.
Eject CD/DVD
Press the button on the CD/DVD player.
Seite 229DVD system in rearEntertainment229
Online Edition for Part no. 01 40 2 918 395 - III/13
Page 231 of 345
Foreign bodies/liquids in the CD/DVD
slot
Make sure that no foreign objects or liquids get
into the CD/DVD slot; otherwise, the CD/DVD
player will be damaged.◀
Humidity High levels of humidity can lead to condensa‐
tion on the CD/DVD or the laser's scan lens,
and temporarily prevent playback.
Malfunctions involving individual CDs/DVDs
If malfunctions occur only with particular CDs/
DVDs, this can be due to one of the following
causes.
Copied or self-recorded CDs/DVDs▷Possible reasons for malfunctions with
home-recorded CDs/DVDs are inconsis‐
tent data creation or recording processes,
or poor quality or old age of the blank CD/
DVD.▷Only label CDs/DVDs on the upper side
with a pen intended for this purpose.
Damaged CDs/DVDs
▷Avoid fingerprints, dust, scratches and
moisture.▷Store CDs/DVDs in a sleeve.▷Do not subject CDs/DVDs to temperatures
over 122 ℉/50 ℃, high humidity or direct
sunlight.
CDs/DVDs with copy protection
CDs/DVDs are often provided with a copy pro‐
tection feature by the manufacturer. As a re‐
sult, some CDs/DVDs cannot be played, can
only be played to a limited degree, or cause the
system to switch off. In this case, wait a short
while and then switch the system back on
again. Then remove the CD/DVD from the
drive.
CDs/DVDs with compressed audio
files
If the language set for the CD/DVD player does
not match the language of the music track, the
music tracks may be displayed incorrectly.
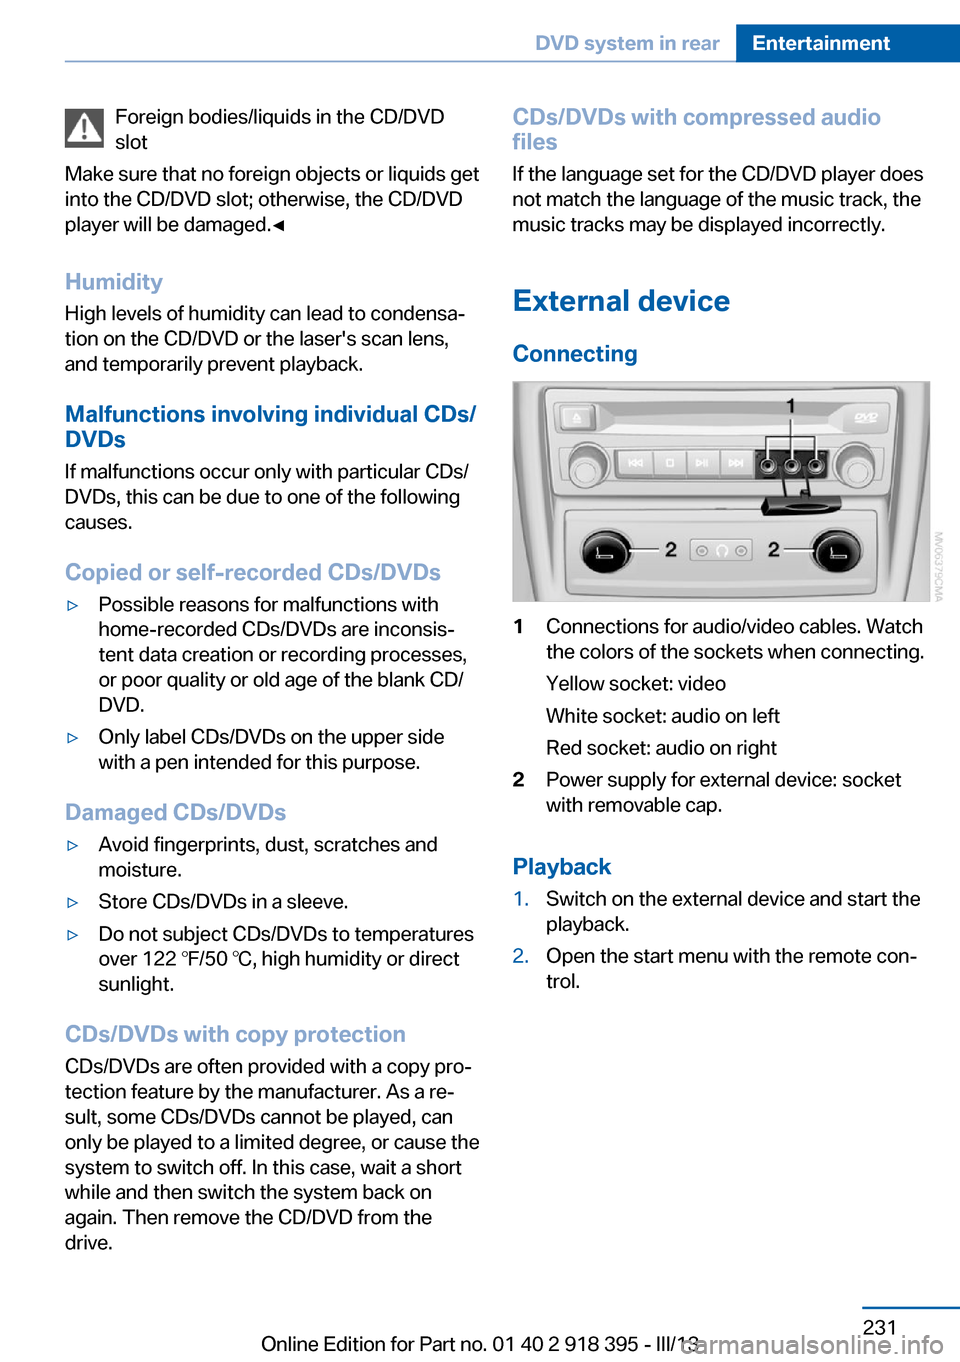
External device
Connecting1Connections for audio/video cables. Watch
the colors of the sockets when connecting.
Yellow socket: video
White socket: audio on left
Red socket: audio on right2Power supply for external device: socket
with removable cap.
Playback
1.Switch on the external device and start the
playback.2.Open the start menu with the remote con‐
trol.Seite 231DVD system in rearEntertainment231
Online Edition for Part no. 01 40 2 918 395 - III/13
Page 232 of 345
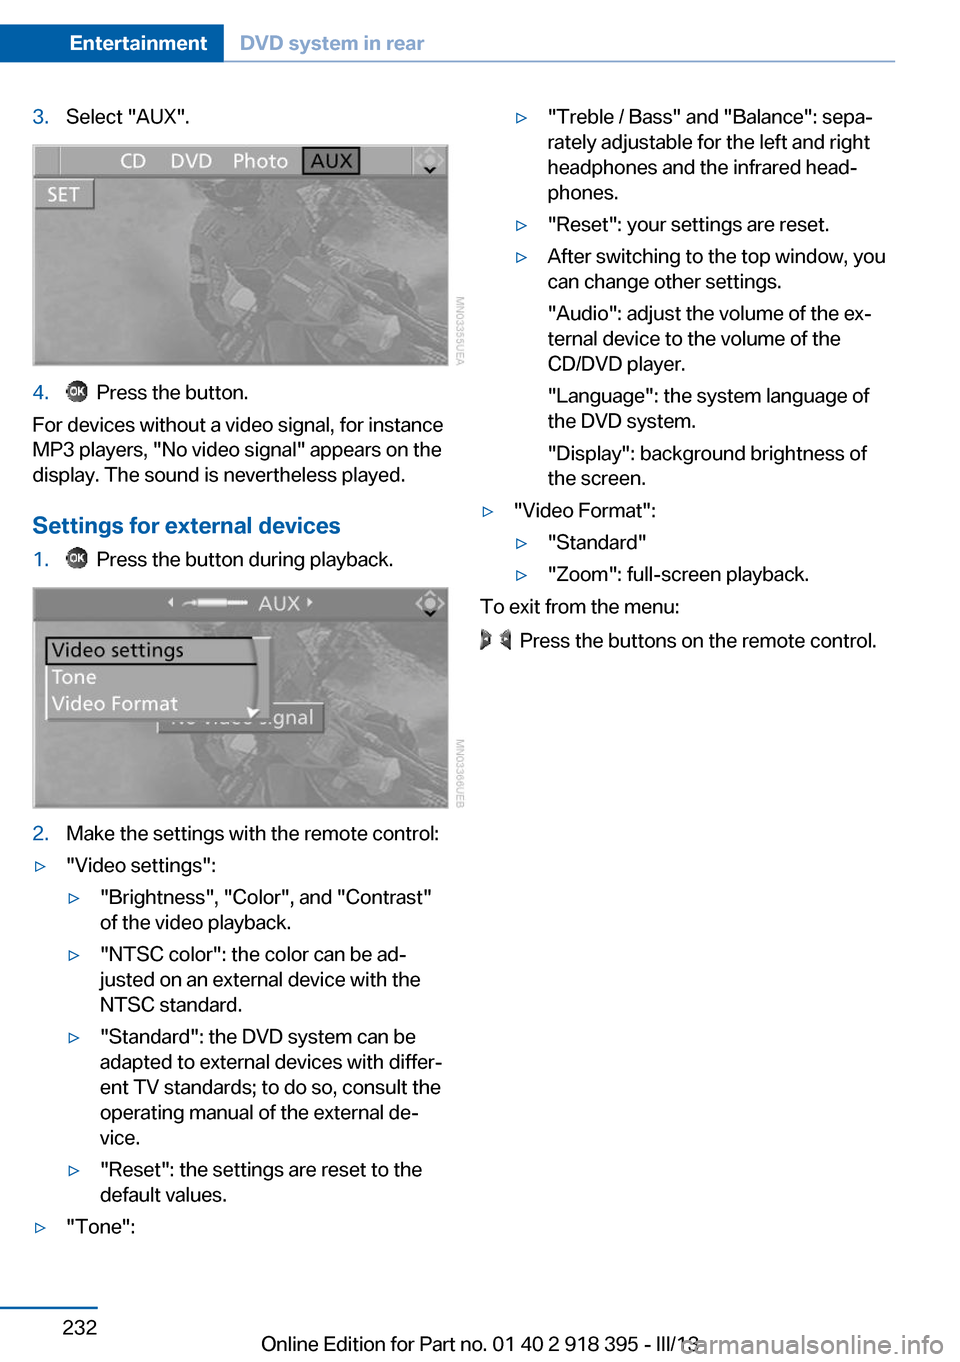
3.Select "AUX".4. Press the button.
For devices without a video signal, for instance
MP3 players, "No video signal" appears on the
display. The sound is nevertheless played.
Settings for external devices
1. Press the button during playback.2.Make the settings with the remote control:▷"Video settings":▷"Brightness", "Color", and "Contrast"
of the video playback.▷"NTSC color": the color can be ad‐
justed on an external device with the
NTSC standard.▷"Standard": the DVD system can be
adapted to external devices with differ‐
ent TV standards; to do so, consult the
operating manual of the external de‐
vice.▷"Reset": the settings are reset to the
default values.▷"Tone":▷"Treble / Bass" and "Balance": sepa‐
rately adjustable for the left and right
headphones and the infrared head‐
phones.▷"Reset": your settings are reset.▷After switching to the top window, you
can change other settings.
"Audio": adjust the volume of the ex‐
ternal device to the volume of the
CD/DVD player.
"Language": the system language of
the DVD system.
"Display": background brightness of
the screen.▷"Video Format":▷"Standard"▷"Zoom": full-screen playback.
To exit from the menu:
Press the buttons on the remote control.
Seite 232EntertainmentDVD system in rear232
Online Edition for Part no. 01 40 2 918 395 - III/13
Page 246 of 345
Redialing
›Redial‹
Voice phone book
Depending on how your vehicle is equipped, it
may be necessary to create your own voice
phone book.
The entries must be entered using voice acti‐
vation and are separate from the memory in
the mobile phone. Up to 50 entries can be set
up.
Saving an entry1.›Save name‹2.Say the name. Do not exceed the speaking
duration of approx. 2 seconds.3.Say the phone number after being
prompted to do so by the system.4.›Save‹
Deleting an entry
1.›Delete name‹2.Say the name after being prompted to do
so.3.Confirm the prompt: ›Yes‹
Deleting all entries
1.›Delete phone book‹2.Confirm the prompt: ›Yes‹3.Confirm the prompt again: ›Yes‹
Reading and selecting entries
1.›Read phonebook‹2.When the desired entry is read aloud: say ›
Dial number‹
Selecting an entry
1.›Dial name‹2.Say the name after being prompted to do
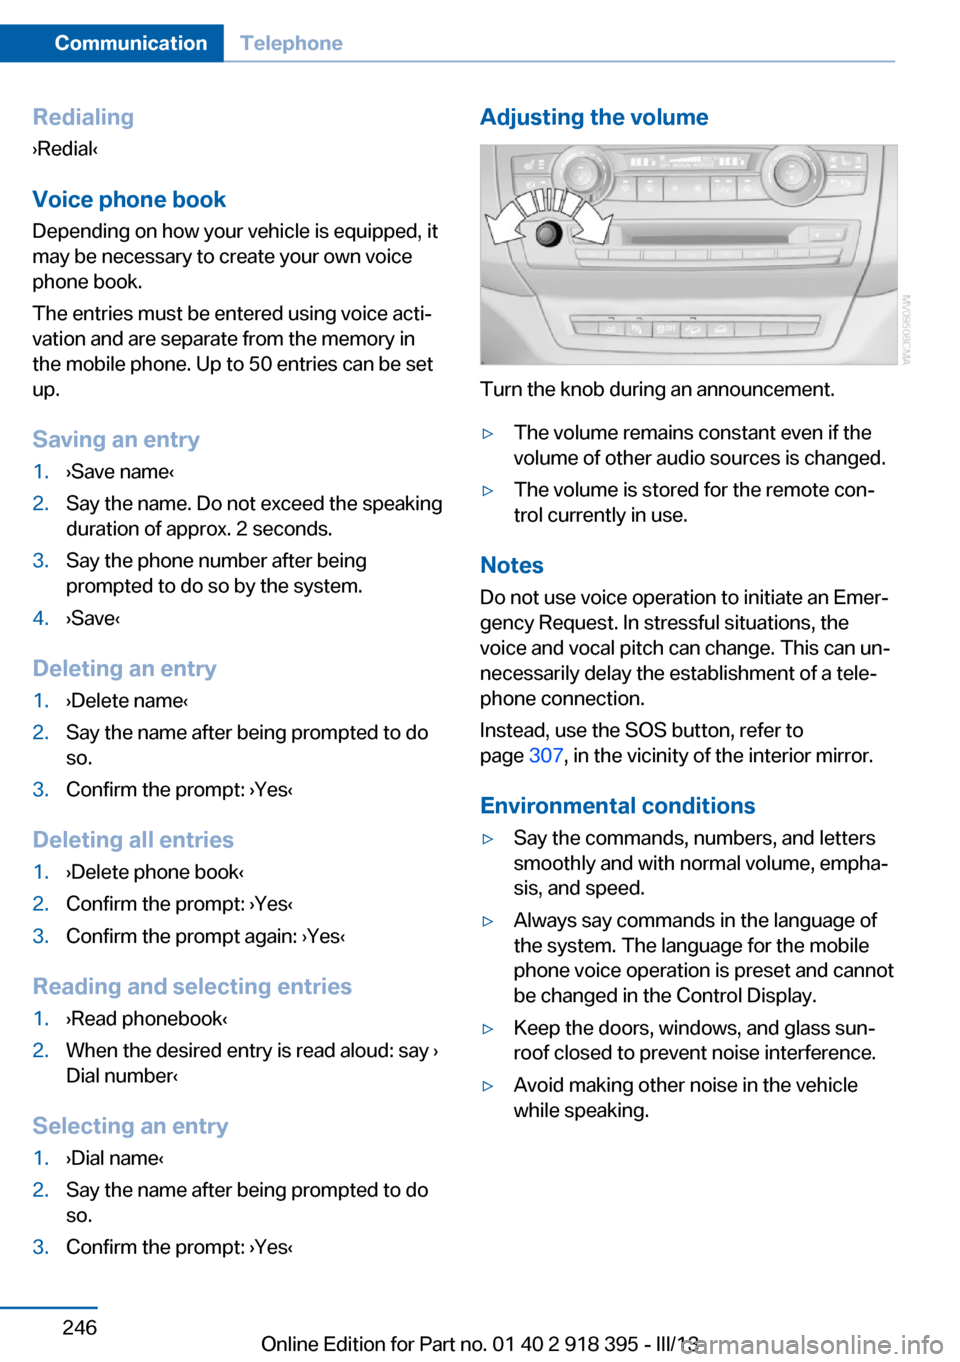
so.3.Confirm the prompt: ›Yes‹Adjusting the volume
Turn the knob during an announcement.
▷The volume remains constant even if the
volume of other audio sources is changed.▷The volume is stored for the remote con‐
trol currently in use.
Notes
Do not use voice operation to initiate an Emer‐
gency Request. In stressful situations, the
voice and vocal pitch can change. This can un‐
necessarily delay the establishment of a tele‐
phone connection.
Instead, use the SOS button, refer to
page 307, in the vicinity of the interior mirror.
Environmental conditions
▷Say the commands, numbers, and letters
smoothly and with normal volume, empha‐
sis, and speed.▷Always say commands in the language of
the system. The language for the mobile
phone voice operation is preset and cannot
be changed in the Control Display.▷Keep the doors, windows, and glass sun‐
roof closed to prevent noise interference.▷Avoid making other noise in the vehicle
while speaking.Seite 246CommunicationTelephone246
Online Edition for Part no. 01 40 2 918 395 - III/13
Page 322 of 345
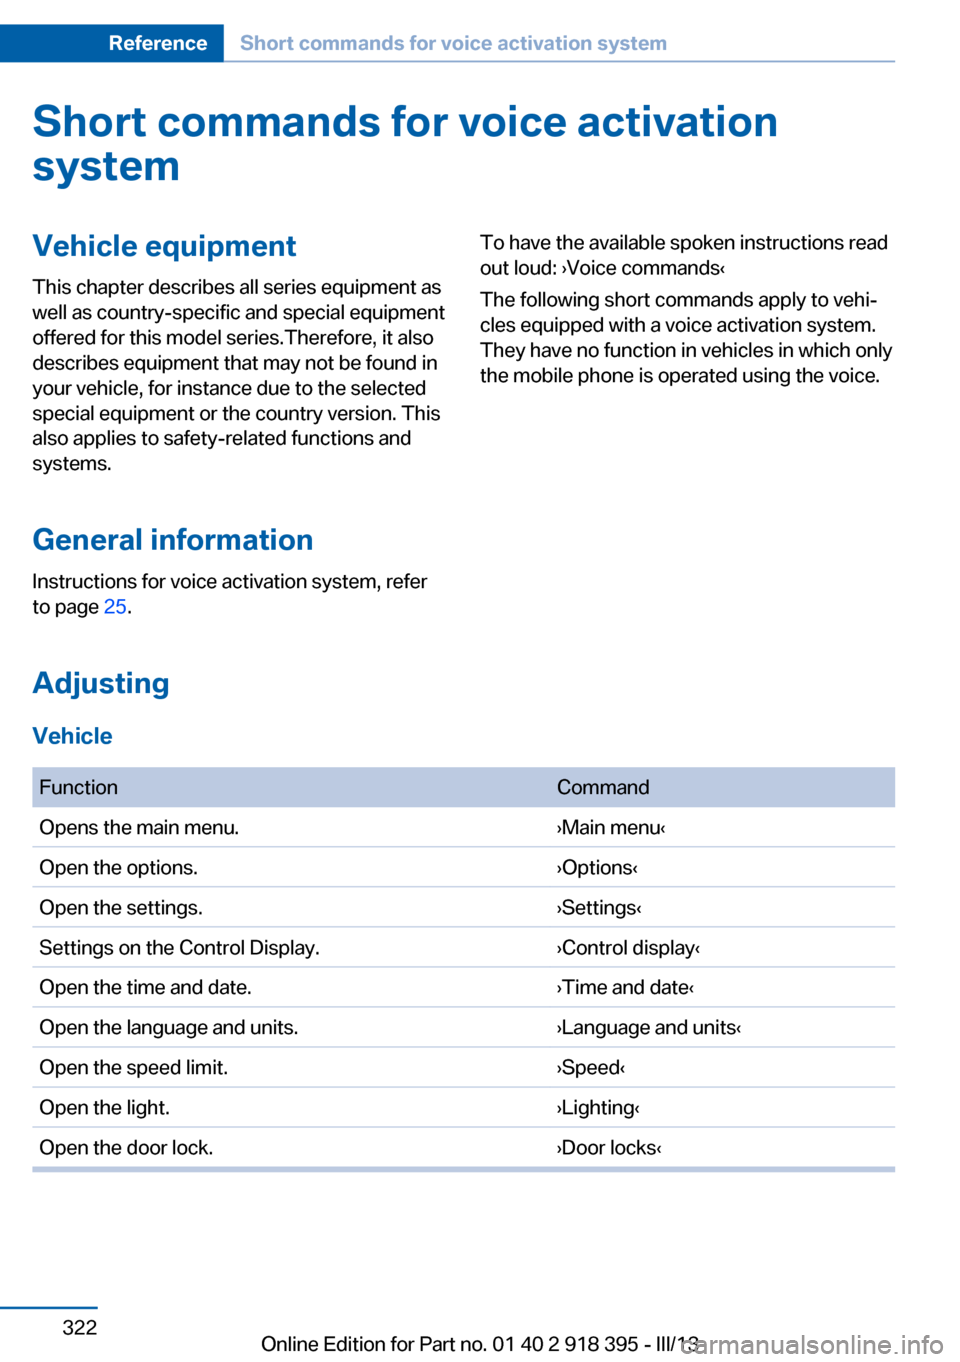
Short commands for voice activationsystemVehicle equipment
This chapter describes all series equipment as
well as country-specific and special equipment
offered for this model series.Therefore, it also
describes equipment that may not be found in
your vehicle, for instance due to the selected
special equipment or the country version. This
also applies to safety-related functions and
systems.
General information
Instructions for voice activation system, refer
to page 25.To have the available spoken instructions read
out loud: ›Voice commands‹
The following short commands apply to vehi‐
cles equipped with a voice activation system.
They have no function in vehicles in which only
the mobile phone is operated using the voice.
Adjusting
Vehicle
FunctionCommandOpens the main menu.›Main menu‹Open the options.›Options‹Open the settings.›Settings‹Settings on the Control Display.›Control display‹Open the time and date.›Time and date‹Open the language and units.›Language and units‹Open the speed limit.›Speed‹Open the light.›Lighting‹Open the door lock.›Door locks‹Seite 322ReferenceShort commands for voice activation system322
Online Edition for Part no. 01 40 2 918 395 - III/13
Page 337 of 345
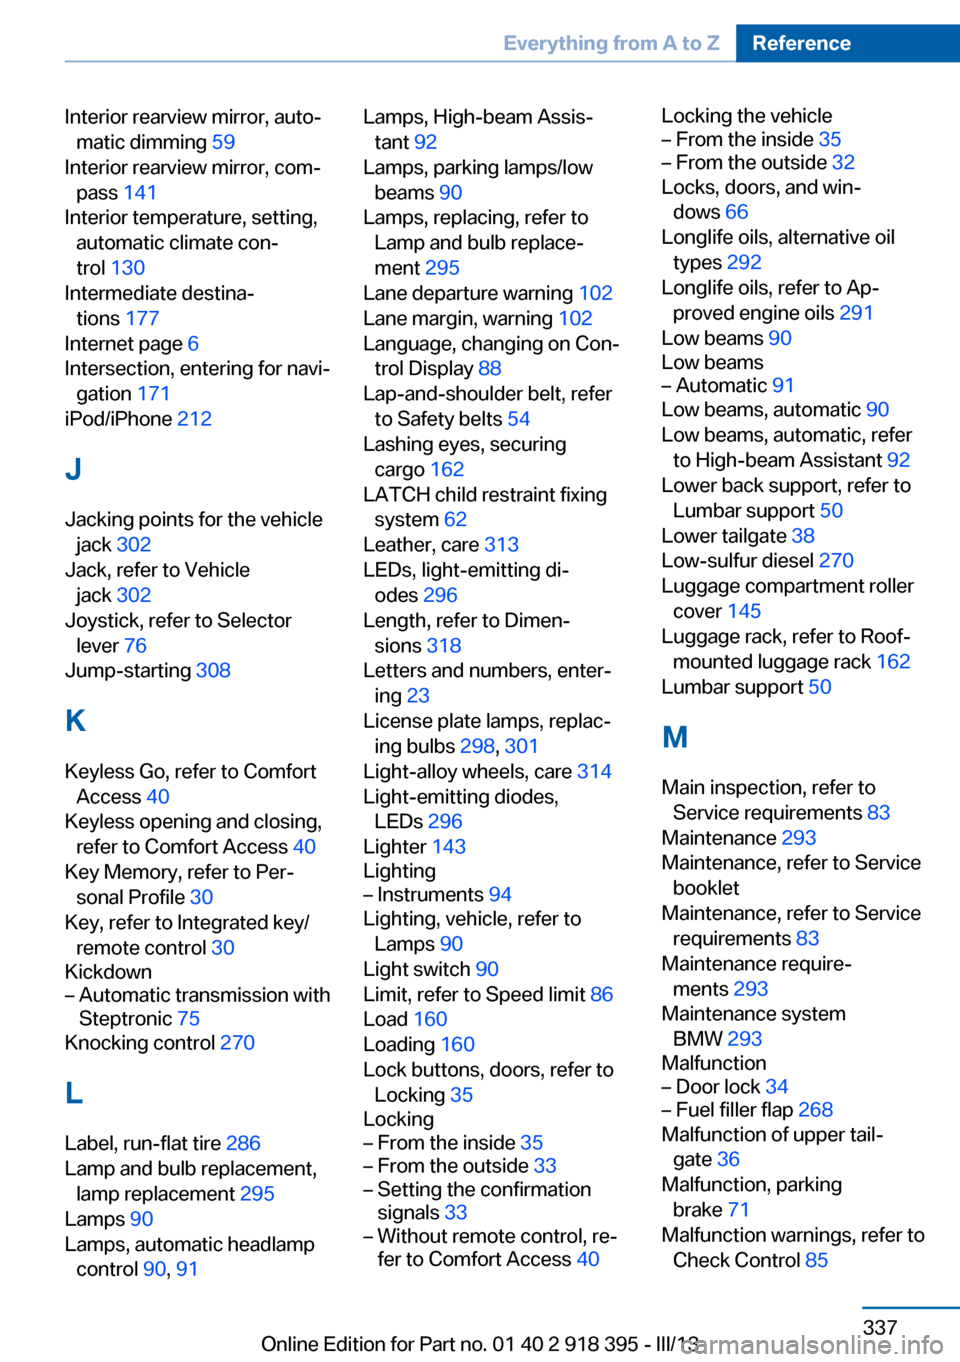
Interior rearview mirror, auto‐matic dimming 59
Interior rearview mirror, com‐ pass 141
Interior temperature, setting, automatic climate con‐
trol 130
Intermediate destina‐ tions 177
Internet page 6
Intersection, entering for navi‐ gation 171
iPod/iPhone 212
J
Jacking points for the vehicle jack 302
Jack, refer to Vehicle jack 302
Joystick, refer to Selector lever 76
Jump-starting 308
K
Keyless Go, refer to Comfort Access 40
Keyless opening and closing, refer to Comfort Access 40
Key Memory, refer to Per‐ sonal Profile 30
Key, refer to Integrated key/ remote control 30
Kickdown– Automatic transmission with
Steptronic 75
Knocking control 270
L
Label, run-flat tire 286
Lamp and bulb replacement, lamp replacement 295
Lamps 90
Lamps, automatic headlamp control 90, 91
Lamps, High-beam Assis‐
tant 92
Lamps, parking lamps/low beams 90
Lamps, replacing, refer to Lamp and bulb replace‐
ment 295
Lane departure warning 102
Lane margin, warning 102
Language, changing on Con‐ trol Display 88
Lap-and-shoulder belt, refer to Safety belts 54
Lashing eyes, securing cargo 162
LATCH child restraint fixing system 62
Leather, care 313
LEDs, light-emitting di‐ odes 296
Length, refer to Dimen‐ sions 318
Letters and numbers, enter‐ ing 23
License plate lamps, replac‐ ing bulbs 298, 301
Light-alloy wheels, care 314
Light-emitting diodes, LEDs 296
Lighter 143
Lighting– Instruments 94
Lighting, vehicle, refer to
Lamps 90
Light switch 90
Limit, refer to Speed limit 86
Load 160
Loading 160
Lock buttons, doors, refer to Locking 35
Locking
– From the inside 35– From the outside 33– Setting the confirmation
signals 33– Without remote control, re‐
fer to Comfort Access 40Locking the vehicle– From the inside 35– From the outside 32
Locks, doors, and win‐
dows 66
Longlife oils, alternative oil types 292
Longlife oils, refer to Ap‐ proved engine oils 291
Low beams 90
Low beams
– Automatic 91
Low beams, automatic 90
Low beams, automatic, refer to High-beam Assistant 92
Lower back support, refer to Lumbar support 50
Lower tailgate 38
Low-sulfur diesel 270
Luggage compartment roller cover 145
Luggage rack, refer to Roof- mounted luggage rack 162
Lumbar support 50
M
Main inspection, refer to Service requirements 83
Maintenance 293
Maintenance, refer to Service booklet
Maintenance, refer to Service requirements 83
Maintenance require‐ ments 293
Maintenance system BMW 293
Malfunction
– Door lock 34– Fuel filler flap 268
Malfunction of upper tail‐
gate 36
Malfunction, parking brake 71
Malfunction warnings, refer to Check Control 85
Seite 337Everything from A to ZReference337
Online Edition for Part no. 01 40 2 918 395 - III/13