reset BMW X6 2013 E71 User Guide
[x] Cancel search | Manufacturer: BMW, Model Year: 2013, Model line: X6, Model: BMW X6 2013 E71Pages: 345, PDF Size: 9.45 MB
Page 102 of 345
Check the tire inflation pressure and reset the
system.
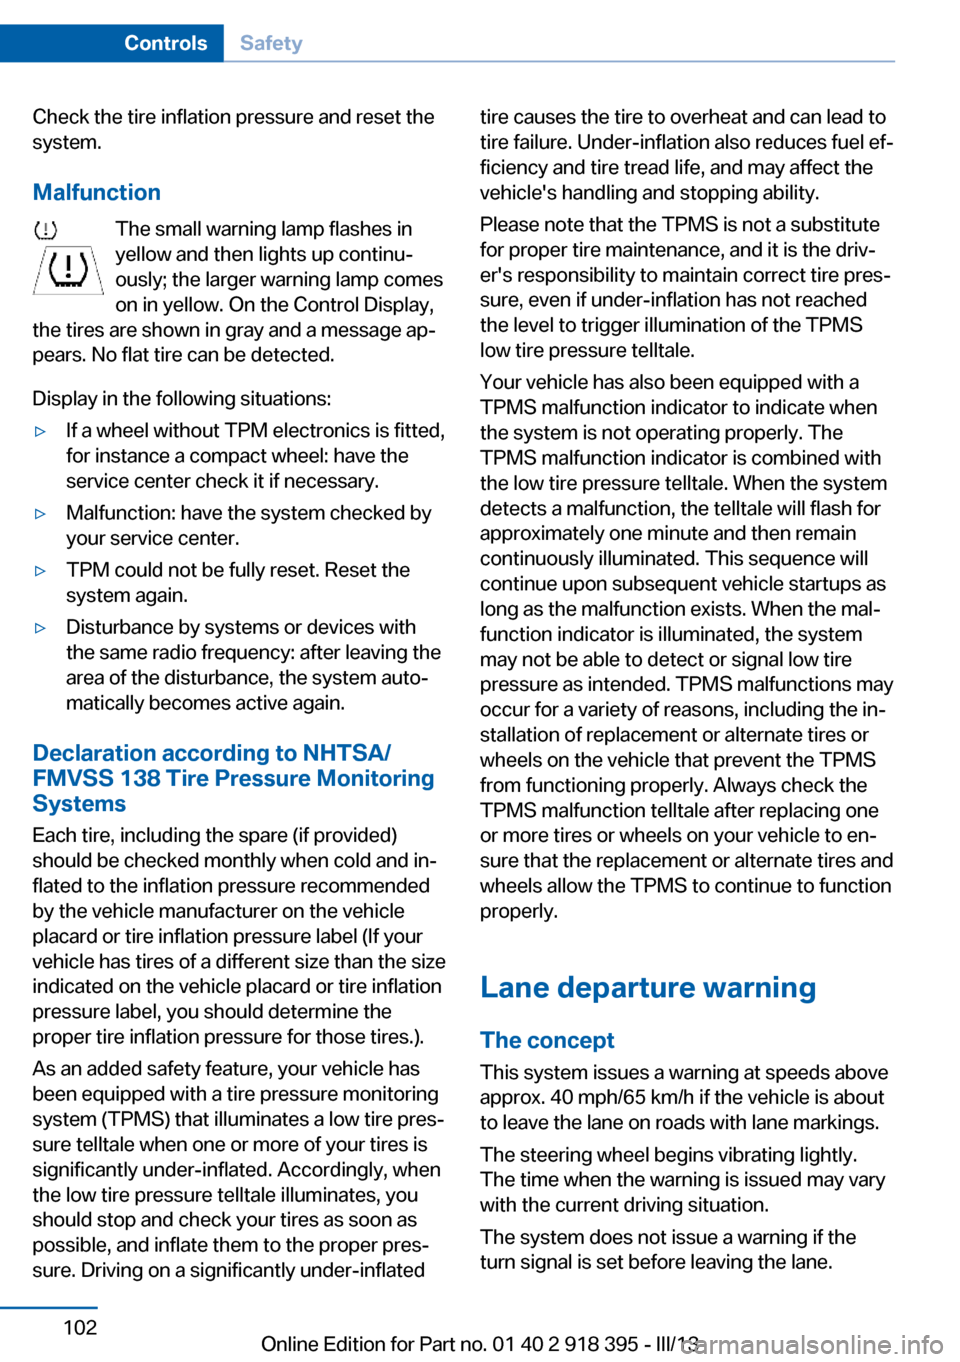
Malfunction The small warning lamp flashes inyellow and then lights up continu‐
ously; the larger warning lamp comes
on in yellow. On the Control Display,
the tires are shown in gray and a message ap‐
pears. No flat tire can be detected.
Display in the following situations:▷If a wheel without TPM electronics is fitted,
for instance a compact wheel: have the
service center check it if necessary.▷Malfunction: have the system checked by
your service center.▷TPM could not be fully reset. Reset the
system again.▷Disturbance by systems or devices with
the same radio frequency: after leaving the
area of the disturbance, the system auto‐
matically becomes active again.
Declaration according to NHTSA/
FMVSS 138 Tire Pressure Monitoring
Systems
Each tire, including the spare (if provided)
should be checked monthly when cold and in‐
flated to the inflation pressure recommended
by the vehicle manufacturer on the vehicle
placard or tire inflation pressure label (If your
vehicle has tires of a different size than the size
indicated on the vehicle placard or tire inflation
pressure label, you should determine the
proper tire inflation pressure for those tires.).
As an added safety feature, your vehicle has
been equipped with a tire pressure monitoring
system (TPMS) that illuminates a low tire pres‐
sure telltale when one or more of your tires is
significantly under-inflated. Accordingly, when
the low tire pressure telltale illuminates, you
should stop and check your tires as soon as
possible, and inflate them to the proper pres‐
sure. Driving on a significantly under-inflated
tire causes the tire to overheat and can lead to
tire failure. Under-inflation also reduces fuel ef‐
ficiency and tire tread life, and may affect the
vehicle's handling and stopping ability.
Please note that the TPMS is not a substitute
for proper tire maintenance, and it is the driv‐
er's responsibility to maintain correct tire pres‐
sure, even if under-inflation has not reached
the level to trigger illumination of the TPMS
low tire pressure telltale.
Your vehicle has also been equipped with a
TPMS malfunction indicator to indicate when
the system is not operating properly. The
TPMS malfunction indicator is combined with
the low tire pressure telltale. When the system
detects a malfunction, the telltale will flash for
approximately one minute and then remain
continuously illuminated. This sequence will
continue upon subsequent vehicle startups as
long as the malfunction exists. When the mal‐
function indicator is illuminated, the system
may not be able to detect or signal low tire
pressure as intended. TPMS malfunctions may
occur for a variety of reasons, including the in‐
stallation of replacement or alternate tires or
wheels on the vehicle that prevent the TPMS
from functioning properly. Always check the
TPMS malfunction telltale after replacing one
or more tires or wheels on your vehicle to en‐
sure that the replacement or alternate tires and
wheels allow the TPMS to continue to function
properly.
Lane departure warning
The concept This system issues a warning at speeds above
approx. 40 mph/65 km/h if the vehicle is about
to leave the lane on roads with lane markings.
The steering wheel begins vibrating lightly.
The time when the warning is issued may vary
with the current driving situation.
The system does not issue a warning if the
turn signal is set before leaving the lane.Seite 102ControlsSafety102
Online Edition for Part no. 01 40 2 918 395 - III/13
Page 137 of 345
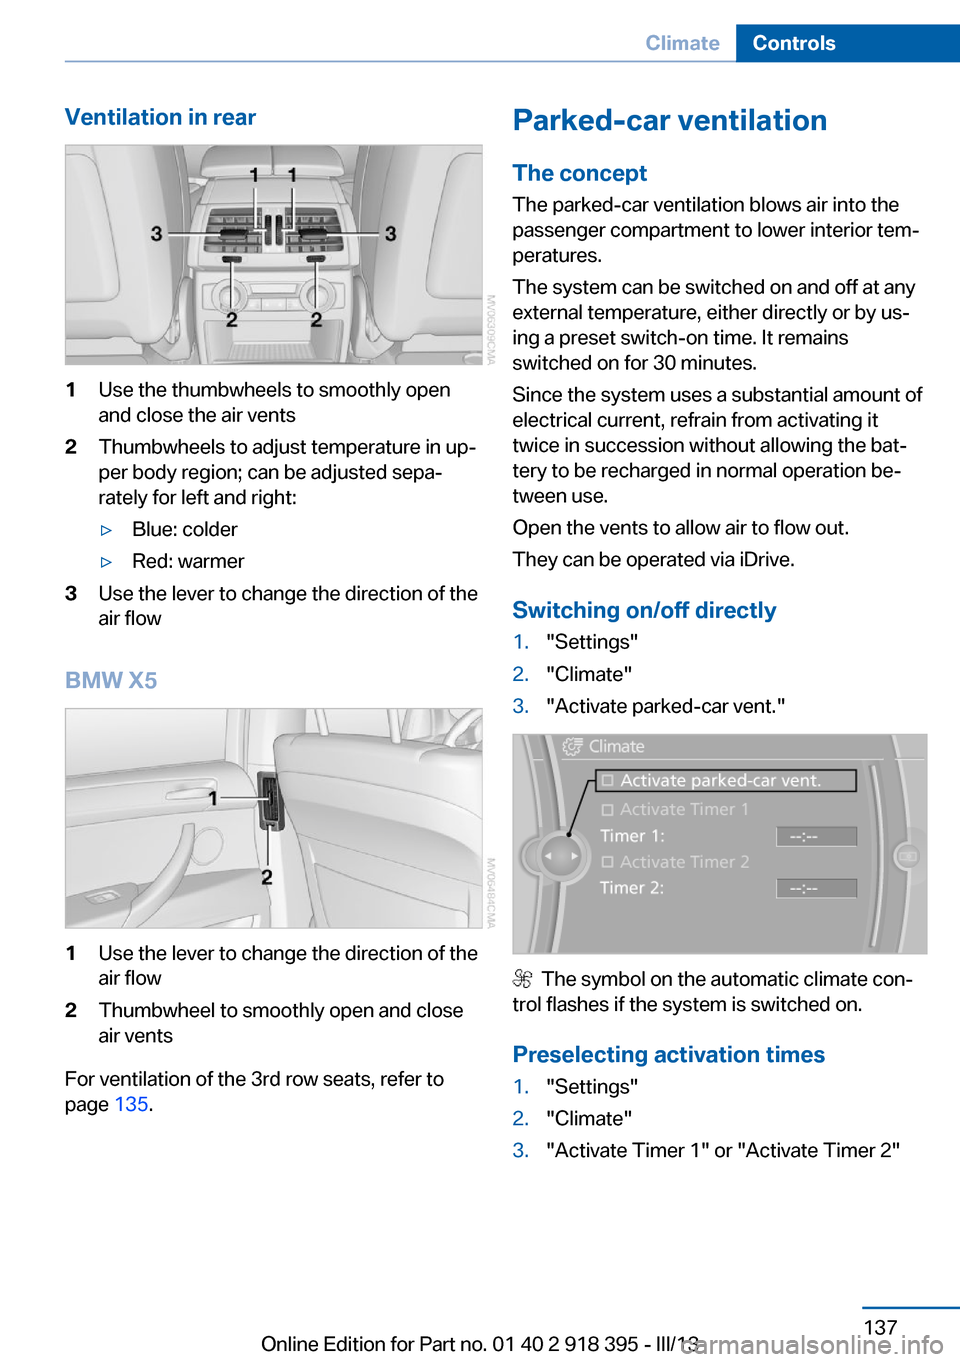
Ventilation in rear1Use the thumbwheels to smoothly open
and close the air vents2Thumbwheels to adjust temperature in up‐
per body region; can be adjusted sepa‐
rately for left and right:▷Blue: colder▷Red: warmer3Use the lever to change the direction of the
air flow
BMW X5
1Use the lever to change the direction of the
air flow2Thumbwheel to smoothly open and close
air vents
For ventilation of the 3rd row seats, refer to
page 135.
Parked-car ventilation
The concept The parked-car ventilation blows air into the
passenger compartment to lower interior tem‐
peratures.
The system can be switched on and off at any
external temperature, either directly or by us‐
ing a preset switch-on time. It remains
switched on for 30 minutes.
Since the system uses a substantial amount of
electrical current, refrain from activating it
twice in succession without allowing the bat‐
tery to be recharged in normal operation be‐
tween use.
Open the vents to allow air to flow out.
They can be operated via iDrive.
Switching on/off directly1."Settings"2."Climate"3."Activate parked-car vent."
The symbol on the automatic climate con‐
trol flashes if the system is switched on.
Preselecting activation times
1."Settings"2."Climate"3."Activate Timer 1" or "Activate Timer 2"Seite 137ClimateControls137
Online Edition for Part no. 01 40 2 918 395 - III/13
Page 191 of 345
Multi-channel playback,
surround
Choose between stereo and multi-channel
playback, surround.
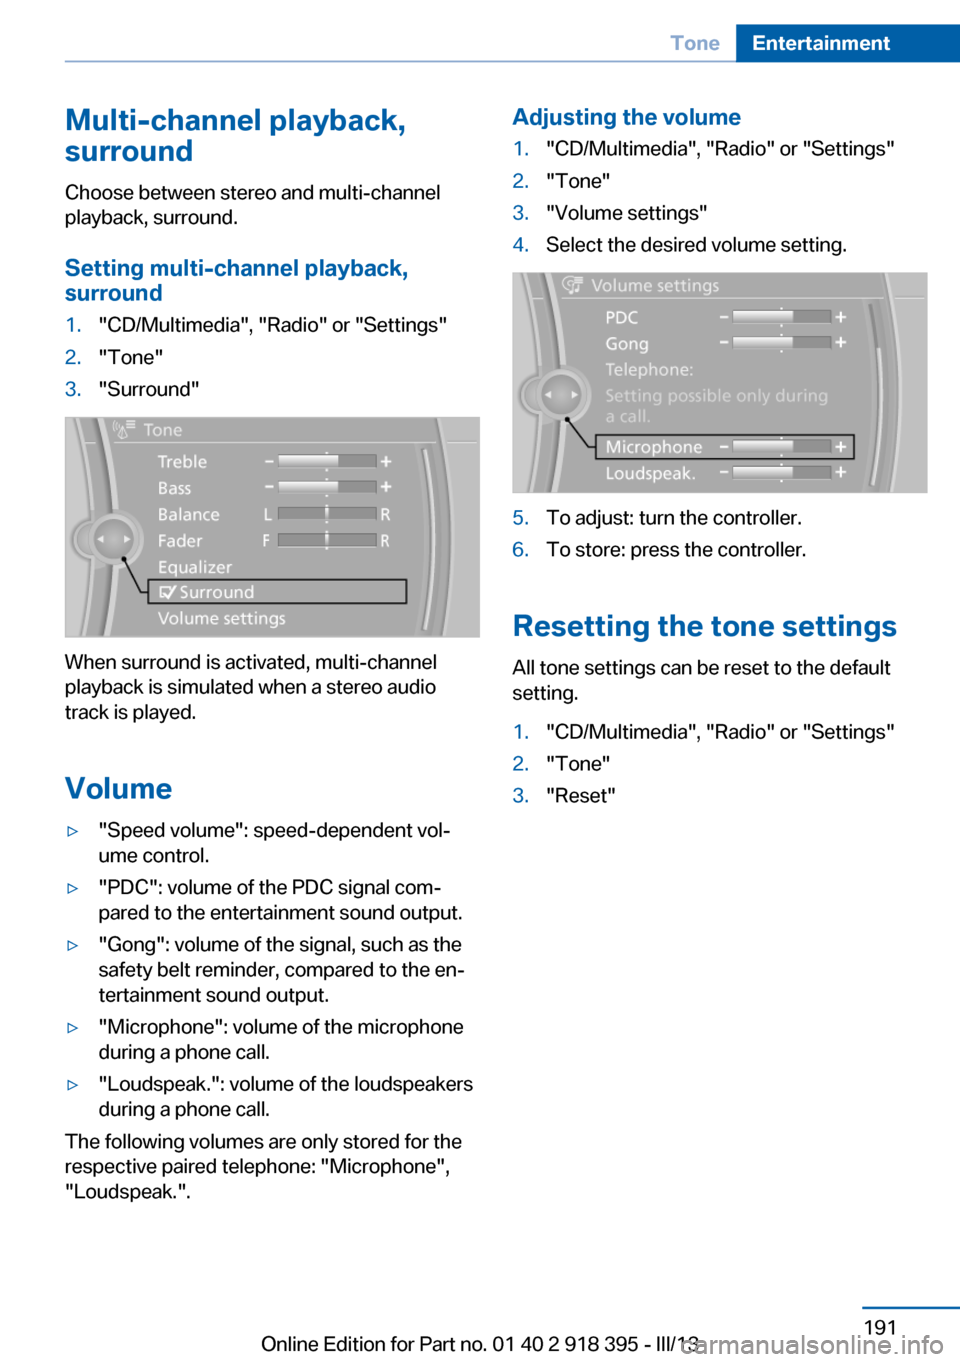
Setting multi-channel playback,
surround1."CD/Multimedia", "Radio" or "Settings"2."Tone"3."Surround"
When surround is activated, multi-channel
playback is simulated when a stereo audio
track is played.
Volume
▷"Speed volume": speed-dependent vol‐
ume control.▷"PDC": volume of the PDC signal com‐
pared to the entertainment sound output.▷"Gong": volume of the signal, such as the
safety belt reminder, compared to the en‐
tertainment sound output.▷"Microphone": volume of the microphone
during a phone call.▷"Loudspeak.": volume of the loudspeakers
during a phone call.
The following volumes are only stored for the
respective paired telephone: "Microphone",
"Loudspeak.".
Adjusting the volume1."CD/Multimedia", "Radio" or "Settings"2."Tone"3."Volume settings"4.Select the desired volume setting.5.To adjust: turn the controller.6.To store: press the controller.
Resetting the tone settings
All tone settings can be reset to the default
setting.
1."CD/Multimedia", "Radio" or "Settings"2."Tone"3."Reset"Seite 191ToneEntertainment191
Online Edition for Part no. 01 40 2 918 395 - III/13
Page 198 of 345
If there is no message, the system changes to
the My Favorites category. All favorites cur‐
rently being broadcast can be selected from a
list.
Managing the favorites
Activating/deactivating the favorites
Favorites can be activated and deactivated
globally and individually.1."Satellite radio"2. "Manage favorites"3.Select "Activate alert" or the desired favor‐
ites.
The setting is stored for the remote control
currently in use.
Deleting favorites
1."Satellite radio"2. "Manage favorites"3.Highlight the desired favorite.4.Open "Options".5."Delete entry"
Traffic Jump Traffic and weather information for a selected
region is broadcast every few minutes.
Selecting a region
1."Radio"2."Satellite radio"3.Open "Options".4."Set jump"5.Select the desired region.
The region is stored for the remote control cur‐
rently in use.
Activating/deactivating the jump
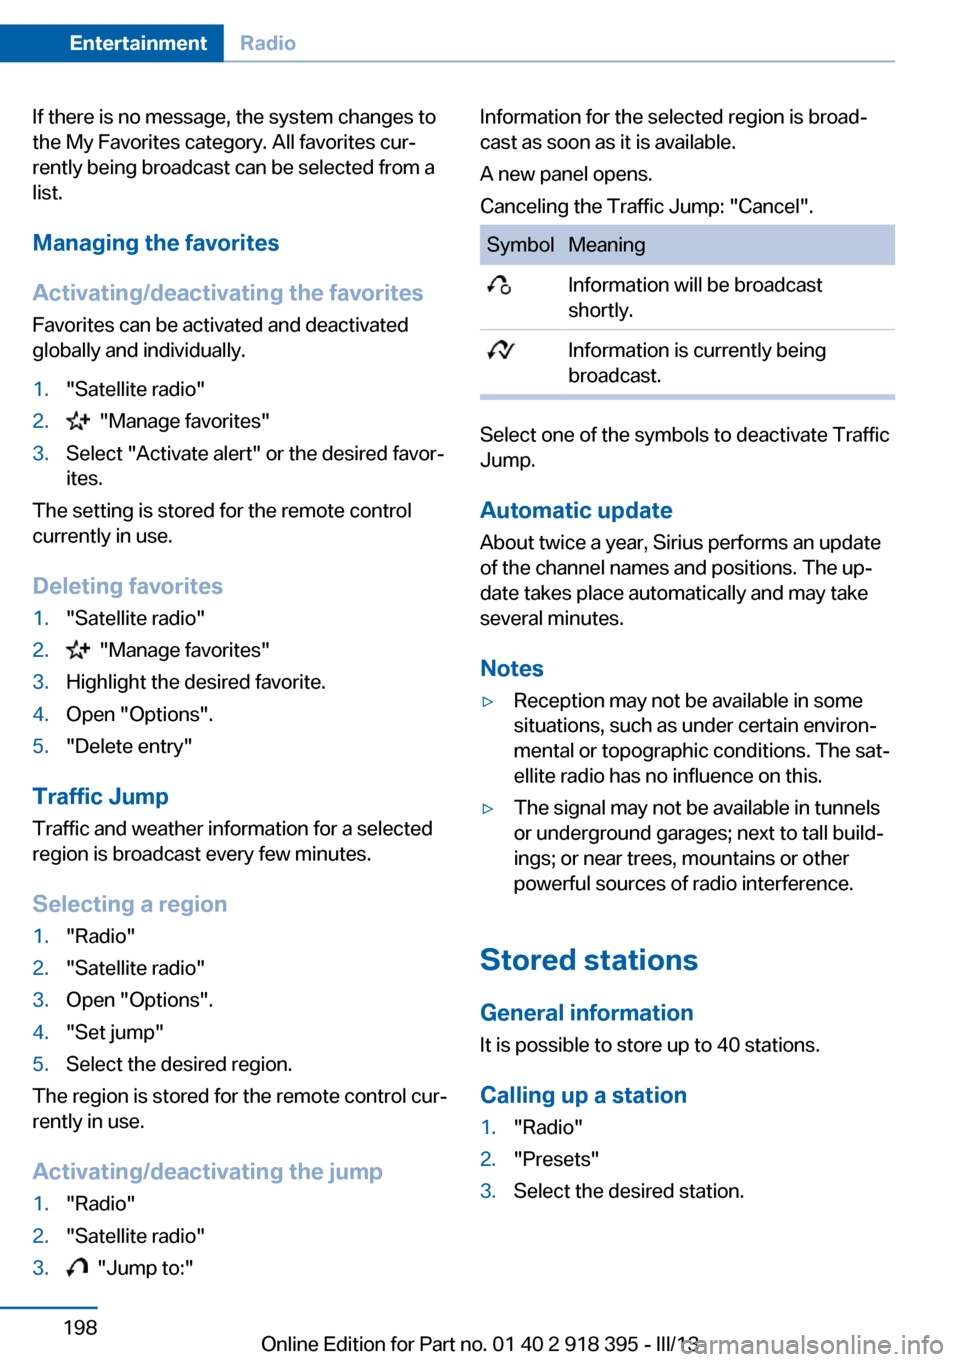
1."Radio"2."Satellite radio"3. "Jump to:"Information for the selected region is broad‐
cast as soon as it is available.
A new panel opens.
Canceling the Traffic Jump: "Cancel".SymbolMeaning Information will be broadcast
shortly. Information is currently being
broadcast.
Select one of the symbols to deactivate Traffic
Jump.
Automatic update
About twice a year, Sirius performs an update
of the channel names and positions. The up‐
date takes place automatically and may take
several minutes.
Notes
▷Reception may not be available in some
situations, such as under certain environ‐
mental or topographic conditions. The sat‐
ellite radio has no influence on this.▷The signal may not be available in tunnels
or underground garages; next to tall build‐
ings; or near trees, mountains or other
powerful sources of radio interference.
Stored stations
General information It is possible to store up to 40 stations.
Calling up a station
1."Radio"2."Presets"3.Select the desired station.Seite 198EntertainmentRadio198
Online Edition for Part no. 01 40 2 918 395 - III/13
Page 199 of 345
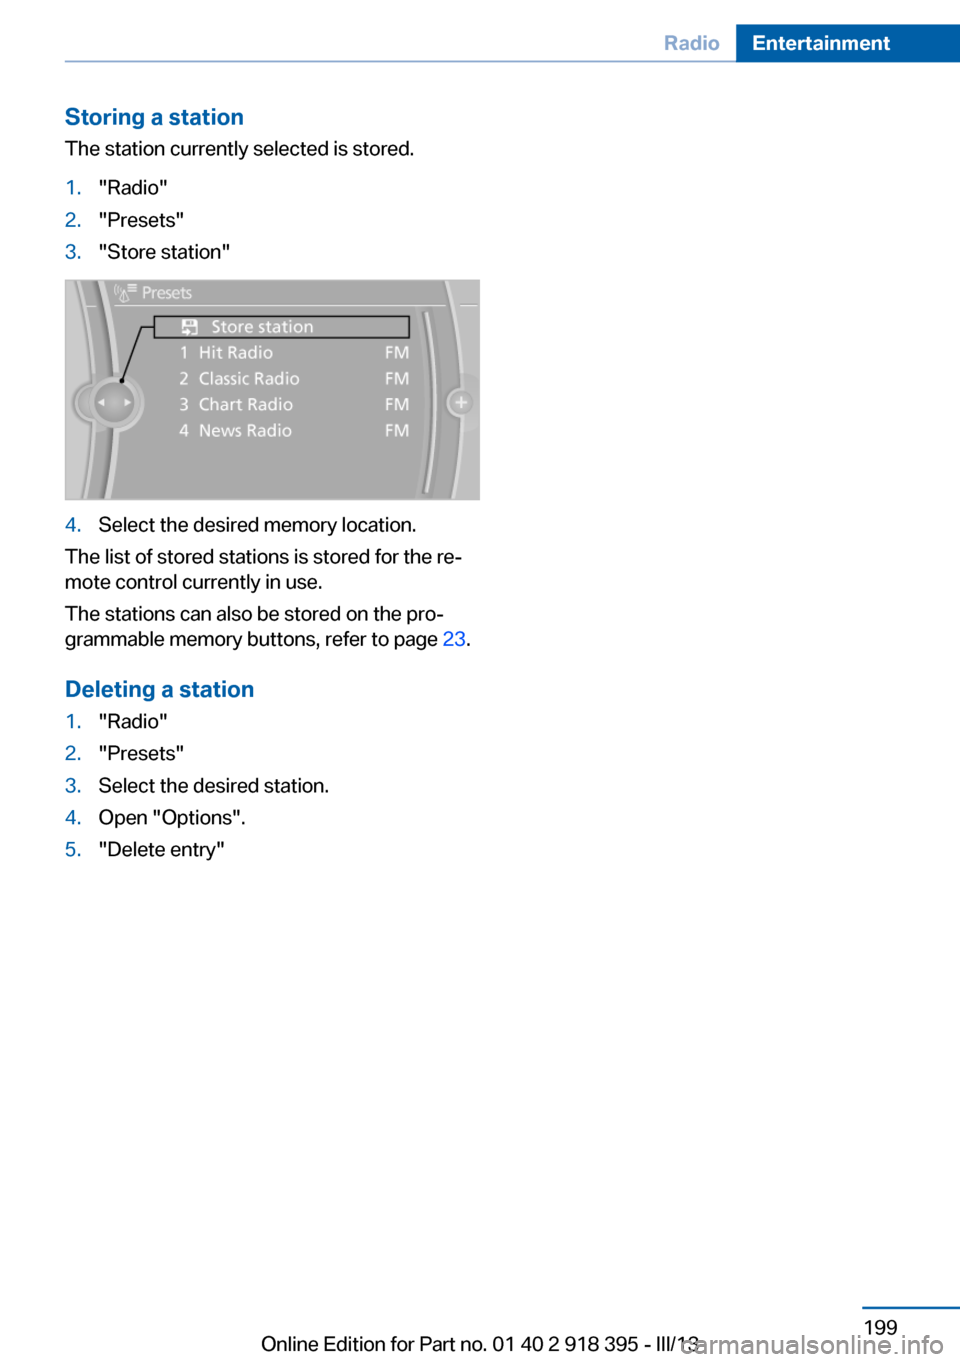
Storing a station
The station currently selected is stored.1."Radio"2."Presets"3."Store station"4.Select the desired memory location.
The list of stored stations is stored for the re‐
mote control currently in use.
The stations can also be stored on the pro‐
grammable memory buttons, refer to page 23.
Deleting a station
1."Radio"2."Presets"3.Select the desired station.4.Open "Options".5."Delete entry"Seite 199RadioEntertainment199
Online Edition for Part no. 01 40 2 918 395 - III/13
Page 215 of 345
Random playbackThe current list of tracks is played back in ran‐dom order.1."CD/Multimedia"2."External devices"3.Open "Options".4."Random"
Fast forward/reverse
Press and hold the button.
Notes Do not expose the audio device to extreme en‐
vironmental conditions, such as very high tem‐
peratures; refer to the audio device operating
instructions.
Depending on the configuration of the audio
files, e.g., bit rates greater than 256 kbit/s, the
files may not play back correctly in each case.
Information on connection
▷The connected audio device is supplied
with a max. power of 500 mA if supported
by the device. Therefore, do not addition‐
ally connect the device to a socket in the
vehicle; otherwise, playback may be com‐
promised.▷Do not use force when plugging the con‐
nector into the USB interface.▷Do not connect devices such as fans or
lamps to the USB audio interface.▷Do not connect USB hard drives.▷Do not use the USB audio interface to re‐
charge external devices.
Bluetooth audio
At a glance
▷Music files on external devices such as au‐
dio devices or mobile phones can be
played back via Bluetooth.Use of a mobile phone as an audio source,
refer to page 238.▷Bluetooth® is a registered trademark of
Bluetooth® SIG, Inc.▷The sound is output on the vehicle loud‐
speakers.▷The volume of the sound output is de‐
pendent on the device. If necessary, adjust
the volume on the device.▷Up to four external devices can be paired
with the vehicle.
Requirements
▷The device is suitable. Information at
www.bmwusa.com/bluetooth.▷The device is ready for operation.▷The ignition is switched on.▷Bluetooth is activated on the vehicle, refer
to page 237, and on the device.▷Bluetooth presettings must be made on
the device, such as for a connection with‐
out confirmation or visibility; refer to the
device operating instructions.▷A number with at least four and a maximum
of 16 digits is defined as the Bluetooth
passkey. It is only required once for pairing.
Pairing and connecting
Pairing a device
To avoid becoming distracted and pos‐
ing an unnecessary hazard both to your own
vehicle's occupants and to other road users,
only pair the device while the vehicle is station‐
ary.◀
1."CD/Multimedia"2."Bluetooth® (audio)"3.If necessary, "Bluetooth® audio".4."Add new phone"Seite 215CD/multimediaEntertainment215
Online Edition for Part no. 01 40 2 918 395 - III/13
Page 225 of 345
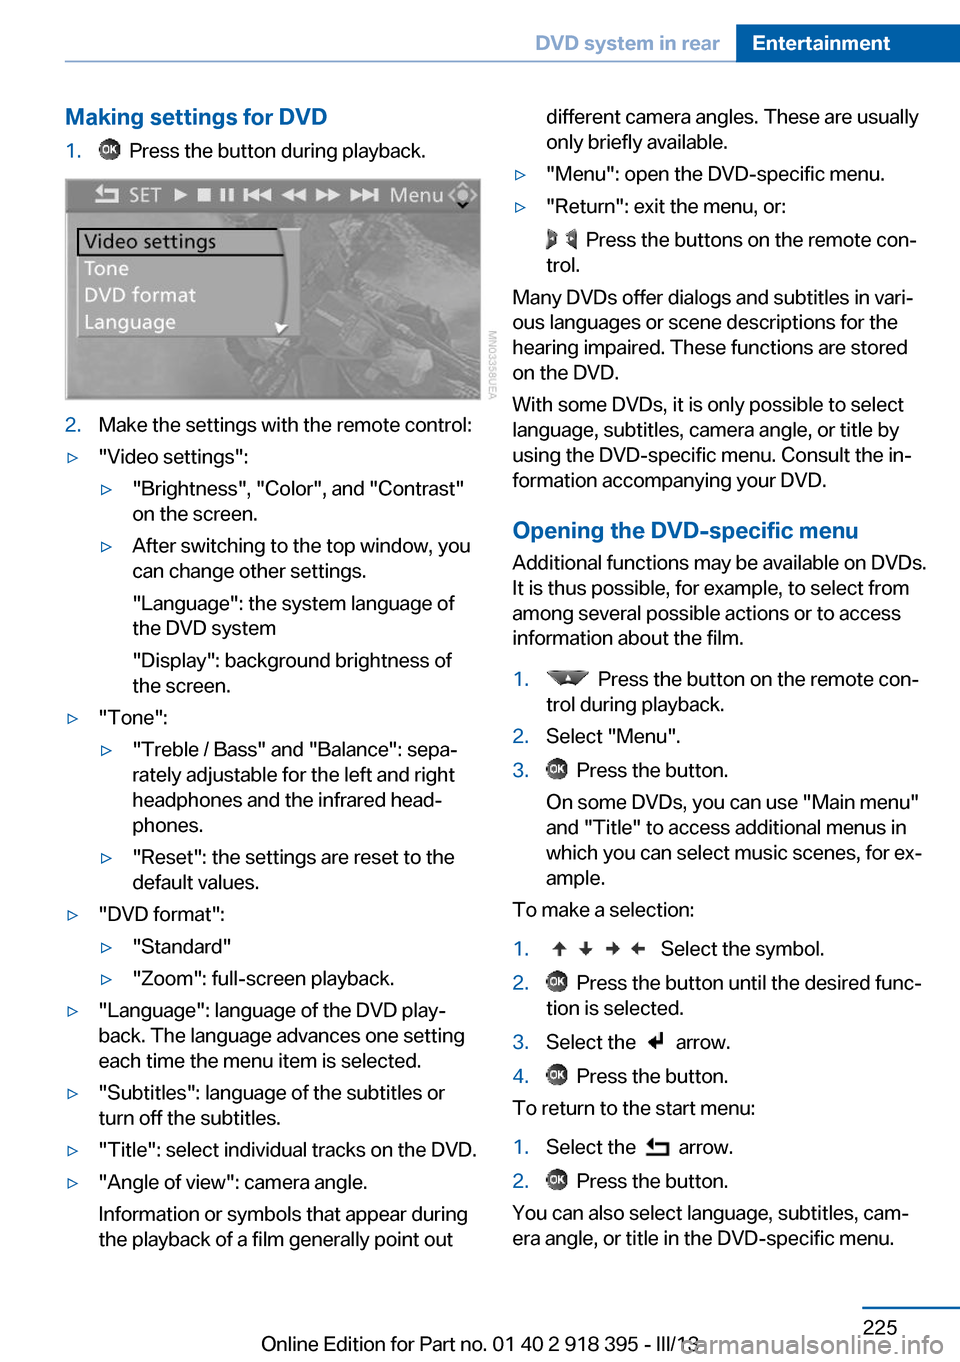
Making settings for DVD1. Press the button during playback.2.Make the settings with the remote control:▷"Video settings":▷"Brightness", "Color", and "Contrast"
on the screen.▷After switching to the top window, you
can change other settings.
"Language": the system language of
the DVD system
"Display": background brightness of
the screen.▷"Tone":▷"Treble / Bass" and "Balance": sepa‐
rately adjustable for the left and right
headphones and the infrared head‐
phones.▷"Reset": the settings are reset to the
default values.▷"DVD format":▷"Standard"▷"Zoom": full-screen playback.▷"Language": language of the DVD play‐
back. The language advances one setting
each time the menu item is selected.▷"Subtitles": language of the subtitles or
turn off the subtitles.▷"Title": select individual tracks on the DVD.▷"Angle of view": camera angle.
Information or symbols that appear during
the playback of a film generally point outdifferent camera angles. These are usually
only briefly available.▷"Menu": open the DVD-specific menu.▷"Return": exit the menu, or:
Press the buttons on the remote con‐
trol.
Many DVDs offer dialogs and subtitles in vari‐
ous languages or scene descriptions for the
hearing impaired. These functions are stored
on the DVD.
With some DVDs, it is only possible to select
language, subtitles, camera angle, or title by
using the DVD-specific menu. Consult the in‐
formation accompanying your DVD.
Opening the DVD-specific menu
Additional functions may be available on DVDs.
It is thus possible, for example, to select from
among several possible actions or to access
information about the film.
1. Press the button on the remote con‐
trol during playback.2.Select "Menu".3. Press the button.
On some DVDs, you can use "Main menu"
and "Title" to access additional menus in
which you can select music scenes, for ex‐
ample.
To make a selection:
1. Select the symbol.2. Press the button until the desired func‐
tion is selected.3.Select the arrow.4. Press the button.
To return to the start menu:
1.Select the arrow.2. Press the button.
You can also select language, subtitles, cam‐
era angle, or title in the DVD-specific menu.
Seite 225DVD system in rearEntertainment225
Online Edition for Part no. 01 40 2 918 395 - III/13
Page 227 of 345
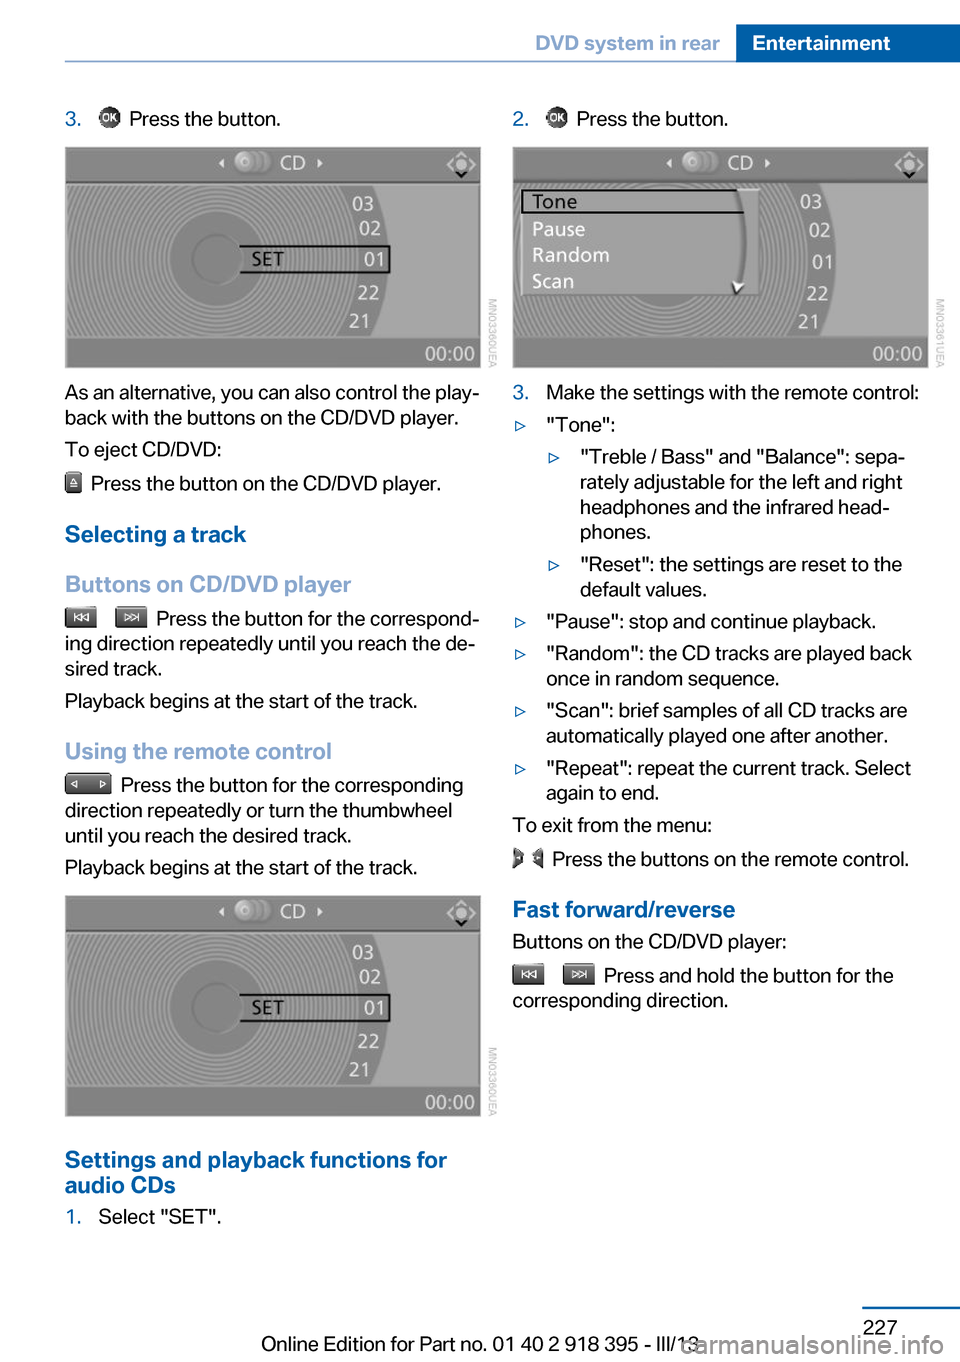
3. Press the button.
As an alternative, you can also control the play‐
back with the buttons on the CD/DVD player.
To eject CD/DVD:
Press the button on the CD/DVD player.
Selecting a track
Buttons on CD/DVD player
Press the button for the correspond‐
ing direction repeatedly until you reach the de‐
sired track.
Playback begins at the start of the track.
Using the remote control
Press the button for the corresponding
direction repeatedly or turn the thumbwheel
until you reach the desired track.
Playback begins at the start of the track.
Settings and playback functions for
audio CDs
1.Select "SET".2. Press the button.3.Make the settings with the remote control:▷"Tone":▷"Treble / Bass" and "Balance": sepa‐
rately adjustable for the left and right
headphones and the infrared head‐
phones.▷"Reset": the settings are reset to the
default values.▷"Pause": stop and continue playback.▷"Random": the CD tracks are played back
once in random sequence.▷"Scan": brief samples of all CD tracks are
automatically played one after another.▷"Repeat": repeat the current track. Select
again to end.
To exit from the menu:
Press the buttons on the remote control.
Fast forward/reverse Buttons on the CD/DVD player:
Press and hold the button for the
corresponding direction.
Seite 227DVD system in rearEntertainment227
Online Edition for Part no. 01 40 2 918 395 - III/13
Page 228 of 345
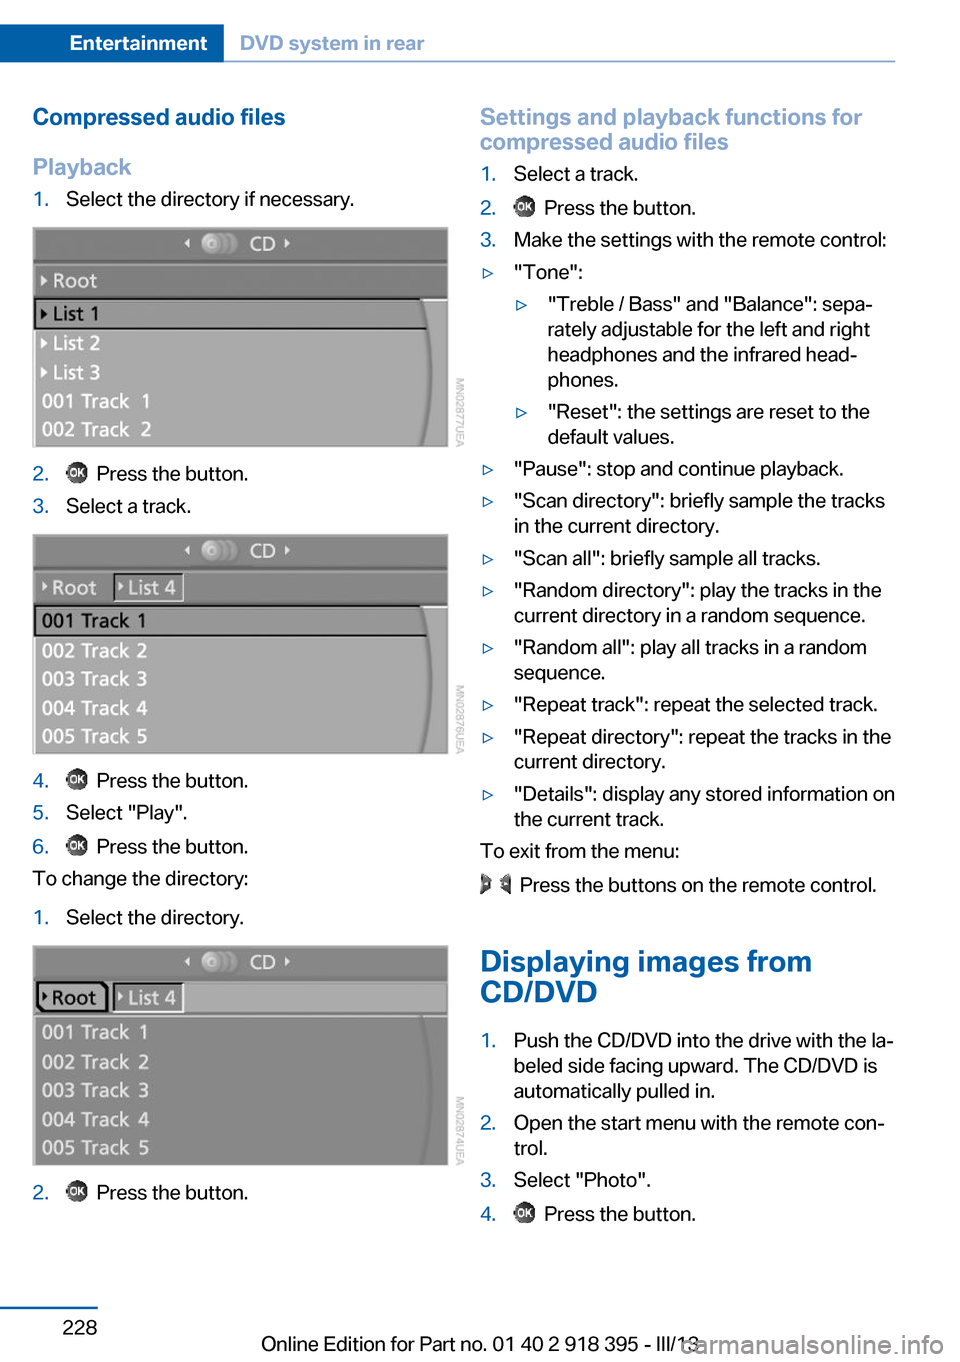
Compressed audio files
Playback1.Select the directory if necessary.2. Press the button.3.Select a track.4. Press the button.5.Select "Play".6. Press the button.
To change the directory:
1.Select the directory.2. Press the button.Settings and playback functions for
compressed audio files1.Select a track.2. Press the button.3.Make the settings with the remote control:▷"Tone":▷"Treble / Bass" and "Balance": sepa‐
rately adjustable for the left and right
headphones and the infrared head‐
phones.▷"Reset": the settings are reset to the
default values.▷"Pause": stop and continue playback.▷"Scan directory": briefly sample the tracks
in the current directory.▷"Scan all": briefly sample all tracks.▷"Random directory": play the tracks in the
current directory in a random sequence.▷"Random all": play all tracks in a random
sequence.▷"Repeat track": repeat the selected track.▷"Repeat directory": repeat the tracks in the
current directory.▷"Details": display any stored information on
the current track.
To exit from the menu:
Press the buttons on the remote control.
Displaying images from
CD/DVD
1.Push the CD/DVD into the drive with the la‐
beled side facing upward. The CD/DVD is
automatically pulled in.2.Open the start menu with the remote con‐
trol.3.Select "Photo".4. Press the button.Seite 228EntertainmentDVD system in rear228
Online Edition for Part no. 01 40 2 918 395 - III/13
Page 232 of 345
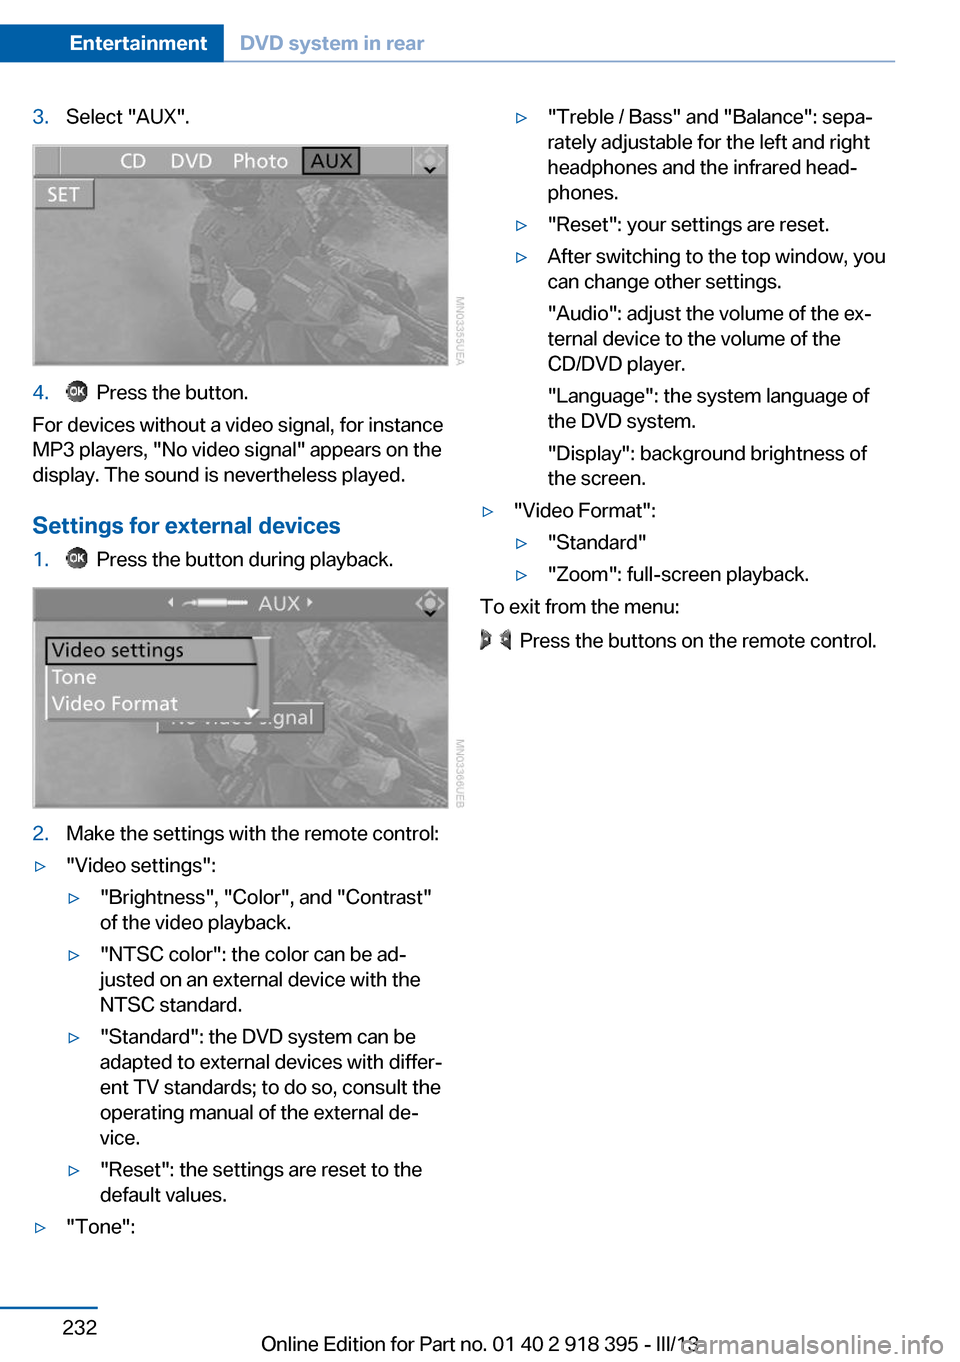
3.Select "AUX".4. Press the button.
For devices without a video signal, for instance
MP3 players, "No video signal" appears on the
display. The sound is nevertheless played.
Settings for external devices
1. Press the button during playback.2.Make the settings with the remote control:▷"Video settings":▷"Brightness", "Color", and "Contrast"
of the video playback.▷"NTSC color": the color can be ad‐
justed on an external device with the
NTSC standard.▷"Standard": the DVD system can be
adapted to external devices with differ‐
ent TV standards; to do so, consult the
operating manual of the external de‐
vice.▷"Reset": the settings are reset to the
default values.▷"Tone":▷"Treble / Bass" and "Balance": sepa‐
rately adjustable for the left and right
headphones and the infrared head‐
phones.▷"Reset": your settings are reset.▷After switching to the top window, you
can change other settings.
"Audio": adjust the volume of the ex‐
ternal device to the volume of the
CD/DVD player.
"Language": the system language of
the DVD system.
"Display": background brightness of
the screen.▷"Video Format":▷"Standard"▷"Zoom": full-screen playback.
To exit from the menu:
Press the buttons on the remote control.
Seite 232EntertainmentDVD system in rear232
Online Edition for Part no. 01 40 2 918 395 - III/13