Auto hold BMW X6 2016 F16 Owner's Manual
[x] Cancel search | Manufacturer: BMW, Model Year: 2016, Model line: X6, Model: BMW X6 2016 F16Pages: 265, PDF Size: 6.17 MB
Page 16 of 265
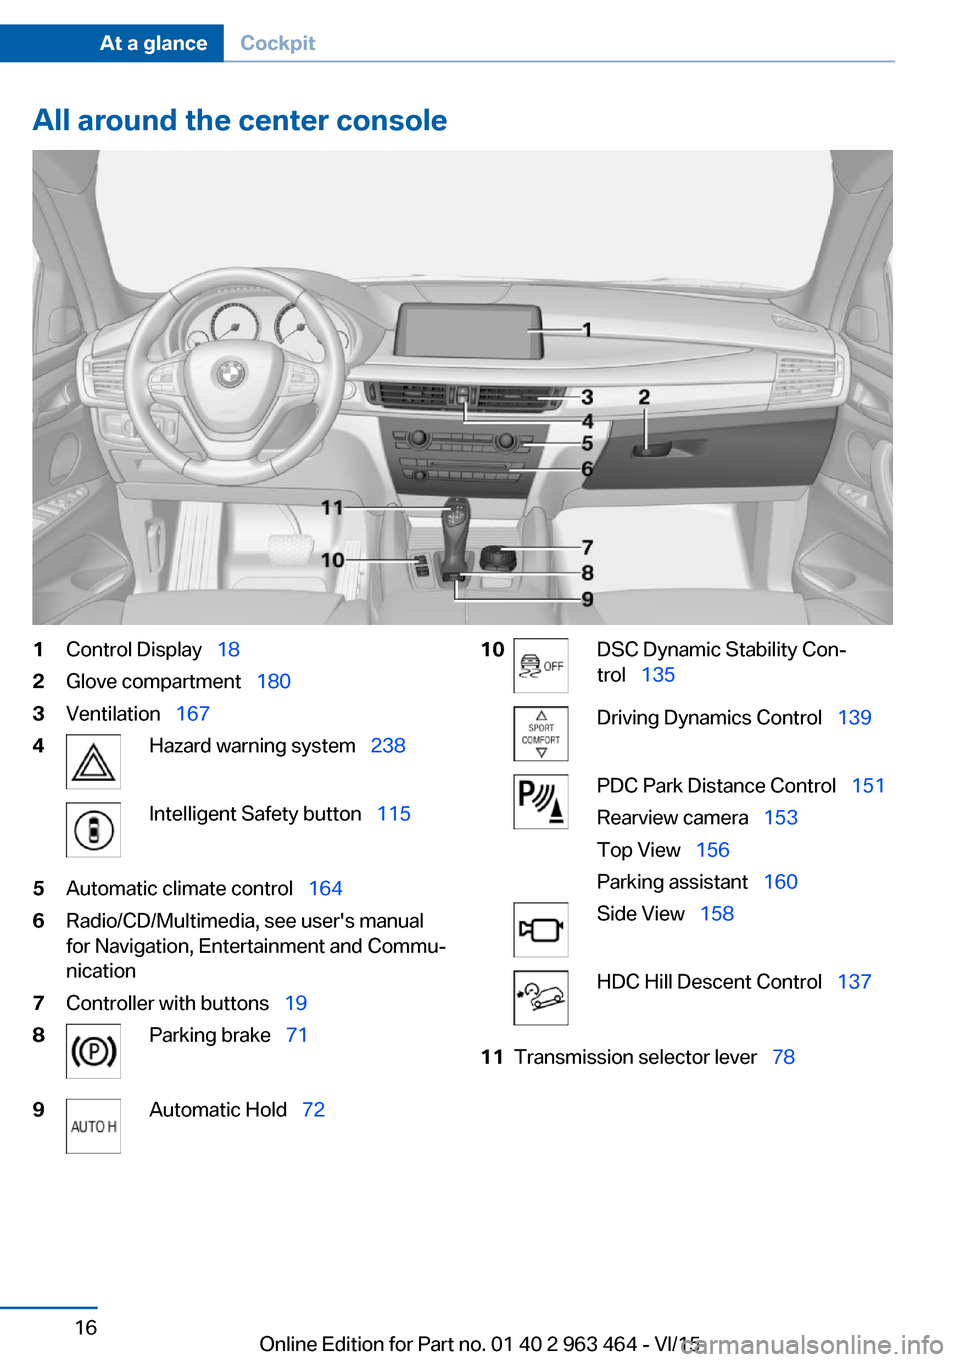
All around the center console1Control DisplayтАВтАЕ182Glove compartmentтАВтАЕ 1803VentilationтАВтАЕ1674Hazard warning systemтАВтАЕ 238Intelligent Safety buttonтАВтАЕ 1155Automatic climate controlтАВтАЕ 1646Radio/CD/Multimedia, see user's manual
for Navigation, Entertainment and CommuтАР
nication7Controller with buttonsтАВтАЕ 198Parking brakeтАВтАЕ719Automatic HoldтАВтАЕ 7210DSC Dynamic Stability ConтАР
trolтАВтАЕ 135Driving Dynamics ControlтАВтАЕ 139PDC Park Distance ControlтАВтАЕ 151
Rearview cameraтАВтАЕ 153
Top ViewтАВтАЕ 156
Parking assistantтАВтАЕ 160Side ViewтАВтАЕ158HDC Hill Descent ControlтАВтАЕ 13711Transmission selector leverтАВтАЕ 78Seite 16At a glanceCockpit16
Online Edition for Part no. 01 40 2 963 464 - VI/15
Page 38 of 265
тЦ╖Driver's door and fuel filler flap.тЦ╖All doors, tailgate, and fuel filler flap.
In addition, the following functions are exeтАР
cuted:
тЦ╖The interior lights are switched on, when it
is dark outside, the courtesy lamps are also
switched on. This function is not available,
if the interior lamps were switched off manтАР
ually.тЦ╖The welcome lamps are switched on, if this
function was activated.тЦ╖The alarm system, refer to page 46, is
disarmed.
Convenient opening
Press and hold this button on the reтАР
mote control after unlocking.
The windows and the glass sunroof are
opened, as long as the button on the remote
control is pressed.
Locking WARNING
Unlocking from the inside is only possiтАР
ble with special knowledge.
If people must spend a longer time in the vehiтАР
cle while it is very hot or cold outside, there is
risk of injuries or danger to life. Do not lock the
vehicle from the outside when there are people
in it.тЧА
The driver's door must be closed. Press button on the remote control.
All doors, the tailgate, and the fuel filler flap are
being locked.
The alarm system, refer to page 46, is armed.
Switching on interior lights and
courtesy lights
Press button on the remote control with
the vehicle locked.
The courtesy lamps are only switched on when
it is dark outside. This function is not available,
if the interior lamps were switched off manтАР
ually.
If the button is pressed again within 10 secтАР
onds after vehicle was locked, the interior moтАР
tion sensor and tilt alarm sensor of the anti-
theft warning system, refer to page 47, are
turned off. After locking, wait 10 seconds beтАР
fore pressing the button again.
Panic mode
You can trigger the alarm system if you find
yourself in a dangerous situation.
Press button on the remote control for
at least 3 seconds.
To switch off the alarm: press any button.
Opening the tailgate CAUTION
The tailgate swings back and up when it
opens. There is risk of property damage. Make
sure that the area of movement of the tailgate
is clear during opening and closing.тЧА
To avoid locking it into the vehicle, do not
place the remote control in the cargo area.
Press button on the remote control for
approx. 1 second.
The closed tailgate is automatically opened,
whether or not the vehicle is locked or unтАР
locked.
Depending on the features and the country
version, it is also possible to have door unтАР
locked. Create the settings, refer to page 45.
The tailgate cannot be opened with the remote
control while a trailer is being towed.Seite 38ControlsOpening and closing38
Online Edition for Part no. 01 40 2 963 464 - VI/15
Page 42 of 265
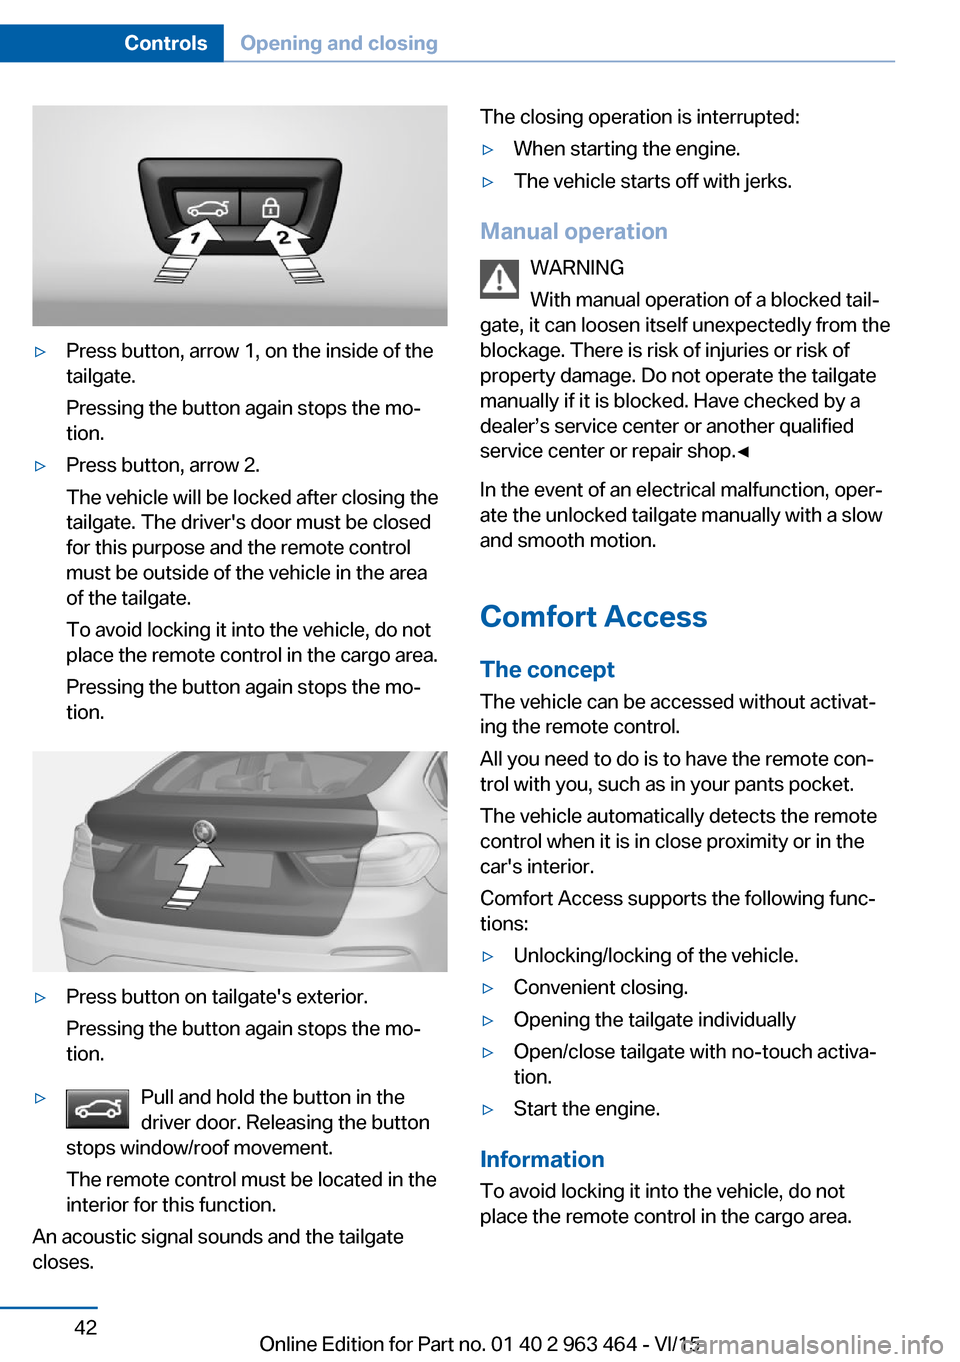
тЦ╖Press button, arrow 1, on the inside of the
tailgate.
Pressing the button again stops the moтАР
tion.тЦ╖Press button, arrow 2.
The vehicle will be locked after closing the
tailgate. The driver's door must be closed
for this purpose and the remote control
must be outside of the vehicle in the area
of the tailgate.
To avoid locking it into the vehicle, do not
place the remote control in the cargo area.
Pressing the button again stops the moтАР
tion.тЦ╖Press button on tailgate's exterior.
Pressing the button again stops the moтАР
tion.тЦ╖Pull and hold the button in the
driver door. Releasing the button
stops window/roof movement.
The remote control must be located in the
interior for this function.
An acoustic signal sounds and the tailgate
closes.
The closing operation is interrupted:тЦ╖When starting the engine.тЦ╖The vehicle starts off with jerks.
Manual operation
WARNING
With manual operation of a blocked tailтАР
gate, it can loosen itself unexpectedly from the
blockage. There is risk of injuries or risk of
property damage. Do not operate the tailgate
manually if it is blocked. Have checked by a
dealerтАЩs service center or another qualified
service center or repair shop.тЧА
In the event of an electrical malfunction, operтАР
ate the unlocked tailgate manually with a slow
and smooth motion.
Comfort Access The conceptThe vehicle can be accessed without activatтАР
ing the remote control.
All you need to do is to have the remote conтАР
trol with you, such as in your pants pocket.
The vehicle automatically detects the remote
control when it is in close proximity or in the
car's interior.
Comfort Access supports the following funcтАР
tions:
тЦ╖Unlocking/locking of the vehicle.тЦ╖Convenient closing.тЦ╖Opening the tailgate individuallyтЦ╖Open/close tailgate with no-touch activaтАР
tion.тЦ╖Start the engine.
Information
To avoid locking it into the vehicle, do not
place the remote control in the cargo area.
Seite 42ControlsOpening and closing42
Online Edition for Part no. 01 40 2 963 464 - VI/15
Page 50 of 265
InformationWARNING
Body parts can be jammed on operating
the glass sunroof. There is risk of injuries.
Make sure that the area of movement of the
glass sunroof is clear during opening and closтАР
ing.тЧА
WARNING
Unattended children or animals can
move the vehicle and endanger themselves
and traffic, e.g. with the following actions:тЦ╖Pressing the Start/Stop button.тЦ╖Releasing the parking brake.тЦ╖Opening and closing of doors or windows.тЦ╖Shifting the selector lever into neutral.тЦ╖Using vehicle equipment.
There is risk of accidents or injuries. Do not
leave children or animals unattended in the veтАР
hicle. Carry remote control along when exiting
and lock the vehicle.тЧА
Tilting up and closing tilted glasssunroof
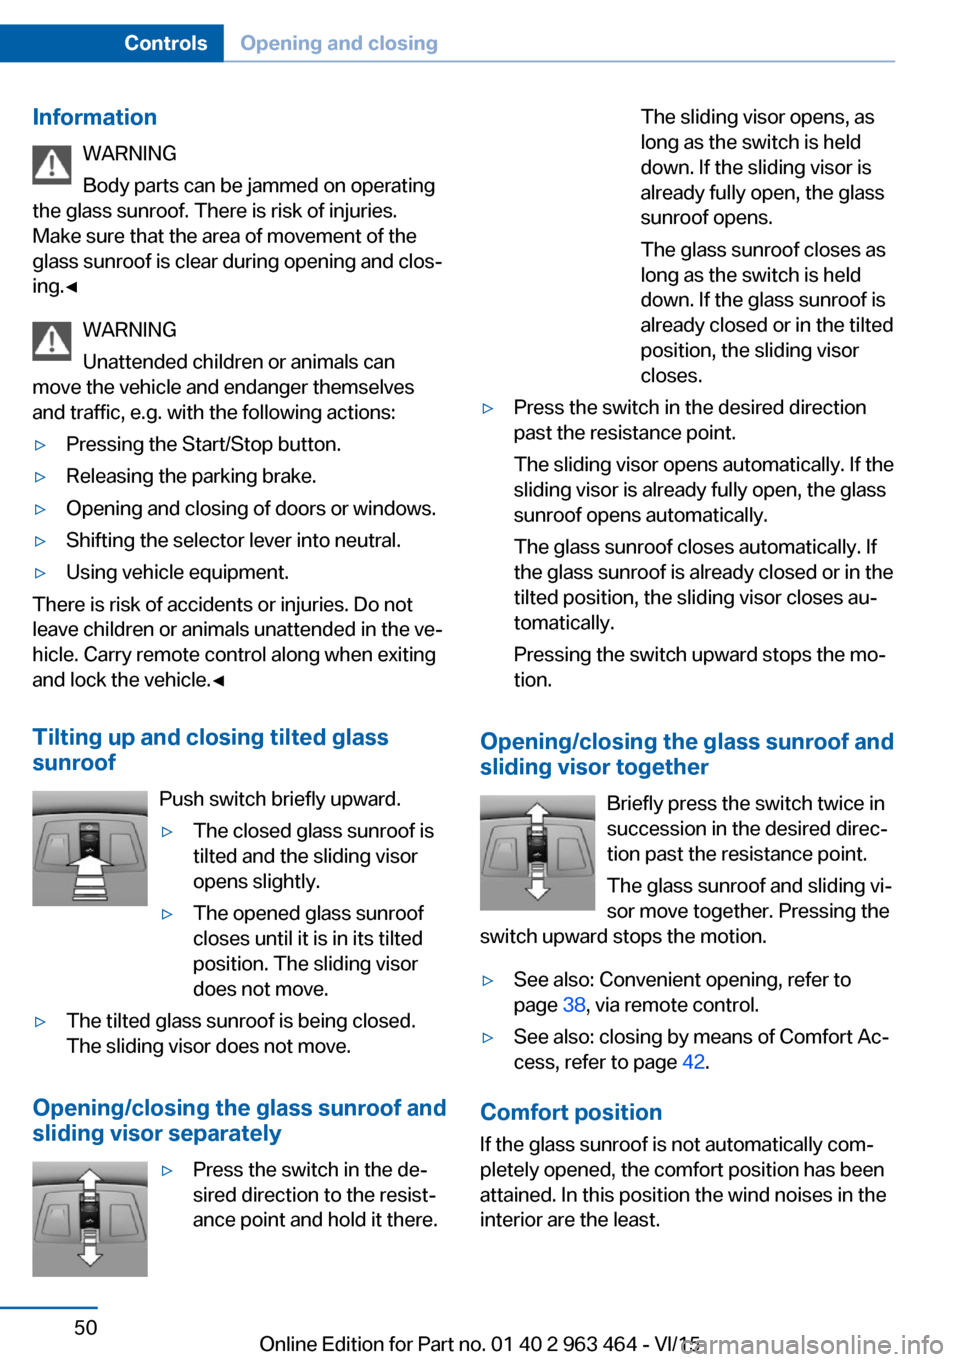
Push switch briefly upward.
тЦ╖The closed glass sunroof is
tilted and the sliding visor
opens slightly.тЦ╖The opened glass sunroof
closes until it is in its tilted
position. The sliding visor
does not move.тЦ╖The tilted glass sunroof is being closed.
The sliding visor does not move.
Opening/closing the glass sunroof and
sliding visor separately
тЦ╖Press the switch in the deтАР
sired direction to the resistтАР
ance point and hold it there.The sliding visor opens, as
long as the switch is held
down. If the sliding visor is
already fully open, the glass
sunroof opens.
The glass sunroof closes as
long as the switch is held
down. If the glass sunroof is
already closed or in the tilted
position, the sliding visor
closes.тЦ╖Press the switch in the desired direction
past the resistance point.
The sliding visor opens automatically. If the
sliding visor is already fully open, the glass
sunroof opens automatically.
The glass sunroof closes automatically. If
the glass sunroof is already closed or in the
tilted position, the sliding visor closes auтАР
tomatically.
Pressing the switch upward stops the moтАР
tion.
Opening/closing the glass sunroof and
sliding visor together
Briefly press the switch twice insuccession in the desired direcтАР
tion past the resistance point.
The glass sunroof and sliding viтАР
sor move together. Pressing the
switch upward stops the motion.
тЦ╖See also: Convenient opening, refer to
page 38, via remote control.тЦ╖See also: closing by means of Comfort AcтАР
cess, refer to page 42.
Comfort position
If the glass sunroof is not automatically comтАР
pletely opened, the comfort position has been
attained. In this position the wind noises in the
interior are the least.
Seite 50ControlsOpening and closing50
Online Edition for Part no. 01 40 2 963 464 - VI/15
Page 55 of 265
After a short time, the system automatically
moves down one level in order to prevent exтАР
cessive cooling.
Switch off Press button longer.
The LEDs go out.
Rear seats Second row of seats
Information WARNING
There is a risk of jamming when folding
down the center armrest in the rear. There is
risk of injuries. Make sure that the area of
movement of the center armrest is clear during
folding down.тЧА
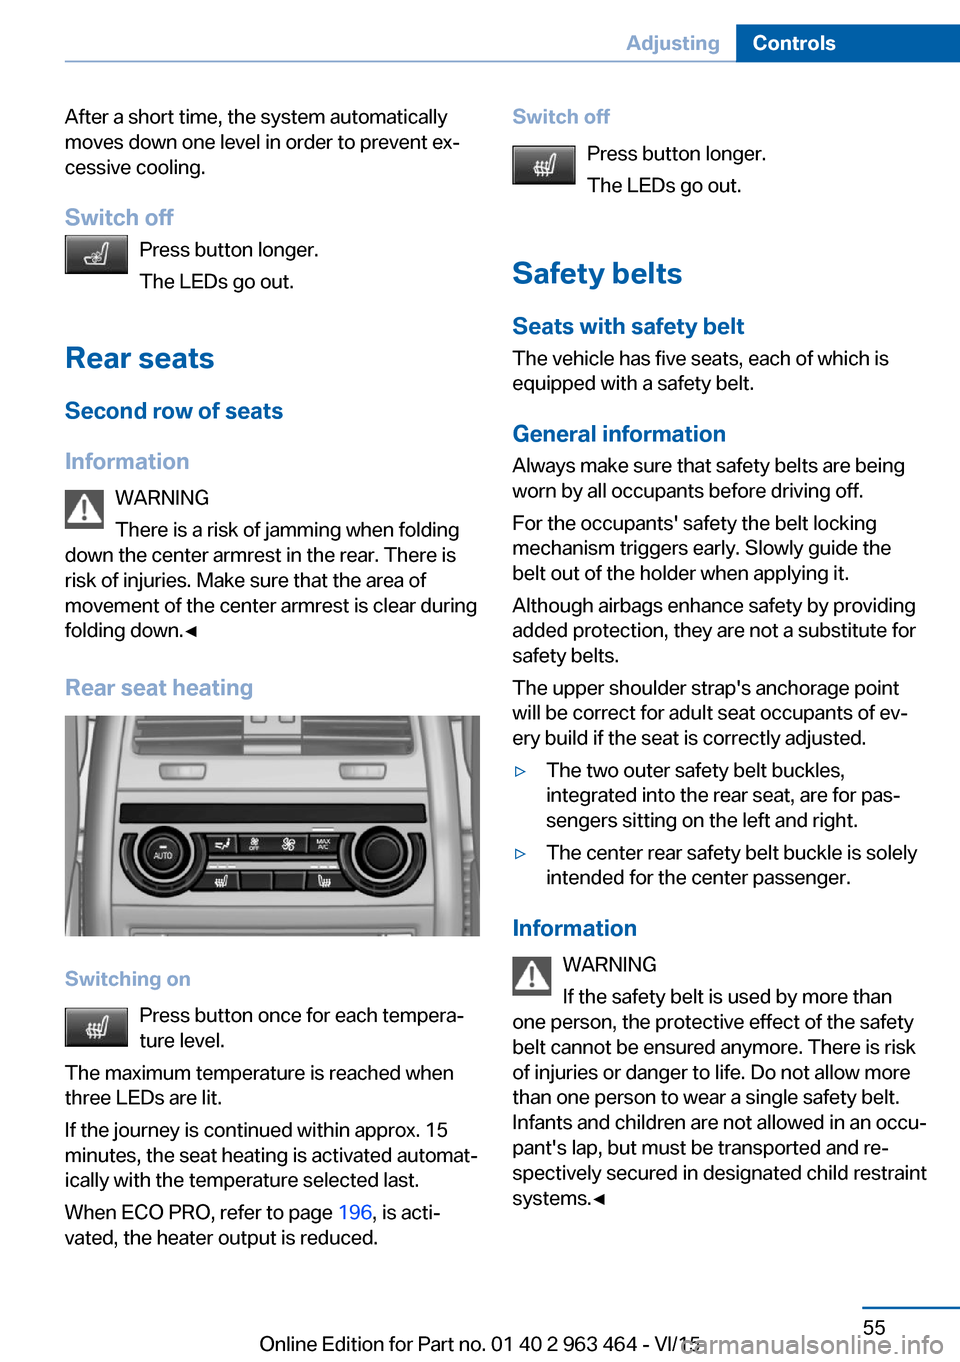
Rear seat heating
Switching on Press button once for each temperaтАР
ture level.
The maximum temperature is reached when
three LEDs are lit.
If the journey is continued within approx. 15
minutes, the seat heating is activated automatтАР
ically with the temperature selected last.
When ECO PRO, refer to page 196, is actiтАР
vated, the heater output is reduced.
Switch off
Press button longer.
The LEDs go out.
Safety belts
Seats with safety belt The vehicle has five seats, each of which is
equipped with a safety belt.
General information
Always make sure that safety belts are being
worn by all occupants before driving off.
For the occupants' safety the belt locking
mechanism triggers early. Slowly guide the
belt out of the holder when applying it.
Although airbags enhance safety by providing
added protection, they are not a substitute for
safety belts.
The upper shoulder strap's anchorage point
will be correct for adult seat occupants of evтАР
ery build if the seat is correctly adjusted.тЦ╖The two outer safety belt buckles,
integrated into the rear seat, are for pasтАР
sengers sitting on the left and right.тЦ╖The center rear safety belt buckle is solely
intended for the center passenger.
Information
WARNING
If the safety belt is used by more than
one person, the protective effect of the safety
belt cannot be ensured anymore. There is risk
of injuries or danger to life. Do not allow more
than one person to wear a single safety belt.
Infants and children are not allowed in an occuтАР
pant's lap, but must be transported and reтАР
spectively secured in designated child restraint
systems.тЧА
Seite 55AdjustingControls55
Online Edition for Part no. 01 40 2 963 464 - VI/15
Page 56 of 265
WARNING
The protective effect of the safety belts
can be limited or lost when safety belts are fasтАР
tened incorrectly. An incorrectly fastened
safety belt can cause additional injuries, e.g. in
the event of an accident or during braking and
evasive maneuvers. There is risk of injuries or
danger to life. Make sure that all occupants are
wearing safety belts correctly.тЧА
WARNING
With a rear backrest that is not locked,
the protective function of the middle safety
belt is not guaranteed. There is risk of injuries
or danger to life. If you are using the middle
safety belt, lock the wider rear backrest.тЧА
Correct use of safety beltsтЦ╖Wear the belt twist-free and as tight to
your body as possible over your lap and
shoulders.тЦ╖Wear the belt deep on your hips over your
lap. The belt may not press on your stomтАР
ach.тЦ╖Do not wear the belt on your throat, rub it
on sharp edges, guide it or jam it in across
hard or fragile objects.тЦ╖Avoid thick clothing.тЦ╖Re-tighten the belt frequently upward
around your upper body.
Buckling the belt
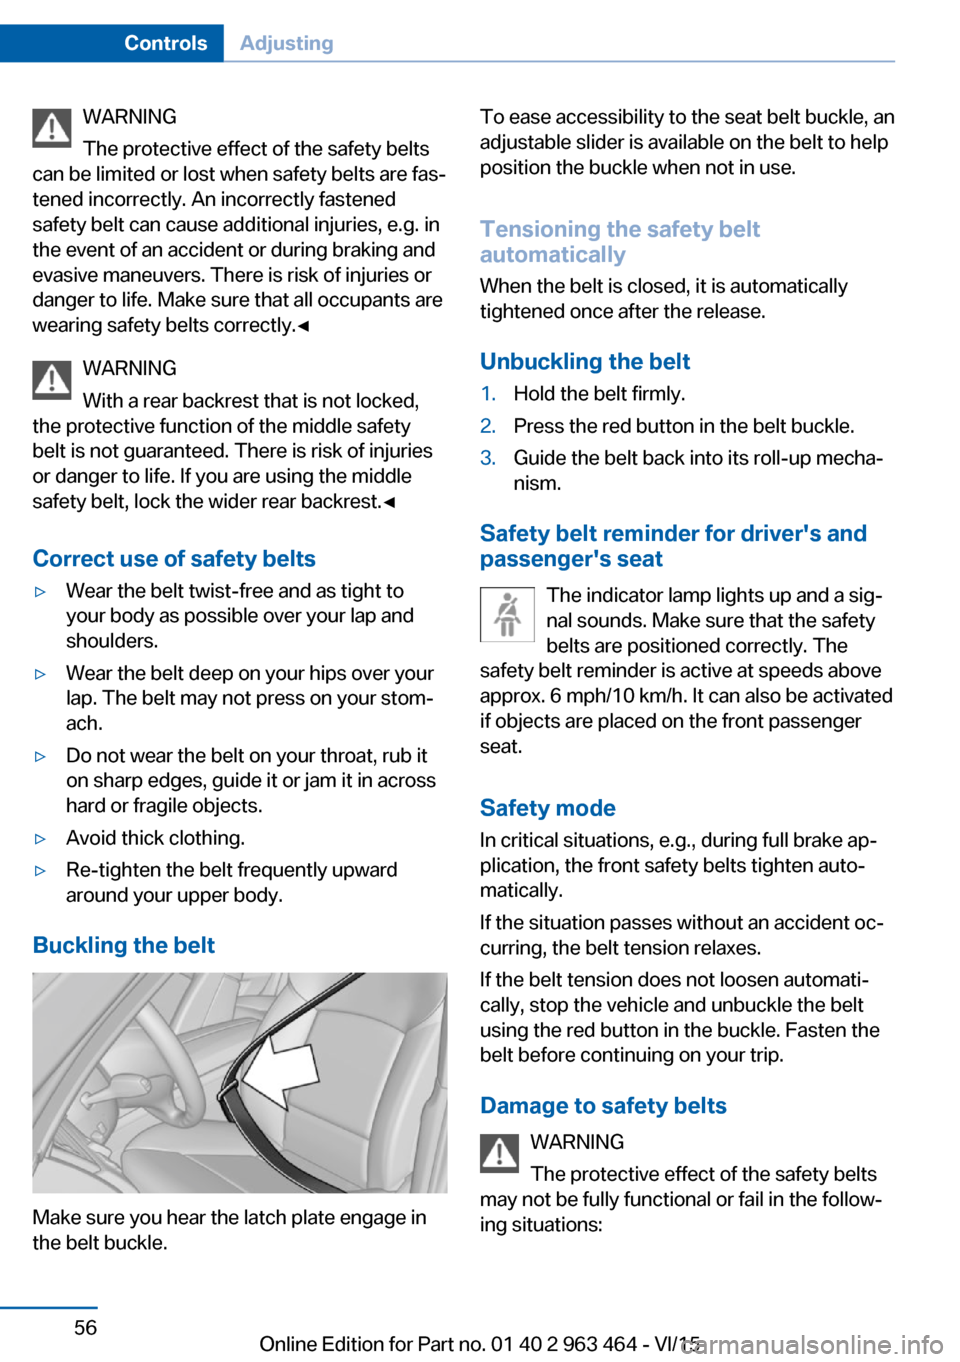
Make sure you hear the latch plate engage in
the belt buckle.
To ease accessibility to the seat belt buckle, an
adjustable slider is available on the belt to help
position the buckle when not in use.
Tensioning the safety belt
automatically
When the belt is closed, it is automatically
tightened once after the release.
Unbuckling the belt1.Hold the belt firmly.2.Press the red button in the belt buckle.3.Guide the belt back into its roll-up mechaтАР
nism.
Safety belt reminder for driver's and
passenger's seat
The indicator lamp lights up and a sigтАР
nal sounds. Make sure that the safety
belts are positioned correctly. The
safety belt reminder is active at speeds above
approx. 6 mph/10 km/h. It can also be activated
if objects are placed on the front passenger
seat.
Safety mode In critical situations, e.g., during full brake apтАР
plication, the front safety belts tighten autoтАР
matically.
If the situation passes without an accident ocтАР
curring, the belt tension relaxes.
If the belt tension does not loosen automatiтАР
cally, stop the vehicle and unbuckle the belt
using the red button in the buckle. Fasten the
belt before continuing on your trip.
Damage to safety belts WARNING
The protective effect of the safety belts
may not be fully functional or fail in the followтАР
ing situations:
Seite 56ControlsAdjusting56
Online Edition for Part no. 01 40 2 963 464 - VI/15
Page 59 of 265
Safety mode1.Close the driver's door or switch on the igтАР
nition.2.Press and hold the desired button 1 or 2
until the adjustment procedure is comтАР
pleted.
Calling up of a seat position
deactivated
After a brief period, calling up stored seat posiтАР
tions is deactivated to save battery power.
To reactivate calling up of a seat position:
тЦ╖Open or close the door or tailgate.тЦ╖Press a button on the remote control.тЦ╖Press the Start/Stop button.
Mirrors
Exterior mirrors
General information The mirror on the passenger side is more
curved than the driver's side mirror.
Depending on the vehicle equipment, the mirтАР
ror setting is stored for the profile currently
used. When the vehicle is unlocked via the reтАР
mote control, the position is automatically reтАР
trieved if this function is active.
Information WARNING
Objects reflected in the mirror are closer
than they appear. The distance to the traffic
behind could be incorrectly estimated, e.g.
while changing lanes. There is risk of an acciтАР
dent. Estimate the distance to the traffic beтАР
hind by looking over your shoulder.тЧА
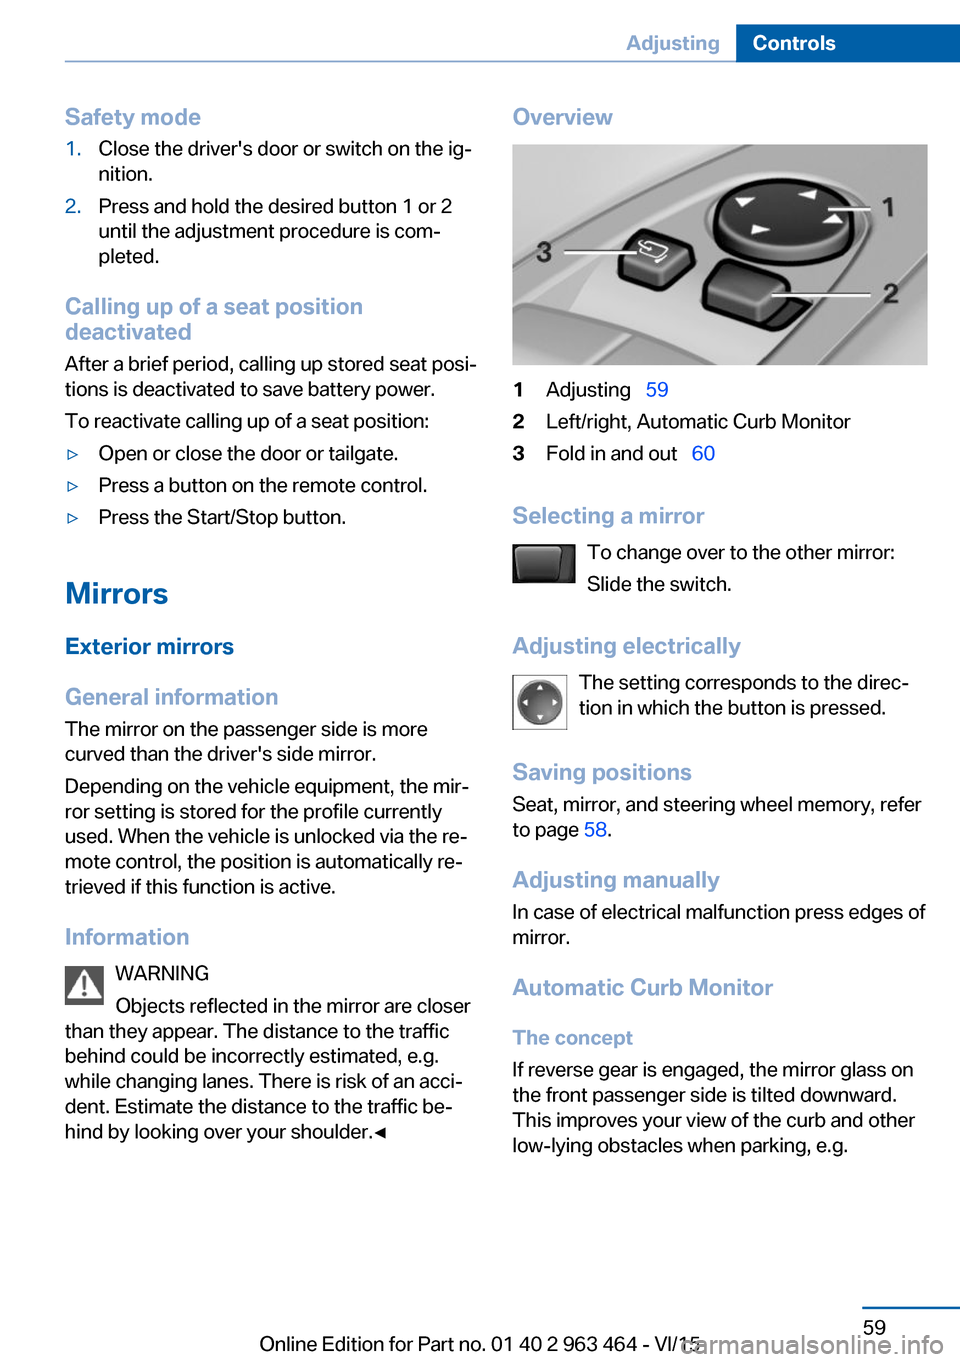
Overview1AdjustingтАВтАЕ 592Left/right, Automatic Curb Monitor3Fold in and outтАВтАЕ 60
Selecting a mirror
To change over to the other mirror:
Slide the switch.
Adjusting electrically The setting corresponds to the direcтАР
tion in which the button is pressed.
Saving positions
Seat, mirror, and steering wheel memory, refer
to page 58.
Adjusting manually In case of electrical malfunction press edges of
mirror.
Automatic Curb Monitor The concept
If reverse gear is engaged, the mirror glass on
the front passenger side is tilted downward.
This improves your view of the curb and other
low-lying obstacles when parking, e.g.
Seite 59AdjustingControls59
Online Edition for Part no. 01 40 2 963 464 - VI/15
Page 69 of 265
тЦ╖Set the parking brake.тЦ╖On uphill grades or on a slope, turn the
front wheels in the direction of the curb.тЦ╖On uphill grades or on a slope, also secure
the vehicle, e.g. with a wheel chock.тЧА
Before driving into a car wash
So that the vehicle can roll into a car wash obтАР
serve instructions for going into an automatic
car wash, refer to page 243.
Steptronic transmission
Switching off the engine
1.Engage selector lever position P with the
vehicle stopped.2.Press the Start/Stop button.
The engine is switched off.
The radio-ready state is switched on.3.Set the parking brake.
Auto Start/Stop function
The concept The Auto Start/Stop function helps save fuel.
The system switches off the engine during a
stop, e.g., in traffic congestion or at traffic lights. The ignition remains switched on. The
engine starts again automatically for driving
off.
Automatic mode After every start of the engine using the Start/
Stop button, the Auto Start/Stop function is in
the last selected state, refer to page 70.
When the Auto Start/Stop function is active, it
is available when the vehicle is traveling faster
than about 3 mph, approx. 5 km/h.
Engine stop
The engine is switched off automatically durтАР
ing a stop under the following conditions:
Steptronic transmission:тЦ╖The selector lever is in selector lever posiтАР
tion D.тЦ╖The brake pedal remains pressed while the
vehicle is stationary or the vehicle is held
by Automatic Hold.тЦ╖The driver's safety belt is buckled or the
driver's door is closed.
The air flow from the air conditioner is reduced
when the engine is switched off.
Displays in the instrument cluster The display indicates that the
Auto Start/Stop function is
ready for an Automatic engine
start.
The display indicates that the conditions for an automatic enтАР
gine stop have not been met.
Functional limitations The engine is not switched off automatically in
the following situations:
тЦ╖External temperature too low.тЦ╖The external temperature is high and autoтАР
matic climate control is running.тЦ╖The car's interior has not yet been heated
or cooled to the required level.тЦ╖The engine is not yet at operating temperтАР
ature.тЦ╖The wheels are at a sharp angle or the
steering wheel is being turned.тЦ╖After driving in reverse.тЦ╖Fogging of the windows when the autoтАР
matic climate control is switched on.тЦ╖Vehicle battery is heavily discharged.тЦ╖At higher elevations.тЦ╖The engine compartment lid is unlocked.Seite 69DrivingControls69
Online Edition for Part no. 01 40 2 963 464 - VI/15
Page 70 of 265
тЦ╖HDC Hill Descent Control is activated.тЦ╖The parking assistant is activated.тЦ╖Stop-and-go traffic.тЦ╖Selector lever in selector lever position N,
M/S or R.тЦ╖Use of fuel with high ethanol content.
Starting the engine
The engine starts automatically under the folтАР
lowing conditions:
тЦ╖Steptronic transmission:
By releasing the brake pedal.
When Automatic Hold is activated: press
the accelerator pedal.
After the engine starts, accelerate as usual.
Safety mode
After the engine switches off automatically, it
will not start again automatically if any one of
the following conditions are met:
тЦ╖The driver's safety belt is unbuckled and
the driver's door is open.тЦ╖The hood was unlocked.
Some indicator lights light up for a varied
length of time.
The engine can only be started via the Start/
Stop button.
Functional limitations
Even if driving off was not intended, the deactiтАР
vated engine starts up automatically in the folтАР
lowing situations:
тЦ╖Excessive warming of the car's interior
when the cooling function is switched on.тЦ╖The steering wheel is turned.тЦ╖Steptronic transmission: change from seтАР
lector lever position D to R, N or M/S.тЦ╖Steptronic transmission: change from seтАР
lector lever position P to N, D, R or M/S.тЦ╖Fogging of the windows when the autoтАР
matic climate control is switched on.тЦ╖Vehicle battery is heavily discharged.тЦ╖Excessive cooling of the car's interior when
the heating is switched on.
Activating/deactivating the system
manually
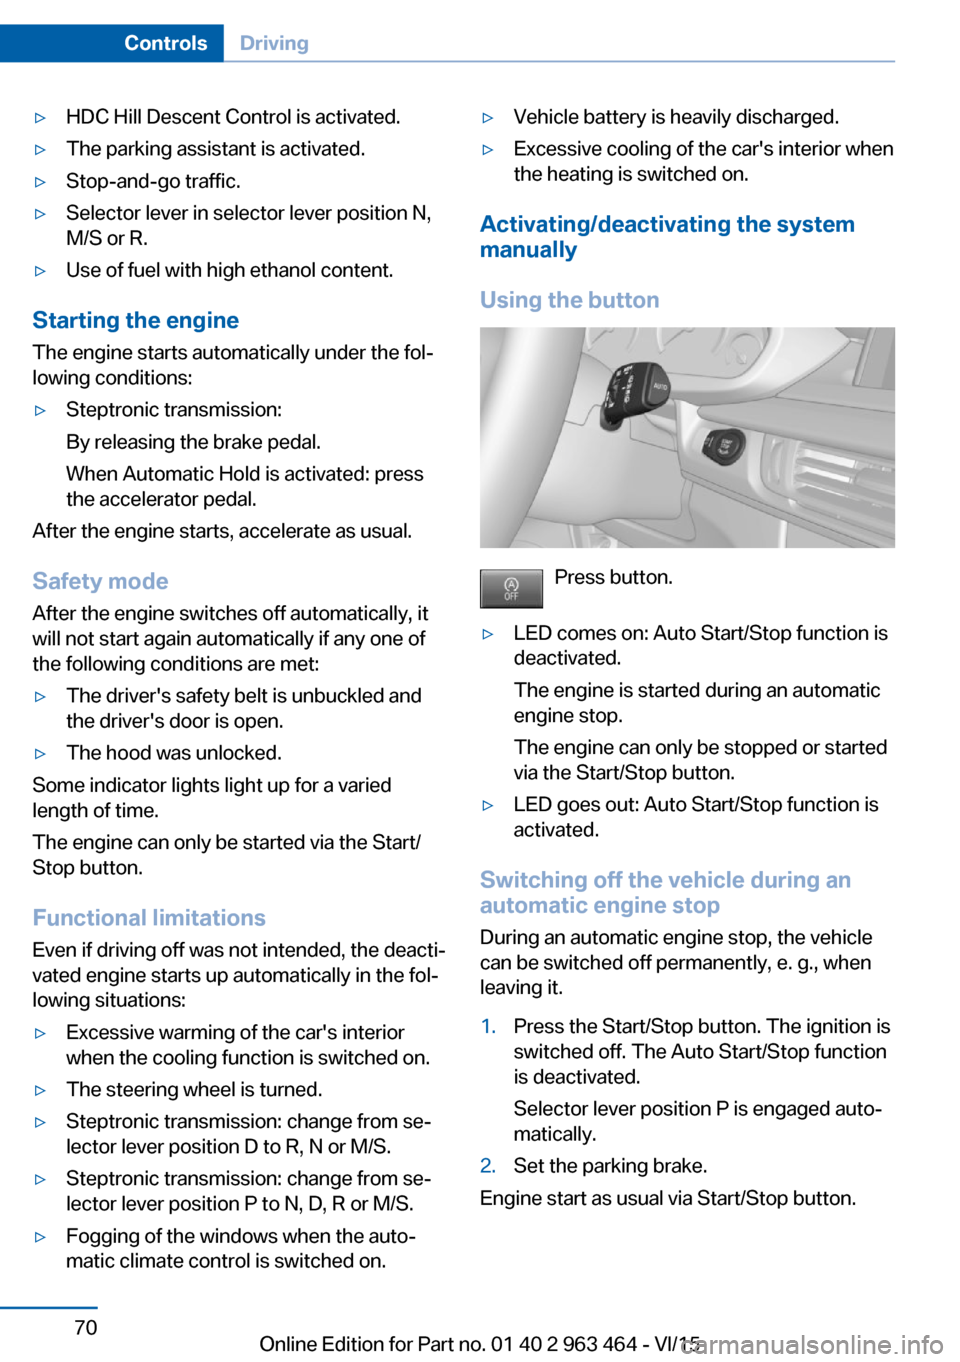
Using the button
Press button.
тЦ╖LED comes on: Auto Start/Stop function is
deactivated.
The engine is started during an automatic
engine stop.
The engine can only be stopped or started
via the Start/Stop button.тЦ╖LED goes out: Auto Start/Stop function is
activated.
Switching off the vehicle during an
automatic engine stop
During an automatic engine stop, the vehicle
can be switched off permanently, e. g., when
leaving it.
1.Press the Start/Stop button. The ignition is
switched off. The Auto Start/Stop function
is deactivated.
Selector lever position P is engaged autoтАР
matically.2.Set the parking brake.
Engine start as usual via Start/Stop button.
Seite 70ControlsDriving70
Online Edition for Part no. 01 40 2 963 464 - VI/15
Page 71 of 265
Automatic deactivation
In certain situations, Auto Start/Stop function
is deactivated automatically for safety reasons
as if the driver were absent.
Malfunction
The Auto Start/Stop function no longer
switches off the engine automatically. A Check
Control message is displayed. It is possible to
continue driving. Have the system checked.
Parking brake The concept
The parking brake is used to prevent the vehiтАР
cle from rolling when it is parked.
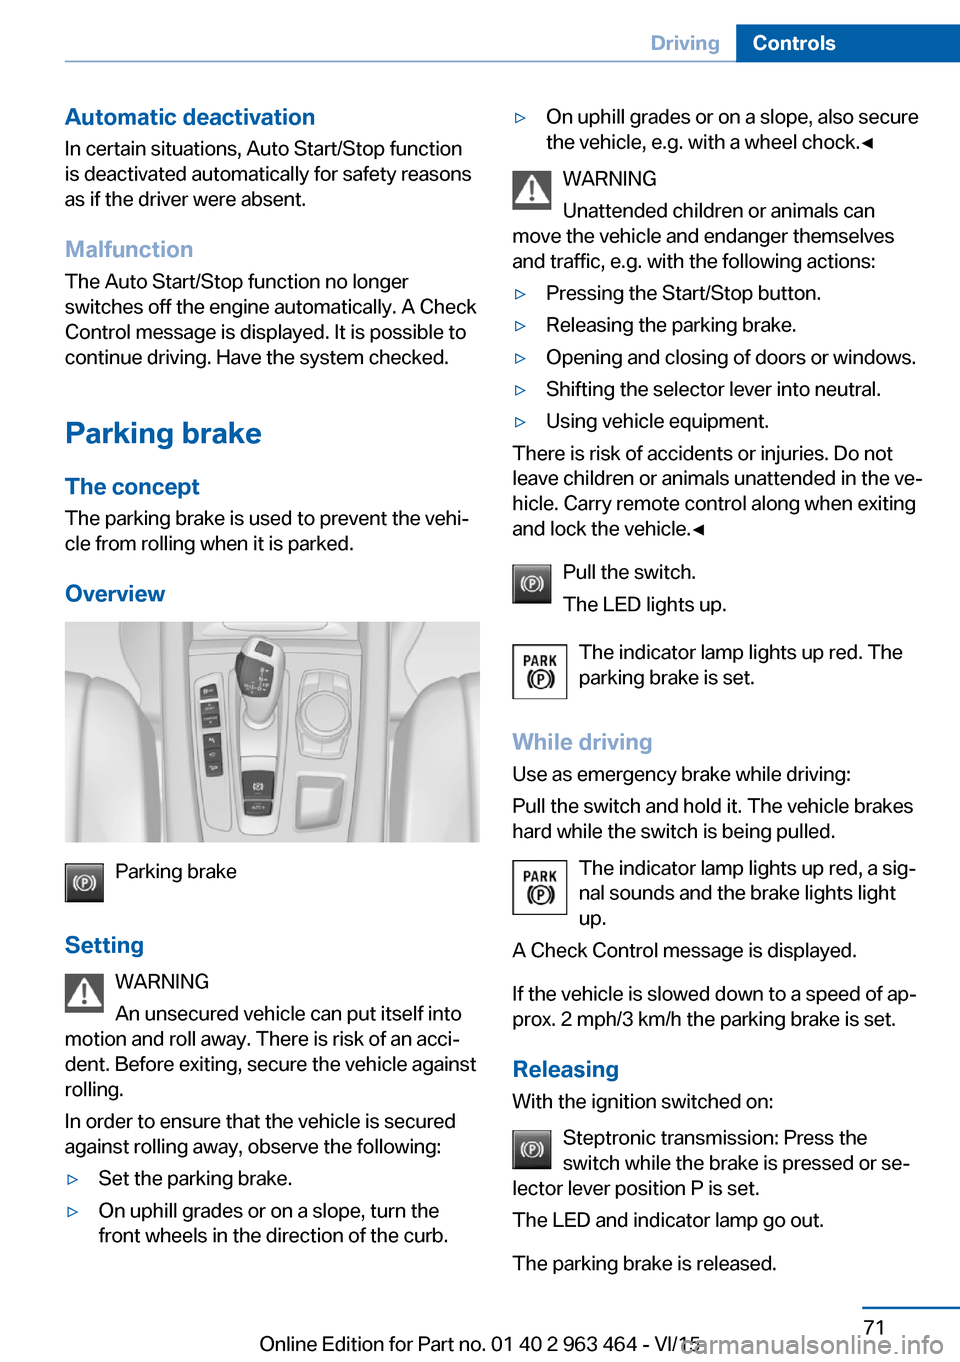
Overview
Parking brake
Setting WARNING
An unsecured vehicle can put itself into
motion and roll away. There is risk of an acciтАР
dent. Before exiting, secure the vehicle against
rolling.
In order to ensure that the vehicle is secured
against rolling away, observe the following:
тЦ╖Set the parking brake.тЦ╖On uphill grades or on a slope, turn the
front wheels in the direction of the curb.тЦ╖On uphill grades or on a slope, also secure
the vehicle, e.g. with a wheel chock.тЧА
WARNING
Unattended children or animals can
move the vehicle and endanger themselves
and traffic, e.g. with the following actions:
тЦ╖Pressing the Start/Stop button.тЦ╖Releasing the parking brake.тЦ╖Opening and closing of doors or windows.тЦ╖Shifting the selector lever into neutral.тЦ╖Using vehicle equipment.
There is risk of accidents or injuries. Do not
leave children or animals unattended in the veтАР
hicle. Carry remote control along when exiting
and lock the vehicle.тЧА
Pull the switch.
The LED lights up.
The indicator lamp lights up red. The
parking brake is set.
While driving
Use as emergency brake while driving:
Pull the switch and hold it. The vehicle brakes
hard while the switch is being pulled.
The indicator lamp lights up red, a sigтАР
nal sounds and the brake lights light
up.
A Check Control message is displayed.
If the vehicle is slowed down to a speed of apтАР
prox. 2 mph/3 km/h the parking brake is set.
Releasing
With the ignition switched on:
Steptronic transmission: Press the
switch while the brake is pressed or seтАР
lector lever position P is set.
The LED and indicator lamp go out.
The parking brake is released.
Seite 71DrivingControls71
Online Edition for Part no. 01 40 2 963 464 - VI/15