Door BMW X6 XDRIVE 35I 2014 User Guide
[x] Cancel search | Manufacturer: BMW, Model Year: 2014, Model line: X6 XDRIVE 35I, Model: BMW X6 XDRIVE 35I 2014Pages: 323, PDF Size: 8.36 MB
Page 43 of 323
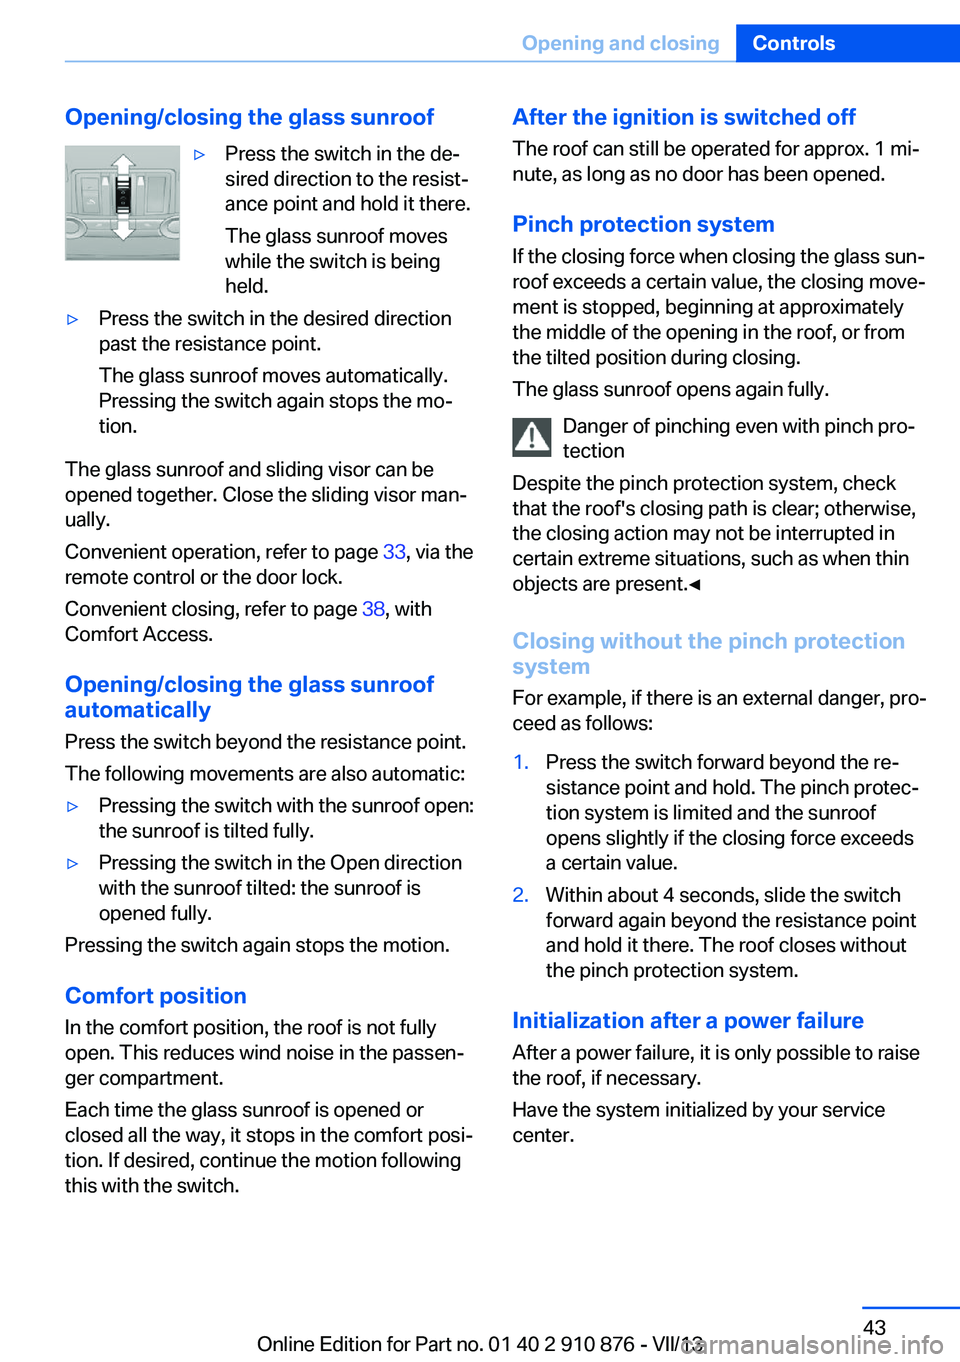
Opening/closing the glass sunroof▷Press the switch in the de‐
sired direction to the resist‐
ance point and hold it there.
The glass sunroof moves
while the switch is being
held.▷Press the switch in the desired direction
past the resistance point.
The glass sunroof moves automatically.
Pressing the switch again stops the mo‐
tion.
The glass sunroof and sliding visor can be
opened together. Close the sliding visor man‐
ually.
Convenient operation, refer to page 33, via the
remote control or the door lock.
Convenient closing, refer to page 38, with
Comfort Access.
Opening/closing the glass sunroof
automatically
Press the switch beyond the resistance point.
The following movements are also automatic:
▷Pressing the switch with the sunroof open:
the sunroof is tilted fully.▷Pressing the switch in the Open direction
with the sunroof tilted: the sunroof is
opened fully.
Pressing the switch again stops the motion.
Comfort position
In the comfort position, the roof is not fully
open. This reduces wind noise in the passen‐
ger compartment.
Each time the glass sunroof is opened or
closed all the way, it stops in the comfort posi‐
tion. If desired, continue the motion following
this with the switch.
After the ignition is switched off
The roof can still be operated for approx. 1 mi‐
nute, as long as no door has been opened.
Pinch protection system If the closing force when closing the glass sun‐
roof exceeds a certain value, the closing move‐ ment is stopped, beginning at approximately
the middle of the opening in the roof, or from
the tilted position during closing.
The glass sunroof opens again fully.
Danger of pinching even with pinch pro‐
tection
Despite the pinch protection system, check
that the roof's closing path is clear; otherwise,
the closing action may not be interrupted in certain extreme situations, such as when thin
objects are present.◀
Closing without the pinch protection
system
For example, if there is an external danger, pro‐
ceed as follows:1.Press the switch forward beyond the re‐
sistance point and hold. The pinch protec‐
tion system is limited and the sunroof
opens slightly if the closing force exceeds
a certain value.2.Within about 4 seconds, slide the switch
forward again beyond the resistance point
and hold it there. The roof closes without
the pinch protection system.
Initialization after a power failure
After a power failure, it is only possible to raise
the roof, if necessary.
Have the system initialized by your service
center.
Seite 43Opening and closingControls43
Online Edition for Part no. 01 40 2 910 876 - VII/13
Page 51 of 323
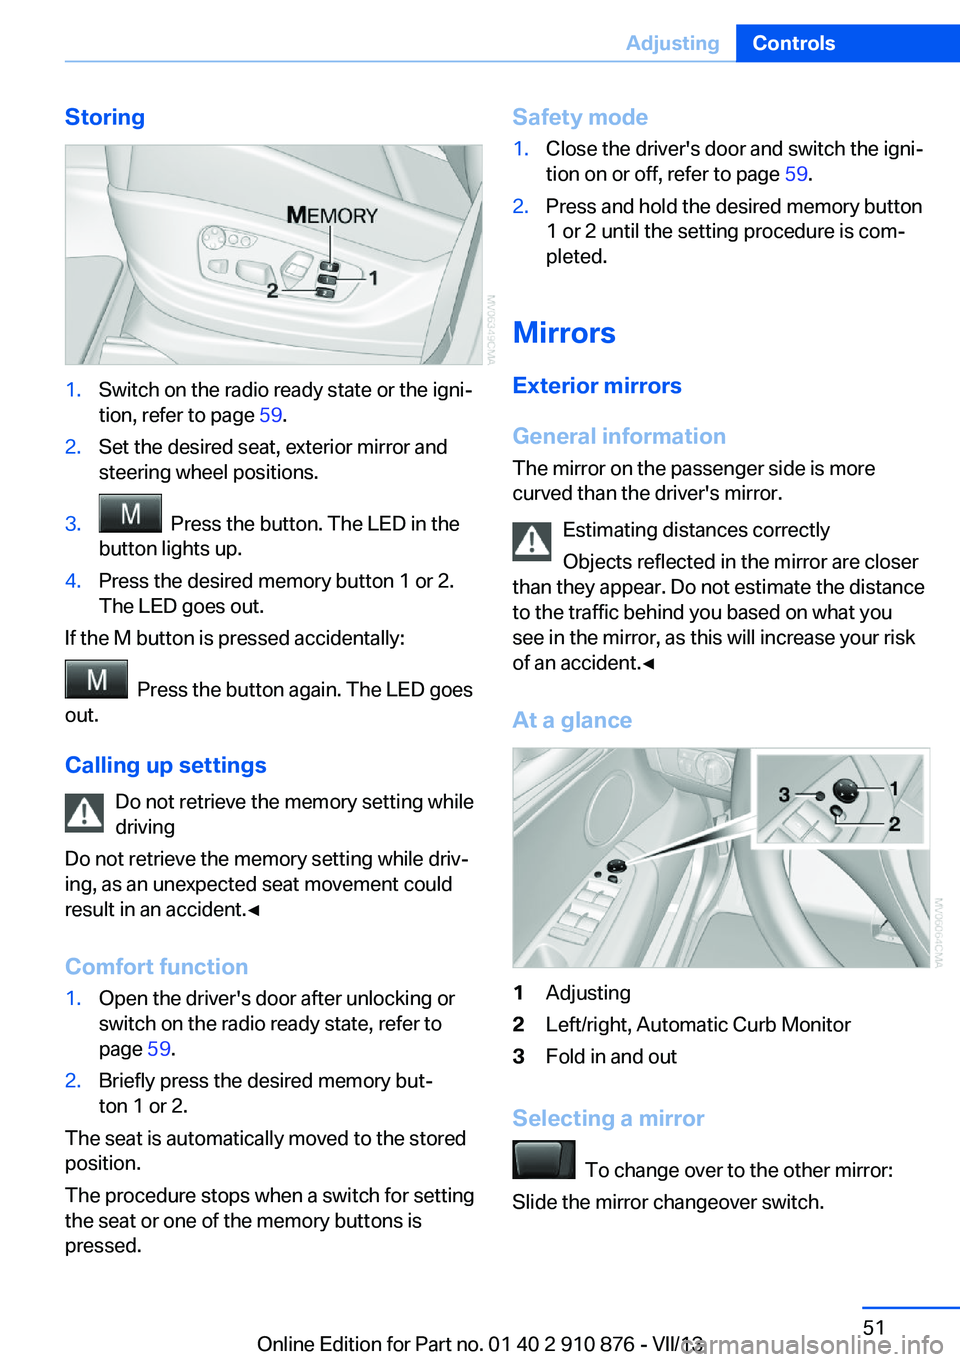
Storing1.Switch on the radio ready state or the igni‐
tion, refer to page 59.2.Set the desired seat, exterior mirror and
steering wheel positions.3. Press the button. The LED in the
button lights up.4.Press the desired memory button 1 or 2.
The LED goes out.
If the M button is pressed accidentally:
Press the button again. The LED goes
out.
Calling up settings Do not retrieve the memory setting while
driving
Do not retrieve the memory setting while driv‐ ing, as an unexpected seat movement could
result in an accident.◀
Comfort function
1.Open the driver's door after unlocking or
switch on the radio ready state, refer to
page 59.2.Briefly press the desired memory but‐
ton 1 or 2.
The seat is automatically moved to the stored
position.
The procedure stops when a switch for setting
the seat or one of the memory buttons is
pressed.
Safety mode1.Close the driver's door and switch the igni‐
tion on or off, refer to page 59.2.Press and hold the desired memory button
1 or 2 until the setting procedure is com‐
pleted.
Mirrors
Exterior mirrors
General information The mirror on the passenger side is more
curved than the driver's mirror.
Estimating distances correctly
Objects reflected in the mirror are closer
than they appear. Do not estimate the distance
to the traffic behind you based on what you
see in the mirror, as this will increase your risk
of an accident.◀
At a glance
1Adjusting2Left/right, Automatic Curb Monitor3Fold in and out
Selecting a mirror
To change over to the other mirror:
Slide the mirror changeover switch.
Seite 51AdjustingControls51
Online Edition for Part no. 01 40 2 910 876 - VII/13
Page 54 of 323
Transporting children safelyVehicle equipmentThis chapter describes all series equipment as
well as country-specific and special equipment
offered for this model series.Therefore, it also
describes equipment that may not be found in
your vehicle, for instance due to the selected
special equipment or the country version. This
also applies to safety-related functions and
systems.
The right place for children
Note Children in the vehicle
Do not leave children unattended in the
vehicle; otherwise, they could endanger them‐
selves and other persons, e.g., by opening the
doors.◀
Children should always be in the rear
Accident research shows that the safest place
for children is on the rear seat.
Transporting children in the rear
Transport children younger than
13 years of age or shorter than 5 ft/150 cm on
the rear seats only, using child restraint fixing
systems suitable for the age, weight, and
height of the child. Otherwise, there is the in‐
creased danger of injury in an accident.
Children 13 years of age or older must wear a
safety belt as soon as a suitable child restraint
fixing system can no longer be used, due to
their age, weight and size.◀
Children on the front passenger seat
Should it be necessary to use a child restraint
fixing system on the front passenger seat,
make sure that the front and side airbags onthe front passenger side are deactivated. Auto‐
matic deactivation of front passenger airbags,
refer to page 87.
Deactivating the front passenger airbags
If a child restraint fixing system is used in
the front passenger seat, the front passenger
airbags must be deactivated; otherwise, there
is an increased risk of injury to the child when
the airbags are triggered, even with a child re‐
straint fixing system.◀
Installing child restraint
fixing systems
Notes Manufacturer's information for child re‐
straint fixing systems
To select, mount and use child restraint fixing
systems, observe the information provided by
the system manufacturer; otherwise, the pro‐
tective effect can be impaired.◀
On the front passenger seat After installing a child restraint fixing system
on the front passenger seat, ensure that the
front and side airbags on the front passenger
side are deactivated.
Deactivating the front passenger airbags
If a child restraint fixing system is used in
the front passenger seat, the front passenger
airbags must be deactivated; otherwise, there
is an increased risk of injury to the child when
the airbags are triggered, even with a child re‐
straint fixing system.◀
Seat position and height
Before installing a child restraint fixing system,
move the front passenger seat as far back asSeite 54ControlsTransporting children safely54
Online Edition for Part no. 01 40 2 910 876 - VII/13
Page 57 of 323
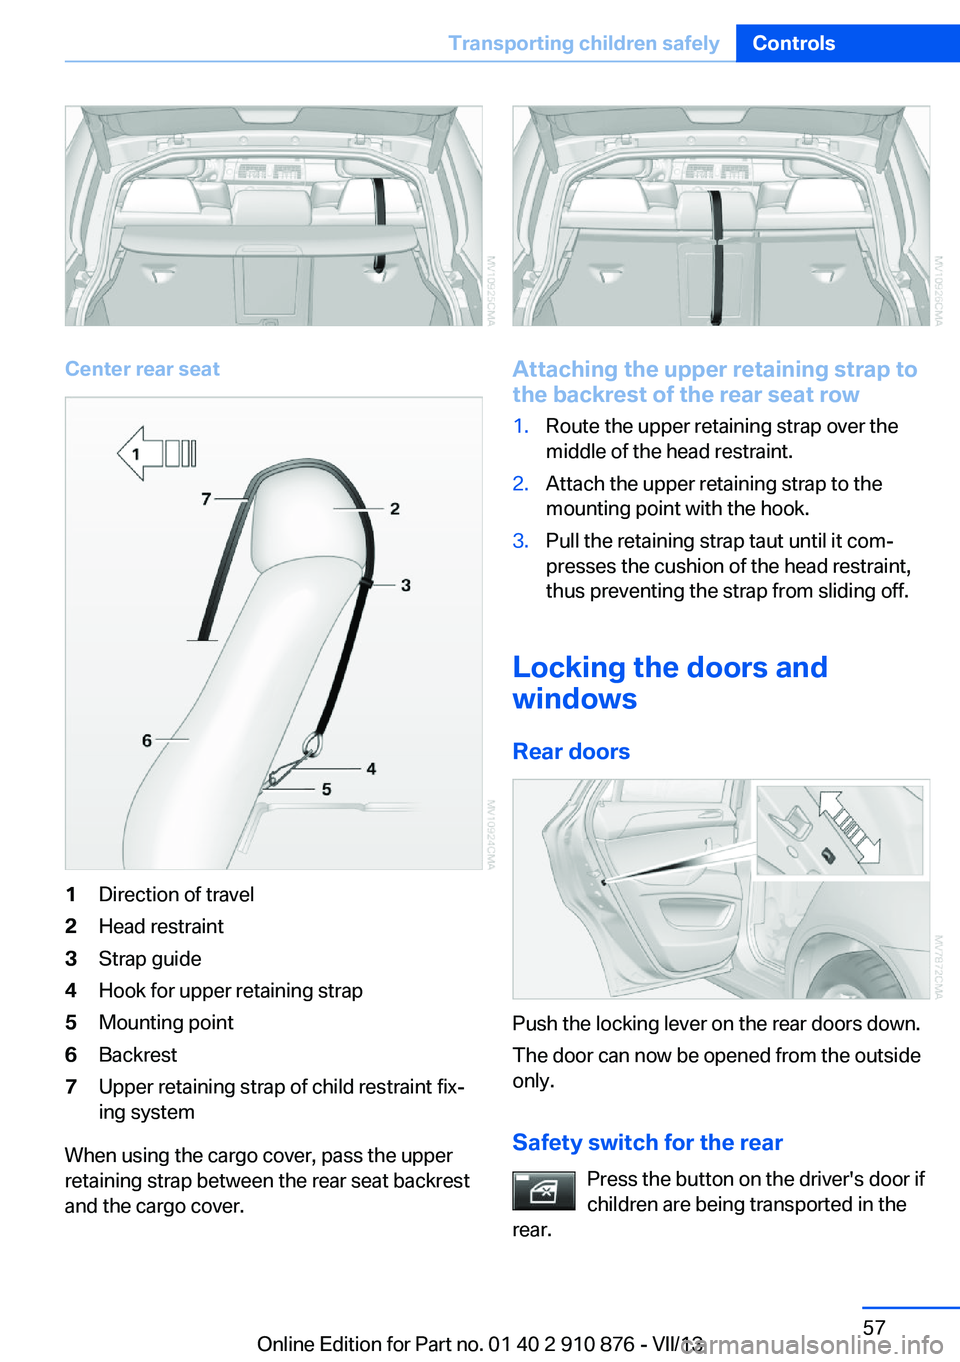
Center rear seat
1Direction of travel2Head restraint3Strap guide4Hook for upper retaining strap5Mounting point6Backrest7Upper retaining strap of child restraint fix‐
ing system
When using the cargo cover, pass the upper
retaining strap between the rear seat backrest
and the cargo cover.
Attaching the upper retaining strap to
the backrest of the rear seat row
1.Route the upper retaining strap over the
middle of the head restraint.2.Attach the upper retaining strap to the
mounting point with the hook.3.Pull the retaining strap taut until it com‐
presses the cushion of the head restraint,
thus preventing the strap from sliding off.
Locking the doors and
windows
Rear doors
Push the locking lever on the rear doors down.
The door can now be opened from the outside
only.
Safety switch for the rear Press the button on the driver's door if
children are being transported in the
rear.
Seite 57Transporting children safelyControls57
Online Edition for Part no. 01 40 2 910 876 - VII/13
Page 59 of 323
DrivingVehicle equipment
This chapter describes all series equipment as
well as country-specific and special equipment
offered for this model series.Therefore, it also
describes equipment that may not be found in
your vehicle, for instance due to the selected
special equipment or the country version. This
also applies to safety-related functions and
systems.
Ignition lock
Insert the remote control into the
ignition lock
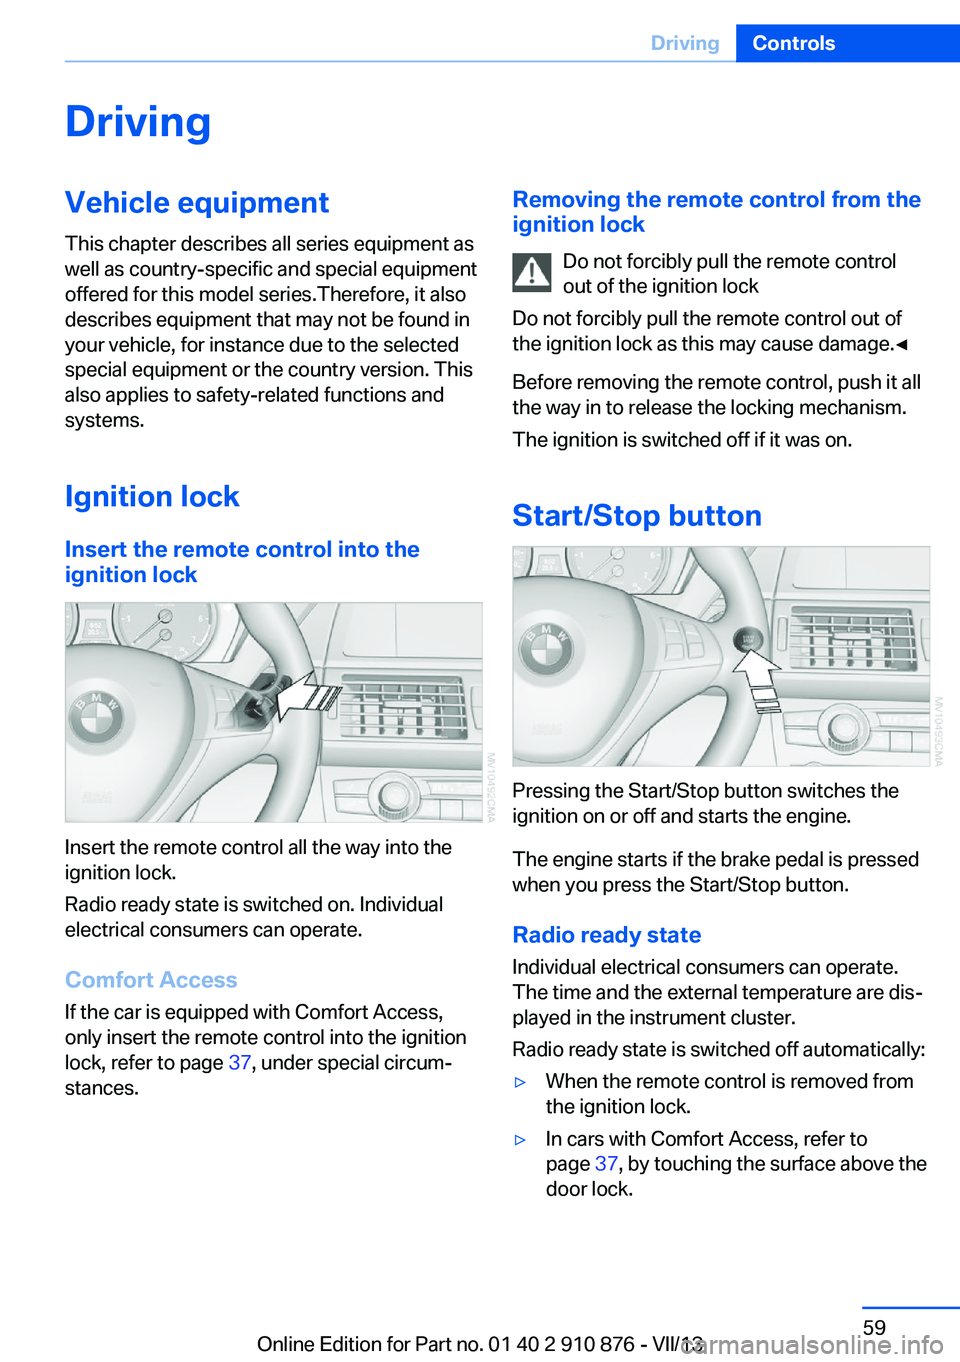
Insert the remote control all the way into the
ignition lock.
Radio ready state is switched on. Individual
electrical consumers can operate.
Comfort Access
If the car is equipped with Comfort Access,
only insert the remote control into the ignition
lock, refer to page 37, under special circum‐
stances.
Removing the remote control from the
ignition lock
Do not forcibly pull the remote control
out of the ignition lock
Do not forcibly pull the remote control out of
the ignition lock as this may cause damage.◀
Before removing the remote control, push it all
the way in to release the locking mechanism.
The ignition is switched off if it was on.
Start/Stop button
Pressing the Start/Stop button switches the
ignition on or off and starts the engine.
The engine starts if the brake pedal is pressed
when you press the Start/Stop button.
Radio ready state Individual electrical consumers can operate.
The time and the external temperature are dis‐
played in the instrument cluster.
Radio ready state is switched off automatically:
▷When the remote control is removed from
the ignition lock.▷In cars with Comfort Access, refer to
page 37, by touching the surface above the
door lock.Seite 59DrivingControls59
Online Edition for Part no. 01 40 2 910 876 - VII/13
Page 62 of 323
Releasing manually
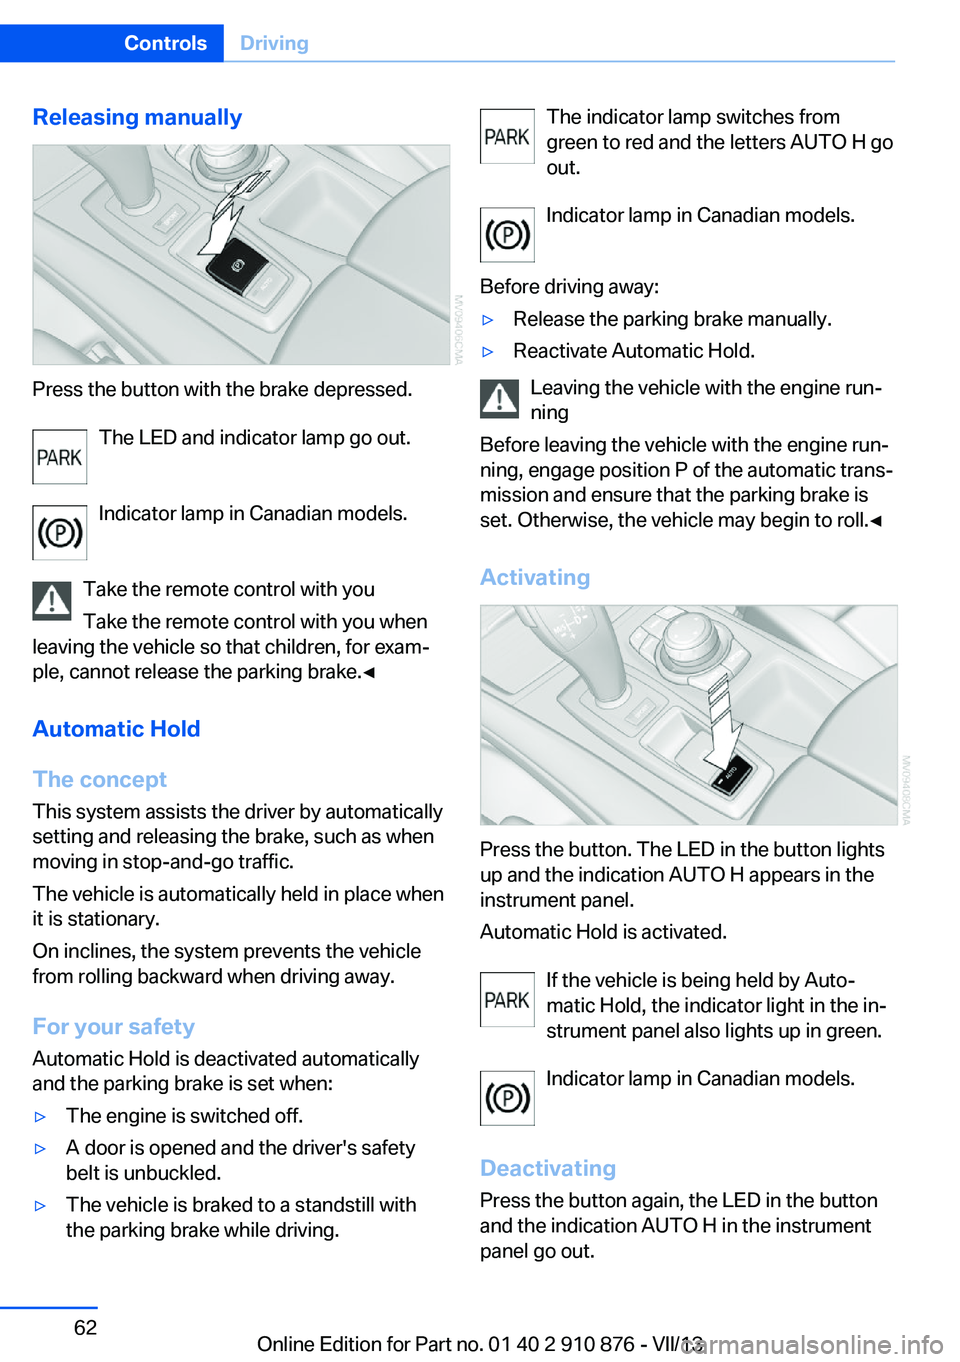
Press the button with the brake depressed.The LED and indicator lamp go out.
Indicator lamp in Canadian models.
Take the remote control with you Take the remote control with you when
leaving the vehicle so that children, for exam‐
ple, cannot release the parking brake.◀
Automatic Hold
The concept This system assists the driver by automatically
setting and releasing the brake, such as when
moving in stop-and-go traffic.
The vehicle is automatically held in place when
it is stationary.
On inclines, the system prevents the vehicle
from rolling backward when driving away.
For your safety
Automatic Hold is deactivated automatically
and the parking brake is set when:
▷The engine is switched off.▷A door is opened and the driver's safety
belt is unbuckled.▷The vehicle is braked to a standstill with
the parking brake while driving.The indicator lamp switches from
green to red and the letters AUTO H go out.
Indicator lamp in Canadian models.
Before driving away:▷Release the parking brake manually.▷Reactivate Automatic Hold.
Leaving the vehicle with the engine run‐
ning
Before leaving the vehicle with the engine run‐
ning, engage position P of the automatic trans‐
mission and ensure that the parking brake is
set. Otherwise, the vehicle may begin to roll.◀
Activating
Press the button. The LED in the button lights
up and the indication AUTO H appears in the
instrument panel.
Automatic Hold is activated.
If the vehicle is being held by Auto‐
matic Hold, the indicator light in the in‐
strument panel also lights up in green.
Indicator lamp in Canadian models.
Deactivating Press the button again, the LED in the button
and the indication AUTO H in the instrument
panel go out.
Seite 62ControlsDriving62
Online Edition for Part no. 01 40 2 910 876 - VII/13
Page 67 of 323
Washer fluid reservoirAdding washer fluid
Only add washer fluid when the engine is
cool, and then close the cover completely to
avoid contact between the washer fluid and
hot engine parts.
Otherwise, there is the danger of fire and a risk
to personal safety if the fluid is spilled.◀
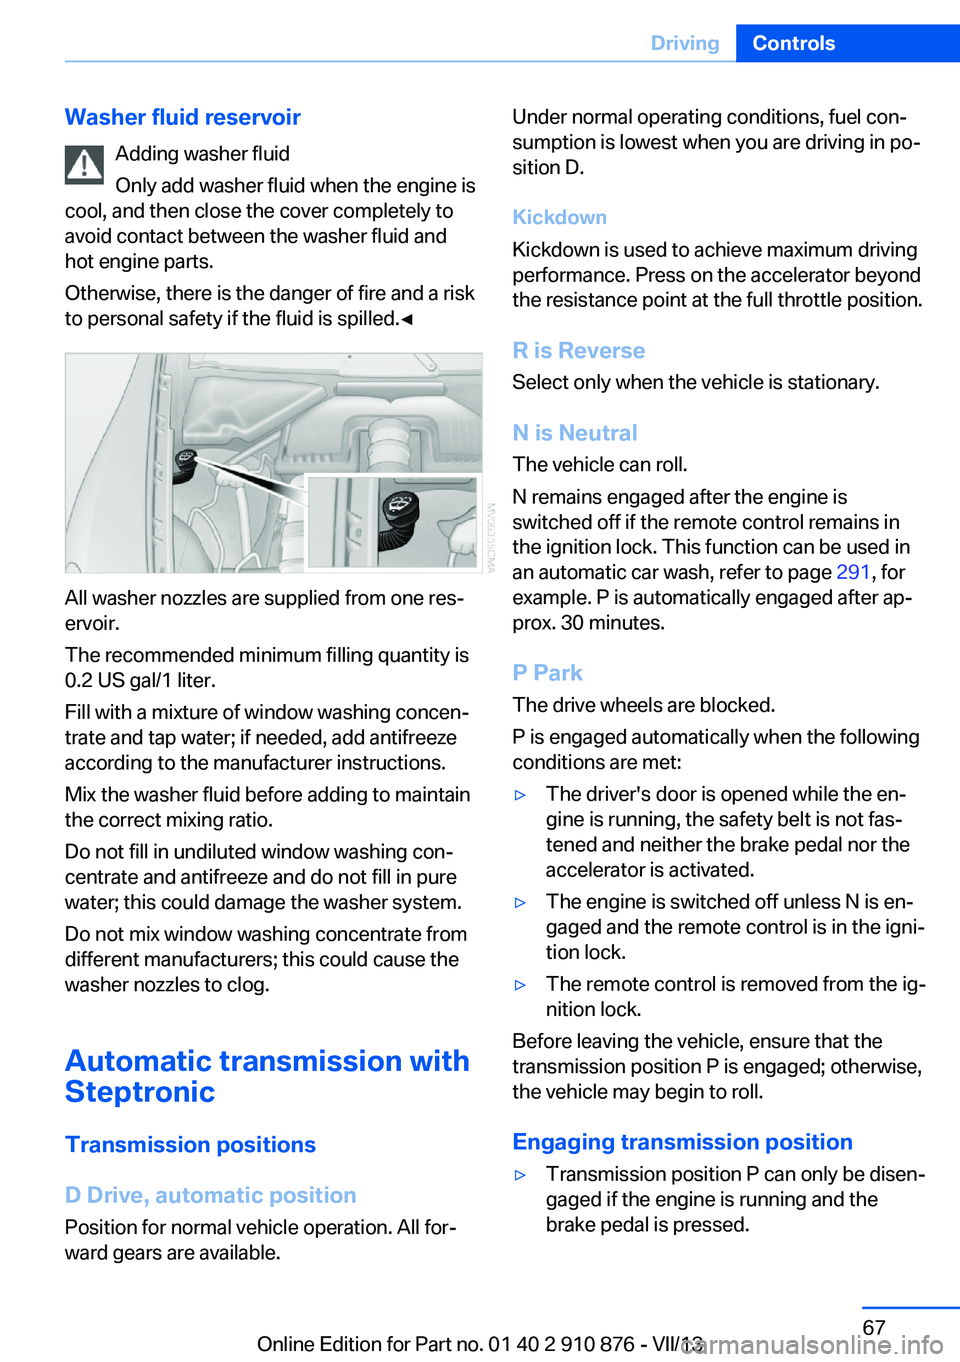
All washer nozzles are supplied from one res‐
ervoir.
The recommended minimum filling quantity is
0.2 US gal/1 liter.
Fill with a mixture of window washing concen‐
trate and tap water; if needed, add antifreeze
according to the manufacturer instructions.
Mix the washer fluid before adding to maintain
the correct mixing ratio.
Do not fill in undiluted window washing con‐
centrate and antifreeze and do not fill in pure
water; this could damage the washer system.
Do not mix window washing concentrate from
different manufacturers; this could cause the
washer nozzles to clog.
Automatic transmission with
Steptronic
Transmission positions
D Drive, automatic position Position for normal vehicle operation. All for‐
ward gears are available.
Under normal operating conditions, fuel con‐
sumption is lowest when you are driving in po‐
sition D.
Kickdown
Kickdown is used to achieve maximum driving
performance. Press on the accelerator beyond
the resistance point at the full throttle position.
R is Reverse Select only when the vehicle is stationary.
N is Neutral The vehicle can roll.
N remains engaged after the engine is
switched off if the remote control remains in
the ignition lock. This function can be used in
an automatic car wash, refer to page 291, for
example. P is automatically engaged after ap‐
prox. 30 minutes.
P ParkThe drive wheels are blocked.
P is engaged automatically when the following
conditions are met:▷The driver's door is opened while the en‐
gine is running, the safety belt is not fas‐
tened and neither the brake pedal nor the
accelerator is activated.▷The engine is switched off unless N is en‐
gaged and the remote control is in the igni‐
tion lock.▷The remote control is removed from the ig‐
nition lock.
Before leaving the vehicle, ensure that the
transmission position P is engaged; otherwise,
the vehicle may begin to roll.
Engaging transmission position
▷Transmission position P can only be disen‐
gaged if the engine is running and the
brake pedal is pressed.Seite 67DrivingControls67
Online Edition for Part no. 01 40 2 910 876 - VII/13
Page 81 of 323
LampsVehicle equipment
This chapter describes all series equipment as
well as country-specific and special equipment
offered for this model series.Therefore, it also
describes equipment that may not be found in
your vehicle, for instance due to the selected
special equipment or the country version. This
also applies to safety-related functions and
systems.
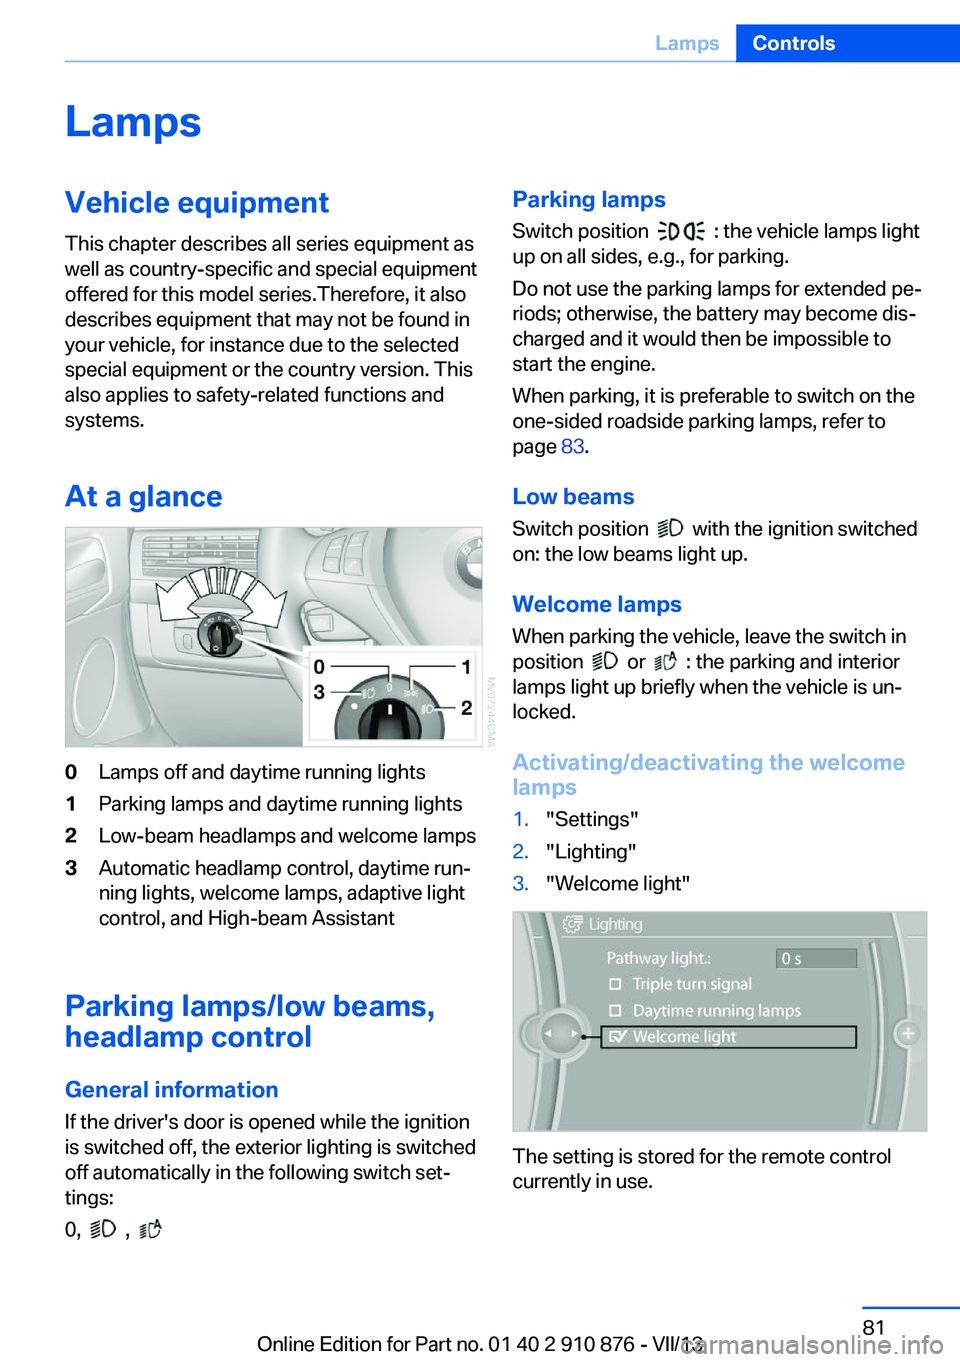
At a glance0Lamps off and daytime running lights1Parking lamps and daytime running lights2Low-beam headlamps and welcome lamps3Automatic headlamp control, daytime run‐
ning lights, welcome lamps, adaptive light
control, and High-beam Assistant
Parking lamps/low beams,
headlamp control
General information If the driver's door is opened while the ignition
is switched off, the exterior lighting is switched
off automatically in the following switch set‐
tings:
0,
,
Parking lamps
Switch position
: the vehicle lamps light
up on all sides, e.g., for parking.
Do not use the parking lamps for extended pe‐
riods; otherwise, the battery may become dis‐
charged and it would then be impossible to
start the engine.
When parking, it is preferable to switch on the
one-sided roadside parking lamps, refer to
page 83.
Low beams Switch position
with the ignition switched
on: the low beams light up.
Welcome lamps When parking the vehicle, leave the switch in
position
or : the parking and interior
lamps light up briefly when the vehicle is un‐
locked.
Activating/deactivating the welcome
lamps
1."Settings"2."Lighting"3."Welcome light"
The setting is stored for the remote control
currently in use.
Seite 81LampsControls81
Online Edition for Part no. 01 40 2 910 876 - VII/13
Page 85 of 323
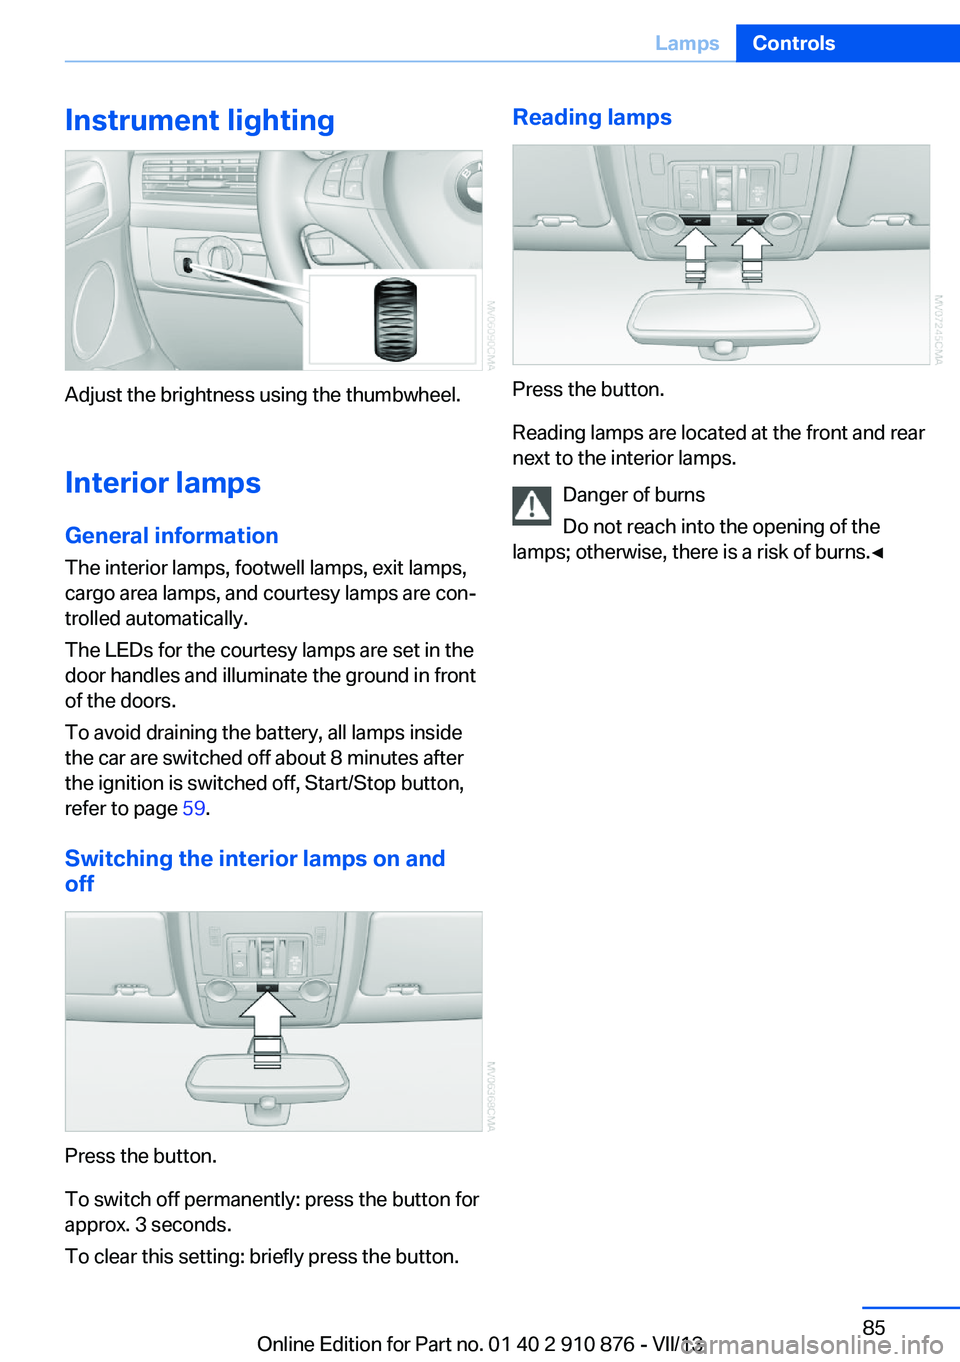
Instrument lighting
Adjust the brightness using the thumbwheel.Interior lamps
General information
The interior lamps, footwell lamps, exit lamps,
cargo area lamps, and courtesy lamps are con‐
trolled automatically.
The LEDs for the courtesy lamps are set in the
door handles and illuminate the ground in front
of the doors.
To avoid draining the battery, all lamps inside
the car are switched off about 8 minutes after
the ignition is switched off, Start/Stop button,
refer to page 59.
Switching the interior lamps on and
off
Press the button.
To switch off permanently: press the button for
approx. 3 seconds.
To clear this setting: briefly press the button.
Reading lamps
Press the button.
Reading lamps are located at the front and rear
next to the interior lamps.
Danger of burns
Do not reach into the opening of the
lamps; otherwise, there is a risk of burns.◀
Seite 85LampsControls85
Online Edition for Part no. 01 40 2 910 876 - VII/13
Page 105 of 323
Interrupting the system
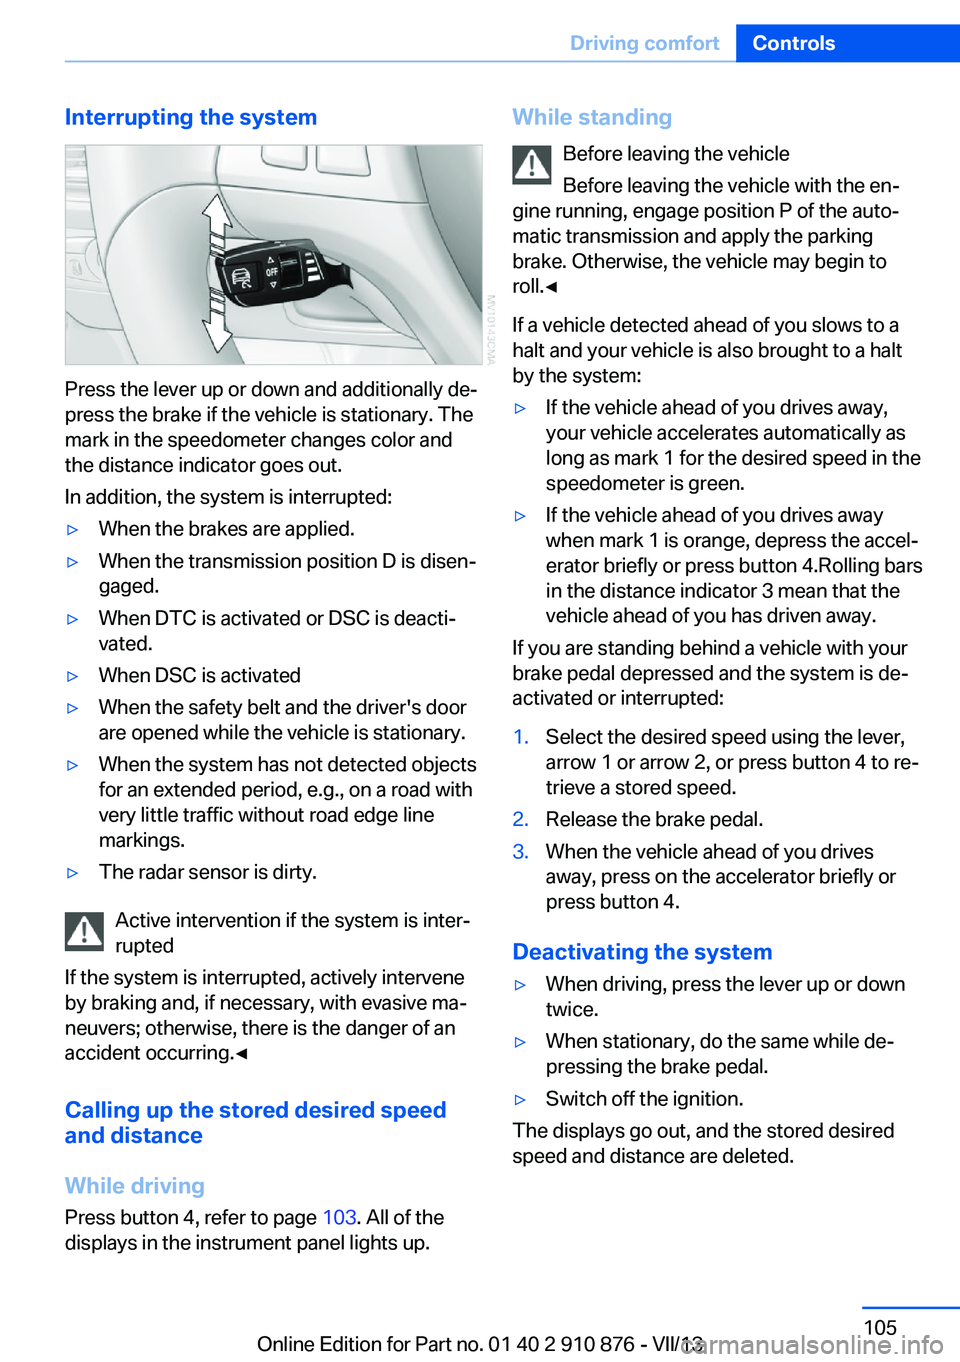
Press the lever up or down and additionally de‐
press the brake if the vehicle is stationary. The
mark in the speedometer changes color and
the distance indicator goes out.
In addition, the system is interrupted:
▷When the brakes are applied.▷When the transmission position D is disen‐
gaged.▷When DTC is activated or DSC is deacti‐
vated.▷When DSC is activated▷When the safety belt and the driver's door
are opened while the vehicle is stationary.▷When the system has not detected objects
for an extended period, e.g., on a road with
very little traffic without road edge line
markings.▷The radar sensor is dirty.
Active intervention if the system is inter‐
rupted
If the system is interrupted, actively intervene
by braking and, if necessary, with evasive ma‐
neuvers; otherwise, there is the danger of an
accident occurring.◀
Calling up the stored desired speed
and distance
While driving
Press button 4, refer to page 103. All of the
displays in the instrument panel lights up.
While standing
Before leaving the vehicle
Before leaving the vehicle with the en‐
gine running, engage position P of the auto‐
matic transmission and apply the parking
brake. Otherwise, the vehicle may begin to
roll.◀
If a vehicle detected ahead of you slows to a
halt and your vehicle is also brought to a halt
by the system:▷If the vehicle ahead of you drives away,
your vehicle accelerates automatically as
long as mark 1 for the desired speed in the
speedometer is green.▷If the vehicle ahead of you drives away
when mark 1 is orange, depress the accel‐
erator briefly or press button 4.Rolling bars
in the distance indicator 3 mean that the
vehicle ahead of you has driven away.
If you are standing behind a vehicle with your
brake pedal depressed and the system is de‐
activated or interrupted:
1.Select the desired speed using the lever,
arrow 1 or arrow 2, or press button 4 to re‐
trieve a stored speed.2.Release the brake pedal.3.When the vehicle ahead of you drives
away, press on the accelerator briefly or
press button 4.
Deactivating the system
▷When driving, press the lever up or down
twice.▷When stationary, do the same while de‐
pressing the brake pedal.▷Switch off the ignition.
The displays go out, and the stored desired
speed and distance are deleted.
Seite 105Driving comfortControls105
Online Edition for Part no. 01 40 2 910 876 - VII/13