wheel BMW X6 XDRIVE35I 2008 Owners Manual
[x] Cancel search | Manufacturer: BMW, Model Year: 2008, Model line: X6 XDRIVE35I, Model: BMW X6 XDRIVE35I 2008Pages: 288, PDF Size: 9.28 MB
Page 5 of 288
Reference
At a glance
Controls
Driving tips
Communications
Navigation
Entertainment
Mobility
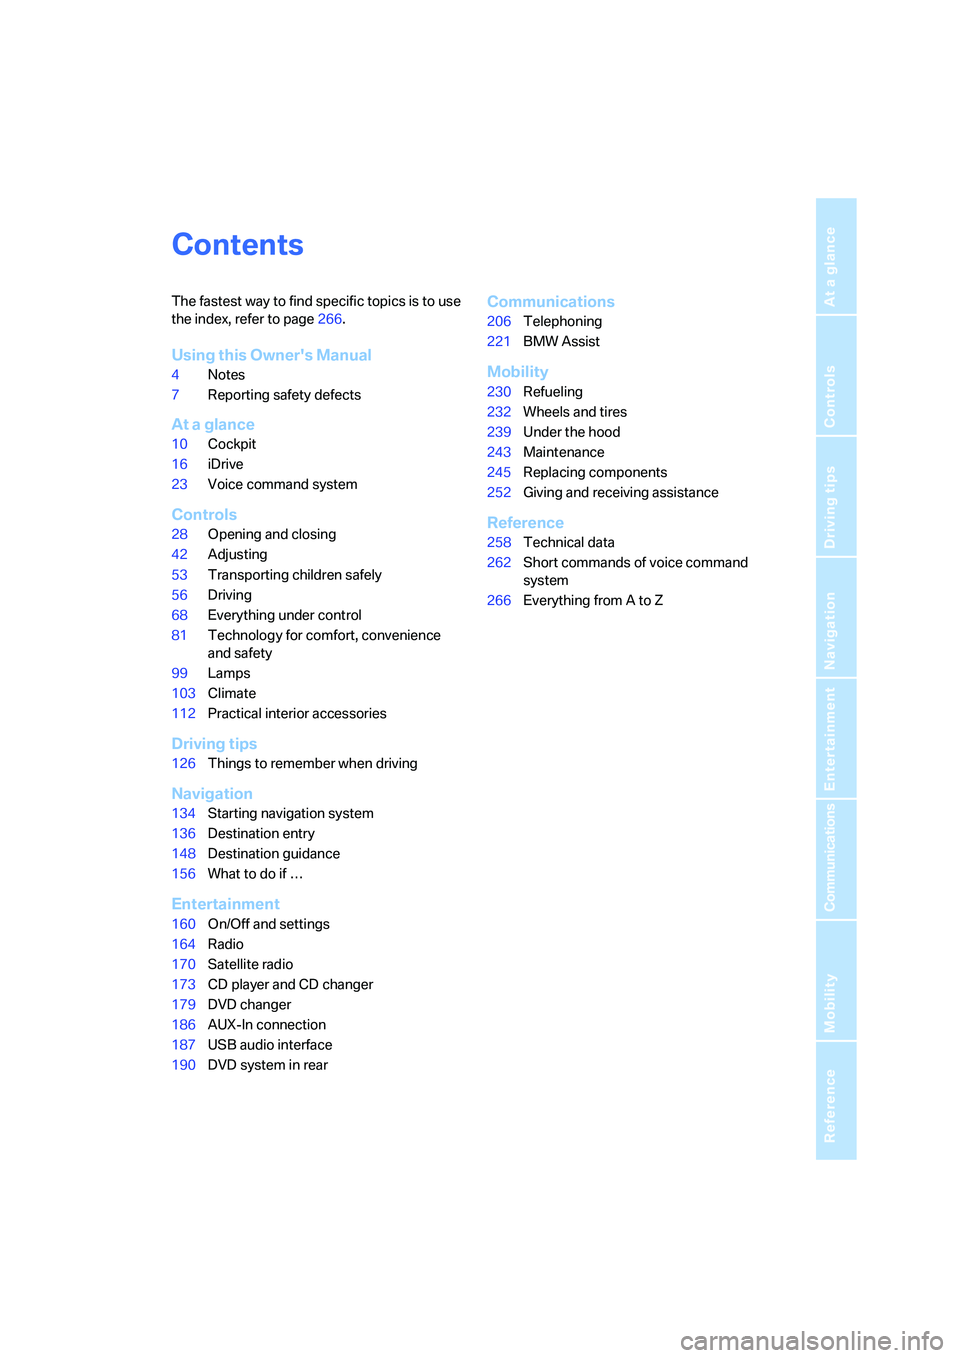
Contents
The fastest way to find specific topics is to use
the index, refer to page266.
Using this Owner's Manual
4Notes
7Reporting safety defects
At a glance
10Cockpit
16iDrive
23Voice command system
Controls
28Opening and closing
42Adjusting
53Transporting children safely
56Driving
68Everything under control
81Technology for comfort, convenience
and safety
99Lamps
103Climate
112Practical interior accessories
Driving tips
126Things to remember when driving
Navigation
134Starting navigation system
136Destination entry
148Destination guidance
156What to do if …
Entertainment
160On/Off and settings
164Radio
170Satellite radio
173CD player and CD changer
179DVD changer
186AUX-In connection
187USB audio interface
190DVD system in rear
Communications
206Telephoning
221BMW Assist
Mobility
230Refueling
232Wheels and tires
239Under the hood
243Maintenance
245Replacing components
252Giving and receiving assistance
Reference
258Technical data
262Short commands of voice command
system
266Everything from A to Z
Page 8 of 288
Notes
6
Parts and accessories
For your own safety, use genuine parts
and accessories approved by BMW.
When you purchase accessories tested and
approved by BMW and Genuine BMW Parts,
you simultaneously acquire the assurance that
they have been thoroughly tested by BMW to
ensure optimum performance when installed
on your vehicle.
BMW warrants these parts to be free from
defects in material and workmanship.
BMW will not accept any liability for damage
resulting from installation of parts and accesso-
ries not approved by BMW.
BMW cannot test every product made by other
manufacturers to verify if it can be used on a
BMW safely and without risk to either the vehi-
cle, its operation or its occupants.
Genuine BMW Parts, BMW Accessories and
other products approved by BMW, together
with professional advice on using these items,
are available from all BMW Sports Activity Vehi-
cle Centers.
Installation and operation of non-BMW
approved accessories such as alarms, radios,
amplifiers, radar detectors, wheels, suspension
components, brake dust shields, telephones,
including operation of any mobile phone from
within the vehicle without using an externally
mounted antenna, or transceiver equipment, for
instance, CBs, walkie-talkies, ham radios or
similar accessories, may cause extensive dam-
age to the vehicle, compromise its safety, inter-
fere with the vehicle's electrical system, or
affect the validity of the BMW Limited Warranty.
Refer to your BMW Sports Activity Vehicle Cen-
ter for additional information.<
Maintenance, replacement, or repair of
the emission control devices and sys-
tems may be performed by any automotive
repair establishment or individual using any cer-
tified automotive part.<
California Proposition 65 Warning
California laws require us to issue the following
warning:
Engine exhaust and a wide variety of
automobile components and parts,
including components found in the interior fur-
nishings in a vehicle, contain or emit chemicals
known to the State of California to cause cancer
and birth defects and reproductive harm. In
addition, certain fluids contained in vehicles and
certain products of component wear contain or
emit chemicals known to the State of California
to cause cancer and birth defects or other
reproductive harm.
Battery posts, terminals and related accesso-
ries contain lead and lead compounds. Wash
your hands after handling.
Used engine oil contains chemicals that have
caused cancer in laboratory animals. Always
protect your skin by washing thoroughly with
soap and water.<
Page 12 of 288
Cockpit
10
Cockpit
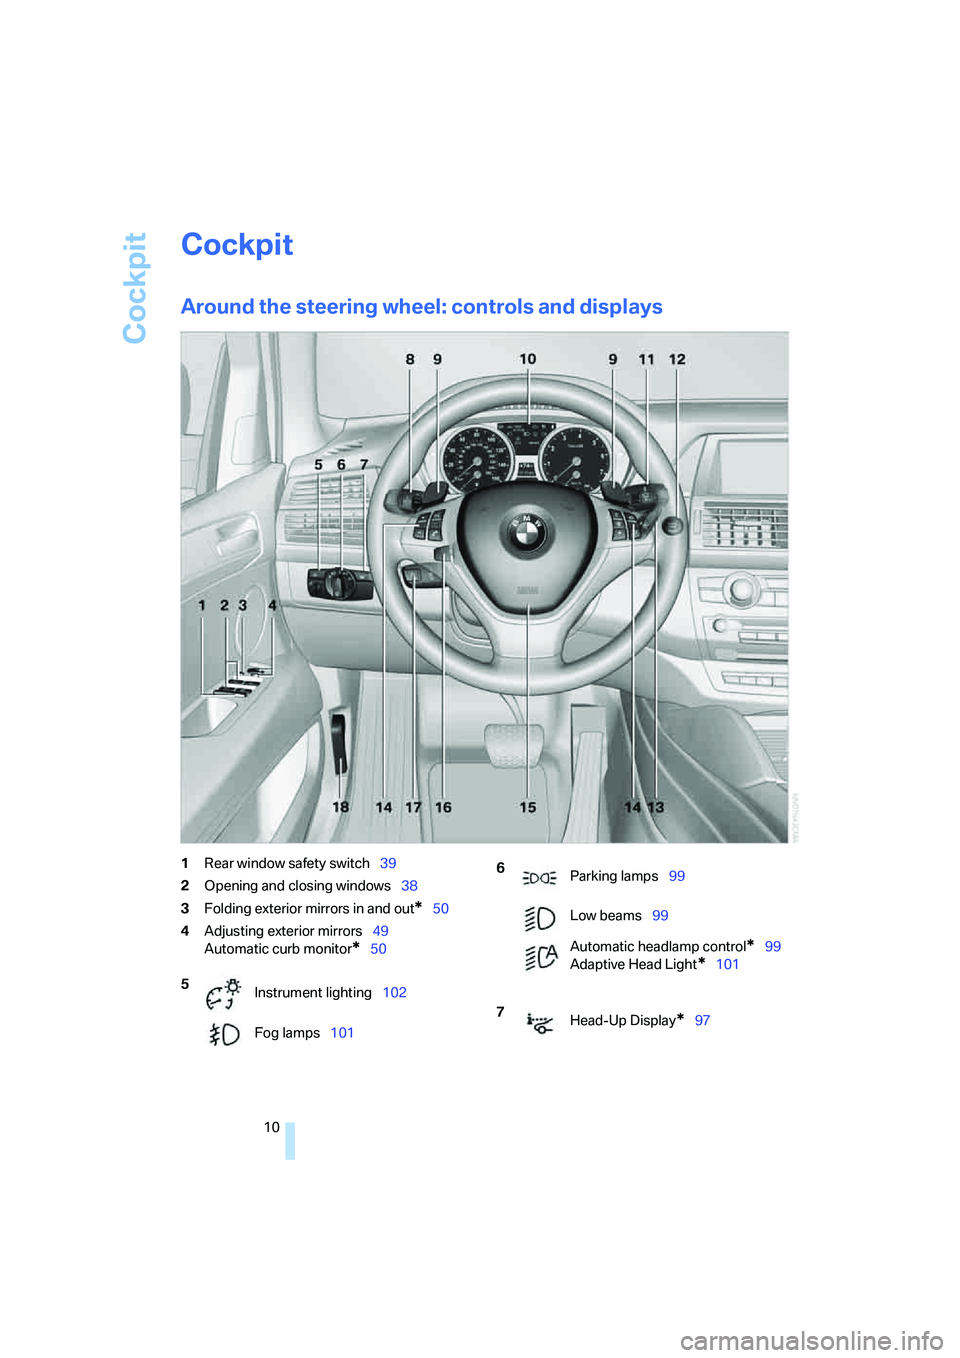
Around the steering wheel: controls and displays
1Rear window safety switch39
2Opening and closing windows38
3Folding exterior mirrors in and out
*50
4Adjusting exterior mirrors49
Automatic curb monitor
*50
5
Instrument lighting102
Fog lamps101
6
Parking lamps99
Low beams99
Automatic headlamp control
*99
Adaptive Head Light
*101
7
Head-Up Display
*97
Page 13 of 288
At a glance
11Reference
Controls
Driving tips
Communications
Navigation
Entertainment
Mobility
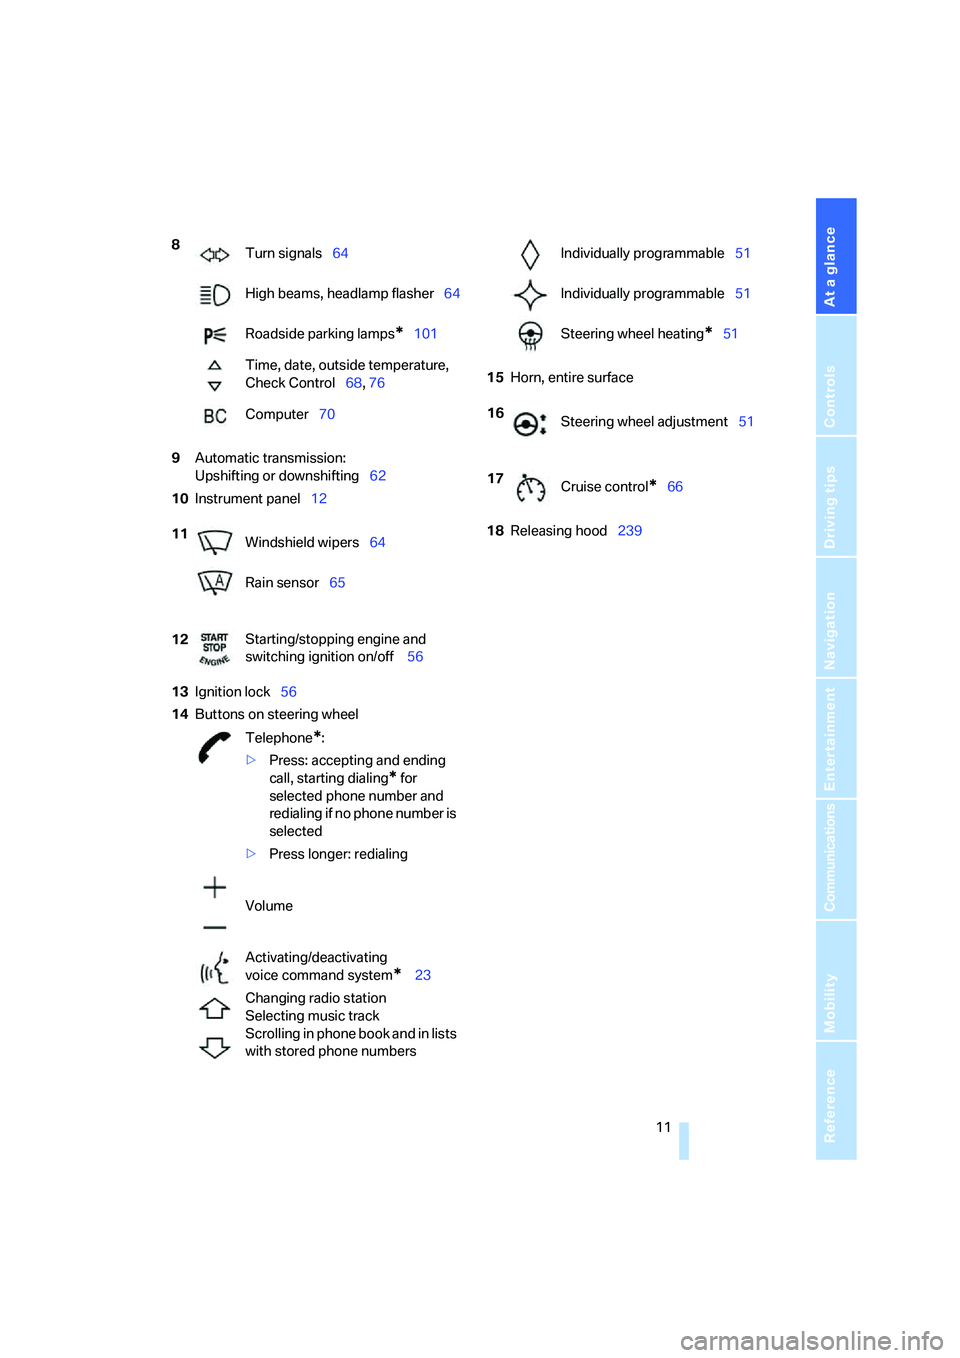
9Automatic transmission:
Upshifting or downshifting62
10Instrument panel12
13Ignition lock56
14Buttons on steering wheel15Horn, entire surface
18Releasing hood239 8
Turn signals64
High beams, headlamp flasher64
Roadside parking lamps
*101
Time, date, outside temperature,
Check Control68, 76
Computer70
11
Windshield wipers64
Rain sensor65
12Starting/stopping engine and
switching ignition on/off 56
Telephone
*:
>Press: accepting and ending
call, starting dialing
* for
selected phone number and
redialing if no phone number is
selected
>Press longer: redialing
Volume
Activating/deactivating
voice command system
* 23
Changing radio station
Selecting music track
Scrolling in phone book and in lists
with stored phone numbers
Individually programmable51
Individually programmable51
Steering wheel heating
*51
16
Steering wheel adjustment51
17
Cruise control
*66
Page 25 of 288
At a glance
23Reference
Controls
Driving tips
Communications
Navigation
Entertainment
Mobility
Voice command system
The concept
The voice command system allows you to con-
trol operation of various vehicle systems with-
out ever removing your hands from the steering
wheel.
Individual menu items on the Control Display
can be spoken as commands. This frees you of
having to use the controller.
The voice command system transforms your
oral commands into control signals for the
selected systems and provides support in the
form of instructions or questions.
The voice command system uses a special
microphone located in the area of the interior
rearview mirror, refer to page14.
Precondition
Via iDrive, set the language that applies for the
voice command system in order to enable iden-
tification of the spoken commands. To set the
language of iDrive, refer to page80.
Symbols in Owner's Manual
Voice commands
Activating voice command system
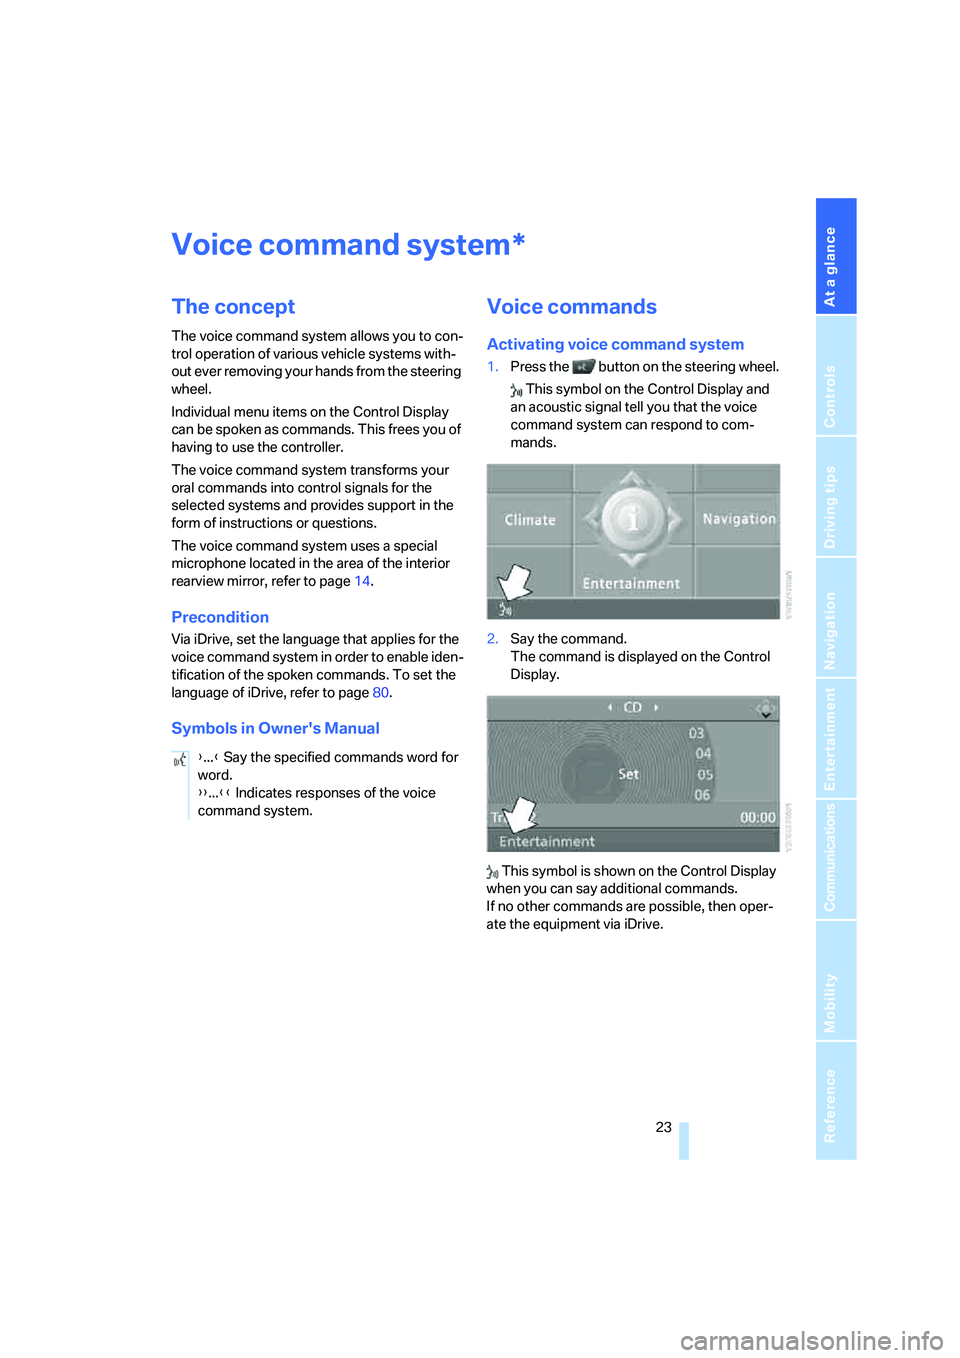
1.Press the button on the steering wheel.
This symbol on the Control Display and
an acoustic signal tell you that the voice
command system can respond to com-
mands.
2.Say the command.
The command is displayed on the Control
Display.
This symbol is shown on the Control Display
when you can say additional commands.
If no other commands are possible, then oper-
ate the equipment via iDrive.
*
{...} Say the specified commands word for
word.
{{...}} Indicates responses of the voice
command system.
Page 26 of 288
Voice command system
24
Terminating or canceling voice
command system
Press the button on the steering wheel
or
Commands
Having possible commands read aloud
You can have the system read aloud the possi-
ble commands related to the selected menu
item on the Control Display.
To have the system list the possible com-
mands:
For example, if you have selected "CD", the
system will read aloud the possible commands
for operating the CD player and the CD
changer
*.
Opening help
Using alternative commands
There are often a number of commands to run a
function, e.g.:
Running functions directly with short
commands
With short commands you can carry out certain
functions directly, regardless of which menu
item is selected, refer to page262.
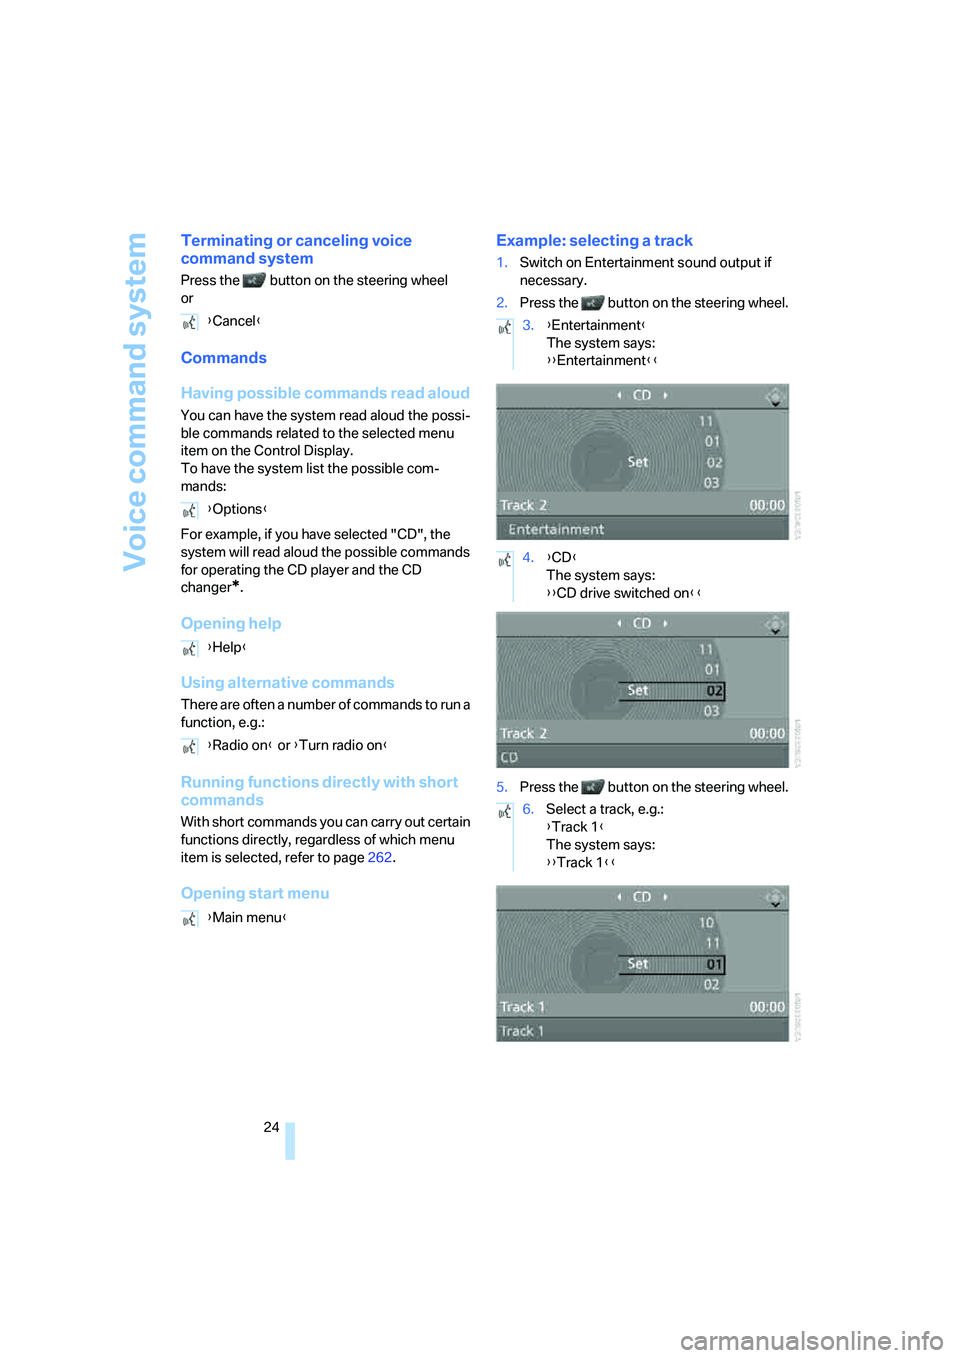
Opening start menuExample: selecting a track
1.Switch on Entertainment sound output if
necessary.
2.Press the button on the steering wheel.
5.Press the button on the steering wheel. {Cancel}
{Options}
{Help}
{Radio on} or {Turn radio on}
{Main menu}
3.{Entertainment}
The system says:
{{Entertainment}}
4.{CD}
The system says:
{{CD drive switched on}}
6.Select a track, e.g.:
{Track 1}
The system says:
{{Track 1}}
Page 30 of 288
Opening and closing
28
Opening and closing
Keys/remote control
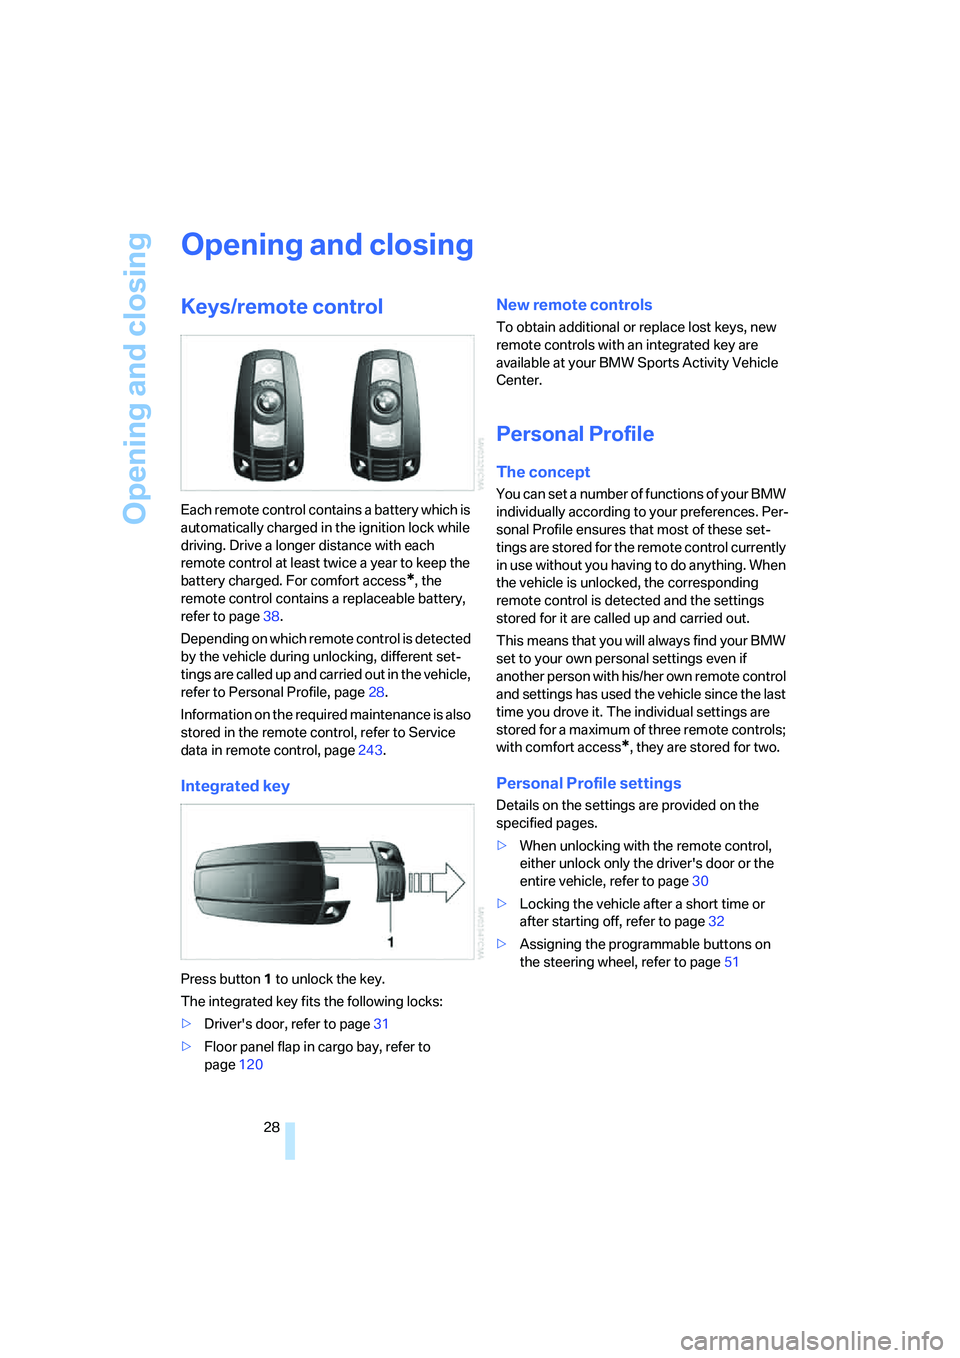
Each remote control contains a battery which is
automatically charged in the ignition lock while
driving. Drive a longer distance with each
remote control at least twice a year to keep the
battery charged. For comfort access
*, the
remote control contains a replaceable battery,
refer to page38.
Depending on which remote control is detected
by the vehicle during unlocking, different set-
tings are called up and carried out in the vehicle,
refer to Personal Profile, page28.
Information on the required maintenance is also
stored in the remote control, refer to Service
data in remote control, page243.
Integrated key
Press button1 to unlock the key.
The integrated key fits the following locks:
>Driver's door, refer to page31
>Floor panel flap in cargo bay, refer to
page120
New remote controls
To obtain additional or replace lost keys, new
remote controls with an integrated key are
available at your BMW Sports Activity Vehicle
Center.
Personal Profile
The concept
You can set a number of functions of your BMW
individually according to your preferences. Per-
sonal Profile ensures that most of these set-
tings are stored for the remote control currently
in use without you having to do anything. When
the vehicle is unlocked, the corresponding
remote control is detected and the settings
stored for it are called up and carried out.
This means that you will always find your BMW
set to your own personal settings even if
another person with his/her own remote control
and settings has used the vehicle since the last
time you drove it. The individual settings are
stored for a maximum of three remote controls;
with comfort access
*, they are stored for two.
Personal Profile settings
Details on the settings are provided on the
specified pages.
>When unlocking with the remote control,
either unlock only the driver's door or the
entire vehicle, refer to page30
>Locking the vehicle after a short time or
after starting off, refer to page32
>Assigning the programmable buttons
on
the steering wheel, refer to page51
Page 31 of 288
Controls
29Reference
At a glance
Driving tips
Communications
Navigation
Entertainment
Mobility
>Settings for the display on the Control Dis-
play:
>Brightness of the Control Display, refer
to page79
>Measuring units for consumption, route/
distances, temperature, and pressure,
refer to page79
>Language on Control Display, refer to
page80
>12h/24h mode of the clock, refer to
page79
>Date format, refer to page79
>Showing optical warning for PDC Park Dis-
tance Control
*, refer to page82
>Selection, brightness and position of dis-
play in Head-Up Display
*, refer to page97
>Settings of automatic climate control, refer
to page104
>Positions of driver's seat, exterior mirrors,
and steering wheel
*, refer to page44
>With Adaptive Drive
*, last selected chassis
and suspension tuning setting, refer to
page88
>Audio sources, volume and tone settings,
refer to page161
>Radio, displaying stored stations, refer to
page164
>Telephone, setting volume, refer to
pages212,218
>Pathway lighting, refer to page100, and
daytime running lamps
*, refer to page100
>Triple turn signal activation, refer to
page64
>With rear view camera
*, selection of func-
tions, refer to page83, and type of display,
refer to page85
>With programmable memory/direct selec-
tion buttons, selection of stored functions,
refer to page21
Central locking system
The concept
The central locking system is ready for opera-
tion whenever the driver's door is closed.
The system simultaneously engages and
releases the locks on the following:
>Doors
>Liftgate
>Fuel filler door
Operating from outside
>via the remote control
>via the door lock
>with comfort access
* via the door handles
At the same time, the anti-theft system is also
operated. It prevents the doors from being
unlocked using the lock buttons or door han-
dles. The interior lamps and the courtesy
lamps
* are also switched on and off with the
remote control. The alarm system
is armed/dis-
armed at the same time.
You can find more detailed information on the
alarm system
on page35.
Operating from inside
Via the button for central locking, refer to
page32. The fuel filler door is not locked.
In an accident of sufficient severity, the central
locking system automatically unlocks the vehi-
cle. In addition, the hazard warning flashers and
interior lamps come on.
Opening and closing:
Using remote control
Persons or animals left unattended in a
parked vehicle can lock the doors from
the inside. Always take along the remote control
when leaving the vehicle so that the vehicle can
then be opened from the outside.<
Page 37 of 288
Controls
35Reference
At a glance
Driving tips
Communications
Navigation
Entertainment
Mobility
To stop the opening process:
>Press the button on the outside of the lift-
gate.
>Press and hold the button on the remote
control.
>Press the button on the inside of the lift-
gate.
>Press the button on the center console
again.
The opening process is interrupted if you
set the vehicle in motion.<
Closing liftgate
Make sure that the closing path of the lift-
gate is clear, otherwise injuries may
result.<
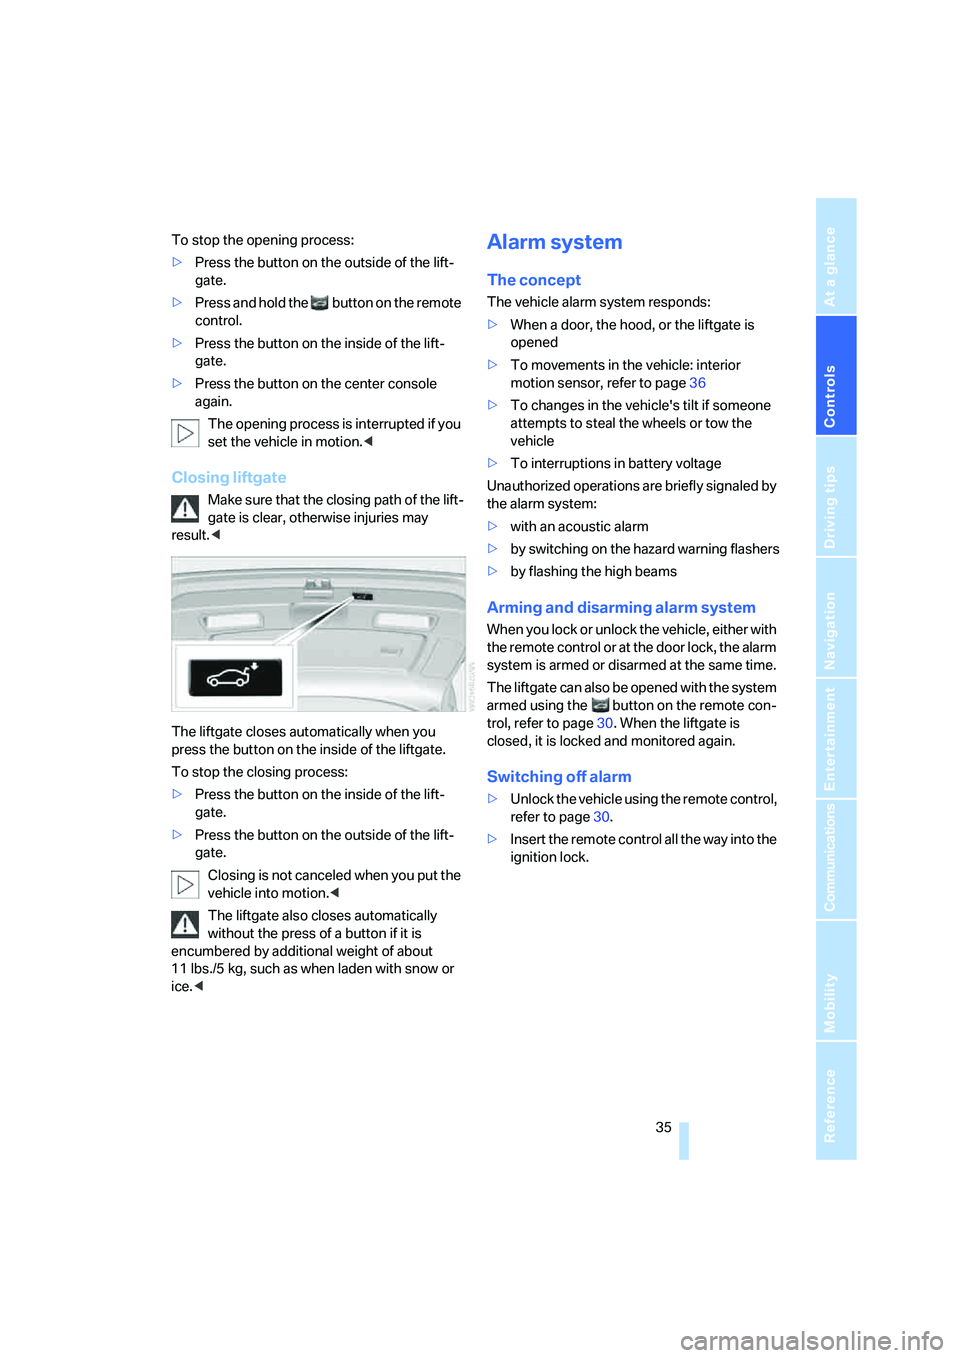
The liftgate closes automatically when you
press the button on the inside of the liftgate.
To stop the closing process:
>Press the button on the inside of the lift-
gate.
>Press the button on the outside of the lift-
gate.
Closing is not canceled when you put the
vehicle into motion.<
The liftgate also closes automatically
without the press of a button if it is
encumbered by additional weight of about
11 lbs./5 kg, such as when laden with snow or
ice.<
Alarm system
The concept
The vehicle alarm system responds:
>When a door, the hood, or the liftgate is
opened
>To movements in the vehicle: interior
motion sensor, refer to page36
>To changes in the vehicle's tilt if someone
attempts to steal the wheels or tow the
vehicle
>To interruptions in battery voltage
Unauthorized operations are briefly signaled by
the alarm system:
>with an acoustic alarm
>by switching on
the hazard warning flashers
>by flashing the high beams
Arming and disarming alarm system
When you lock or unlock the vehicle, either with
the remote control or at the door lock, the alarm
system is armed or disarmed at the same time.
The liftgate can also be opened with the system
armed using the button on the remote con-
trol, refer to page30. When the liftgate is
closed, it is locked and monitored again.
Switching off alarm
>Unlock the vehicle using the remote control,
refer to page30.
>Insert the remote control all the way into the
ignition lock.
Page 38 of 288
Opening and closing
36
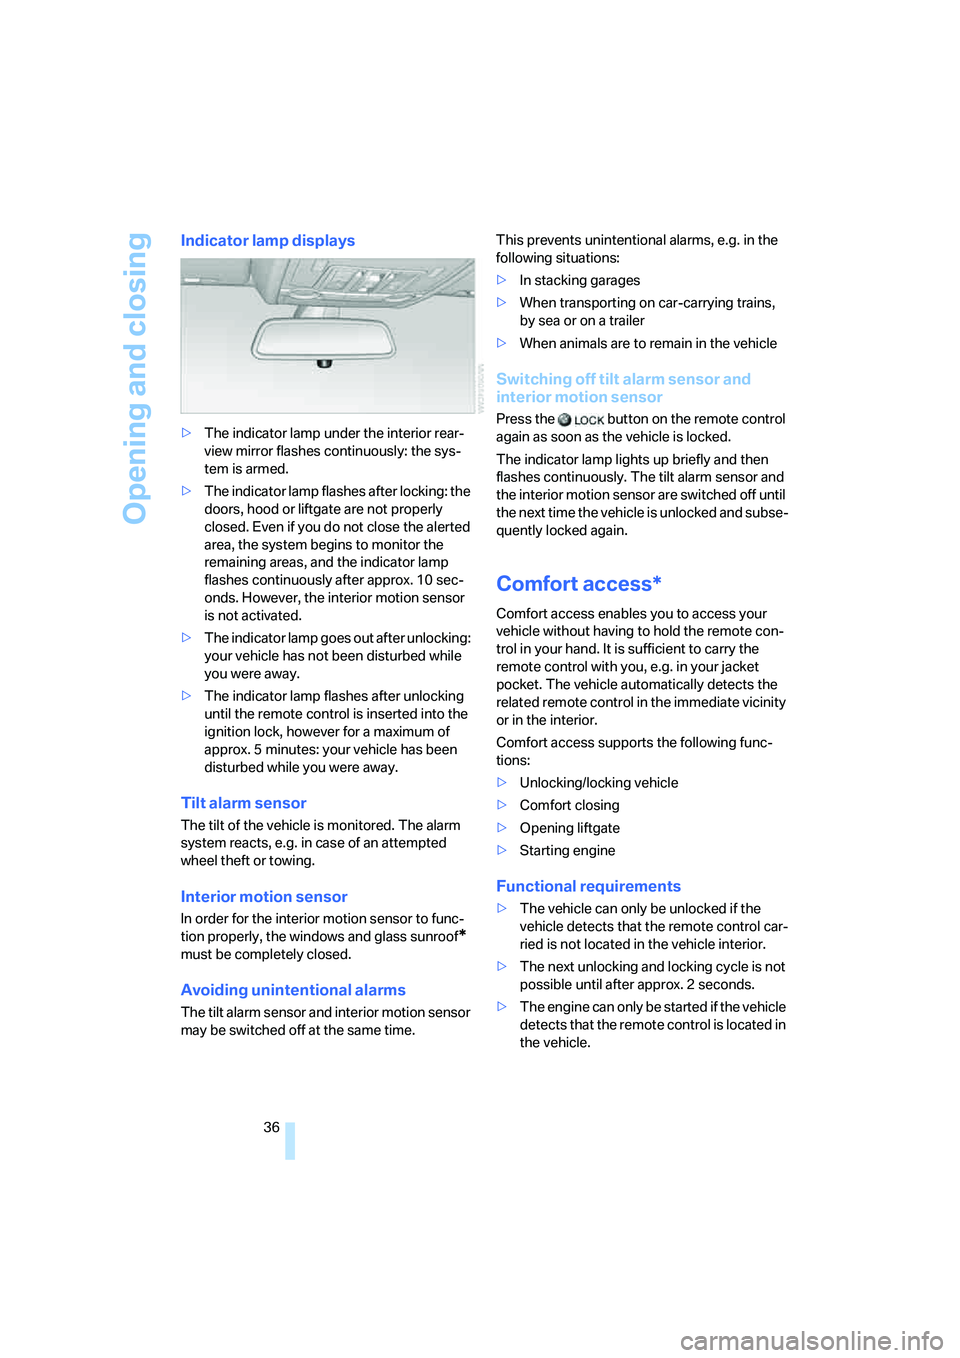
Indicator lamp displays
>The indicator lamp under the interior rear-
view mirror flashes continuously: the sys-
tem is armed.
>The indicator lamp flashes after locking: the
doors, hood or liftgate are not properly
closed. Even if you do not close the alerted
area, the system begins to monitor the
remaining areas, and the indicator lamp
flashes continuously after approx. 10 sec-
onds. However, the interior motion sensor
is not activated.
>The indicator lamp goes out after unlocking:
your vehicle has not been disturbed while
you were away.
>The indicator lamp flashes after unlocking
until the remote control is inserted into the
ignition lock, however for a maximum of
approx. 5 minutes: your vehicle has been
disturbed while you were away.
Tilt alarm sensor
The tilt of the vehicle is monitored. The alarm
system reacts, e.g. in case of an attempted
wheel theft or towing.
Interior motion sensor
In order for the interior motion sensor to func-
tion properly, the windows and glass sunroof
*
must be completely closed.
Avoiding unintentional alarms
The tilt alarm sensor and interior motion sensor
may be switched off at the same time. This prevents unintentional alarms, e.g. in the
following situations:
>In stacking garages
>When transporting on car-carrying trains,
by sea or on a trailer
>When animals are to remain in the vehicle
Switching off tilt alarm sensor and
interior motion sensor
Press the button on the remote control
again as soon as the vehicle is locked.
The indicator lamp lights up briefly and then
flashes continuously. The tilt alarm sensor and
the interior motion sensor are switched off until
the next time the vehicle is unlocked and subse-
quently locked again.
Comfort access*
Comfort access enables you to access your
vehicle without having to hold the remote con-
trol in your hand. It is sufficient to carry the
remote control with you, e.g. in your jacket
pocket. The vehicle automatically detects the
related remote control in the immediate vicinity
or in the interior.
Comfort access supports the following func-
tions:
>Unlocking/locking vehicle
>Comfort closing
>Opening liftgate
>Starting engine
Functional requirements
>The vehicle can only be unlocked if the
vehicle detects that the remote control car-
ried is not located in the vehicle interior.
>The next unlocking and locking cycle is not
possible until after approx. 2 seconds.
>The engine can only be started if the vehicle
detects that the remote control is located in
the vehicle.