window BMW X6M 2009 E71 User Guide
[x] Cancel search | Manufacturer: BMW, Model Year: 2009, Model line: X6M, Model: BMW X6M 2009 E71Pages: 317, PDF Size: 9.56 MB
Page 41 of 317
Controls
39Reference
At a glance
Driving tips
Communications
Navigation
Entertainment
Mobility
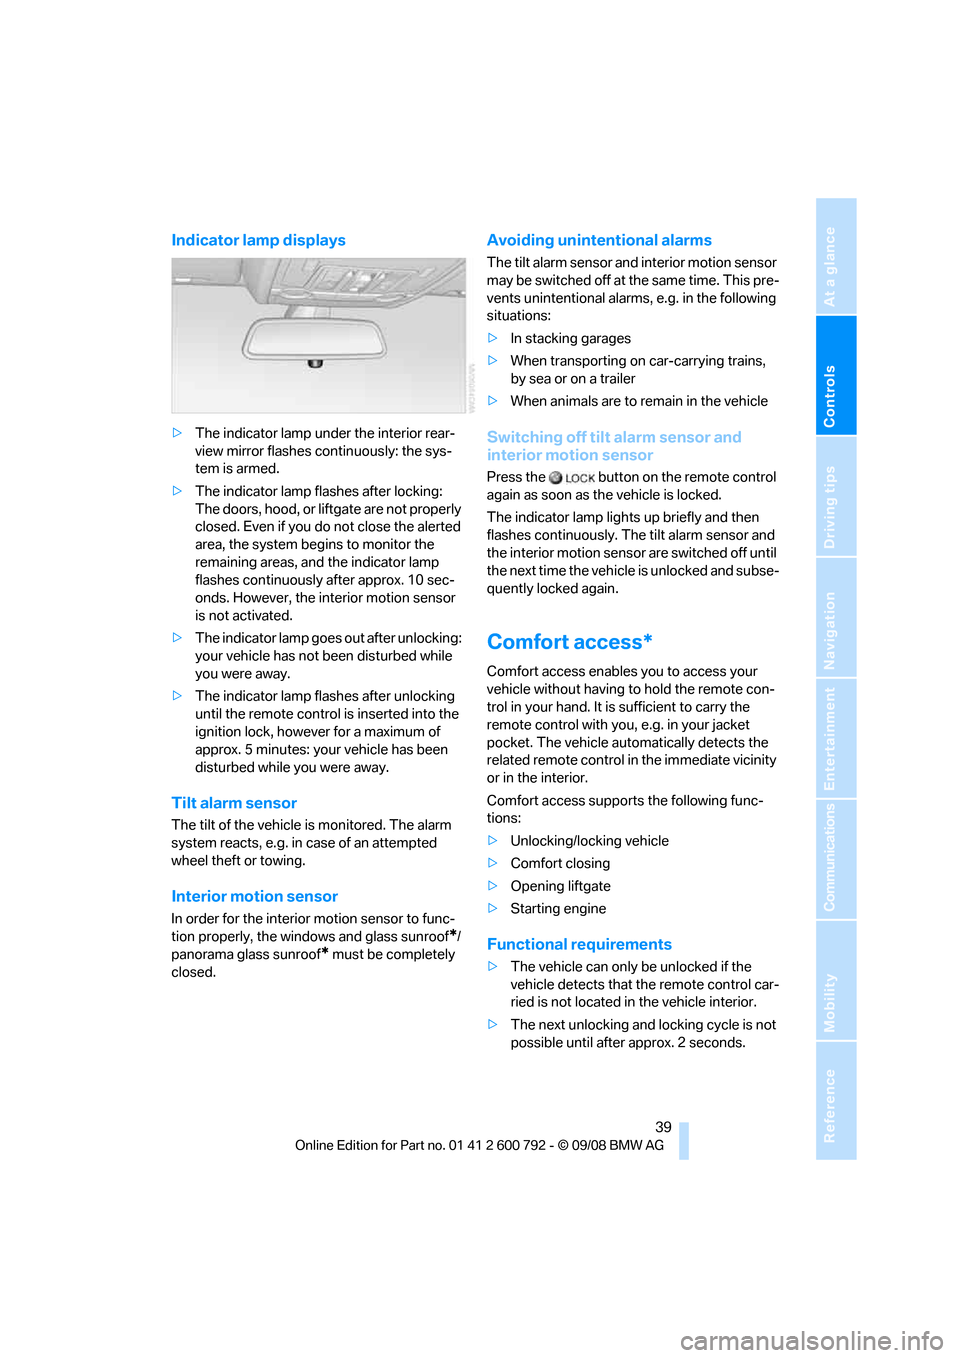
Indicator lamp displays
>The indicator lamp under the interior rear-
view mirror flashes continuously: the sys-
tem is armed.
> The indicator lamp flashes after locking:
The doors, hood, or liftgate are not properly
closed. Even if you do not close the alerted
area, the system begins to monitor the
remaining areas, and the indicator lamp
flashes continuously after approx. 10 sec-
onds. However, the interior motion sensor
is not activated.
> The indicator lamp goes out after unlocking:
your vehicle has not been disturbed while
you were away.
> The indicator lamp flashes after unlocking
until the remote control is inserted into the
ignition lock, however for a maximum of
approx. 5 minutes: your vehicle has been
disturbed while you were away.
Tilt alarm sensor
The tilt of the vehicle is monitored. The alarm
system reacts, e.g. in case of an attempted
wheel theft or towing.
Interior motion sensor
In order for the interior motion sensor to func-
tion properly, the windows and glass sunroof
*/
panorama glass sunroof
* must be completely
closed.
Avoiding unintentional alarms
The tilt alarm sensor and interior motion sensor
may be switched off at the same time. This pre-
vents unintentional alarms, e.g. in the following
situations:
> In stacking garages
> When transporting on car-carrying trains,
by sea or on a trailer
> When animals are to remain in the vehicle
Switching off tilt alarm sensor and
interior motion sensor
Press the button on the remote control
again as soon as the vehicle is locked.
The indicator lamp light s up briefly and then
flashes continuously. The tilt alarm sensor and
the interior motion sensor are switched off until
the next time the vehicle is unlocked and subse-
quently locked again.
Comfort access*
Comfort access enables you to access your
vehicle without having to hold the remote con-
trol in your hand. It is sufficient to carry the
remote control with you, e.g. in your jacket
pocket. The vehicle auto matically detects the
related remote control in the immediate vicinity
or in the interior.
Comfort access supports the following func-
tions:
> Unlocking/locking vehicle
> Comfort closing
> Opening liftgate
> Starting engine
Functional requirements
>The vehicle can only be unlocked if the
vehicle detects that th e remote control car-
ried is not located in the vehicle interior.
> The next unlocking and locking cycle is not
possible until after approx. 2 seconds.
Page 42 of 317
Opening and closing
40
>
The engine can only be started if the vehicle
detects that the remote control is located in
the vehicle.
Comparison with ordinary remote
control
You can control the functions mentioned previ-
ously with the comfort access or by pressing
the buttons on the remote control. Therefore,
please familiarize yourself with the information
on opening and closing beginning on page 28
beforehand.
The special features when using comfort
access are described in the following.
Should a short delay occur when opening
or closing the windows or the glass sun-
roof
*/panorama glass sunroof*, the system
checks whether a remote control is located in
the vehicle. Please repeat opening or closing if
necessary. <
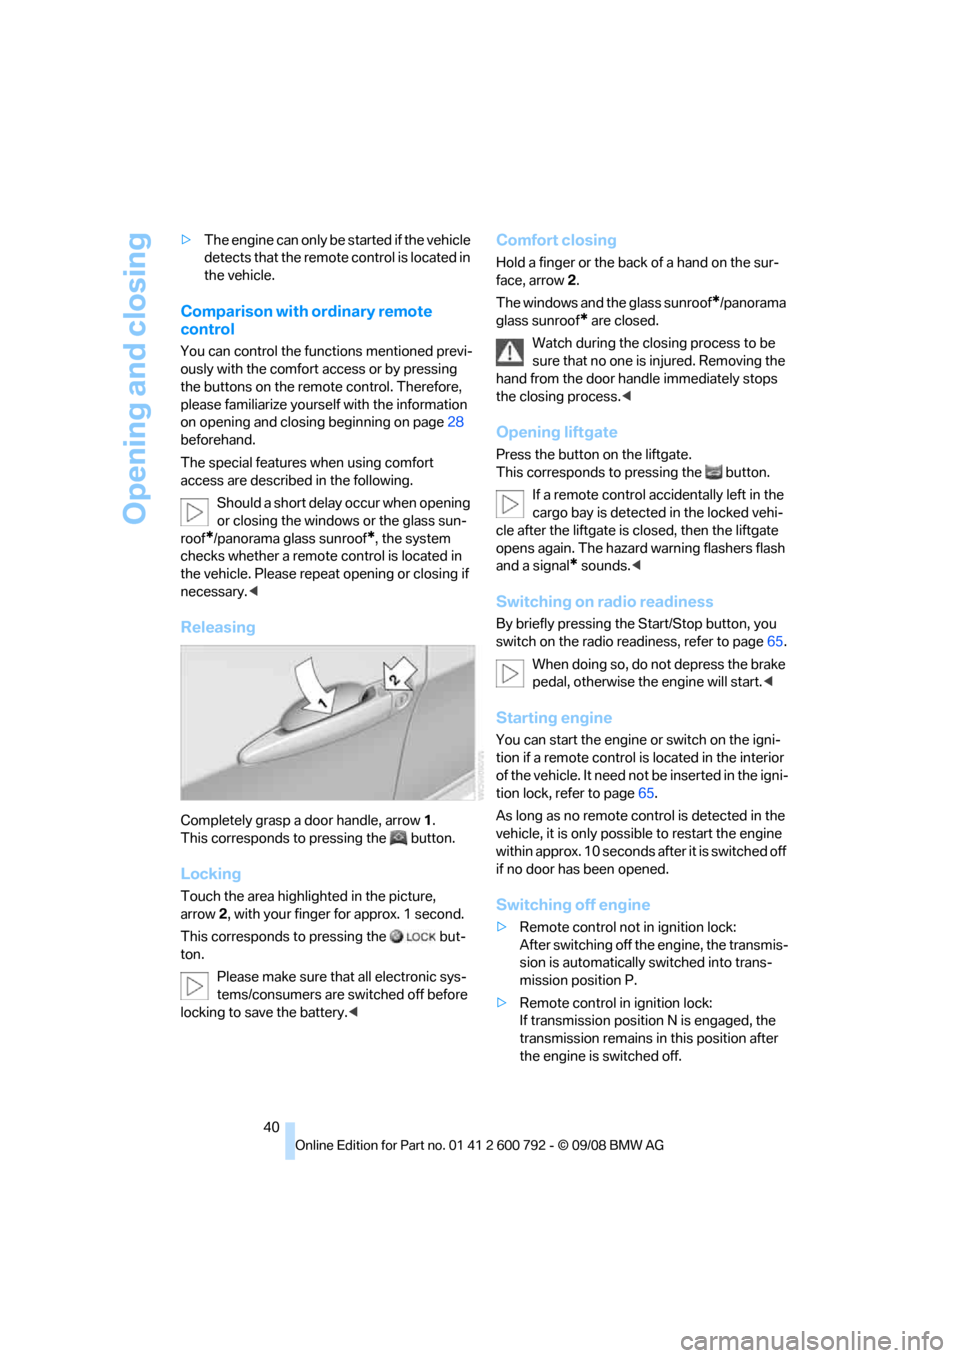
Releasing
Completely grasp a door handle, arrow 1.
This corresponds to pressing the button.
Locking
Touch the area highlighted in the picture,
arrow 2, with your finger for approx. 1 second.
This corresponds to pressing the but-
ton.
Please make sure that all electronic sys-
tems/consumers are sw itched off before
locking to save the battery. <
Comfort closing
Hold a finger or the back of a hand on the sur-
face, arrow2.
The windows and the glass sunroof
*/panorama
glass sunroof
* are closed.
Watch during the closing process to be
sure that no one is injured. Removing the
hand from the door handle immediately stops
the closing process. <
Opening liftgate
Press the button on the liftgate.
This corresponds to pr essing the button.
If a remote control acci dentally left in the
cargo bay is detected in the locked vehi-
cle after the liftgate is closed, then the liftgate
opens again. The hazard warning flashers flash
and a signal
* sounds. <
Switching on radio readiness
By briefly pressing the Start/Stop button, you
switch on the radio readiness, refer to page 65.
When doing so, do not depress the brake
pedal, otherwise the engine will start.<
Starting engine
You can start the engine or switch on the igni-
tion if a remote control is located in the interior
of the vehicle. It need not be inserted in the igni-
tion lock, refer to page 65.
As long as no remote co ntrol is detected in the
vehicle, it is only possible to restart the engine
within approx. 10 seconds after it is switched off
if no door has been opened.
Switching off engine
> Remote control not in ignition lock:
After switching off the engine, the transmis-
sion is automatically switched into trans-
mission position P.
> Remote control in ignition lock:
If transmission position N is engaged, the
transmission remains in this position after
the engine is switched off.
Page 43 of 317
Controls
41Reference
At a glance
Driving tips
Communications
Navigation
Entertainment
Mobility
Before driving into a car wash
The vehicle can roll if you proceed according to
the following steps:
1.Insert remote control into ignition lock.
2. Depress brake pedal.
3. Engage transmission position N.
4. Release the parking brake.
5. Switch off the engine.
6. Leave the remote control in the ignition
lock.
Malfunction
The comfort access function may malfunction
due to local radio waves. Then open or close the
vehicle with the buttons on the remote control
or with a key. To start the engine following this,
insert the remote control in the ignition lock.
The warning lamp in the instrument
panel lights up when an attempt is
made to start the engine: starting the
engine is not possible. The remote control is
not in the vehicle or has a malfunction. Take
along the remote control into the vehicle or
have it checked. Insert another remote control
into the ignition lock if necessary.
The warning lamp in the instrument
panel lights up when the engine is
running: the remote control is no
longer in the vehicle. After switching off the
engine, the engine can only be started again
within approx. 10 seconds if no door has been
opened.
The indicator lamp in the instrument
panel lights up and a message
appears on the Control Display:
Replace the battery of the remote control.
Replacing battery
The remote control for comfort access contains
a battery which must be replaced if necessary.
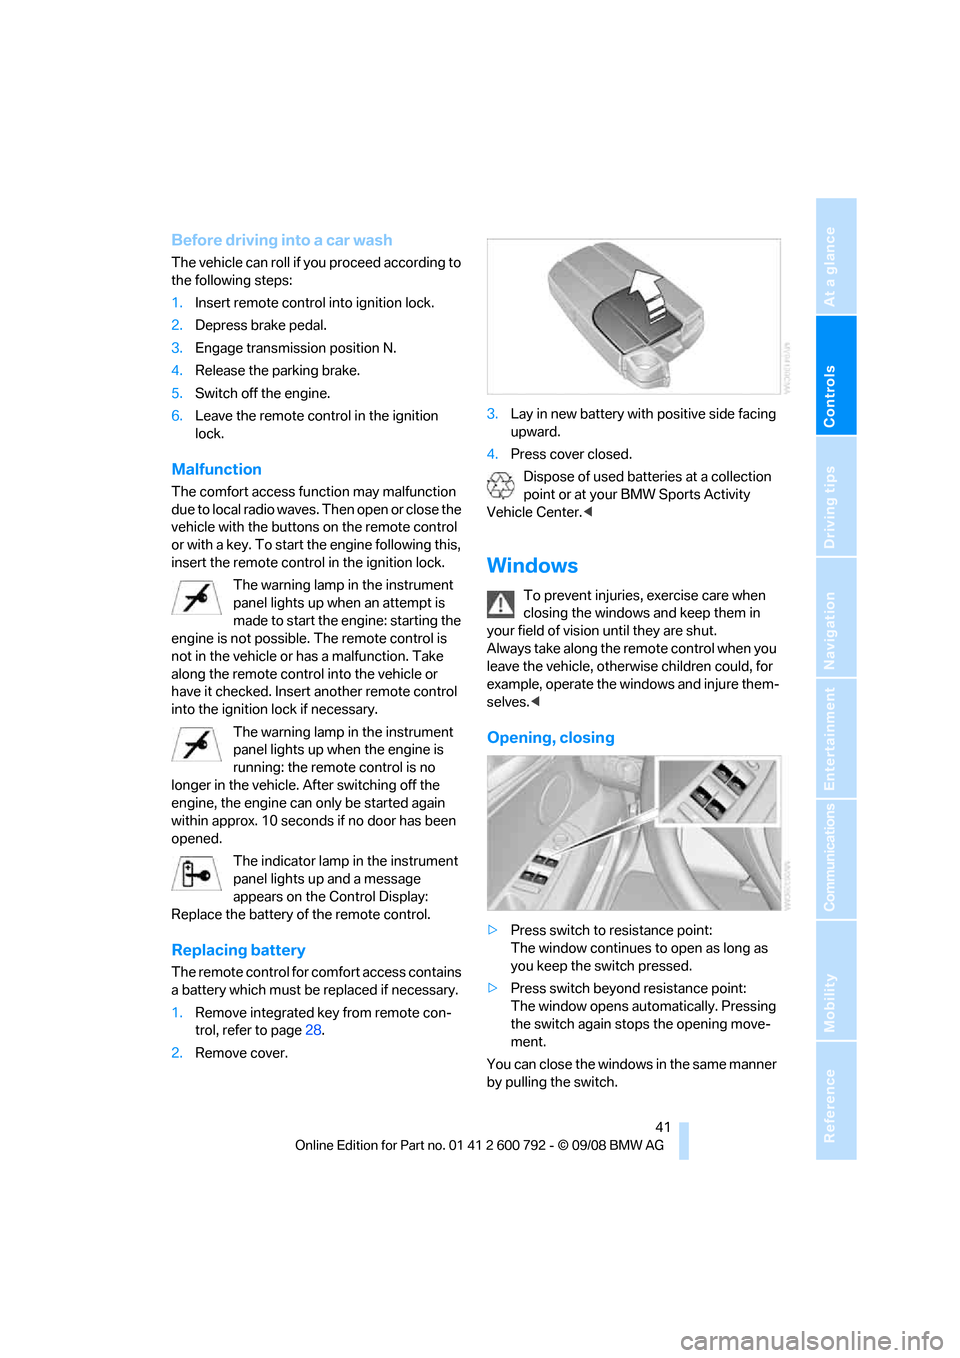
1.Remove integrated key from remote con-
trol, refer to page 28.
2. Remove cover. 3.
Lay in new battery with positive side facing
upward.
4. Press cover closed.
Dispose of used batteries at a collection
point or at your BMW Sports Activity
Vehicle Center. <
Windows
To prevent injuries, exercise care when
closing the windows and keep them in
your field of vision until they are shut.
Always take along the remote control when you
leave the vehicle, otherw ise children could, for
example, operate the windows and injure them-
selves. <
Opening, closing
>Press switch to resistance point:
The window continues to open as long as
you keep the switch pressed.
> Press switch beyond resistance point:
The window opens automatically. Pressing
the switch again stops the opening move-
ment.
You can close the windows in the same manner
by pulling the switch.
Page 44 of 317
Opening and closing
42
Separate switches for the rear windows are
located in the rear.
For information on using convenience opera-
tion at the door lock or
with the remote control,
refer to page 30 or32.
For information on comfort closing with comfort
access, refer to page 40.
After switching off ignition
You can still operate the windows with the
remote control remove d or the ignition
switched off for approx. 1 minute, as long as
neither of the front doors has been opened.
Pinch protection system
If the closing force rises beyond a predefined
threshold during closing, the system will stop
moving the window prior to lowering it again
slightly.
Despite the pinch protection system,
inspect the window's travel path prior to
closing it, as the safety system might fail to
detect certain kinds of obstructions, such as
thin objects, and the window would continue
closing.
Do not install any accesso ries in the range of
movement of the windows, otherwise the pinch
protection system will be impaired. <
Closing without pinch protection
system
In case of danger from outside or if, for example,
ice on the window prevents normal closing, pro-
ceed as follows:
1.Pull the switch beyond the resistance point
and hold. The pinch protection system is
limited and the window opens slightly if the
closing force exceeds a certain value.
2. Pull the switch beyond the resistance point
and hold again within approx. 4 seconds.
The window closes without the pinch pro-
tection system.
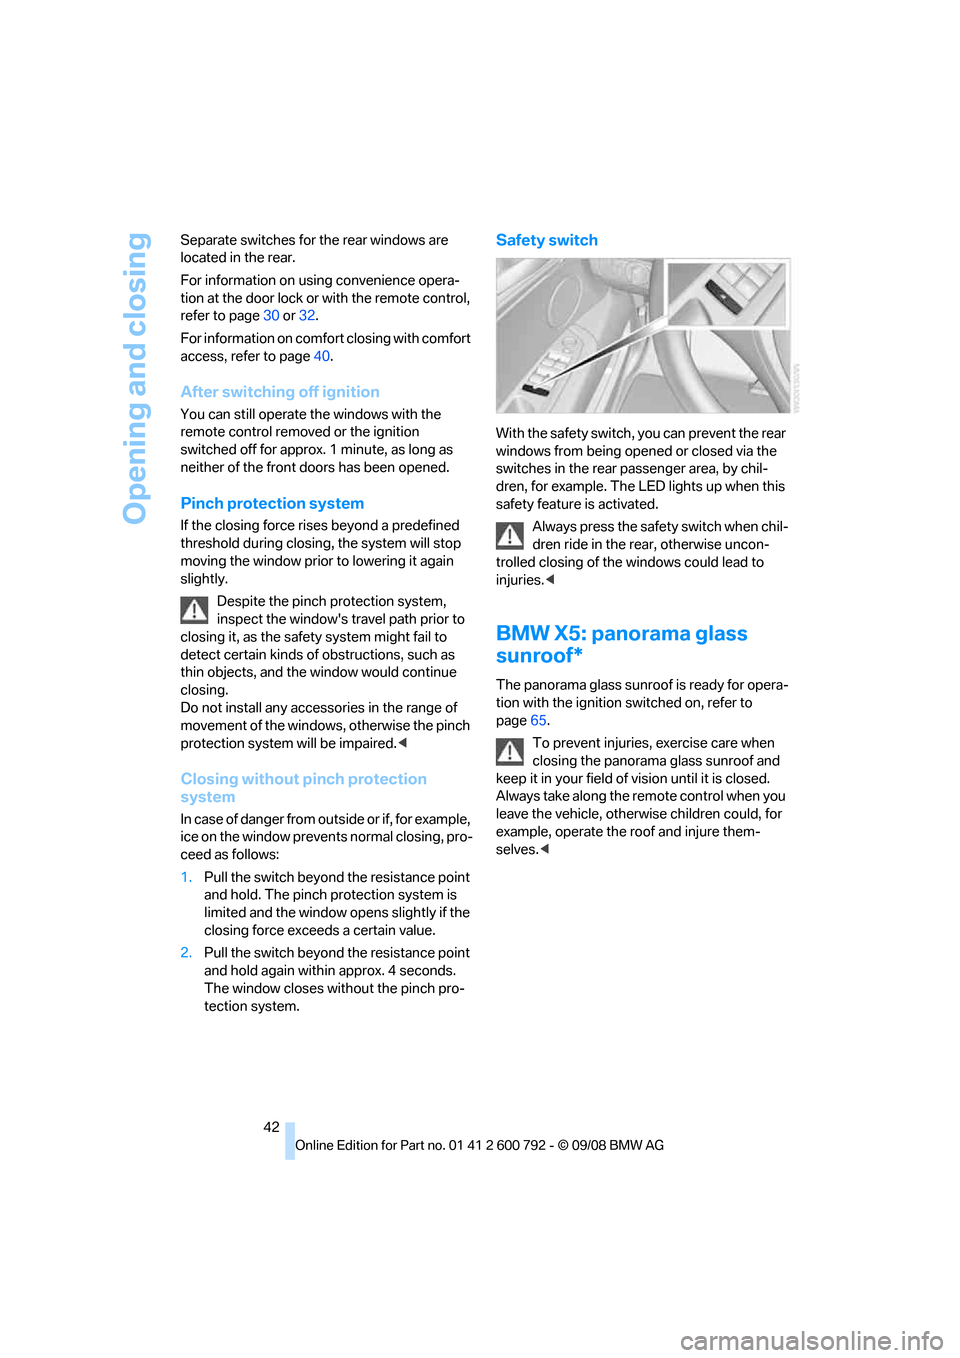
Safety switch
With the safety switch, you can prevent the rear
windows from being opened or closed via the
switches in the rear passenger area, by chil-
dren, for example. The LED lights up when this
safety feature is activated.
Always press the safety switch when chil-
dren ride in the re ar, otherwise uncon-
trolled closing of the windows could lead to
injuries. <
BMW X5: panorama glass
sunroof*
The panorama glass sunr oof is ready for opera-
tion with the ignition switched on, refer to
page 65.
To prevent injuries, exercise care when
closing the panorama glass sunroof and
keep it in your field of vision until it is closed.
Always take along the re mote control when you
leave the vehicle, otherwise children could, for
example, operate the roof and injure them-
selves. <
Page 66 of 317
Transporting children safely
64
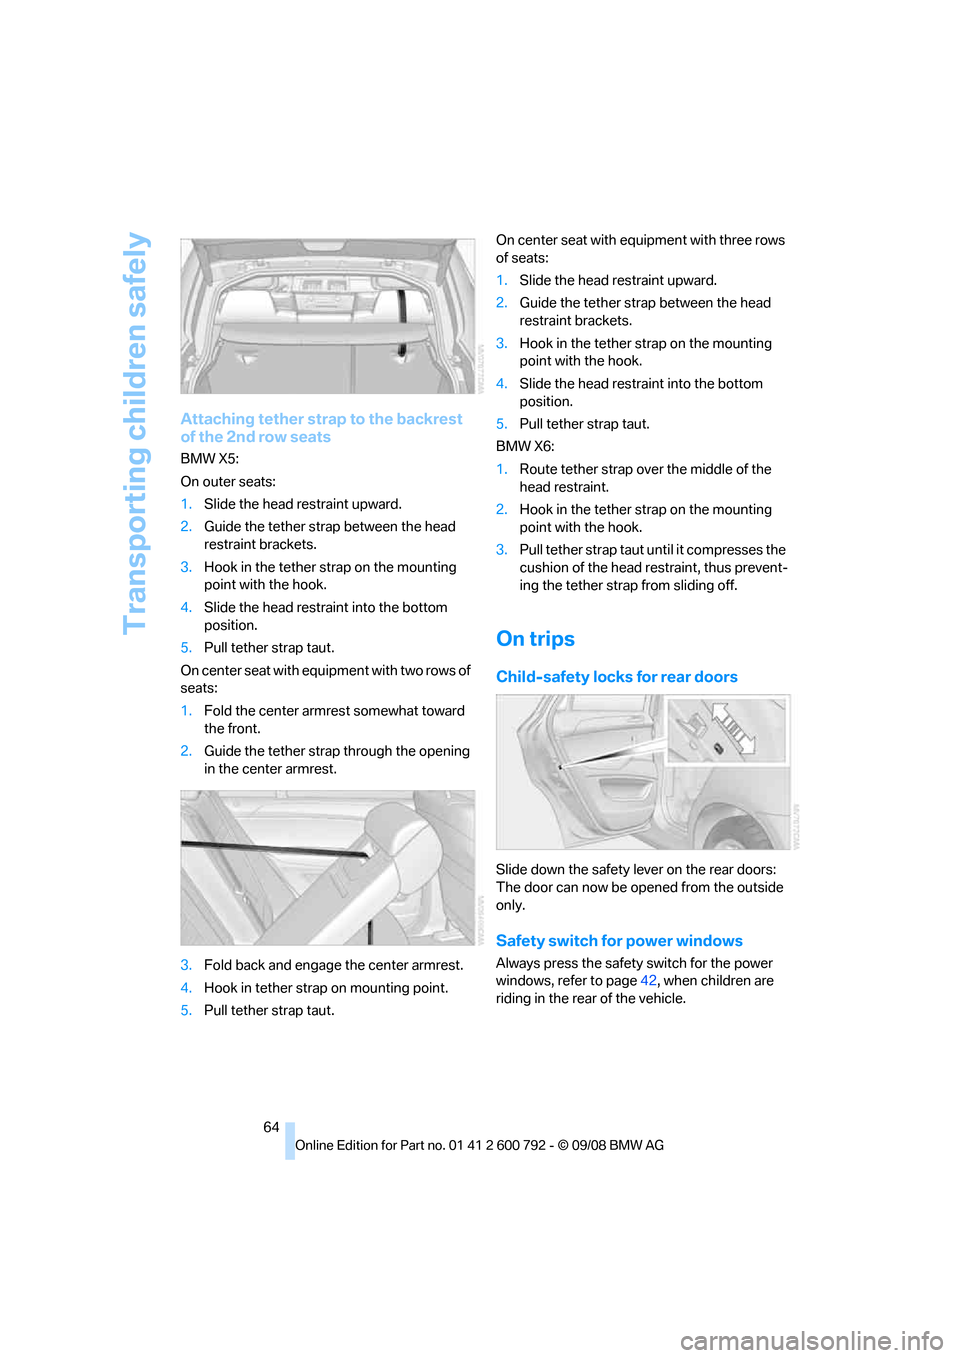
Attaching tether strap to the backrest
of the 2nd row seats
BMW X5:
On outer seats:
1.Slide the head re straint upward.
2. Guide the tether stra p between the head
restraint brackets.
3. Hook in the tether st rap on the mounting
point with the hook.
4. Slide the head restra int into the bottom
position.
5. Pull tether strap taut.
O n c e n t e r s e a t w i t h e q u i pment with two rows of
seats:
1. Fold the center armr est somewhat toward
the front.
2. Guide the tether strap through the opening
in the center armrest.
3. Fold back and engage the center armrest.
4. Hook in tether strap on mounting point.
5. Pull tether strap taut. On center seat with equipment with three rows
of seats:
1.
Slide the head restraint upward.
2. Guide the tether strap between the head
restraint brackets.
3. Hook in the tether st rap on the mounting
point with the hook.
4. Slide the head restraint into the bottom
position.
5. Pull tether strap taut.
BMW X6:
1. Route tether strap over the middle of the
head restraint.
2. Hook in the tether st rap on the mounting
point with the hook.
3. Pull tether strap taut until it compresses the
cushion of the head restraint, thus prevent-
ing the tether strap from sliding off.
On trips
Child-safety locks for rear doors
Slide down the safety le ver on the rear doors:
The door can now be opened from the outside
only.
Safety switch for power windows
Always press the safety switch for the power
windows, refer to page 42, when children are
riding in the rear of the vehicle.
Page 77 of 317
Controls
75Reference
At a glance
Driving tips
Communications
Navigation
Entertainment
Mobility
Windshield washer nozzles
Both windshield washer nozzles are automati-
cally heated with the engine running or the igni-
tion switched on.
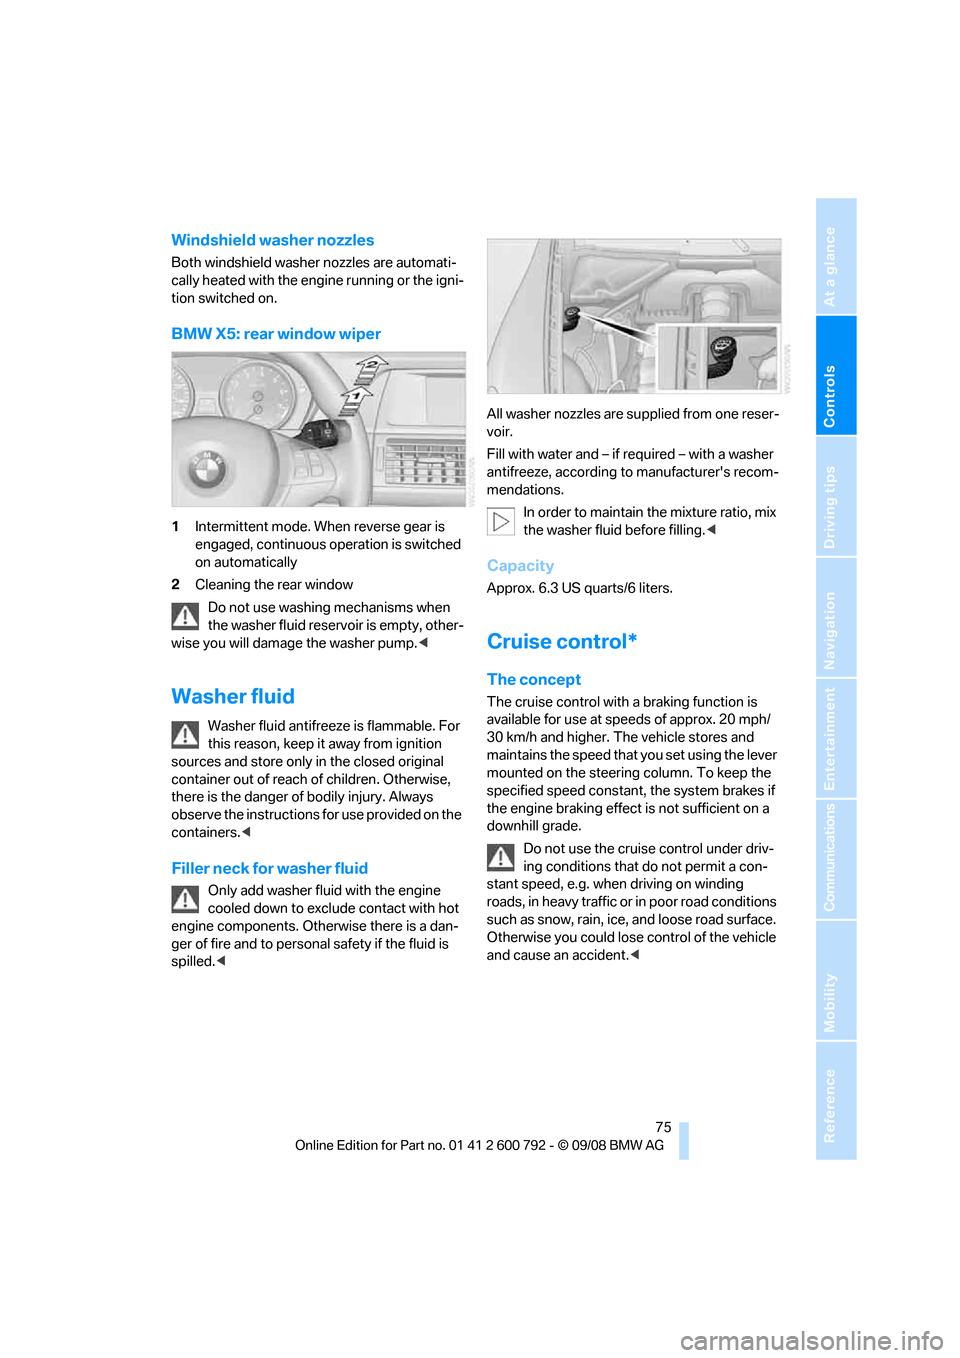
BMW X5: rear window wiper
1Intermittent mode. When reverse gear is
engaged, continuous operation is switched
on automatically
2 Cleaning the rear window
Do not use washing mechanisms when
the washer fluid reservoir is empty, other-
wise you will damage the washer pump. <
Washer fluid
Washer fluid antifreeze is flammable. For
this reason, keep it away from ignition
sources and store only in the closed original
container out of reach of children. Otherwise,
there is the danger of bodily injury. Always
observe the instructions for use provided on the
containers. <
Filler neck for washer fluid
Only add washer fluid with the engine
cooled down to excl ude contact with hot
engine components. Otherwise there is a dan-
ger of fire and to personal safety if the fluid is
spilled. < All washer nozzles are supplied from one reser-
voir.
Fill with water and – if re
quired – with a washer
antifreeze, according to manufacturer's recom-
mendations.
In order to maintain the mixture ratio, mix
the washer fluid before filling. <
Capacity
Approx. 6.3 US quarts/6 liters.
Cruise control*
The concept
The cruise control with a braking function is
available for use at speeds of approx. 20 mph/
30 km/h and higher. The vehicle stores and
maintains the speed that you set using the lever
mounted on the steering column. To keep the
specified speed constant, the system brakes if
the engine braking effect is not sufficient on a
downhill grade.
Do not use the cruise control under driv-
ing conditions that do not permit a con-
stant speed, e.g. when driving on winding
roads, in heavy traffic or in poor road conditions
such as snow, rain, ice, and loose road surface.
Otherwise you could lose control of the vehicle
and cause an accident. <
Page 84 of 317
Everything under control
82
Starting or stopping the
trip computer, or reset-
ting all values:
1. Select "Set" and pr ess the controller.
2. Select the desired menu item.
3. Press the controller.
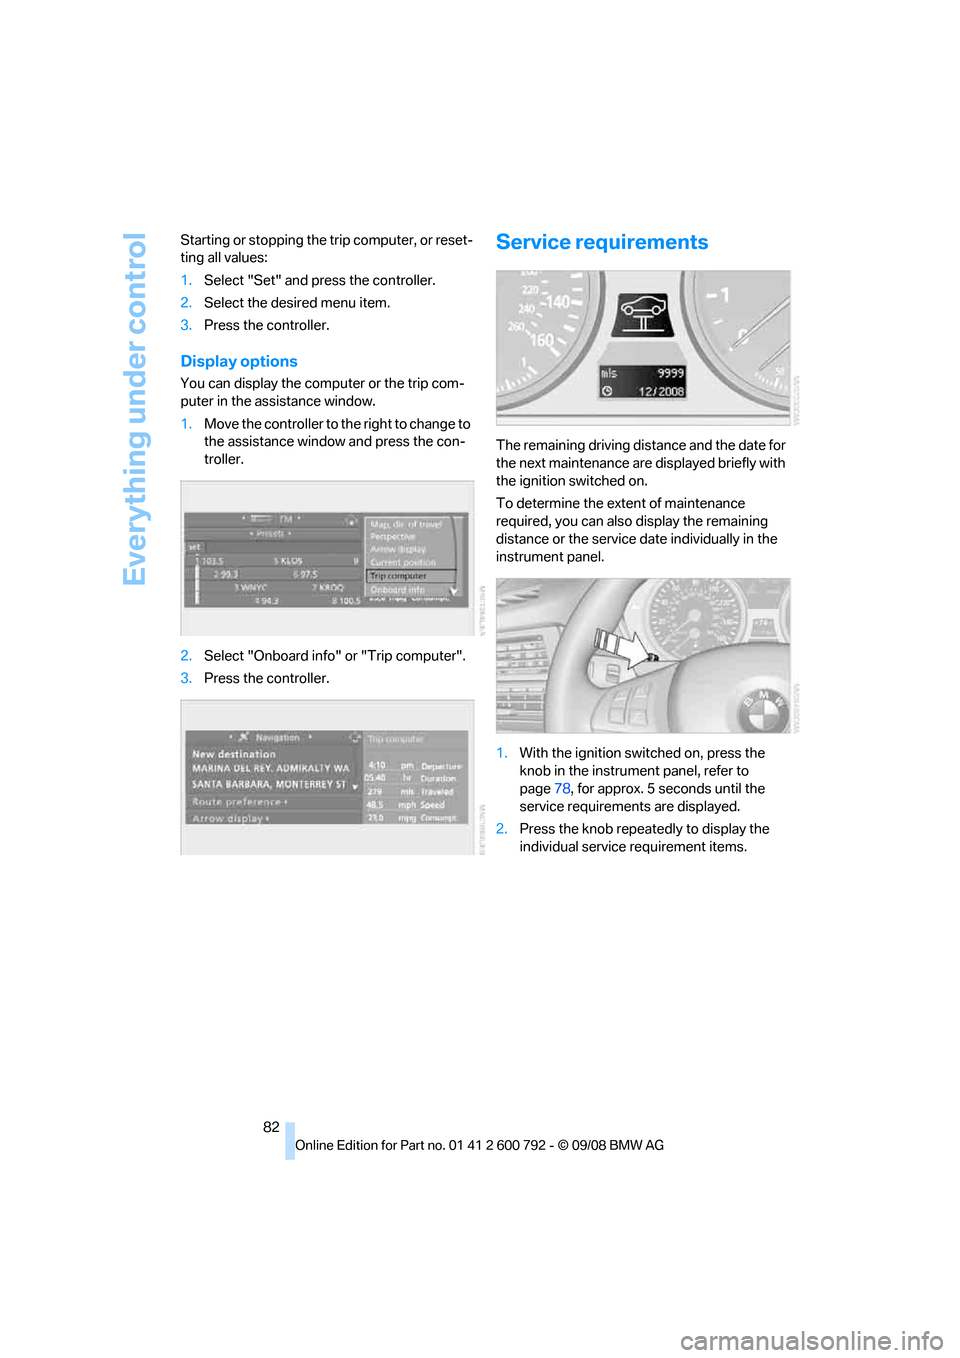
Display options
You can display the computer or the trip com-
puter in the assistance window.
1.Move the controller to the right to change to
the assistance window and press the con-
troller.
2. Select "Onboard info" or "Trip computer".
3. Press the controller.
Service requirements
The remaining driving dist ance and the date for
the next maintenance are displayed briefly with
the ignition switched on.
To determine the extent of maintenance
required, you can also display the remaining
distance or the service da te individually in the
instrument panel.
1. With the ignition switched on, press the
knob in the instrument panel, refer to
page 78, for approx. 5 seconds until the
service requirements are displayed.
2. Press the knob repeatedly to display the
individual service requirement items.
Page 94 of 317
Technology for comfort, convenience and safety
92
PDC with visual warning
You can also have the system show distances
to objects on the Control Display. Objects that
are farther away are already shown there before
a signal tone sounds.
The setting is stored for the remote control cur-
rently in use.
If the vehicle is equipped with a rear view cam-
era, refer to Displays on page 95.
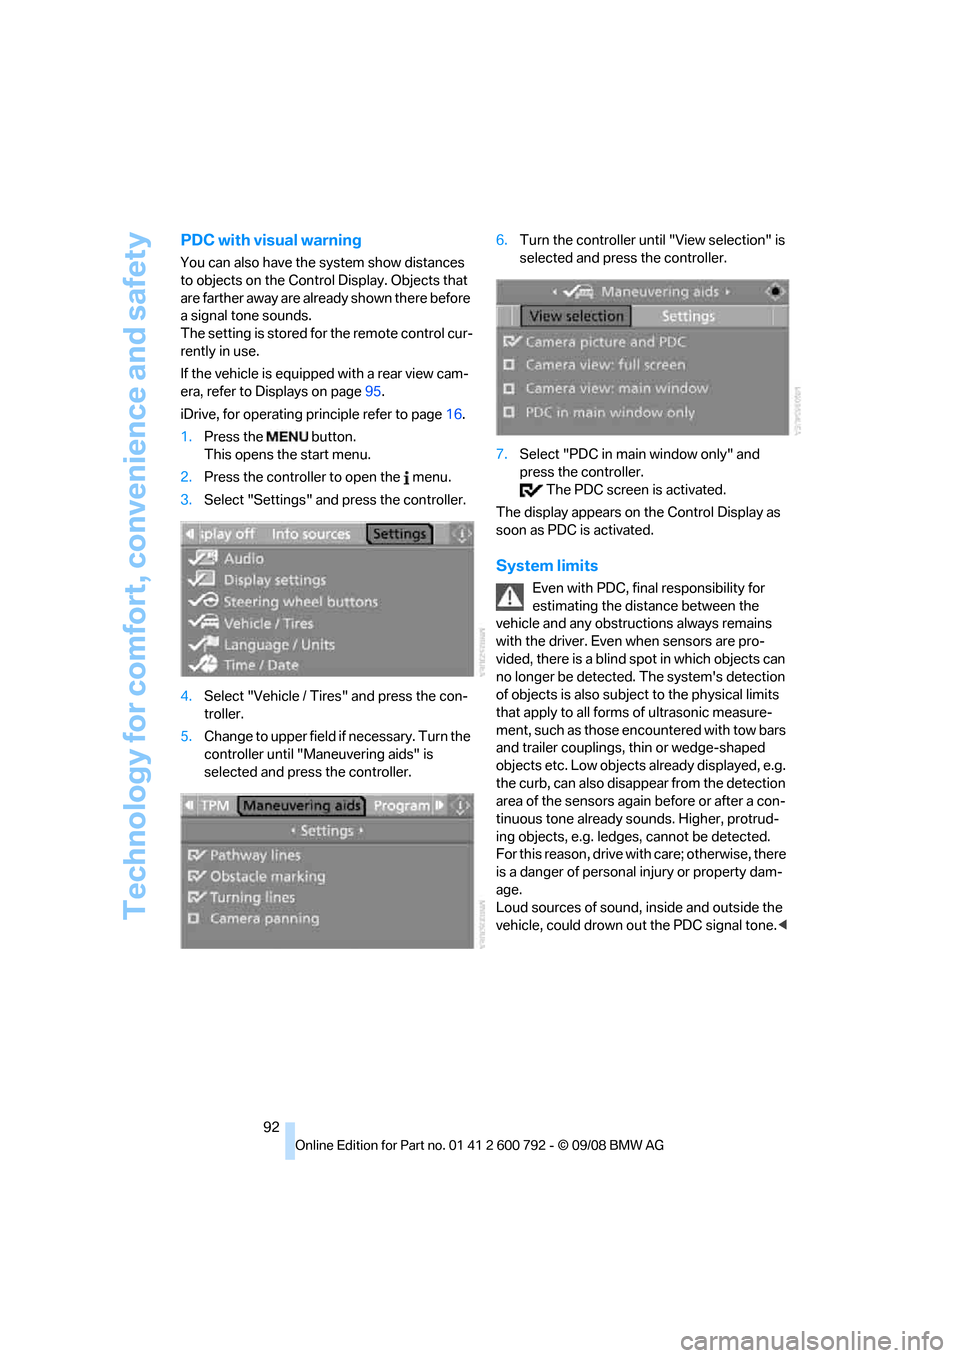
iDrive, for operating pr inciple refer to page16.
1. Press the button.
This opens the start menu.
2. Press the controller to open the menu.
3. Select "Settings" and press the controller.
4. Select "Vehicle / Tire s" and press the con-
troller.
5. Change to upper field if necessary. Turn the
controller until "Maneuvering aids" is
selected and press the controller. 6.
Turn the controller until "View selection" is
selected and press the controller.
7. Select "PDC in main window only" and
press the controller.
The PDC screen is activated.
The display appears on the Control Display as
soon as PDC is activated.
System limits
Even with PDC, final responsibility for
estimating the distance between the
vehicle and any obstructions always remains
with the driver. Even when sensors are pro-
vided, there is a blind sp ot in which objects can
no longer be detected. The system's detection
of objects is also subjec t to the physical limits
that apply to all forms of ultrasonic measure-
ment, such as those encountered with tow bars
and trailer couplings, th in or wedge-shaped
objects etc. Low objects already displayed, e.g.
the curb, can also disappear from the detection
area of the sensors again before or after a con-
tinuous tone already sounds. Higher, protrud-
ing objects, e.g. ledg es, cannot be detected.
For this reason, drive with care; otherwise, there
is a danger of personal injury or property dam-
age.
Loud sources of sound, inside and outside the
vehicle, could drown ou t the PDC signal tone.<
Page 97 of 317
Controls
95Reference
At a glance
Driving tips
Communications
Navigation
Entertainment
Mobility
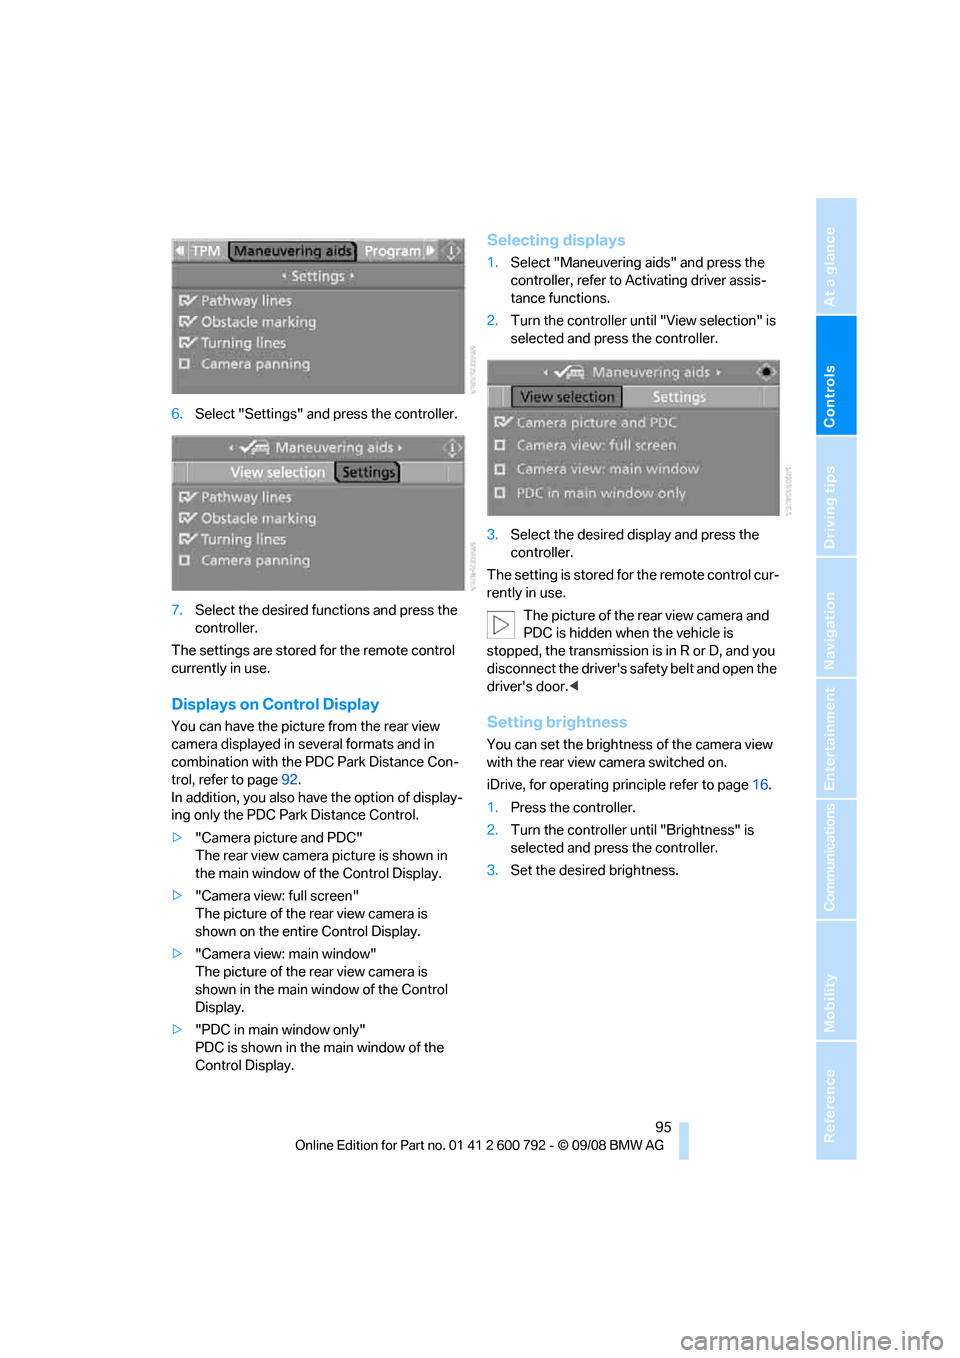
6.Select "Settings" and press the controller.
7. Select the desired fu nctions and press the
controller.
The settings are stored for the remote control
currently in use.
Displays on Control Display
You can have the picture from the rear view
camera displayed in se veral formats and in
combination with the PDC Park Distance Con-
trol, refer to page 92.
In addition, you also have the option of display-
ing only the PDC Park Distance Control.
> "Camera picture and PDC"
The rear view camera picture is shown in
the main window of the Control Display.
> "Camera view: full screen"
The picture of the rear view camera is
shown on the entire Control Display.
> "Camera view: main window"
The picture of the rear view camera is
shown in the main window of the Control
Display.
> "PDC in main window only"
PDC is shown in the main window of the
Control Display.
Selecting displays
1.Select "Maneuvering aids" and press the
controller, refer to Activating driver assis-
tance functions.
2. Turn the controller until "View selection" is
selected and press the controller.
3. Select the desired display and press the
controller.
The setting is stored for the remote control cur-
rently in use. The picture of the rear view camera and
PDC is hidden when the vehicle is
stopped, the transmission is in R or D, and you
disconnect the driver's safety belt and open the
driver's door. <
Setting brightness
You can set the brightness of the camera view
with the rear view camera switched on.
iDrive, for operating pr inciple refer to page16.
1. Press the controller.
2. Turn the controller until "Brightness" is
selected and press the controller.
3. Set the desired brightness.
Page 107 of 317
Controls
105Reference
At a glance
Driving tips
Communications
Navigation
Entertainment
Mobility
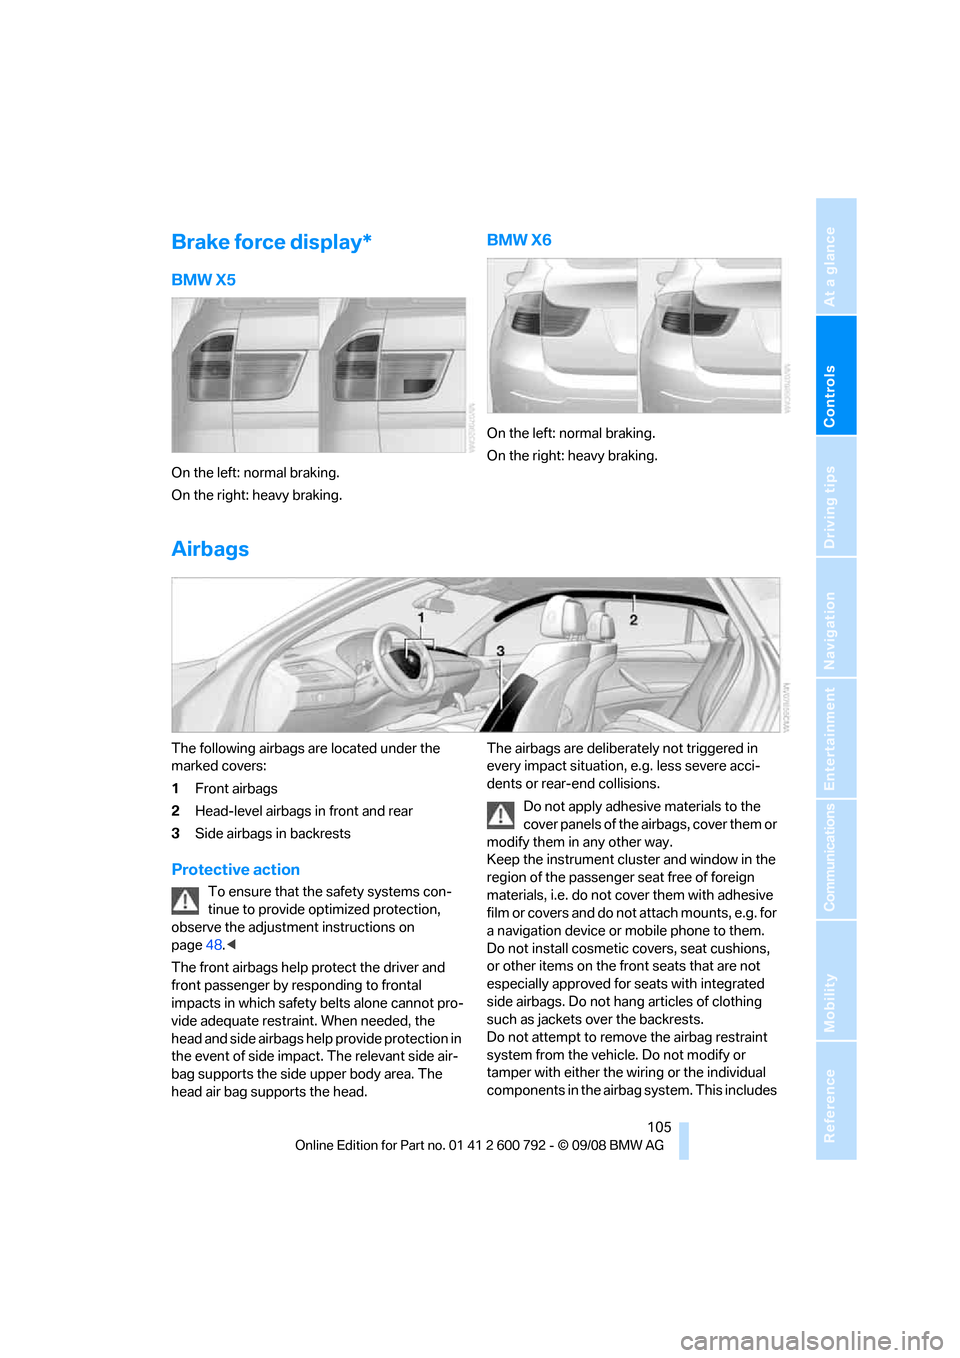
Brake force display*
BMW X5
On the left: normal braking.
On the right: heavy braking.
BMW X6
On the left: normal braking.
On the right: heavy braking.
Airbags
The following airbags are located under the
marked covers:
1Front airbags
2 Head-level airbags in front and rear
3 Side airbags in backrests
Protective action
To ensure that the safety systems con-
tinue to provide optimized protection,
observe the adjustment instructions on
page 48.<
The front airbags help protect the driver and
front passenger by re sponding to frontal
impacts in which safety belts alone cannot pro-
vide adequate restraint. When needed, the
head and side airbags help provide protection in
the event of side impact. The relevant side air-
bag supports the side upper body area. The
head air bag supports the head. The airbags are deliberately not triggered in
every impact situation, e.g. less severe acci-
dents or rear-end collisions.
Do not apply adhesive materials to the
cover panels of the airbags, cover them or
modify them in any other way.
Keep the instrument cluster and window in the
region of the passenger seat free of foreign
materials, i.e. do not co ver them with adhesive
film or covers and do not attach mounts, e.g. for
a navigation device or mobile phone to them.
Do not install cosmetic covers, seat cushions,
or other items on the fr ont seats that are not
especially approved for seats with integrated
side airbags. Do not hang articles of clothing
such as jackets over the backrests.
Do not attempt to remove the airbag restraint
system from the vehicle. Do not modify or
tamper with either the wiring or the individual
components in the airbag system. This includes