key BMW X6M 2014 F86 Owner's Manual
[x] Cancel search | Manufacturer: BMW, Model Year: 2014, Model line: X6M, Model: BMW X6M 2014 F86Pages: 251, PDF Size: 7.35 MB
Page 28 of 251
2."Split screen"
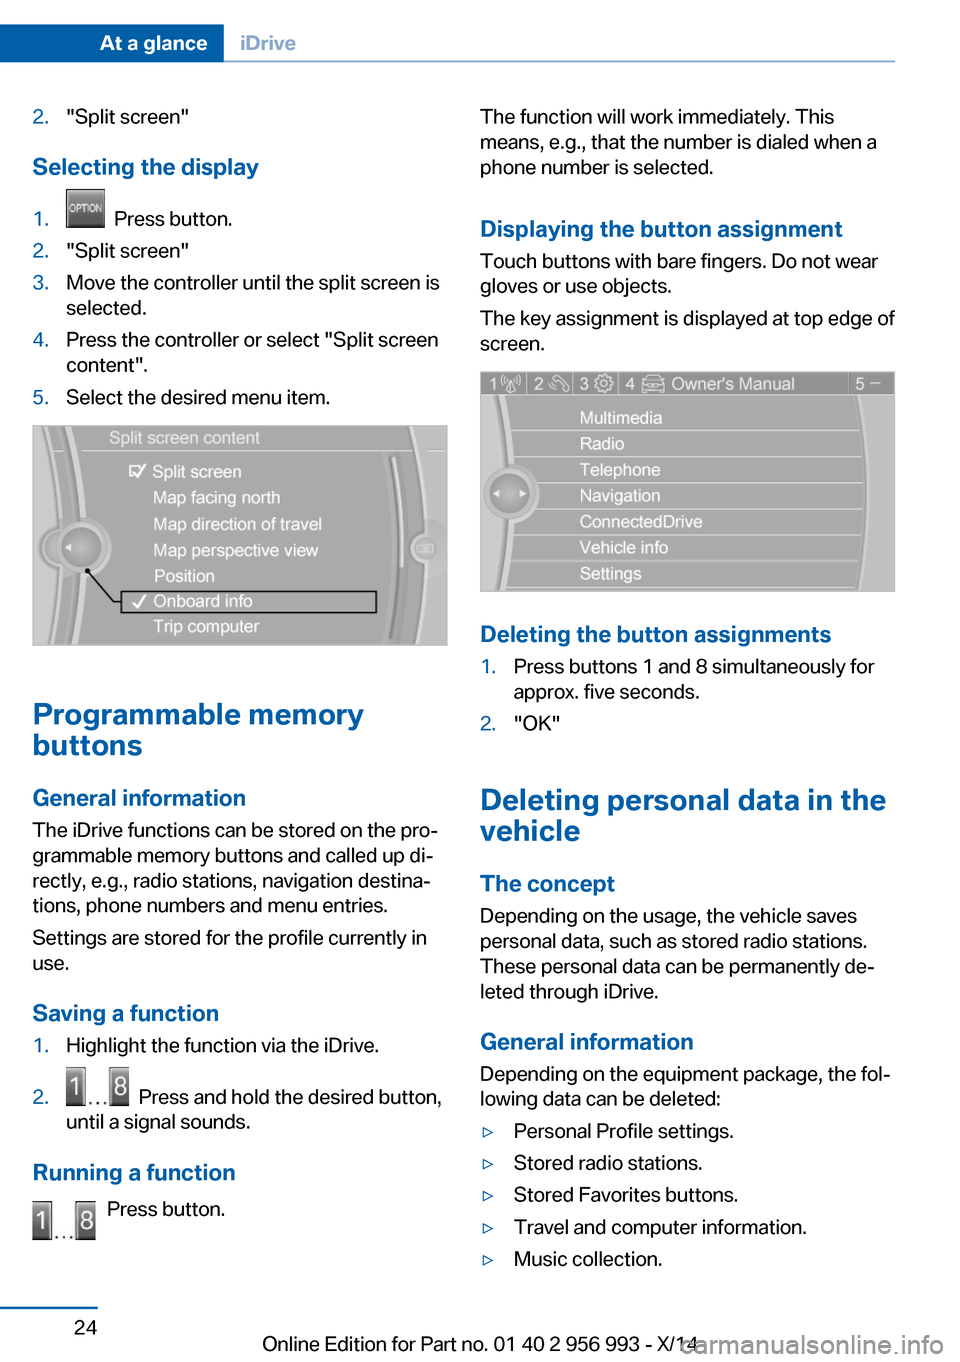
Selecting the display
1. Press button.2."Split screen"3.Move the controller until the split screen is
selected.4.Press the controller or select "Split screen
content".5.Select the desired menu item.
Programmable memory
buttons
General information
The iDrive functions can be stored on the pro‐
grammable memory buttons and called up di‐
rectly, e.g., radio stations, navigation destina‐
tions, phone numbers and menu entries.
Settings are stored for the profile currently in
use.
Saving a function
1.Highlight the function via the iDrive.2. Press and hold the desired button,
until a signal sounds.
Running a function
Press button.
The function will work immediately. This
means, e.g., that the number is dialed when a
phone number is selected.
Displaying the button assignment
Touch buttons with bare fingers. Do not wear
gloves or use objects.
The key assignment is displayed at top edge of
screen.
Deleting the button assignments
1.Press buttons 1 and 8 simultaneously for
approx. five seconds.2."OK"
Deleting personal data in the
vehicle
The concept
Depending on the usage, the vehicle saves
personal data, such as stored radio stations.
These personal data can be permanently de‐
leted through iDrive.
General information
Depending on the equipment package, the fol‐
lowing data can be deleted:
▷Personal Profile settings.▷Stored radio stations.▷Stored Favorites buttons.▷Travel and computer information.▷Music collection.Seite 24At a glanceiDrive24
Online Edition for Part no. 01 40 2 956 993 - X/14
Page 38 of 251
Opening and closingVehicle features and options
This chapter describes all standard, country-
specific and optional features offered with the
series. It also describes features that are not
necessarily available in your car, e. g., due to
the selected options or country versions. This
also applies to safety-related functions and
systems.
Remote control/key
General information The vehicle is supplied with two remote con‐
trols with integrated key.
Every remote control holds a replaceable bat‐
tery.
You may set the key functions depending on
the optional features and country-specific ver‐
sion. For Settings, refer to page 45.
The vehicle stores personal settings for every
remote control. Personal Profile, refer to
page 35.
The remote controls hold information on re‐
quired maintenance. Service data in the re‐
mote control, refer to page 211.
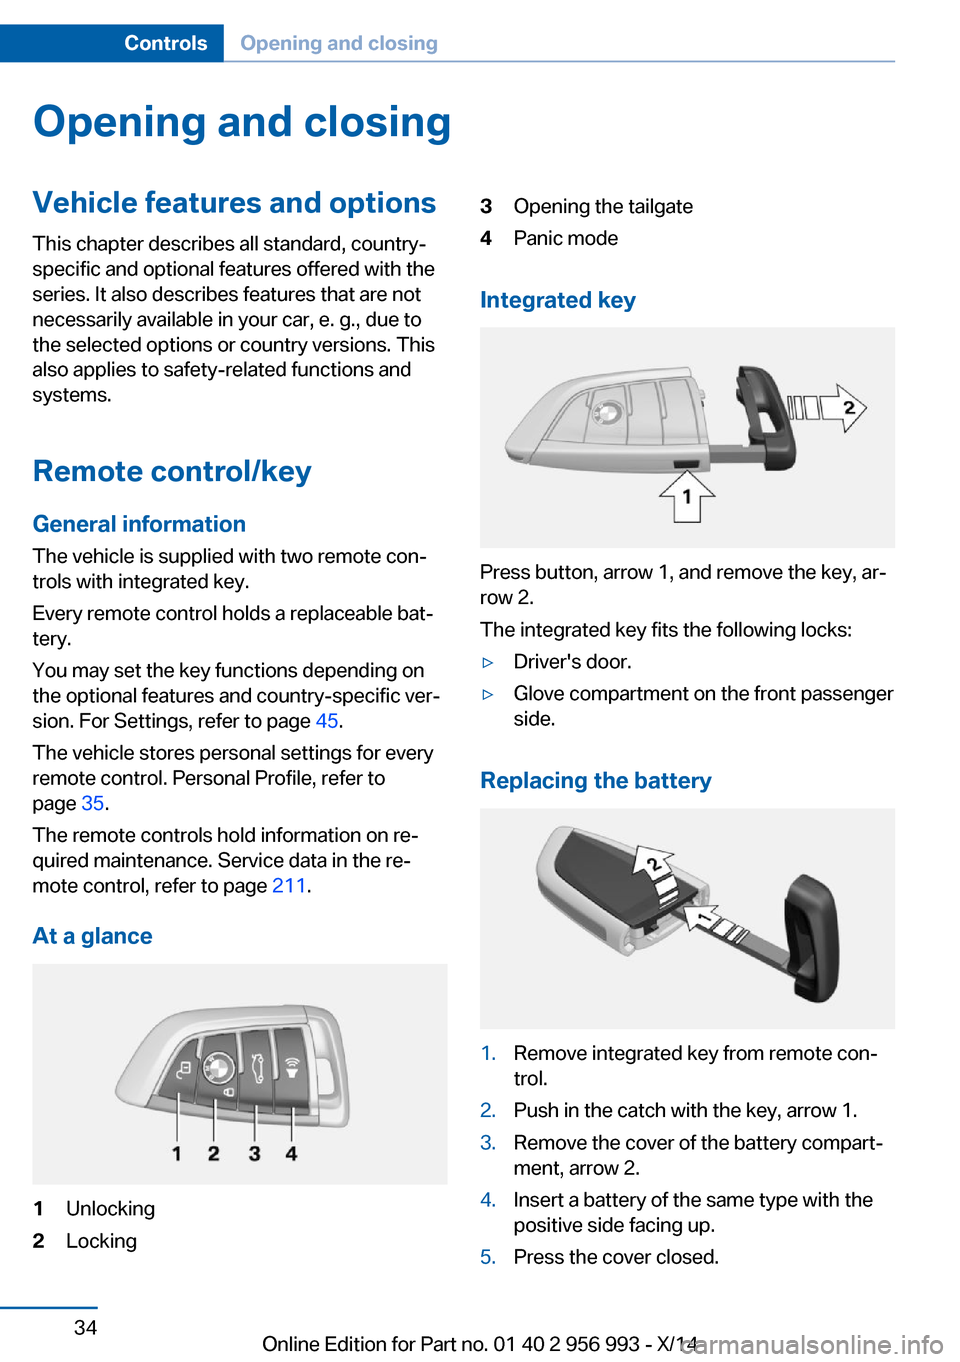
At a glance1Unlocking2Locking3Opening the tailgate4Panic mode
Integrated key
Press button, arrow 1, and remove the key, ar‐
row 2.
The integrated key fits the following locks:
▷Driver's door.▷Glove compartment on the front passenger
side.
Replacing the battery
1.Remove integrated key from remote con‐
trol.2.Push in the catch with the key, arrow 1.3.Remove the cover of the battery compart‐
ment, arrow 2.4.Insert a battery of the same type with the
positive side facing up.5.Press the cover closed.Seite 34ControlsOpening and closing34
Online Edition for Part no. 01 40 2 956 993 - X/14
Page 43 of 251
Without remote control
From the outside Locking from the outside
Do not lock the vehicle from the outside
with people inside the car, as the vehicle can‐
not be unlocked from inside without special knowledge.◀
Remove the key before pulling the door
handle
Before pulling the outside door handle, remove
the key to avoid damaging the paintwork and
the key.◀
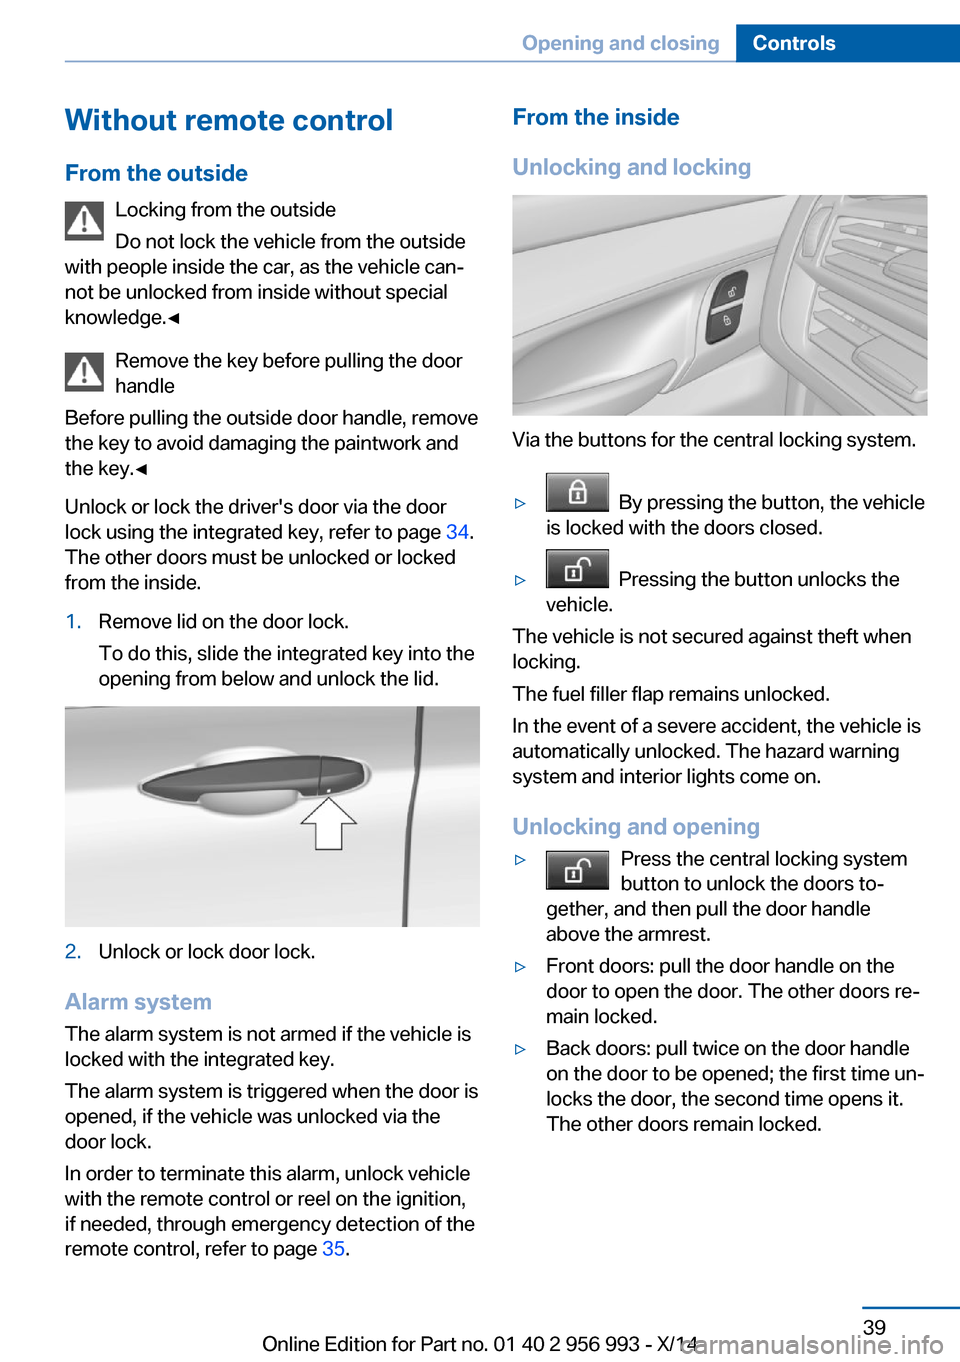
Unlock or lock the driver's door via the door
lock using the integrated key, refer to page 34.
The other doors must be unlocked or locked
from the inside.1.Remove lid on the door lock.
To do this, slide the integrated key into the
opening from below and unlock the lid.2.Unlock or lock door lock.
Alarm system
The alarm system is not armed if the vehicle is
locked with the integrated key.
The alarm system is triggered when the door is
opened, if the vehicle was unlocked via the
door lock.
In order to terminate this alarm, unlock vehicle
with the remote control or reel on the ignition,
if needed, through emergency detection of the
remote control, refer to page 35.
From the inside
Unlocking and locking
Via the buttons for the central locking system.
▷ By pressing the button, the vehicle
is locked with the doors closed.▷ Pressing the button unlocks the
vehicle.
The vehicle is not secured against theft when
locking.
The fuel filler flap remains unlocked.
In the event of a severe accident, the vehicle is
automatically unlocked. The hazard warning
system and interior lights come on.
Unlocking and opening
▷Press the central locking system
button to unlock the doors to‐
gether, and then pull the door handle
above the armrest.▷Front doors: pull the door handle on the
door to open the door. The other doors re‐
main locked.▷Back doors: pull twice on the door handle
on the door to be opened; the first time un‐
locks the door, the second time opens it.
The other doors remain locked.Seite 39Opening and closingControls39
Online Edition for Part no. 01 40 2 956 993 - X/14
Page 49 of 251
Avoiding unintentional closing
In situations in which the opened tailgate
should not to be closed with no-touch activa‐
tion, ensure that the remote control is located
beyond the range of the sensor, at least
5 ft/1.50 m from the rear of the car.
Otherwise, the tailgate may be closed inadver‐
tently, for example by an unintentional or mis‐
interpreted movement of the foot.◀
Keep the closing path clear
Make sure that the closing path of the
tailgate is clear; otherwise, injuries may re‐
sult.◀
Do not place the remote control in the
cargo area
Take the remote control with you and do not
leave it in the cargo area; otherwise, the re‐
mote control is locked inside the vehicle when
the tailgate is closed.◀
Malfunction
Remote control detection by the vehicle can
among others be malfunctioning under the fol‐
lowing circumstances:▷Interference of the radio connection from
transmission towers or other equipment
with high transmit power.▷Shielding of the remote control due to
metal objects.▷Interference of the radio connection from
mobile phones or other electronic devices
in direct proximity.
Do not transport the remote control together
with metal objects or electronic devices.
In the case of a malfunction, unlock and lock
the vehicle using the buttons of the remote
control or using the integrated key, refer to
page 39.
Adjusting
Unlocking The settings are saved in the active profile, re‐
fer to page 35.
Doors1."Settings"2."Doors/key"3. Select the symbol.4.Select the desired function:▷"Driver's door only"
Only the driver's door and the fuel filler
flap are unlocked. Pressing again un‐
locks the entire vehicle.▷"All doors"
The entire vehicle is unlocked.
Tailgate
Depending on optional features and country
version, this setting is not offered in some
cases.
1."Settings"2."Doors/key"3. Select the symbol.4.Select the desired function:▷"Tailgate"
The tailgate is opened.▷"Tailgate + door(s)"
The tailgate is opened and the doors
unlocked.
Confirmation signals from the vehicle
The settings are saved in the active profile, re‐
fer to page 35.
1."Settings"2."Doors/key"3.Deactivate or activate the desired confir‐
mation signals.Seite 45Opening and closingControls45
Online Edition for Part no. 01 40 2 956 993 - X/14
Page 50 of 251
▷"Acoustic sig. lock/unlock"▷"Flash when lock/unlock"
Automatic lockingThe settings are saved in the active profile, re‐fer to page 35.
1."Settings"2."Doors/key"3.Select the desired function:▷"Lock if no door is opened"
The vehicle locks automatically after a
short period of time if no door is
opened.▷"Lock after start driving"
The vehicle locks automatically after
you drive off.
Retrieving the seat, mirror, and
steering wheel settings
The driver's seat, exterior mirror, and steering
wheel position adjusted last will be stored for
the active profile.
When the vehicle is unlocked, these positions
are automatically retrieved if this function was
activated.
Pinch hazard when moving back the seat
If this function is used, first make sure
that the footwell behind the driver's seat is
empty. Otherwise, people might get injured or
objects damaged when the seat is moved
back.◀
The adjustment procedure is interrupted:
▷When a seat position reel is pressed.▷When a button of the seat, mirror, and
steering wheel memory is pressed briefly.
Activating the setting
1."Settings"2."Doors/key"3."Last seat position autom."Alarm system
The conceptWhen the vehicle is locked, the vehicle alarm
system responds to:▷Opening a door, the hood or the tailgate.▷Movements in the interior.▷Changes in the vehicle tilt, e. g., during at‐
tempts at stealing a wheel or when towing
the car.▷Disconnected battery voltage.
The alarm system briefly signals tampering:
▷By sounding an acoustic alarm.▷By switching on the hazard warning sys‐
tem.▷By flashing the daytime running lights.
Arming and disarming the alarm
system
When you unlock or lock the vehicle, either
with the remote control or via the Comfort Ac‐
cess, the alarm system is disarmed or armed at
the same time.
Door lock and armed alarm systemThe alarm system is triggered when the door is
opened, when the vehicle is unlocked via the
door lock.
Tailgate and armed alarm system
The tailgate can be opened even when the
alarm system is armed.
After the tailgate is closed, it is locked and
monitored again when the doors are locked.
The hazard warning system flashes once.
Panic mode You can trigger the alarm system if you find
yourself in a dangerous situation.
Press button on the remote control for
at least 3 seconds.
Seite 46ControlsOpening and closing46
Online Edition for Part no. 01 40 2 956 993 - X/14
Page 172 of 251
Storage compartmentsVehicle features and optionsThis chapter describes all standard, country-
specific and optional features offered with the
series. It also describes features that are not
necessarily available in your car, e. g., due to
the selected options or country versions. This
also applies to safety-related functions and
systems.
Hints No loose objects in the car's interior
Do not stow any objects in the car's inte‐
rior without securing them; otherwise, they
may present a danger to occupants e.g., during
braking and evasive maneuvers.◀
Do not place anti-slip mats on the dash‐
board
Do not place anti-slip mats on the dashboard.
The mat materials could damage the dash‐
board.◀
Storage compartments The following storage compartments are avail‐
able in the vehicle interior:▷Glove compartment on the front passenger
side, refer to page 168.▷Glove compartment on the driver's side,
refer to page 169.▷Compartments in the doors, refer to
page 169.▷Storage compartment on the center arm‐
rest, refer to page 169.▷Center armrest, refer to page 169.▷Glasses compartment, refer to page 170.Glove compartment
Front passenger side
Note Close the glove compartment again im‐
mediately
Close the glove compartment immediately af‐
ter use while driving; otherwise, injury may oc‐
cur during accidents.◀
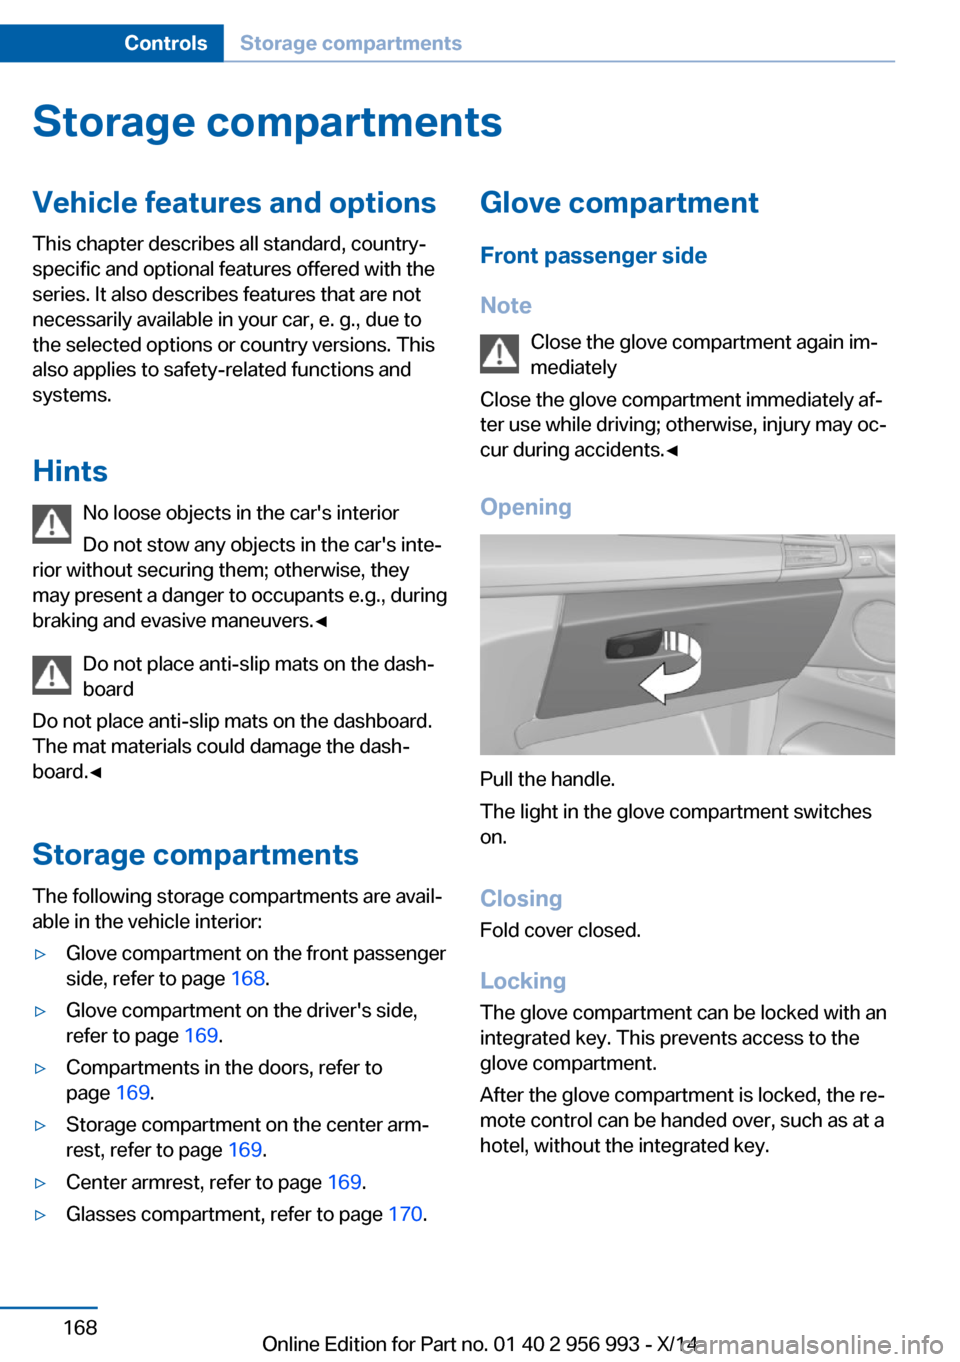
Opening
Pull the handle.
The light in the glove compartment switches
on.
ClosingFold cover closed.
Locking
The glove compartment can be locked with an
integrated key. This prevents access to the
glove compartment.
After the glove compartment is locked, the re‐
mote control can be handed over, such as at a
hotel, without the integrated key.
Seite 168ControlsStorage compartments168
Online Edition for Part no. 01 40 2 956 993 - X/14
Page 241 of 251
Brake assistant 129
Brake discs, break-in 177
Brake force display 126
Brake lights, adaptive 126
Brake lights, brake force dis‐ play 126
Brake pads, break-in 177
Braking, hints 178
Breakdown assis‐ tance 220, 221
Break-in 177
Brightness of Control Dis‐ play 98
Bulb replacement 214
Bulb replacement, front 215
Bulb replacement, rear 216
Bulbs and lights 214
Button, Start/Stop 68
Bypassing, refer to Jump- starting 222
C
California Proposition 65 Warning 7
Calling up mirror adjust‐ ment 46
Calling up seat adjust‐ ment 46
Calling up steering wheel ad‐ justment 46
Camera, care 228
Camera, rearview cam‐ era 140
Camera, Side View 145
Camera, Top View 143
Can holder, refer to Cu‐ pholder 171
Car battery 218
Car care products 226
Care, displays 228
Care, vehicle 226
Cargo 181
Cargo area 164, 166
Cargo area, enlarg‐ ing 164 , 166 Cargo area partition net 165
Cargo area, storage compart‐ ments 172
Cargo cover 164, 166
Cargo, securing 182
Cargo straps, securing cargo 182
Car key, refer to Remote con‐ trol 34
Carpet, care 228
Car wash 225
Catalytic converter, refer to Hot exhaust system 178
CBS Condition Based Serv‐ ice 211
CD/Multimedia, see user's manual for Navigation, En‐
tertainment and Communi‐
cation
Center armrest 169
Center console 16
Central locking system 39
Central screen, refer to Con‐ trol Display 18
Changes, technical, refer to Safety 7
Changing parts 213
Changing wheels 216
Changing wheels/tires 199
Chassis number, see vehicle identification number 9
Check Control 85
Checking the engine oil level electronically 206
Checking the oil level elec‐ tronically 206
Children, seating position 63
Children, transporting safely 63
Child restraint fixing sys‐ tem 63
Child restraint fixing system LATCH 65
Child restraint fixing systems, mounting 63
Child safety locks 67 Child seat, mounting 63
Child seats 63
Chrome parts, care 227
Cigarette lighter 160
Cleaning displays 228
Climate control 150
Clock 89
Closing/opening via door lock 39
Closing/opening with remote control 37
Closing the tailgate with no- touch activation 44
Clothes hooks 172
Cockpit 14
Combination reel, refer to Turn signals 75
Combination reel, refer to Wiper system 75
Comfort Access 43
Compact wheel 216
Compartments in the doors 169
Compass 96
Compound brake 176
Compressor 200
Computer 95
Condensation on win‐ dows 151
Condensation under the vehi‐ cle 179
Condition Based Service CBS 211
Confirmation signal 45
ConnectedDrive, see user's manual for Navigation, En‐
tertainment and Communi‐
cation
ConnectedDrive Services
Connecting electrical devi‐ ces 161
Control Display 18
Control Display, settings 97
Controller 18, 19
Control systems, driving sta‐ bility 129 Seite 237Everything from A to ZReference237
Online Edition for Part no. 01 40 2 956 993 - X/14
Page 244 of 251
IIce warning, see External temperature warning 89
Icy roads, see External tem‐ perature warning 89
Identification marks, tires 196
Identification number, see ve‐ hicle identification num‐
ber 9
iDrive 18
Ignition key, refer to Remote control 34
Ignition off 68
Ignition on 68
Indication of a flat tire 110 , 112
Indicator and alarm lamps, see Check Control 85
Indicator lamp, see Check Control 85
Individual air distribution 151
Individual settings, refer to M Drive 61
Individual settings, refer to Personal Profile 35
Inflation pressure, tires 194
Inflation pressure warning FTM, tires 112
Info display, refer to Com‐ puter 95
Initialize, Tire Pressure Moni‐ tor TPM 110
Initializing, Flat Tire Monitor FTM 112
Instrument cluster 84
Instrument cluster, electronic displays 84
Instrument lighting 104
Integrated key 34
Integrated Owner's Manual in the vehicle 29
Intelligent Emergency Re‐ quest 220
Intelligent Safety 113 Intensity, AUTO pro‐
gram 151
Interior equipment 157
Interior lights 104
Interior lights via remote con‐ trol 37
Interior motion sensor 47
Interior rearview mirror, auto‐ matic dimming feature 60
Interval display, service re‐ quirements 92
J Jacking points for the vehicle jack 216
Jump-starting 222
K Key/remote control 34
Keyless Go, refer to Comfort Access 43
Key Memory, refer to Per‐ sonal Profile 35
Knee airbag 106
L Lamp replacement 214
Lamp replacement, front 215
Lamp replacement, rear 216
Lane departure warning 123
Lane margin, warning 123
Language on Control Dis‐ play 98
Lashing eyes, securing cargo 182
LATCH child restraint sys‐ tem 65
Launch Control 82
Leather, care 227
LED front fog lights, bulb re‐ placement 216
LED headlights, bulb replace‐ ment 215 LEDs, light-emitting di‐
odes 214
Letters and numbers, enter‐ ing 25
Light alloy wheels, care 227
Light control 102
Light-emitting diodes, LEDs 214
Lighting 101
Lighting via remote con‐ trol 37
Light reel 101
Lights 101
Lights and bulbs 214
Load 182
Loading 181
Lock, door 39
Locking/unlocking via door lock 39
Locking/unlocking with re‐ mote control 37
Locking, automatic 46
Locking, settings 45
Lock, power window 49
Locks, doors, and win‐ dows 67
Low beams 101
Low beams, automatic, refer to High-beam Assistant 103
Lower back support 53
Lower tailgate 42
Low Speed Assistant 79
Luggage rack, see Roof- mounted luggage rack 183
Lumbar support 53
M
Maintenance 211
Maintenance require‐ ments 211
Maintenance, service require‐ ments 92
Maintenance system, BMW 211
Make-up mirror 159 Seite 240ReferenceEverything from A to Z240
Online Edition for Part no. 01 40 2 956 993 - X/14
Page 245 of 251
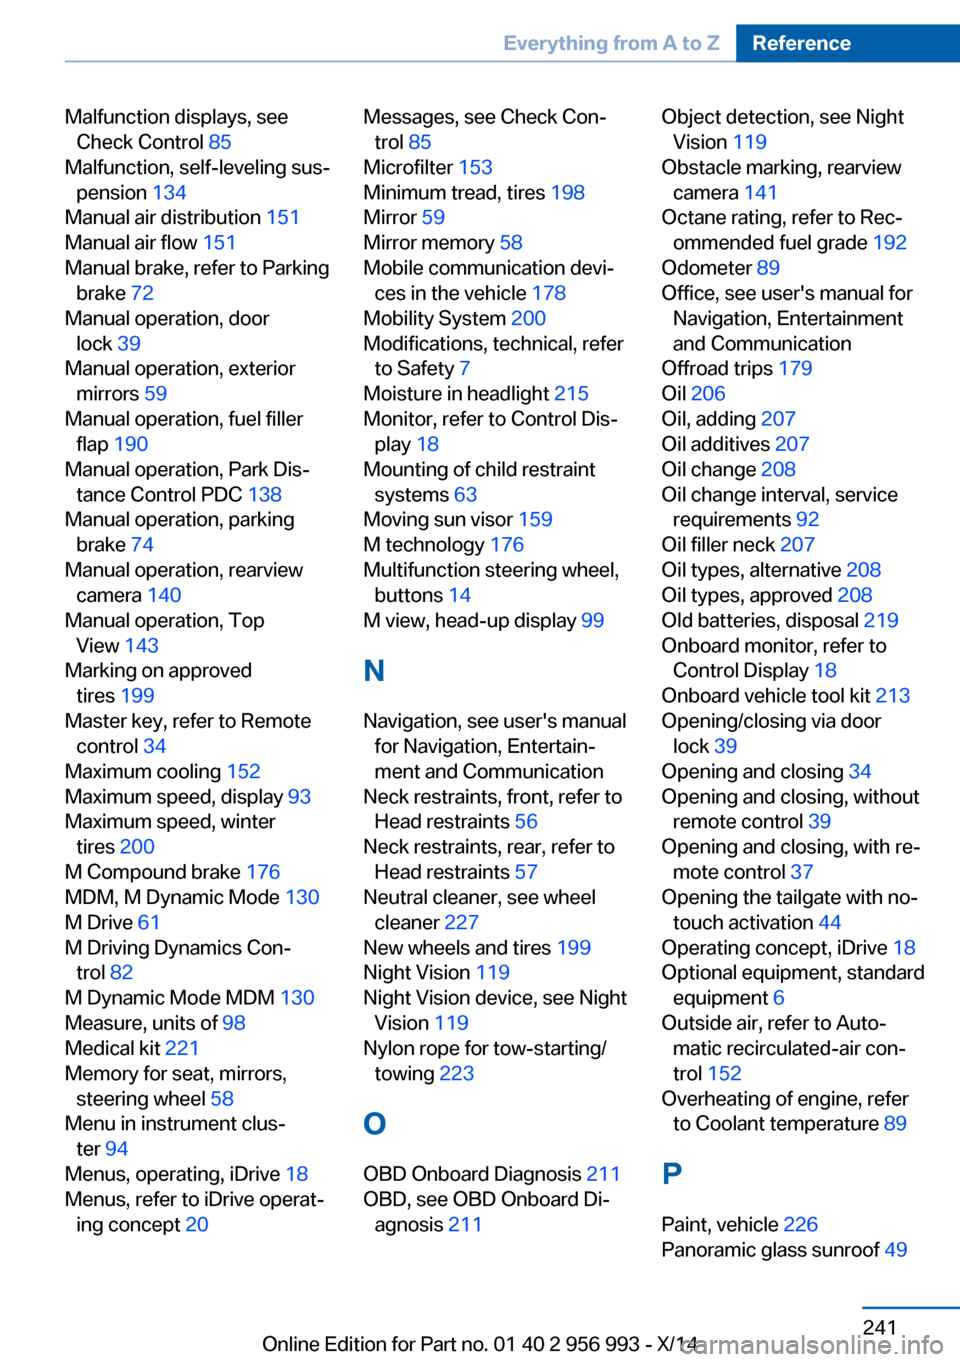
Malfunction displays, seeCheck Control 85
Malfunction, self-leveling sus‐ pension 134
Manual air distribution 151
Manual air flow 151
Manual brake, refer to Parking brake 72
Manual operation, door lock 39
Manual operation, exterior mirrors 59
Manual operation, fuel filler flap 190
Manual operation, Park Dis‐ tance Control PDC 138
Manual operation, parking brake 74
Manual operation, rearview camera 140
Manual operation, Top View 143
Marking on approved tires 199
Master key, refer to Remote control 34
Maximum cooling 152
Maximum speed, display 93
Maximum speed, winter tires 200
M Compound brake 176
MDM, M Dynamic Mode 130
M Drive 61
M Driving Dynamics Con‐ trol 82
M Dynamic Mode MDM 130
Measure, units of 98
Medical kit 221
Memory for seat, mirrors, steering wheel 58
Menu in instrument clus‐ ter 94
Menus, operating, iDrive 18
Menus, refer to iDrive operat‐ ing concept 20 Messages, see Check Con‐
trol 85
Microfilter 153
Minimum tread, tires 198
Mirror 59
Mirror memory 58
Mobile communication devi‐ ces in the vehicle 178
Mobility System 200
Modifications, technical, refer to Safety 7
Moisture in headlight 215
Monitor, refer to Control Dis‐ play 18
Mounting of child restraint systems 63
Moving sun visor 159
M technology 176
Multifunction steering wheel, buttons 14
M view, head-up display 99
N Navigation, see user's manual for Navigation, Entertain‐
ment and Communication
Neck restraints, front, refer to Head restraints 56
Neck restraints, rear, refer to Head restraints 57
Neutral cleaner, see wheel cleaner 227
New wheels and tires 199
Night Vision 119
Night Vision device, see Night Vision 119
Nylon rope for tow-starting/ towing 223
O OBD Onboard Diagnosis 211
OBD, see OBD Onboard Di‐ agnosis 211 Object detection, see Night
Vision 119
Obstacle marking, rearview camera 141
Octane rating, refer to Rec‐ ommended fuel grade 192
Odometer 89
Office, see user's manual for Navigation, Entertainment
and Communication
Offroad trips 179
Oil 206
Oil, adding 207
Oil additives 207
Oil change 208
Oil change interval, service requirements 92
Oil filler neck 207
Oil types, alternative 208
Oil types, approved 208
Old batteries, disposal 219
Onboard monitor, refer to Control Display 18
Onboard vehicle tool kit 213
Opening/closing via door lock 39
Opening and closing 34
Opening and closing, without remote control 39
Opening and closing, with re‐ mote control 37
Opening the tailgate with no- touch activation 44
Operating concept, iDrive 18
Optional equipment, standard equipment 6
Outside air, refer to Auto‐ matic recirculated-air con‐
trol 152
Overheating of engine, refer to Coolant temperature 89
P Paint, vehicle 226
Panoramic glass sunroof 49 Seite 241Everything from A to ZReference241
Online Edition for Part no. 01 40 2 956 993 - X/14
Page 246 of 251
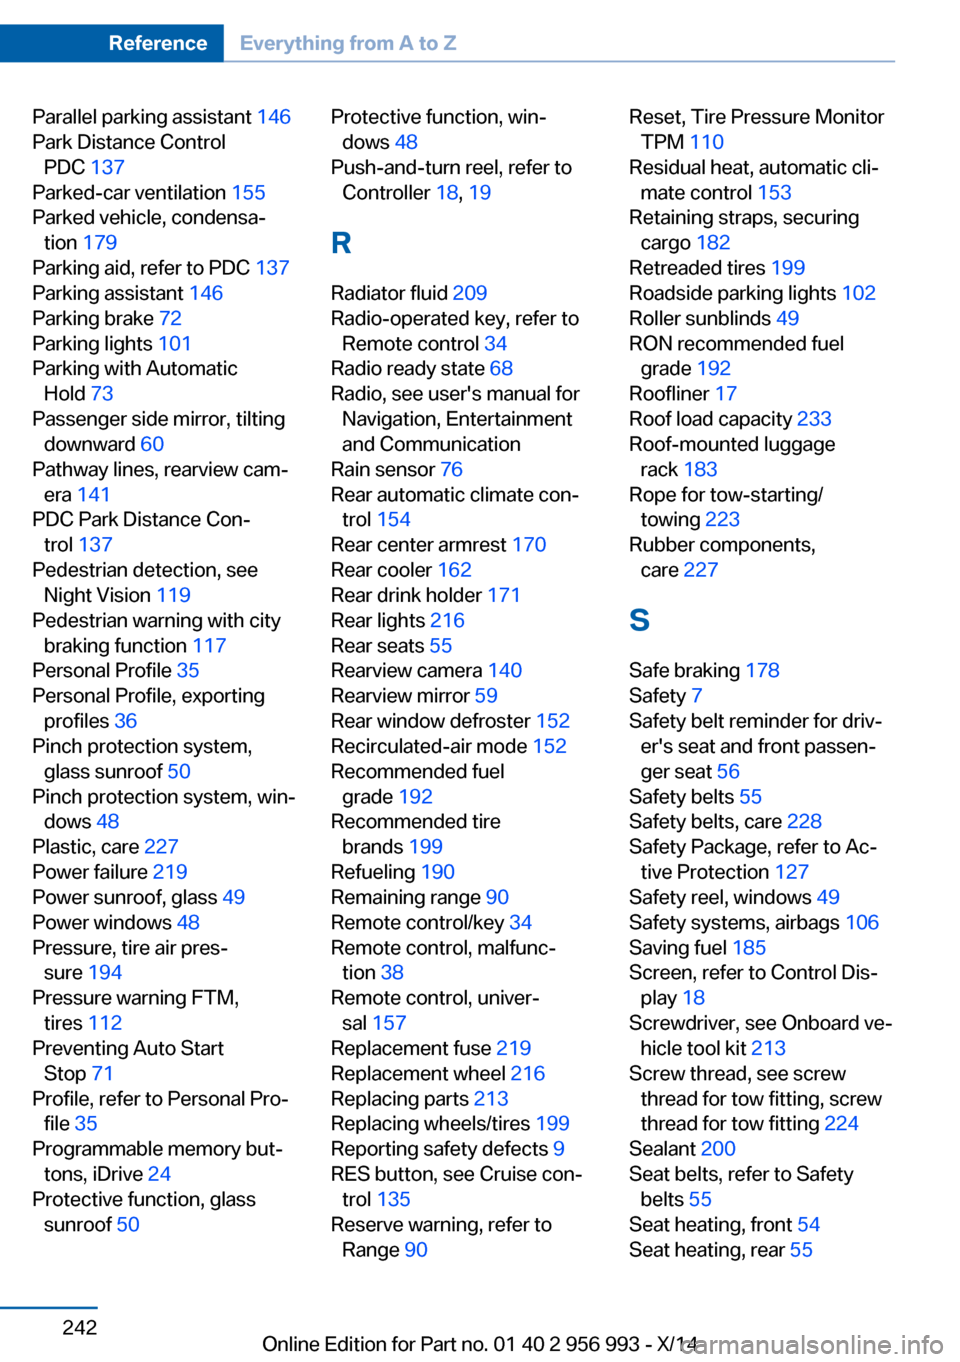
Parallel parking assistant 146
Park Distance Control PDC 137
Parked-car ventilation 155
Parked vehicle, condensa‐ tion 179
Parking aid, refer to PDC 137
Parking assistant 146
Parking brake 72
Parking lights 101
Parking with Automatic Hold 73
Passenger side mirror, tilting downward 60
Pathway lines, rearview cam‐ era 141
PDC Park Distance Con‐ trol 137
Pedestrian detection, see Night Vision 119
Pedestrian warning with city braking function 117
Personal Profile 35
Personal Profile, exporting profiles 36
Pinch protection system, glass sunroof 50
Pinch protection system, win‐ dows 48
Plastic, care 227
Power failure 219
Power sunroof, glass 49
Power windows 48
Pressure, tire air pres‐ sure 194
Pressure warning FTM, tires 112
Preventing Auto Start Stop 71
Profile, refer to Personal Pro‐ file 35
Programmable memory but‐ tons, iDrive 24
Protective function, glass sunroof 50 Protective function, win‐
dows 48
Push-and-turn reel, refer to Controller 18, 19
R Radiator fluid 209
Radio-operated key, refer to Remote control 34
Radio ready state 68
Radio, see user's manual for Navigation, Entertainment
and Communication
Rain sensor 76
Rear automatic climate con‐ trol 154
Rear center armrest 170
Rear cooler 162
Rear drink holder 171
Rear lights 216
Rear seats 55
Rearview camera 140
Rearview mirror 59
Rear window defroster 152
Recirculated-air mode 152
Recommended fuel grade 192
Recommended tire brands 199
Refueling 190
Remaining range 90
Remote control/key 34
Remote control, malfunc‐ tion 38
Remote control, univer‐ sal 157
Replacement fuse 219
Replacement wheel 216
Replacing parts 213
Replacing wheels/tires 199
Reporting safety defects 9
RES button, see Cruise con‐ trol 135
Reserve warning, refer to Range 90 Reset, Tire Pressure Monitor
TPM 110
Residual heat, automatic cli‐ mate control 153
Retaining straps, securing cargo 182
Retreaded tires 199
Roadside parking lights 102
Roller sunblinds 49
RON recommended fuel grade 192
Roofliner 17
Roof load capacity 233
Roof-mounted luggage rack 183
Rope for tow-starting/ towing 223
Rubber components, care 227
S
Safe braking 178
Safety 7
Safety belt reminder for driv‐ er's seat and front passen‐
ger seat 56
Safety belts 55
Safety belts, care 228
Safety Package, refer to Ac‐ tive Protection 127
Safety reel, windows 49
Safety systems, airbags 106
Saving fuel 185
Screen, refer to Control Dis‐ play 18
Screwdriver, see Onboard ve‐ hicle tool kit 213
Screw thread, see screw thread for tow fitting, screw
thread for tow fitting 224
Sealant 200
Seat belts, refer to Safety belts 55
Seat heating, front 54
Seat heating, rear 55 Seite 242ReferenceEverything from A to Z242
Online Edition for Part no. 01 40 2 956 993 - X/14