BMW Z3 2002 Owners Manual
Manufacturer: BMW, Model Year: 2002, Model line: Z3, Model: BMW Z3 2002Pages: 187, PDF Size: 2.73 MB
Page 151 of 187
151n
IndexDataTechnologyRepairsMaintenanceControlsOverview
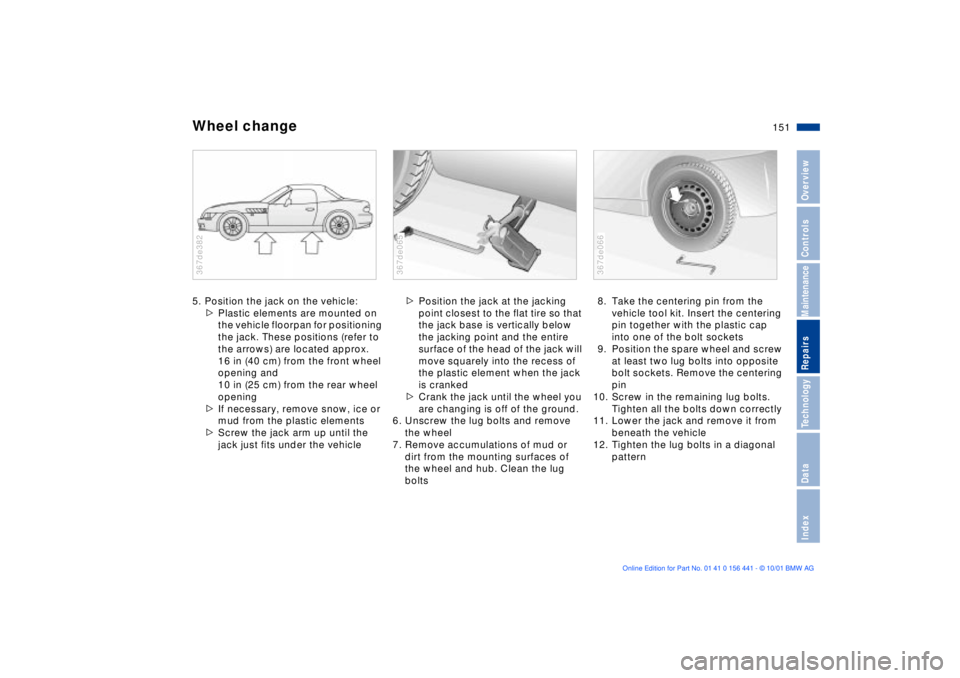
Wheel change5. Position the jack on the vehicle:
>Plastic elements are mounted on
the vehicle floorpan for positioning
the jack. These positions (refer to
the arrows) are located approx.
16 in (40 cm) from the front wheel
opening and
10 in (25 cm) from the rear wheel
opening
>If necessary, remove snow, ice or
mud from the plastic elements
>Screw the jack arm up until the
jack just fits under the vehicle367de382
>Position the jack at the jacking
point closest to the flat tire so that
the jack base is vertically below
the jacking point and the entire
surface of the head of the jack will
move squarely into the recess of
the plastic element when the jack
is cranked
>Crank the jack until the wheel you
are changing is off of the ground.
6. Unscrew the lug bolts and remove
the wheel
7. Remove accumulations of mud or
dirt from the mounting surfaces of
the wheel and hub. Clean the lug
bolts367de065
8. Take the centering pin from the
vehicle tool kit. Insert the centering
pin together with the plastic cap
into one of the bolt sockets
9. Position the spare wheel and screw
at least two lug bolts into opposite
bolt sockets. Remove the centering
pin
10. Screw in the remaining lug bolts.
Tighten all the bolts down correctly
11. Lower the jack and remove it from
beneath the vehicle
12. Tighten the lug bolts in a diagonal
pattern367de066
Page 152 of 187
152n
Wheel change13. Wheels with full wheel covers:
Place the wheel cover with the
valve opening over the valve. Use
both hands to press the cover
securely onto the rim
14. Check and correct the inflation
pressure at the earliest opportunity.
Use only the full wheel cover
installed by the factory. Other
wheel covers may not fit securely. The
full wheel cover may not be installed on
the spare wheel because the cover
could be damaged.<
The jack is designed for changing
wheels only. Do not attempt to lift
a different vehicle model or any other
type of load with the jack. To do so
could lead to property damage or
personal injury.
To ensure continued safety, check the
tightness of the lug bolts at the earliest
opportunity (torque specification:
72 lbs ft [100 Nm]).<
If light-alloy wheels other than Original
BMW light-alloy wheels have been
mounted, it may be necessary to use
different lug bolts for those wheels.
Replace the defective tire as soon as
possible and have the new wheel/tire
balanced.
Driving with the spare wheelDrive cautiously and do not exceed a
speed of 50 mph (80 km/h).
Be aware that vehicle handling will be
altered. Slower brake response time,
longer braking distances and changed
steering characteristics may be antici-
pated when approaching limit condi-
tions.
Only one spare wheel may be
mounted at any time. Mount a
wheel and tire with the same size and
specifications as the others at the
earliest possible opportunity. Maintain
the specified tire inflation pressures,
refer to the table on page 27.<
Page 153 of 187
153n
IndexDataTechnologyRepairsMaintenanceControlsOverview
Battery
Battery posts, terminals and
related accessories contain lead
and lead compounds. Wash hands after
handling.<
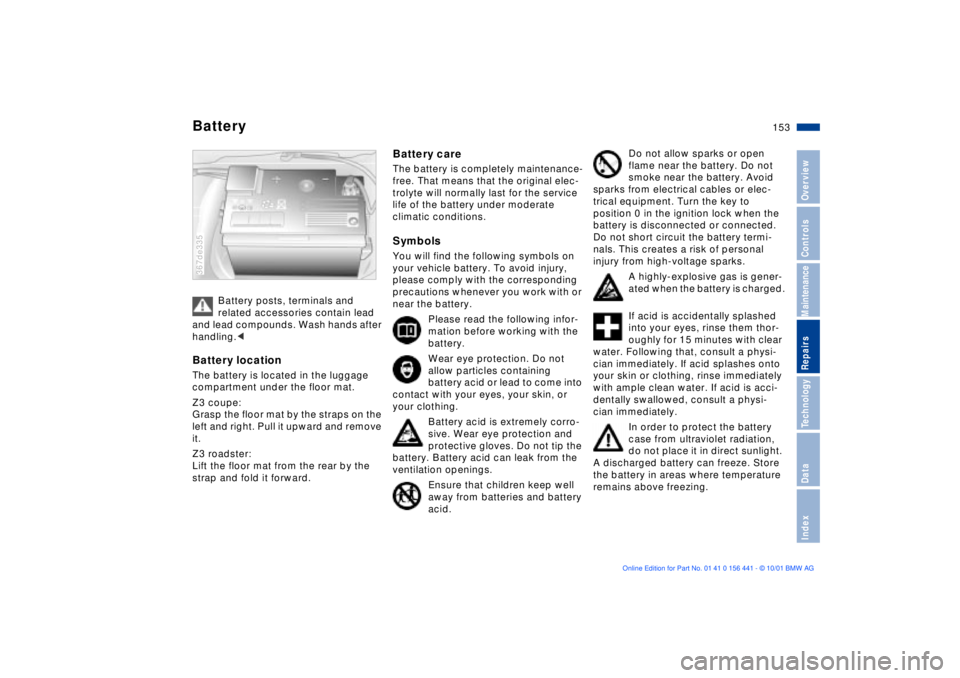
Battery locationThe battery is located in the luggage
compartment under the floor mat.
Z3 coupe:
Grasp the floor mat by the straps on the
left and right. Pull it upward and remove
it.
Z3 roadster:
Lift the floor mat from the rear by the
strap and fold it forward.367de335
Z3 d Z3
Battery careThe battery is completely maintenance-
free. That means that the original elec-
trolyte will normally last for the service
life of the battery under moderate
climatic conditions.SymbolsYou will find the following symbols on
your vehicle battery. To avoid injury,
please comply with the corresponding
precautions whenever you work with or
near the battery.
Please read the following infor-
mation before working with the
battery.
Wear eye protection. Do not
allow particles containing
battery acid or lead to come into
contact with your eyes, your skin, or
your clothing.
Battery acid is extremely corro-
sive. Wear eye protection and
protective gloves. Do not tip the
battery. Battery acid can leak from the
ventilation openings.
Ensure that children keep well
away from batteries and battery
acid.
Do not allow sparks or open
flame near the battery. Do not
smoke near the battery. Avoid
sparks from electrical cables or elec-
trical equipment. Turn the key to
position 0 in the ignition lock when the
battery is disconnected or connected.
Do not short circuit the battery termi-
nals. This creates a risk of personal
injury from high-voltage sparks.
A highly-explosive gas is gener-
ated when the battery is charged.
If acid is accidentally splashed
into your eyes, rinse them thor-
oughly for 15 minutes with clear
water. Following that, consult a physi-
cian immediately. If acid splashes onto
your skin or clothing, rinse immediately
with ample clean water. If acid is acci-
dentally swallowed, consult a physi-
cian immediately.
In order to protect the battery
case from ultraviolet radiation,
do not place it in direct sunlight.
A discharged battery can freeze. Store
the battery in areas where temperature
remains above freezing.
Page 154 of 187
154n
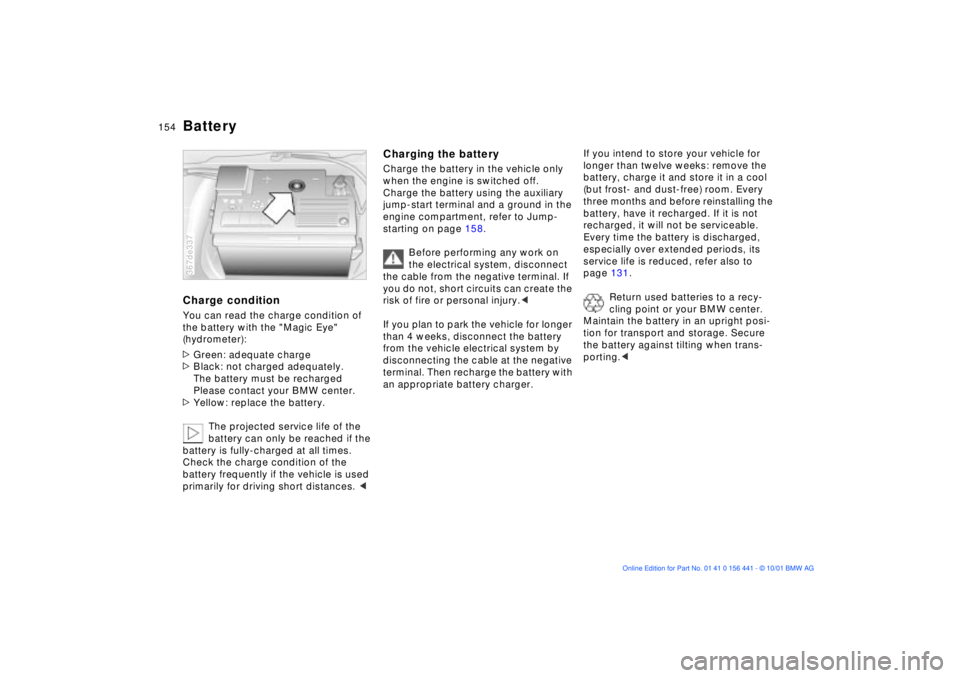
BatteryCharge condition You can read the charge condition of
the battery with the "Magic Eye"
(hydrometer):
>Green: adequate charge
>Black: not charged adequately.
The battery must be recharged
Please contact your BMW center.
>Yellow: replace the battery.
The projected service life of the
battery can only be reached if the
battery is fully-charged at all times.
Check the charge condition of the
battery frequently if the vehicle is used
primarily for driving short distances. < 367de337
Charging the batteryCharge the battery in the vehicle only
when the engine is switched off.
Charge the battery using the auxiliary
jump-start terminal and a ground in the
engine compartment, refer to Jump-
starting on page 158.
Before performing any work on
the electrical system, disconnect
the cable from the negative terminal. If
you do not, short circuits can create the
risk of fire or personal injury.<
If you plan to park the vehicle for longer
than 4 weeks, disconnect the battery
from the vehicle electrical system by
disconnecting the cable at the negative
terminal. Then recharge the battery with
an appropriate battery charger.
If you intend to store your vehicle for
longer than twelve weeks: remove the
battery, charge it and store it in a cool
(but frost- and dust-free) room. Every
three months and before reinstalling the
battery, have it recharged. If it is not
recharged, it will not be serviceable.
Every time the battery is discharged,
especially over extended periods, its
service life is reduced, refer also to
page 131.
Return used batteries to a recy-
cling point or your BMW center.
Maintain the battery in an upright posi-
tion for transport and storage. Secure
the battery against tilting when trans-
porting.<
Page 155 of 187
155n
IndexDataTechnologyRepairsMaintenanceControlsOverview
BatteryRemoval and installation
Do not disconnect the battery
cables when the engine is running.
Disconnecting the battery cables when
the engine is running will cause a
voltage surge which will damage the
vehicle's onboard electronics.
Do not make any modifications in the
wires leading to the positive terminal. If
you do so, the battery safety terminal's
safety function will no longer be guaran-
teed. Repair and disposal must be
performed by trained technicians only.<
When removing the battery, disconnect
the negative terminal first, then the
positive terminal.
Unscrew the battery retaining clamp.
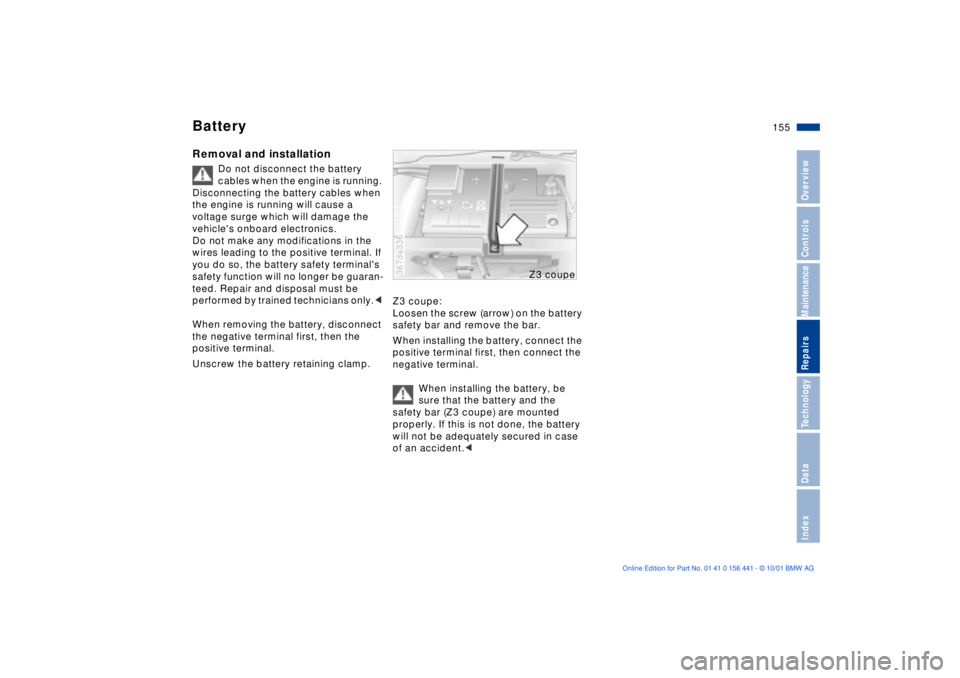
Z3 coupe:
Loosen the screw (arrow) on the battery
safety bar and remove the bar.
When installing the battery, connect the
positive terminal first, then connect the
negative terminal.
When installing the battery, be
sure that the battery and the
safety bar (Z3 coupe) are mounted
properly. If this is not done, the battery
will not be adequately secured in case
of an accident.< 367de336
Z3 cou
pe
Page 156 of 187
156n
FusesIf an electrical accessory should fail,
switch it off and check the fuse.
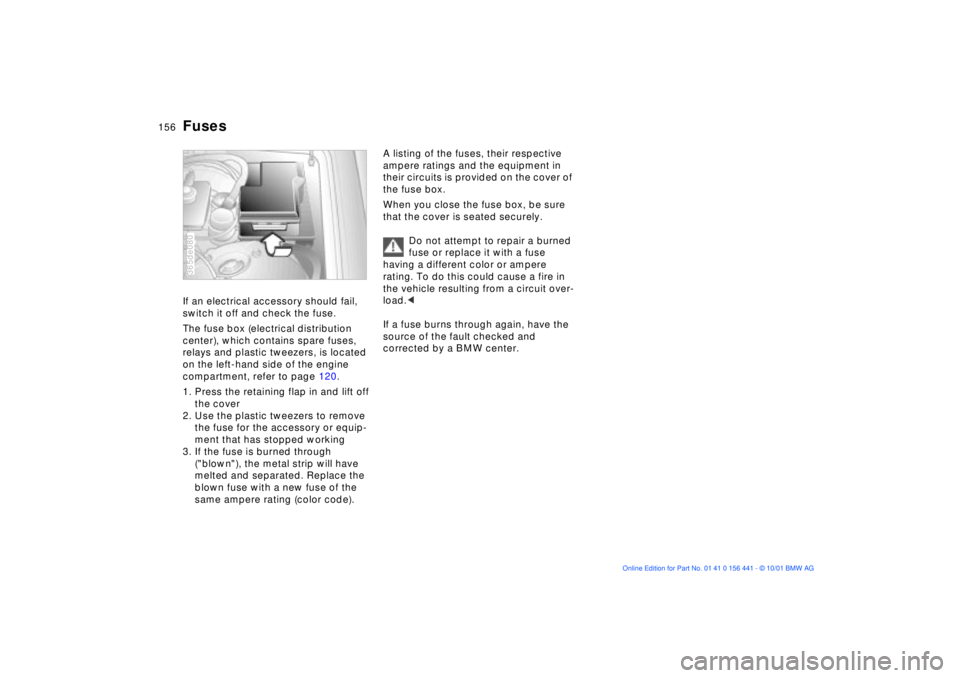
The fuse box (electrical distribution
center), which contains spare fuses,
relays and plastic tweezers, is located
on the left-hand side of the engine
compartment, refer to page 120.
1. Press the retaining flap in and lift off
the cover
2. Use the plastic tweezers to remove
the fuse for the accessory or equip-
ment that has stopped working
3. If the fuse is burned through
("blown"), the metal strip will have
melted and separated. Replace the
blown fuse with a new fuse of the
same ampere rating (color code).365de080
A listing of the fuses, their respective
ampere ratings and the equipment in
their circuits is provided on the cover of
the fuse box.
When you close the fuse box, be sure
that the cover is seated securely.
Do not attempt to repair a burned
fuse or replace it with a fuse
having a different color or ampere
rating. To do this could cause a fire in
the vehicle resulting from a circuit over-
load.<
If a fuse burns through again, have the
source of the fault checked and
corrected by a BMW center.
Page 157 of 187
157n
IndexDataTechnologyRepairsMaintenanceControlsOverview
Power convertible top
*
Fuel filler door
Closing manually For roadsters with electrical power
convertible top
*, the convertible top
drive unit is located in the luggage
compartment behind the left side trim
panel.
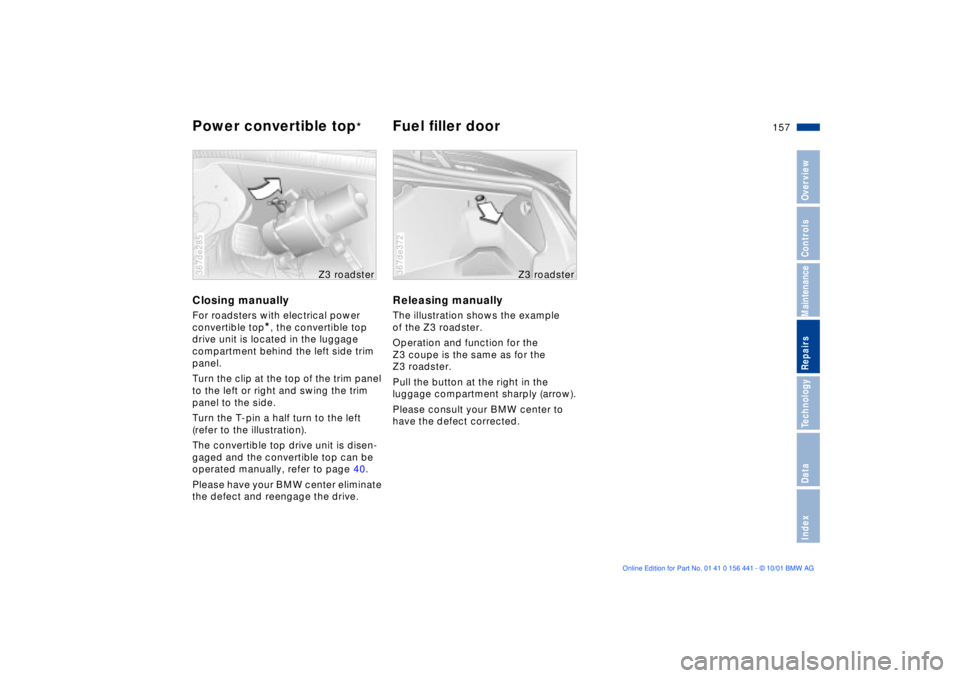
Turn the clip at the top of the trim panel
to the left or right and swing the trim
panel to the side.
Turn the T-pin a half turn to the left
(refer to the illustration).
The convertible top drive unit is disen-
gaged and the convertible top can be
operated manually, refer to page 40.
Please have your BMW center eliminate
the defect and reengage the drive.
367de285
Z3 roadster
Releasing manuallyThe illustration shows the example
of the Z3 roadster.
Operation and function for the
Z3 coupe is the same as for the
Z3 roadster.
Pull the button at the right in the
luggage compartment sharply (arrow).
Please consult your BMW center to
have the defect corrected.367de372
Z3 roadster
Page 158 of 187
158n
Jump-startingNever use spray starter fluids to start
the engine.
When your battery is discharged you can
used two jumper cables to start your
vehicle with power from the battery in a
second vehicle. You can also use the
same method to help start another
vehicle. Always use jumper cables with
fully insulated handles on the terminal
clamps.
Do not touch components
carrying high-voltage on a running
engine. Contact with components
carrying high voltage can cause fatal
injury. Carefully observe the following
instructions to avoid personal injury
and/or damage to one or both vehi-
cles.<
1. Ensure that the battery in the support
vehicle is also rated at 12 volts. This
information is provided on the top of
the battery casing
2. Do not disconnect the battery from
your vehicle's electrical system.
Switch off all electrical accessories in
both vehicles
3. Make absolutely certain that there is
no contact between the bodywork of
the two vehicles Ð short circuit
hazard
4. Start the engine on the support
vehicle and allow it to run
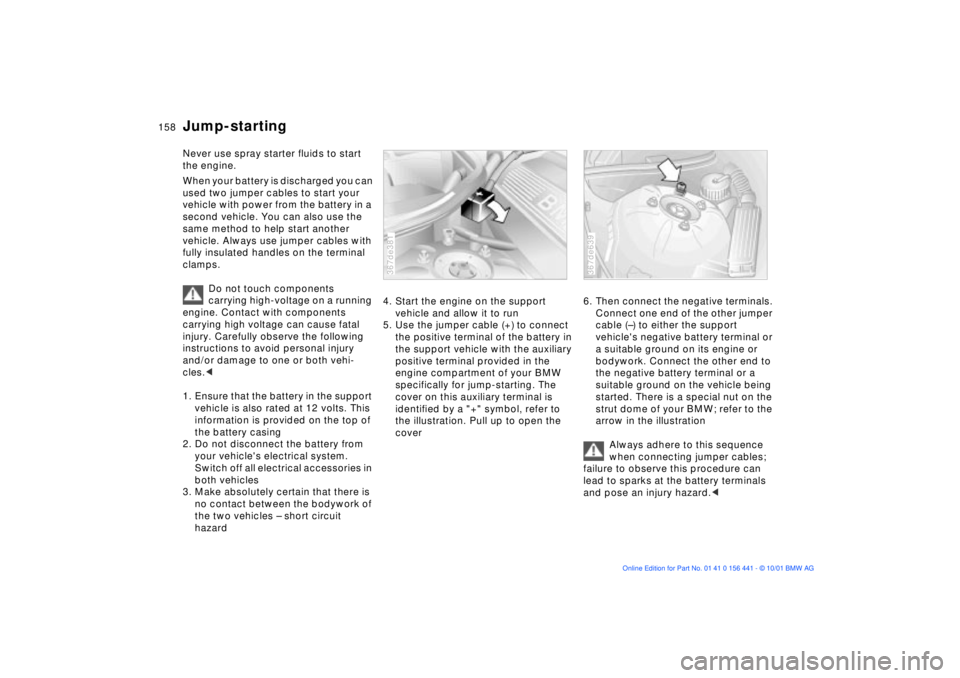
5. Use the jumper cable (+) to connect
the positive terminal of the battery in
the support vehicle with the auxiliary
positive terminal provided in the
engine compartment of your BMW
specifically for jump-starting. The
cover on this auxiliary terminal is
identified by a "+" symbol, refer to
the illustration. Pull up to open the
cover 367de381
6. Then connect the negative terminals.
Connect one end of the other jumper
cable (Ð) to either the support
vehicle's negative battery terminal or
a suitable ground on its engine or
bodywork. Connect the other end to
the negative battery terminal or a
suitable ground on the vehicle being
started. There is a special nut on the
strut dome of your BMW; refer to the
arrow in the illustration
Always adhere to this sequence
when connecting jumper cables;
failure to observe this procedure can
lead to sparks at the battery terminals
and pose an injury hazard.< 367de639
Page 159 of 187
159n
IndexDataTechnologyRepairsMaintenanceControlsOverview
Jump-starting Towing the vehicle7. Start the support vehicle's engine
and let it run at an increased idling
speed for a few minutes. Start the
engine on the vehicle needing the
jump-start, and allow it to run as
usual. If the first start attempt is not
successful, wait a few minutes
before another attempt in order to
allow the discharged battery to
recharge
8. Before disconnecting the jumper
cables let the engines run for a few
minutes
9. Then disconnect the jumper cables
in reverse sequence.
Depending on the cause of the fault,
have the battery recharged by your
BMW center.
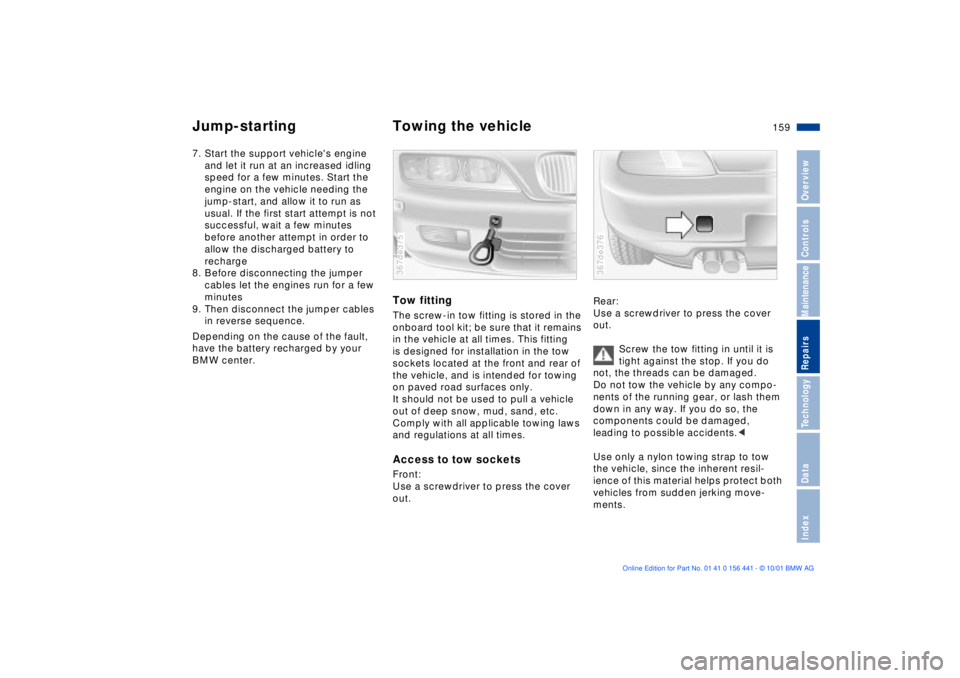
Tow fittingThe screw-in tow fitting is stored in the
onboard tool kit; be sure that it remains
in the vehicle at all times. This fitting
is designed for installation in the tow
sockets located at the front and rear of
the vehicle, and is intended for towing
on paved road surfaces only.
It should not be used to pull a vehicle
out of deep snow, mud, sand, etc.
Comply with all applicable towing laws
and regulations at all times.Access to tow socketsFront:
Use a screwdriver to press the cover
out.367de375
Rear:
Use a screwdriver to press the cover
out.
Screw the tow fitting in until it is
tight against the stop. If you do
not, the threads can be damaged.
Do not tow the vehicle by any compo-
nents of the running gear, or lash them
down in any way. If you do so, the
components could be damaged,
leading to possible accidents.<
Use only a nylon towing strap to tow
the vehicle, since the inherent resil-
ience of this material helps protect both
vehicles from sudden jerking move-
ments.367de376
Page 160 of 187
160n
Towing the vehicle
The towed vehicle should always
be the lighter of the two vehicles.
If this is not the case, it will not be
possible to control vehicle handling.<
Tow-startingIt is not possible to start the engine of a
vehicle with an automatic transmission
by towing or pushing the vehicle.
For instructions on jump-starting, refer
to page 158.
Never attempt to use your vehicle to
push another vehicle. This could result
in damage to the energy-absorbing
bumpers.
Towing a vehicle with automatic
transmission1. Place the selector lever in
position "N"
2. Towing speed:
max. 45 mph (70 km/h)
3. Towing distance:
max. 95 miles (150 km)
4. Leave the ignition key in position 1 to
ensure that brake lamps, turn signal
indicators, horn and windshield
wipers remain operative, and to
prevent the steering lock from
engaging
5. Switch on the hazard-warning
flashers (observe applicable legal
regulations).
Find some means of identifying the
vehicle in tow. Place a sign or warning
triangle in the rear window, for
instance.
Even when the electrical system
has failed, make sure that the igni-
tion key remains in position 1 to prevent
the steering lock from engaging.
The steering and brakes are without
power assist when the engine is off.
This means that increased effort is
required for steering and braking.<
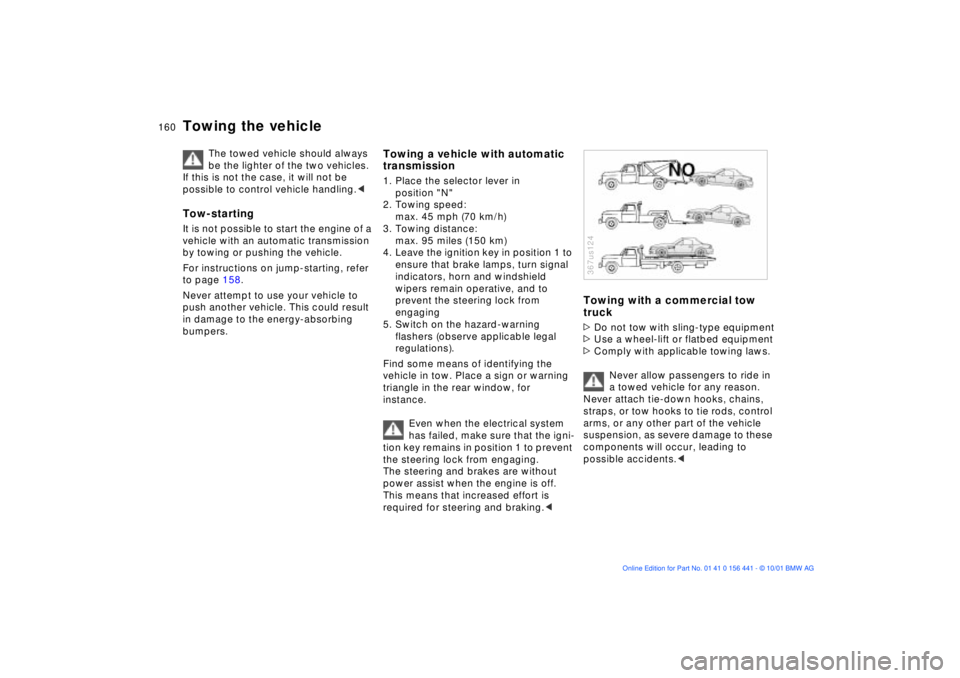
Towing with a commercial tow
truck>Do not tow with sling-type equipment
>Use a wheel-lift or flatbed equipment
>Comply with applicable towing laws.
Never allow passengers to ride in
a towed vehicle for any reason.
Never attach tie-down hooks, chains,
straps, or tow hooks to tie rods, control
arms, or any other part of the vehicle
suspension, as severe damage to these
components will occur, leading to
possible accidents.< 367us124